Importing my character reference into Blender, I started sculpting with metaballs by placing 5 around the one in the middle, bringing them close together so that they’d merge into one shape. For this star model, this is as far as i got as i was confused and once i received help from Michael, he advised me that my character was too simple and there wasn’t much to sculpt so if i was aiming for a higher grade, to change it to something a bit more complicated.


I sat in class, brainstorming again for a while as everyone was taking their turn sharing their screen and getting help with their sculpts. I was just quickly drawing out sketches of ideas on my iPad, trying to follow the star idea but making it more complex and interesting. Star fruits came to mind and i thought about designing a star shaped fruit with eye catching leaves and small textures made from clay to make the fruit seem spikey coated. After sketching out a few variations of leaves and fruits, my mind just very suddenly jumped to a cow and i started sketching. I’d been interested in something called a “strawberry cow” for quite a while as I like how they’re very closely related to the real life animals but with a small twist on their colour pallet and sometimes appearance, with strawberries either as horns or on the tuft of the tail. For this reason, i then decided I’d make a strawberry cow instead of a normal cow, giving it a pale pink for the main colour and a nice deeper shade for its spots and other stand out areas such as its tail tuft and its hooves. Since i wanted it to be simplistic, centring its design on its colours more than features, i didn’t give it any distinguishing features of strawberries and put it in a plain paddock setting. This meant the scene wasn’t crowded and everything fit together nicely, framing the cow and making it easy and pleasing to look at.

Now i had my remade design, i started a new file in blender and placed my reference image on a pureref window down at the bottom left of my screen, as this would help me to get the overall shape and pose of my character with the metaballs. I got some help from Henry after class in a 1-1 tutorial on Blackboard, as i still wasn’t sure how to sculpt correctly and it was starting to stress me out. He took about an hour explaining things to me and letting me follow along step-by-step in my own blender file, stopping to look over my sculpt every now and then, helping me correct any mistakes or catch me up if I’ve missed anything. It was a very helpful session as I got to understand more about sculpting and how to use the metaballs as well as gain more knowledge about the tools and learned that the sculpting tools all have a “falloff” which helps me get a better understanding of how they’re going to effect my model.
To make the model, I took the earlier model as a guide and looked back over the video Henry recorded from our tutorial, using spheres and ellipses from metaballs to shape my base mesh. Once i had this done, i sent it to henry to see if it was alright and he gave me the go ahead but i wasn’t happy as i thought it looked more like a monkey so i restarted for the third time and when i finished with this base mesh, i was pretty happy and proud of myself because i just did it from my own judgement this time. Before i got to my final basemesh, my friend Rhys tried to help me create a basemesh from mesh shapes relating to the character but i wasn’t happy with how that turned out either, though I’m still thankful for his help.


(the above image is close to but not exact of my new basemesh as i forgot to take screenshots, so i used a more developed and smoothed version from later on to show the differences.)
With this new basemesh, i went into the sculpting tab and started to shape my cow with the sculpting tools. I found myself mainly using the inflate, clay strips, hard draw and smooth brushes throughout this process. To start with, I had to use the dyntopo option to give me more geometry to work with which was done by turning dyntopo on, changing the detail to constant detail, turning on smooth shading then hitting the “detail flood fill” button. I now had something to enable me to get finer details onto my cow model, which going in with the grab brush i started to sculpt by pulling certain vertexes out after turning on the x symmetry. Having created the ears with the grab tool, i smoothed them out by using the smooth brush on a low strength as this was a brush that could very easily become destructive if the strength was set too high.

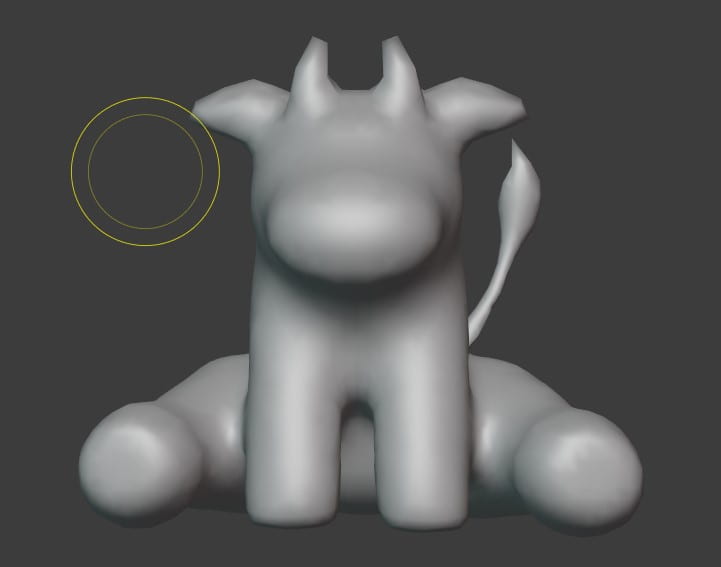
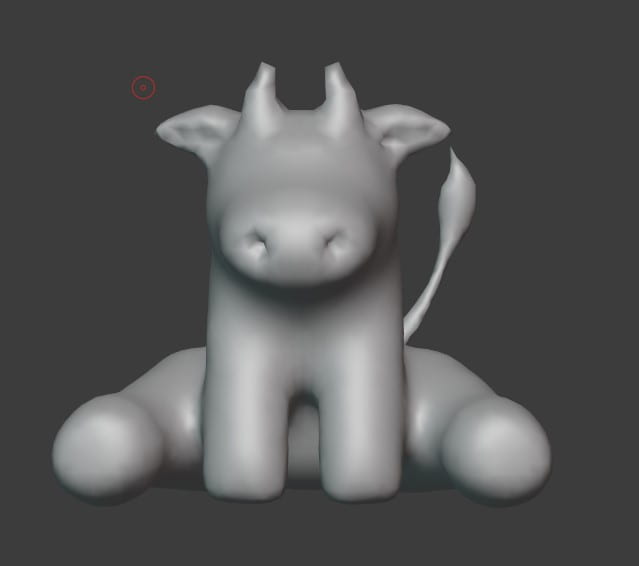
I used the grab tool on the sprouts of the horns to pull them up to be a little more pronounced than stubs and used the snake hook brush to give them the point that horns have, aiming to curl it inwards. The horns changed a lot throughout the process of my model as at first i wanted them to be big and easily noticeable, curving inwards, then decided this made him look unbalanced and tried to curve the horns outwards, making them smaller, changing the distance between both horns and a whole lot of other stuff just trying to figure out what suited my model until i eventually settled on a simple horn shape where they were cartoonish and just pricked up, kind of like the “story of seasons: friends of mineral town” cows and some chibi drawings which you can find an image of below.


Smoothing out the shape of my cow after using the inflate brush to make his limbs a bit chunkier, i went in with the crease brush to set apart the legs from the stomach of my cow, making it look more believable that he was sitting down.
By this point i felt my model looked more like a pig than a cow and wanted to restart, so I saved my progress on this model and hit “new file” using my base mesh from the last model, making some adjustments where i thought needed such as the whole model was too spread out, so i rotated the legs to better face the viewer and positioned them more believably at the back, as well as moving the head a bit more upwards facing, thinning the metaballs at the neck and shoulders and picking up his back end slightly to look more balanced, though i couldn’t move it as much as id like because then it messed up the rest of my base mesh. Going back into the sculpting tab, i used dyntopo again then smoothed out my model with the smooth brush. This let me see the places on my model where i needed to sculpt detail into and what parts i could just make small adjustments to.
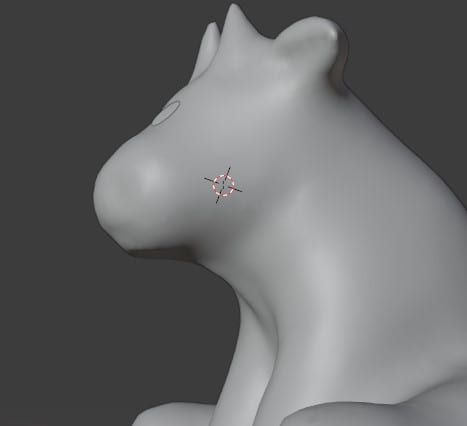
I started adding in the details such as using the snake hook brush to pull the horns into points and taking the grab tool and moving them slightly to be shaped more like horns with thickness. Keeping with the grab brush, I took the small starts of the ears and used a big sized falloff brush as seen in the image to pull them out to the side to better represent ears. For all the creases and fold in my model, i took the smooth brush and smoothed out the surfaces such as in-between the front legs at the chest, the skin between the back legs and stomach and the nose of the cow. This meant i had a better area to work with when adding in finer details such as deeper and more accurate creases.
Next i used the draw sharp brush and made two dents in the nose for the cows nostrils, using the smooth brush later to smooth it out but not too much as this would fill the holes in and get rid of the nostrils, so i had to be careful and moderate how far i smoothed them. I took the same brush and moved onto the ears, with the symmetry still on i only had to work on one ear and it would copy to the other. I smoothed the ear down after making the insides where the fluff would sit later and smoother the horns out little after pulling them up again. For the tail you will realise that i made more changes to it with the snake hook brush to make it look more pointy like a tuft of fur.
Yet again, i changed the horns slightly as i was very indecisive about them and wanted them to suit my sculpt. In this stage i smoothed everything out after doing another run over with dyntopo as this adds more geometry to work with meaning it gets rid of all the smoothing you’ve done previously. Using the grab tool again, i started pulling and puffing out the cheeks of my cow to make it look less flat as well as giving the nose more character.

Using a UV sphere and scaling it down, i created a new pair of eyes and tried my best to “attach” them to my character, more so just getting a placement idea for now as i was no where near done to even add the yes. Upon inspection i realised my cow looked a bit too unnatural still so i decided to use the inflate brush and give him a bit more meat around the shoulders so they looked more like muscles then thin skin and bones.

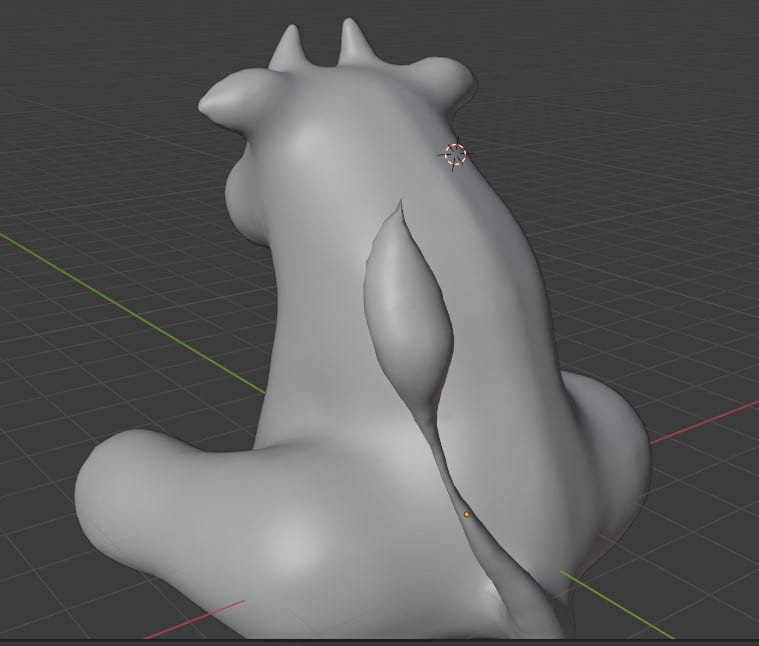
Lastly. i used clay strips along the back to make a spine by smoothing and using the draw sharp brush until i was happy with it, moving on to create a little neck skin that cows have using the same technique. Before finishing and exporting my model as an FBX, i smoothed everything and used the flatten brush to create a smooth bottom for my cow to be sat on a piece of ground later and flattened the soles of his feet to make smooth hooves.