Below are my finished project animations for my run cycle, walk cycle and body mechanics animation. I added music/sound effects to each in Adobe Premiere Pro and animated them with a character rig in Maya.

A record of all my animation work
Below are my finished project animations for my run cycle, walk cycle and body mechanics animation. I added music/sound effects to each in Adobe Premiere Pro and animated them with a character rig in Maya.
During the first semester of second year, we were given an assignment which required us to animate a biped walk and run cycle and body mechanics such as showing a heavy weight lift, an iceskater effortlessly gliding along the ice, dancing, basically just anything that shows weight and motion within the body.
To start off with, I decided to do the animation I thought I’d struggle with most, the body mechanics, as this gave me the opportunity to spend a lot of time on it and not have to worry about rushing it because I spent too long on the cycles.
Once I knew I was going to be working on my body mechanics, I had to choose an idea of what I wanted to animate and find some references online or record them myself. My first thought was I’ll go with yoga, as I thought it’d be nice and peaceful to animate and they’re usually quite flexible in how they shape their bodies so that’d make for an interesting visual, but after mulling this over and looking for a set of yoga references I decided dance might be more fun and interesting as it’s a lot more fast paced and rhythmic. With dance now in mind, I sat staring at the YouTube search bar trying to figure out what kind of dance style I’d like to research then I thought about all the Shuffle dances I’d usually come across and thought this was a good place to start as I like watching people shuffle and wanted to challenge myself to animate it.
I found a good source of reference from a guy on YouTube called Prokopik Yuri who makes shuffle tutorials which are step by step followed by a normal speed run-through of what it should look like. After looking through a few of his videos I settled in two that I really liked, his 5 Step Basic Tutorial and his self made shuffle Star Bomb. Obviously I couldn’t do both of them, though I really wanted to find a way to combine them I found in the end that’d be like jumping in the deep end without knowing how to swim, so I chose just one and went with the 5 Basic Steps. https://youtu.be/ZIcTHJrwaho
After some research into how to download a YouTube video with VLC player, I saved it and brought it into Syncsketch where I could then take notes over the original video. I watched a few videos on how to find key poses and how to use video reference, as at this point I still couldn’t really understand how to use the video to get the poses I needed, and which ones needed to stay in and be taken out. –https://youtu.be/fMSrQc-LocQ , https://youtu.be/y1z8wGzszco– Now I had the knowledge, it was time to put it to the test. I scrubbed through my video reference and marked the very start and very end of my frames and worked on from there, going back to the start and marking every frame I felt was a key pose. Admittedly this was a bit difficult since it was a dance and his feet were kinda going all over the place but I just tried my best to distinguish the contact poses and every major change such as when he jumps and his feet pass or when he crouches in preparation for the next move.


Now I have my poses, I’ll jump into Maya with my University provided “Jack Rig” and start moving the controls to match the key poses of my reference. Starting off from the one second mark, I focus on the legs first, moving the hips up and down as need be to get the right bend in the knees, matching the up and down of the natural moves in my reference, once I’m happy with the position and rotation of the feet, I use S on my keyboard and create a keyframe then move onto the next pose until I have the feet animated. In this rig there are 3 controllers on the feet and I found the 2 new (to me) controllers useful as I could angle the foot with the “toes” controller and make a bend in the foot with the controller shaped like a lollipop (lack of better words) to give my character the illusion of weight being pressed down upon his foot.
Next I moved onto finding a reference for the arms as this video only showed his legs. It wasn’t too hard since these moves had certain names which I could just key into YouTube and get lots of results, but I found one with interesting arm movements and this video had the person actually dance along with the tutorial instead of just step by step and no dance which isn’t helpful. –https://youtu.be/C5KOrND2G90– I worked off the YouTube video for this, as I tried to freehand it without a reference and my arms ended up looking kind of dead and messy so I went through the video, pausing at poses i liked which I used to pose the arms of my rig in time with the appropriate feet movements. I tried to also give some variation between the hands by opening one and closing the other but I wanted the dance to feel synced and balanced so I didn’t disturb the flow too much by keeping the arms mostly in time with each other, following the same movements.
I retimed the feet so the dance felt more like a dance than a model moving every part of its body 5 seconds apart as this looked unnatural and floaty, so I used the dope sheet and pulled every key back 4 frames to quicken the pace, though this was then too fast so I pushed them back 1 and although it’s not as on beat as I’d like it to be, I settled with this as honestly I’m unsure of how to time it exactly with my reference. I spent a while scrubbing back and fourth between keyframes and moving a few of them out of line with the rest to give my character some weight and timing like in the reference when he jumps up on his heels and stays there for about a second before landing on his feet then jumping up for the next move. I messed around with the arms a bit here too, retiming them and repositioning them so the dance flowed more smoothly and the arms read clearer. At this point I also animated little jumps whenever the man hops up onto his heels and then back onto his feet and whenever he jumps and crosses his legs as I felt this looked more lively and like a dance rather than just sitting still in one location. I also made the head look down and back up a few times in rhythm with the jumps to get the whole body involved in the dance and make it more believable.
With the first part of the shuffle done and having taken so long, I realised I wouldn’t be able to do all 5 steps as it’d take too long so I just took the next step of the shuffle and focused on that before adding hip movements and final adjustments. The other shuffle “running man” with a slight hop was animated basically in the same way, I got a few different references for the legs and focused on them first, moving the waist up and down as need be, running my animation over every few seconds to check how it looked and making adjustments where required, then moved onto the arms using another reference. When doing the arms I tried to give them a bit of an abrupt move so it looked like he was pulling his arms back forcefully with a little pause in beat with the shuffle before continuing to move them again. I did this by offsetting the keys slightly from the legs and adding a “hold” frame after each pull back of the arm. https://youtu.be/vQR8LoVOF7A i used this video to help me with the legs and head bob, and this one to help me with the arms 0:33-0:35 https://youtu.be/MRjzecRlVGc.
Checking how the arms and legs looked when animated beside one another, I went through and made position and rotation adjustments until i was happy with how they ran together and added in head and hip motion and made the whole rig spin 90° to the right for when he stops one shuffle and proceeds into the other.
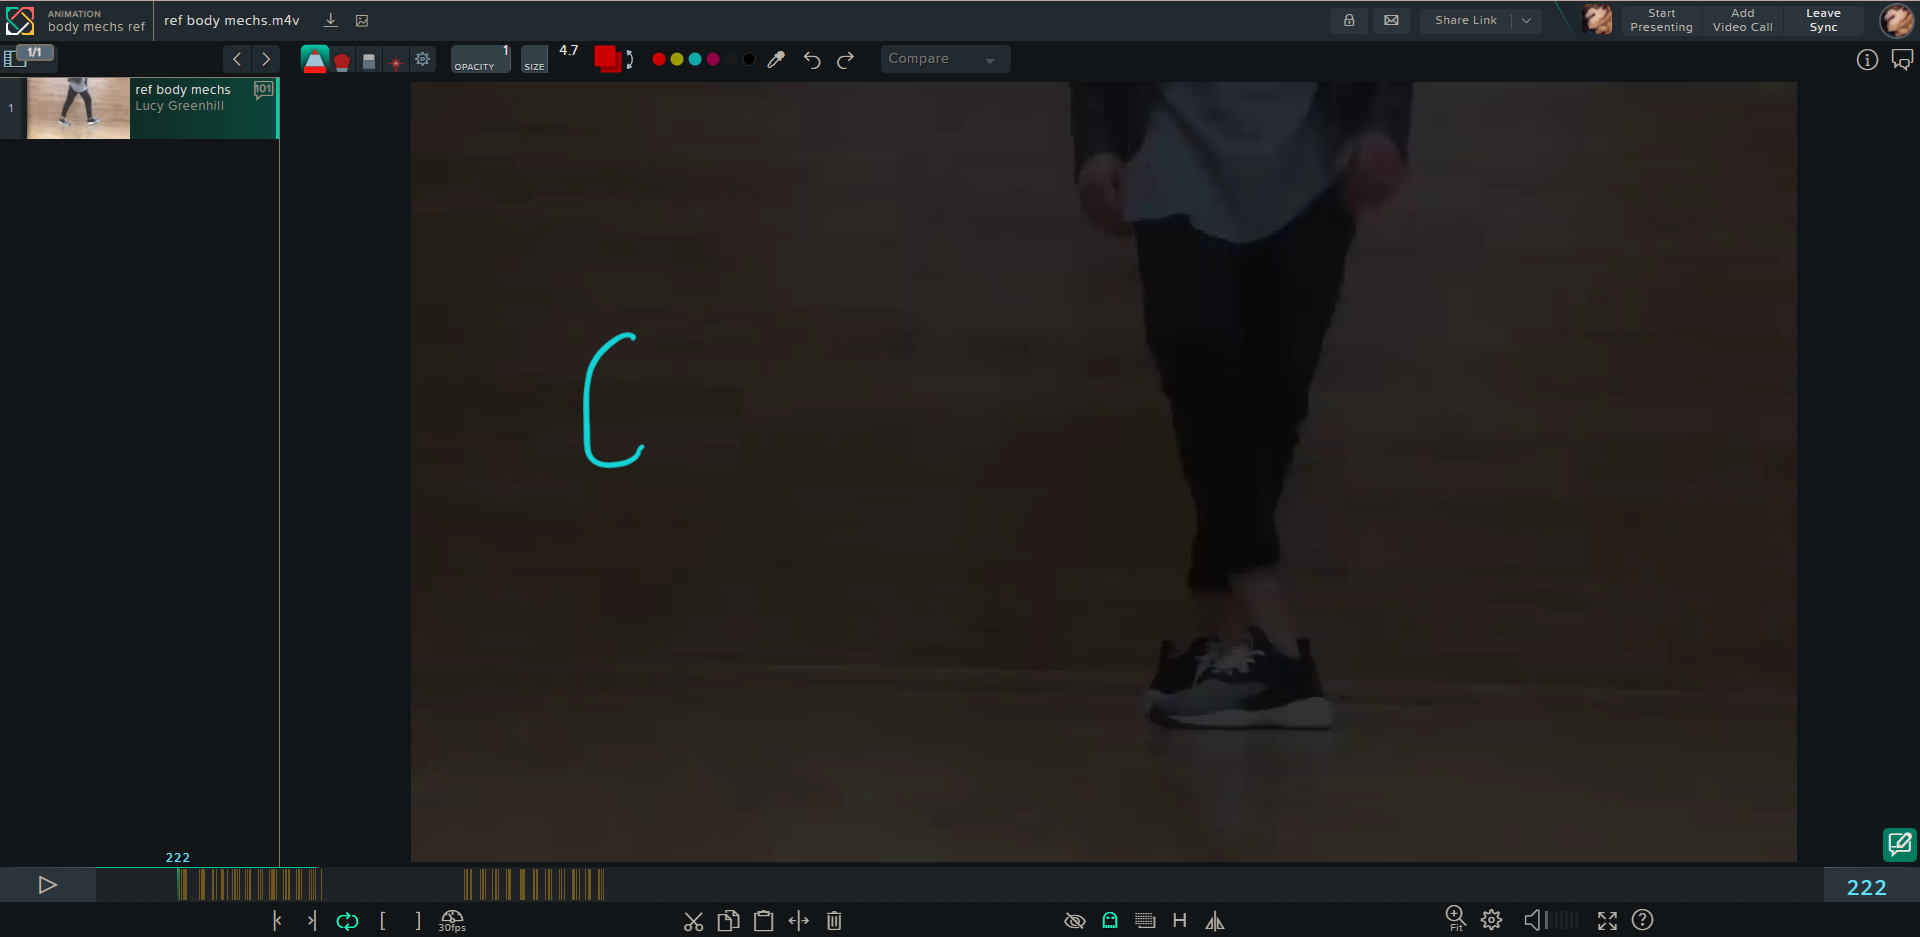
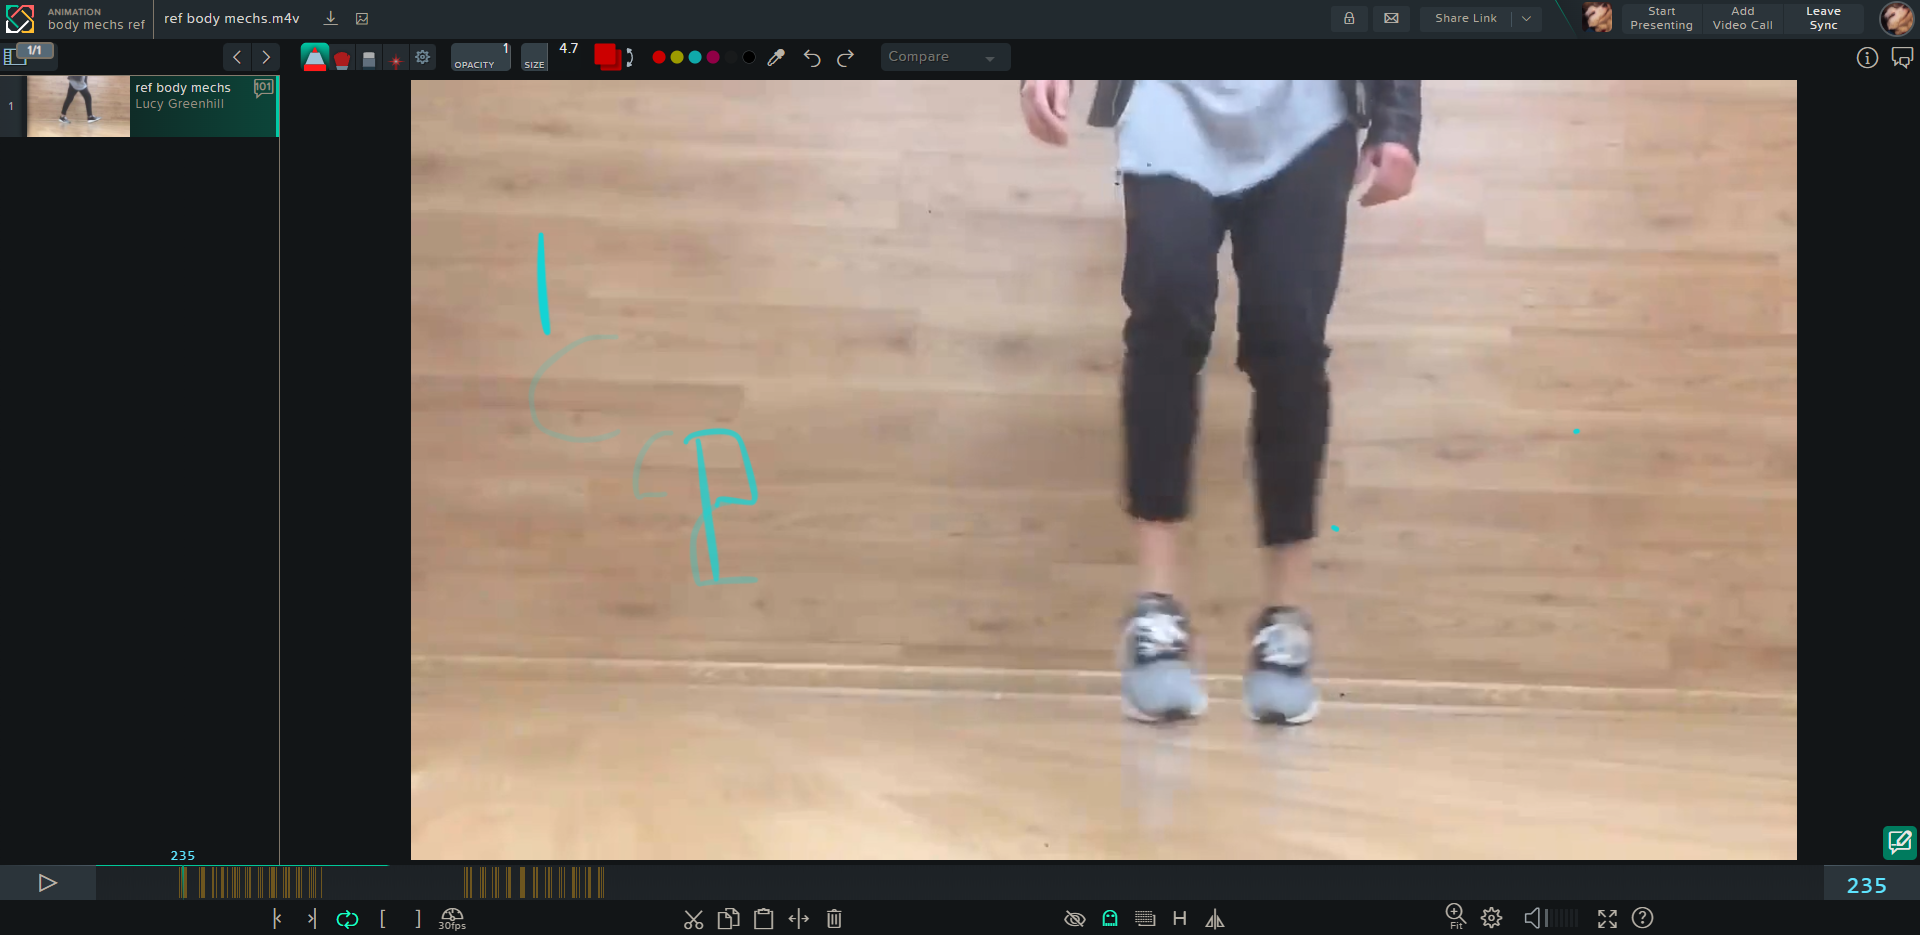
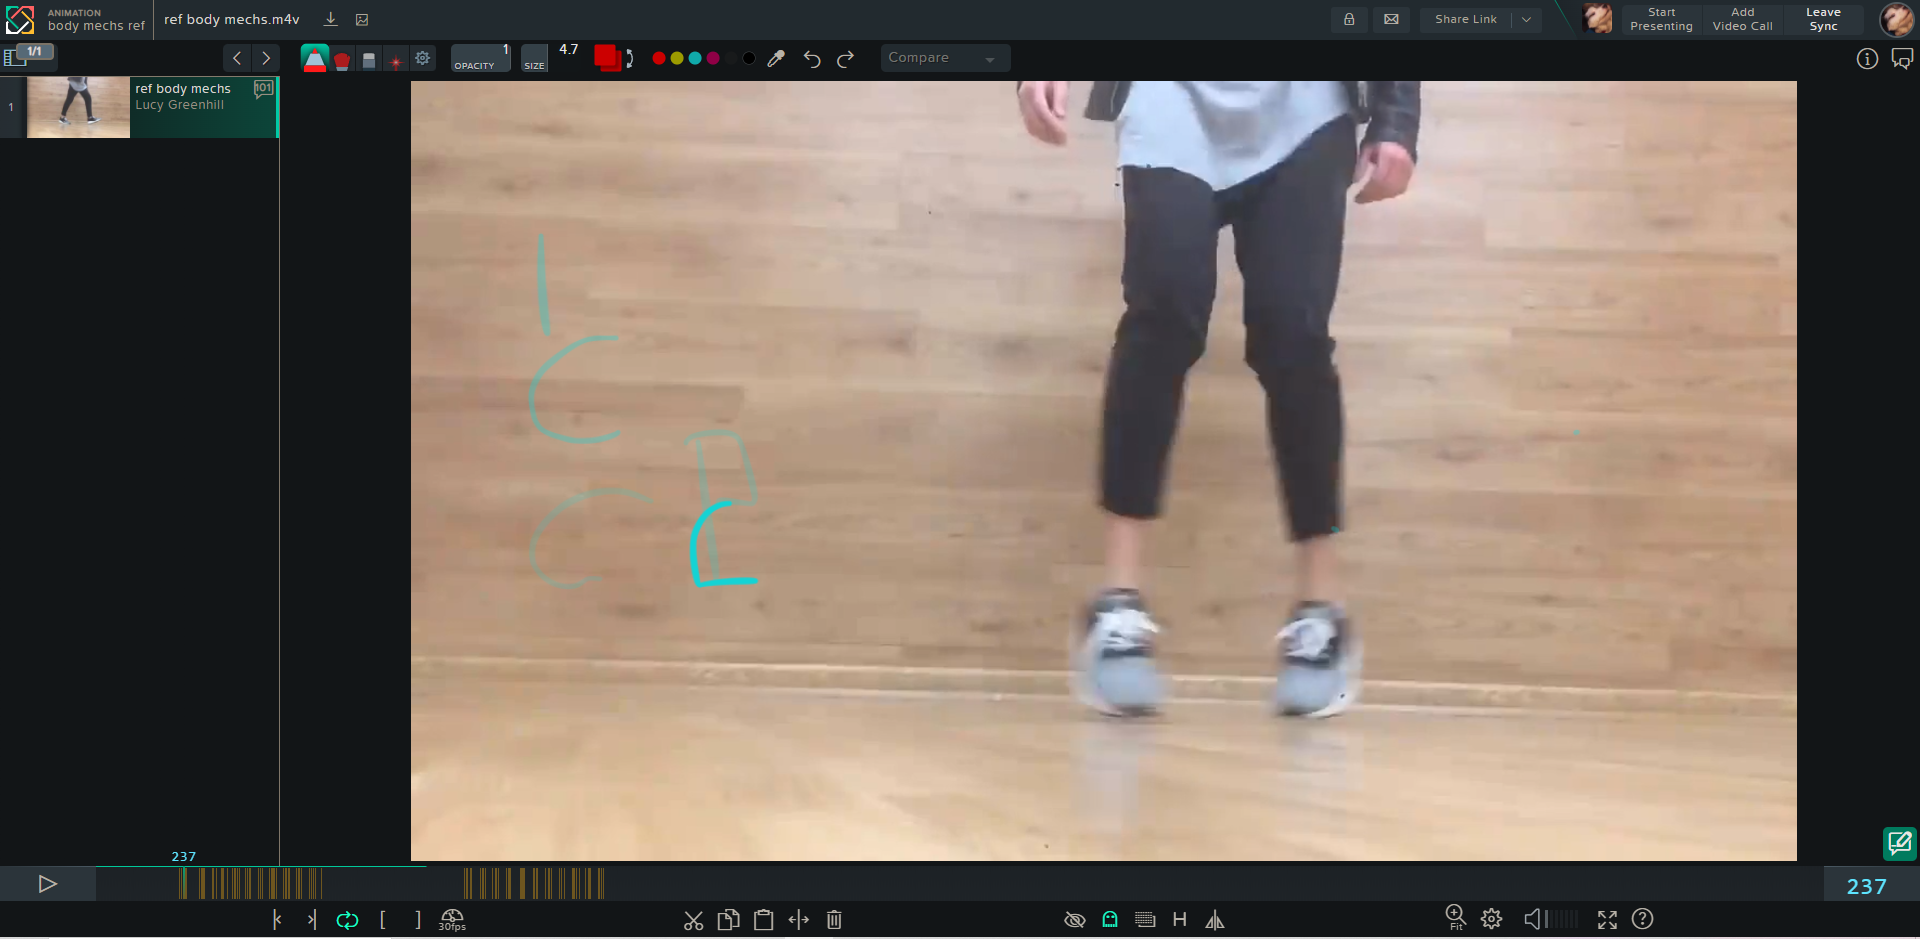
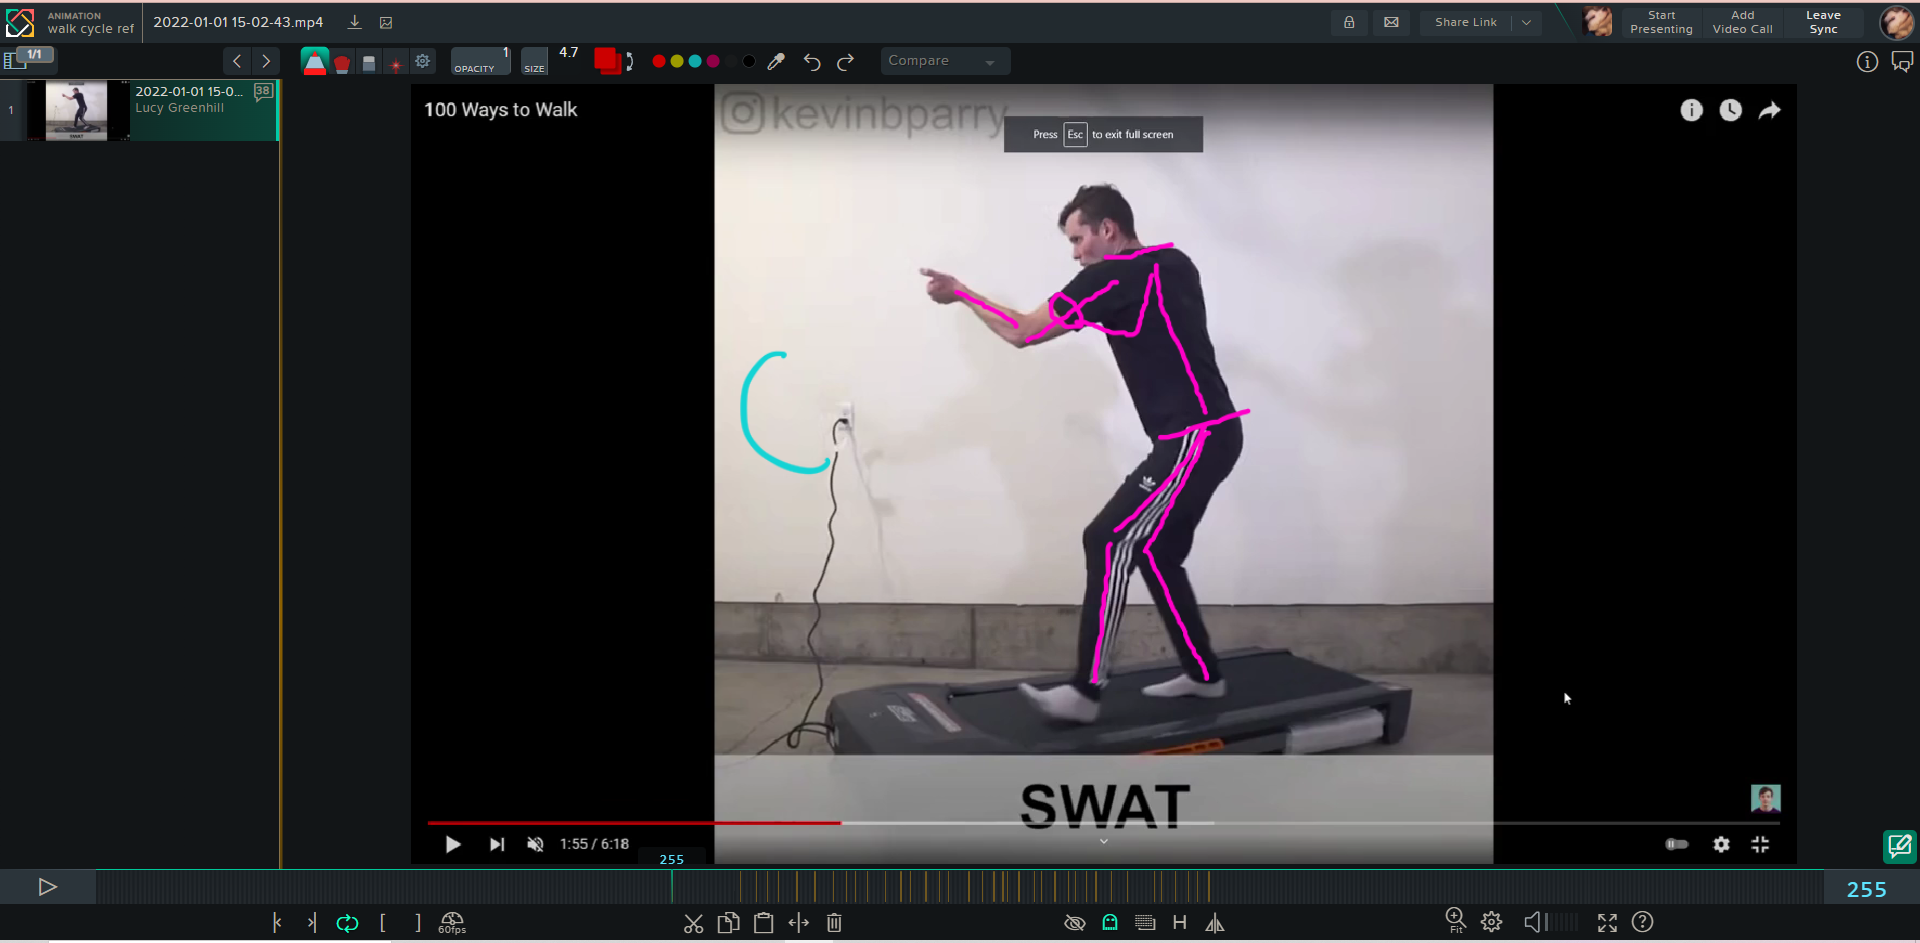
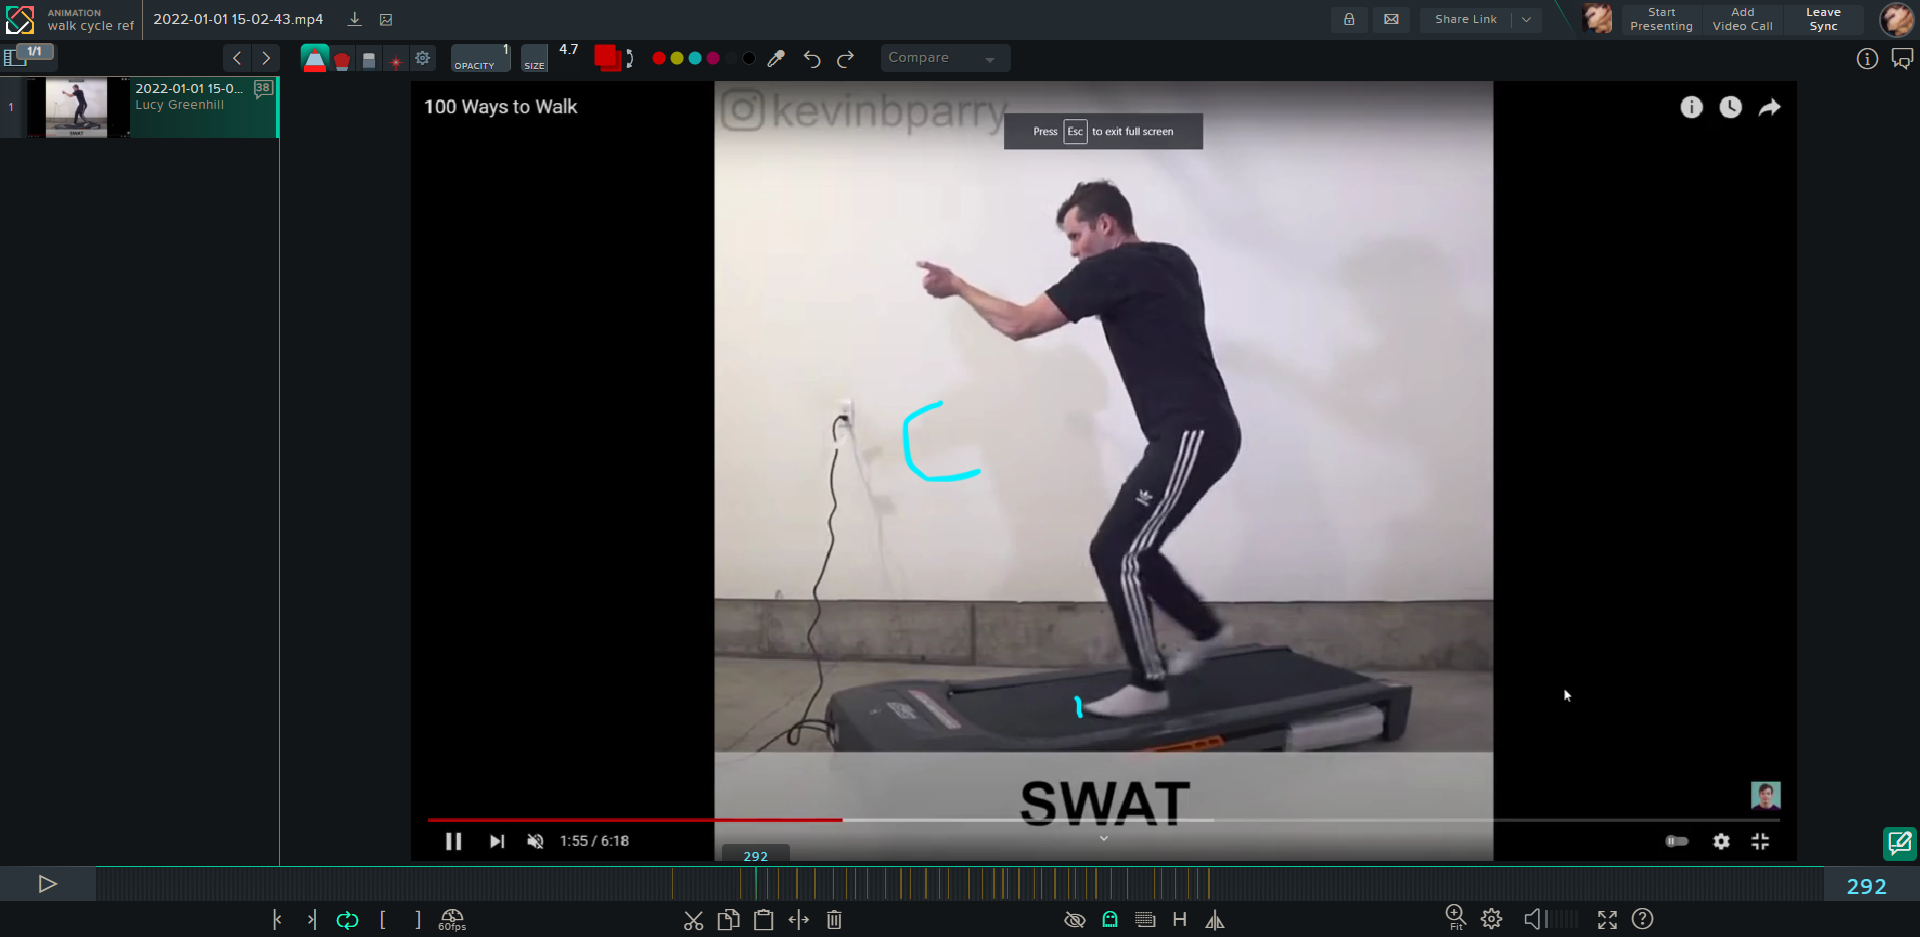
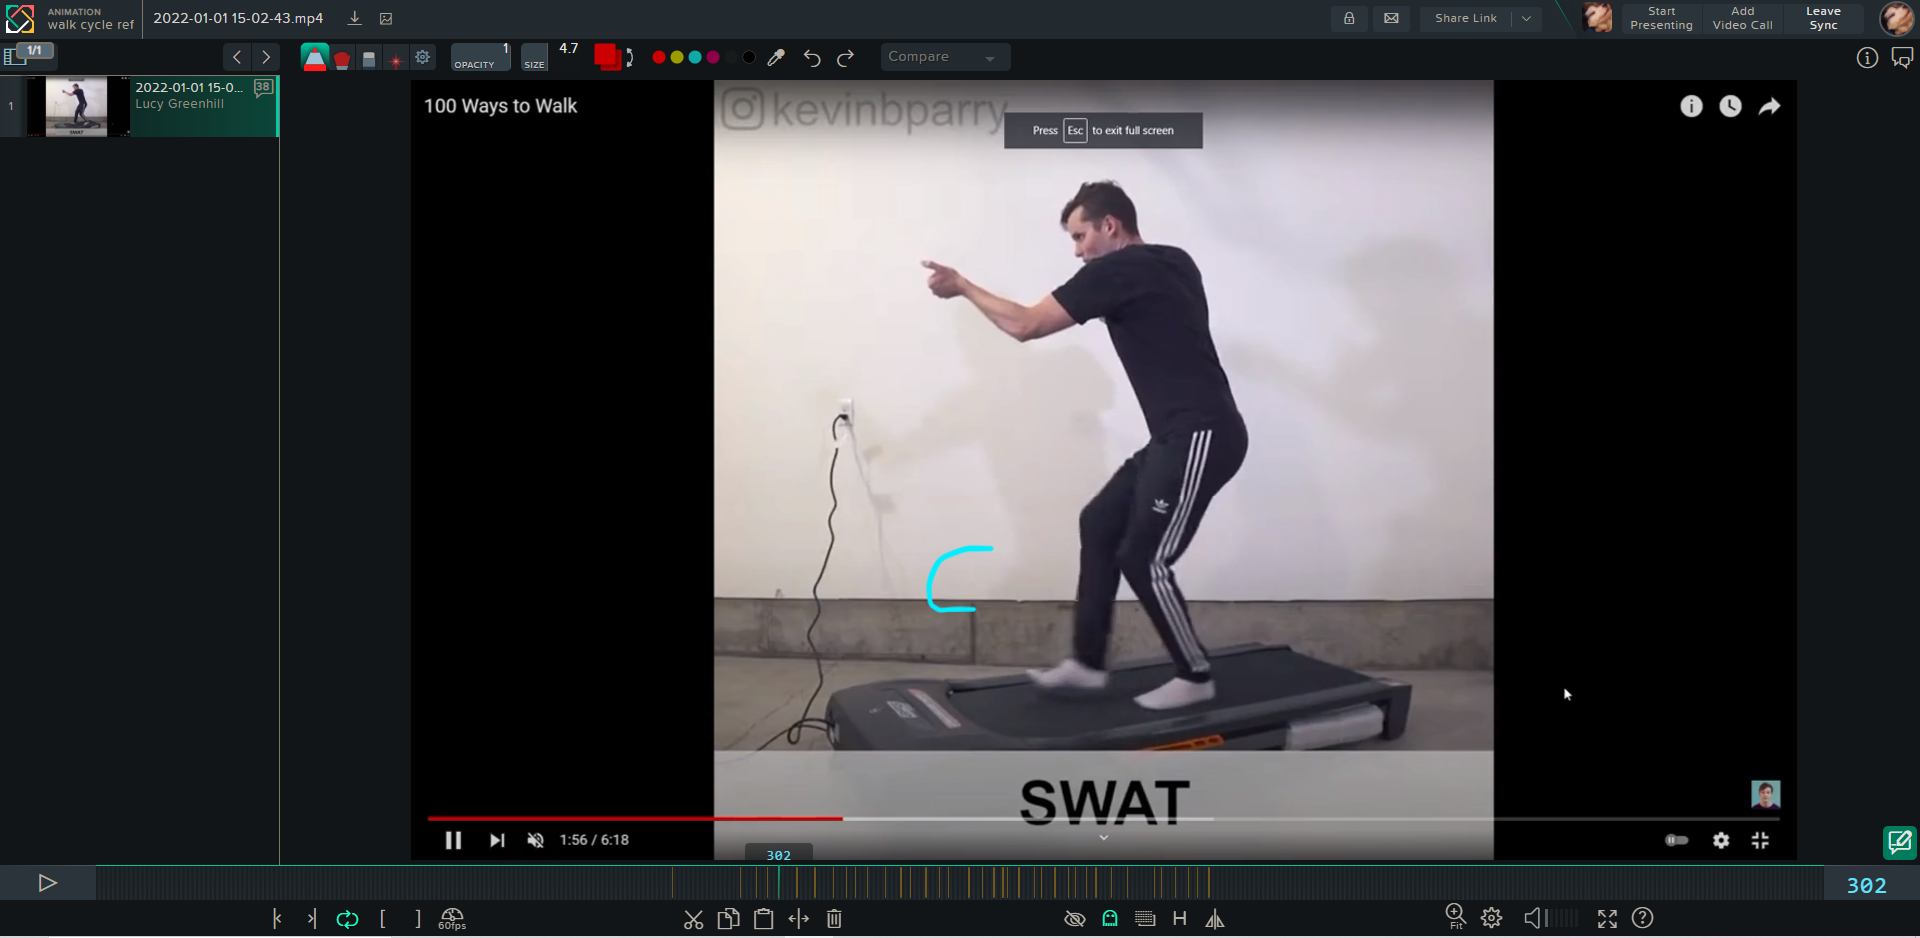
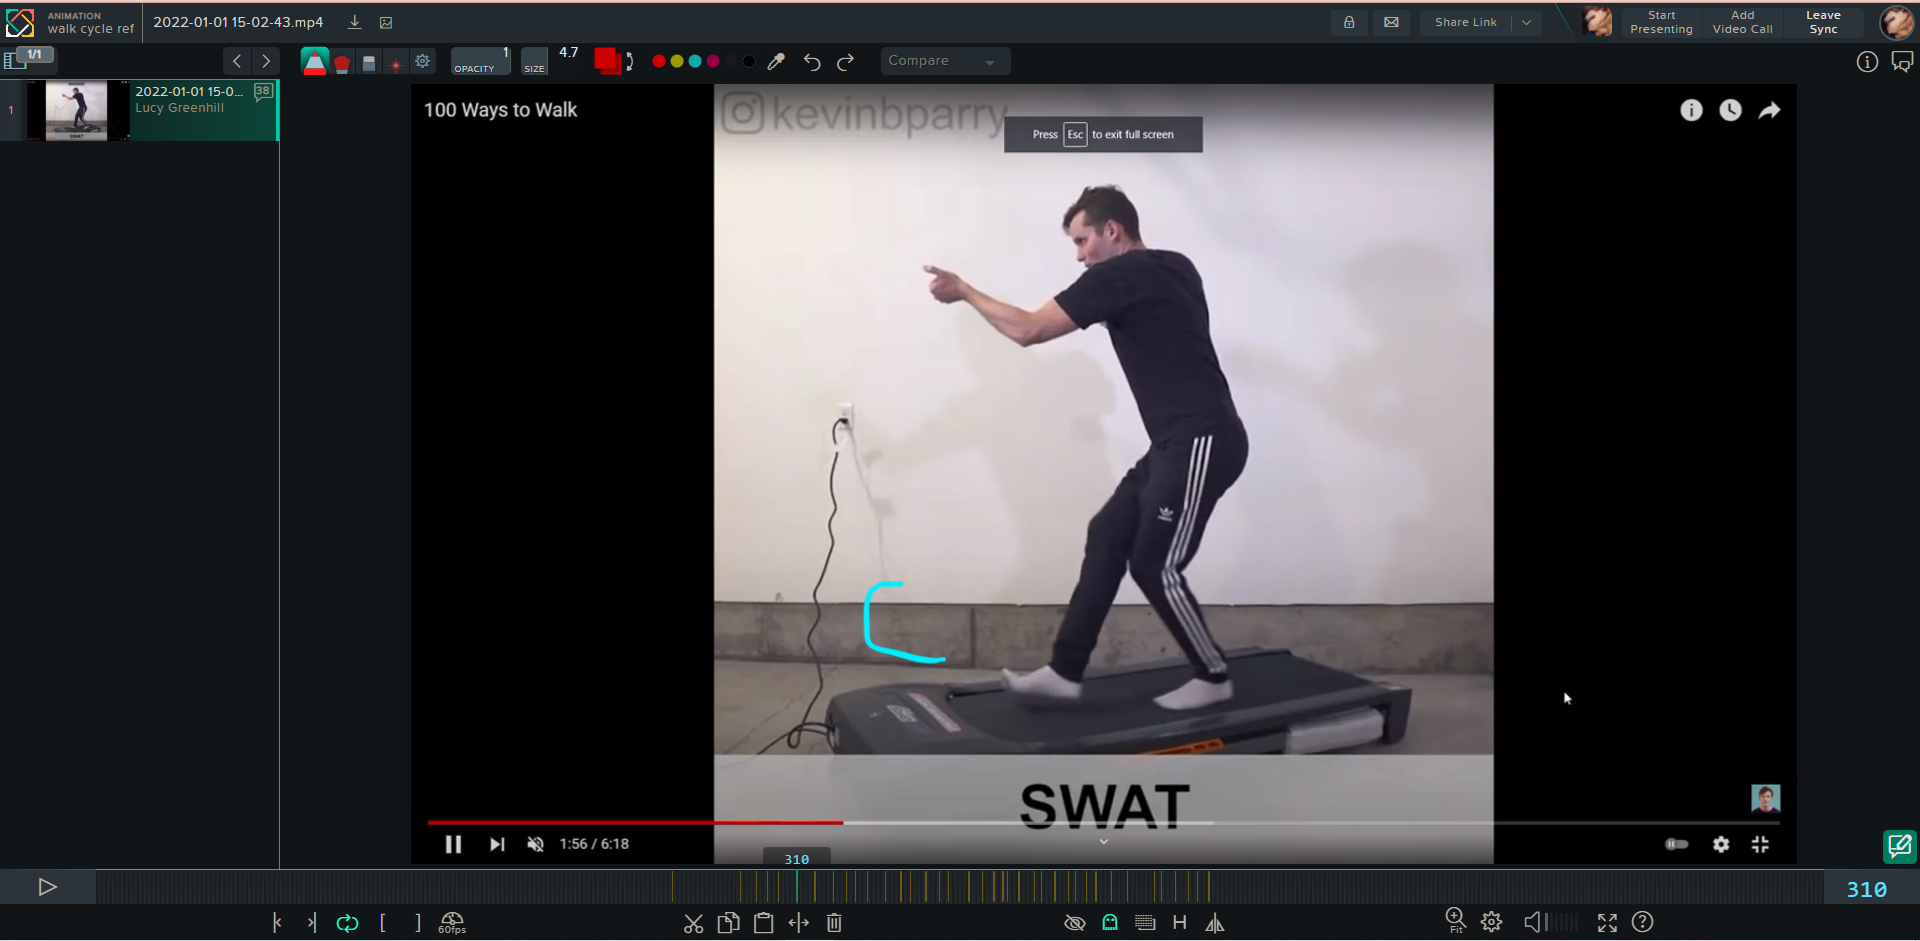
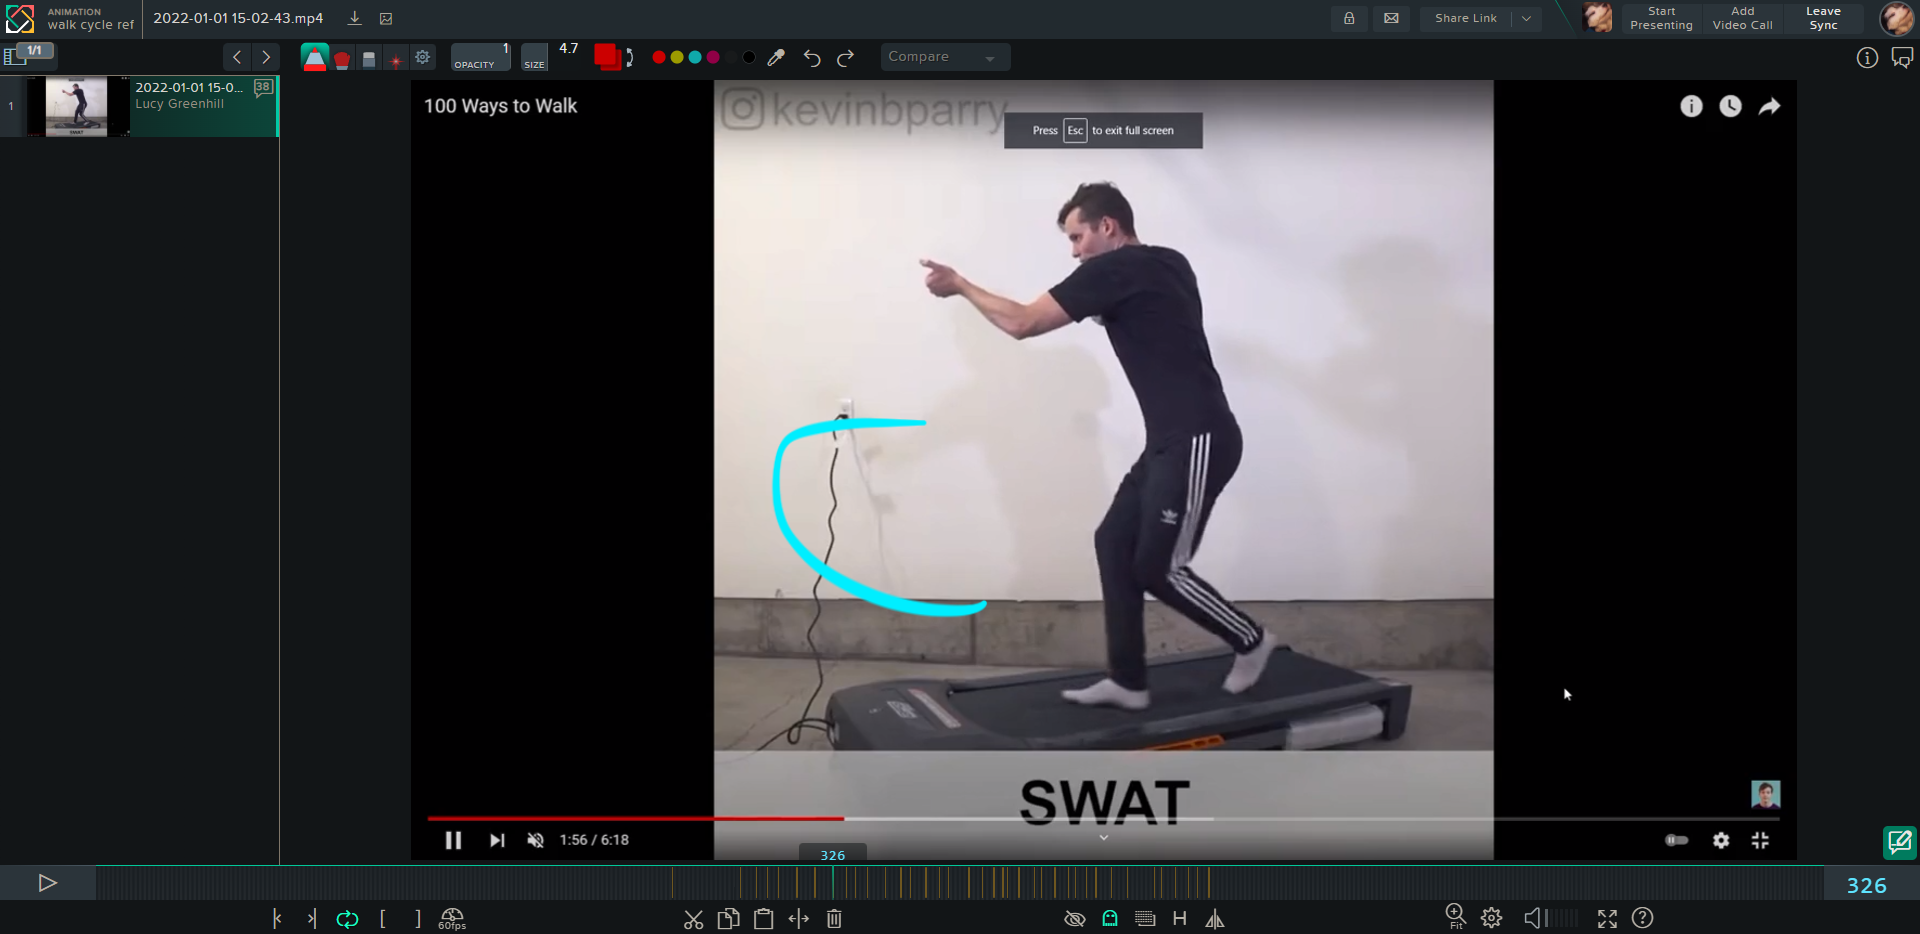
With one animation out of the way, I now had two left, the run cycle and the walk cycle which I’m starting now. To get a reference I used Kevin Parry’s “100 walks” video on YouTube and picked a walk I liked https://youtu.be/HEoUhlesN9E. I’m interested in becoming a games animator so the SWAT walk cycle stuck out to me as I play a lot of FPS games and this walk reminded me of them and I thought it’d be cool to give it a go since I’m always admiring the walk cycles in CoD lobbies. I screen recorded the video with OBS and uploaded it to Syncsketch to start finding my key poses.
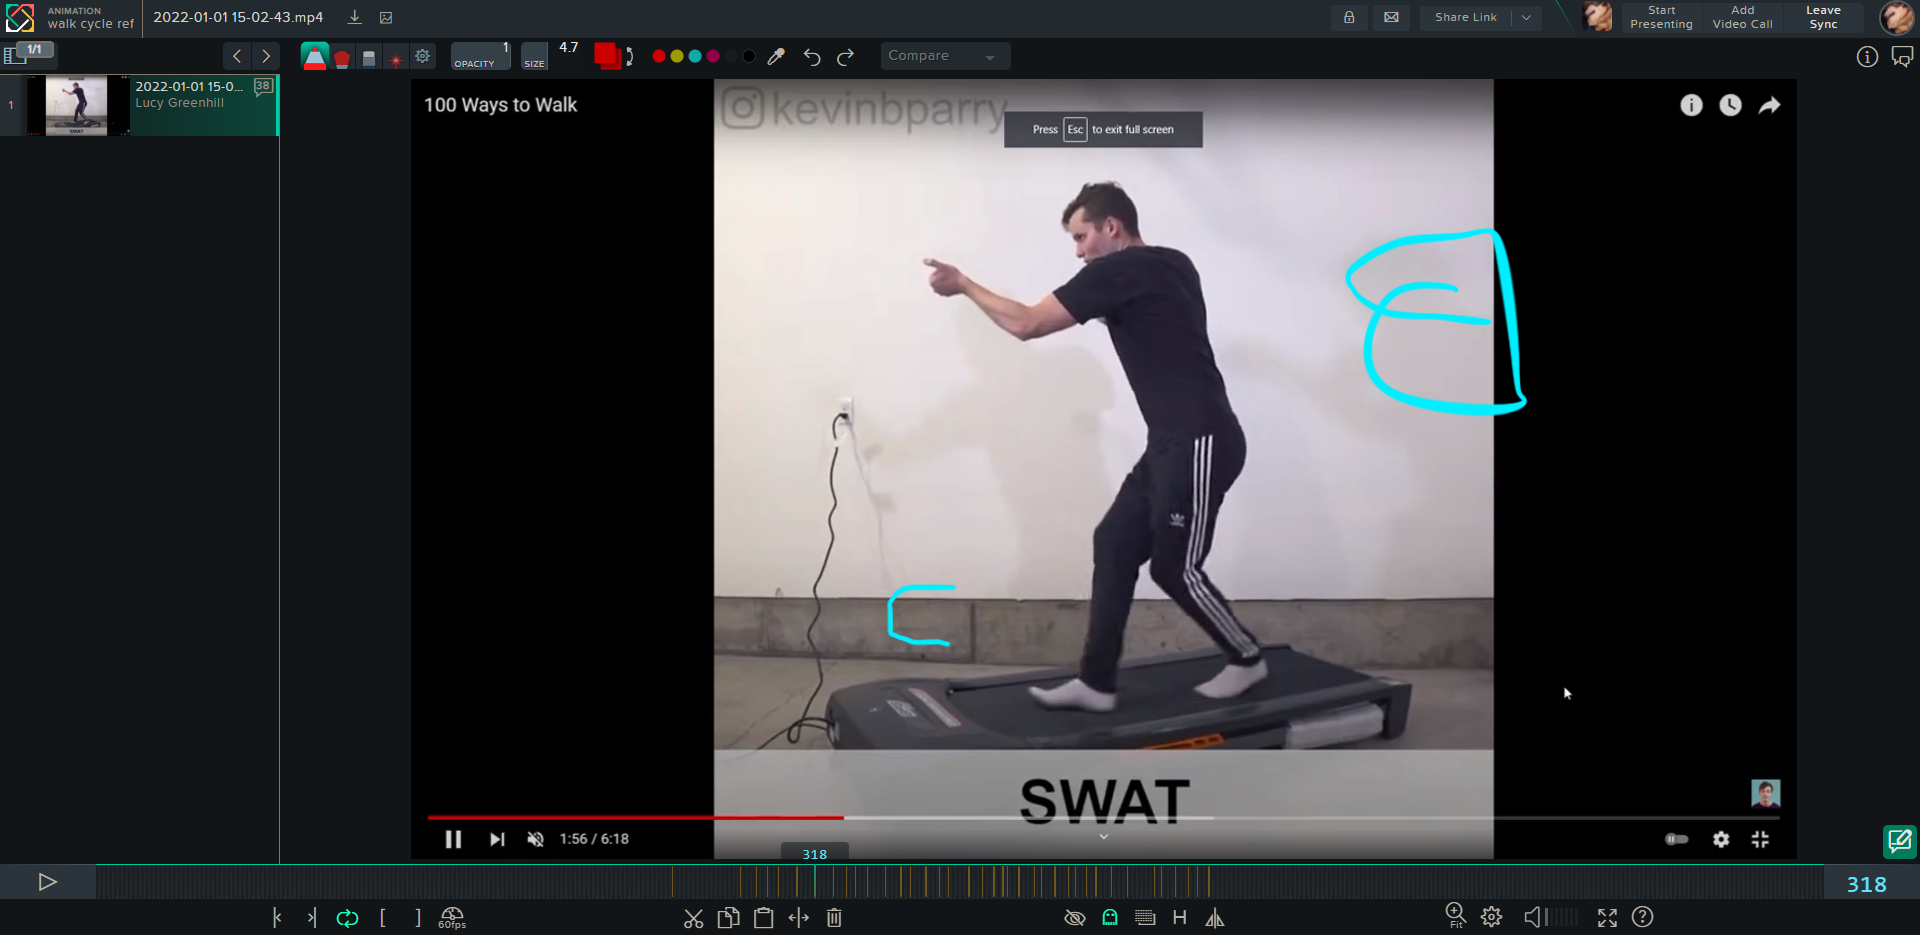
Once in Syncsketch, I placed a mark at the beginning of the walk and at the end just before it switched to the clown walk. I used these two markers to scrub through the footage and get the contact, up, passing and down poses of the walk cycle and marked them with an appropriate C, U, P, D. I marked some Inbetweens or frames I wasn’t exactly sure about with an I so I could come back to them later and they’d be there instead of having to look for them again. The treadmill made it annoying to try define what was a contact position and whether the foot was still on the treadmill since its always moving, but I did my best to differentiate them.


With my new key poses, I loaded Maya up again and used the same Jack rig as last time and docked Google Chrome up against my Maya window to have my reference up while I work. I started with the legs again as I find this the easiest way to work, using the feet controllers to emphasize the bend in the foot due to the pressure of leaning on it as the character makes slow steady steps. Since this walk is pretty rhythmic with around one step per second, I tried to move the keyframes to a point where I could mimic this and it works for the most part. As I was working with the feet, I moved the waist controller up and down as appropriate to give the knees their bend.
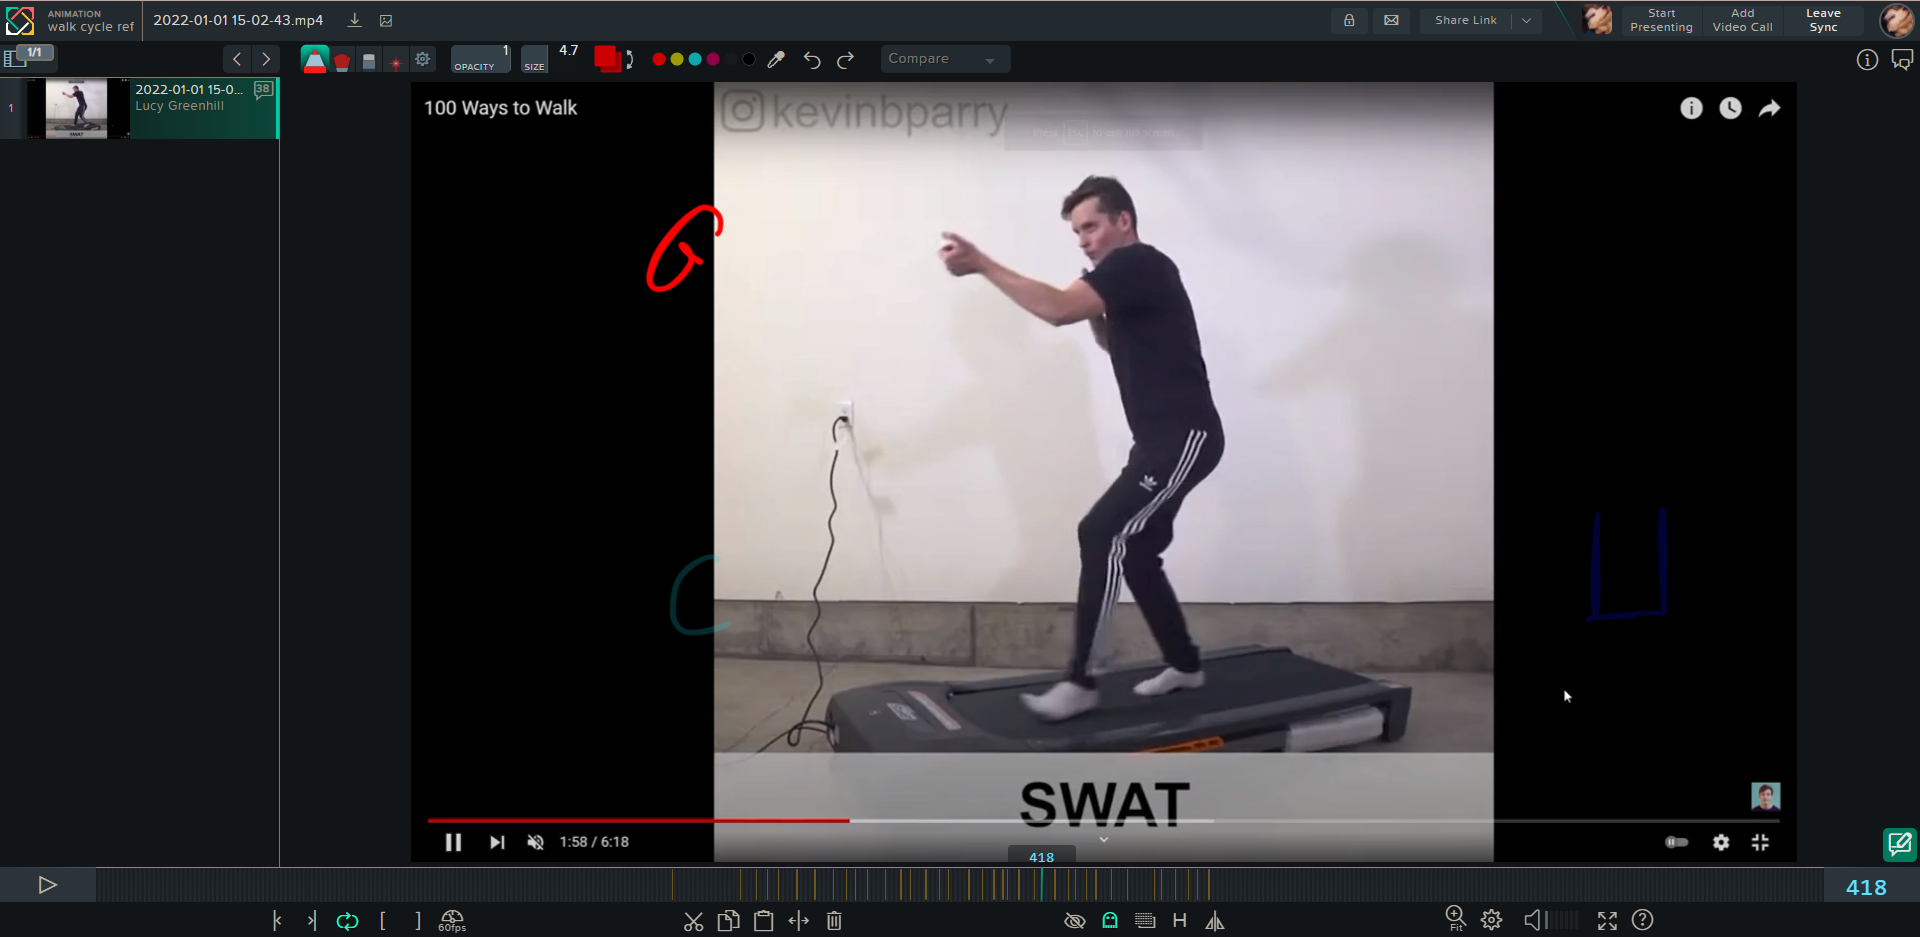
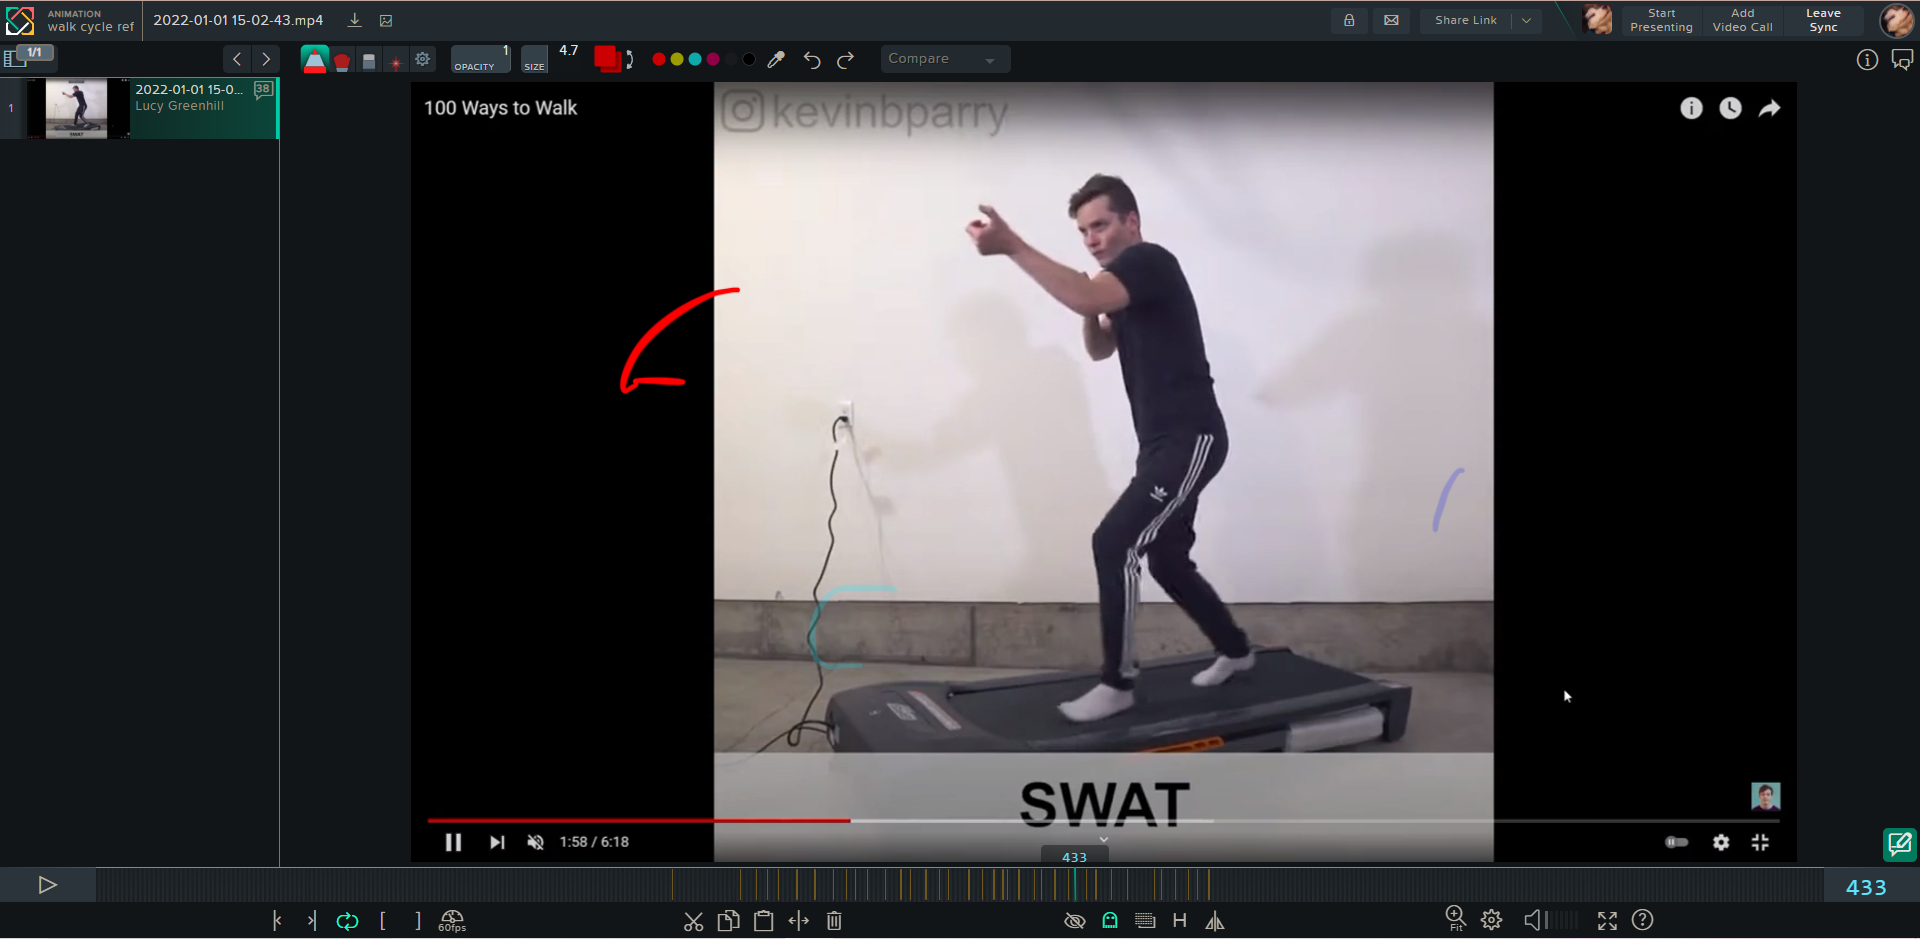
Moving onto the arms, I marked the frames in the reference with a G (for gun) where the actor moved his arms so I could just skip to these frames to see the pace and how much he moved his arms. Obviously I wanted to set a keyframe to tell the arms where to sit in the first place so I positioned them as if he were holding a gun and scoping down it and set this as the first and last frames. About halfway through the walk, I offset the key for the arms as they start to turn to the right, looking toward something in the distance. I used a second keyframe about 2 seconds or so after the arm started turning, this was for the point where the character would stop turning and take a second to assess what was in front of him, which I acknowledged by holding this position and giving the head an abrupt nod up as if to say “sup” to whatever he was looking at -I like to think there’s another member of his team in front and he’s acknowledging them, but you can interpret it whatever way you’d like.- Along with the arm movements, I made the back crouch over and moved the shoulders forward to follow the concentration of looking down the gun while also creating a nicer shape in the back. To finish it off, I set the head to duck lower down to be in line with the imaginary gun so it looked more accurate and gave the head and arms slightly offset little bounces to make the animation more interesting whenever he took steps.
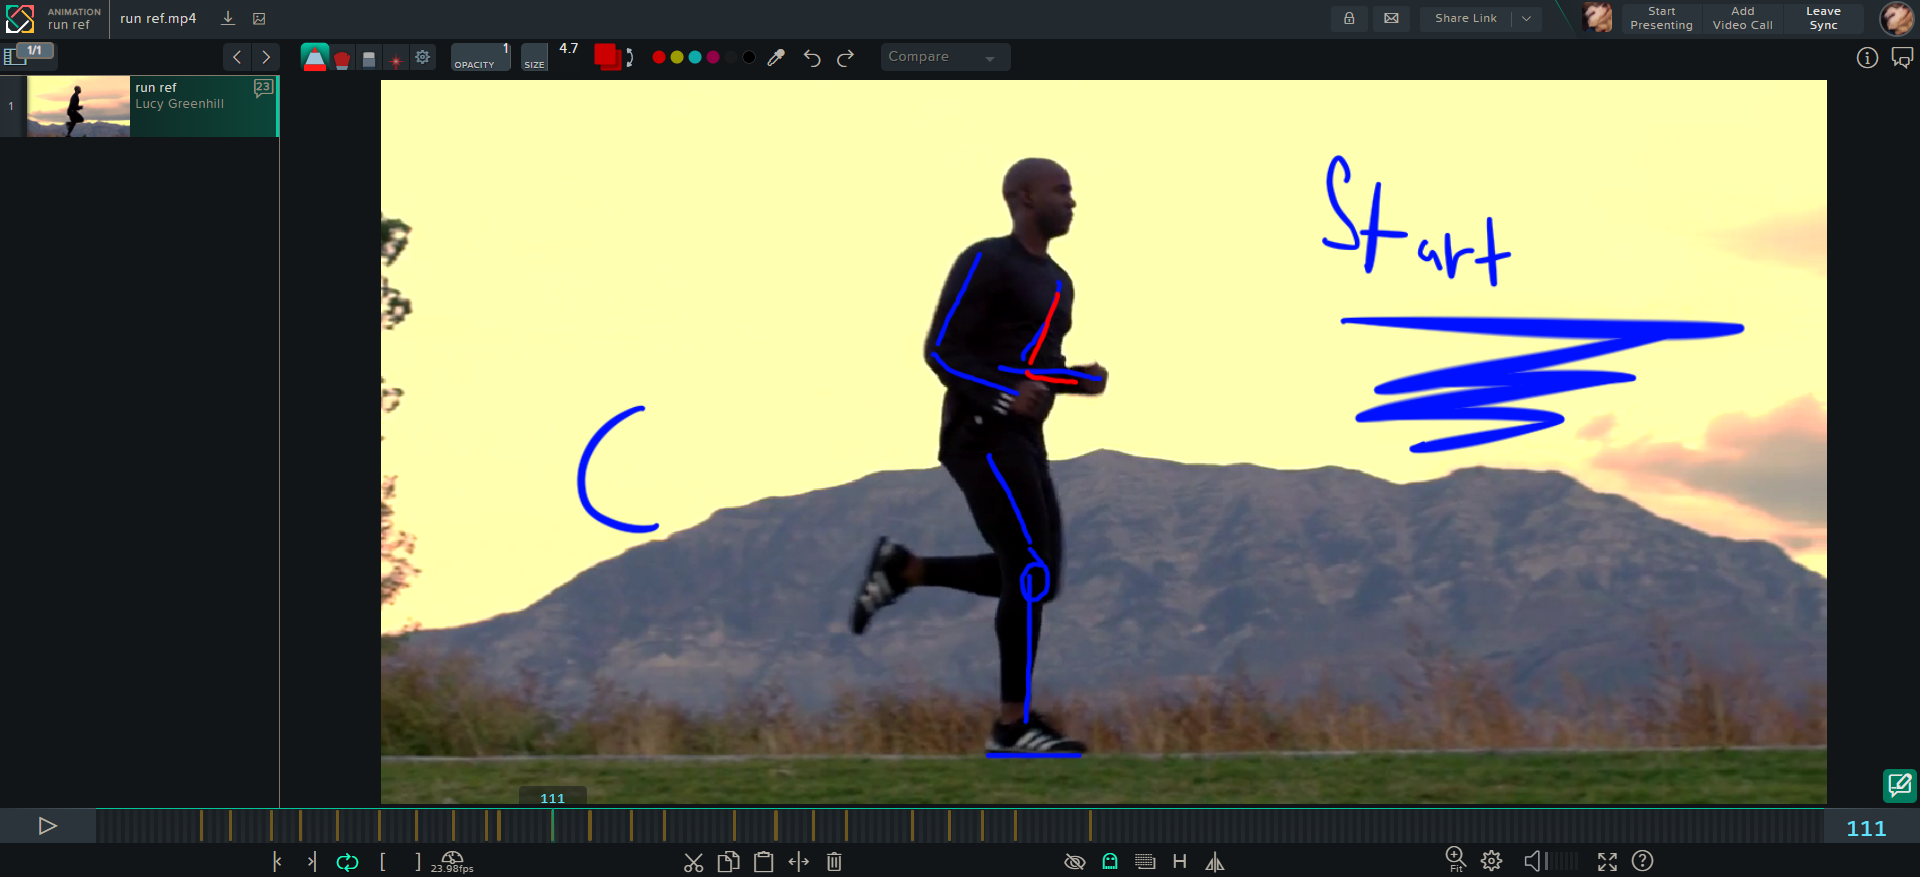
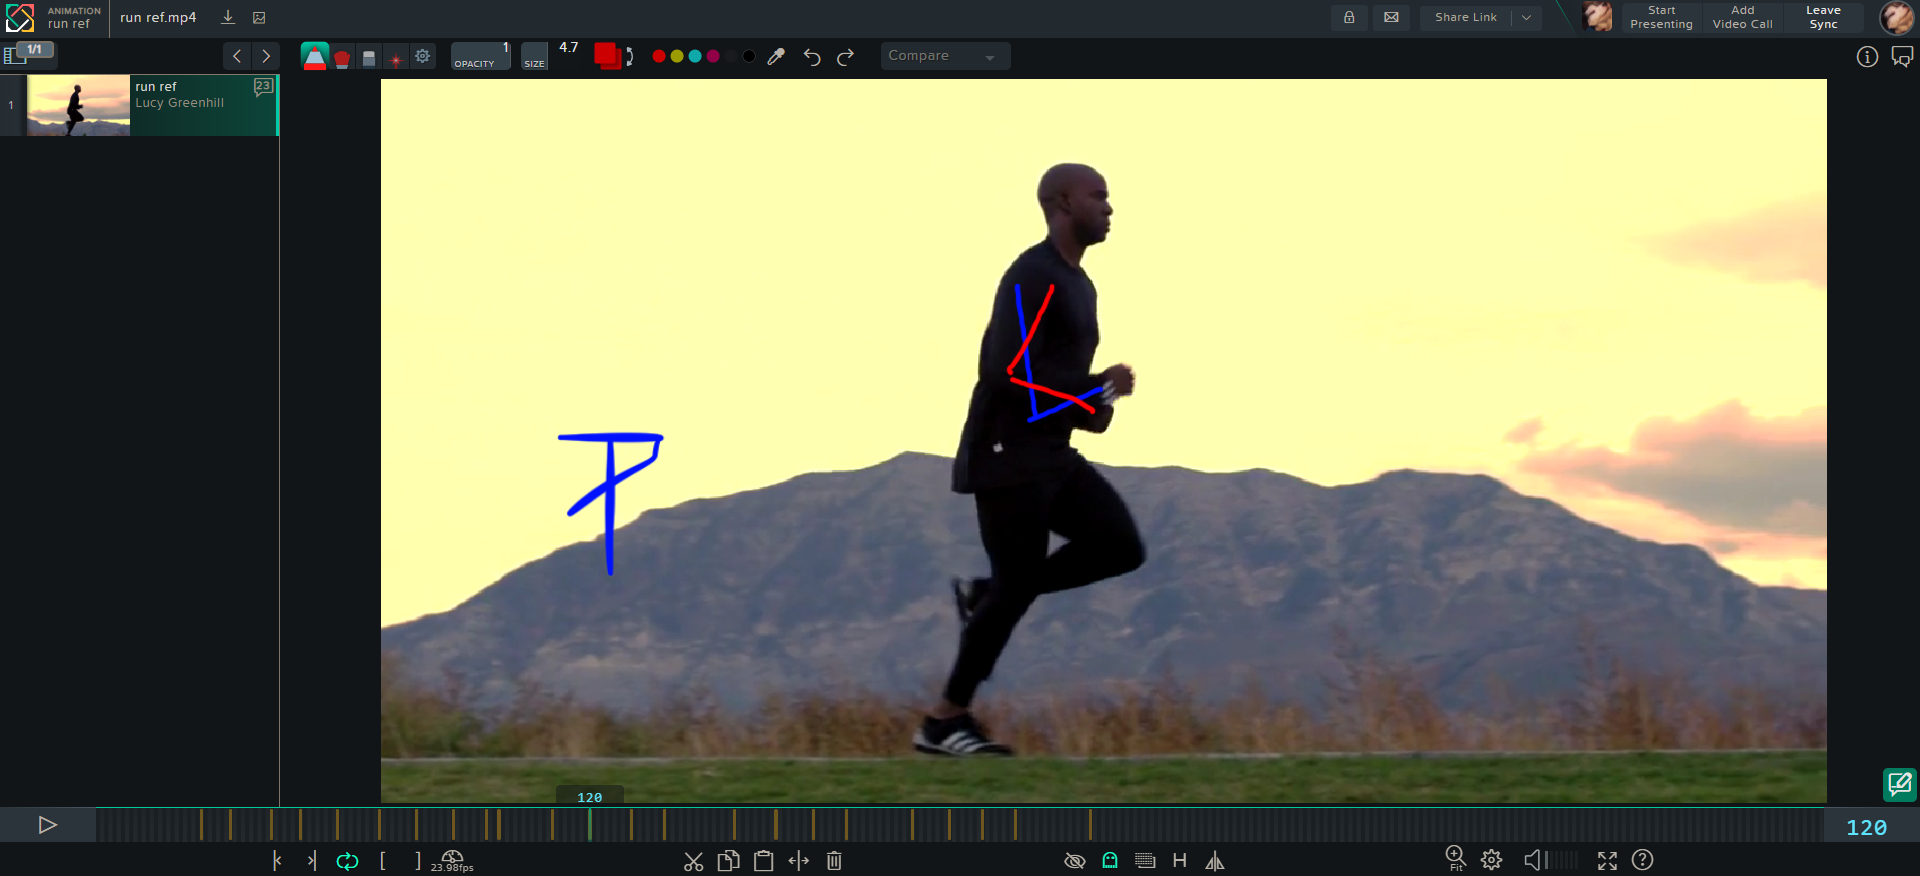
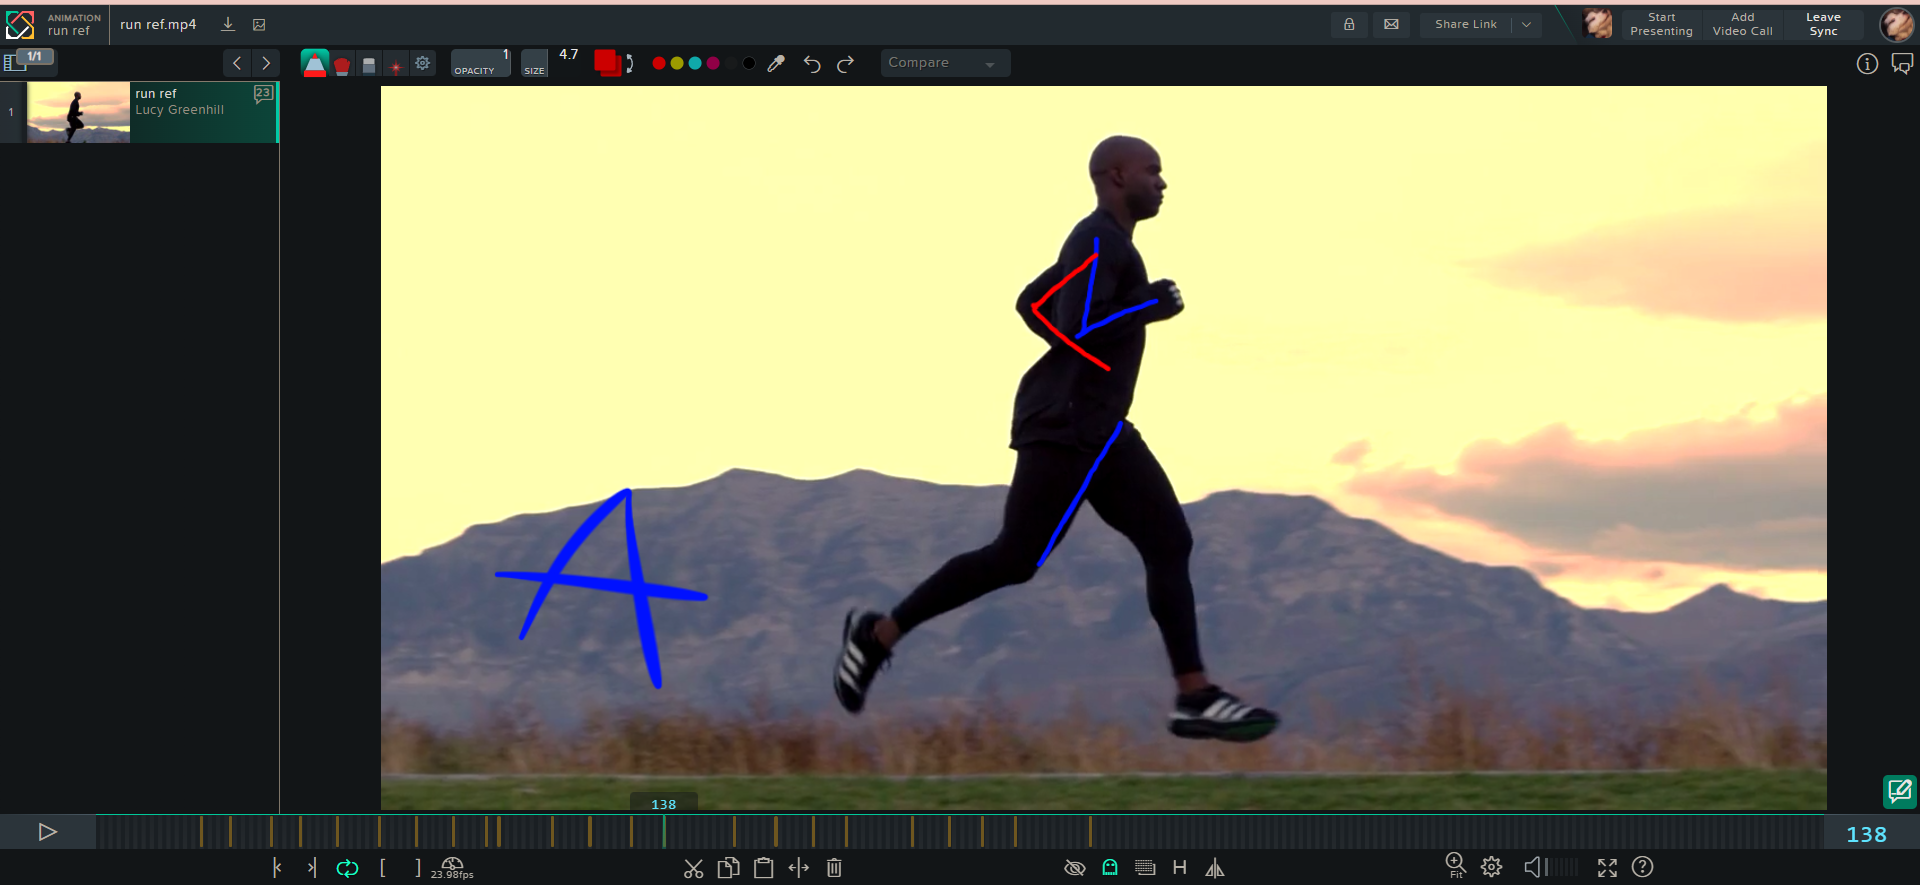
To start off with, I found a reference on YouTube of a man running, though it was in slo-mo, who was wearing dark clothing so it made it a little hard to accurately see how his arms were moving and I had to pay close attention to which leg was in front of the other to make sure I didn’t make any mistakes (which, admittedly, still happened and confused me a few times lol) https://youtu.be/vWGg0iPmI8k
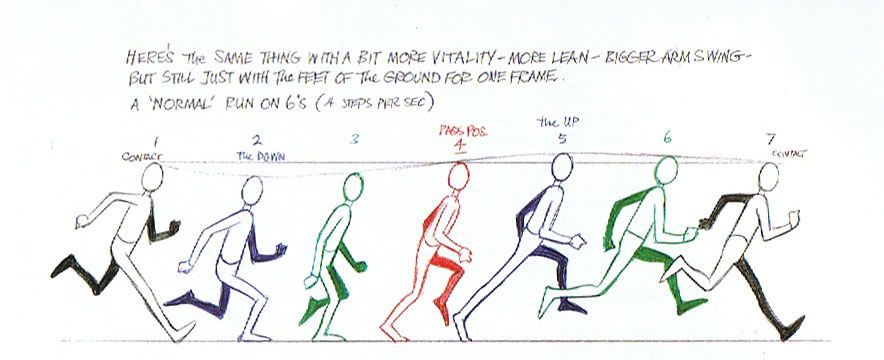
Same as the other animations, I downloaded my reference from YouTube with VLC player and uploaded it to Syncsketch to draw over it and mark out my key poses. I used the help of the image below to figure out which poses to pick out, though I had an idea already which poses I needed, I just wasn’t sure what they were labelled as, though the way my reference actor ran was slightly different to the illustrated run cycle so the contact and pass points were a little different. Since the actor was also in a strange perspective at some points of the video, I had to make educated guesses on where his arms where and how they moved, which I did by drawing a simple skeleton over his form with red for the foreground limbs and blue for the hidden ones in the back. I also used lines to measure how far up and down his head moved whenever he left the ground and landed with his contact foot. With all this information, I feel confident enough to load Maya back up and start animating.


Sticking with the trustworthy Jack rig, I kept my windows docked beside one another to have my reference alongside my workstation and started posing the legs once again using the feet controllers to get a more accurate weight flow and clearly show when the foot is leaving the ground and making contact again. Flicking back and forth between my video reference and the run cycle illustration reference, I keyframed the key poses of the legs for one cycle as I didn’t need to waste time doing more than one cycle as I can just use Kappa later to loop my render. With the feet done, I move onto the arms and pose them to match the skeleton I drew over the video reference in time with the feet. I tried to close the hands but with the thumb inly having one main controller it looks a little odd and I’m pretty sure it clips through the fingers a little, but it’s not too visible so I saw no need to fix it. To finish this cycle I puffed the chest out a little so it looked like a confident run and made the head move in time with the steps to give the illusion of huffing in rhythmic breaths.
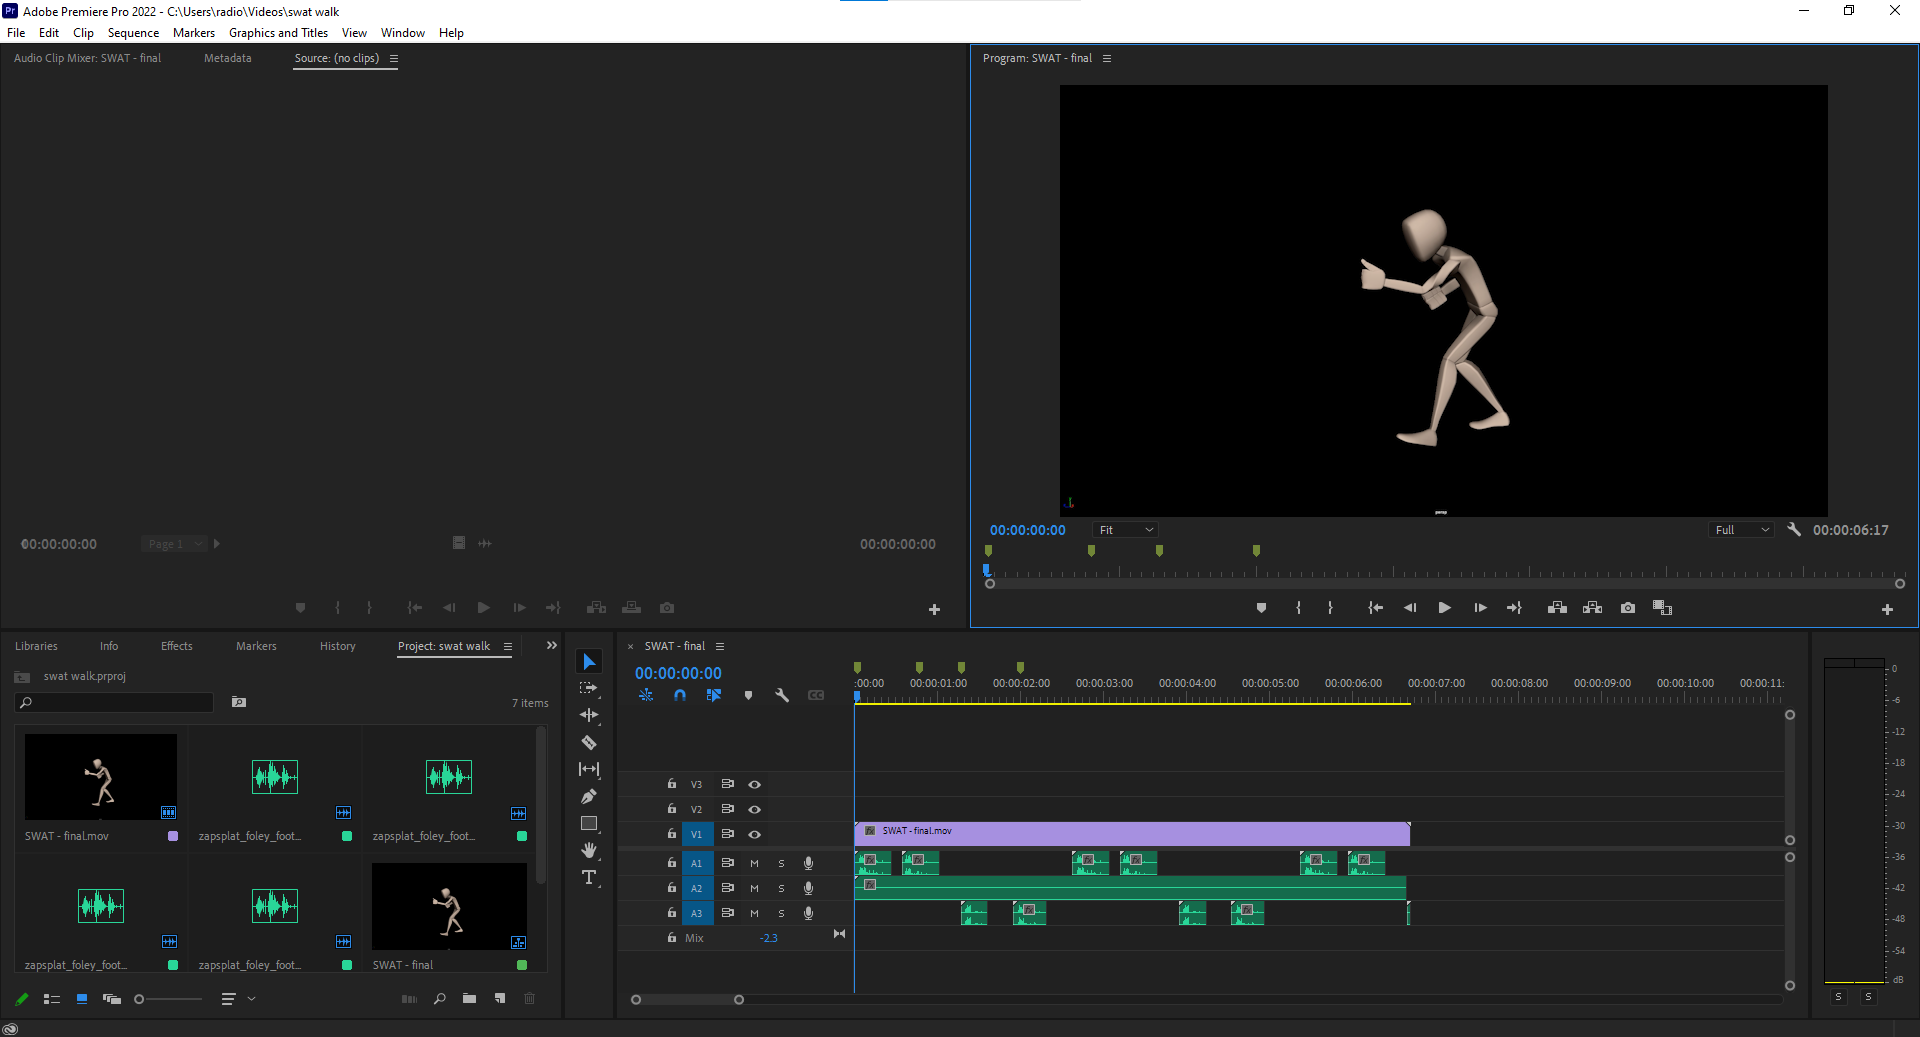
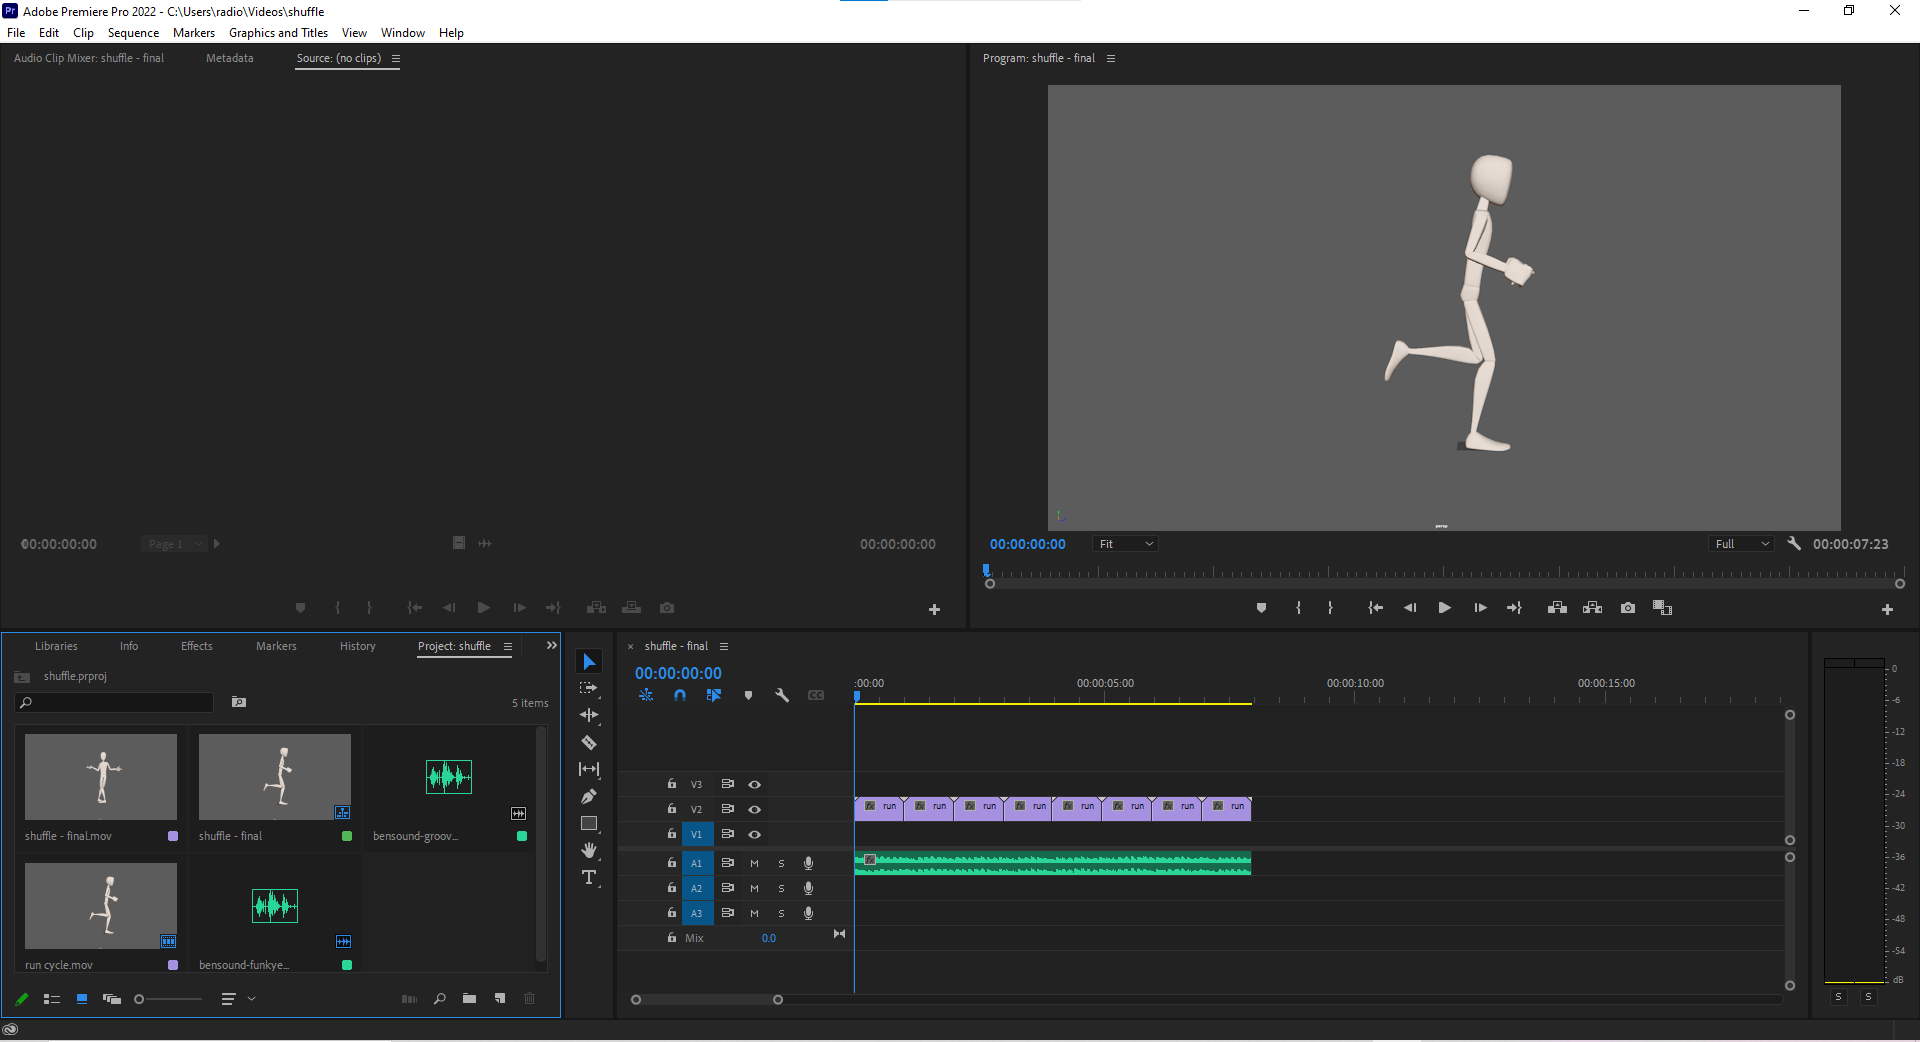
To finish all my animations, I loaded them into separate project files in Adobe Premiere Pro and downloaded music from Bensound.com and sound effects from Zapsplat.com and added them into the timeline of the appropriate animations. The run cycle and body mechanics were easy enough as i just added the music track and exported the video but the walk cycle was a bit more difficult as i had to download 4 separate walking sounds and edit them in time to the animation.
When working on my animations, I had to do some research before and during the process to help me figure out how to animate and which techniques to use. Looking into straightforward and blocking techniques I figured for me and how I like to animate in 3D, blocking would be more beneficial to me as I like to go from pose to pose rather than making one keyframe at the start and using my imagination to fill in the rest of the frames as this would result in a clunky and unbelievable animation. To keep everything in check and make sure my timing and poses were up to par, I used the “next frame” and “previous frame” buttons on the timeline in Maya as well as the “stepped preview” which allowed me to view the poses from one to the next without hitting play where Maya would then put in-betweens in to make the movement more smooth. This helped me figure out the readability of my poses and the timing so I could make adjustments if needed.
All in all I feel like I did a very good job with my animations, especially because before this I had absolutely no idea hoe to use video reference and it used to stress me out to the point I could only read step by step instructions, but now this has equipped me with a very useful skill for this industry. I had a lot of fun with this project, I especially enjoyed the shuffling animation as it was a bit of a challenge to go from a step by step walk cycle to something so high energy and unique. I’ve also never really animated a biped character before as I’m more interested in creatures and animals, so most of my previous animations are things like horses, dogs, dolphins, etc which made this a nice change of pace and a good learning experience.
If I had to redo this project again I’d definitely try make more time for it as I wasn’t able to use the three months we were given because I had too much on my plate so by the time i actually got round to starting it there were only two weeks left, so I’m kind of surprised I managed to do it. I would also like to embrace a more “personalised” run cycle as the normal run I did was quite boring. I was going to choose a unique run from “runs if animals were humans” but got confused on how I’d make it a run cycle instead of just a pass by the screen kind of thing. I’d also try get feedback off my classmates and tutors- though that would also fall under the category of time management as feedback was deadlined to December.