
After getting the main story ideas for my animation, I started thinking about how the characters would look and drew up a few sketches of them, adding a background to try and figure out colour pallets. For this stage I used a drawing app on my phone and took inspiration from images online of things like the zodiac signs, and used an AI image generator in Discord with the prompt “glowing constellation animals” to give me some idea of how I wanted to show these are constellations but also give them a unique feel rather than just stars.
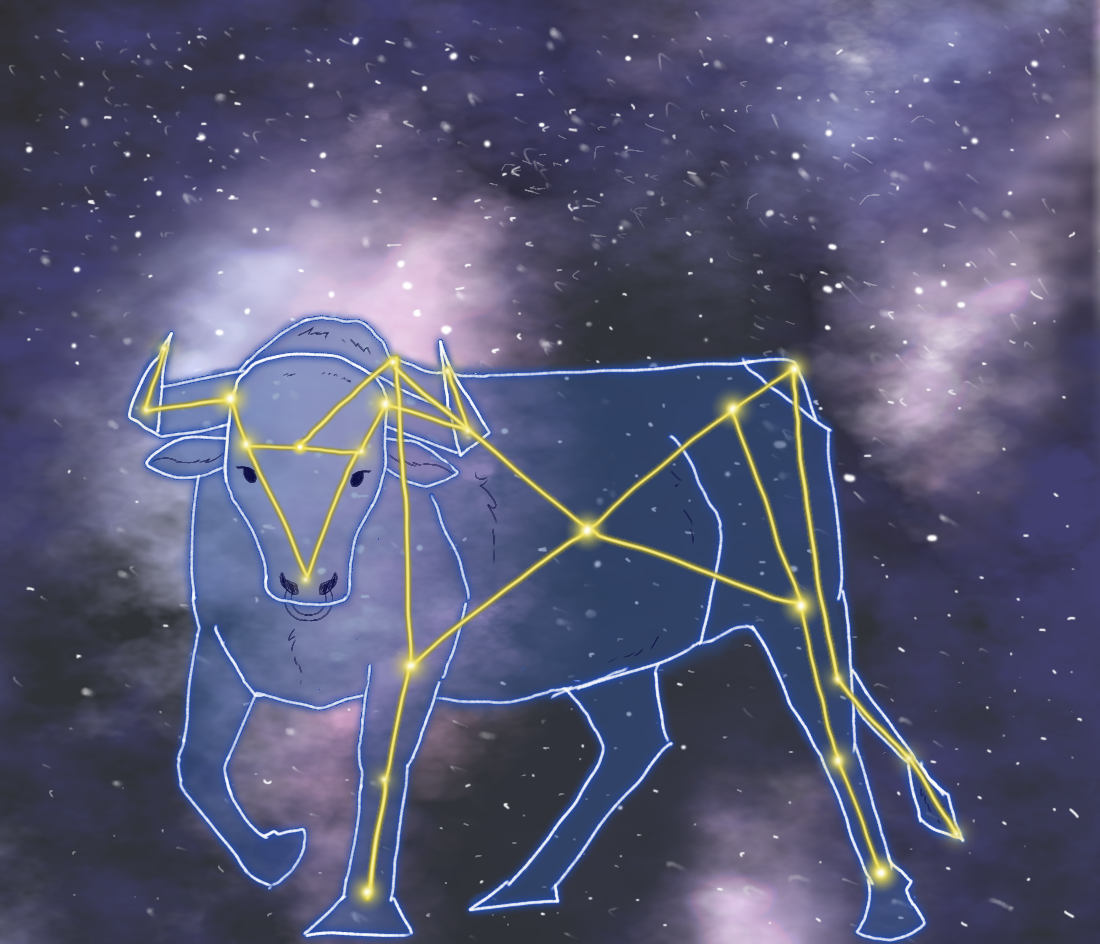
The AI came up with some weird images but they helped me figure out that I wanted to have a yellow outline with bright glowing stars running throughout the inside of each animal to give them a classic constellation feel but also help them stand out against their background and be easily told apart from one another.
Here are the concepts of the characters I drew in my drawing app, I gave them all yellow outlines with a desaturated dark blue to help the outlines stand out and make the characters blend in a bit with the nightsky, but still give them enough colour to be recognisable. I turned down the opacity as I felt that gave them a more ethereal feeling like in a dream or a storybook, and I drew on features such as fluff, eyes and noses to help the characters pop out even more and give them a higher range of expression rather than just movement.
For the background, I knew I was setting everything in space so I wanted to try draw a sort of nebula in the background to help make the environment interesting and realistic. I found the colours pink and purple worked well against the blue and yellow of my characters so I went with those colours and then lay my characters on top to see how everything looked together. At this point I was also drawing doodles of the planet I want in the background, including little sketchovers of a model in Maya. See below for these images.


Obviously, these are all just concepts and everything will look much better in 3D space when I get to actually make my models and create a nicer background, but these help me get a good idea of what I’m trying to achieve. Now all that’s left is drawing up the storyboard and start transferring my ideas to 3D with Maya.


In Maya I started off by making two low-poly models of a bull and a wolf, using multiple reference images to help me and keeping mostly in orthographic view to make sure everything was lined up and looked as close to their real-life counterpart as possible. I started making a few low-poly models as tests before starting this stage by making a deer and a crocodile following a blend of two tutorials I found on youtube for Blender. The deer was an easy enough animal to model as most animals are tall four legged creatures, though the horns were a bit awkward it helped me learn how to make curves and tapers within my models. Whereas the crocodile helped me get to grips with making more unusual shapes in my models such as an animal with a body so low down, its feet are at its belly and I needed to find a way to make that look as natural as possible, thinking about folds and geometry shape. Using this knowledge, I translated everything into Maya as best I could, as they’re similar programs with slightly different interfaces and tools, and created the low-poly bull and wolf, then going in and using the retopology tool to individually place each quad over the low-poly mesh to make a higher quality realistic model of each animal, using the smooth mesh tool at least once per mesh. Once I had my models, I used the UV editor to cut around the edge loops of the legs, tail, ears, horns, and head of each animal to create a pelt for each of them, ensuring the textures will fit properly onto each model without any complications or pulling.
With both models made and UV unwrapped, it was time to outline them using the toon shader material for Arnold, following an online tutorial article to get the right width. Here I learned you have to chabge your render filter settings to contour to get the lines to render, but I’d have to do two passes for each shot to get both the colour of the outline and the full of each animal, for which I’d have to change back to the gaussian filter. I had attempted to make a starry texture in Substance Painter for these models, but I was advised to just make them blue and add the stars in post as the texture wouldnt be able to sit right since i want a low opacity on the base colour of the blue, which would also turn the stars opacity down. To use the outline and the base colour, I had to plug the toon shader into the transmission for the base colour material.
https://www.en.techgaku.com/render-toon-like-with-aitoon-shader/
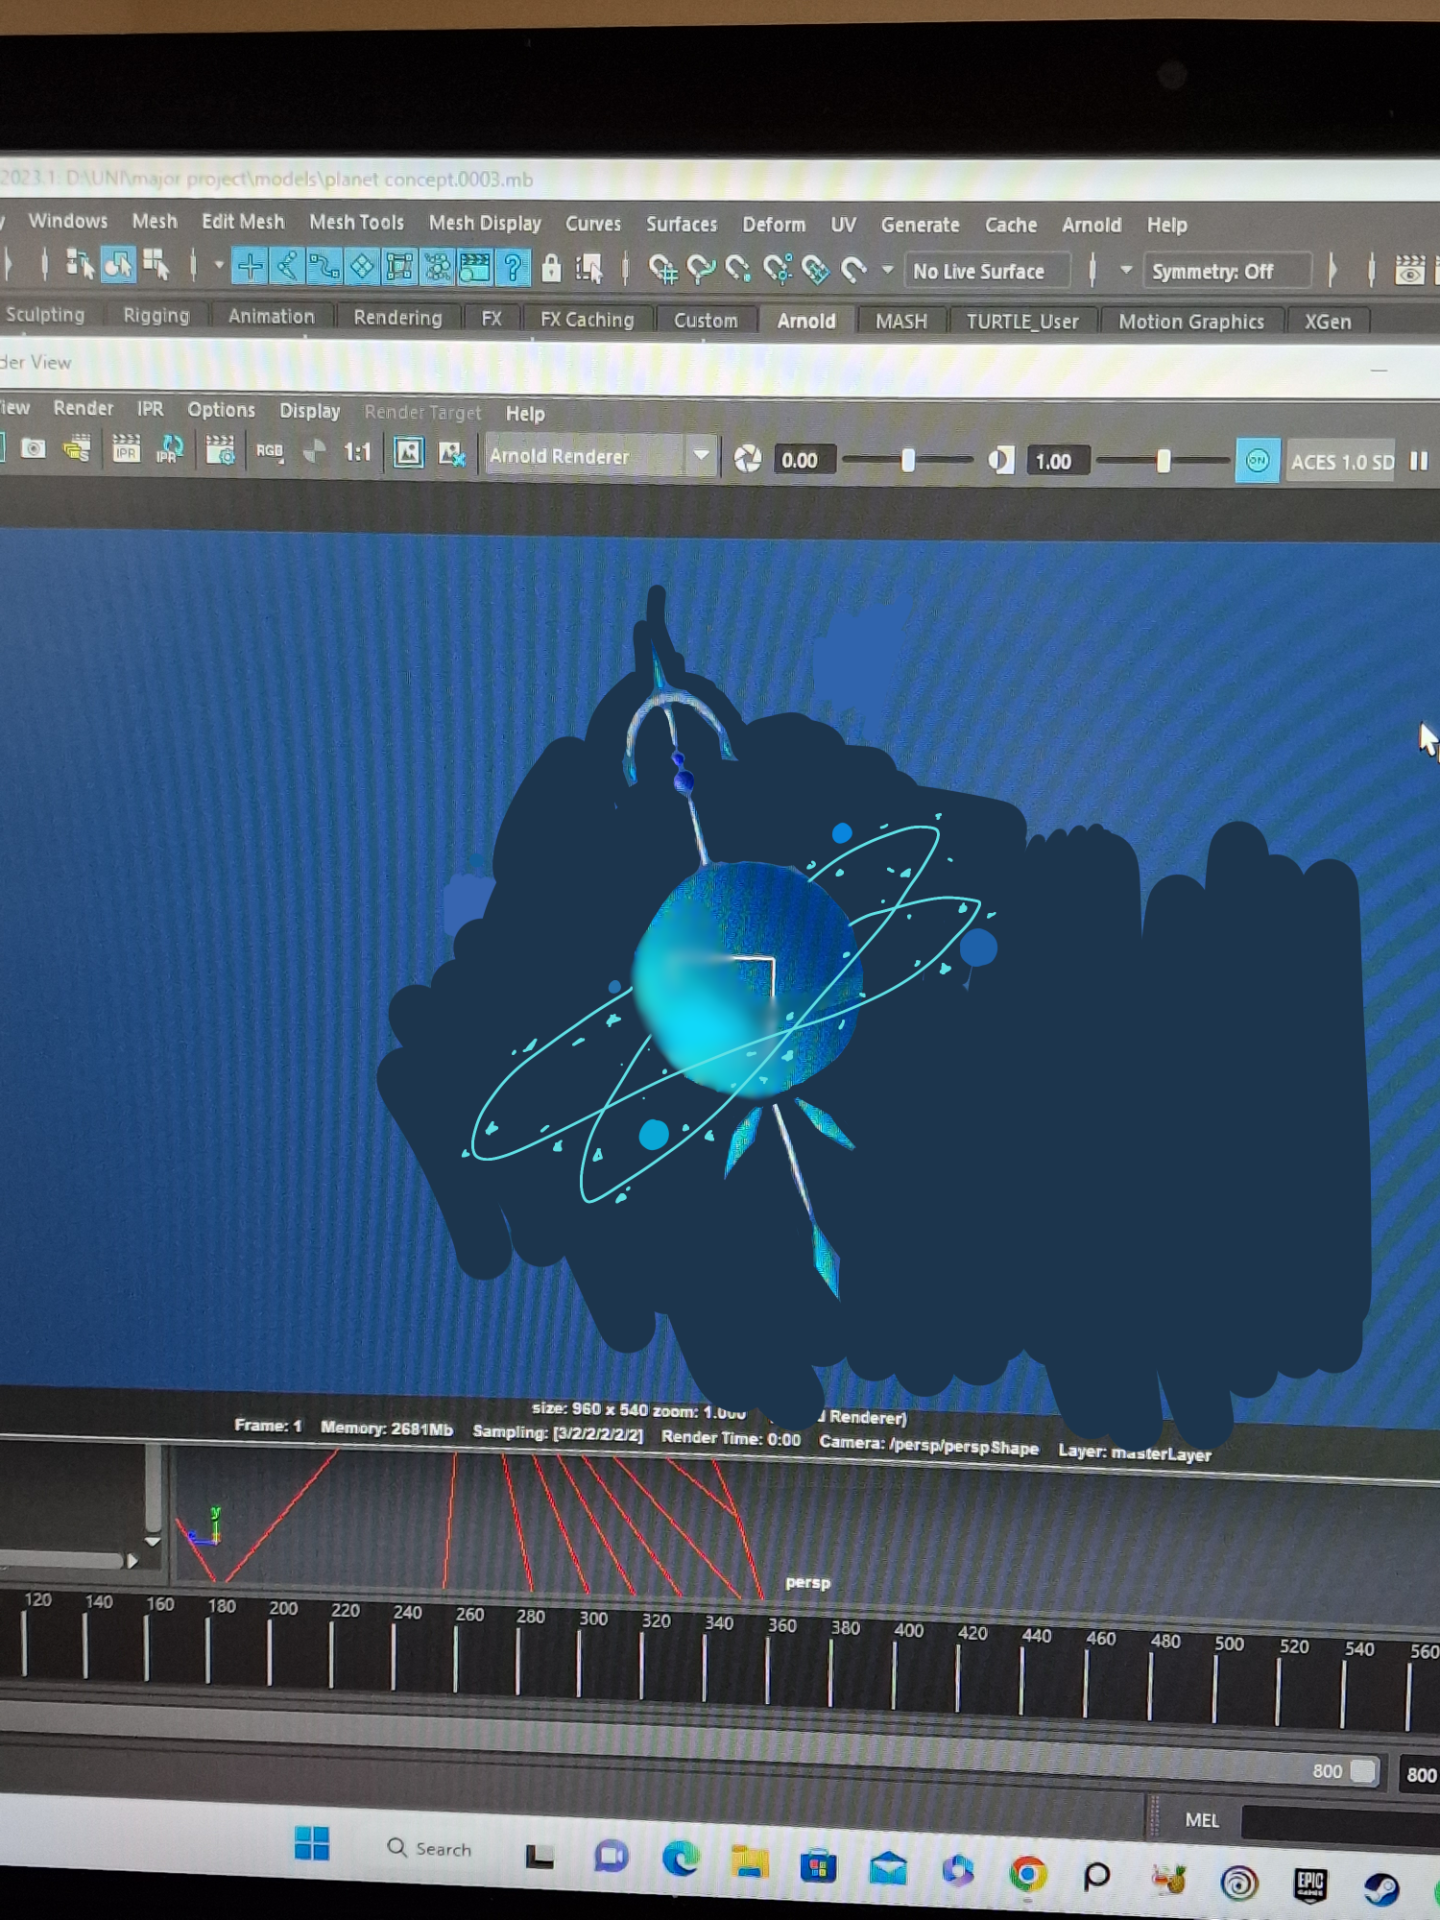
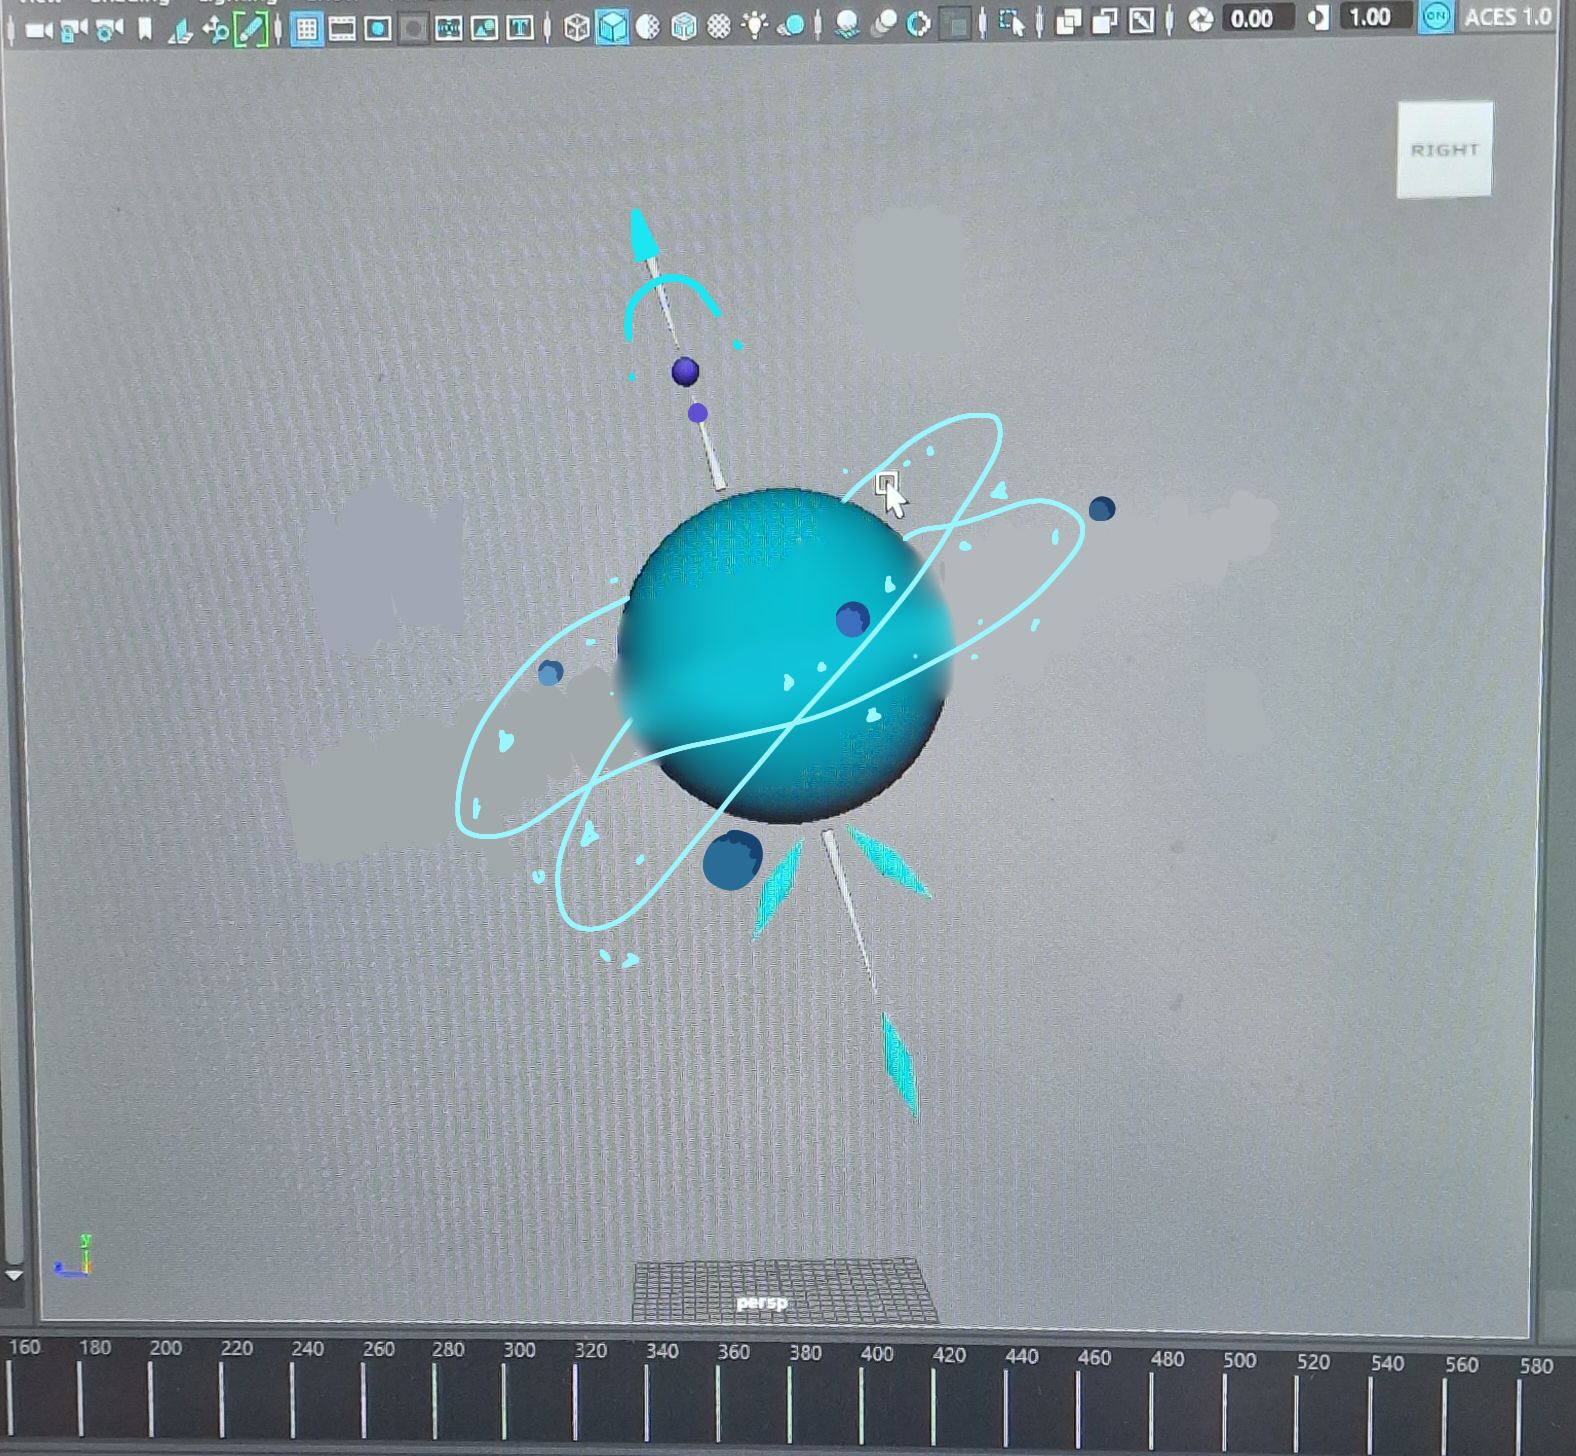
Moving on from the animals for the time being, I needed to model my planet that was in the background, and a few crystals to float around it. I did the planet in maya just using simpke shapes such as a sphere for the main planet and its 4 moons, modified pipe shapes for the two diagonal metal rings hugging the planet, and out of shape cubes squished into diamond shapes for the crystals on the top and bottom of the long staff going through the planet. I used a cone and the multicut tool to create the big spikey staff going through the centre of the planet, and finally an out of shape cube with a smooth modifier added to it for the arch. As for the ring of crystals surrounding it all, I made most of them in Blender then exported them into Maya until i realised I could just make a low-poly cube in Maya and distort it a bit with the multicut tool and navigate tool to make cool looking crystals. I also used these models for the crystals that the characters will be running through in the later scenes after they find the planet. I looked at images of crystals shards and fantasy crystals on Google to help me get an idea of the shape and jaggedness of crystals, as well as having drawn a little scene sketch on my phone to try picture what the crystals will look like beside the characters.
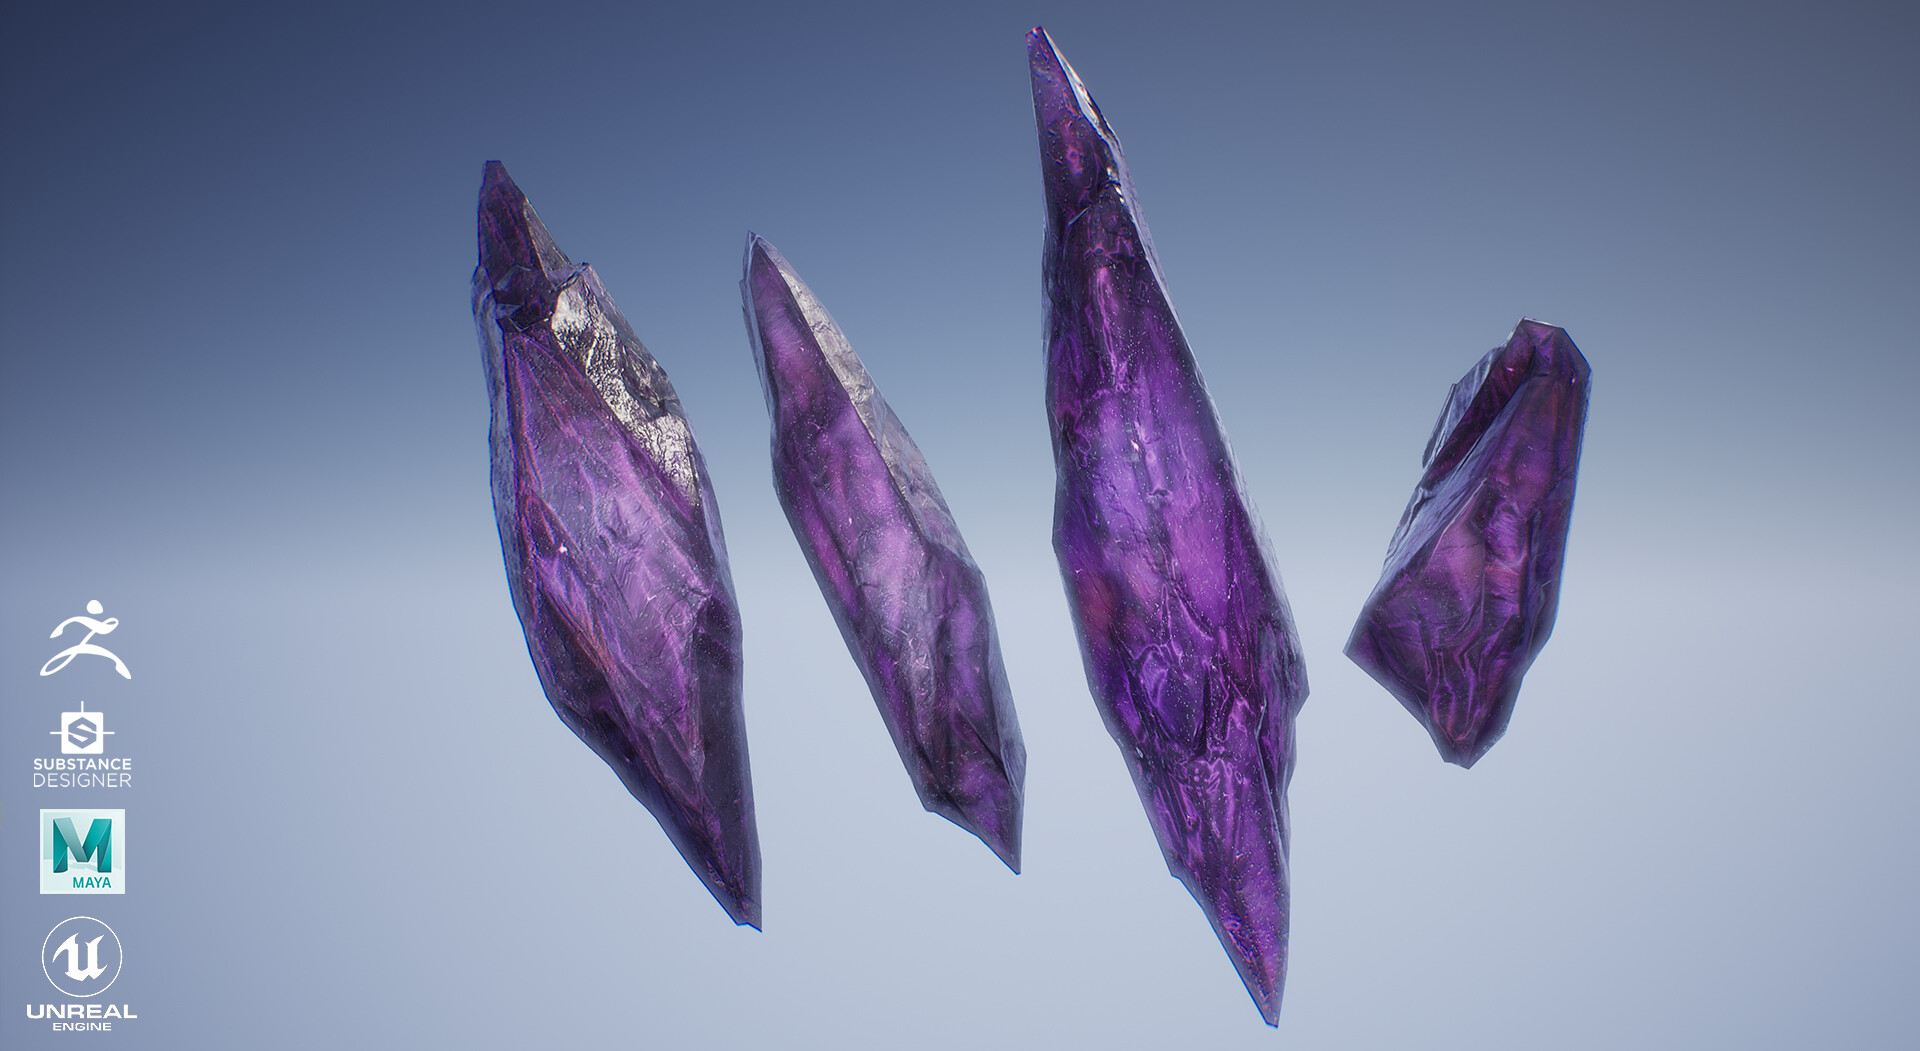
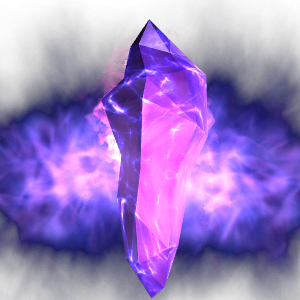


I took each crystal into Substance Painter after UV unwrapping them, along with the rest of the planet, and downloaded materials from the Adobe Asset Store to use with colour overlays and slight imperfections to make the crystals look as real as possible. As for the planet and its moons, I used a textured brush to give them some colour with a light colour on the top and a darker on the bottom with a midtone to make them all more interesting than a single plain colour. I gave the moons little bumps and craters to look more like moons and i applied a smartmaterial of stylised sand with a blue overlay to the planet to make it look more interesting and to tie it all together with the fantasy vibe of my animation. However, once i took these textures back into Maya there was a bit of a problem as they didnt quite come out how I expected even though i used the Substance Painter plug-in to help me attach all the right textures in the right places, even then manually going in and fixing them afterwards. Unfortunately there wasnt enough time to fix everything so I did what i could with fixing the UVs and then retexturing the crystals but they still look a little odd.
Coming back to the models, I sent them away to my tutor Alec so he could help me rig them, as I had tried and followed many tutorials but since I’ve only ever done a rig of a bird foot once before in second year, I was very lost and quickly running out of time so I had to ask for help. He returned the models to me rigged and skinned and told me I had to paint the skin weights, which I had to then ask Henry for help with because, again, i was clueless, so after about half an hour of sitting with him explaining things to me, I was able to grasp that the black parts on the model meant there was 0 influence, whereas white meant 100% influence, and all the light grey parts in between meant the influence of that area of skin would be shared between bones, so to avoid complications it was best not to use grey areas unless it was something that needed to bend and fold the skin such as a leg or neck joint. Once I had set the skin weights for both models, I realised I needed a bear model, so I downloaded one off Sketch Fab and sent that away to Alec with permission after another failed attempt at rigging as I just dont understand how the hierarchies are supposed to work and how to keep everything neatly organised but still functioning properly. Once I got that model back, there was no need to adjust the paint weights because this bear wouldnt be animated and is only shown in two static poses.
For the background I wanted to use a realistic looking space environment so I was looking up tutorials online and found that after effects was the best way to do this. So I had to use a tutorial which showed me how to use multiple layers of solids and nulls and cameras, to create stars as particles which you can adjust the depth of to look real, create two nebulas with displacement maps and turbluence and masks to find the nebula shapes of wispy clouds, then animating everything together to make them look like theyre slowly pulling one into the other. I like how realistic it looked and decided I would set up a camera to use to navigate my environment as I coulnt use the whole scene static all the time as itd make the animation feel stale.
