Working on the foliage – ivy leaves

Knowing i was in charge of creating the leaves for our project, i set out to find a tutorial of how best to create them as i hadn’t done this before so i needed some guidance. I found this tutorial on YouTube which went at a nice pace, and if need be i just slowed the video down https://youtu.be/Ycu3A_vf-YU 

To begin, i opened Maya and created a plane with height and width subdivisions of 4 and 2, these would be the base for my leaf as I now have to switch to vertex mode and manipulate them into a leaf shape by using the scale tool to achieve a symmetrical look.

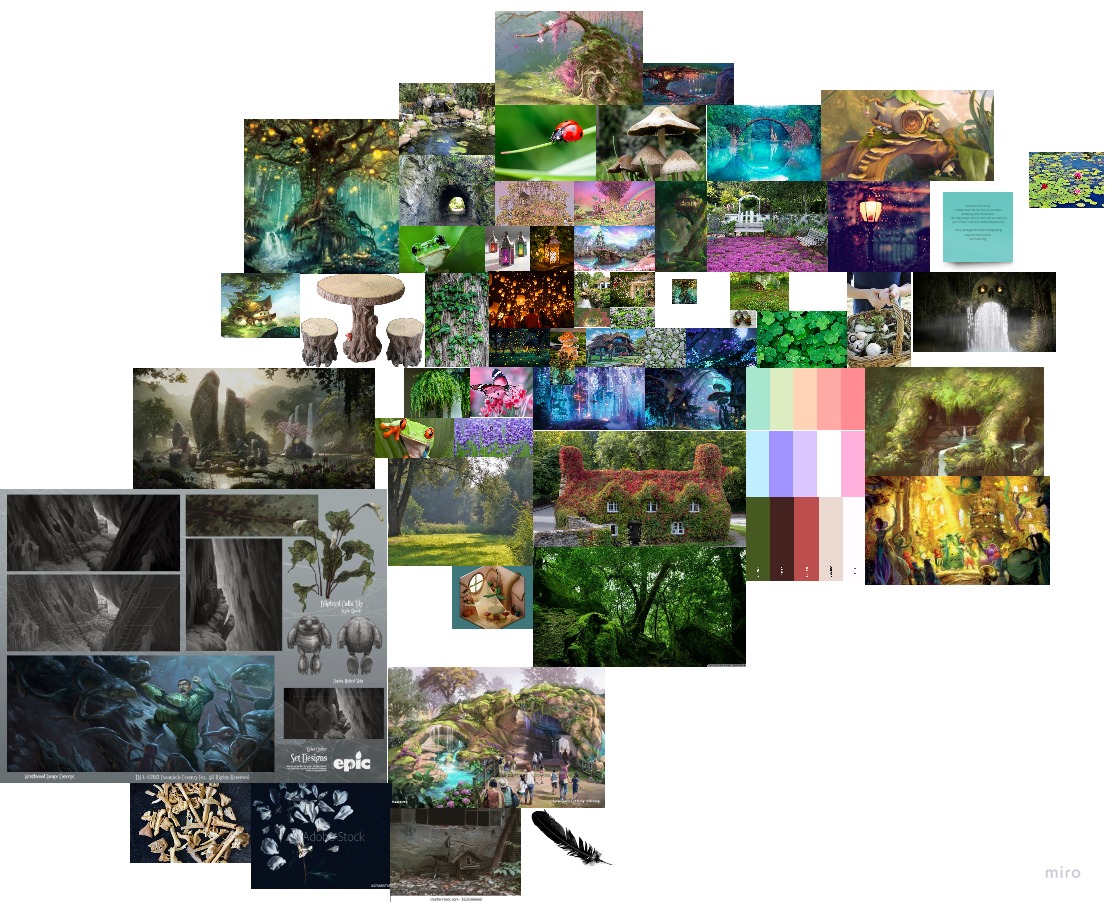
Of course, I’m not just free handing this, so beforehand i imported my reference image of some concept designs i drew up for the leaves and throughout the whole process I’m constantly comparing them. For this leaf, I’m following my “star” shaped leaf references as pictured below.

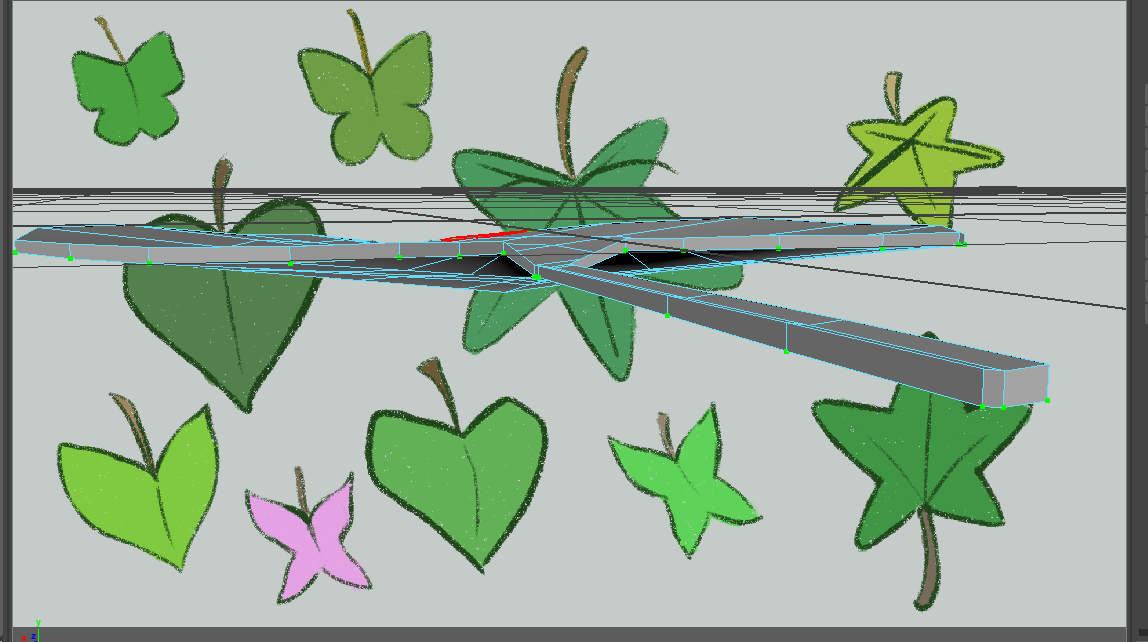
To achieve the star look, I moved some vertexes around with the scale tool, pushing two points outwards at the same time, and selecting rows to push them up with the move tool to have a more symmetrical star shape. Unfortunately I ran into problems with the symmetry so with my faces option, I selected one half of the star, deleted it, then mirrored the right side on the -X axis.

Once finished, the star looked good, but there was no where to give it depth that leaves have where they slope in slightly due to gravity, so to fix this, I used the multi-cut tool to create loop cuts around the star where i thought was necessary. Later i can use these edges to manipulate into small dips and folds for the more believable leaf shape i was looking to achieve.

With the plane now shaped, I went to face mode and selected all the faces of my polygons, then pressed shift = e on my keyboard to bring up the “extrude” options. Switching to the move tool with w, I dragged the extrusions up on the Z axis to give my leaf edges and bring it from a 2D plane to a 3D shape.

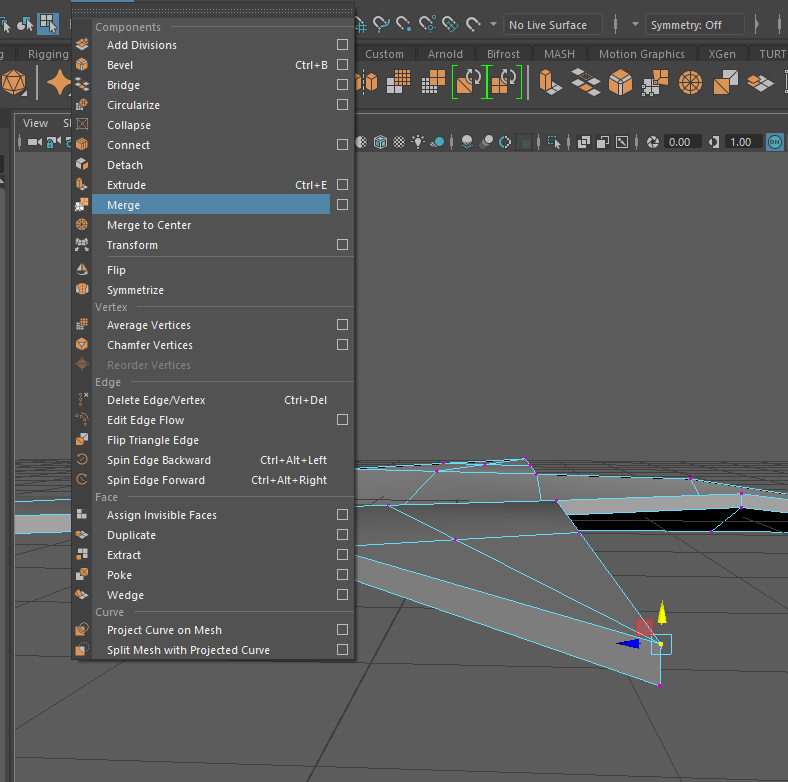
Due to getting caught up in the work and trying to problem solve, I forgot to take screenshots of some of the process such as extruding the bottom faces of the leaf and tapering them in to create the stem, selecting the edge that runs through the middle of the leaf and pulling that down to create a gentle slope, and having to go through and merge the vertexes on the edges of my leaf because it wasn’t behaving as wanted with double vertexes accidentally placed right beside the true vertexes, so i had to get rid of these, as seen below.

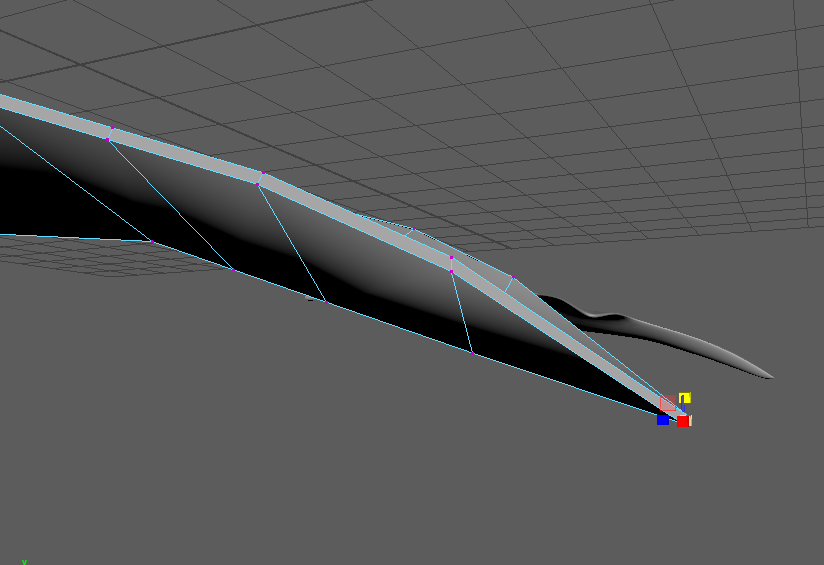
Pressing 3 on my keyboard to smooth out my model, I noticed the stem was looking a little bit strange where it connected to the leaf, so I added an edge loop with the multi-cut tool to make that area more defined, giving me the preferred look in the second image below. At this stage, I also went into vertex mode and started rotating the leaf downwards, using B on my keyboard to get soft selection and then using the move tool to slightly adjust the height where appropriate. Working my way down I adjusted every vertex as I wanted this leaf to look a little droopy as if gravity was pulling it down like in real life, because leaves aren’t stiff and rigid.

Continuing to work on the believability of the leaf, I went back to edge selection and started pulling down the middle edges of each individual point to give them all a slight dip that’d lead back to the middle. After working on the dips I moved back to vertex mode and started pulling down and rotating the vertexes on the points to make them follow the same pull as the rest of the leaf, obviously remaining a little more rigid and supportive near the top of the leaf where it connected to the stem, which i also gave a soft curve to follow along with the leaf.

Once happy with the shape, I tried to select the bottom faces of the points and change their rotation and translation in order to create thickness within the leaf, which i found didn’t really give the results i was after but after a little tweaking, it looked alright and since it was just going to be a small leaf on a vine, it probably didn’t matter too much.

Selecting the vertexes on the end of each point, i used the scale tool to scale them down on all axis to create a better point, this also tapered the end of each tip and made the leaf look a lot better than before, so it was a real trust the process here.

Following along with the rest of the tutorial, i bevelled the edges of my leaf the whole way round to give it a defined edge helping create thickness so it wasn’t just paper, as seen below with a few more angles thrown in to let you see it better.

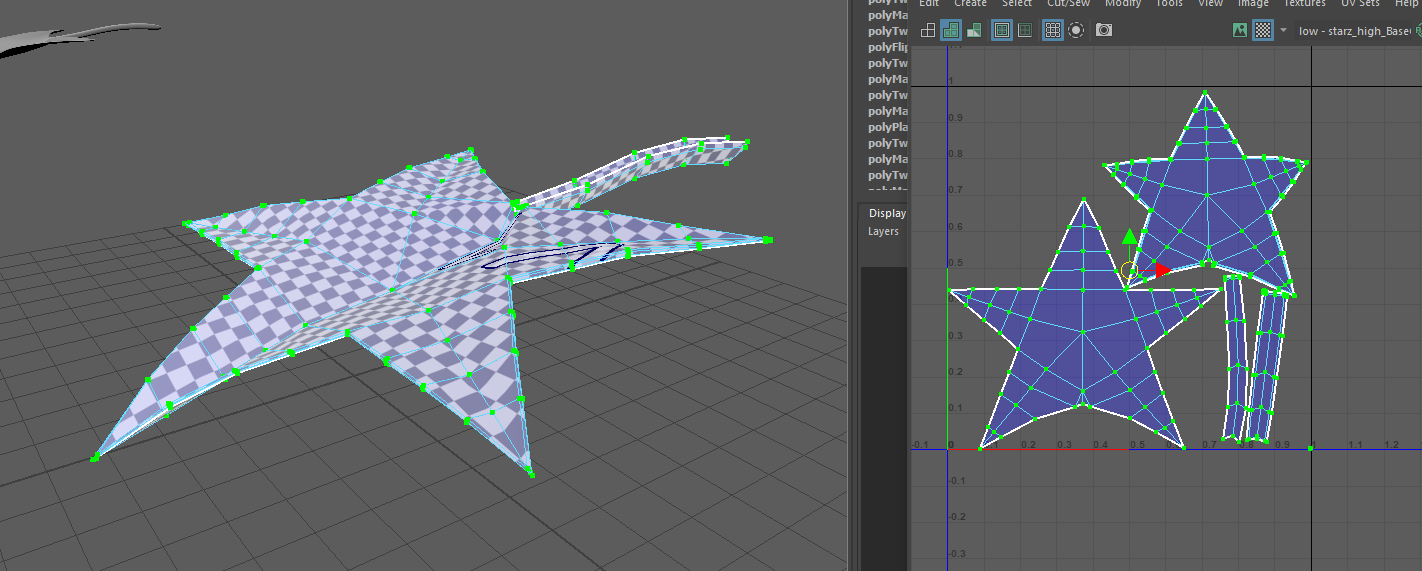
Before exporting my model, i have to UV unwrap it to ensure the textures will work correctly in substance and it helps me to create more accurate details in Zbrush. With my model selected, i navigate to the UV editor and select all the faces, creating a planar on the Z axis then using the edge selection mode I found the edges i thought most suited to placing cuts as they need to be placed with the smooth mesh in mind which can sometimes change how the uvs look compared to the original model. For this model, i placed cuts on the top and bottom edges of the leaf, and all four sides of the stem. When I had made all my cuts, i then selected all my uvs and unfolded them and used the layout button to fit them all neatly in the box.

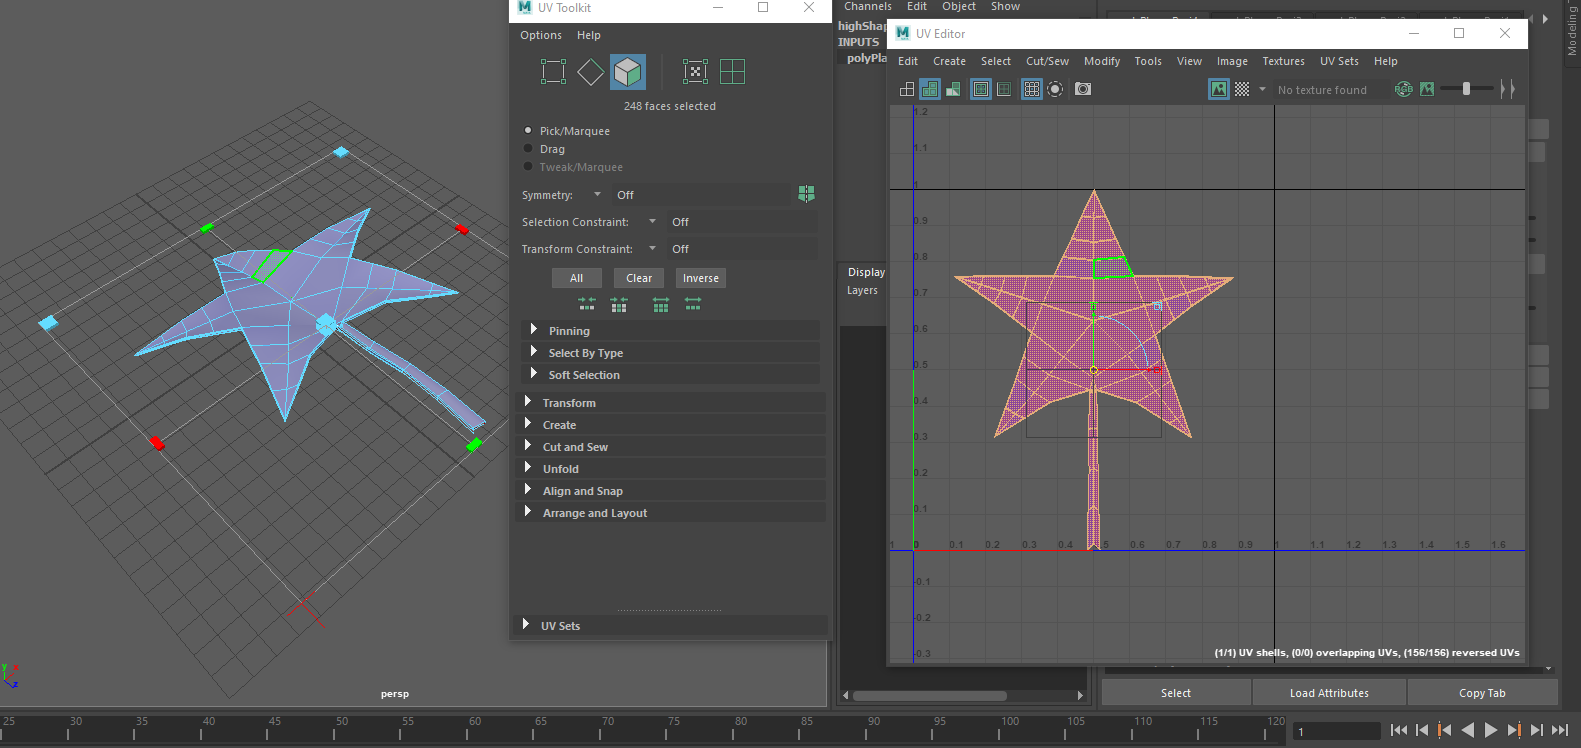
The first time i did this, i did it wrong as i didn’t realise this so after sitting here confused for some time i messaged my tutor henry on Discord for some advice and he was very quick to answer telling me that the uv maps needed modifying because my cuts should be on the bottom of the leaf, creating two uvs for the top and bottom of the leaf and the same with the stem, so in total i should have about 4 or 5 uvs. He sent me a video to go along with his written advice to help me understand it better which i really appreciated because I’m more of a visual learner so this helped me understand where i went wrong and how to fix it in the future. Below you will find my fixed UVs.

For reference in the conversation: I’m Leaf and my tutor is Henry

This helped me fix my other leaf uvs as i had done them the same way, but that was an opportunity to learn more and create a better texture which I’m a lot happier with compared to the old one, so not all mistakes are bad mistakes!

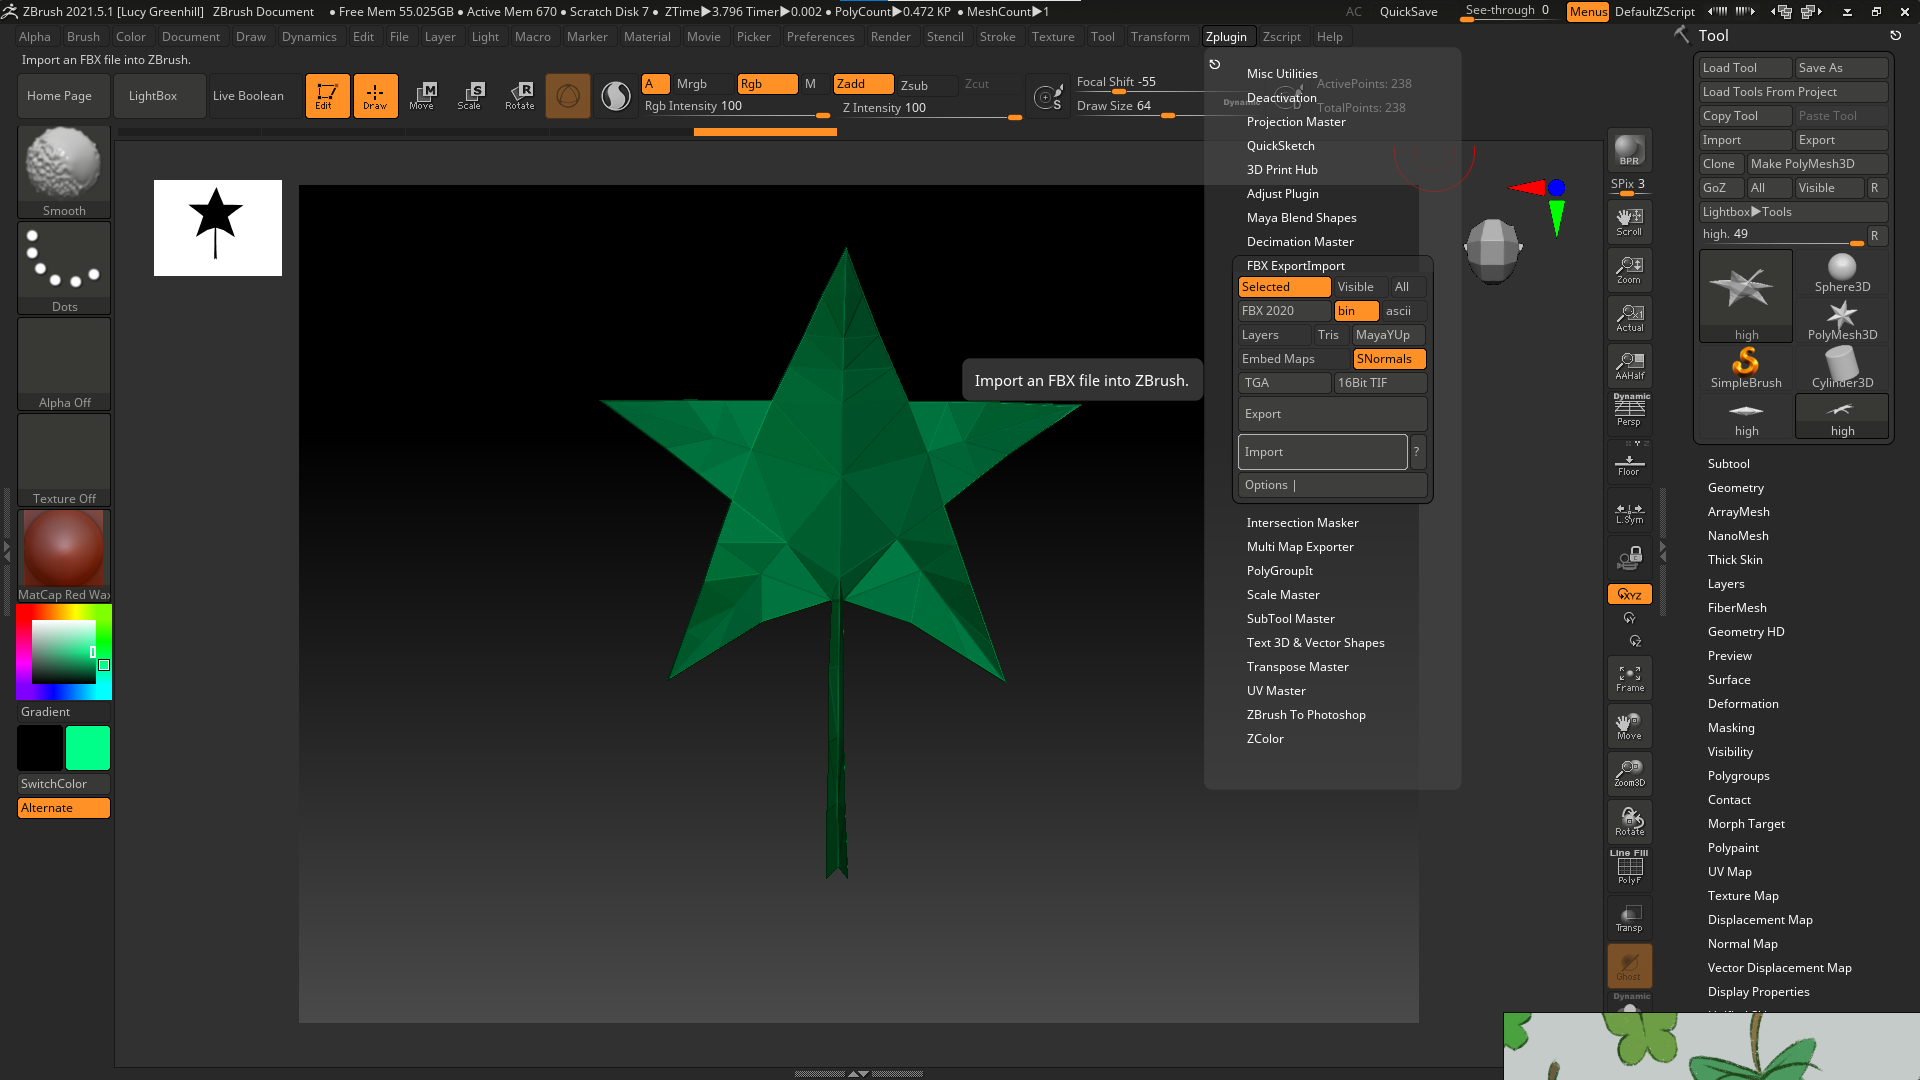
Now that the mesh of the model is finished, i can delete the history and freeze the transformations before exporting it as an FBX to import into Zbrush for some detail. To start the detail, i had to import my FBX into Zbrush with the FBX importer under zplugins and draw my leaf into existence, using the edit mode button to have it recognised as a 3d model and not a 2d plane. Rotating the model to face me using the alt button, i navigated into the geometry menu and hit the subdivide button about 4 times, giving my model 5 subdivisions for me to work with as this would make my sculpting easier and more accurate.

To begin sculpting, i hit the lightbox menu button and chose brushes, heading over to the “scratch” folder where I selected the scratch 2 brush as i thought this would help me easily create veins in my leaf to give it more believability. Changing the size of the brush to reduce the radius, i got a reference of a real leaf that was as close to a star shape as i could get and tried to mimic the veins in the points so my star didn’t look strange.  The scratch brush was still a bit too harsh even with the intensity turned down so i had to hold shift and use the smooth brush, much like in blender, to give the original model back some of its shape and to make the scratches blend in a lot more naturally so they didn’t stick out like a sore thumb.

Once finished sculpting my details, I headed back over to the zplugins menu and used the FBX option to export my mesh as a low poly with one subdivision and a high poly with 5 subdivisions, as this brings my normal maps as well to allow me to bake them in substance painter afterwards.

Below is the result of my sculpting on the leaf.

Now i can take my model into substance painter and texture it to be more like a leaf. Opening substance painter, i select file, new, and select my low poly leaf model from my computer files, setting the resolution to 2048 and hitting ok to start texturing. Thankfully the tutorial i was watching also covered a little of the texturing process so i mostly just followed along with this, using my own settings for the generators and such. Before i got to texturing though, i have to bake the mesh textures from the high poly to the low poly model with the texture settings so simple enough, it runs through all the maps quickly after i select the high poly model and all the sculpting details show up.

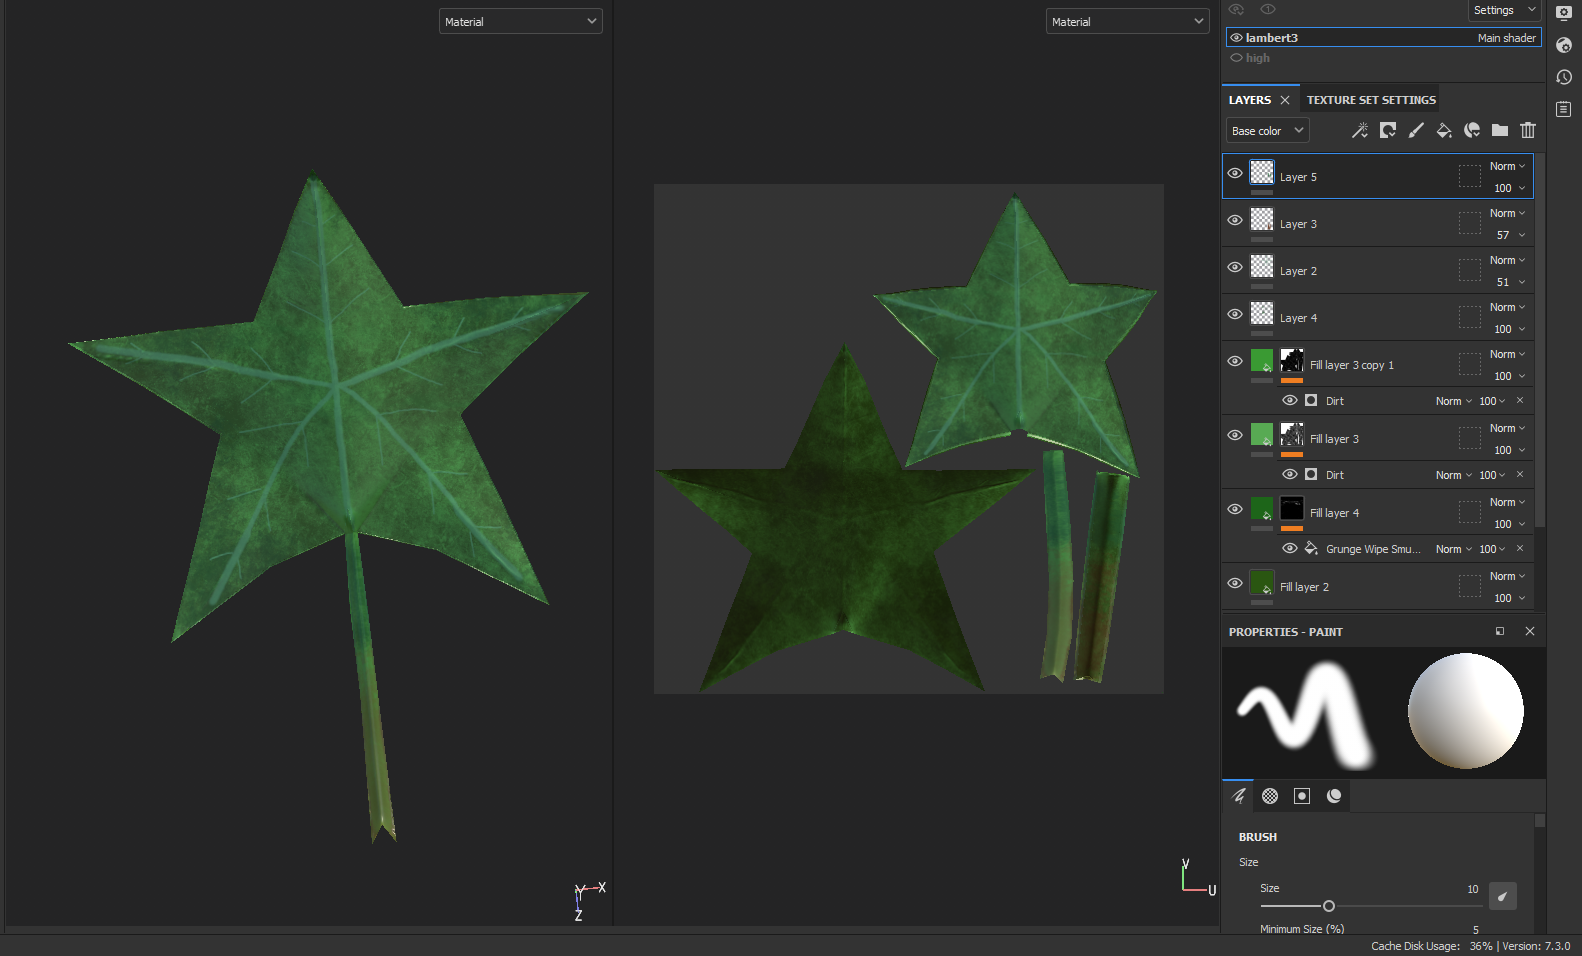
With a new fill layer, i selected a colour of green i thought would look nice for the base colour, adding another fill layer on top of this an right clicking, adding a black mask then adding a dirt generator and messing around with the parameters such as contrast, dirt balance, rotation, scale, etc as each setting helped to make my leaf look different and more realistic. Duplicating the previous layer, I adjusted the dirt parameters to be slightly different to what i thought looked nice then created another fill layer with a darker shade of green and added a black mask with fill rather than another generator, then looked for the grunge smeared wipe heavy and messed with the parameters on that until i felt i had a nice ivy look to my leaf with all the different coloured splotches and spots.

To finish off my textures, i used three paint layers to add details such as a bit of dark green around the edges, a bright cyan type of colour for the veins so they were more visible and adding more realistic colours to the stem like a lighter green and a reddish brown near the bottom of the stem where it would connect to the vine. I then exported my textures after choosing a save file destination for them and headed back to Maya for my final preparations.

Above are four screenshots of the textured leaf in substance painter from before i got advice from henry on the UVs, with the below picture being the new texture with fixed UVs so it came out much cleaner and that was the one i actually used.

Finally, loading up my model in Maya again, i applied a new lambert material to it and selected my colour file as the base colour texture i just exported from substance painter. Once everything was placed on my leaf texture-wise and the mode was smooth meshed, i went to the game exporter and saved my FBX to be used in Unreal Engine.

Below are examples of the old leaf in Unreal Engine beside the other old leaf i created, as i was looking at the improvement in such short time.

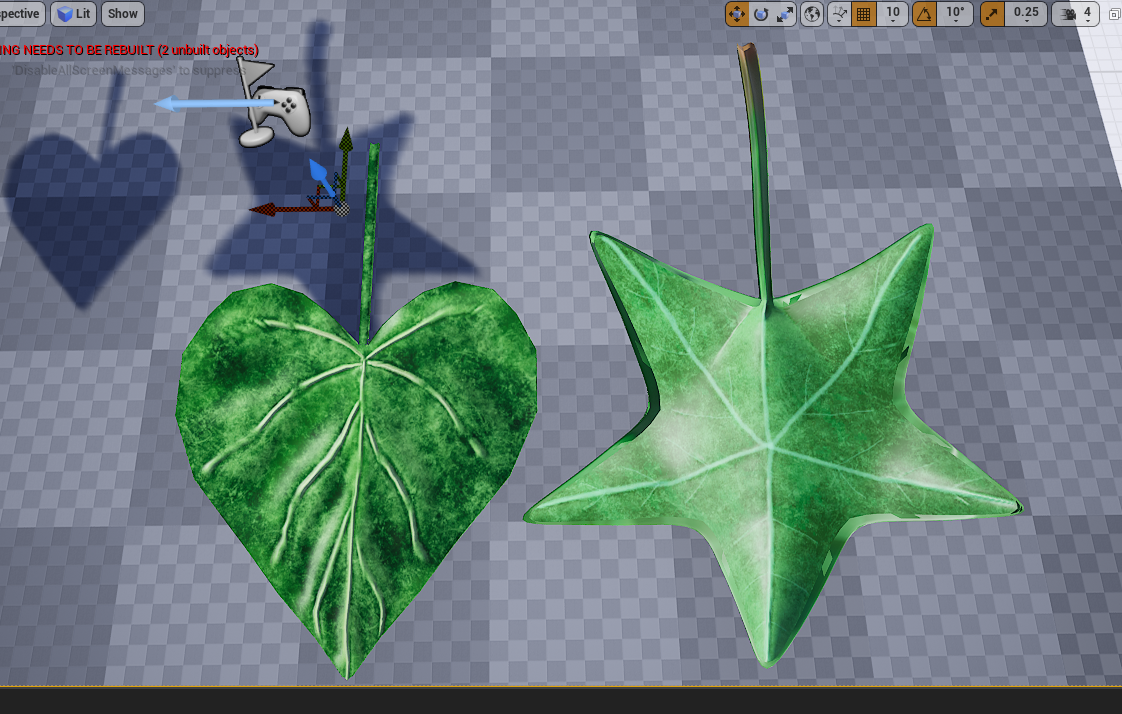
Below is the finial rendition of my leaf in Unreal Engine with the proper UVs and fixed texture, I’m quite proud of it, especially since the tutorial i was following was for a basic shaped leaf and having this be the first time I’ve modelled something like this, i think i did well, i learned a lot of new things and it came out good! The background behind the leaf is a texture i made for the ground, its meant to be seen smaller and look like Irish moss, since we used Thyme in the actual foliage i wanted to still incorporate this somehow.

For my other leaf, i made a heart shaped ivy leaf to give some variation between the leaves on the tree and make it look more interesting. I created it basically the same way as the last last leaf, just making a different shape at the start and whenever i extruded the plane to make a 3 dimensional object, i used the rotate tool to give the leaf varied thickness instead of waiting for the bevelling process later on. I also had to go back and fix the UVs on this model because i made the exact same mistake so it was an easy and quick fix regardless.


refs:

These helped me see how i could shape my leaves and how to place them on the vines as well as how to place them on the tree so they look as if they’re growing on the surface.


Week 5 – art style research

Continuing work on our cinematic environment, a crucial part of any pipeline is determining the art style for the whole project, as this has to set strict rules and guidelines for the whole team to follow to ensure everyone is on the same tracks. To help us understand this pipeline, we’re doing an exercise on researching art styles and the techniques used to get to the finished product.

After a quick presentation, we were armed with the knowledge of how to efficiently research what art style we wanted to try and recreate in this mornings exercise. A few of these rules were things correlating to the shapes of the lines, if they were soft and round or jagged and threatening, this for example plays a huge part in things like media for younger audiences, giving each character an individual shape depending on their personalities. Colour schemes have to be established to get an idea of the atmosphere the artists will be conveying, and how best to use them for different settings and characters, for example if it was a calming game, you’d tend to see a lot of pastels as these are soothing to our eyes and help us relax, whereas on the contrary if it was an animation about a monster in a forest, there’d be a lot of dark and muted tones to make the atmosphere cold and mysterious.

To begin my research, I first downloaded the Maya file provided by our tutors and selected the tree that stuck out the most to me, the very last tree as it looked very mystical and straight away I could imagine it as a vibrant jelly tree or some sort of mushroom with the varying shapes and sizes of the heads. Taking an even closer look, I started seeing it as a lantern based tree made out of brass, or an evil twisty growth I could add thorns to that’s clasping onto lost souls. Already, just from a simple shape, I could see so many directions I could take this tree just by giving it different art styles and textures, but unfortunately I can only pick one, maybe two, if I have time. Since my group project is about a magical fairy realm, I think I’d like to push myself and think outside of that box for a while and go with the creepy soul tree to get my brain creative.

So now I have an idea of what I’d like to do with the tree, I now need to decide on an art style to follow to achieve this look and feel.

Week 3 – presentation and a little change

Last week we were sent home with a homework to develop some concept designs for our roles and to put together a presentation of all the work we’d done so far, explaining our process and what we had planned for the future to give our tutor an idea of where we were at.

(pres video)

As you can see from above, we all developed a few concepts and slightly changed the ideas from last week, though at this point we still don’t really have an idea for our layout or what our scenes were going to include.

We were told we had to scale down our thinking as it looked like we were planning to build a world instead of a simple environment scene as we seemed to be thinking of too many assets and none of them were really connected to a solid shared idea. With this, I was given some advice on how to make my mushrooms more unique and interesting from each other such as swapping and sharing certain characteristics like the stems and heads with different mushrooms and using splines to create the stems to give them all different bends and imperfections.


Week 2 – new member and concepts

This week, we found out Jamie had joined our group and with him brought some new and interesting ideas, such as we could do both light and dark themes by showing the fairy village at peace, then slowly deteriorating into an evil settlement showing the chaos and misfortune they bring.

Moving on into class, we sat down and followed some video tutorials that Henry had setup for the morning, showing us how to create landscapes in Unreal Engine 4. We had to make a small forest environment from scratch, learning how to use brushes to paint in foliage for a more realistic approach as we were able to control the size, density and whether or not what we were painting was varied or uniform. Today was my first day finding out how to make materials in Unreal and creating things like material layers, painting them onto the landscape and changing their roughness and specular properties with things called constants and landscape coordinates. I really enjoyed this activity, but unfortunately I don’t have any pictures of my environment as it was done on a pc in university. I tried to redo it at home, but i had to download assets off Quixel Bridge as i couldn’t access the files Henry gave us, but I didn’t like it as much so I didn’t fully finish it.

After lunch, we were put but into our groups to discuss our ideas further. We came up with a few roles to hand out and wrote everything down on a whiteboard that Amber kindly photo’d and uploaded to our Discord group for further reference. After this, we all presented some concepts we came up with over the week and used these to figure out more assets we’d need such as reeds and rocks for the pond, what size the mushrooms would be or how the hollow in the tree would work.

We decided how we wanted the environment to be laid out this week, with the tree staying in the middle, the lake was defined as a pond with lily pads and a lotus flower and we came up with the ideas of civilization where there would be ranks of common people, middle class fairies and noble fairies, each with their own area and species of mushrooms. To expand further on this, we were going to give the common people the area of ground at the bottom of the trunk, with common species of mushroom houses and mushrooms to display their rank, the middle class would have houses in slightly rarer mushrooms species and live higher up in the tree with decent living styles, and the nobles would live in the trees hollows with rare mushroom species and gems and jewellery stolen from the humans to show off their status.

We also talked about camera movement and angles for the cinematic and how it could work to show off our environment, adding in small details like a boat on the water to give signs of life and the contrast of the lives of the fairies with the danger of the ground at the bottom compared to the safety of the tree hollow.

We split off this week with the homework task of developing some concepts for our chosen roles to show the group next Monday.

Week 1 – planning and getting into groups

This first week back at university for second year, we were greeted with a fun assignment to create a Cinematic Short due in December. There were 8 separate environment topics on the board we had to choose 2 from, then narrow it down to one, and with these we would split off into groups of people who wanted to work on the same thing. I chose the Fairy Realm group as id been really into mushrooms and nature lately and thought it’d be a fun thing to work on.

After a short while i found like-minded people who wanted to work on the Fairy Realm, but there were 10 of us and since groups were only allowed to be 5 people, we split into two groups. Once our group was recorded as group 5, we were able to sit down and start brainstorming ideas for the environment such as the basic plan for what we actually wanted to create, which in the end we settled for Aoibheann’s idea of a fairy tree. With this in mind, we split off to two computers with me and Amber on one and Thomas, Aoibheann and Cain at the other, where we started a Miro board to gather references we thought would be helpful to visualise our environment and the assets. We took inspiration from games like “Pokémon: Sword and Shield”, films such as “Epic”, and illustrations drawn by artists on the internet such as Alector Fencer who can be found here at their DeviantArt page https://www.deviantart.com/alectorfencer.

I had started with the idea of going with a soft and sweet fairy realm with soft and pastel colours where natural mushrooms and moss covered the grounds, a big tree in the middle of a lake where fairy houses would sit on the bank of the water, with a few higher up in the tree. I also liked the idea of mushroom houses where the fairy’s had hollowed out mushrooms and used a ladder to get up into them, with small gardens round the side and a nice forest behind the tree that was accessed by stepping stones through the lake.

(og concept of the mushroom house)

Fireflies also seemed cute to me so I wanted them to be flying freely around the environment but to make it simpler, they could just be stationary and increase and decrease their glow throughout the camera panning, which led me to the idea of using lanterns for their light source either hanging from the tree or just placed neatly on the ground, but to still show a sense of design, they’d be sitting on a small rock or wooden stool. I took a lot of this inspiration from things i usually build in Minecraft where you’re limited to grid snapping with blocks, so you have to try incorporate different heights and designs to your builds to make them more interesting.

Above is a reference of a build i made using lanterns propped on rocks or hanging from them instead for variation.

After this idea, i heard Aoibheann referring to fairy’s as evil, so i did some research on them and found that in Celtic mythology, they’re considered daemons and tricksters so i decided to make some ideas for this path too, including some bones, tattered bird feathers and wilted flowers down at the bank, with a rotted tree in the middle and vines and overgrowth covering it all. Since they were tricksters i also thought that them stealing toothpicks from humans and making weapons with them sounded appropriate, and their houses should be resembling wooden bird houses that they built themselves that could have caved in roofs or the wood could be warped due to the negative energy these creatures gave off, making everything around them distorted and drained of life, which also then led me to the idea of having jagged rocks in the background surrounded by a low hanging dark fog to set the atmosphere.

(og dark tree concept)

At the end of the class, we knew we wanted a tree with a pond, possibly some fairy houses and definitely mushrooms to capture the fairy aesthetic, though we were torn on whether to make the environment light or dark, which we then decided to leave up to the individual for when they were lighting their render.

To communicate, we set up a discord group for our project and added each group member, made three separate channels to help keep ourselves organised and let everyone know they could message at any time with any ideas, questions or progress they wanted to show.

Job research

The animation industry has a lot more layers to it than just animation, there’s a whole pipeline work must go through in order for the animations we see on our screens to be produced.  I’m going to be researching further into this to explore all the different roles that are in this pipeline, giving a brief summary of what each does.

Starting off, we have the production management department. There are four roles in this department

  • Director -Coming up with the look and feel of the whole animation
  • Producer – keeps track of time and budget, oversees departments and searches for partnerships
  • Production Coordinator – mainly looking after assets, delivery and stocks, making sure equipment is on hand for all departments
  • Runner – taking notes, database trackers, material logging, sorting out accommodation, in large scale companies they help the production coordinator

The development department with just two roles help support the pipeline by creating the ideas for storylines and visuals of the animation.

  • Writer – giving unique story ideas in the form of a script to directors and storyboard artists
  • Concept artist – Designing the look of the animation with visuals of certain characters, places and environments

Pre-production is in charge of getting into the finer details of concepts, creating final pieces to be used in the animation

  • Head of story – using the scripts, they make animatics and plan panels of action, cameras and staging
  • Storyboard artist – creating a sequence of images following the script to visualise it with annotations that show what’s happening in each image
  • Art director – creates the art style for the animation
  • Character designer – creates characters complete with personalities and appearances based off of concept art and the directors descriptions
  • Model maker – create ready to animate models of props, characters and environments that have been agreed on, work in both 3D and stop motion animation
  • Background designer – takes inspiration from concept art and storyboards to create detailed background environments

The production department starts work on the final animation, given the assets and information from previous departments.

  • Rigger – takes the 3D models, giving them bones which enable them to move
  • Animator – following a brief such as a storyboard or description, they create a sequence of still images then play them back rapidly to give the illusion of movement, causing the characters to move, speak and interact with their environment
  • Animation technical director – creating and testing tools to help improve the digital artists workflows, also offer technical support
  • Layout artist – In charge of depth and perspective
  • Lighting artist – Light placement, selection and intensity to fit the mood
  • Effects technical director – In charge of creating digital effects such as fire, smoke, water, lightning, etc
  • Compositor – putting everything together to create the finished images

Post production department

  • Sound designer – creating sounds to be used in the animation
  • Composer – creates original music pieces to fit the atmosphere or emotions of characters
  • Editor – working on the planning of scenes, shots and editing the final animation together to create a finished piece
  • Edit assistant – helping the editor to keep track of materials, scene orders, video format outputs for clients and arranging meetings

Distribution department

  • Sales executive – get the animations shown on screens via licenses
  • Marketing executive – work on creating advertisement to help the animation reach an audience and encourage them to watch it


Moving on, I’m going to be looking for open and active job applications in the animation industry.

Starting with Indeed, i have found around 6 actively looking job applications, one even from a popular AAA company in the gaming industry.

  • Role: Junior technical animator
  • Company/employer: Sumo Digital ltd
  • Position: Full time entry level
  • Role:  Junior animator/motion designer
  • Company/employer: Hurricane
  • Position: Full time junior
  • Role: Character animator, Facebook reality labs
  • Company/employer: Guardian jobs
  • Position: Entry position
  • Role: Junior motion designer/animator
  • Company/employer: miri growth
  • Position: full time entry level
  • Role: Gameplay animator (junior/mid level)
  • Company/employer: Rockstar games
  • Position: full time entry level
  • Role: 2D animator
  • Company/employer:  Play N’ Go
  • Position: full time entry level

I thought it’d be best if i sourced my research from more than one website, so I’ve also taken a look on Glassdoor to find some more jobs.

  • Role: Junior 3D animator
  • Company/employer: Idea Boxes
  • Position: full time Junior
  • Role: Full time junior motion graphics designer
  • Company/employer: Tapin
  • Position: full time junior
  • Role: Junior technical animator
  • Company/employer: Aardvark swift
  • Position: Junior
  • Role: Animator/editor
  • Company/employer: Gabriel Skelton
  • Position: junior to mid level

Now that I’ve covered some of the available jobs, i think it’d be beneficial to go over a job in detail to see what they’re looking for in an applicant and get an idea of what the job is like.

Random42 Scientific Communication are on Glassdoor hiring a 3D animator, with Junior positions available, and are looking for someone experienced and enthusiastic about 3D animation with a strong show reel. They give a list of skills they’re looking for you to have such as

  • Strong skills in rigging/character animation with their preferred software being 3DS Max, but other software’s are considered
  • Meeting deadlines with high quality work
  • Good communication and motivation skills
  • Workflows which are organic, procedural and which make use of tools and modifiers to create unique animations

Alongside these skills, they’ve made another list for skills that would be nice to have and would probably set you apart from the rest of the applicants to be better considered.

  • Having a good understanding of modelling, texturing, lighting, rendering, animation and compositing
  • Experience working with game engines and the Unity animation pipeline
  • Experience with render engines
  • Compositing in Fusion or Nuke

Additionally, they tell us that training can be provided to people with cross-compatible 3D application skills, then end off by telling us where to apply, what to send in and give the option of keeping your CV and considering you for better suited positions.

To end my research, I’m going to find an animator currently working in creature animation and find out a bit about how they got there, if i can find any old work and just in general try find out as much as i can about their journey.

I have chosen to research Richard Oud as he was one of the animators who worked on Horizon Zero Dawn and throughout the whole game i was so inspired and impressed with the creature animation, especially how the machines were made to feel so realistic to their real life counterparts.

Richard is a lead animator at game studio Guerrilla Games and has worked there four over 14 years now. He used to be an animation intern at DNA productions where he worked on the ant bully for 9 months from July 2005 – March 2006, where he graduated and then joined Guerrilla Games and got to work on 3 games known as the Killzone franchise, an fps game, where he was doing the gameplay animations.

In 2009, Richard Oud was an animator for first and third person animation for Killzone 2, which then progressed into Killzone 3 in 2011 and finally Killzone: Shadow Fall as a cinematic animator in 2013 before taking lead creature animator in Horizon Zero Dawn. Unfortunately i cant find much on his work with Killzone other than the YouTube show reel, but i can find older demo reels from about 13 years ago showing his progression to where he is now.

https://www.youtube.com/user/richardoud/videos all his animation demos can be found here on his YouTube channel, including the show reel for Horizon Zero Dawn.

His socials such as linked in, Instagram, twitter, can all be found in these links:

Linked In – https://www.linkedin.com/in/richard-oud-8173519/?originalSubdomain=nl 

Art Station – https://www.artstation.com/richardoud

Twitter – https://twitter.com/richard_oud

Instagram – https://www.instagram.com/richard.oud/

He is also a teacher at ianimate, focusing on combat and gameplay animation https://ianimate.net/richard-oud-bio

His journey has taught me that even if you entry the industry in one area, you can still work your way up or completely change direction and get a job in another position, you’re never stuck in one place.