Vertical Slice Project – Starting on the theatre

At this point, I forgot to keep track of anything ive been writing down in my note pad as everything was starting to get stressful with multiple assignments coming up  so unfortunately i cant go week by week anymore.

Starting to gather reference images for the operation room, i talked to team mate Tori about who was doing what for the theatre and got in contact with Darren who offered to texture everything we’d modelled and our future models to speed up the pace of everything.

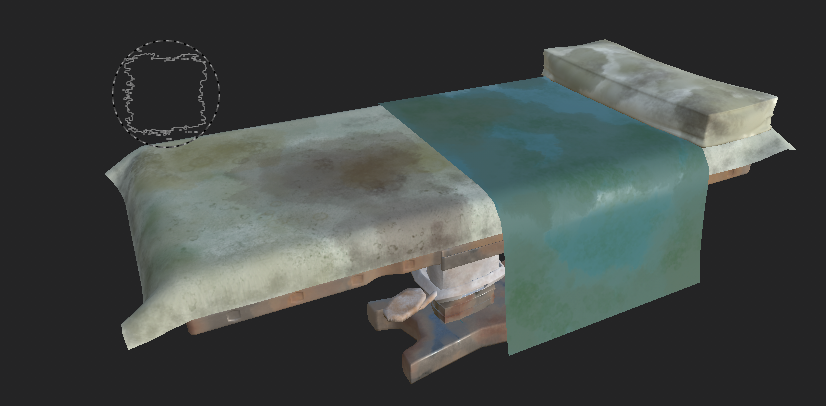
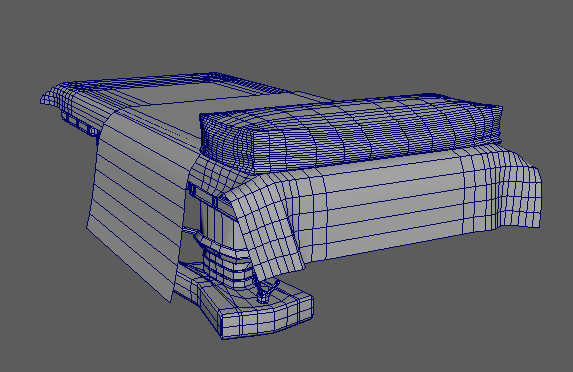
For the pillow, blanket and sheet on top of the blanket i used ncloths.

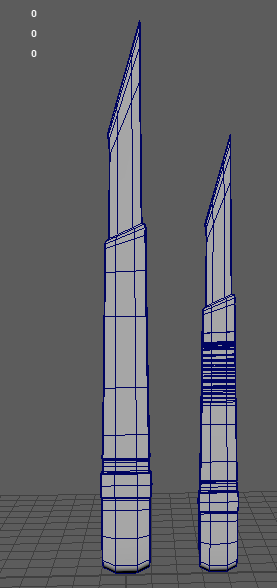
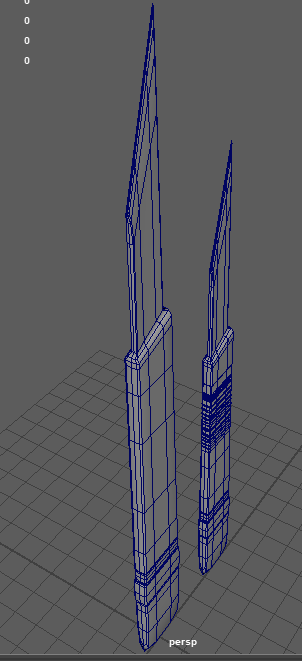
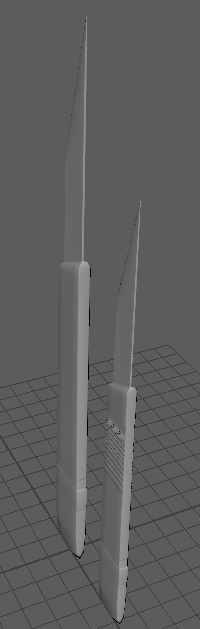
Next i worked on a scalpel which was done within 5 minutes:

I duplicated the original, scaled it down a little and gave it some ridges like in the reference above.

I did want to work on more tools but level designer Joe told me we ha more than enough models for labs and the theatre, since models from the labs could also be used here such as the crucibles, tongs, syringe, etc.

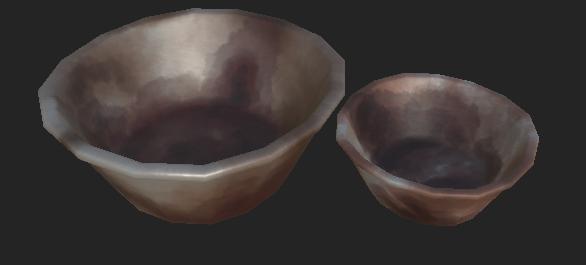
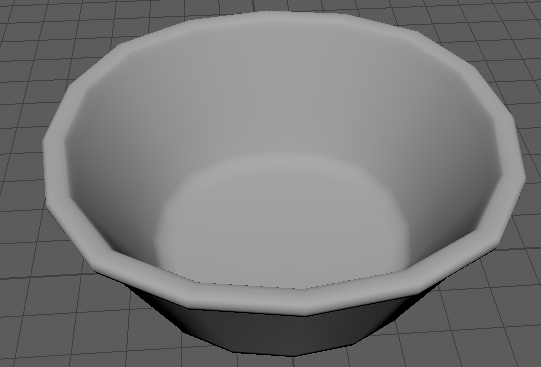
My final model was an operation dish which once again, i duplicated and scaled down for variation:

I had to texture a few of my models myself as Darren was running out of time and had a lot on his plate already, but I didn’t mind, things happen all the time in the industry so you have to expect the unexpected and be ready for anything. Luckily i was able to get my Substance account up and running again after signing up for a new student licence.

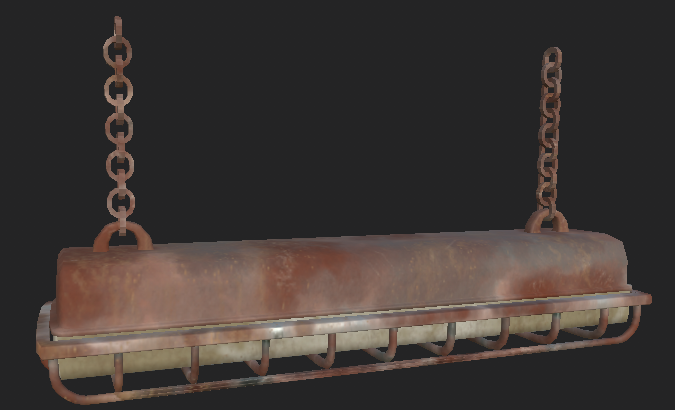
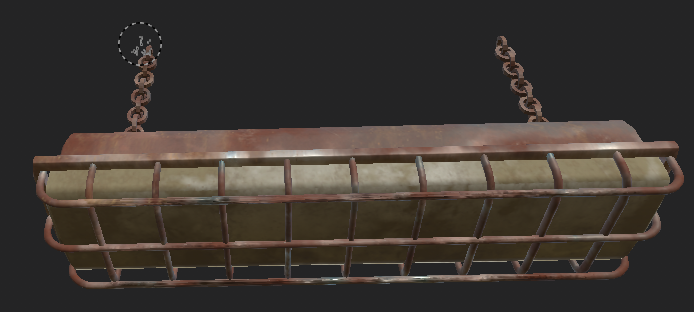
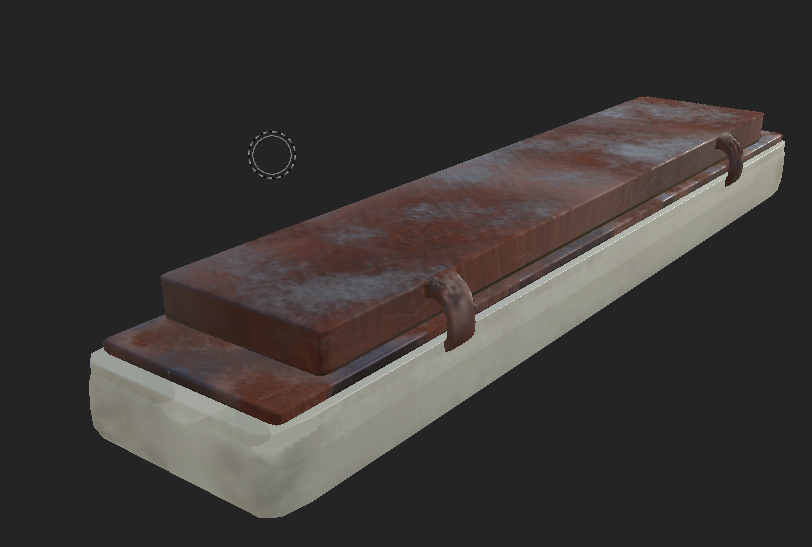
Since everything is years old and underwater, I tried to make all the metal rusted and dirty, and i put old dried blood on things in the theatre such as the dishes, scalpels and the operating table. I also tried my best to add mould and sweat stains on the tables mattress, sheet and blanket.


Small details – 3D pebble asset

This was obviously quite an easy thing to make so i wasn’t sure if it even needed a blog but were told to record all our progress so i figured i might as well.

To start with, i gathered a few references of pebbles i liked after drawing a very rough concept sketch of what i wanted my scene layout to be, then opened Blender and created a UV sphere, scaling it down to the basic shape of a pebble by squishing it and making it a bit wider, then taking it into sculpting mode I flattened the bottom with the flatten brush at a high radius, using the smooth brush to give it back some shape so it looked more natural than an oval with a flat bottom.  This was pretty much my model finished so i exported it as an FBX and imported it to Maya where i had to use the auto retopo tool so i could make my UVs. I had to ask my tutor Henry for some help gain here though, as i wasn’t sure if the triangular mesh was ok and then if the lopsided quad mesh was alright and he was very helpful in explaining to me -finish this part-

Moving onto the UVs, i just created a planar in the Z axis same as most other assets, then selected an edge at the bottom of the rock to hide the seam, cut it and unfolded and laid out the UV, having to adjust a few UVs manually but aside from that it was easy as. I used this UV to then go into substance painter and use the clean concreate texture to give my pebble a realistic look.

Moving it into Maya to apply the material for my new texture and exporting it with game exporter as an FBX, i opened it in my unreal test project scene and placed it on the ground to make sure it was ok, and it looked quite nice and fit well into the environment.

refs:

These pictures helped me figure out how to shape my pebble and whether i wanted the path to made of big slabs of stone or multiple small stones.

reflection of this year

I feel like I’ve learned a lot through this course year, i really enjoyed making the 3d models and the freedom we had when choosing what we wanted to create. Substance painter was a really exciting thing to learn as it gives you a lot of control over your textures and you can make some really realistic looking textures in this application.

Over all out of these two assignments, i really enjoyed the first one as i liked the exact measurements of modelling in Maya for a staff and gaining knowledge on all the different tools that could be used for so many things. Learning to UV map was also fun as my past course in tech ad left me confused, this got me all clued up an id say I’m pretty good at unwrapping UVs now which makes it even better when I’ve made my own textures because then I’ve made everything from scratch and it gives me a nice sense of achievement.

The tutors were really friendly and helpful throughout the assignments and we had plenty of opportunities to contact them if we needed help or were unsure of things like errors or hardware issues. I had a really fun first year even if i was stressing out a little, I’m only new to this environment and believe i will get better as time goes by.

Overall, i enjoyed creating my own models and getting to work on my own projects as the outcome of each made me realise just what i was actually capable of and has me excited to see how much i can improve.

A reflection of my first year at university

Looking back, I’d say I’ve really improved a lot in not only my skills but my confidence to get work done and up to standards, as well as being able to work efficiently in groups. I’ve learned that I have quite good leadership skills as I’m able to go round the group and help out, doing my best to sort problems any members have and bounce ideas of one another. I try my best to make sure everyone has a say in group projects and that no one feels left out or avoided.

Working with 3D was definitely more appealing to me than 2D as its a whole new world of tools an resources, and I love being able to make a 3D model of my ideas, getting to better understand how they work and function, so I’ll certainly be working on this skill throughout the summer. Animating in 3D is a little more taxing than I thought it would be, but its still fun and i think I’m pretty good at it so far. I’ve learned the 12 principles of animation and how to use them effectively to create an interesting animation. This was also my first experience working with Maya, and my first time actively learning about blender and how to use it, I’m looking forward to spending more time with these programs as well as time goes on. 2D still had its own strengths though, as there was more room for complex designs and more stylised pieces, as drawing is something I’ve been used to rather than a 3D program where you model using shapes like cubes and cylinders. Even if it was a little harder trying to draw every frame and getting them to match the past frames, getting the pacing right and trying to make the scene appealing i still did enjoy making my part for the 2D animation, as well as developing my designing skills in the researching stage.

Learning about the history and techniques of animation was very interesting, as i got to research about things I’d never read in detail before, and it helped me broaden my horizon on what kinds of animation actually exist. It also led to me finding some very interesting animators who i can watch and learn from.

The tutors at this university are very friendly and you can tell they want to set you up for success. Its easy to go and talk to them when I need help or when I’m unsure of anything and they do their best to make sure everyone in the class is at the same place and understands what they’re saying. Their lessons are very thorough and enjoyable as they interact with the class throughout and have conversations about the topic on hand. They’ve also given me opportunities for 1 to 1s in order to help me better understand my work and get help and guidance with what I’m doing.

All in all, I’ve enjoyed this first year and had many opportunities to try new things, meet new people and feel safe and welcomed in this educational environment. I’m looking forward to next year, and showing what I’m capable of by practicing my skills over the summer to improve.

Week 10 – Starting to line

Following up on the sketches from last week, I was now taking the animatic and starting to do my line work to make it appear more clear and smooth to the audience.

I started using a schedule at this point in time, as it’s never too late for improvements, and felt it helped me organise and manage my time easier resulting in more efficient work progress. See below for my work schedules and how I felt keeping them simple would help me keep a straight head and focus on my work.

I used a lot of this time to fix the Nyxer creature design and make it look more believable in anatomy, also taking my time to taper off the edges of the legs and shoulders, realising at this point I was most likely doing things wrong as I’d been too ambitious and done too much to handle. However, i persevered and fixed the creature, then moving onto the Anglerfish Child’s lines and adding the detail of her clothing.

Above is an example of how it looked whenever I took my feedback into consideration and changed the anatomy and posing of the Nyxer creature in my animation, arching its back more and making it actually bend down low to the ground as it growls, giving it a much more exaggerated and dangerous effect than the below example of before when I first animated the creature and only bent its head down a little. In the video above, as you can see I also made small notes and sketches to help me get the posing correct in a less detailed manner.

In this example above of my “before” animation, you can see how much less effective and confusing it is to the example prior. The tail moves in a confusing way instead of in an arc, the back appears to want to rip through the skin as the front legs bend and the head dips and the body unexpectantly elongates, pushing it back legs back and its front legs forward, making no sense in anatomy and believability.

I also took this time to completely erase the drawings of her eye and fix them using appropriate references, resulting in a more believable and better looking eye, though i still struggled with the eyelashes as i wanted to keep it simple yet also realistic to a point. See below for the references I gathered, noticing how the eye slants down at the top and goes up along the bottom to then meet at an acute angle and make the eyelids, which I found by taking video reference of my own eye, seems to close over on the eye whenever you look down. For this part I also took a video reference of myself progressing from a neutral face to frowning, as I needed to see how the eyebrows worked alongside the eyelids whenever someone frowns.

695-03383040
© Masterfile Royalty Free
Model Release: Yes
Property Release: No
Woman’s hazel eye, view from the side.