From our task last week, my group managed to piece together a general idea of what we wanted our game to look and feel like. We chose realism as our style aim as its proven to be more successful in horror than things like cartoony styles, so we chose to make realistic models for our “show room”. I took on the task of making a light, which I wanted to animate swaying back and forth gently, creaking and with a flickering light.
The thought process:
I was a little confused at first with what we were being told to do, but luckily my teammates are very understanding and were able to explain to me so I could proceed to starting my work. I told them i was going to go for a light, since one of the examples they gave me was about a wire sparking, it just made me think of a flickering light. I reckoned in horror games like this, especially in abandoned places and old sites, they usually had a fluorescent light that would buzz and flicker to make the atmosphere heavier and break the silence with an unsettling hum. Just typing in “fluorescent light 60s” didn’t really get me too far as it wasn’t really anything I thought would work in our atmosphere, so I then started searching “underwater light 60s” and found some pretty cool lights known as “crocodile” lights that I figured would suit well with the underwater atmosphere as they’re heavy iron with hard casing and a cage. With this light now in mind, I was happy enough to begin creating for our set.
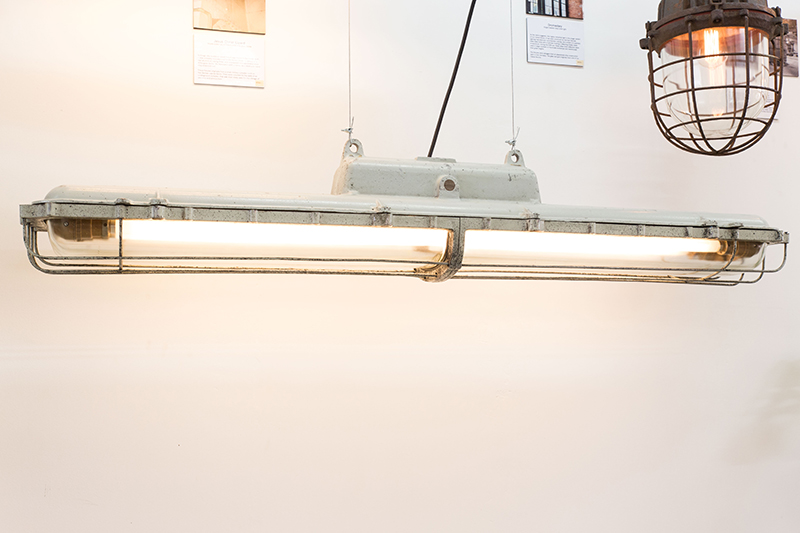


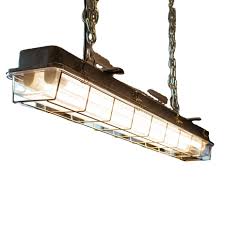
Once I gathered some refences of this light type at different angles, I also checked to see how other people have gone about modelling this kind of thing, examining how everyone approached the light bulb inside the “casing”, how much or how little detail did they put into it, what kinds of lights were they focusing on, that sort of thing. It also helped looking at these models to find out small details I couldn’t see too well on the reference images I gathered. Now happy with what I was modelling, I drew a very terrible rough look on my phone and opened Maya to get started.

The making:
I modelled everything starting out with a cube, as this is something I picked up in first year, and if I need something like a sphere or cylinder, I use the smooth tool. For cases like how I created the light bulb strips, I spawned a cylinder polygon and reduced the subdivisions so it was more so a pentagon, changed the dimensions of the axis to be longer and a little wider, then smoothed it for a rounder look. When creating the light “body” I also started off with just a cube, making multi-cuts, extrusions and bevels where necessary then manually selecting and deleting edge loops to reduce the polygon count. The cage part was a little annoying at first, as I’d always usually tried to avoid complicated shapes such as curves and bends because I didn’t really understand how to do them. I had to watch a tutorial for how to use the “bend” deformer but I was still confused, so in the end I spawned a cube, used the multi-cut tool to give it subdivisions and then pressed B on my keyboard to get the soft-selection tool, rotating and moving each section little by little until I was happy with the bar. To make it easier on myself, I placed a cut directly in the middle of the bar, selected the left half and deleted it so I could then mirror the right side so I had an even shape. I then duplicated the shape around 6 times and placed each a little further back, giving an even layout to all the bars.
I made chains for the light, which I intended to have lightly swinging the light, by spawning in a cube, selecting the left face and using ctrl+E on my keyboard to extrude the face, rotating it slightly and moving it up to the left, then extruding that face, rotating and moving it and extruding that face and so on until I had a circle of links. Using the same technique as the bars, I selected one half of the circle and deleted the faces, allowing me to use the mirror tool to get a completely symmetrical look. Once happy with the circle, I duplicated it and turned it sideways, placing the top of this new loop on the bottom of the previous, creating what was starting to look like a chain link. I did this a few more times, duplicating a link, rotating it to face the correct way, positioning it and once I had about 6 or so links in the chain, I selected all the links and used the combine tool, edit>delete all>history and freezing their transformations once I positioned them on the light. I then duplicated the entire chain and shifted it over to the other side of the light.
Texturing:
With my model now finished and cleaned up, I exported it using the game exporter plug-in in Maya and saved it into an “exports” folder where I’d later put the rest of the games models for easy access. Switching to Substance Painter, I got a few references of rust and wear and tear from google and started painting the base colours of the light, giving the outside an iron texture, the casing a kind of plastic feel and making the fluorescent lights glass. I messed around for a bit, layering colours and textures on top of each other, just doing what I felt looked good then moved onto the rust. For the rust I had about 3 or 4 different layers, with the base colours, the actual texture, more grain, and then small details such as scratches and peeling. Again I just kind of kept the reference images in mind as to where most rust would gather and how it spreads, then just painted in what I thought looked good and scientifically correct.
Other things we had to have done by this week were deciding on a group name (or at least a rough template), have a logo thought out if possible, and team roles, all set out in a handy image sent by the tutors.

The first message was sent by Karl but his name got cut off as my screen isn’t big enough, but here is a screenshot of us discussing possible team names.

In the end Karl was the one who actually made the name we stuck with, Scaredy Cat Studios.

We then started talking about possible logo ideas, with me suggesting we go with a hissing cat thats all puffed up, to go with the general idea of fear.
![]()
![]()
In the end, Tori drew out an idea for the logo and we all liked it so we stuck with it and used it as our Discord server picture to make it feel more official.
![]()
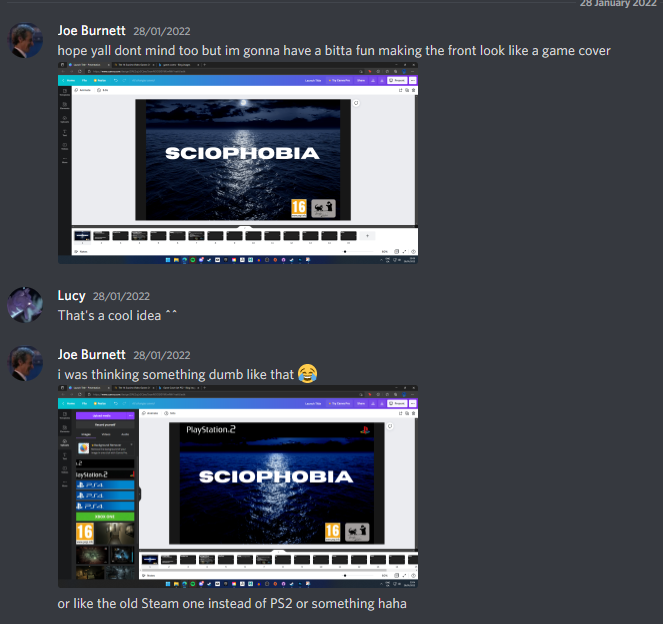
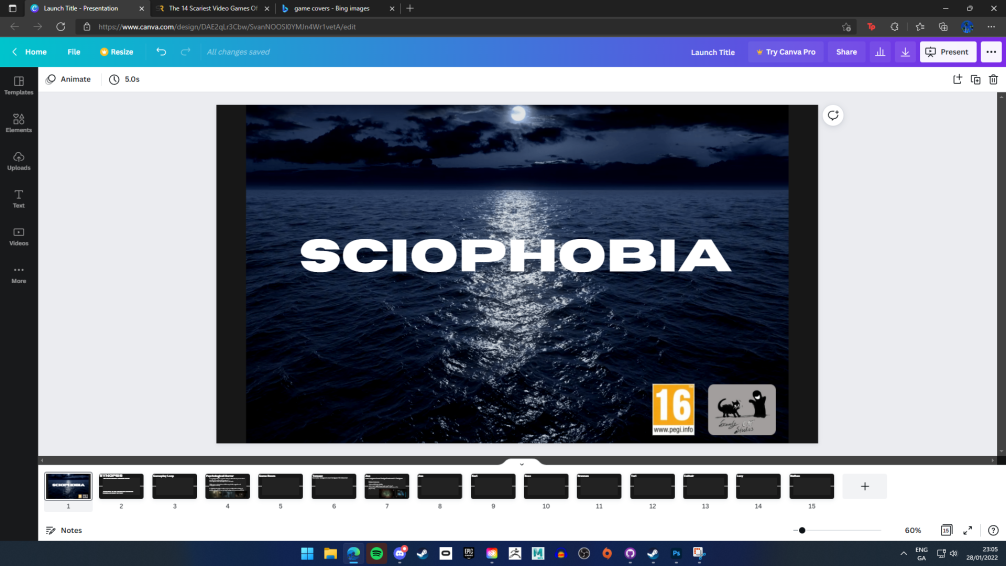
By this stage we’d also thought about a name for the game, going with names like “Mendacium” or similar kind of sounding names until we remembered how we’d talked about Sciophobia being the strong disliking or fear of shadows and we thought that fit our game idea really well, so was born the name for our game.

Image credit to team mate Joe from games design who created the above title slide for our presentation and the below fake game cover and reveal trailers.