Modelling the Grandfather Clock

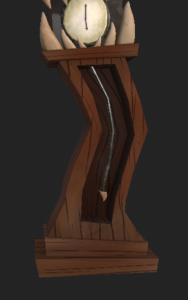
I have started modelling the Grandfather Clock design that I had made back in the concepts. I am hoping for this model to be very expressive and stand out well in this haunted mansion.

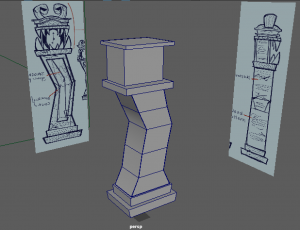
 I started with bringing in my designs into the Maya scene, and blocking out the main shapes of the clock – the base and the case of the clock.

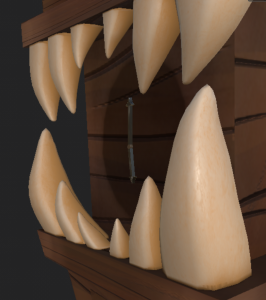
After adding a few more parts like the top of the clock and the clock face, I moved onto the teeth. I used a cube poly for the teeth and added a few edge loops. I scaled down the top part and scaled up the bottom of the tooth. I also gave them a little curve too. Since the teeth I made on one side was going to be the same on the other side, I used the mirror tool to project each tooth over on the other side In the correct place. I used the mirror place centre x input to help position them to a good place. Usually between 3.5 to 4cm away from the other tooth, worked well.
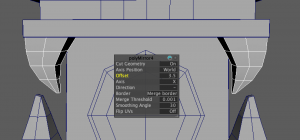
I did the same thing with the new teeth I modelled at the top of the mouth. Again I used the mirror tool to offset the position of the mirrored tooth.
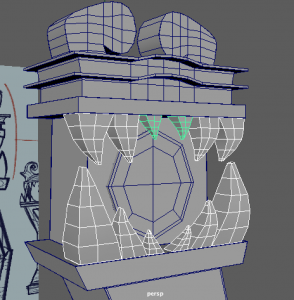
After I had finished the teeth this is how they looked. I had also spent time adding more details to the top of the grandfather clock such as where the monster eyes will go, and the layered ‘crown’ of the clock.
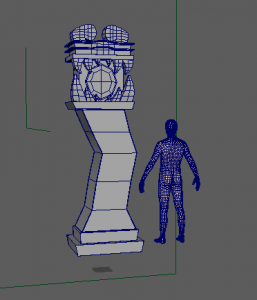
At this point I was halfway done the modelling process. I have some more details to add such as the inside of the pendulum, the clock hands, the eye detail, and so on. I referred to a mannequin model to see the scale of the clock. Although it was a little big, we decided to keep it as it is so I could contain the same scale measurements it has at the moment to keep myself on the right track. I can scale it down later on as we build the haunted house.

I used booleans – difference tool to cut into the inside of the clock case. So now I could add the pendulum inside.

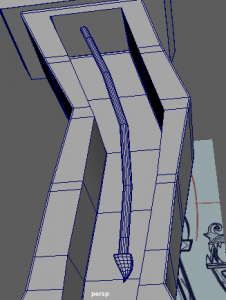
I started to work on the little details of the clock such as the eyes at the top, the pendulum, and the clock hands. After a few more alterations, I would have finished modelling the clock here.

I was now able to start UV mapping the clock asset. I started with the more simple polys such as the base, as they layout into the usual cube foldout. More difficult polys to UV map were the round eye parts, the teeth, and the hour and minute hands on the clock.
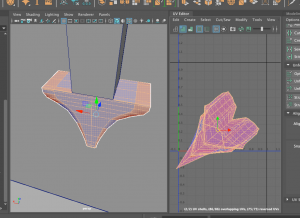
For example, I had the point of the hands attached to the long body part of the hand as I thought it would be okay as a full poly, however it was difficult to unfold into a regular UV in the editor. I tried modelling the hands though this time, the point was separate from the body. This made it much easier to find a way to cut the UV and display it correctly on the UV map.

In time, I had completed UV Mapping the grandfather clock. I assorted the UVs into multiple maps, which makes the model a UDIM – since its a bigger model, I wanted to preserve the UV tile layout for each material (eg. Wood, bones) and enable painting across tiles for Substance Painter.

I made a new file in Substance Painter with resolution 2048, and turned on UV tile workflow (UDIMs). I placed in my fbx of the clock and started to bake the mesh.

I liked how the model was looking, but I felt it needed a bit more of an irregular/wonky look to it. I got back into my Maya file and looked for what I could do to capture this visual.

I remembered my tutor Michael mentioning to our group that there is a tool called Lattice, in the Deform window, that allows me to warp the model I made while keeping its regular measurements and UVs in the same place as before. It almost acts like an illusion because when you move the Lattice base away from the model, it goes back to its regular shape. I used this tool on the clock to make the sides more wonky and lopsided. I was much more happy with this shape on the clock as a result.

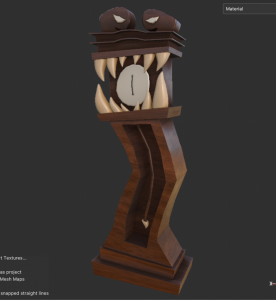
I brought back the model into Substance Painter and redid the bake mesh process. I placed down some temporary materials onto my clock to get an idea of its style and colours first of all.
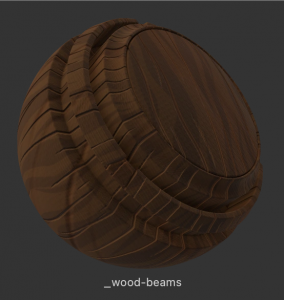
 Matthew in our team gathered some wood materials and styles that we could use, so I imported them all into this project and tried them all on the clock to see which one I can develop more. I really like the material “wood_beams” it contained lots of simple details that fit well around the clock.

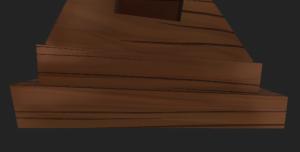
I started by using the paint layers and gathering colours to paint on bright contrasting browns, some highlights on the side of the wood, and dark brown shadows on each corner.
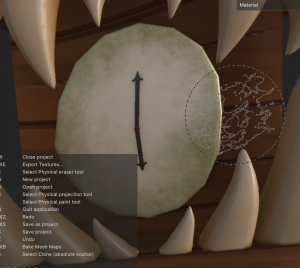
I painted the clock base with a rusty green colour, and a painty brush, to give the indication that this is an old, rusty clock. Here I also applied a dark Iron material onto the hands and gave it a grunge procedural texture on it using black mask – fill layer on the iron material.
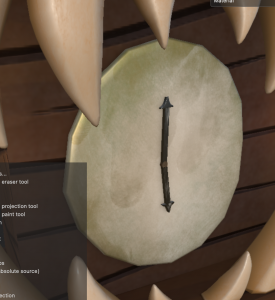
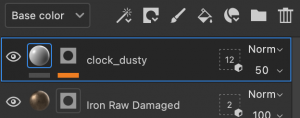
I also found a nice alpha material that created a dusty look with finger prints/marks all over it. I thought this was a great texture to place on as it enhances the idea that the clock is old but may have been touched by someone or something.

I gave the same look to the eyes of the clock. The copper material, the rusty paint, and the dusty texture.
At first I placed the Bone Stylised material onto the teeth of the clock, but decided to keep it and work more on it. I knew the teeth would be challenging to get right as its very different from the rest of the clock, but I gathered reference to help me out.

I used this image to help picture the roughness and texture on an animals pair of teeth. I tried to capture the dark rough texture on the teeth.

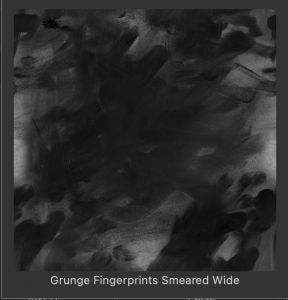
I used a fill layer with a darker beige colour – black mask – fill layer with a grayscale called Grunge Concrete old. I played about with the options and got this texture on the left.

I had placed a grunge texture also onto the brass pendulum of the clock using the black mask option. I also added a blur filter to the layer to blend in the texture to the material.

Lastly, I used the dusty texture again this time on the wood of the clock, to enhance the dirtiness and oldness of the clock. It isn’t as noticeable but it is a subtle touch to the model that makes it unique.

Eventually, this was my Grandfather clock finished. I enjoyed the process of making this clock! It was the first of the models I made so it could have some missing touches that I am adding to future models, when I experiment with new things. However it still stands out as it is. The clock will be an important asset to the Haunted Mansion.

Further on in the project, I made some alterations to the Grandfather clock that eventually made the piece stronger. We presented a short presentation on how our projects are coming along, and I showcased my scenes and some practice cinematic shots for the class. I got good feedback and some ideas for improvement. They suggested I could build the Grandfather clock with more structure, and alternations in the wood placing.
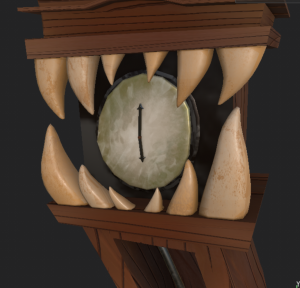
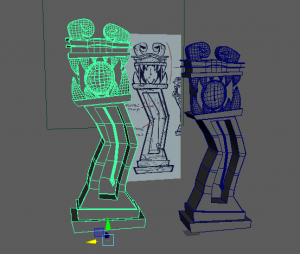
I went back into Maya to add details like a frame for the clock and a backing for the frame. I brought this new model into substance and placed my smart materials from the past model, onto this model. From here I was able to change up the wood placement on the base of the clock, from the flat, plank parts. This made the Grandfather clock look more realistic, as it includes real life logic to how a grandfather clock is built.

Before —- After

The clock is now more visually interesting and pleasing to look at, from the new iron pendulum, to the wood placement, to the frame of the clock. I mentioned beforehand the clock may have had some missing touches that I would have added to my other assets, as soon as I got used to my workflow. Now I feel the clock is more suitable among the other assets with this upgrade.
Guest Talks

This week in our Professional Practice lecture we talked to three industry guests, and previous graduates of Ulster University in Animation. We talked to:

Zoe Woods – Graduated in 2018, Working for Framestore AI as a Layout technical director in London

Aisling McElroy – Graduated in 2018 – Working for Italic Pig as Production co-ordinator in Holywood

Greg Woodcock – Graduated in 2008 – Working for Dimension Studio as an Animator in Newcastle/London


Source

https://eu-lti.bbcollab.com/collab/ui/session/playback/load/552fb1c85c104967ad082a0eef3476a1

https://eu-lti.bbcollab.com/collab/ui/session/playback/load/bdc37370fd624c6784e73e618616dd70


Zoe Woods came to talk to us first.

Zoe Woods is currently a layout Technical Director at frame store IA. she graduated in 2018 from Ulster University. Zoe completed a placement year at Enter Yes as an Animation Intern. Zoe went into the animation course wanting to work in the Gaming industry, however she bounced between gaming and VFX while studying. She has worked on shows such as Millie Inbetween, Pip and Posy, and Jessy and Nessy.

Zoe started as a runner at BBC Blackstaff, where she organised the behind the scenes of a show. She would organise the extras, do coffee runs, make phone calls, emails, hand out sheets and scripts and organising filming abroad, partys and more. Zoe became a Data wrangler at Jam Media, where she would look after the renders and point out issues that may appear – communicate with IT & compositors to address errors. Zoe moved onto 2D Render lead at Jam Media, where she led the team to organise shots, identify issues, and checking everyones work. Zoe then went onto become a Layout artist for many studios, where she sets up scenes, props, and characters ready for animation, setting up placement, blockings, and cameras to correct places. Zoe taught us a lot about the current role she takes as a layout artist, the studio workflow and how it is changing every year.


Aisling McElroy talked to us next.

Aisling McElroy is currently a production co-ordinator for Italic Pig, and she graduated in 2018 from Ulster University. Aisling went into the animation course wanting to do a bit of everything, but also always loved working within a team and organising a project – this led her to working in production. She completed a 3 year placement at Sixteen south, working on three different projects. She had dabbled in the likes of design, edit, audio recording, scripting etc. She graduated as a generalist, but wanted to pursue a role in production.

She found a job in Blackstaff Games where she produced for a small platform game, ‘Buildings have feelings too!’. Aisling took an opportunity to organise gaming play through for students in Belfast Met. She then went on to work for Taunt studios for a brief time. She was managing and reaching out to companies within Belfast and London to build up the studio, as they were just a starting company. Aisling moved over to Italic Pig where she has been working for 2 years now. Her role was an art-line producer at first, where she looking after the art department of the studio. She would be in change of the documentation, making sure everyone knows what they are doing, and scheduling. More recently she has become a Lead Producer for five different projects. She is learning to produce with many different teams, managing projects and deadlines. Aisling explains her role and the studio workflow   when answering a few questions we asked.


Lastly Greg woodcock talked to us.

Greg Woodcock is an Animator working as a freelancer, currently working for Dimension Studio. He graduated in 2008 from Swansea Met University. He has been in the industry for 10+ years, and has created many projects such as console games, advertising, TV adverts, mobile apps casino games and more. Greg works primarily with 3D animation and rigging, and has a range tool sets in Autodesk Maya – going from project to project he said he is always learning new skills and collects tools to use in the future.

Greg’s first job was for the studio Serious Parody creating animation / body mechanics for a wrestling game. Currently he is working with VR and mobcap for a VR game at Dimension Studio. He takes on roles such as working with human IK & skeletons, and setting in keyframes. Greg emphasises the challenge of starting to find opportunities in the animation industry, and how the more experience you get, the more opportunities you could find.


These guest talks were very interesting to listen into. It was great to hear from people in the industry and what they have experienced so far into their careers. What I learnt about most is the reality that my options/roles may or may not change further in the future etc. could start wanting to be an animator, but become a producer. It also was interesting to know about what duties these guys took on for their different kinds of jobs, and how they felt about them.

Texturing, Art style

Week 5 consisted of looking at the process of texturing and its many strategies. We have many assets that require a texture. From our tasks we learnt the different ways to apply textures in UE, and the different ways to apply textures to a mesh. Overall these methods helped with our texturing stage on Substance Painter, and applying textures on UE.

Image 1: Applying Decals

Image 2: Working with materials & Instances

Image 3: Texturing with layers on Substance Painter


Source:

https://learning.ulster.ac.uk/webapps/blackboard/content/listContent.jsp?course_id=_323028_1&content_id=_6114034_1

https://learning.ulster.ac.uk/webapps/blackboard/content/listContent.jsp?course_id=_323028_1&content_id=_6271359_1


We also had a lecture on ‘Designing a pipeline based on an art style’ from Michael.

Art style possibilities are endless:

  • There is not just only ‘realistic’ or ‘stylised’. There is a massive range in-between and beyond. etc. the many art styles of Link / the legend of Zelda – all can tell the mood of the storyline
  • Outside of games and VFX, ‘realistic’ is almost non-existent in Animation. ‘Realistic’ animations that exist to require fantastical elements to define its style.


Every artistic version is also a technical challenge

  • A good director is not just someone with a vision,, but someone who knows how to clearly communicate that vision to others
  • One person may have a style without thinking of it. However for a team it must be defined, communicated and maintained throughout a project. An Art directors role consists of this.


How do they ‘define’ an art style?

  • What is the shape language? sharp lines? Soft or rounded? Elongated shapes? Cluttered and busy or minimalist?
  • What is the colour scheme, what are the rules for creating new colour schemes within the world? Pastel colours or saturated or monochrome?
  • What makes our character look like they do? Design references or existing art styles. Be specific. What do they eyes look in th world? What will the hair look like? what are the Childs proportions compared to an adults or animals proportions?
  • Define the painted style, ink? watercolour? oil? flat colours? Is black allowed, or never? What will the lighting look like?


The more questions you answer the better you understand your art,

and easier to communicate with others. 


Art directors create style guides to emphasise key do’s and don’t’s to pass the rule on to the team.

Source: https://ericreimer.com/art-direction-enviromental-style-guide

This art direction art style guide made by Eric Reimer allows their team to be aware of the preferences and stylistic approaches of the project. They have designed the mood and setting of the environment in a game perspective, included references, and breakdowns of each part of the environment to further explain the uses. This is a great way to communicate an art style to others.

It also needs to be translated step by step to reach its final form etc. concept, sculpt, model texture, rig – light. With coherency, consistency, in a technically achievable way. Figuring out how is the job of a Technical director.

How does a technical director do this?

Consists of experimentation and testing, critical evaluation and comparison.

What to evaluate?

  • How closely does the test render match the style?
  • Is the style still good/appealing after translated into 3D?
  • What changes can be made to make the art style suit 3D better?
  • What software best helps us reach the result?
  • was they’re technical limitations to be aware of?
  • How difficult was it to achieve?


Tech direction will then develop a pipeline in detail for other artists. This will encompass every aspect of producing an animated sequence that style is accurate to the project – They will provide:

  • Shader / material with correct setting where artists can swap textures for each asset
  • Animation cycles that can be loaded and edited for different shots
  • Light rigs for sets to serve as a starting point
  • Modular models
  • Reference models
  • Custom starting scenes with correct render settings

Lastly, the Lead artists will work together with the art and tech director to develop, or set starting points of models, textures and lighting guides for each team – to emphasise the particular approach needed in each department.


This was an interesting lecture to listen to – it definitely gave me and my group a second thought of how we were approaching our art style, and to find a style we can all adjust to.


After this weeks lecture, I started on creating the texture of the wallpaper for the room walls. I was able to make this texture using the tasks from this weeks lesson on texturing – mostly grasping the idea of making a ‘Seamless Texture’ which helped create the effect of a repetitive pattern.

The explanation of the wallpaper design is on this post:

General Asset Modelling

Modular asset modelling

On week four, we learned about modular assets and their importance to be modelled at the start of the project, such as the walls of a room, table, fireplace – usually the major assets that determine the size/layout of the scene.

We followed tasks from our tutors to learn how to make modular assets and bring them from Maya, to Blender, to Substance, then finally to UE. As a result of this task we will be able to produce trim sheets of our modular assets to share with the team, and prepare our scene.

During this task we made modular assets for the wall of a scene. This encouraged me and my group to start thinking of the walls in our Haunted House, and start modelling it.

Source:

https://learning.ulster.ac.uk/webapps/blackboard/content/listContent.jsp?course_id=_323028_1&content_id=_6089286_1


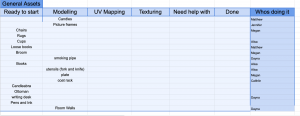
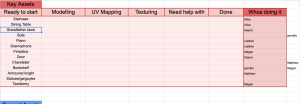
This week we had set up google sheets to create a Kanban board of our asset planning – to see what step each asset is in as we work on them, and who is working on it. We have started working on general assets so we could ease back into the Maya, Blender, Substance painter softwares and gain our knowledge back from last year. We had all put our name down for multiple assets we wanted to work on . I had put my name down for etc. the room walls, smoking pipe, writing desk, grandfather clock, grand door, and more if some need help.

So far we have started our modelling process for multiple objects from this Mondays class. We dove back into the Maya software to learn about creating modular assets.


With the knowledge of this weeks task, I chose to work on wall assets to start off the mansions build.

My blog post about modelling the room walls can be found here:

Modelling the Room Walls


Final concepts, layout/blockout

During the third week, we were given feedback from our presentation. We were told the project is going in a good direction, and what we should focus on this week/next week is a strong sense of art style, and a list of roles for everyone to complete. We had a discussion that class about our feedback and prepared to make our list.

We have been finalising how our style is implemented into our work by making concepts for our key assets such as the Grandfather clock, Armoured Knight, Gramophone, Piano etc.

I have been working on the Grandfather clock, and the Main door.

I referred back to my clock sketches and decided on combining both of the monster themed designs to create the final design. I also used the reference from before to help guide me again. I made a small turnaround to help me model this asset later on. I made sure to add the key descriptions to emphasise this design. For example, I thought about the wonky/warped style – the clock is broken/tilted to the side a bit, and I thought about the decay of the mansion – the clock is scratched and work out.


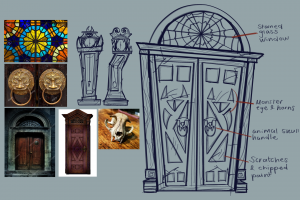
I also came up with a design for the main door. I found some useful references to help my idea such as the stained glass window and the door handles. I also referred back to my clocks to implement the same monster theme in the door design.

My grandfather clock and grand door progress can be found through these links:

Modelling the Grandfather Clock

Modelling the Grand Door


As a group we also experimented and discussed how we will block out our haunted mansion. We visualised a layout from sketches, to Unreal Engine projects.

Jennifer’s Layout sketch

Alisa’s layout sketch


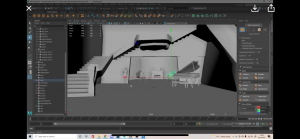
Matthew’s Maya blockout

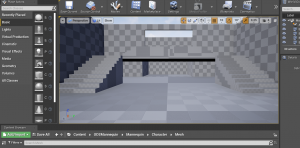
My Unreal Engine blockout


With our layout ideas on screen, from here we decided we would all take the same one layout idea but incorporate it into our own environment individually. This way we can all have a bit of freedom to layout and position each asset the way we would like to. This also can encourage us to be more creative in how we present our scenes.

Showreels

This weeks Professional Practice class focused around the making, and presentation of showreels. First of all we joined the class with an example of an animation showreel we found and thought was very well edited and presented.


The showreel I found was from an artist/animator called Michelle Cheng (username Lemoncholy). Her winter 2021 showreel is intriguing to me all throughout the video. It starts with showcasing her contact details, and a beautiful visual of opening the door to a bathroom, in black negative space. During the showreel she showcases finished animations, sketch animations, cinematography skills, and colouring. At the end, the tail of the character swings by and reveals her contact details again, showing great editing skills also.

Her contact details are shown clear and neat within the video which makes it look professional. She has also kept between the 30-60 second length of a showreel, in which she presents many different kinds of work in this limited time. The music is very chill and not a distraction at all to what is being shown. I think this is a great example of an animation showreel, and I hope to achieve this level someday.

Source

https://www.youtube.com/channel/UCgSku43Ciye6rdl23J3mTGw


Next in this class, we were given an activity to edit a 30 second showreel of our tutors animation work. We got an introduction to Premiere Pro, where we would be editing this showreel, and started the activity during class.


I looked through my tutors work and thought his 3D animation, modelling, lighting, and compositing of the adverts and character animation he did were interesting to make into a short reel.

I used the provided music and collected each clip I wanted to present, and organised them into suitable places that would transition well, etc. At the end of Alec’s animation of the pea in the Lurkpak advert, I paired it with the Im Drink advert when they both presented the colour green. I also did a similar thing, where I paired the Freeview advert with his the Property pal advert, because they both took place in an outside/town space.

I had a bit of trouble getting to the 30 second limit, as I kept going over 2 minutes with the amount of clips I wanted to use. I had to take out most of the clips, and keep the ones I thought looked best. I also quickly made sure the clips played well with the beat of the music, as that is also a good skill to make your showreel look interesting.

Finally, I was happy with how it looked and exported the video. Here is the result.


Concepts and Presentation

The second week of our project was spent creating a few more concept work on our assets primarily, and to make our presentation and showcase it to our class.

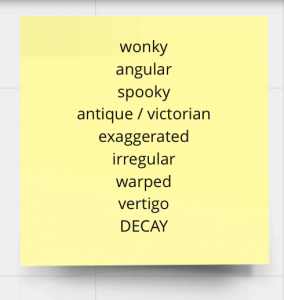
First, we had another discussion about our style and how we would describe it. We all discussed keywords that we all agree would fit the style and emphasise what visuals we are going to create. This was the list of words we came up with.

These words will eventually influence our work as we figure out, what makes the scene look wonky/warped? what made the room decay? Why would the furniture be antique/victorian?
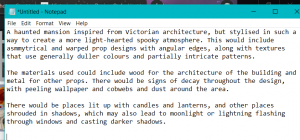
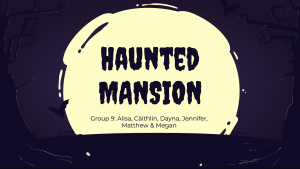
Our teammate Jennifer helped to write out a paragraph describing our theme and style using the words above. This will help our visual direction and will give the class an idea of what we are going to create.

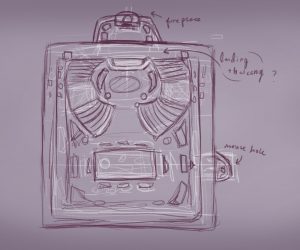
During this time, I made some sketches of an asset we would like to add to the mansion, a grandfather clock. I focused on the words and themes we discussed once before to give a theme to the assets, etc. monsters, animal/human bones, gothic look. These were fun to create and I tried to capture the keywords into my work as much as I could!


Next up was the presentation. I helped start us off with a template and we started filling in the slides as we communicated through discord. We spent the weekend designing our slides, adding our work, references and our plans for the upcoming weeks. We described our initial idea, listed our assets, described our concepts and our practice with Unreal engine and Maya. We voiced over the slides with an explanation and then edited together for next Mondays class to present!

Source

Link to presentation:

https://ulster-my.sharepoint.com/:v:/g/personal/keaney-d_ulster_ac_uk/EQzBRsVZ949IsPzum2QPkcIB2zTo9pp4ruCkE_ir7naQxw?e=wUPqJ3

During the past Monday class we also had our first proper introduction to Unreal Engine. We took some time to understand the workspace and navigation, meshes and materials, nodes, instances etc.

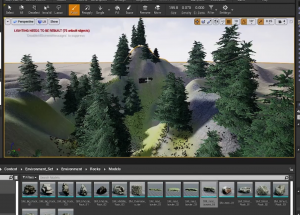
We experimented with the landscape function of Unreal Engine as we will be using this in the future. We followed videos made by our tutors to create a nature landscape with foliage use and texture painting.

Lastly, we touched on blocking out in both UE and Maya. This process will help us roughly structure our layout of our Haunted Mansion later on. I used this method to practice blocking by making the year 2 room i was in at campus. This taught me how to use reference, and observe my surroundings to see if I can replicate it.

Sources:

https://learning.ulster.ac.uk/webapps/blackboard/content/listContent.jsp?course_id=_323028_1&content_id=_6087411_1

https://learning.ulster.ac.uk/webapps/blackboard/content/listContent.jsp?course_id=_323028_1&content_id=_6087412_1

https://learning.ulster.ac.uk/webapps/blackboard/content/listContent.jsp?course_id=_323028_1&content_id=_6089085_1

Intro and brainstorming

Our first assignment in the module ‘Animation strategies‘ is to produce a cinematic Short film using the 3D environment we create, as its storytelling medium. We will work in groups to produce, develop and model key assets to build the chosen theme of environment. During this assignment I will build my skills with Unreal engine to render the environment, coordinate with my team in person and remotely, organise an equal share of projects for each person to work on, and plan, research and help out my classmates.


For week 1, I joined a group of 5 classmates that were interested in creating the Haunted mansion environment. They are Alisa, Caithlin, Matthew, Megan and Jennifer. We started off our brainstorming by discussing in class and using a whiteboard to write our ideas. We wrote down our biggest inspirations, assets we could make, the look of the environment etc. Here are a few images of the brainstorm.

We conceptualised our own ideas of what a Haunted Mansion looks like and what it may contain so we wrote down essential assets such as staircase, clock, paintings, chairs and tables. We also thought about what rooms it would have – kitchen, grand hall, library, dining room. For a while we were stuck between choosing a vibrant cartoon style like Luigi’s Mansion, or a sophisticated, realistic style like victorian houses.


On the weekend we had a group call on discord discussing our initial style and what story we could tell from our environment. We collected many more references that influenced our ideas, we brought in our thumbnails and early concept pieces, and we found a way to describe a style we all like.

We used miro board to bring together all our ideas. We had collected many references from video games, animated films, live action films, local vintage shops, google maps, and cinematography genres.

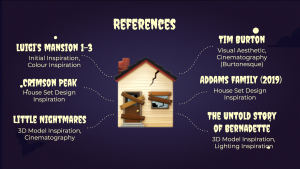
We were very interested in luigis mansions asset style that create a fun/spooky vibe to a haunted mansion. We were also inspired by the colour palette from the game and took reference from them. More games that inspired us was Little Nightmares, and a student game, Bernadette – they helped us with picturing our visuals and assets. We found clips and screenshots from films such as 101 Dalmatians, The Addams family, The Nightmare before Christmas, Crimson peak, Beetlejuice. We were fond of all their takes on haunted places, their set design, their cinematography, and props they used. Additionally we looked into German expressionism for the set building and camera shots they make to create their eerie, haunted visuals.

I also was recommended to look through a website called on the Square Emporium – a vintage shop with many victorian style furniture and objects that would enhance our asset modelling in the future.


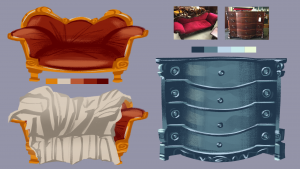
Later on we used these references, and made our own thumbnails and concept work as a group to put on paper, our imagination of how our haunted mansion will look. I had made a thumbnail page and a concept page, using ref from the On the Square Emporium site, and colour palettes from Luigi’s Mansion.


I made thumbnails of some room layouts and assets that could be included in the haunted mansion. I also made concepts of a sofa and desk from the vintage shop, and painted them with the colour palette below that our teammate Jennifer made.


Jennifers Colour palette


With my concepts, and the groups concepts together, we had made a better idea of how our haunted mansion was going to look, and how it will be presented. Next we will be continuing our concepts, organising our workflow, and making our first presentation on the project.

Job/Animation Research

To start off my module ‘Professional practice’ I have been asked to search for different jobs in the animation industry, and to write a brief description of these jobs. I will also look at job sites such as Indeed, Linked in or Reed, and write down a brief reflection of these jobs and its roles. Lastly I will find a junior or mid-level animator/artist that I like, and research them – their social medias, their career, their work and what their journey tells me.

As a result of this research task I will have found one or multiple animation job roles that I am interested in, I will have a better understanding of these jobs, their roles, and how to achieve this job. And, I will have a better understanding of how artists/animators are presented in the industry.


First of all I will pick out a couple of animation jobs that interest me, and find out what they actually entail.

Sources

 https://www.screenskills.com/starting-your-career/job-profiles/animation/

https://www.cgspectrum.com/blog/what-is-2d-animation

https://www.animationcareerreview.com/careers-animation/types-jobs

https://www.nfi.edu/career-in-animation/

2D Animator – 2d animators illustrate frame by frame or use vector images to create motion in 2-dimensional space. They work from concept artists, storyboard artists, and animatics work to produce a story or message into an animation. They implement the principles of animation into their work to convey the emotion and action the creators are looking to show.

3D Animator – 3D Animators create characters, assets and scenes from computer generation. 3D animators learn technical software to produce a 3-Dimensional object, and give it motion in a 3-dimensional space. They also work from concept artists, storyboard artists, and animatic editors work to produce a story or message into an animation.

Concept Artist – Concept artists comes up with the first initial ideas/looks/sketches for an animation, following the information and story made by the writer. They work with the writers, producer, and head of story to produce a good and engaging style for the animation. They provide visuals and references for animators, background artists, and character designers.


Source: https://conceptartempire.com/what-is-concept-artist/


Animatic Editor – An animatic editor is the role of combining storyboards, audio and timing to an edited rendition of how the animation will play out. They work with storyboard artists, Audio composers and compositors to capture each of their creative work and display them in real time. An animatic editor will focus on using an editing software to bring these together and plan the pace, sounds, and key posing of an animation.


Source: https://boords.com/animatic/what-is-the-definition-of-an-animatic-storyboard


Background Designer – A background designer is the role of designing the environment of a scene in animation. They work with layout artists, concept artists and storyboard artists to capture the right colour, texture and lighting for a particular scene in a story. They also help to highlight which, and what kind of objects will or will not interact with the background scene.


Source: https://conceptartempire.com/what-is-layout-background-designer/


Render Wrangler – A render wrangler monitors and controls the rendering process of a 3D/computer animation. They may work on multiple machines to produce rendered frames, and ensure that the technical data and software are all in control and running the way they plan. They will work with the animators, and technicians to ensure the rendering process runs smoothy. And if not, they are to solve the problem in efficient time.


Character Designer – a character designers job is to design and bring to life the visuals of characters in a story. They are given descriptions from the director and concept artists to produce experimental designs, and finalised designs of a character. These said characters can be produced in model sheets and professional layouts for modellers, animators and storyboard artists to capture the characters visual. They will ensure the characters are ‘on model’ within future work.


Source: https://characterdesignreferences.com/art-of-animation-4/art-of-adventure-time


Animation/production assistant – A production assistant, or a ‘runner’ ensures that the animation production is running smoothly by helping out in anyway they can. Most trainees and internship roles for animation start out here. Production assistants work consists of taking notes in meetings and giving reports, organising work progress and workflow, printing scripts and necessary documents, etc.


https://www.screenskills.com/starting-your-career/job-profiles/animation/production-management/runner/


Now I will look around websites such as Indeed, Linked In and Reed to find junior, intern or entry-level animation jobs.

Sources

https://www.reed.co.uk/jobs/junior-motion-designer/43603379?source=searchResults&filter=%2fjobs%2fanimator-jobs-in-united-kingdom%3fproximity%3d30

https://uk.indeed.com/?r=us

https://www.glassdoor.co.uk/index.htm


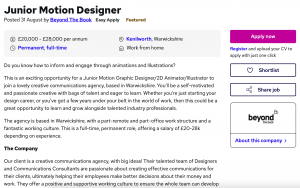
1. Junior Motion Designer

Reed.co.uk

Beyond The Book

Remote/Office

  • Part-remote part-office job that allows those ‘starting their design career’ to apply
  • Requires skills in drawing, to be comfortable in storyboarding, knowledge of Adobe apps – after effects/photoshop/illustrator, experience with illustrating, experience with animation principles.
  • They look for someone self-motivated and passionate, confident in communicating ideas to the team, who can work on any client amends/follow brand guidelines, and someone enthusiastic about storytelling.
  • Asks for CV as you get in touch


2. Junior Animation Assistant

Indeed.com

RAW Pictures Ltd

Remote

  • Looking for someone ‘looking to start their career in the world of 2D animation’
  • Requires strong emphasis in 2D work, comfortable with adobe apps (after effects etc.), skills in 3D animation.
  • They look for someone that can fit into the ‘young and forward thinking company’, who are looking to grow their 2D and 3D skills, isn’t afraid to share their ideas and work in a team, has a strong work ethic, and someone who has studied animation before.


3. Junior Graphic Artist

Glassdoor.co.uk

Astra Games

Remote/Office


  • An Entry-level graphics role
  • Requires knowledge of 2D creation software (Adobe apps – After effects etc.), some experience of 3D design programs, knowledge of game engine workflows, knowledge of online gaming.
  • They look for someone who has the ability to take projects from briefing to delivery with creative and considered approach, a love for illustration & character design, a keen eye for detail and accuracy, ability to respond efficiently, must be organised, self-motivated, and a team player.
  • Asks for a portfolio / portfolio link in the application


Lastly, I will pick out a junior or mid-level animator/artist that I like, and research their progress/career.

Sources

http://www.marielumart.com

https://linktr.ee/PuccaNoodles

https://www.linkedin.com/in/marie-lum-a8667389?trk=people-guest_people_search-card

Marie Lum (nickname PuccaNoodles) is a Los Angles based animator and illustrator.

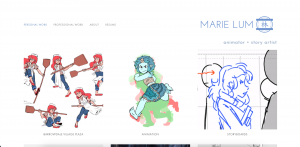
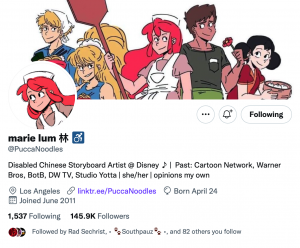
Marie had studied at Otis College of Art and Design and majored with a BFA in animation. Marie shares her work and connects with others through her Twitter social, and Instagram social. She has built her own website to showcase her professional work, personal work, and her resume. Additionally, she has set up her own online store selling merchandise such as stickers, key-rings and caps.


In her resume you can see she has worked with many great companies such as Disney TV Animation, Warner Bros. Animation, and Cartoon Network. During the start of her career she worked for smaller studios such as Trinket Studios, Rose art Mattel, and Studio Yotta.

She is skilled in programmes such as Storyboard Pro, ToonBoom Harmony, Paint Tool Sai, Clip Studio Paint, Adobe software and Microsoft software.


Screenshots of: Marie Lum’s Website, Marie’s Twitter


Screenshots of: Marie Lum’s Instagram, Marie’s Linked In


Marie Lum’s career started in Studio Yotta in 2015 where she did animation clean-ups for shorts and cartoon pilots. She later on worked for Trinket Studios that year to create designs and assisted animations for a video game. In 2016 she ranged from many studios starting at Rose Art Mattel as an illustrator, moved towards Warner Bros. Animation as an animation production intern, then to Dreamworks TV as a clean-up animator. Marie moved upwards to Cartoon Network from 2017 to 2019 to work on Craig of the Week as a storyboard revisionist/artist. Marie returned to Warner Bros. in 2020 to work on storyboard revisions for Aquaman: King of Atlantis. Finally, Marie is currently working at Disney TV Animation as a storyboard artist, on an unannounced show!

Her journey has been long and it seems she has taken on many different roles in the animation industry. She started with junior jobs and worked her way up to be a talented storyboard artist. Her journey inspires me as she has worked hard to get to where she is, and that her style is so unique but fits well to where she works for etc. Her work for Infinity Train suits the style of the actual show.

Additionally, Marie has a big following for her art of her own original world called ‘Barrowdale Village Plaza’. Her profile pictures and art usually consist of the main character of this story, Biscotti.


You can find her work/portfolio on her website: http://www.marielumart.com

Her Linked In: https://www.linkedin.com/in/marie-lum-a8667389?trk=people-guest_people_search-card


Animatic/storyboard work

Personal animation, Artwork for Barrowdale Village Plaza


Second Animation Short Portfolio

My portfolio for the Second Animation Short assignment

Character design

Environment studies


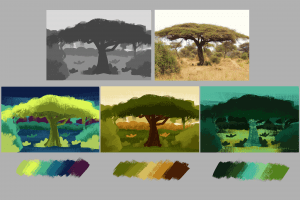
Thumbnails and colour studies

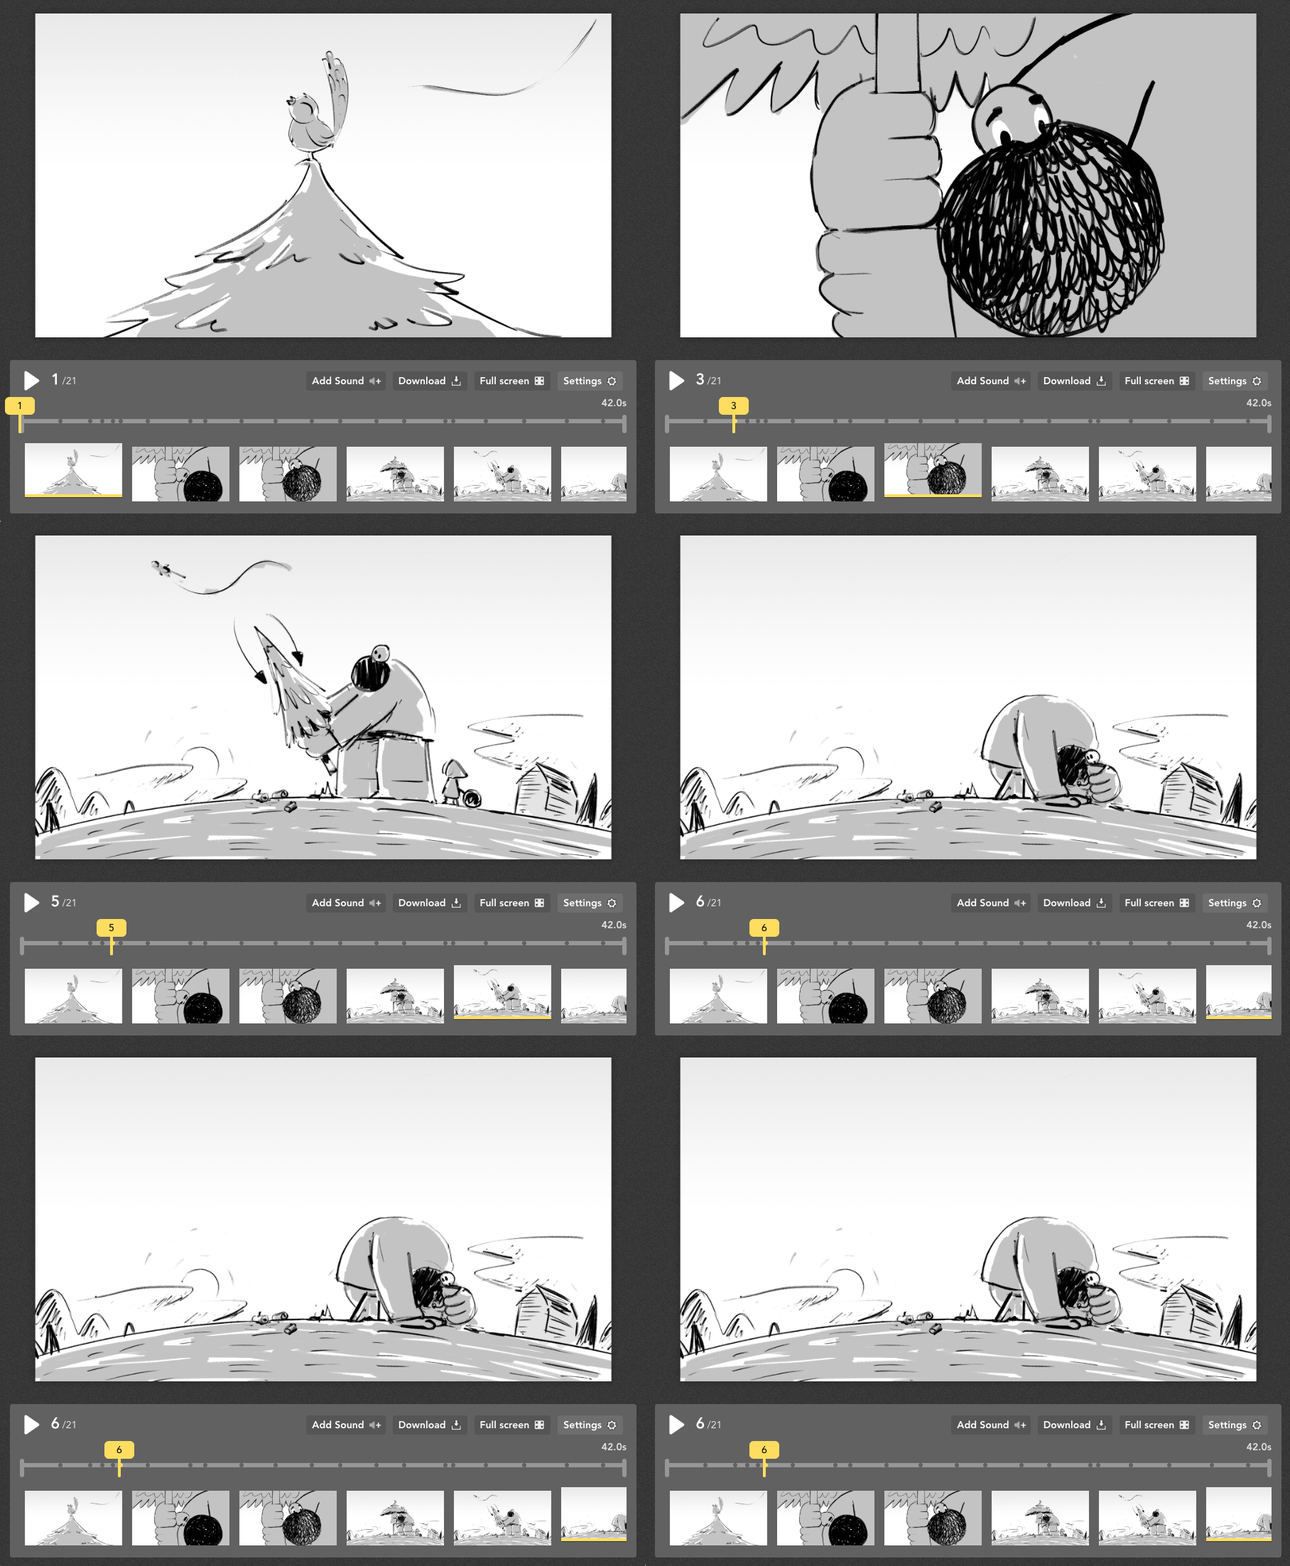
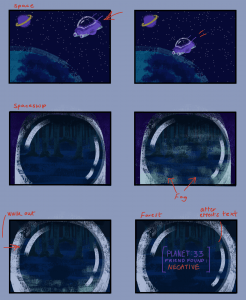
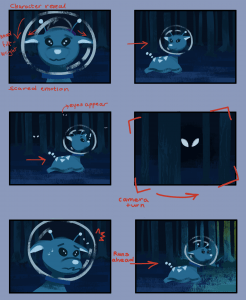
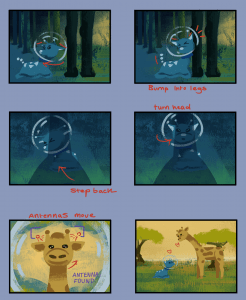
Storyboards

3D Previs Character assets

3D Previs shot 4

3D Previs shot 5

Toon shader experiments


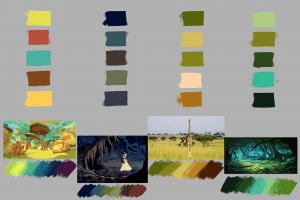
Final colour palette
Animation process

Animation shot 5 & 6 Playblast

Animation shot 7 Playblast

Animation shot 5 & 6 final render

Animation shot 7 final render

Circle loading animation

Final Animation

https://drive.google.com/file/d/1YSqn5RoCed4nl4jCd0GEZ-a1zl5dDCea/view?usp=sharing

Back To Top
Skip to toolbar