I have started modelling the Grandfather Clock design that I had made back in the concepts. I am hoping for this model to be very expressive and stand out well in this haunted mansion.

 I started with bringing in my designs into the Maya scene, and blocking out the main shapes of the clock – the base and the case of the clock.


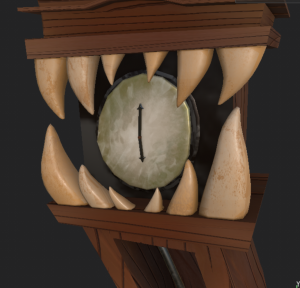
After adding a few more parts like the top of the clock and the clock face, I moved onto the teeth. I used a cube poly for the teeth and added a few edge loops. I scaled down the top part and scaled up the bottom of the tooth. I also gave them a little curve too. Since the teeth I made on one side was going to be the same on the other side, I used the mirror tool to project each tooth over on the other side In the correct place. I used the mirror place centre x input to help position them to a good place. Usually between 3.5 to 4cm away from the other tooth, worked well.
I did the same thing with the new teeth I modelled at the top of the mouth. Again I used the mirror tool to offset the position of the mirrored tooth.
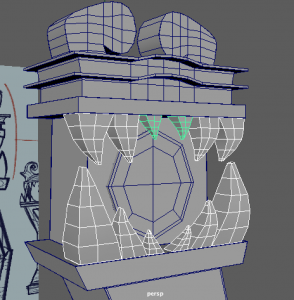
After I had finished the teeth this is how they looked. I had also spent time adding more details to the top of the grandfather clock such as where the monster eyes will go, and the layered ‘crown’ of the clock.
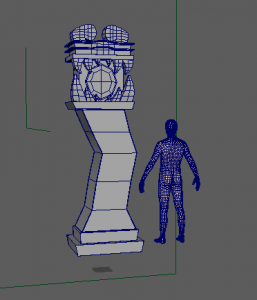
At this point I was halfway done the modelling process. I have some more details to add such as the inside of the pendulum, the clock hands, the eye detail, and so on. I referred to a mannequin model to see the scale of the clock. Although it was a little big, we decided to keep it as it is so I could contain the same scale measurements it has at the moment to keep myself on the right track. I can scale it down later on as we build the haunted house.


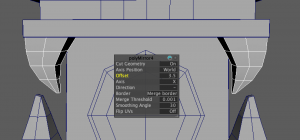
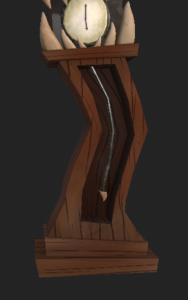
I used booleans – difference tool to cut into the inside of the clock case. So now I could add the pendulum inside.


I started to work on the little details of the clock such as the eyes at the top, the pendulum, and the clock hands. After a few more alterations, I would have finished modelling the clock here.


I was now able to start UV mapping the clock asset. I started with the more simple polys such as the base, as they layout into the usual cube foldout. More difficult polys to UV map were the round eye parts, the teeth, and the hour and minute hands on the clock.
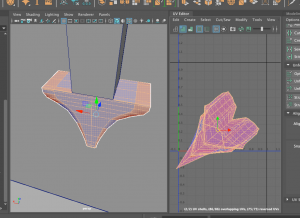

For example, I had the point of the hands attached to the long body part of the hand as I thought it would be okay as a full poly, however it was difficult to unfold into a regular UV in the editor. I tried modelling the hands though this time, the point was separate from the body. This made it much easier to find a way to cut the UV and display it correctly on the UV map.

In time, I had completed UV Mapping the grandfather clock. I assorted the UVs into multiple maps, which makes the model a UDIM – since its a bigger model, I wanted to preserve the UV tile layout for each material (eg. Wood, bones) and enable painting across tiles for Substance Painter.

I made a new file in Substance Painter with resolution 2048, and turned on UV tile workflow (UDIMs). I placed in my fbx of the clock and started to bake the mesh.
I liked how the model was looking, but I felt it needed a bit more of an irregular/wonky look to it. I got back into my Maya file and looked for what I could do to capture this visual.


I remembered my tutor Michael mentioning to our group that there is a tool called Lattice, in the Deform window, that allows me to warp the model I made while keeping its regular measurements and UVs in the same place as before. It almost acts like an illusion because when you move the Lattice base away from the model, it goes back to its regular shape. I used this tool on the clock to make the sides more wonky and lopsided. I was much more happy with this shape on the clock as a result.

I brought back the model into Substance Painter and redid the bake mesh process. I placed down some temporary materials onto my clock to get an idea of its style and colours first of all.
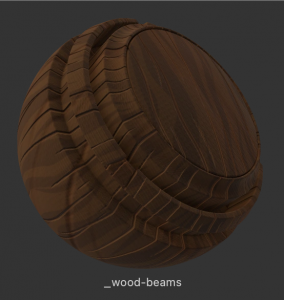


Matthew in our team gathered some wood materials and styles that we could use, so I imported them all into this project and tried them all on the clock to see which one I can develop more. I really like the material “wood_beams” it contained lots of simple details that fit well around the clock.

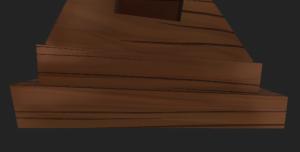


I started by using the paint layers and gathering colours to paint on bright contrasting browns, some highlights on the side of the wood, and dark brown shadows on each corner.
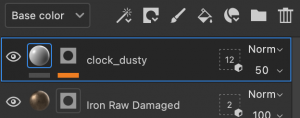
I painted the clock base with a rusty green colour, and a painty brush, to give the indication that this is an old, rusty clock. Here I also applied a dark Iron material onto the hands and gave it a grunge procedural texture on it using black mask – fill layer on the iron material.
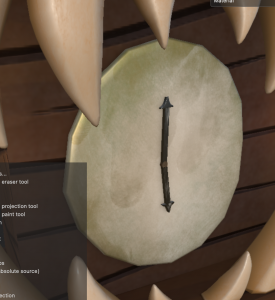
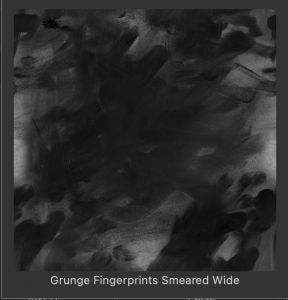
I also found a nice alpha material that created a dusty look with finger prints/marks all over it. I thought this was a great texture to place on as it enhances the idea that the clock is old but may have been touched by someone or something.

I gave the same look to the eyes of the clock. The copper material, the rusty paint, and the dusty texture.
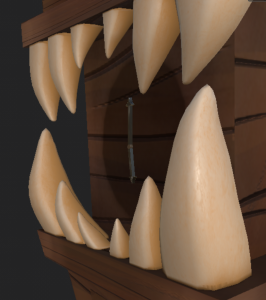
At first I placed the Bone Stylised material onto the teeth of the clock, but decided to keep it and work more on it. I knew the teeth would be challenging to get right as its very different from the rest of the clock, but I gathered reference to help me out.

I used this image to help picture the roughness and texture on an animals pair of teeth. I tried to capture the dark rough texture on the teeth.

I used a fill layer with a darker beige colour – black mask – fill layer with a grayscale called Grunge Concrete old. I played about with the options and got this texture on the left.

I had placed a grunge texture also onto the brass pendulum of the clock using the black mask option. I also added a blur filter to the layer to blend in the texture to the material.


Lastly, I used the dusty texture again this time on the wood of the clock, to enhance the dirtiness and oldness of the clock. It isn’t as noticeable but it is a subtle touch to the model that makes it unique.
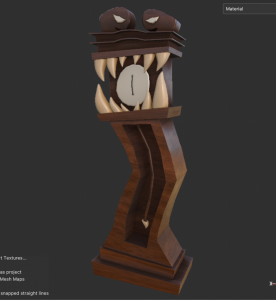
Eventually, this was my Grandfather clock finished. I enjoyed the process of making this clock! It was the first of the models I made so it could have some missing touches that I am adding to future models, when I experiment with new things. However it still stands out as it is. The clock will be an important asset to the Haunted Mansion.

Further on in the project, I made some alterations to the Grandfather clock that eventually made the piece stronger. We presented a short presentation on how our projects are coming along, and I showcased my scenes and some practice cinematic shots for the class. I got good feedback and some ideas for improvement. They suggested I could build the Grandfather clock with more structure, and alternations in the wood placing.

I went back into Maya to add details like a frame for the clock and a backing for the frame. I brought this new model into substance and placed my smart materials from the past model, onto this model. From here I was able to change up the wood placement on the base of the clock, from the flat, plank parts. This made the Grandfather clock look more realistic, as it includes real life logic to how a grandfather clock is built.
Before —- After

The clock is now more visually interesting and pleasing to look at, from the new iron pendulum, to the wood placement, to the frame of the clock. I mentioned beforehand the clock may have had some missing touches that I would have added to my other assets, as soon as I got used to my workflow. Now I feel the clock is more suitable among the other assets with this upgrade.