MP Production
Asset Building
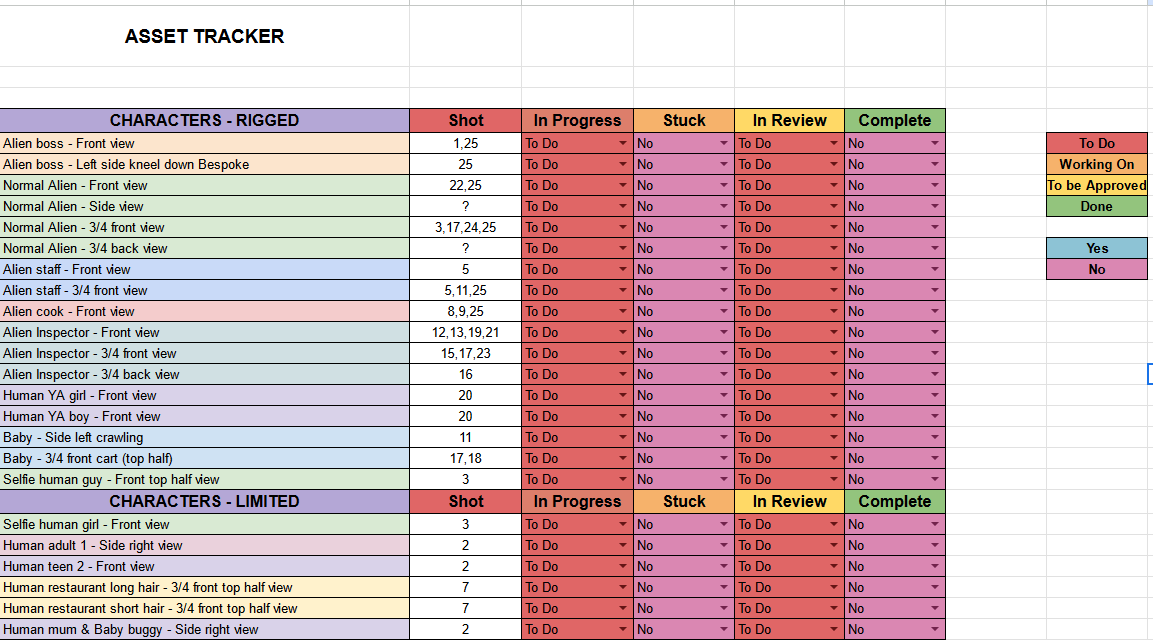
Before I started any major asset building, I set up an asset tracker to keep record of every asset I need, and what progress they are in. This helped me condense the amount of work I need to produce, taking out unnecessary assets, and adding other variants after reviewing the animatic.
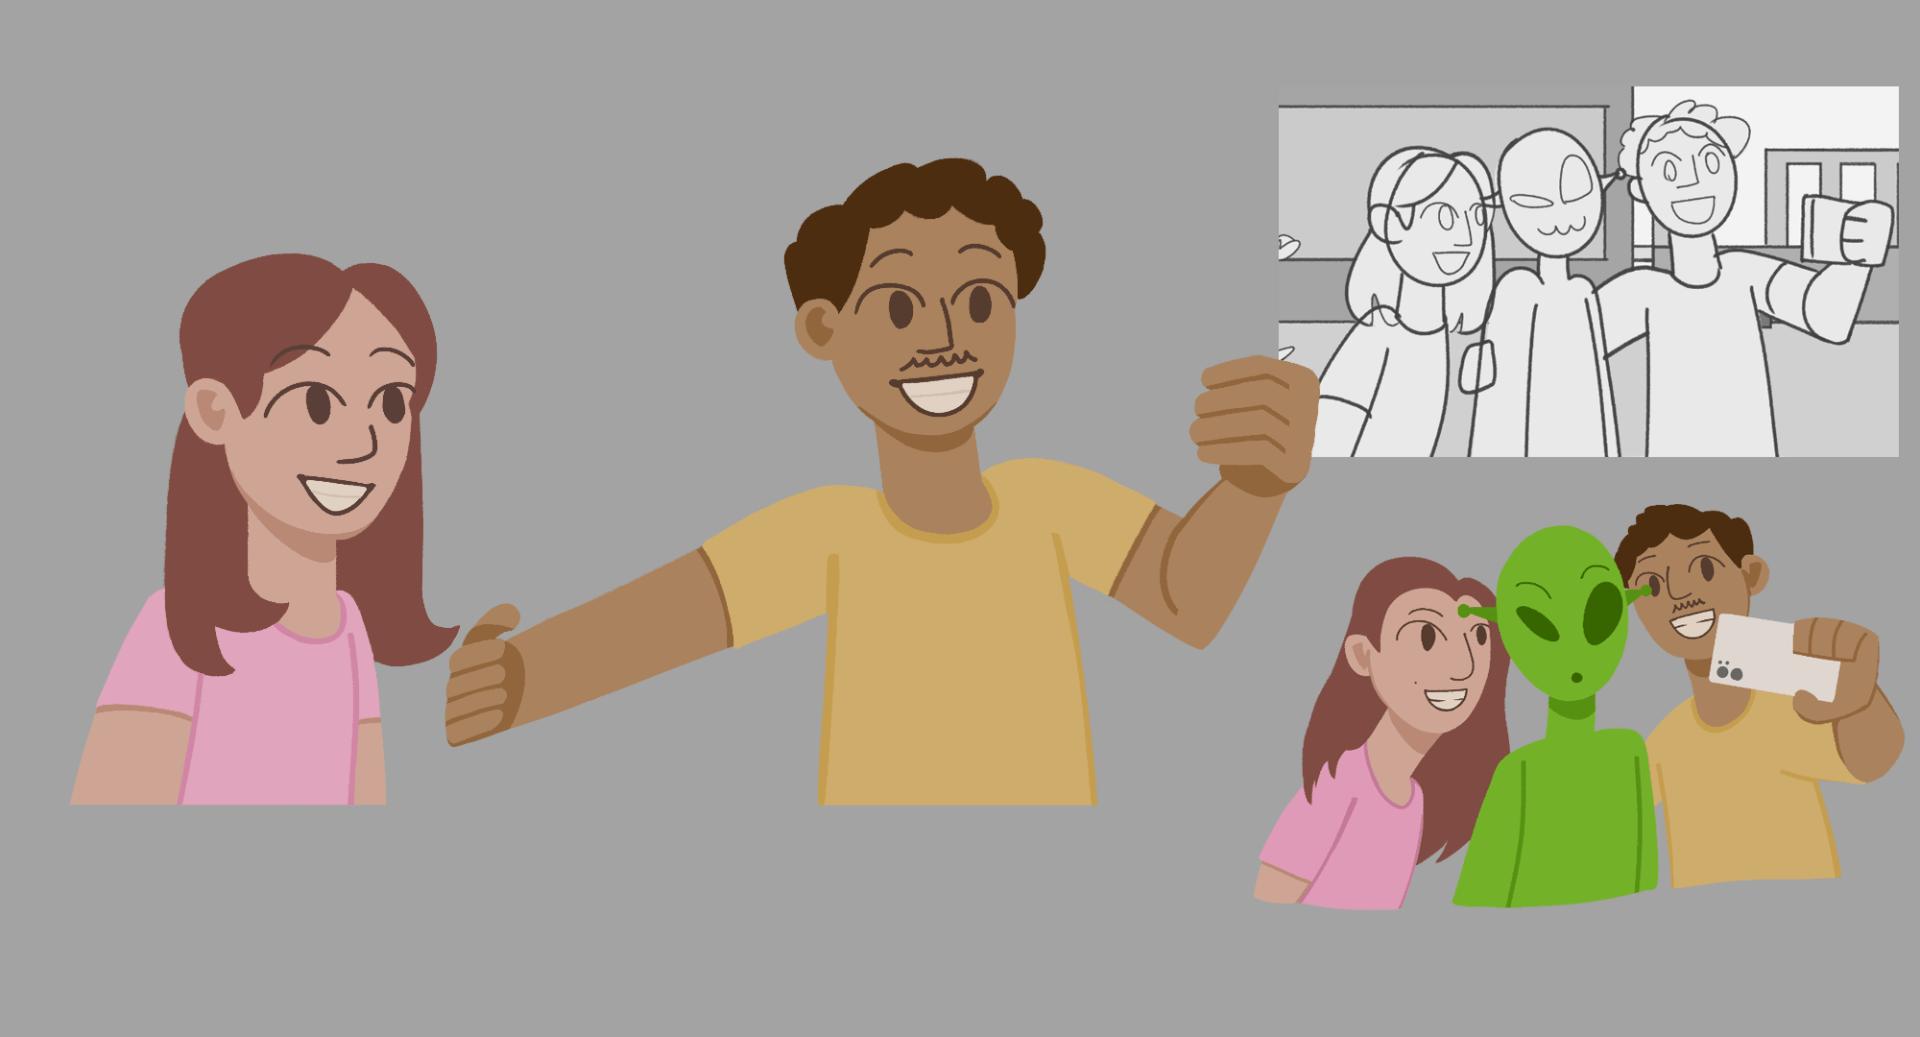
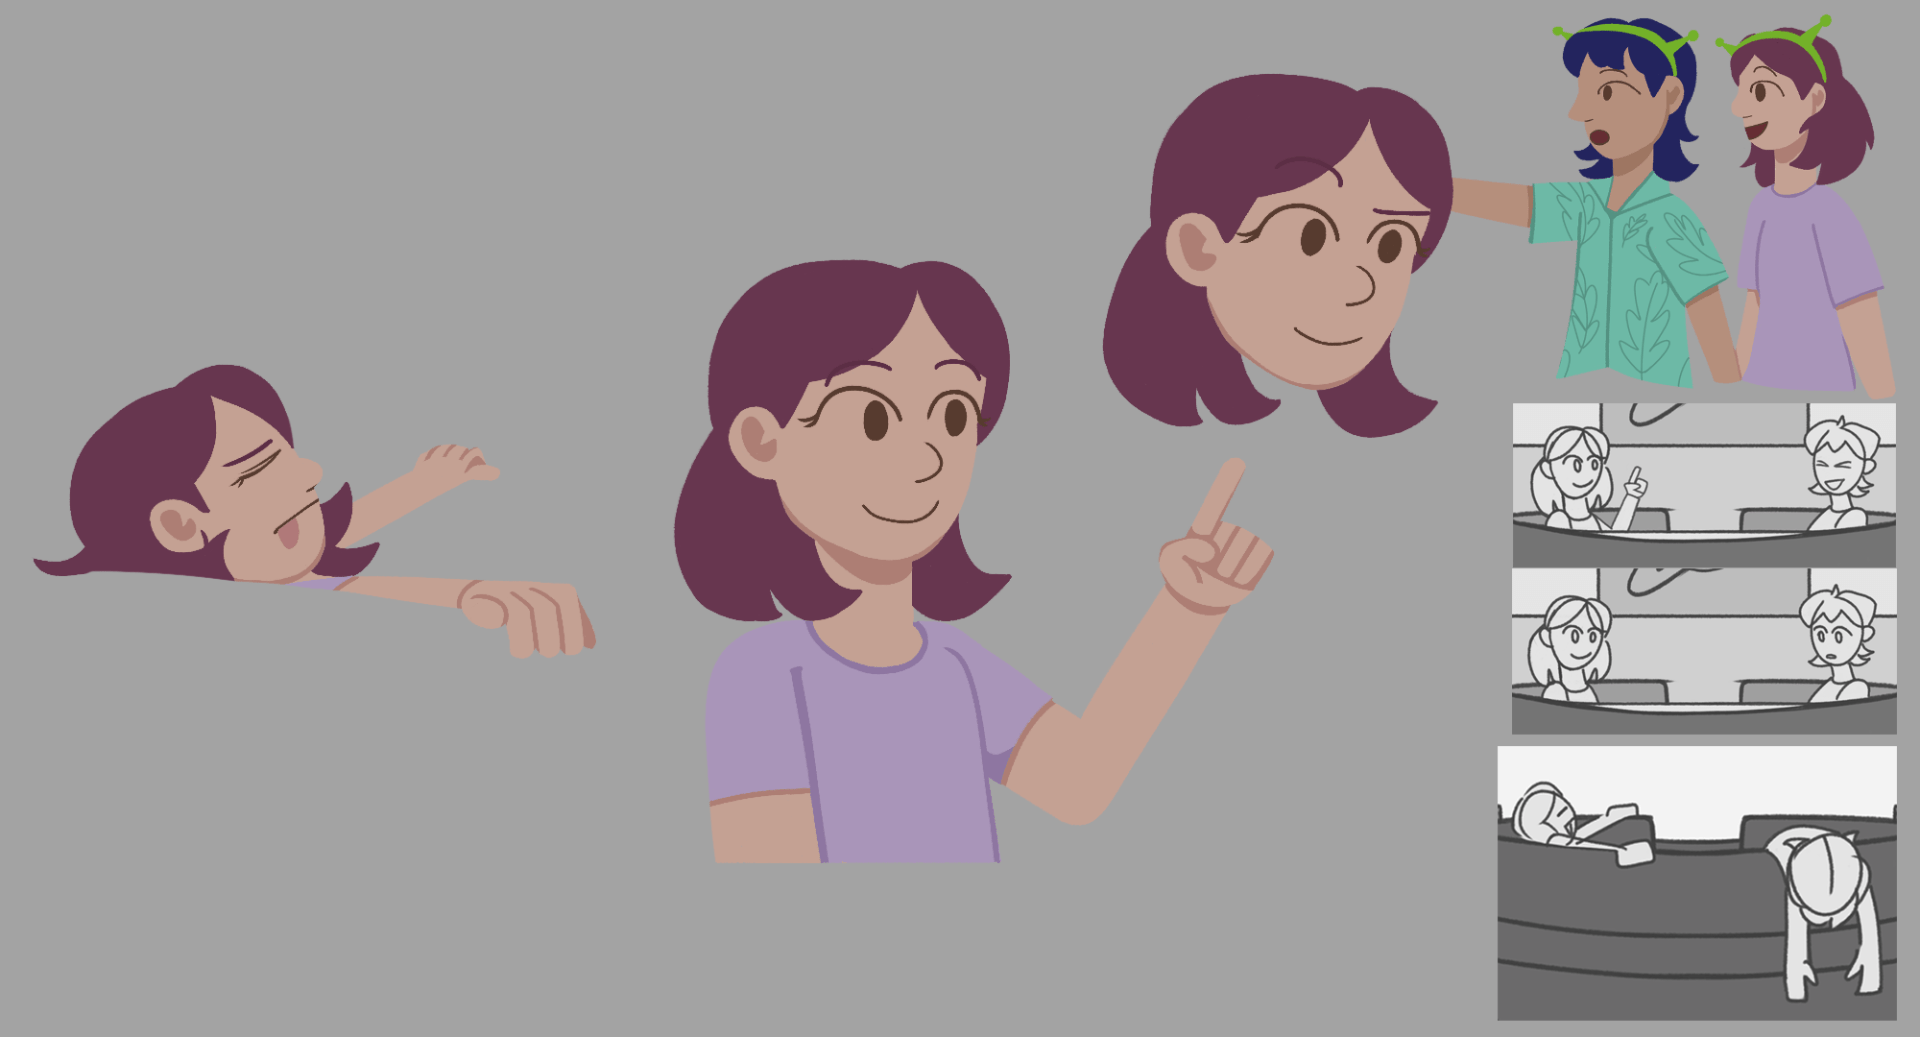
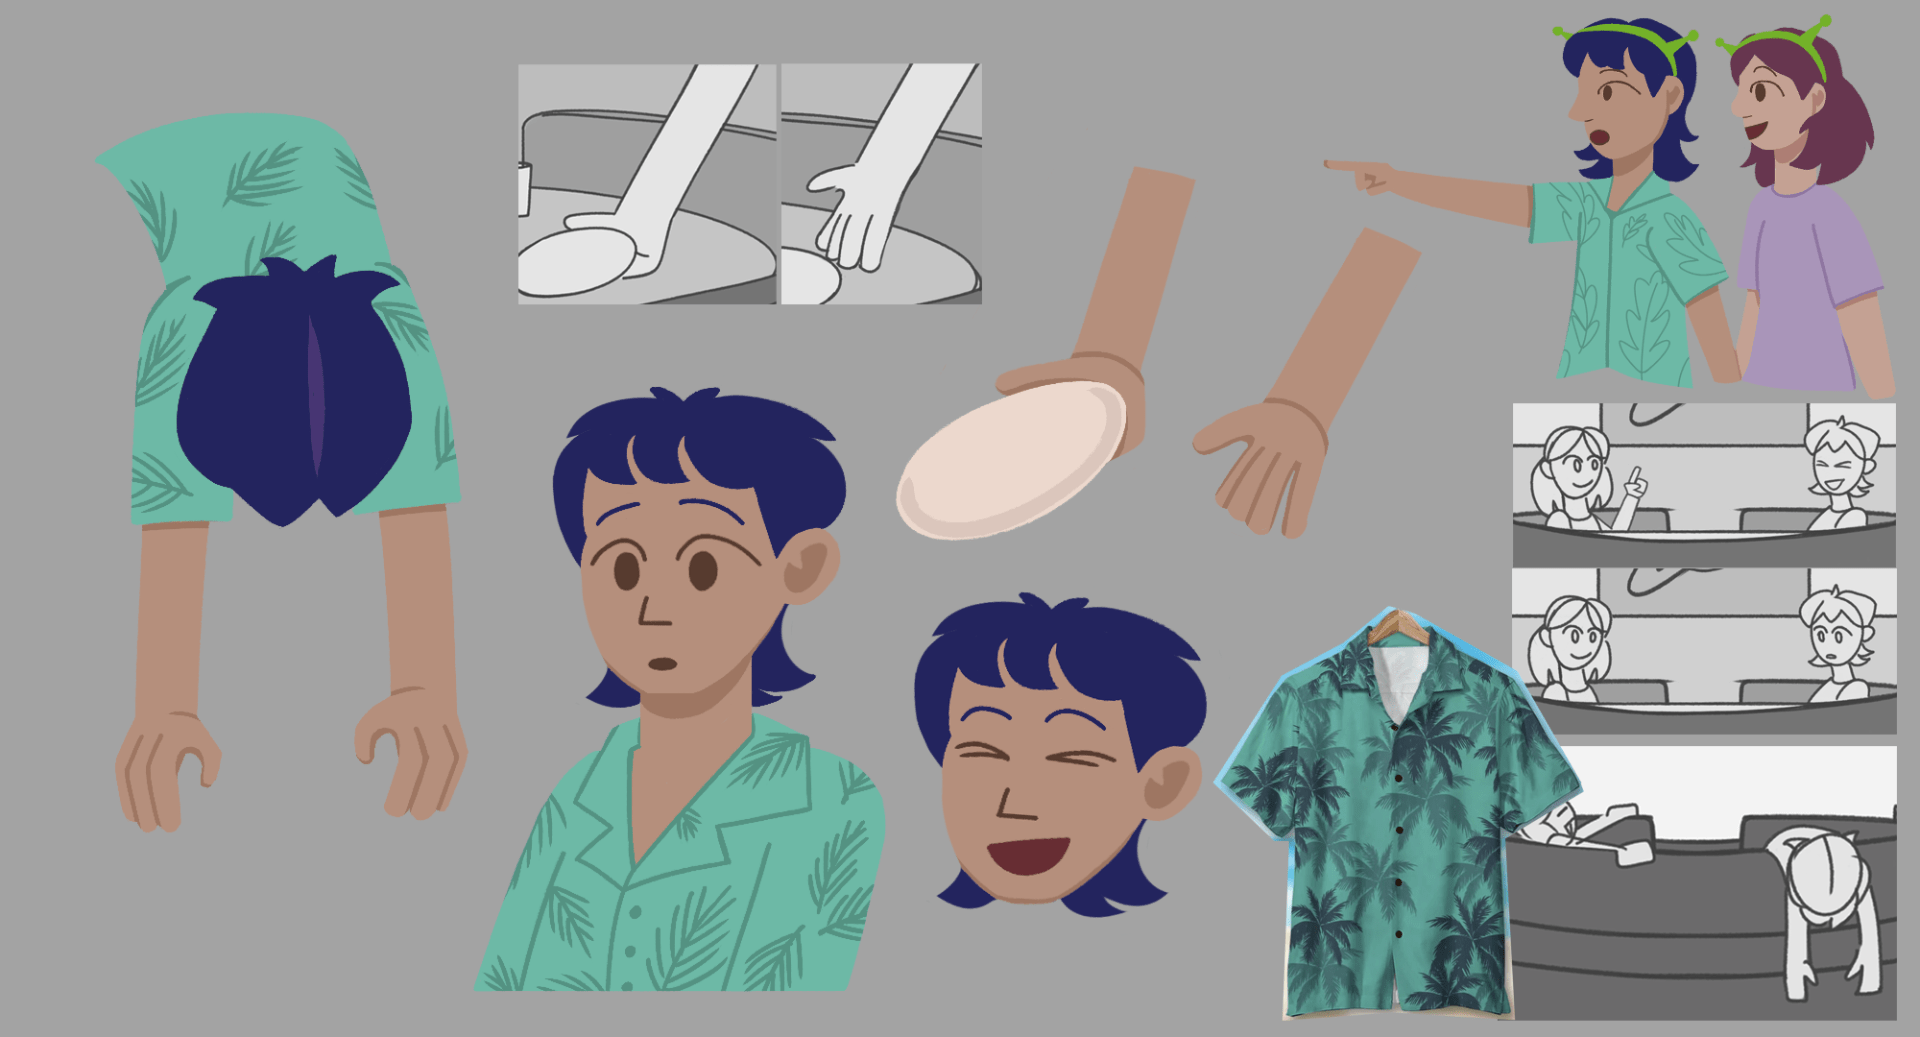
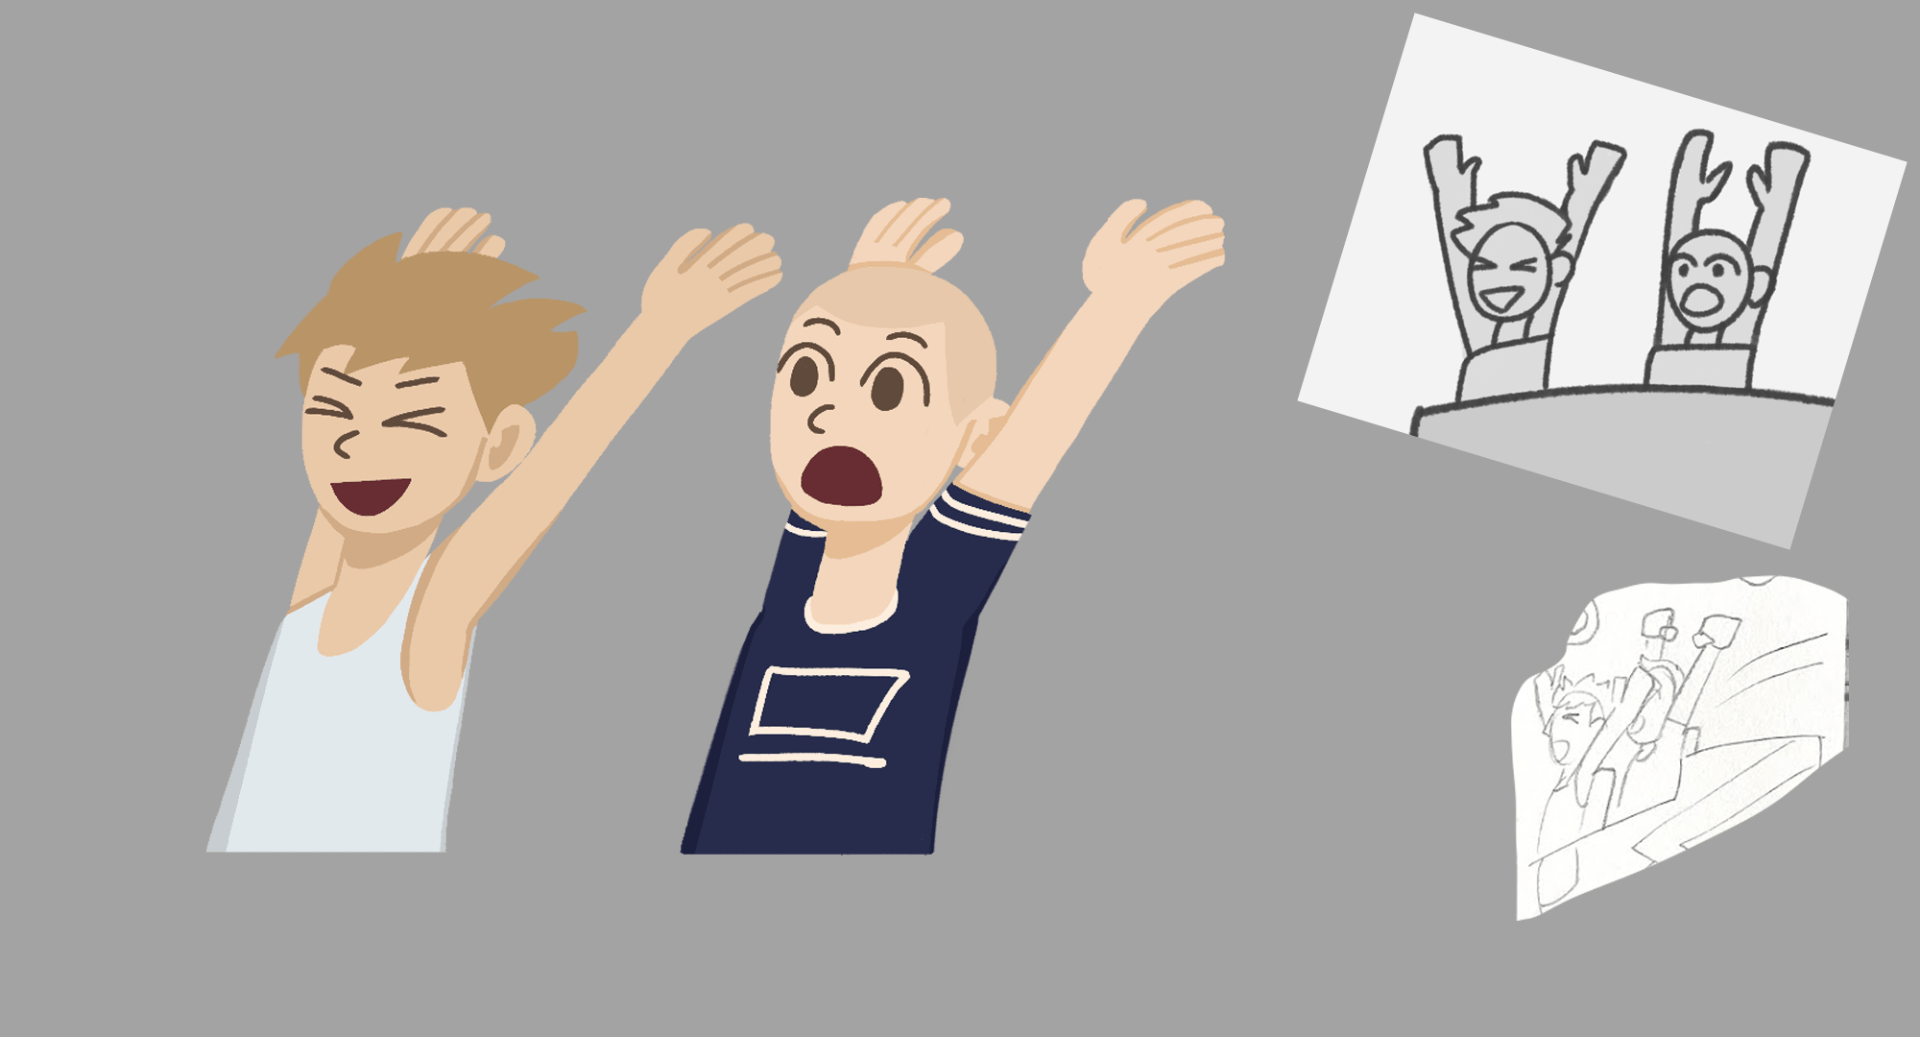
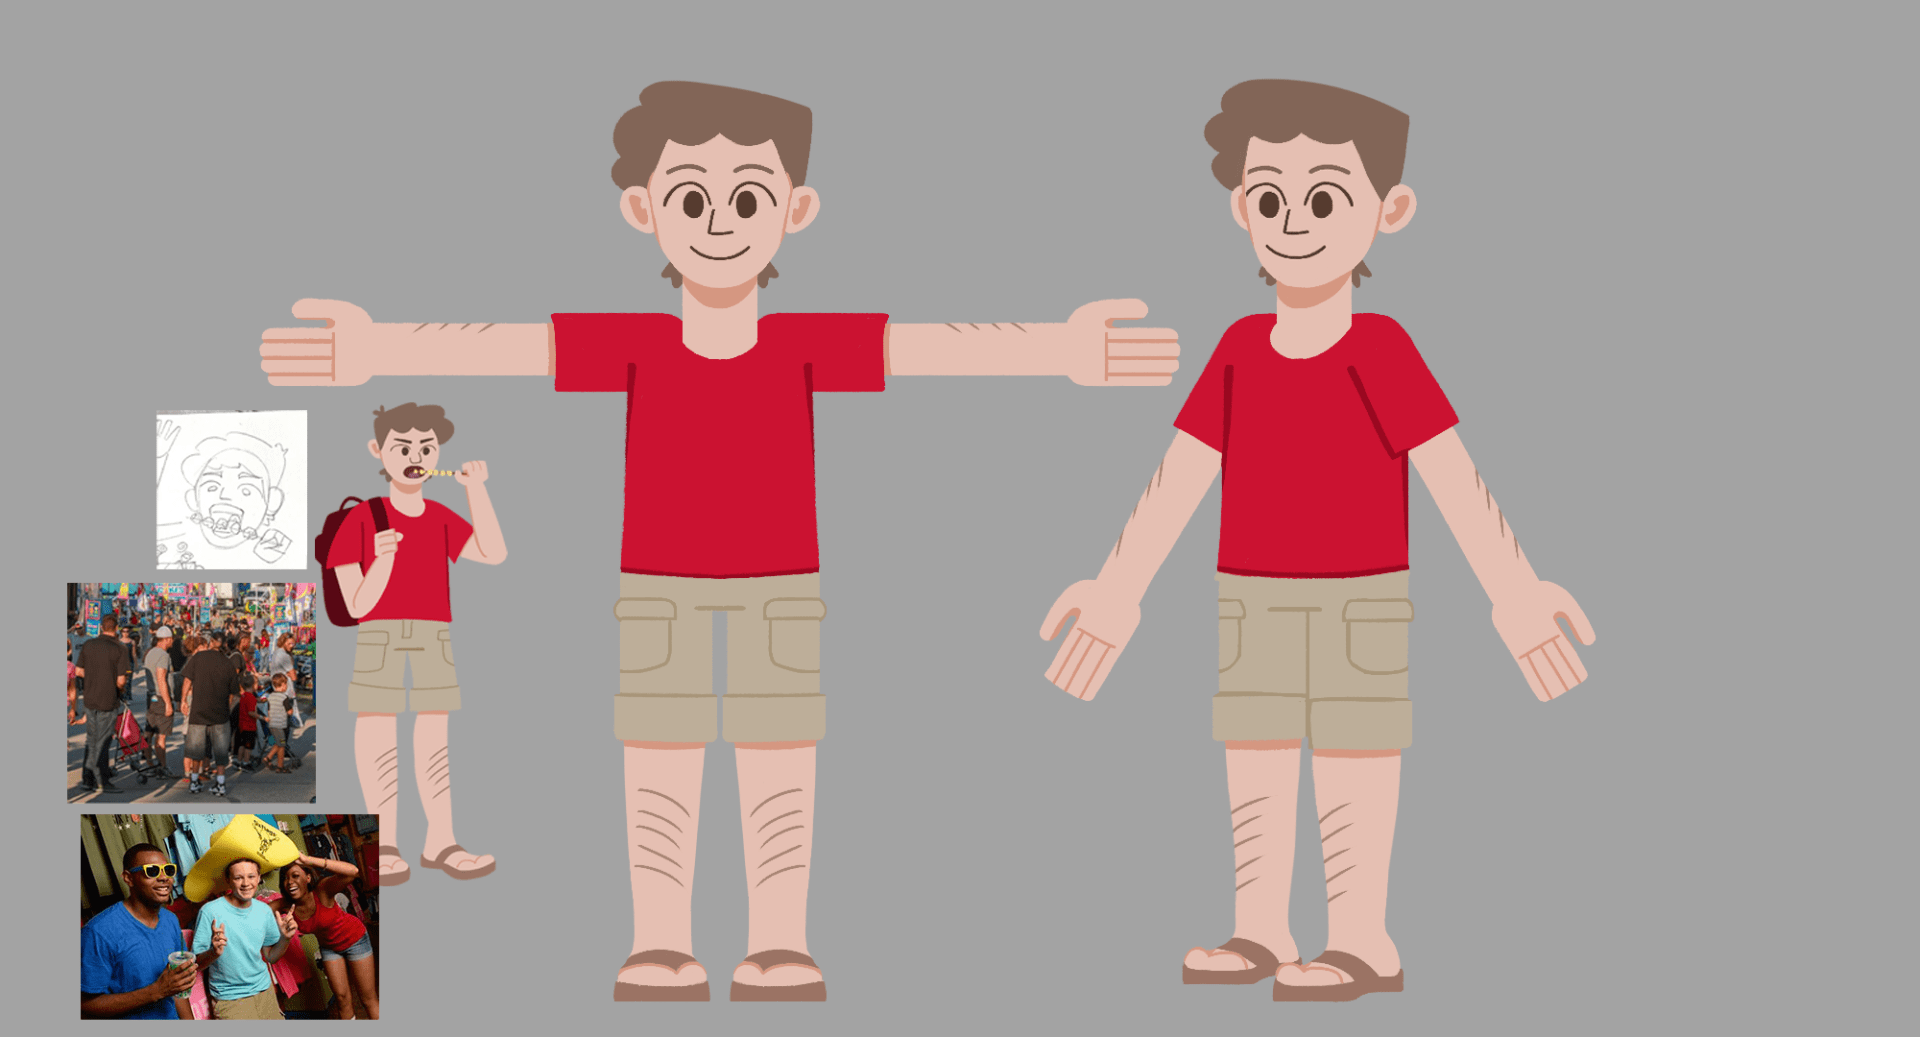
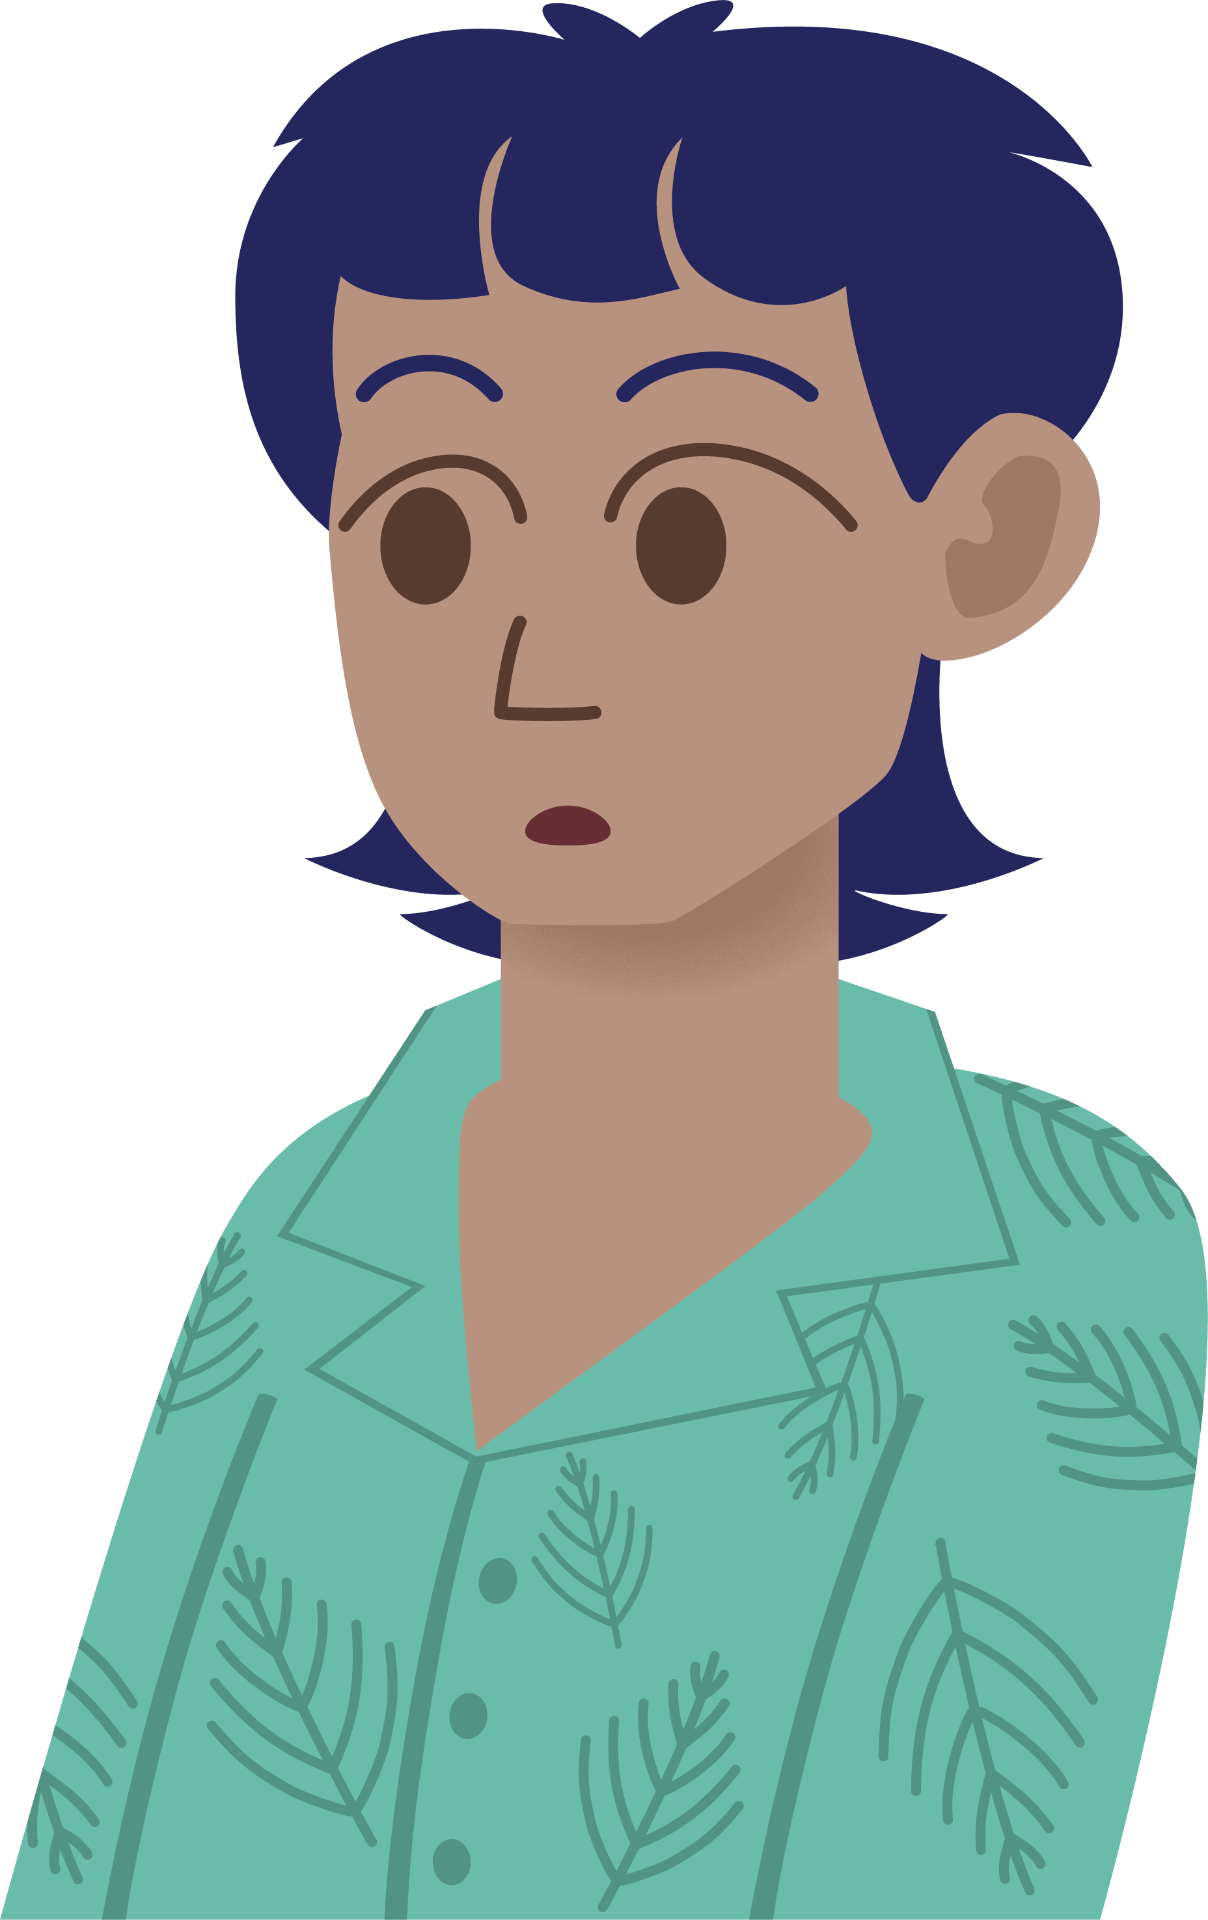
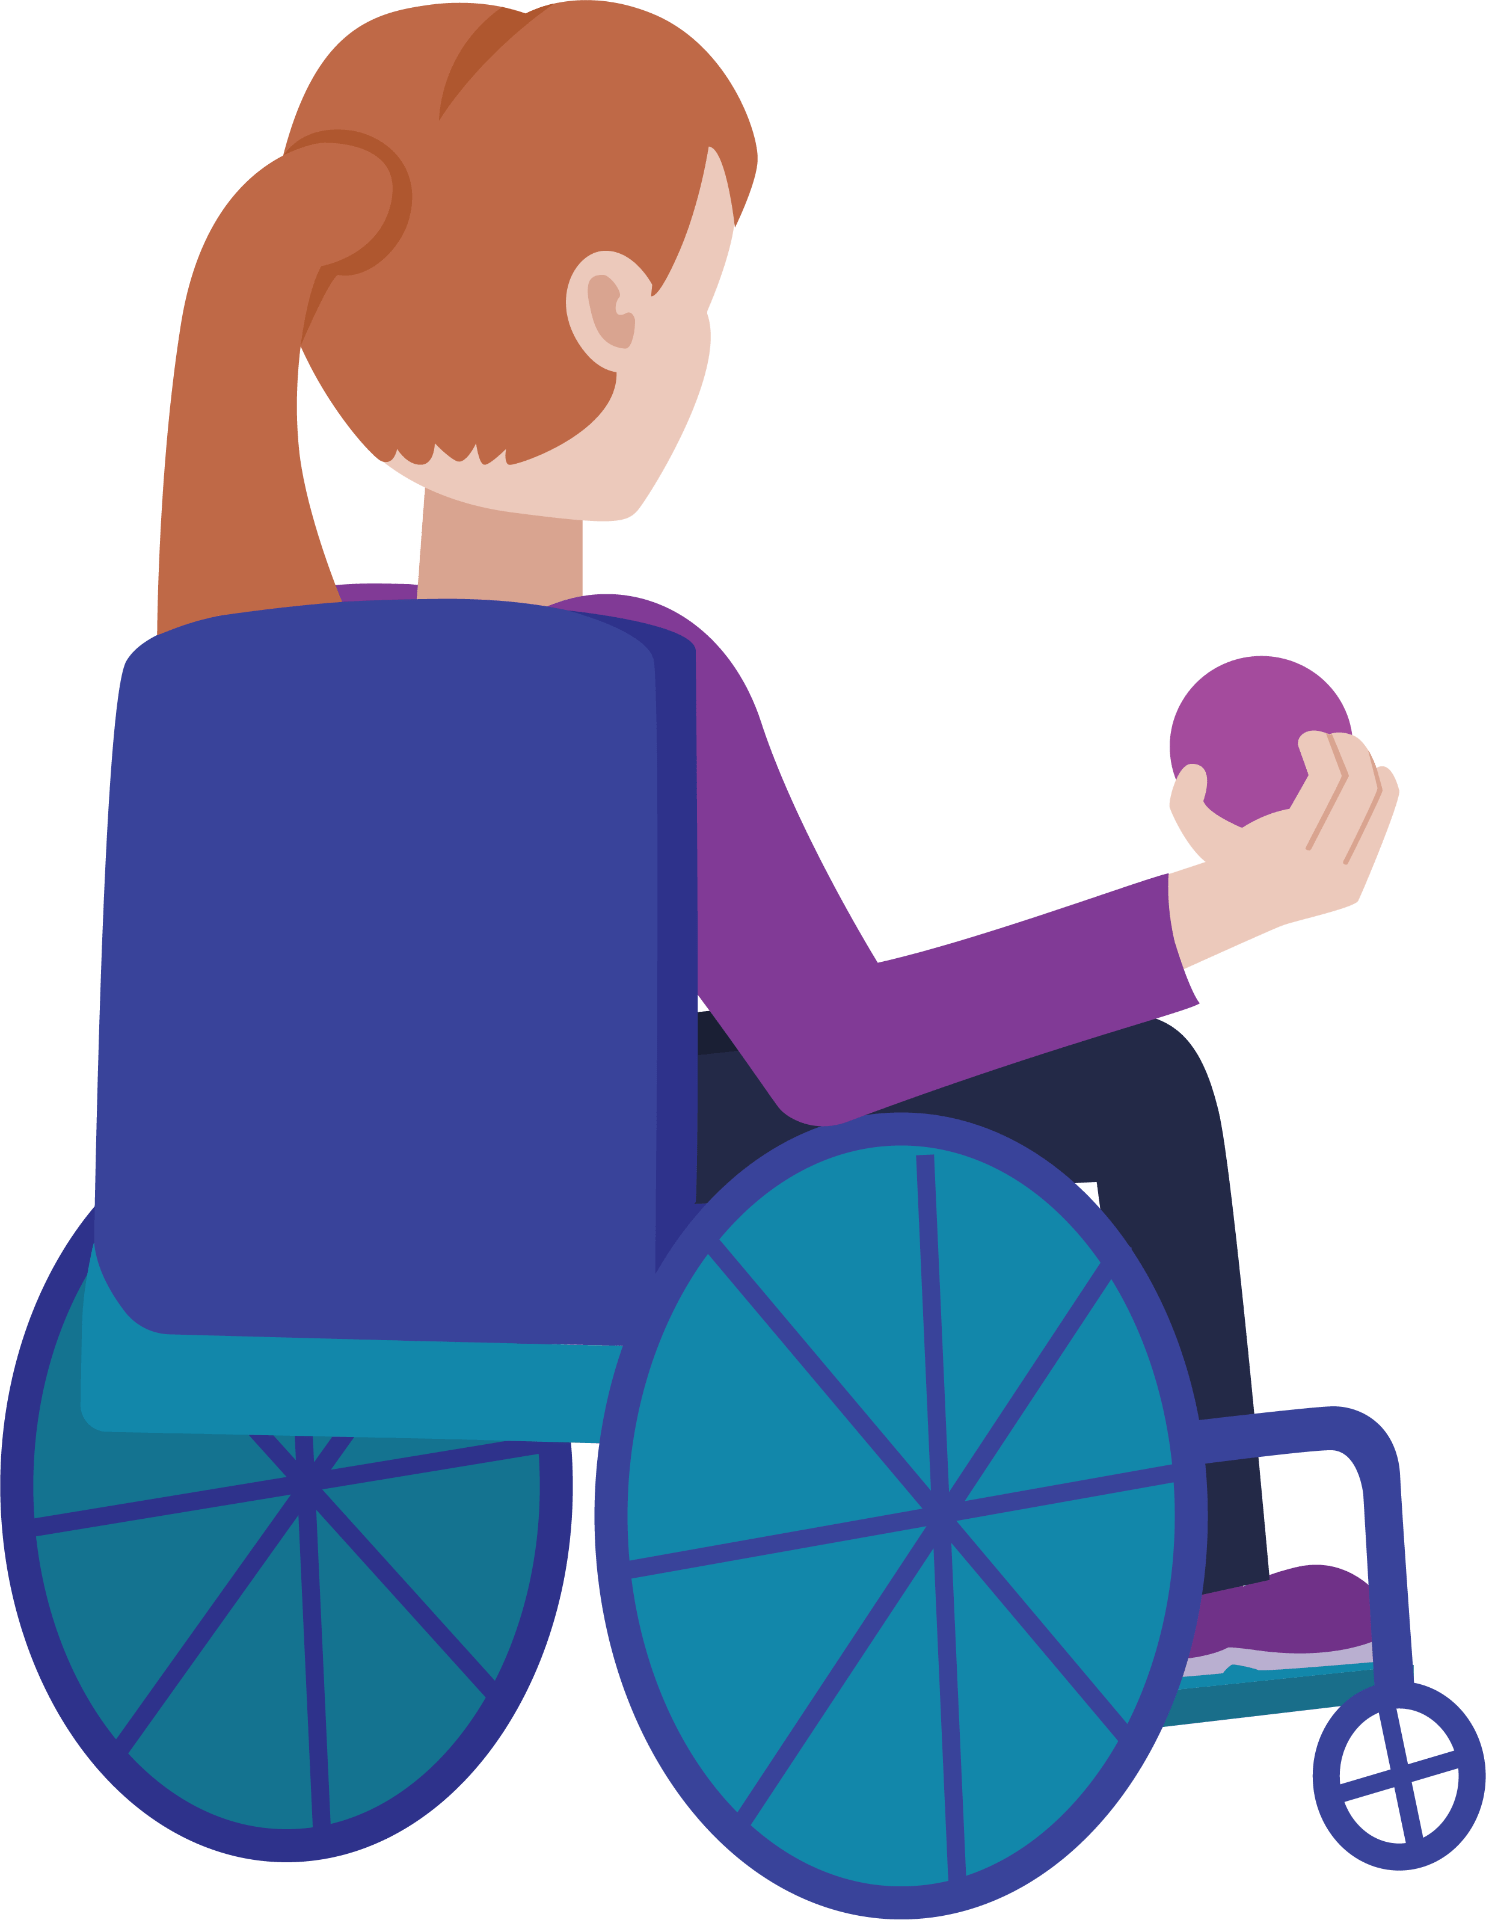
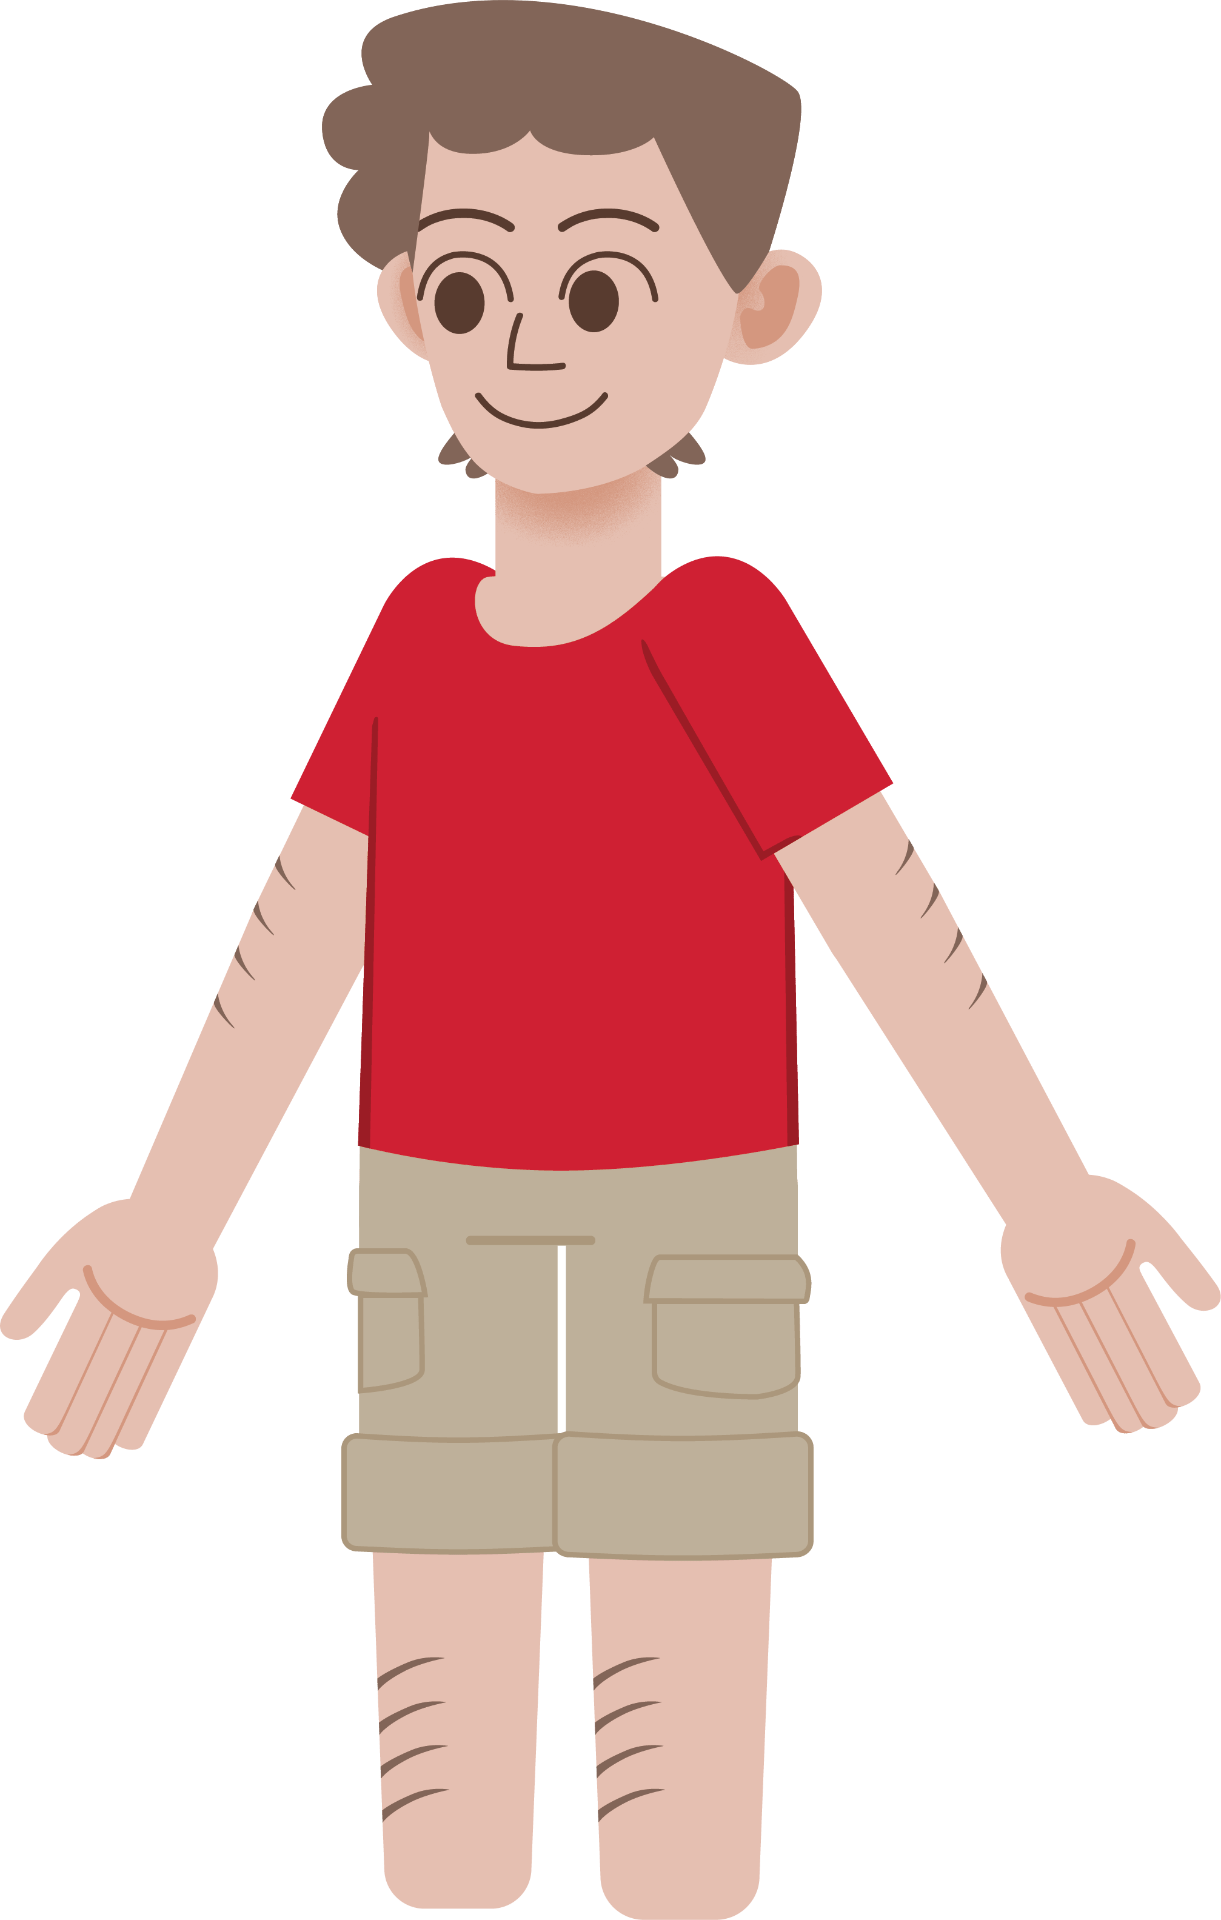
For the human characters of the film, they require key art to establish posing, colour schemes and finalised design. This will be useful when I bring the images into Illustrator to make either their static asset, or position to rig in AE.
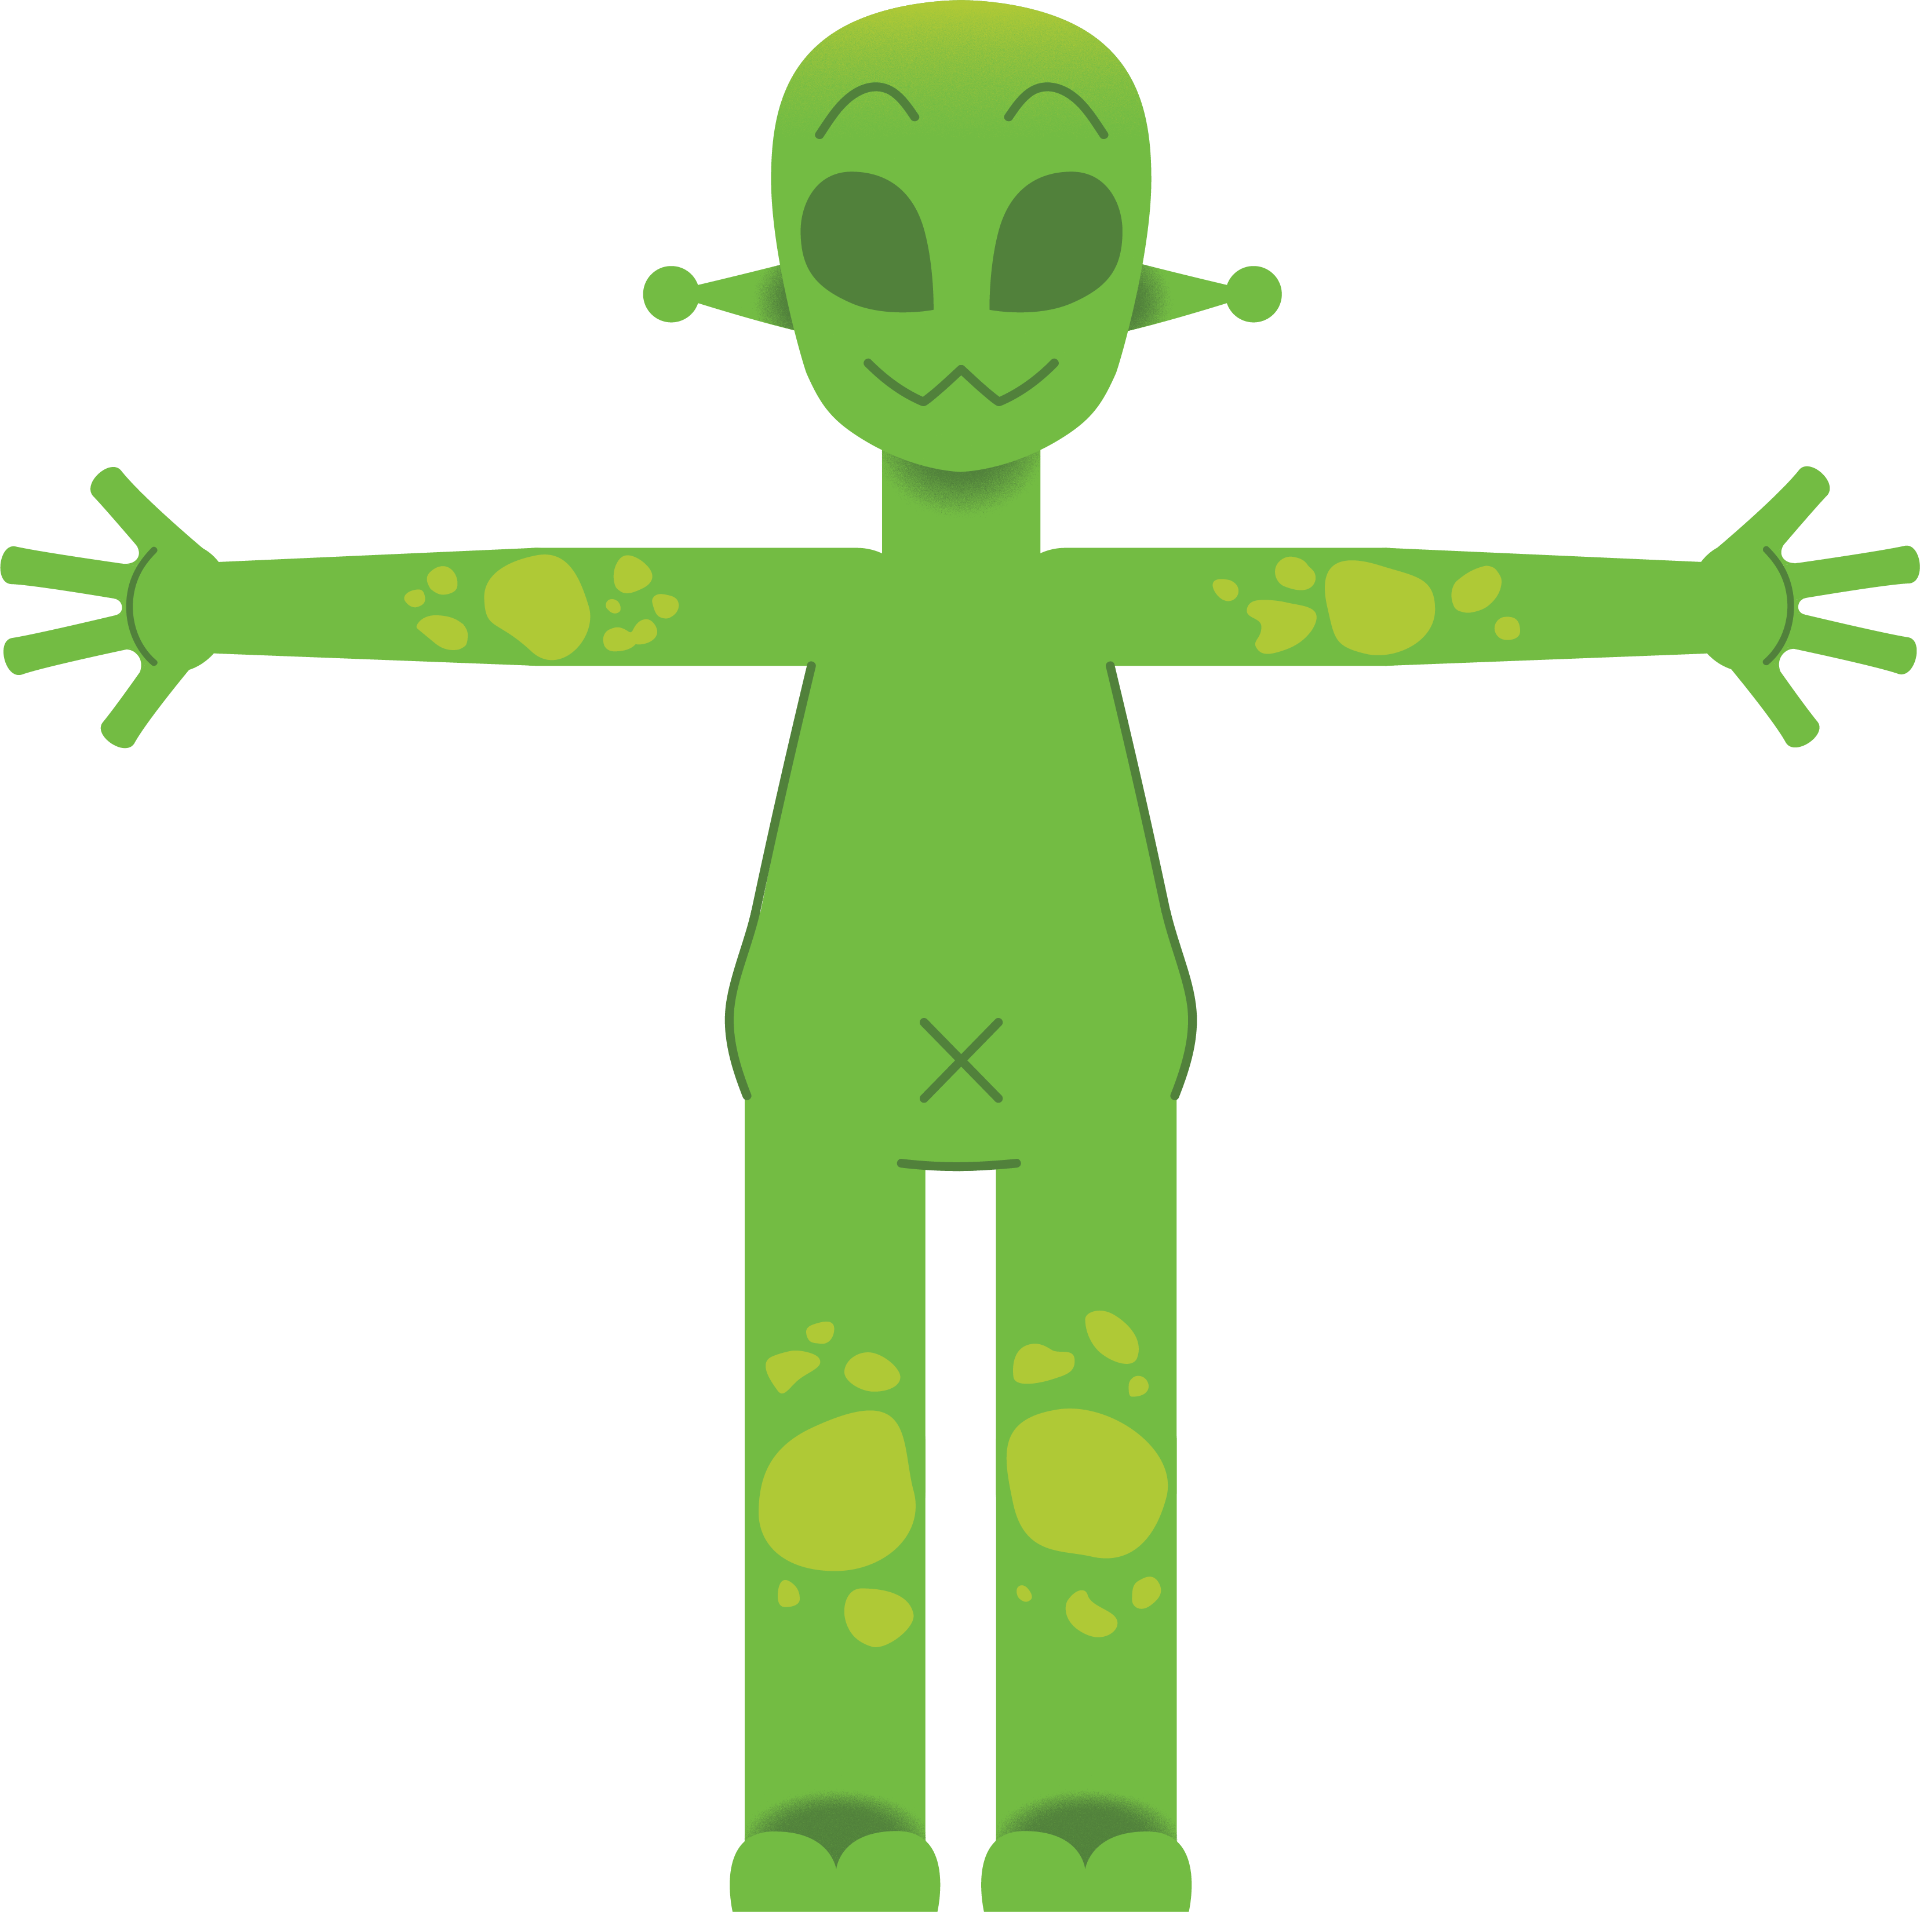

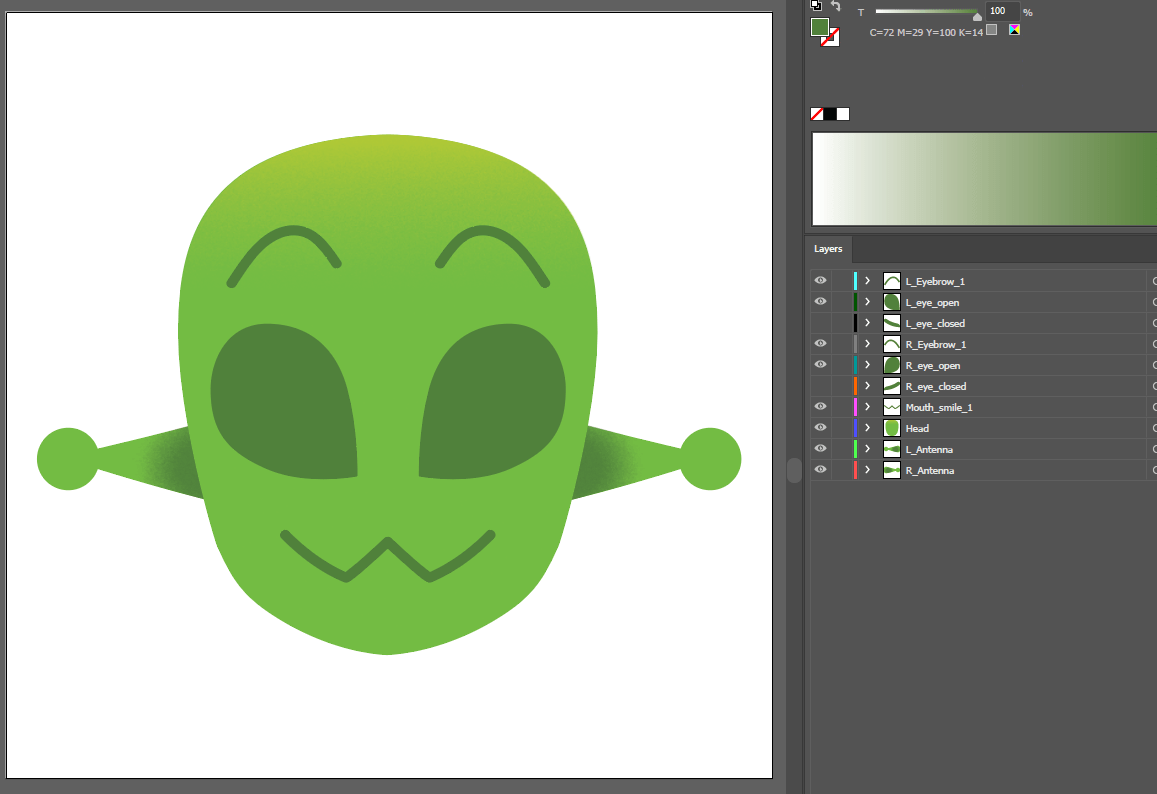
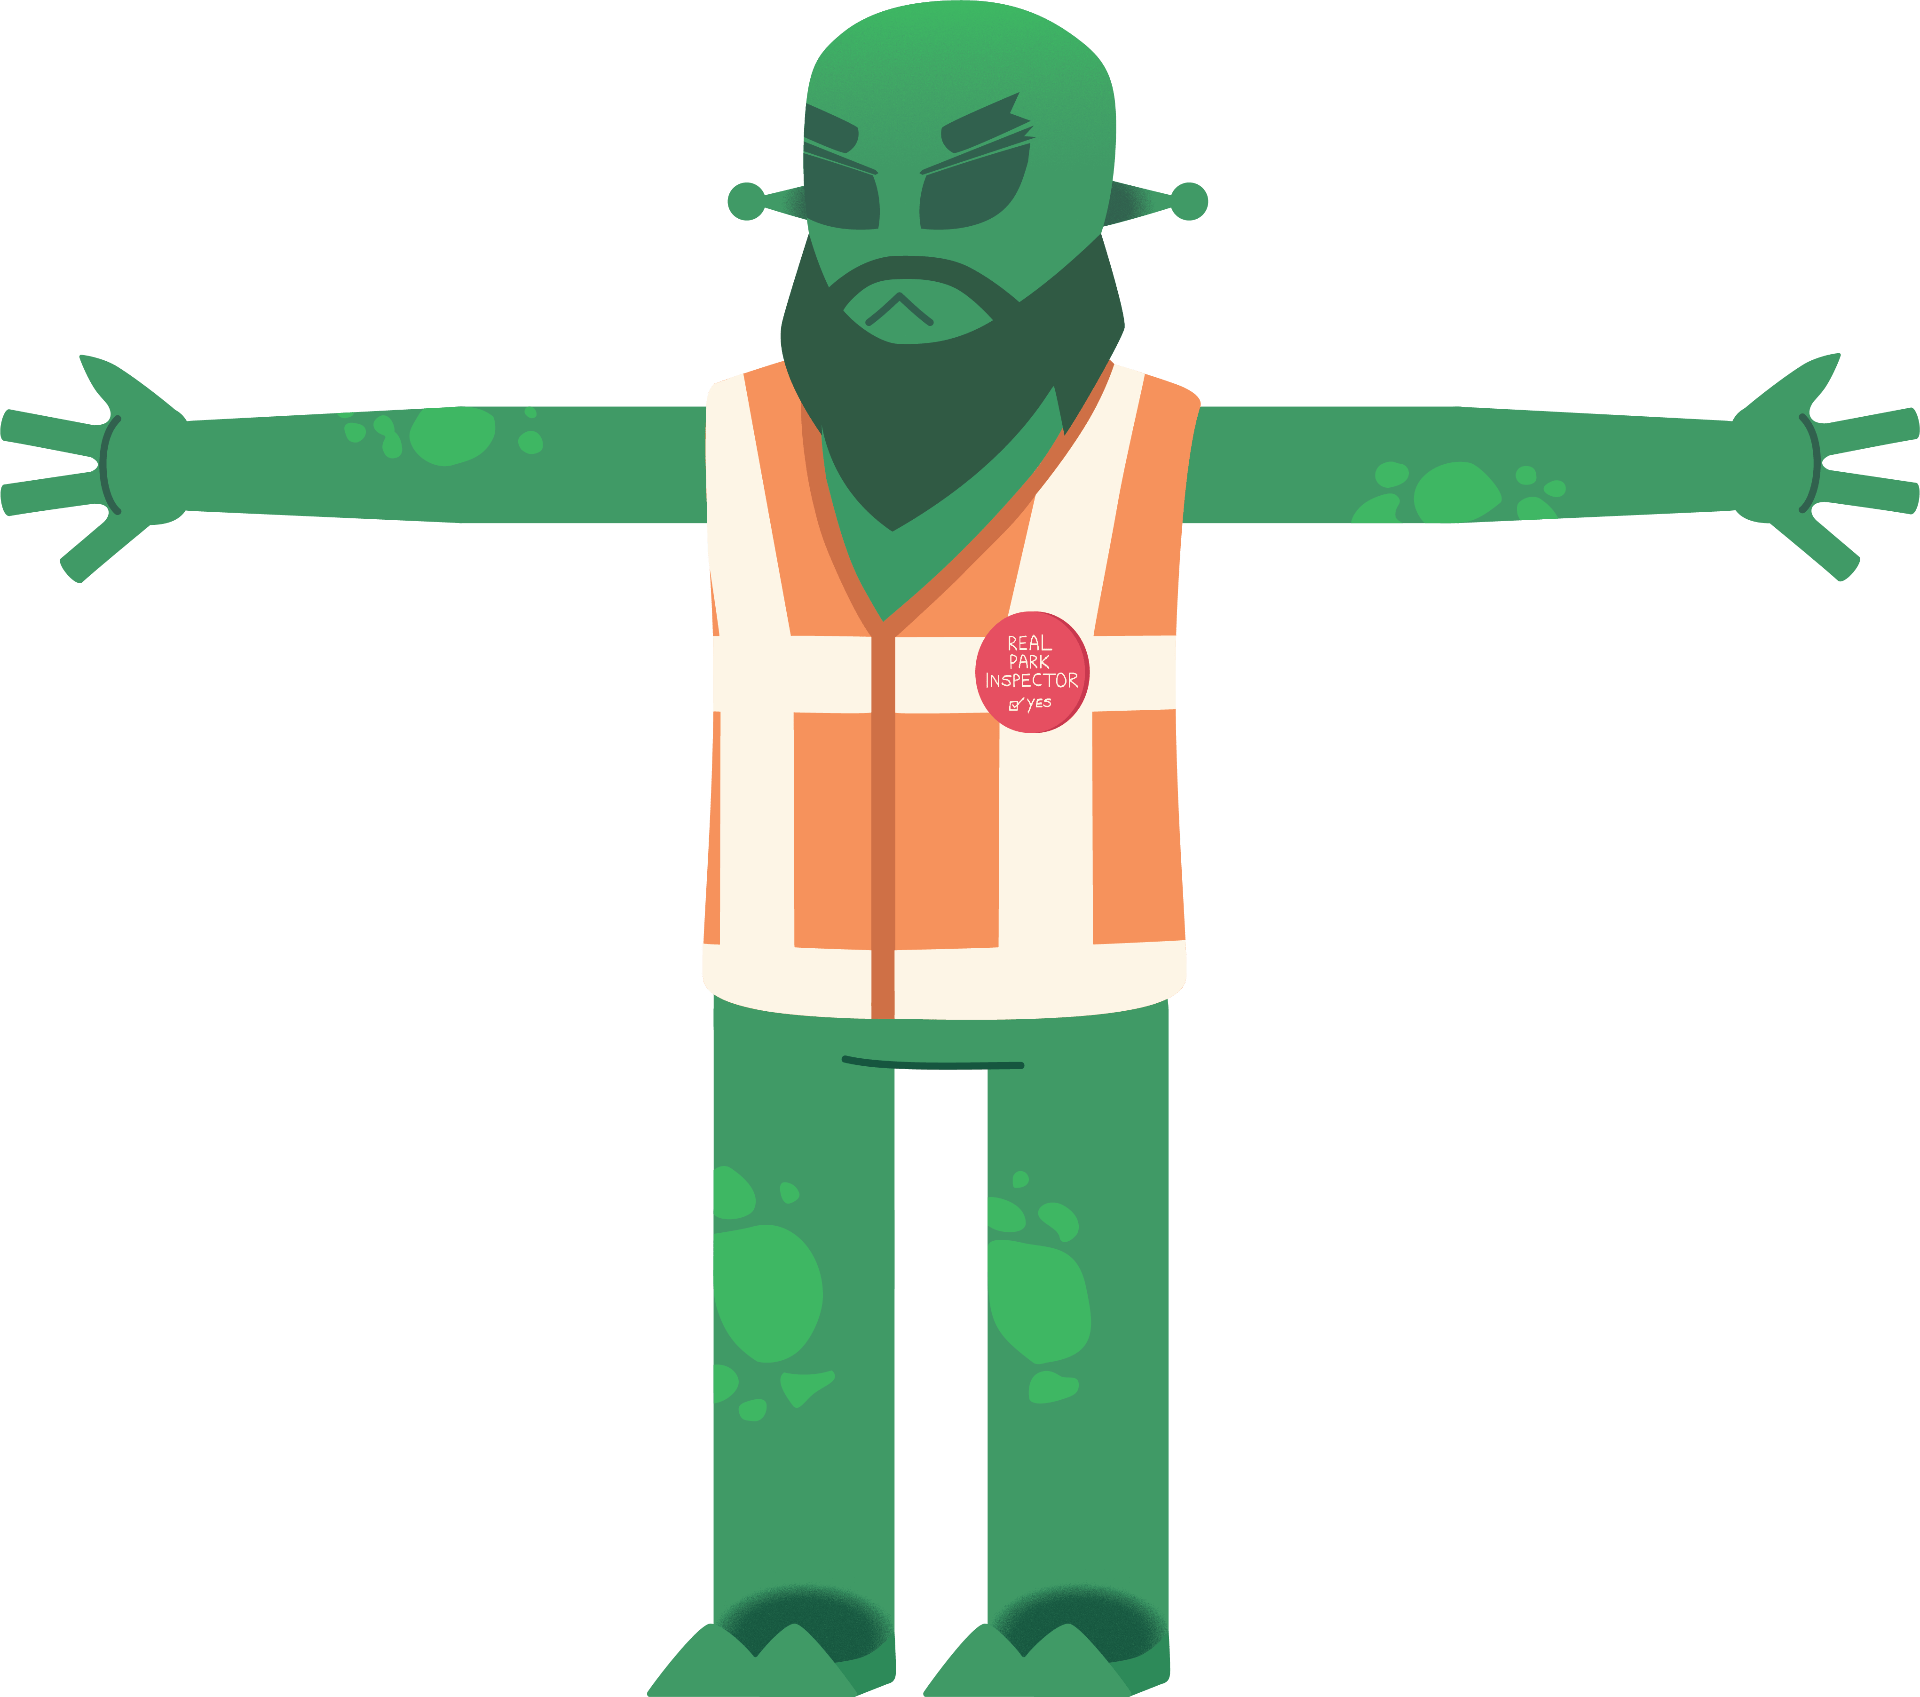
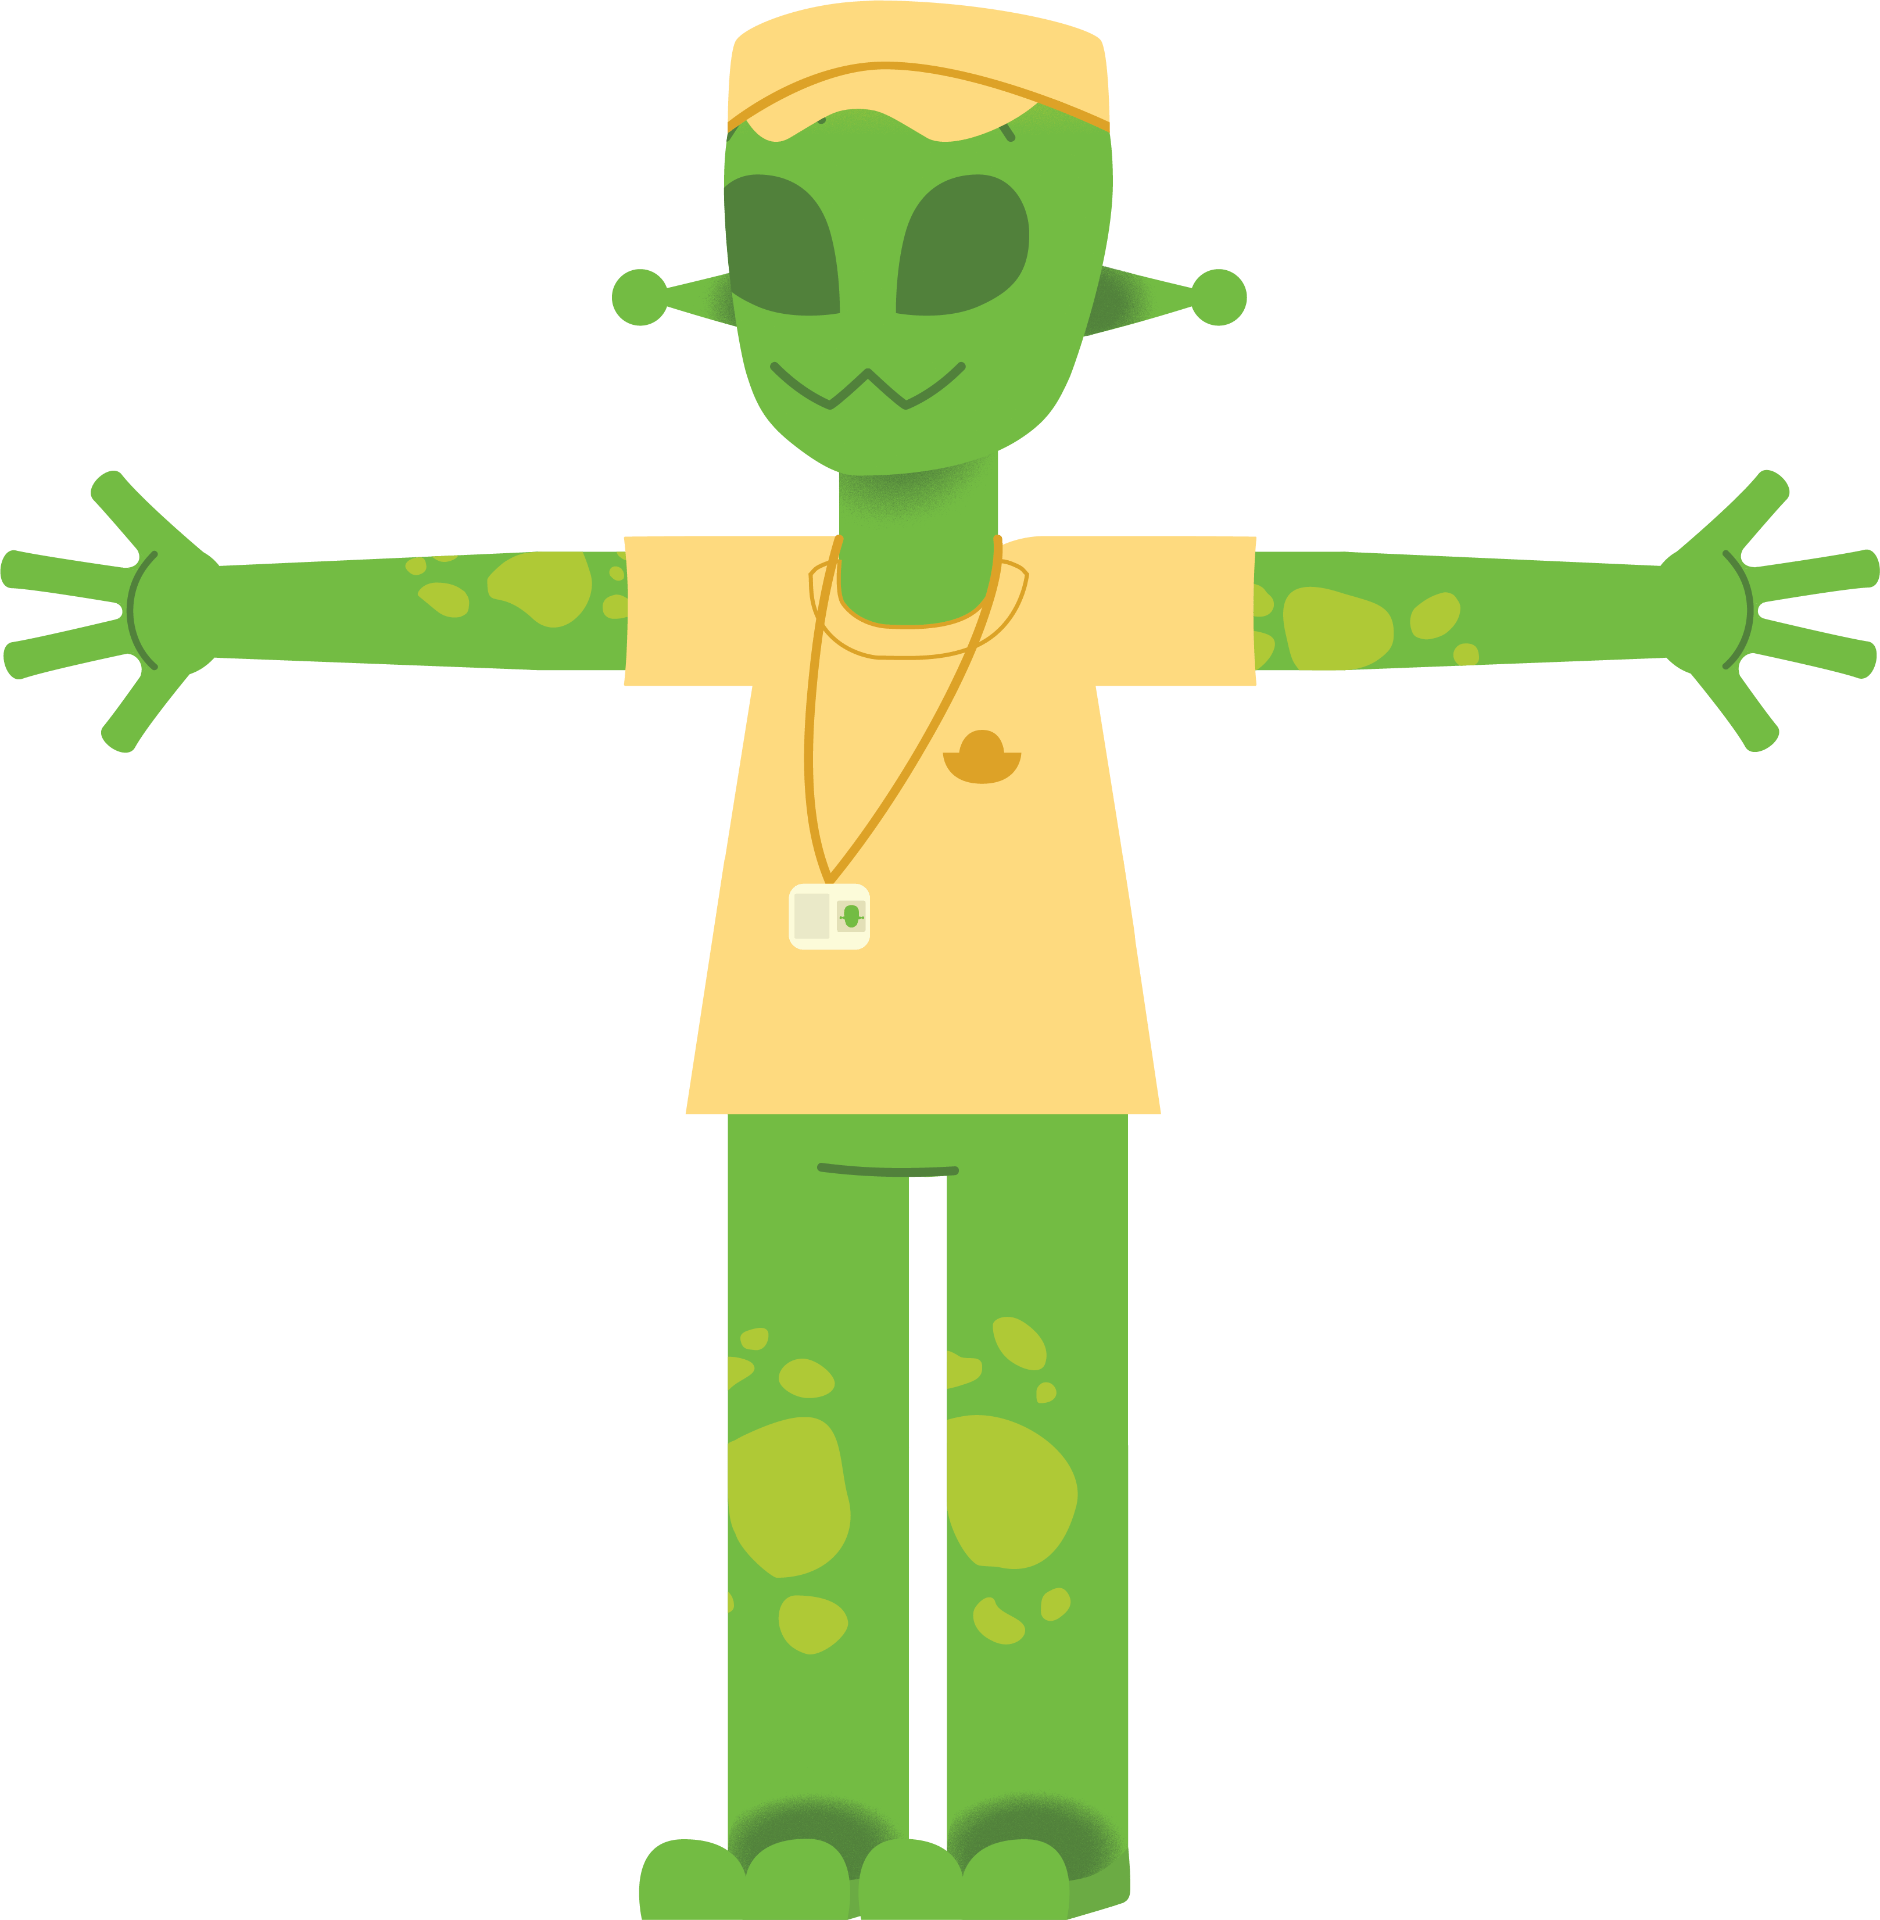
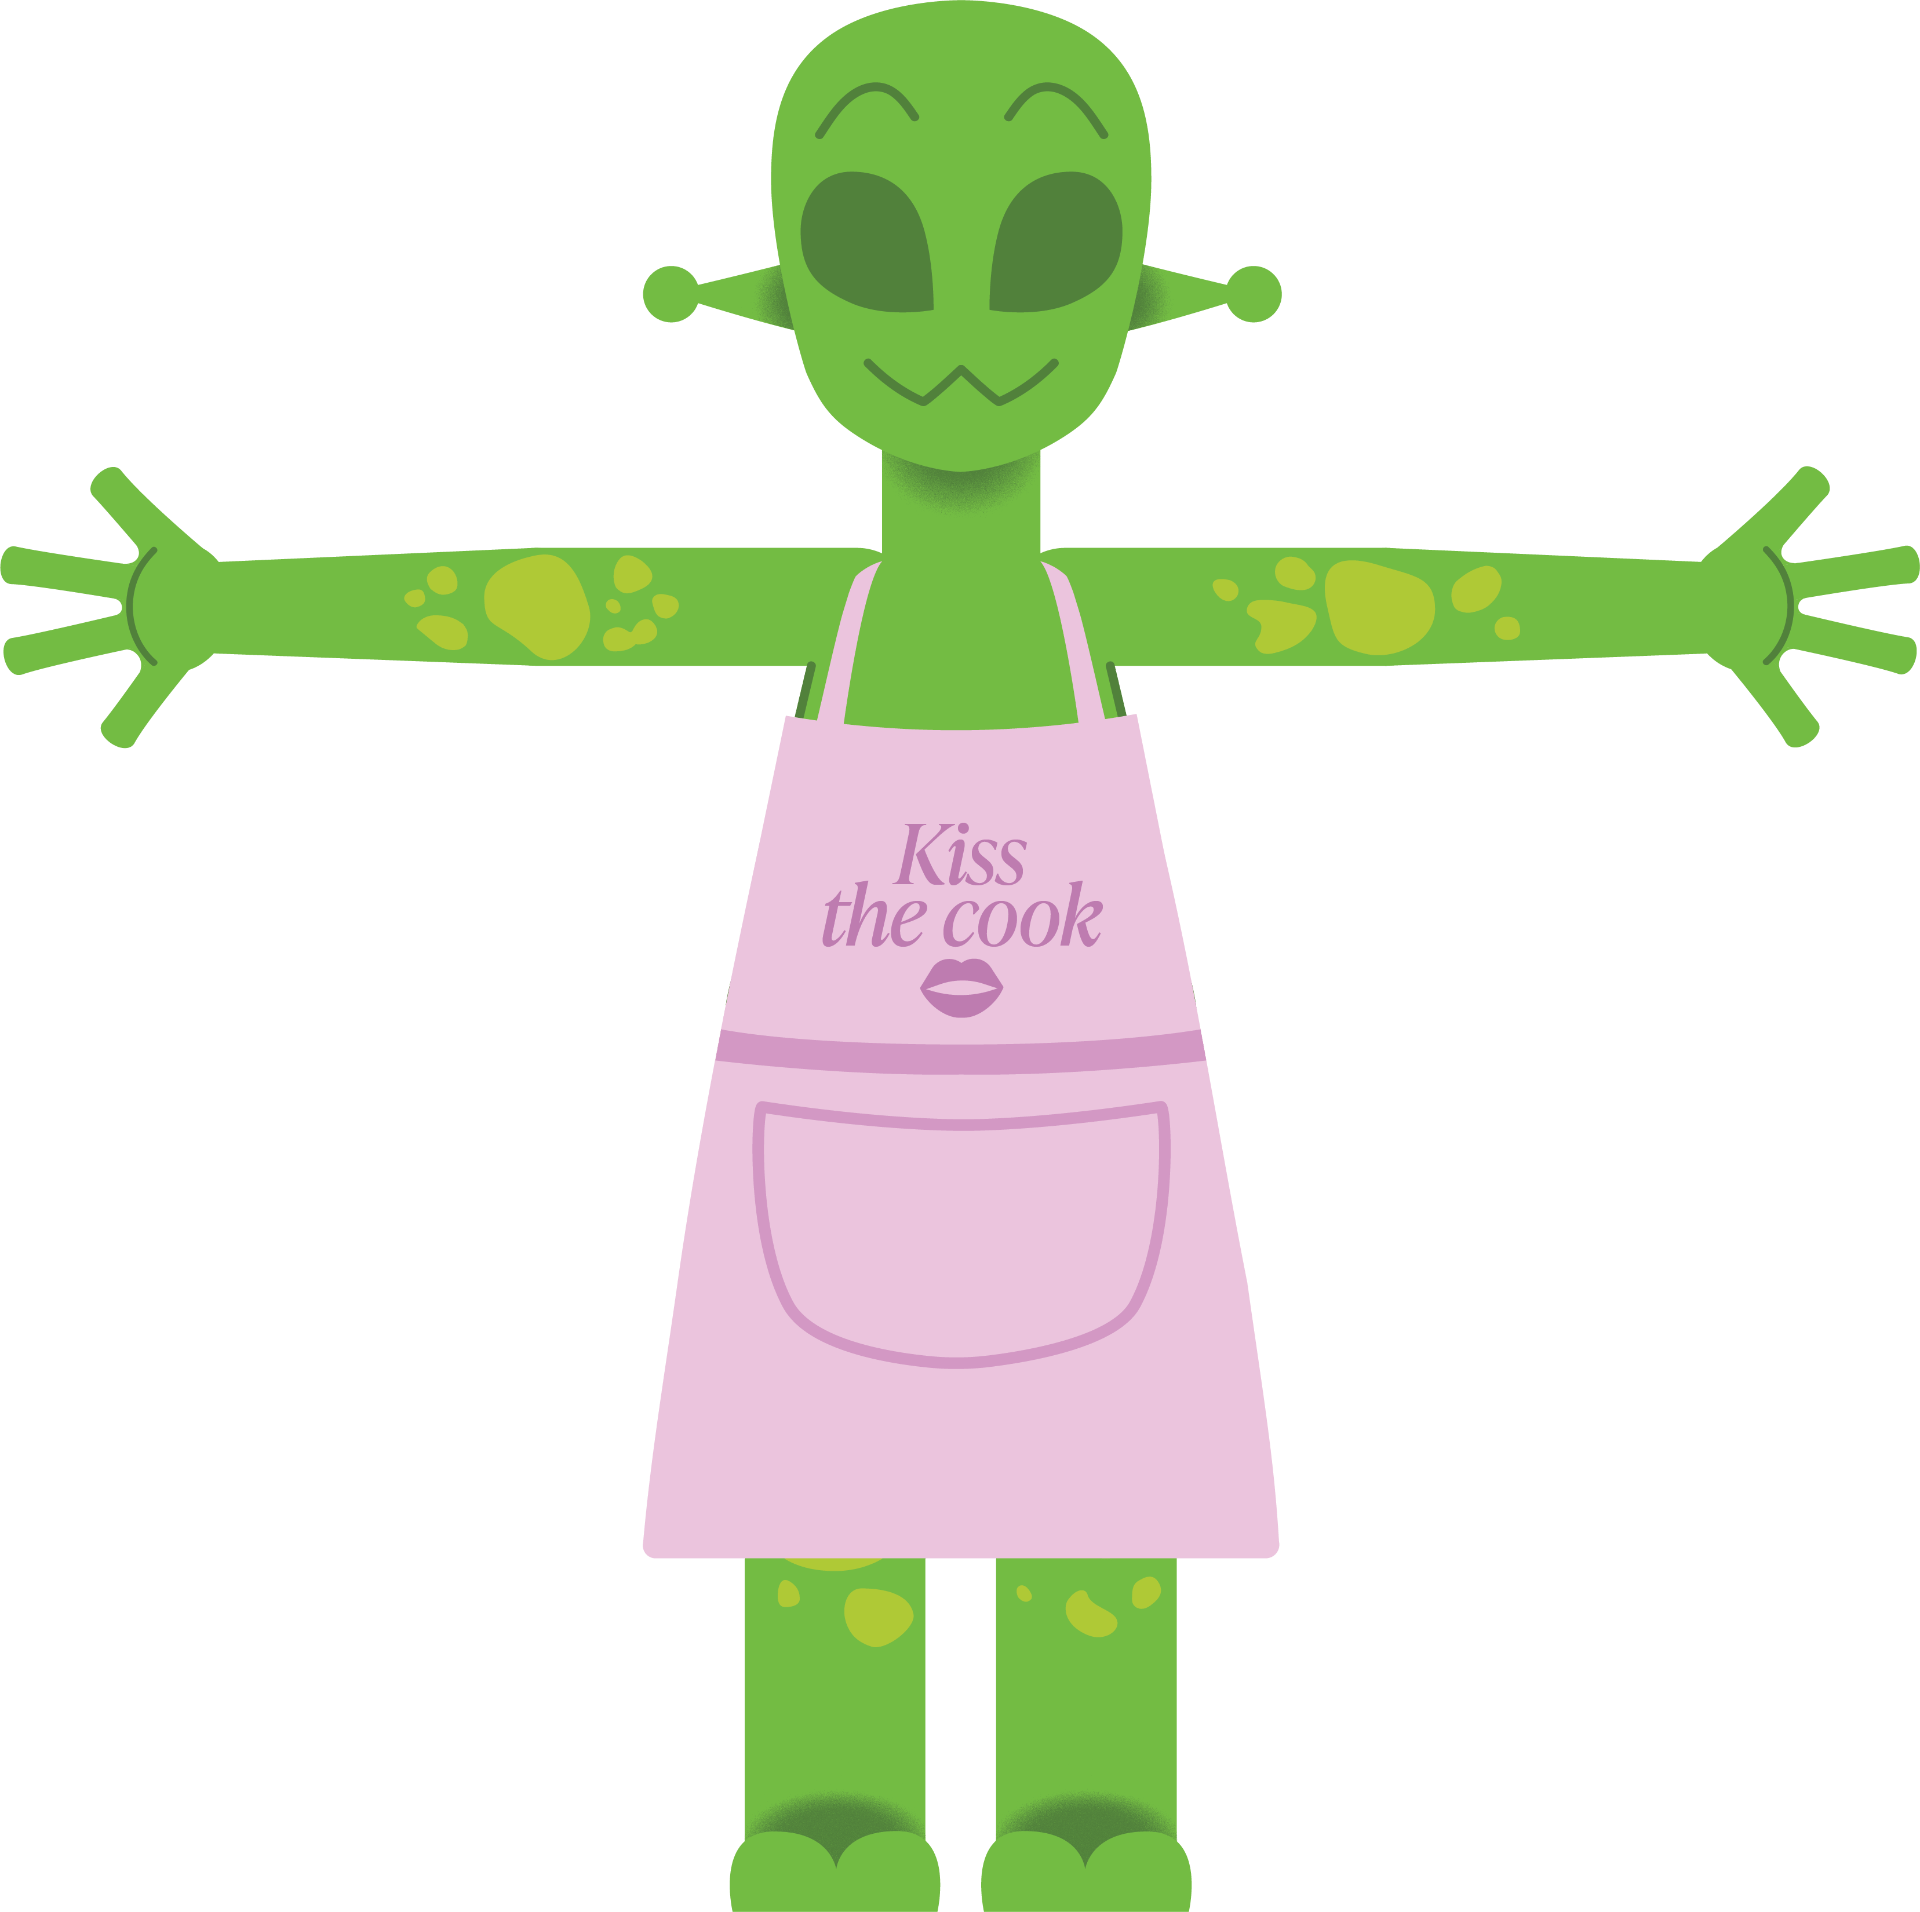
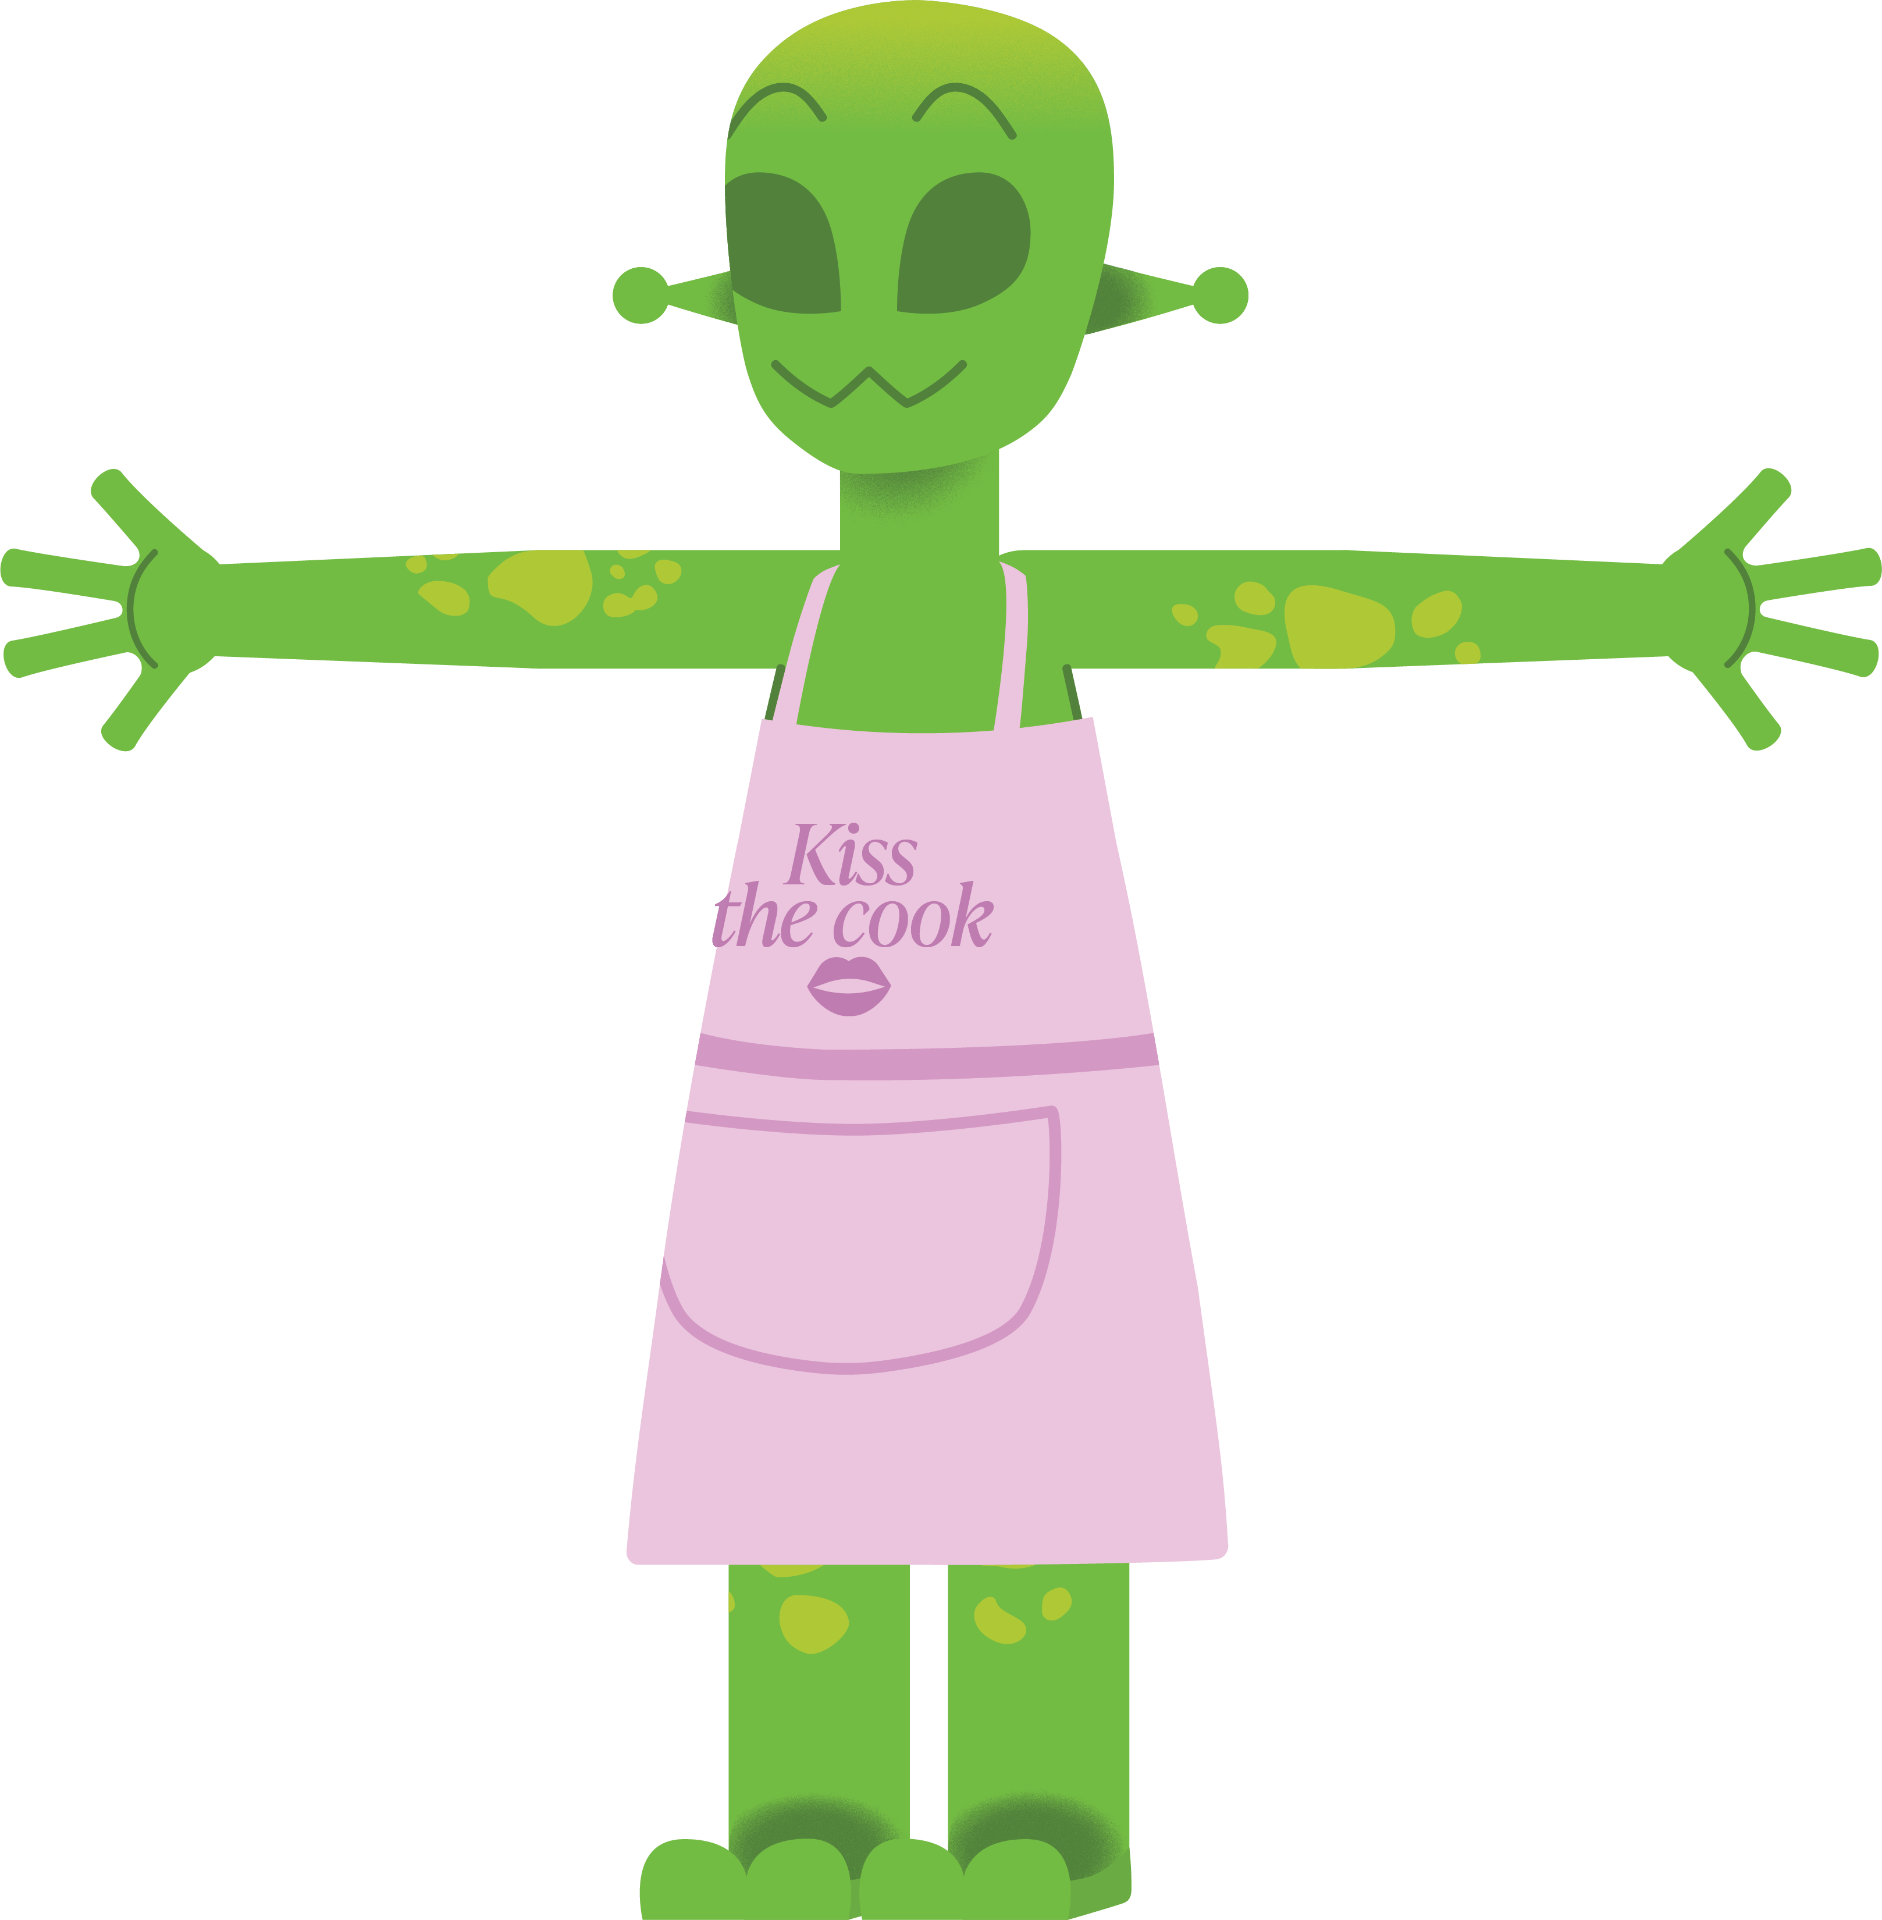
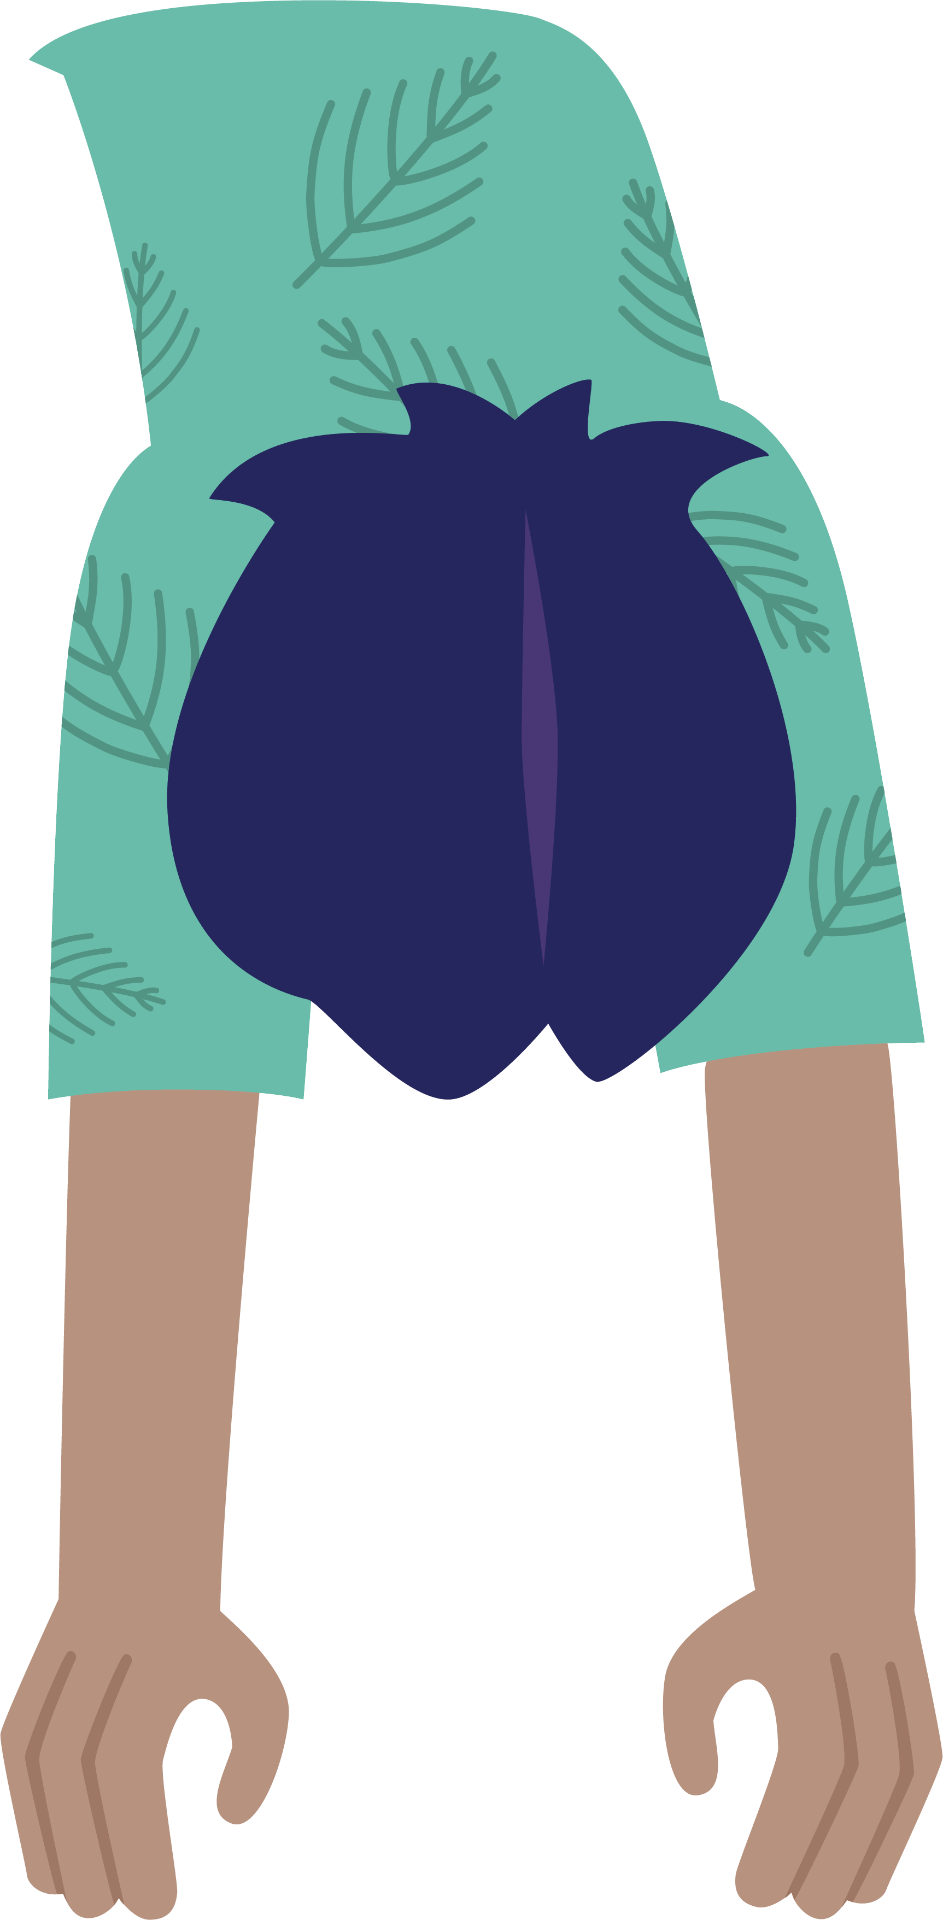
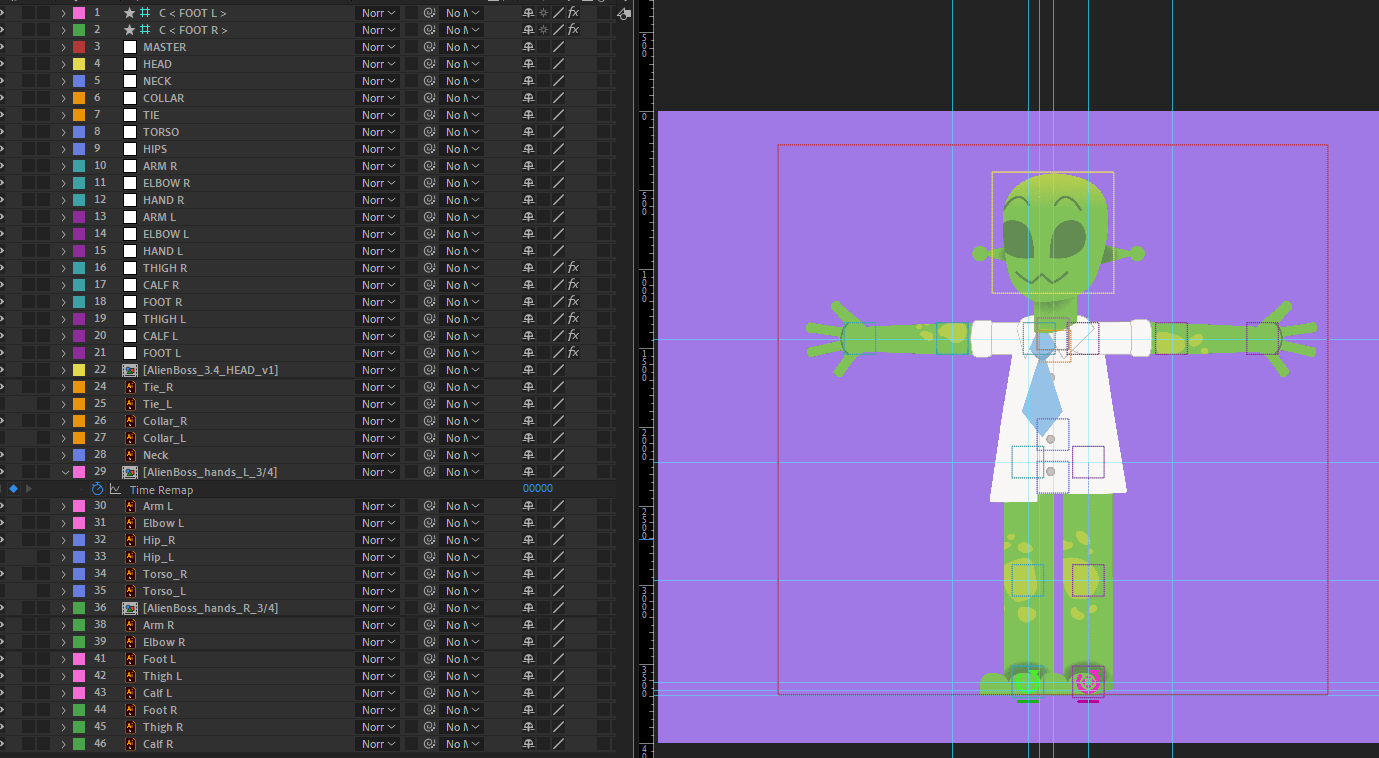
Here are the builds of the Normal Alien and Alien Inspector. I kept the alien mostly like the experiment apart from altering the layers, and the arm pattern, where I experimented with blobs of lighter colour in alternate shapes and sizes. This makes the alien visual a lot more interesting and differentiates them from the humans.
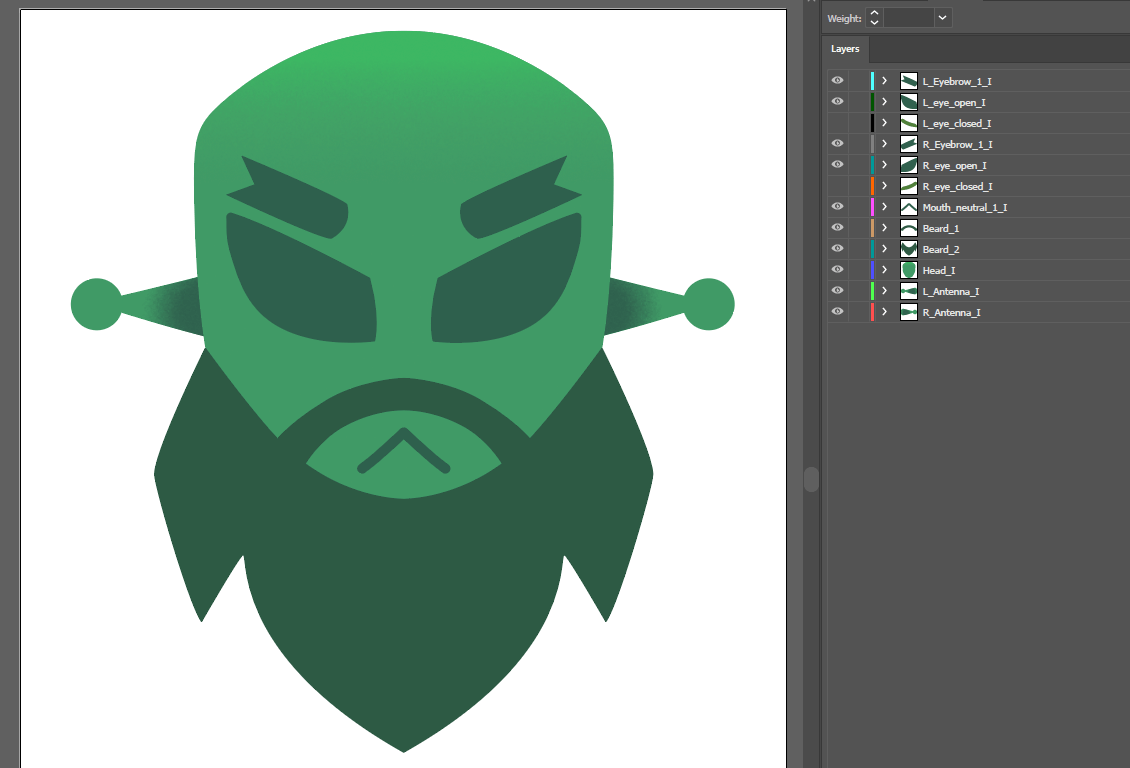
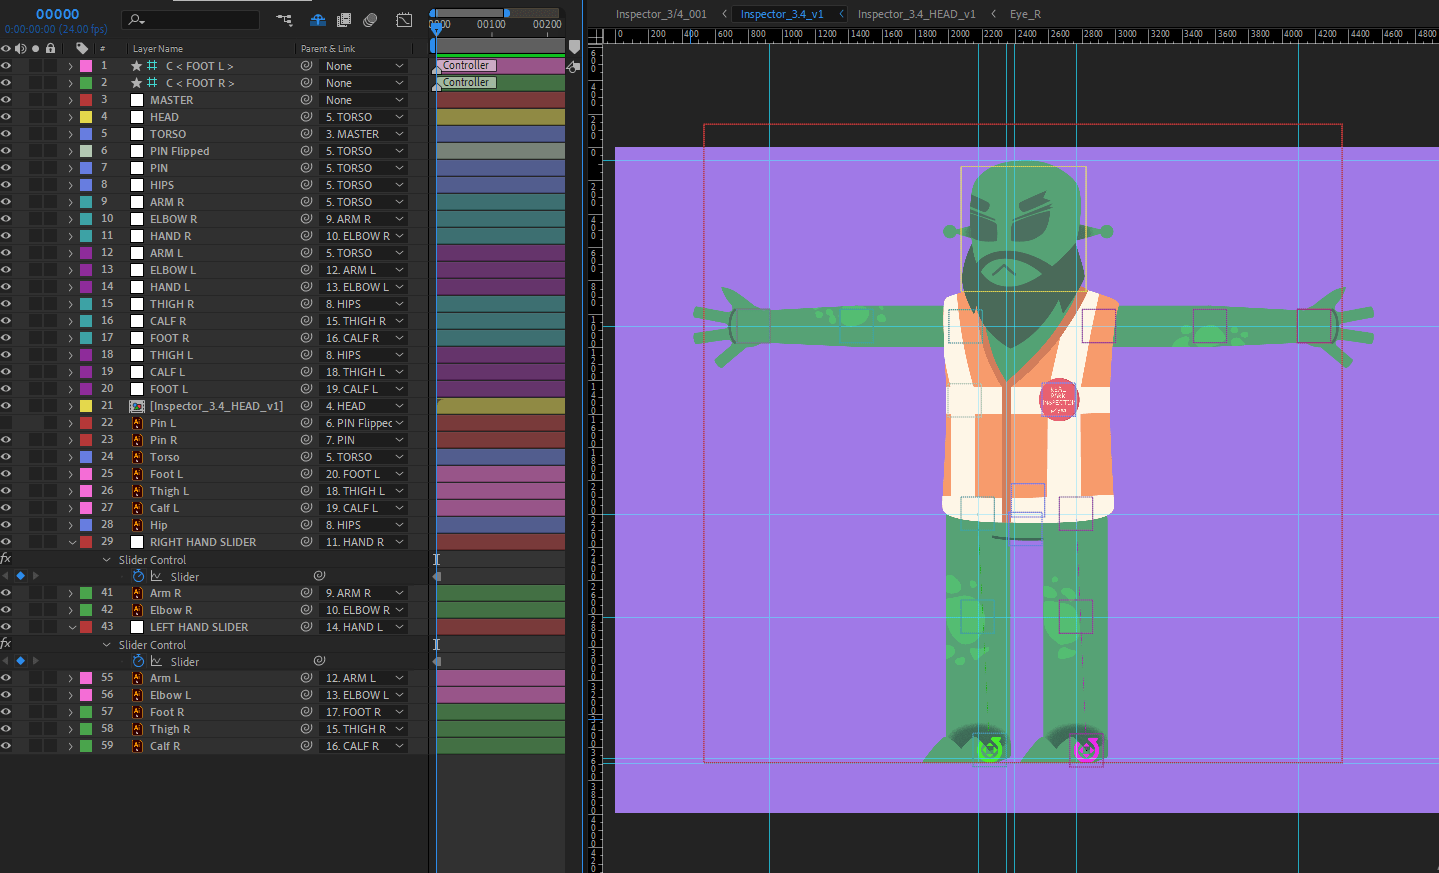
I applied the same visual to the inspector, though I added the vest, pin, beard, and alternate eyebrows to them. It’s good we can see that the inspector and aliens are the same species, but the inspector will stand out as a unique character with the alternate colouring, and sharper features.
Overall, building characters in Illustrator was strange at first as I had to refresh myself with its tools and abilities. However, the process is going very well now. Building each part in vector shapes is much easier than painting each part like in photoshop, and the files import into AE seamlessly.

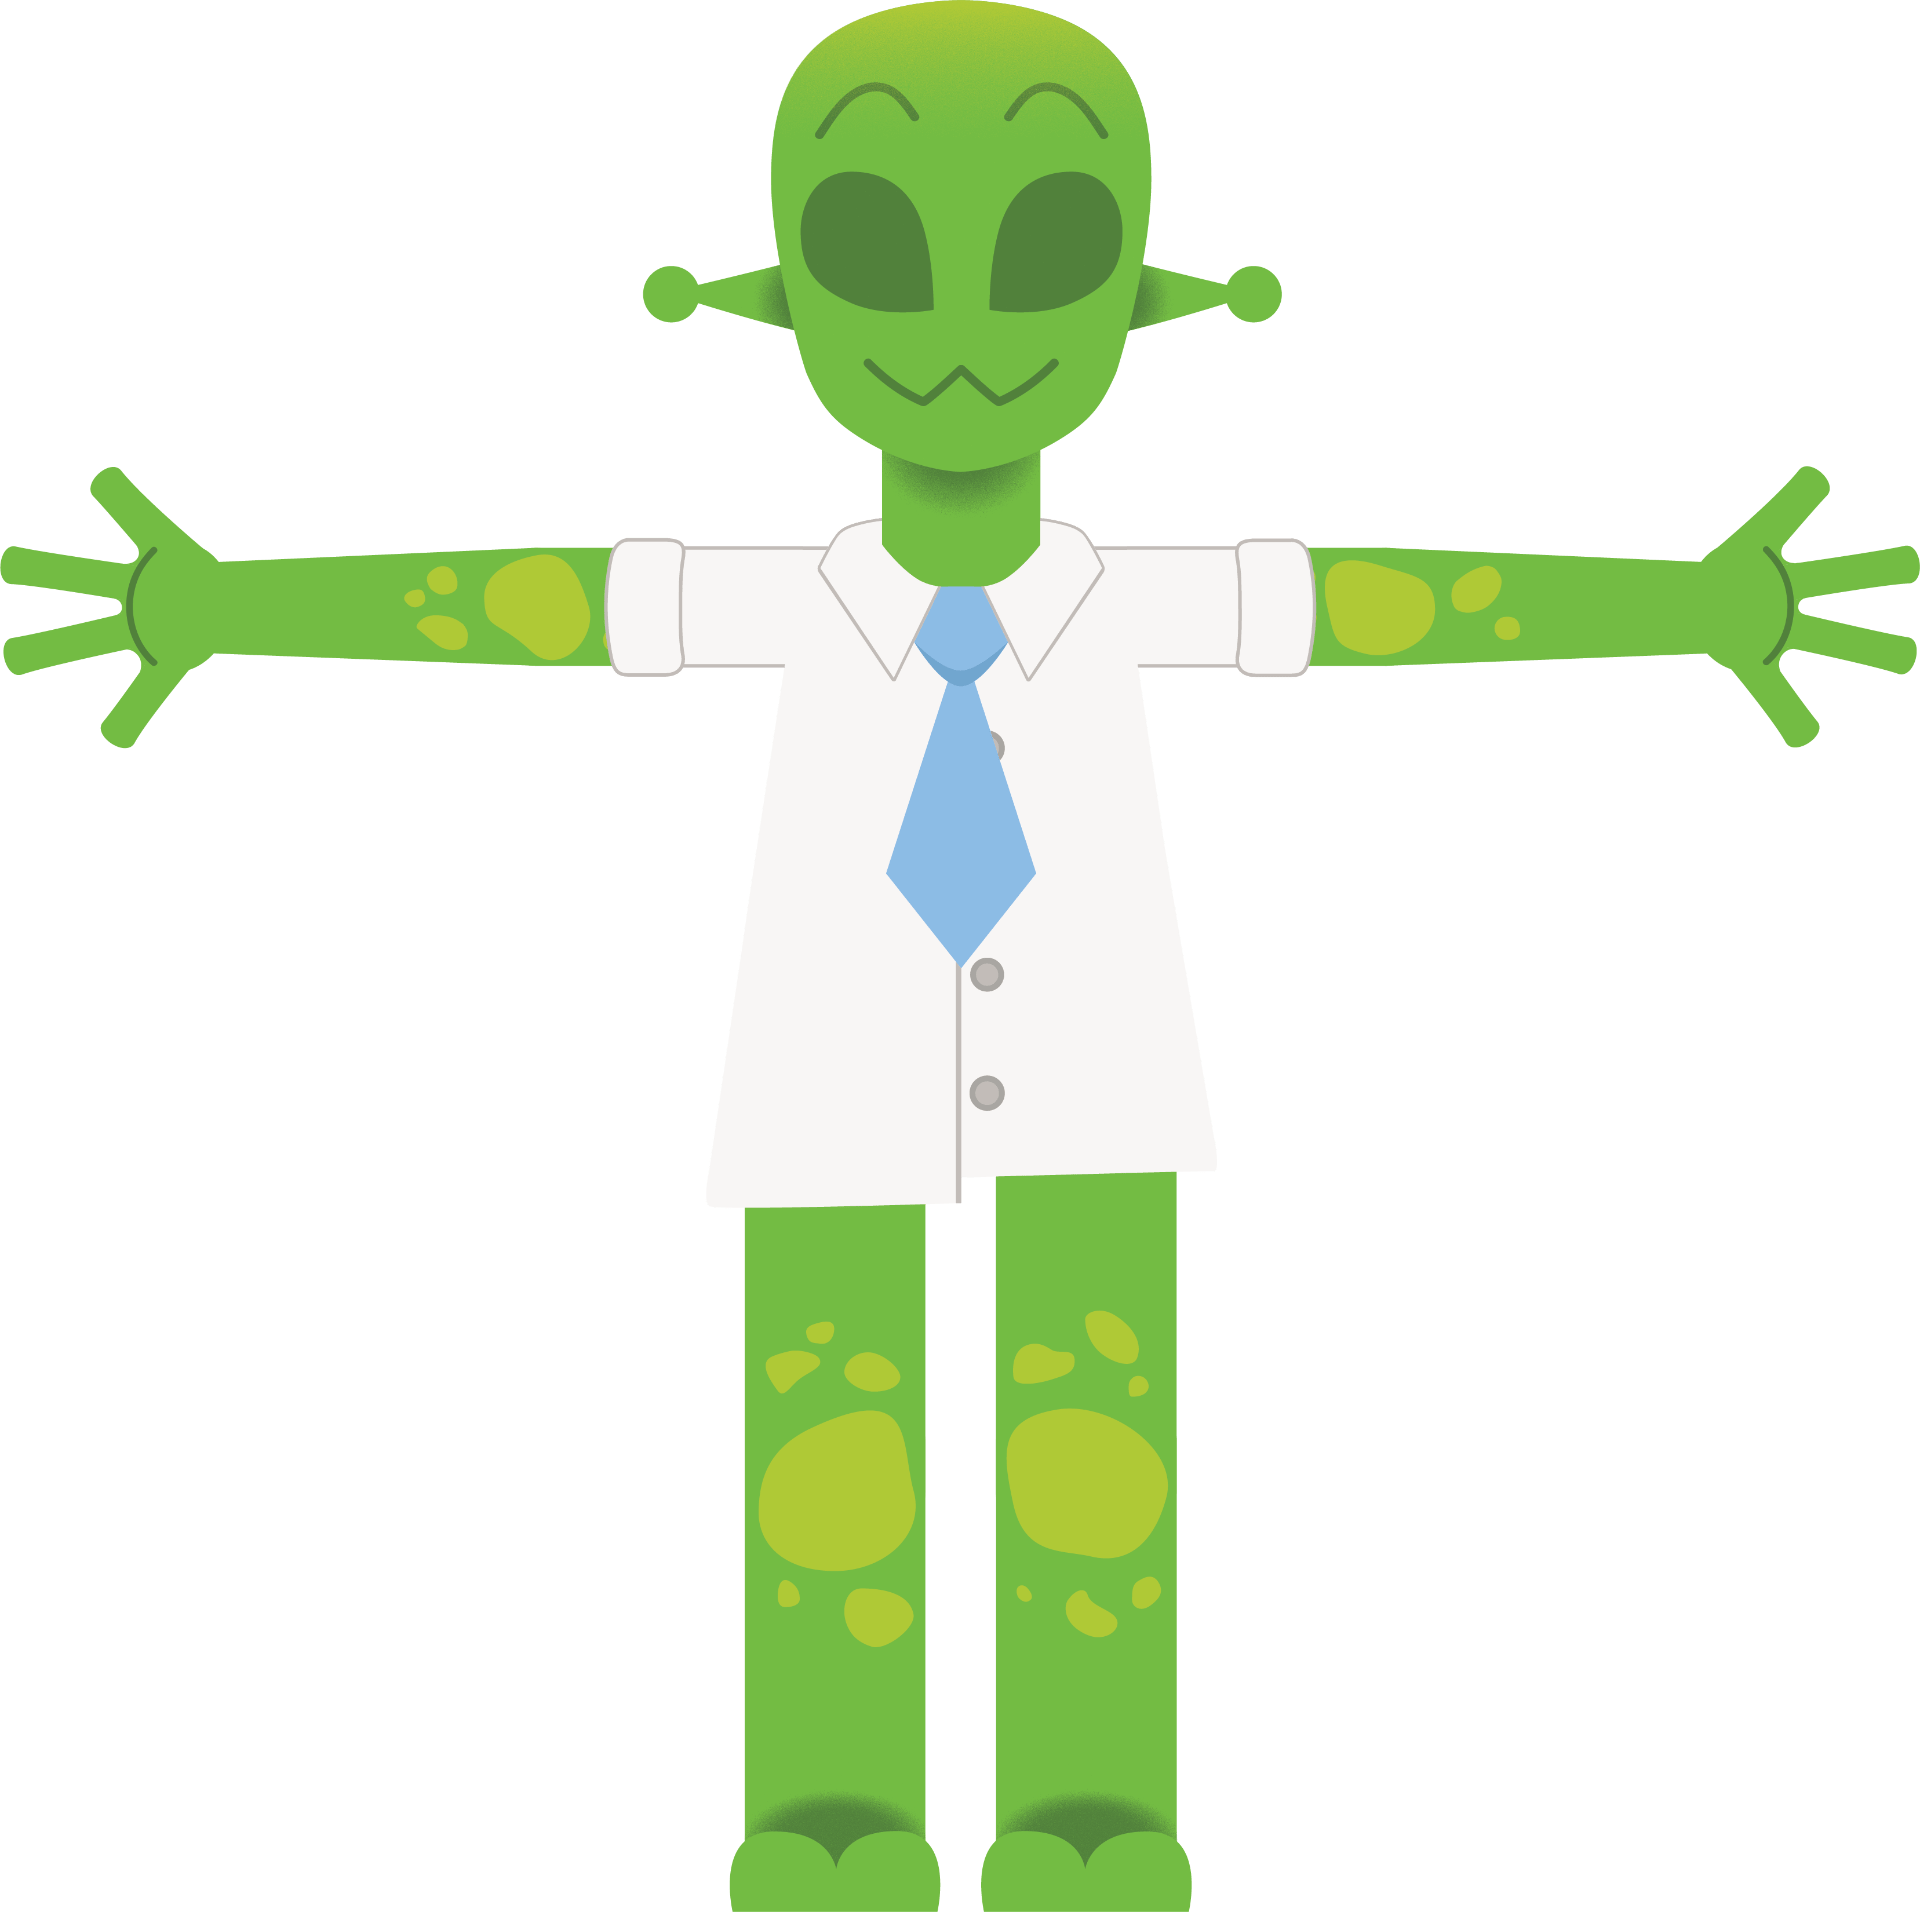
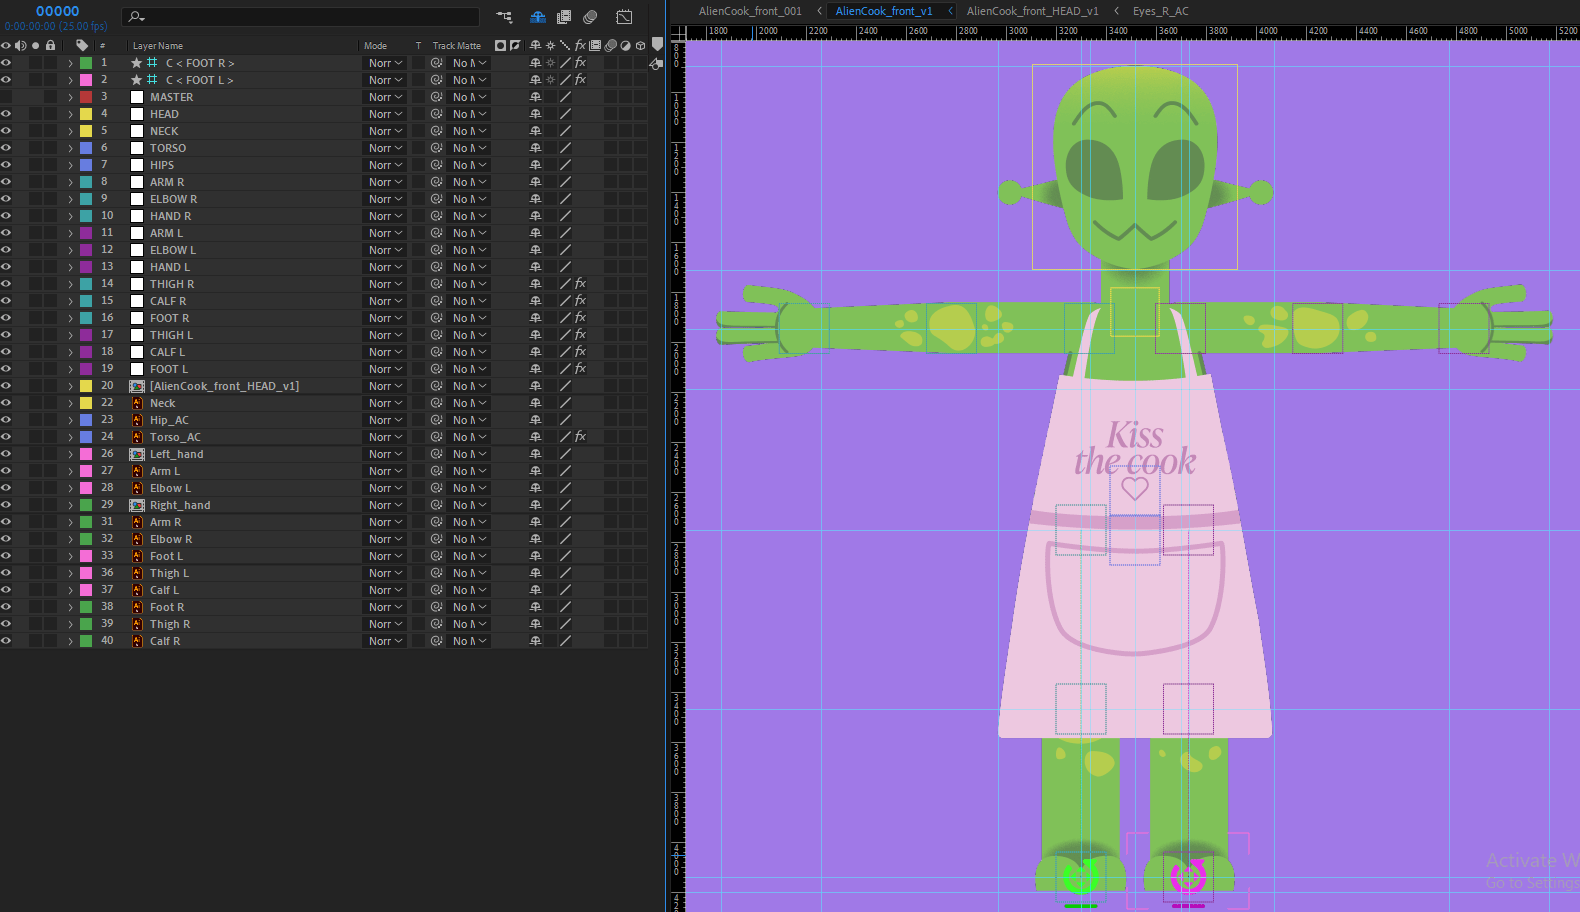
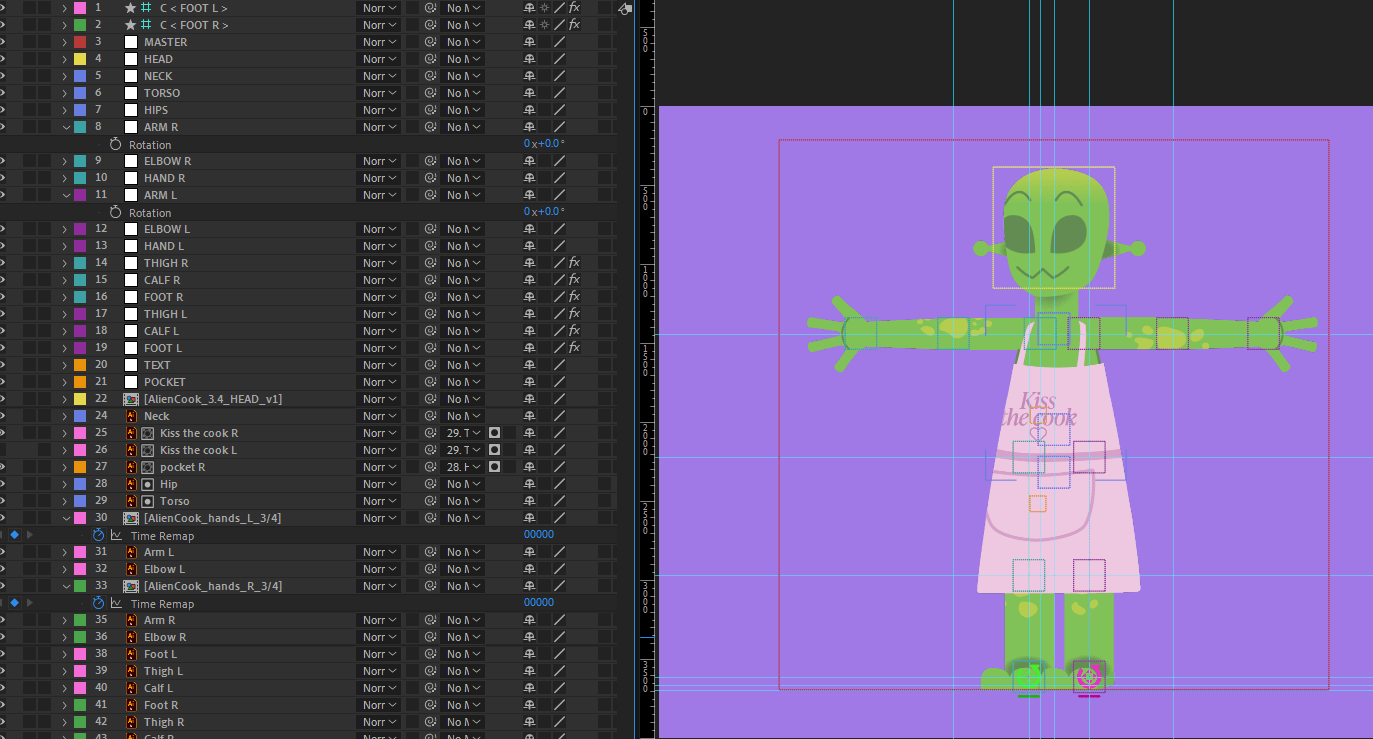
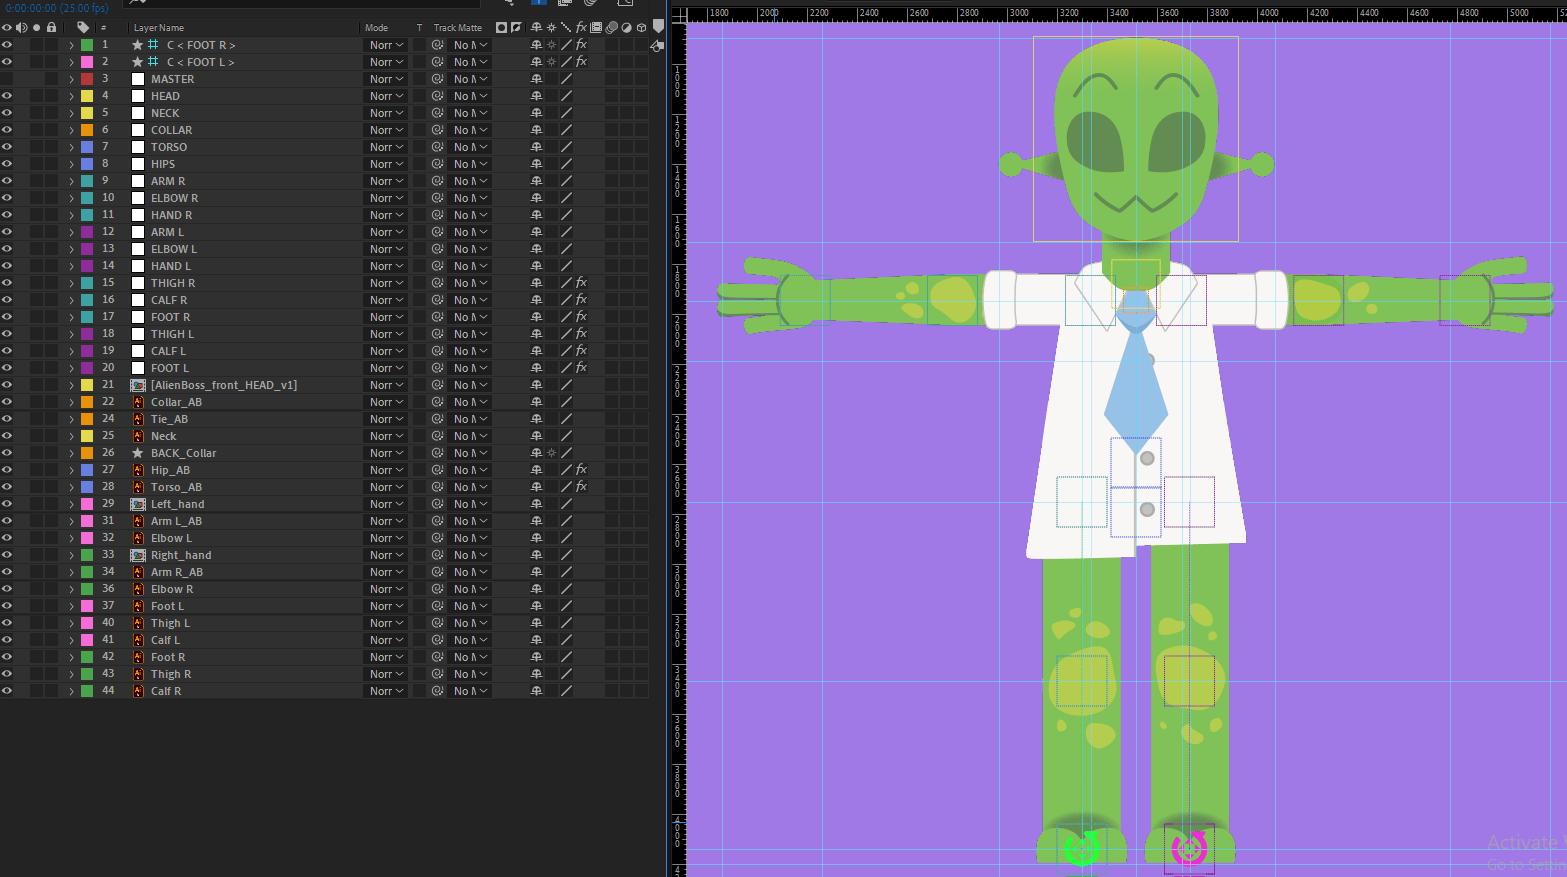
As for the aliens with clothing on, I added to the parts of the body already made, such as the torso, hip and arms, or made layers for additional pieces like collar, tie and hat. This process went smoothly, and I like how each piece of clothing contrasts with the alien’s skin colour.


After building the aliens, next was to build the human/background characters on Illustrator. Those that will be rigged have most of their build in separate layers, and those that are static are in limited layers.


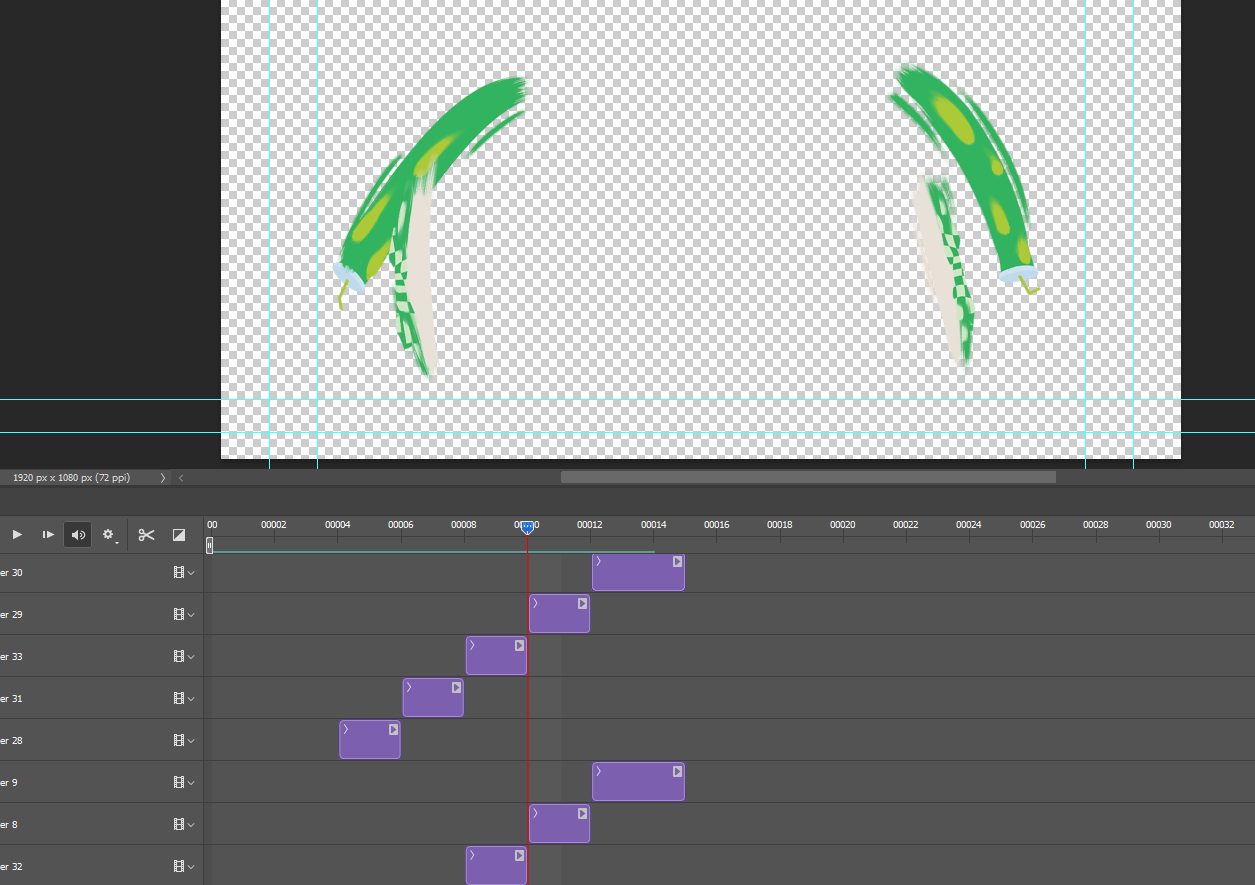
Props were also built on Illustrator. Using the pen tool, gradient effects, and clipping masks, I designed props to be on characters, held by characters, or in the background.
My major props include the laser gun, the alien phone, and the popcorn boxes, as they frequently appear in the film as props the characters use/hold. Props that are animated include the food trays / cups, balloons, and carts. The rest are standstill objects or appear on a character etc. the badges.


Rigging
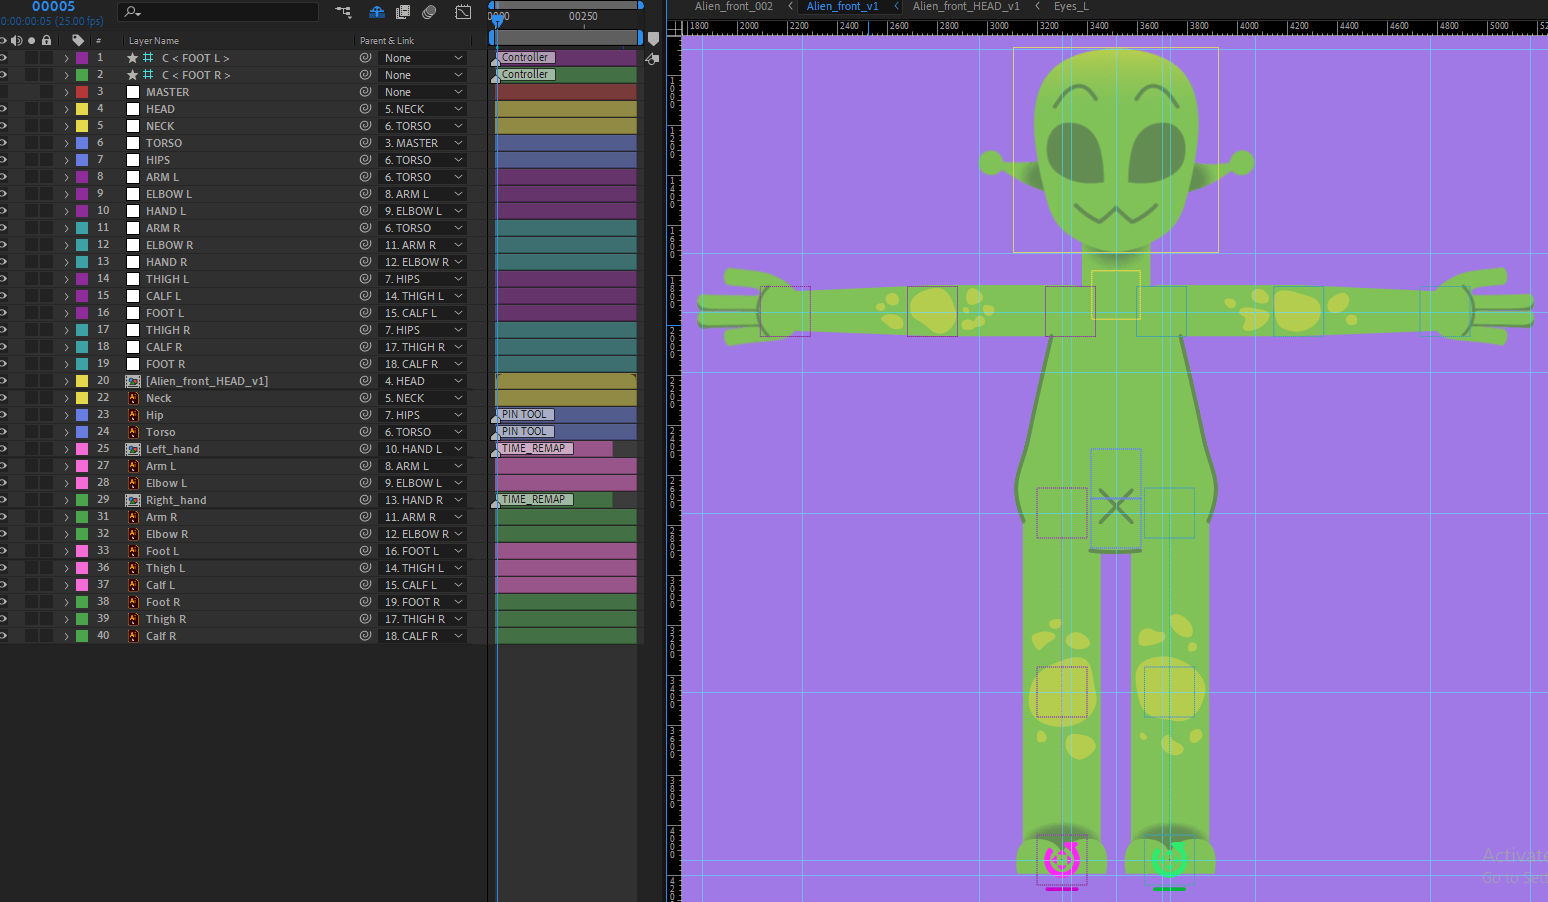

Rigging is a tedious process but an especially important part of my project. I will explain the process in order:
- I import the illustrator file into a new comp and set up the right size/ratio.
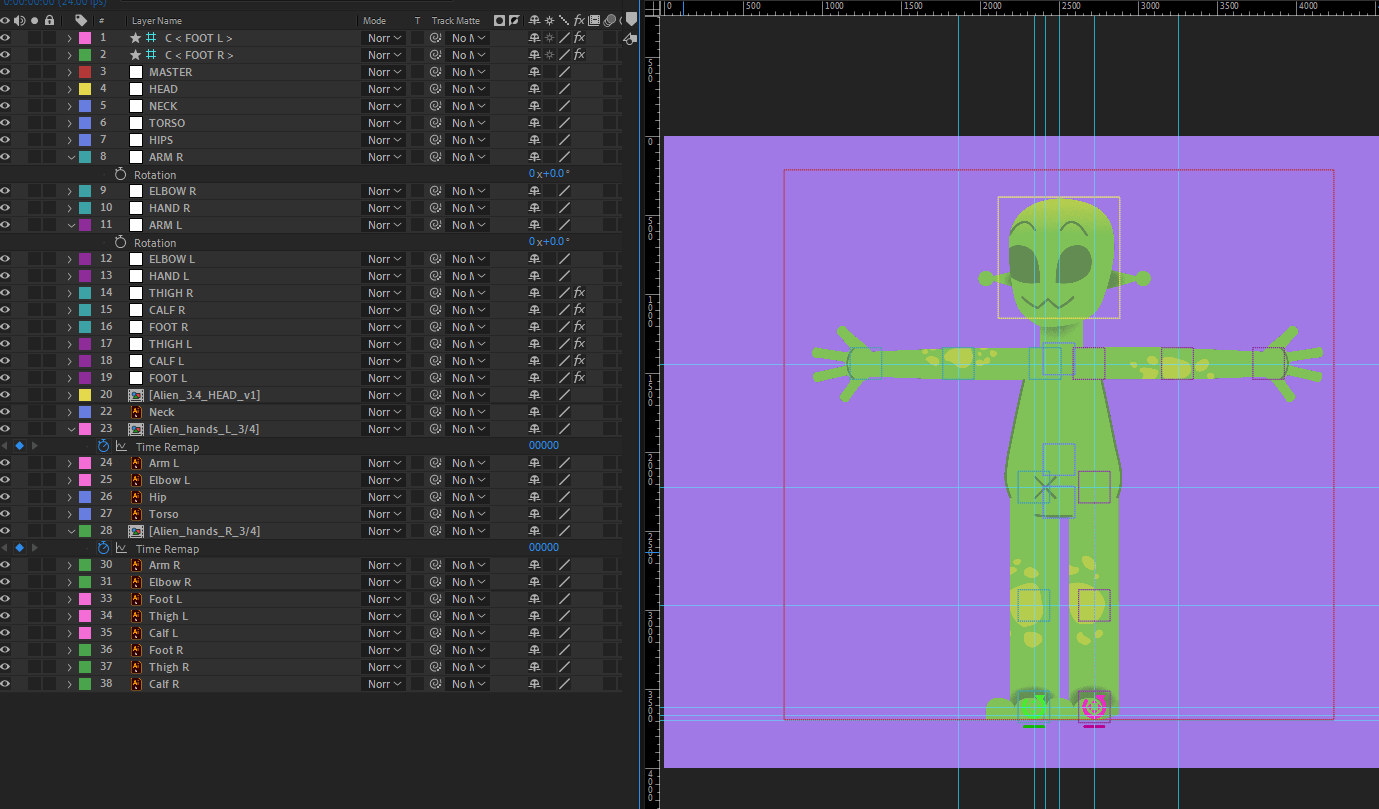
- I make sure each body part is masked to its size, and the anchor point is moved to where the main position of movement will be.
- I make nulls of each body part, labelling correctly, then placing the nulls to the anchor points of the layers.
- I parent the layers to their labelled null, and parent the nulls together based on hierarchy e.g. Hand to Elbow to Arm to Torso.
- I place an auto rig on the legs from the DUIK plugin. This helps keep the feet grounded to the floor, and it is easier to use for walking animations.
As for the head the same process applies, but more is included:
- To make a head turn I keyframe the up, down, left, and right position of each part of the face.
- I highlight my keyframes and add the properties to a 2D Connector from the DUIK plugin. This remote then allows me to move and keyframe the head position.
- I also apply a jaw turn for a better look when the face turns left and right.
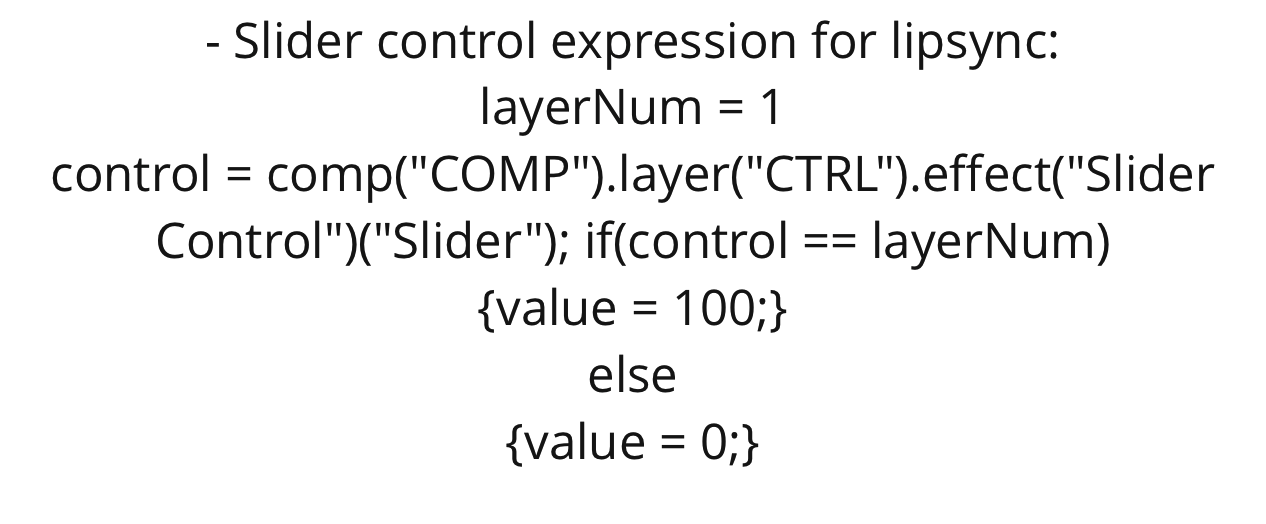
- I apply a slider control effect for the eyebrows and mouth so that its multiple shapes can be swapped over for different expressions.
- Eyes are keyframed to blink with shape layers.
- I place pins on the antennas so they can warp to alternate positions.
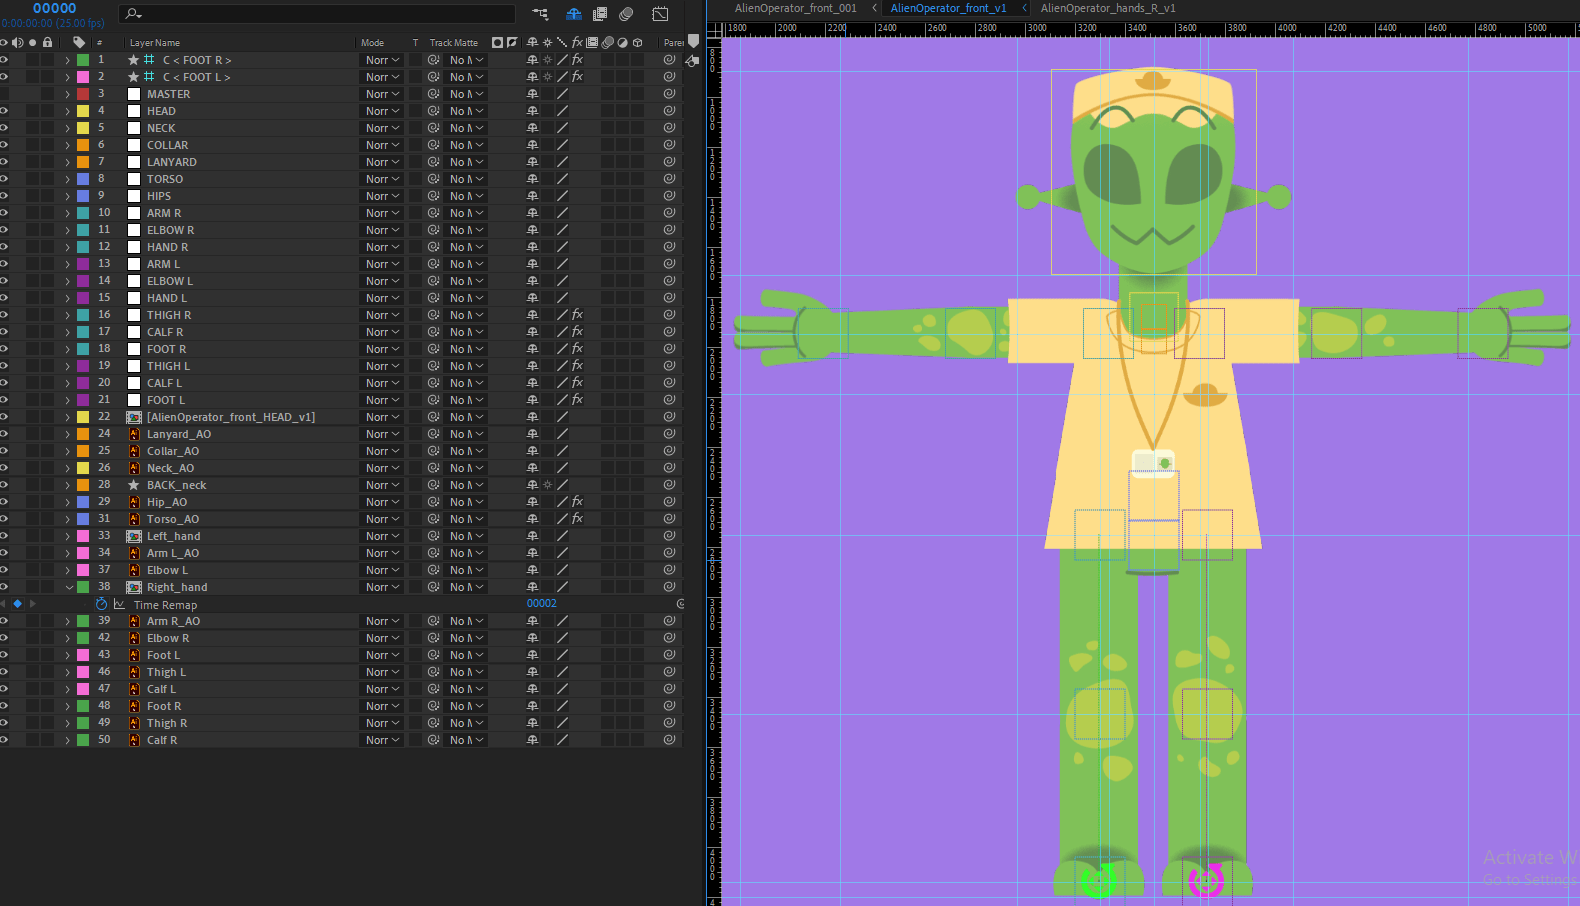
Since the front alien is rigged (and 3.4 view), I can copy this file add in the aliens different clothing, save them as separate files, then I get already rigged versions of Alien Boss, Alien Operator and Alien Cook, with just little amount of adjustment on each one. This helps speed up the process to move onto the next rigs.
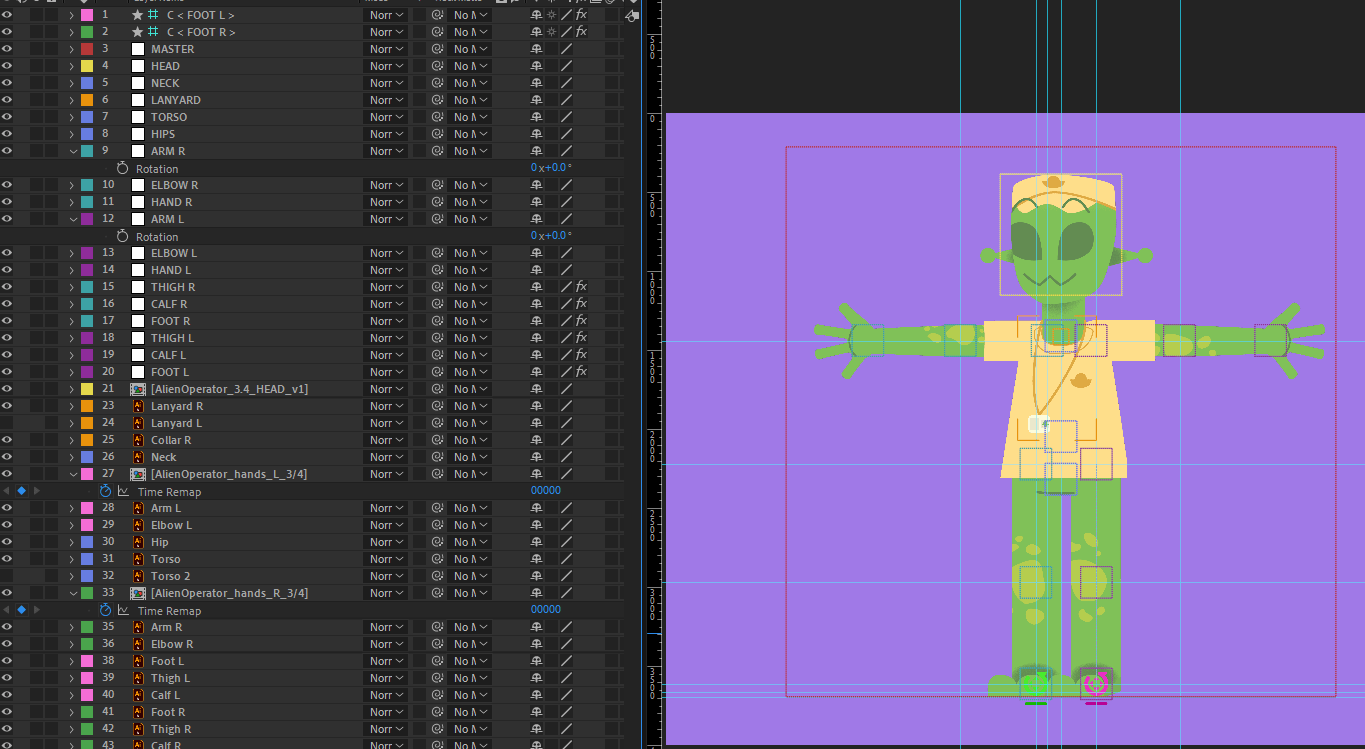
The same process is done for the inspector; however, it required a bit more work on the head, especially the beard. I had asked Dan Wilson, who was teaching us an After Effects workshop, how I could go about this. He showed me the ‘Create Nulls from Paths’ plugin that I can use to make keyframes points on the beard and apply it to a connector in the same way as the head turn.

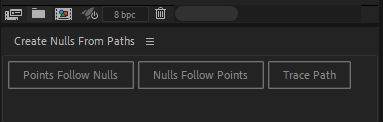
Once I made the beard layers into vector shapes, I had points on the shape that I could apply the ‘points follow nulls’ option to. I used these nulls positions to keyframe the left, right, up and down positions of the head turn as I would normally do. Once the x and y positions were connected to a 2D slider, I got the result below, which I am very happy with.
I thank Dan for giving us great tips during his AE workshops!

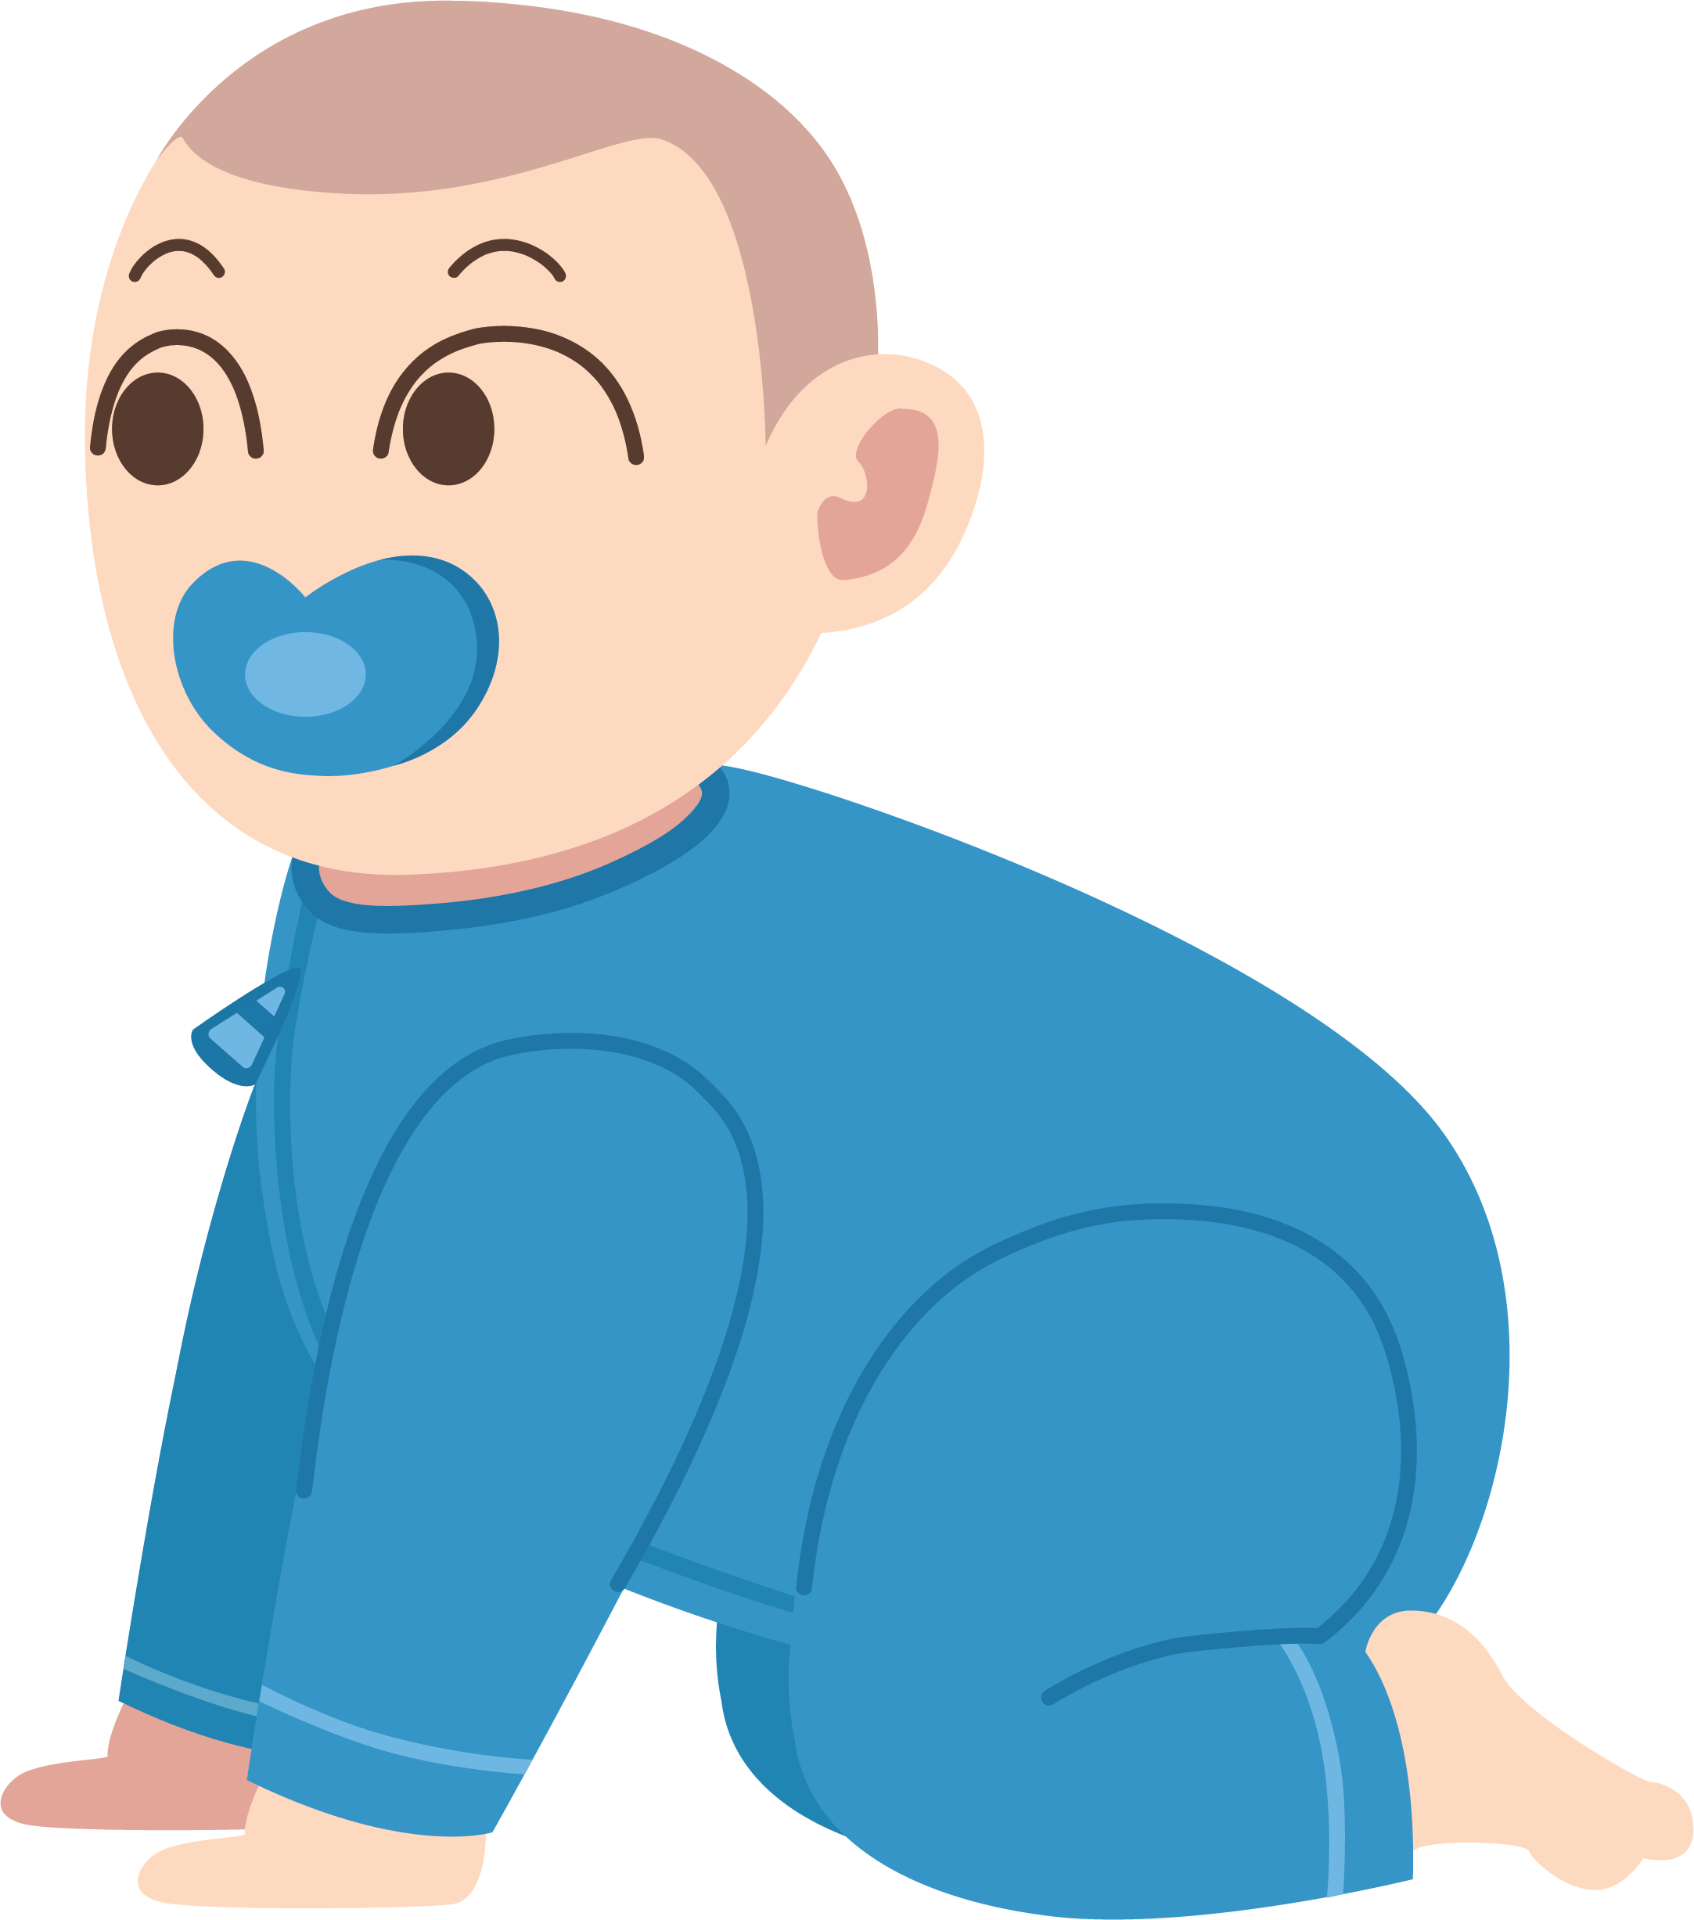
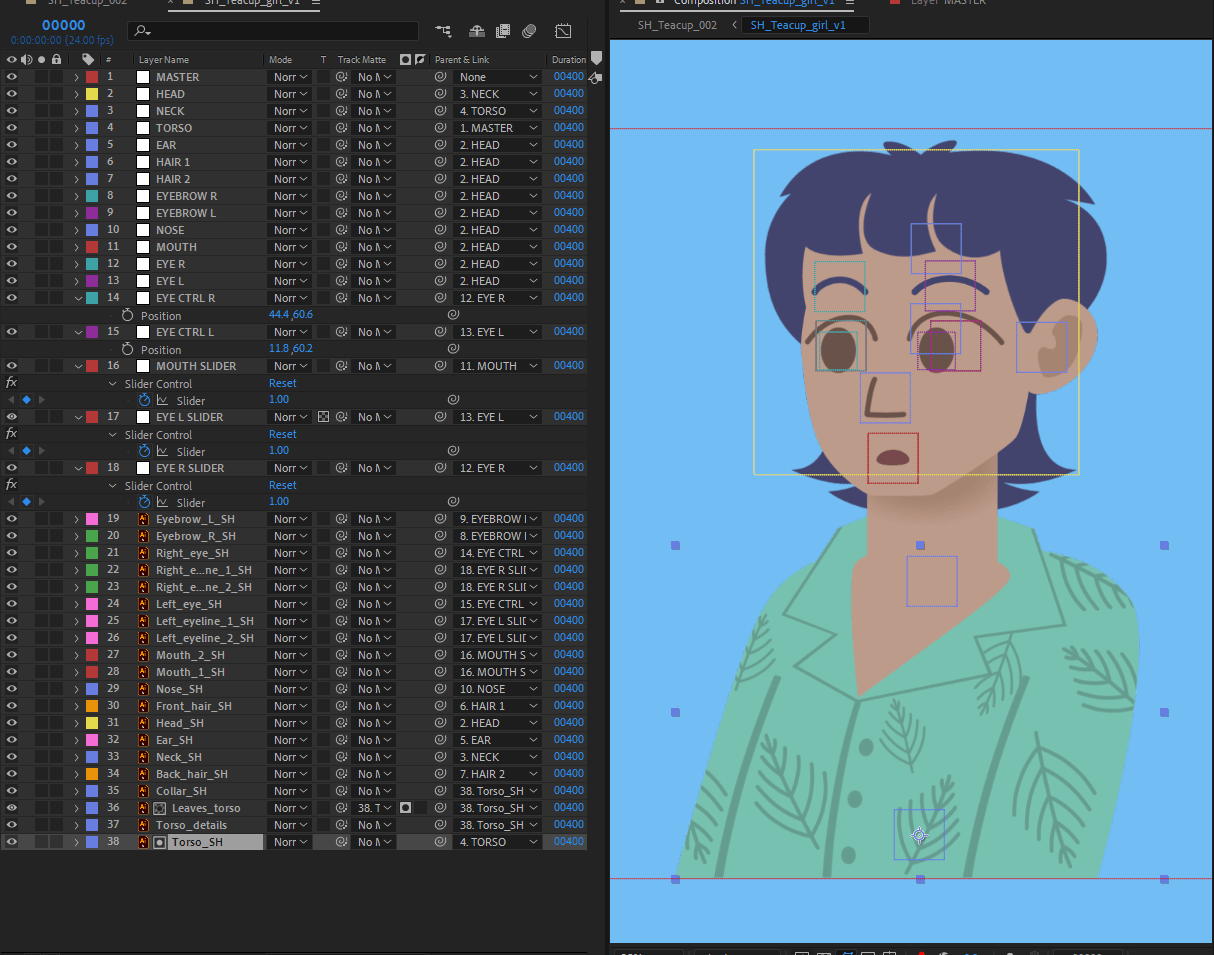
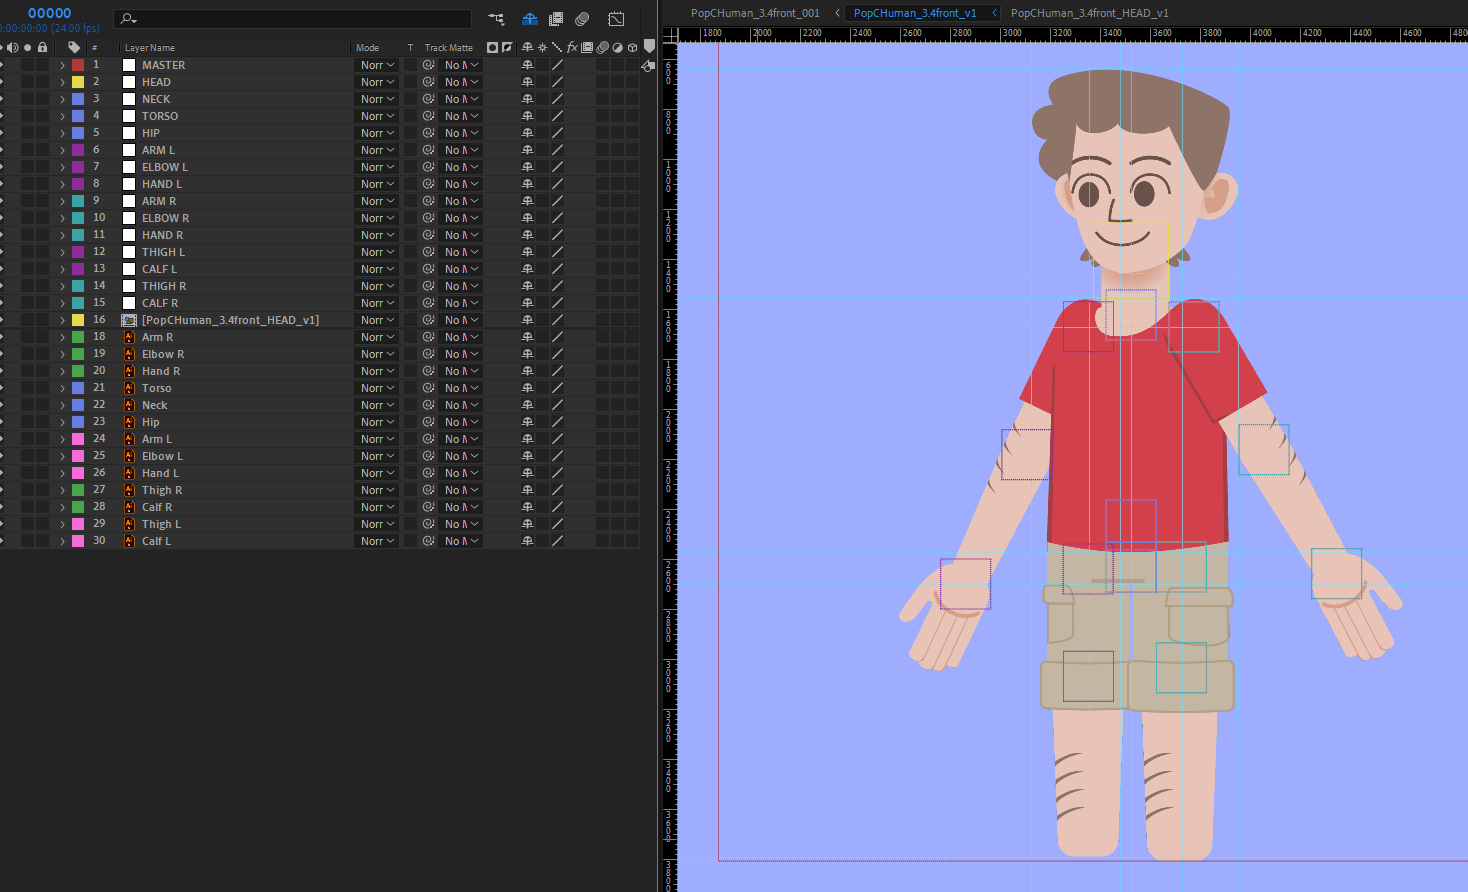
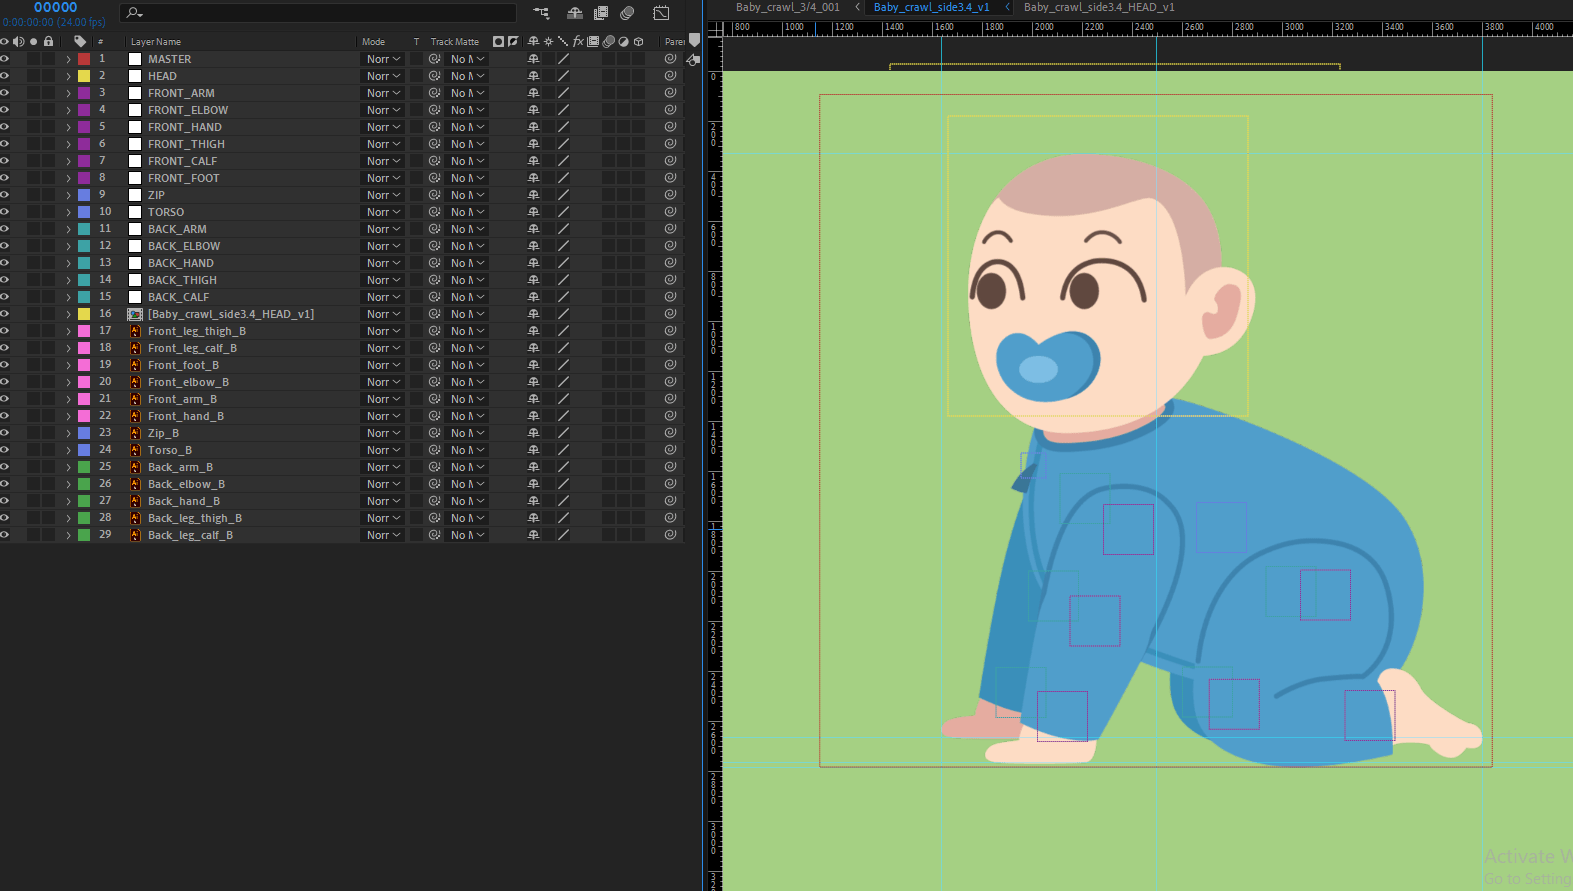
I moved onto the human characters that may need some rig abilities. The teacup customers, and the popcorn stall man have basic rig builds to be able to move their arms, head and face features. The baby character has a similar rig build, but in the form of quadruped. These simple rigs will help create the right actions and provide better animated results.

Building the rigs worked very well and was majorly a smooth process. The worst problem I came across was when I was halfway through building the inspector rig, and the file corrupted on me. Unfortunately, I could not find a workable solution to this problem, so restarted it. I feared this would set me behind schedule of producing work, however it didn’t take too long to build again.
Another problem was I had to change the system that controls the hand shapes in each rig. Beforehand I had all shapes in one comp, and used time-remap to swap between them, but this did not work when I chose a new hand because it would not export correctly in the renders. The neutral hand would stay instead of another chosen hand.
I changed this to the same expression I use for the eyebrows and mouth in the head comps. This expression uses Slider control – it indicates which hand should appear from what number is set on the slider control – it is applied to the opacity section of each asset so it makes assets disappear if it is not chosen. This system can show the hands in the renders better than the last attempt.

Any other small problems were either with colour correction from Illustrator to AE, and to fix clothing clipping to limbs with masks, or shape layers.
Test rig animations
Before I started any animated scenes, I tested the abilities of my rigs by animating actions and expressions. This helps to discover how they look as they move, and what kind of style and speed of animation will suit best. I can experiment more like this if needed during the animation process, but these examples can work as reference for me.
Scene Prep
For scene prep, I set up a template AE file that applies the right settings I need for each animated scene.
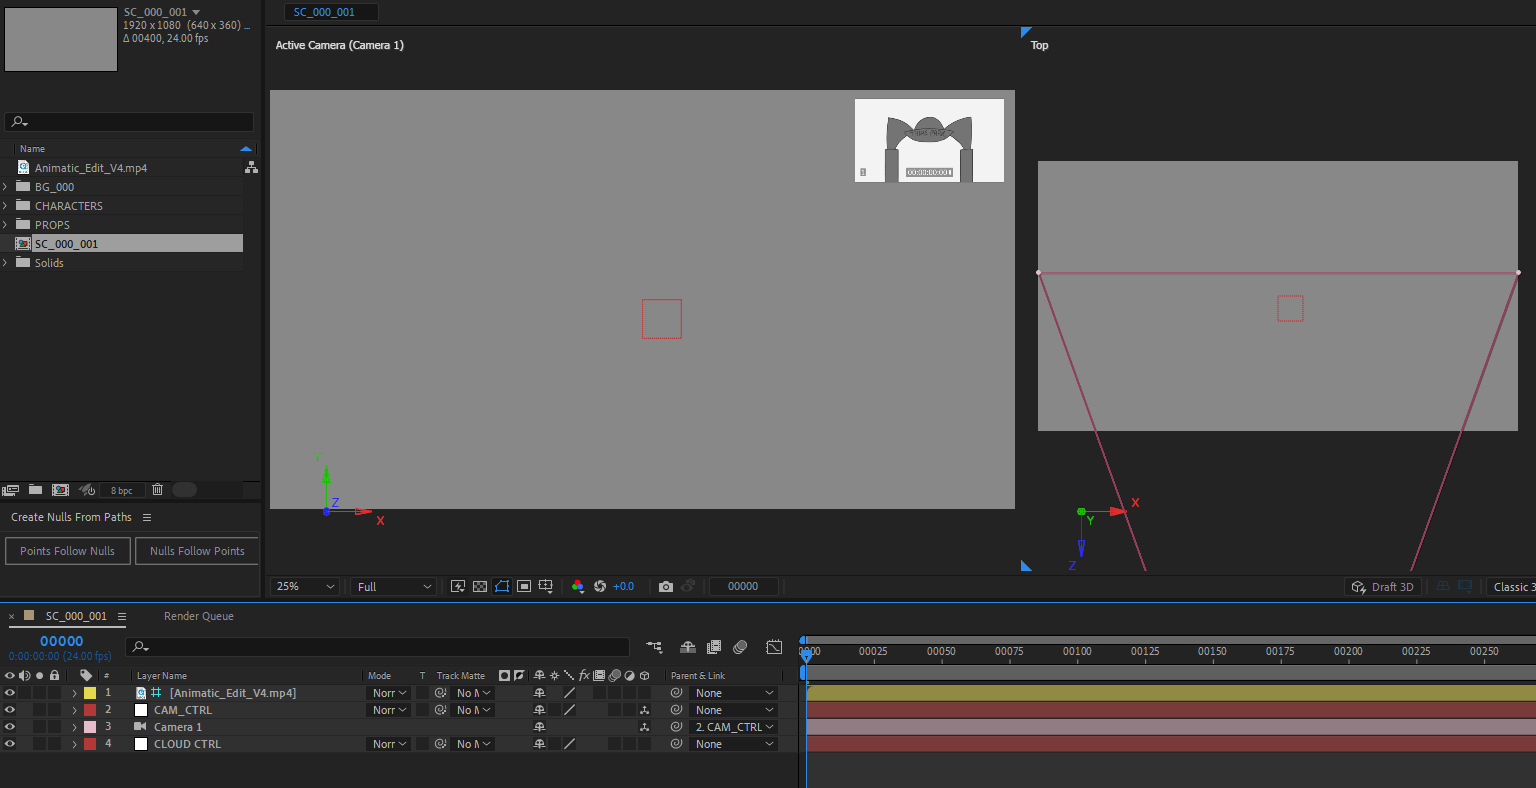
The template includes the latest animatic edit, a camera control null, the camera, and a control null for clouds. The main comp is labelled as the scene and version number, and set as 1920 x 1080, 24fps.

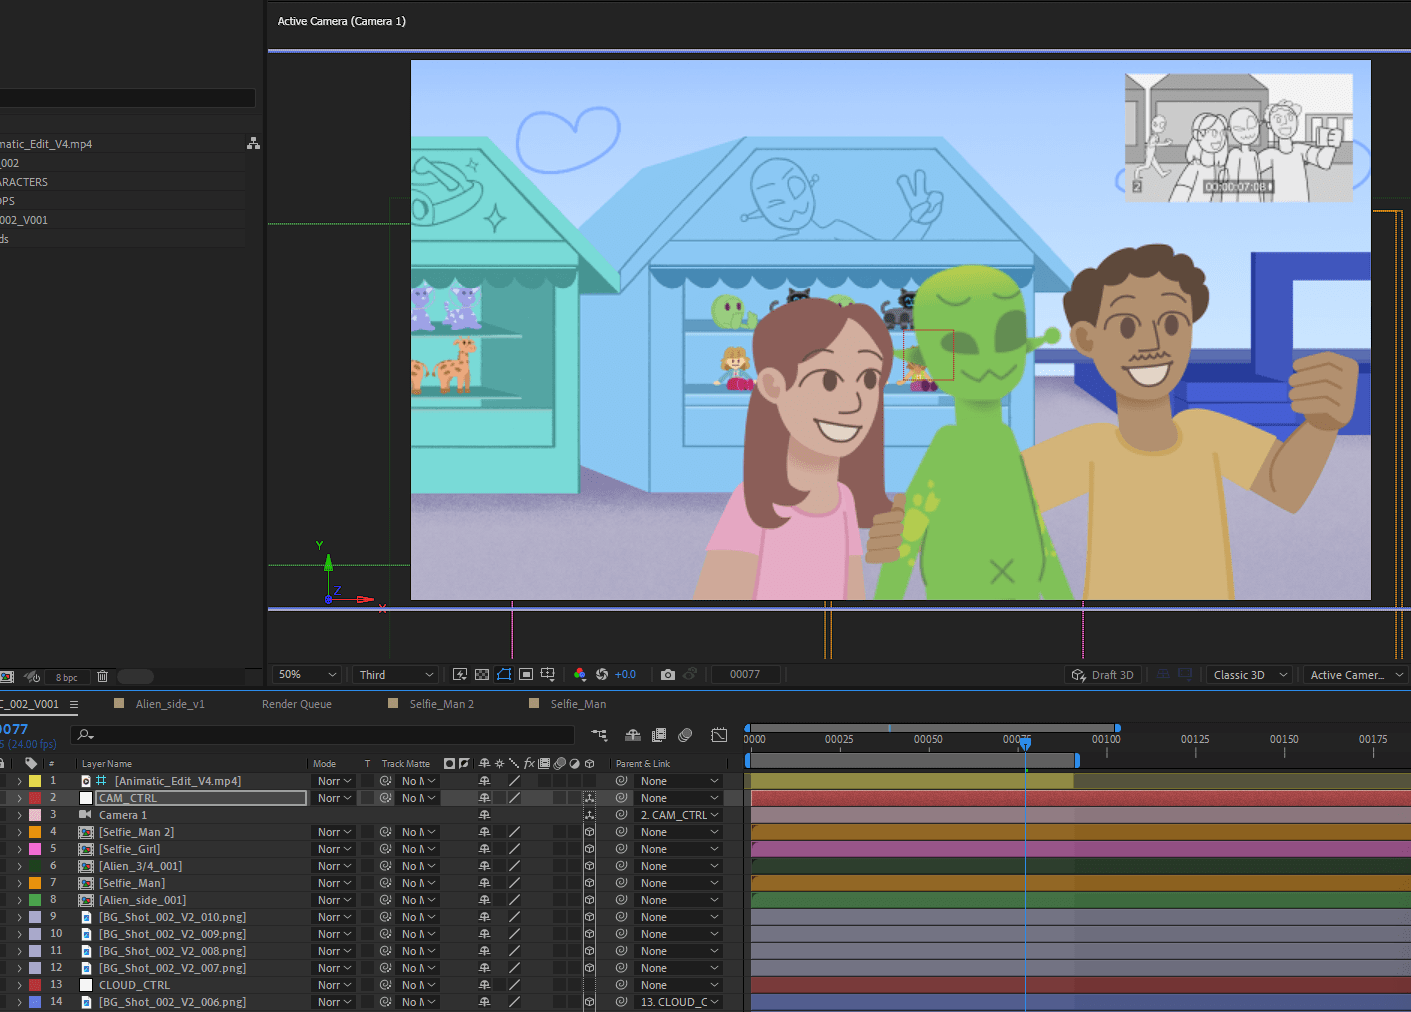
An example of a scene setup is tested below. Shot 2 has a left to right pan view, so I tested the camera and control null here. I will also add the animatic at the top right of each shot for clear viewing of layout and timing. It is set as a guide layer so once the scene is at rendering stage, it will not show.
Now each scene is ready to animate, each starting on V001 (version 1). Once I go through more polished animating, I will save an updated version each time to prevent losing complete amounts of work, and it’s easy to get back to a past version.
Animation
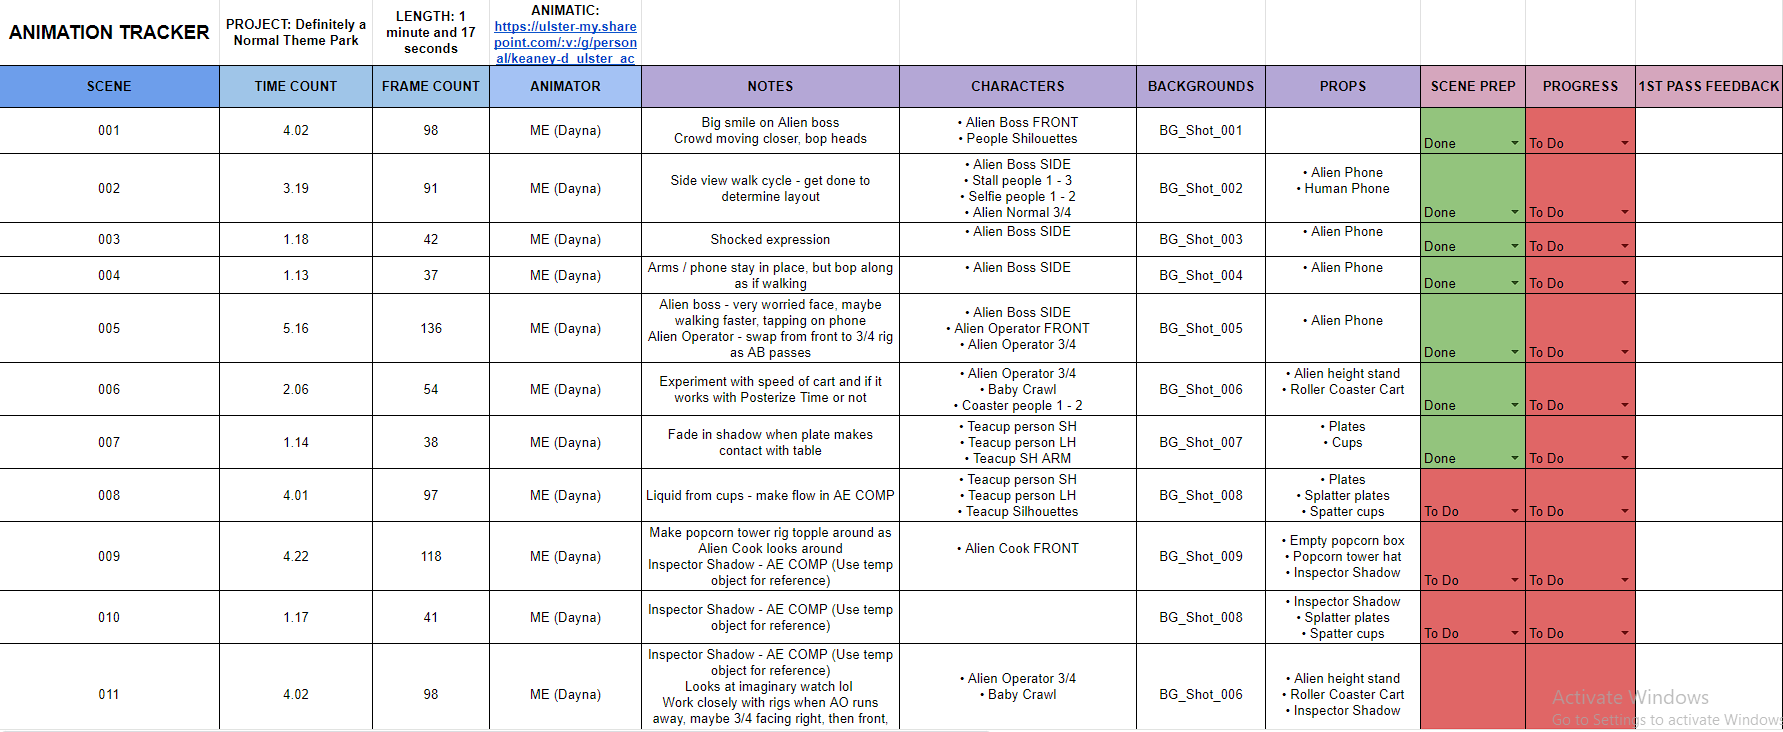
To record my animation progress, I prepared an animation tracker which includes time and frame count of each scene, informative notes before animating, and what characters, backgrounds and props are featured in each scene. I set up this tracker layout based on my placement year production’s tracker they used to keep progress of each episode. Implementing this into my workflow will help advise me throughout the animating stage, and structures how much work I must produce in the time I have.
From my animatic, I gathered all extra animation assets to produce, and worked through each one to achieve the right visuals.

One asset was the spinning teacups. I first found two examples of spinning actions in ‘T.U.F.F. Puppy’ and ‘My Little Pony: Friendship is Magic’ to grasp the idea of how this idea is formed.
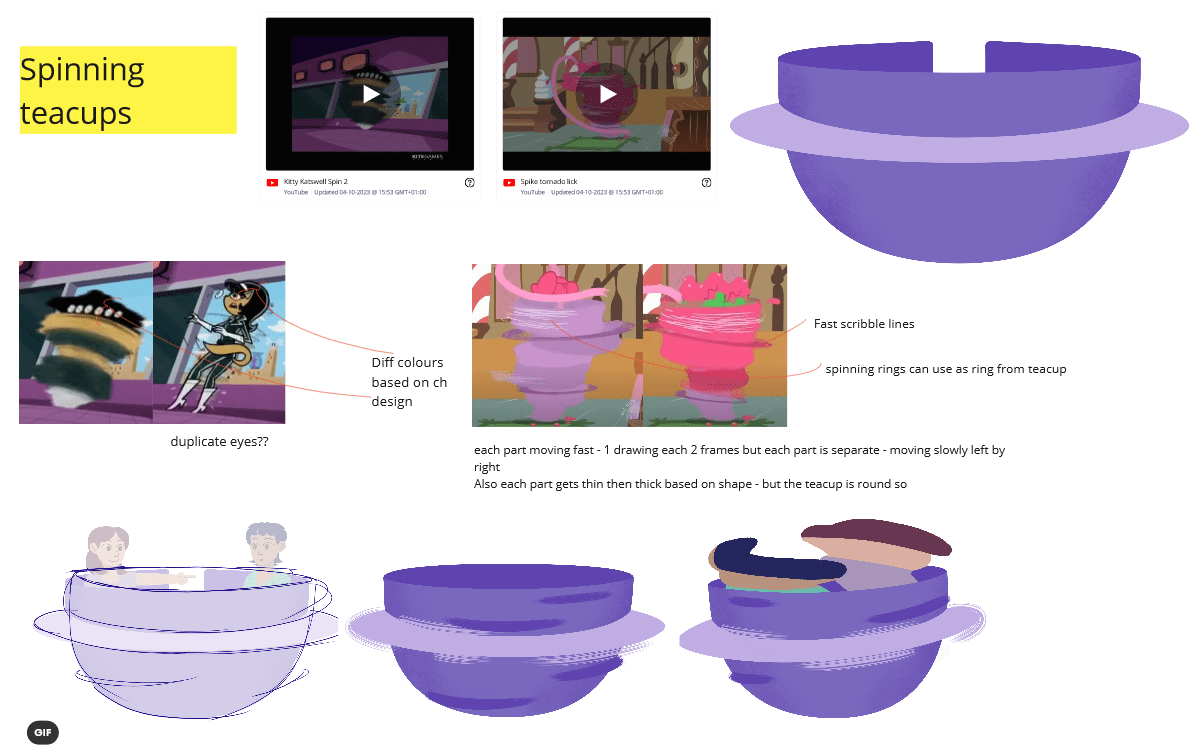
I roughed out a hand-drawn animation of how the teacup will spin. With this reference, I used Photoshop to build the teacup in, following the same design and textures as in the backgrounds. I tried out different ‘fast motion strokes’ before I was happy with the final concept.

Next, I added in people in the teacups. I made one attempt, then realised I made them spin in one spot, when really they should spin wider along the teacup. I made my next attempt, and I was much happier with the outcome, and happy that I caught this thought early on.
The next asset was laser ray visuals. In two scenes, the Inspector will shoot a ray gun that will target the Alien Boss, and ‘hit’ them to give them a badge. I researched TV shows that included visuals of lasers and shooting rays. ‘Ducktales,’ ‘Powerpuff Girls’ and ‘The Simpsons’ provided good examples I can reference. 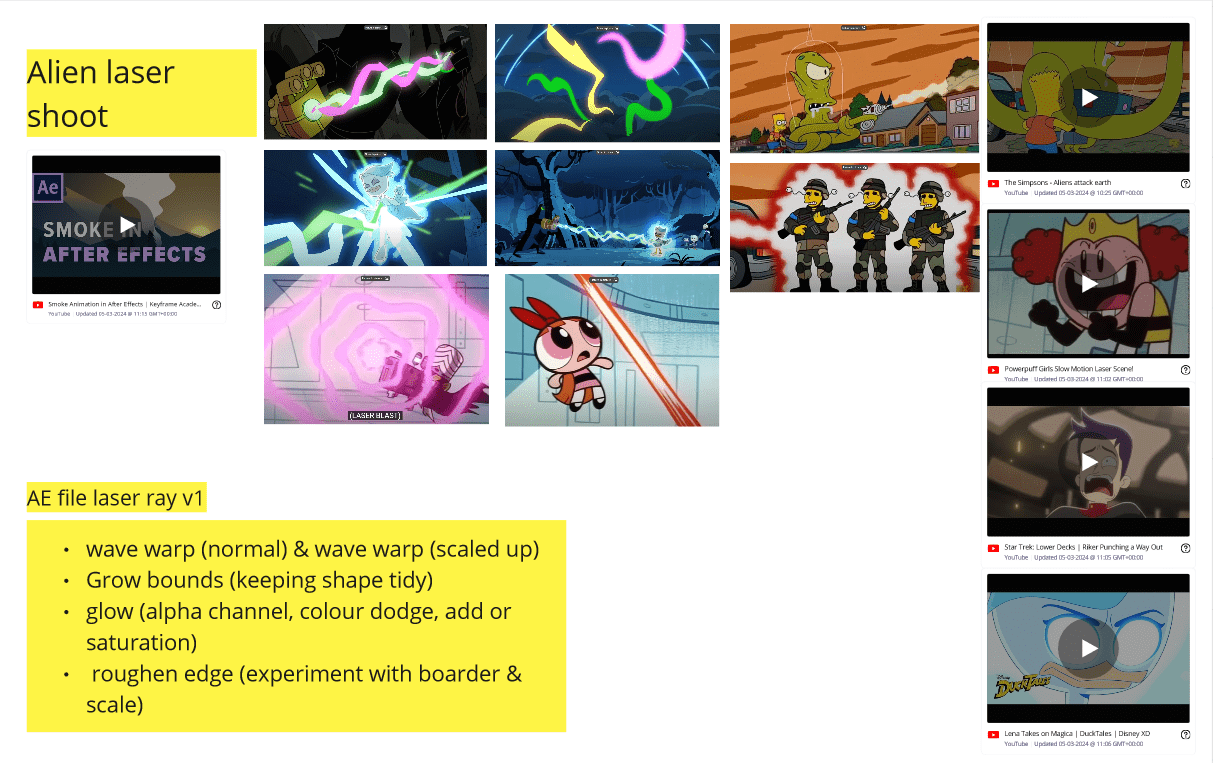
This After Effects tutorial on smoke motion is a helpful video which I have used once before, I’m aiming to use these tricks to give me the visual I am looking for.
Effects like wave warp help in my experimentation below to give me an effective visual of lasers. I added in glow and roughen edge to each attempt and altered their settings to get different results.
I then experimented with the visuals for shot 24, where the laser warps around Alien Boss. I used the same effects on a circle, which I animated scaling up, then down. I duplicated its comp three times and altered the wave warp evolution, so each part is flowing in different timing. The warp behind is set different in roughen edge to create smaller bubbly parts for an alien/space effect. I was recommended to lower the opacity too so you can slightly see through each part, and a secondary action to where the laser is shooting towards – the star badge that is put on the alien’s shirt.
Shot 23 will include the shot from the gun. I followed a similar process, but instead I used a trim path to guide the rectangle of laser from the left to the right. I used mesh warp to make it wobblier as it shoots through to the other side, then used trim path again to bring the effect back from the start to the end – indicating it is travelling far beyond the screen.
Next, I made food trays and cups flying out from the spinning teacups in Shot 8. I referenced a scene from ‘DC Super Hero Girls’ of a food fight scene, and screenshotted some frames that I could reference the motion of food thrown through the air.
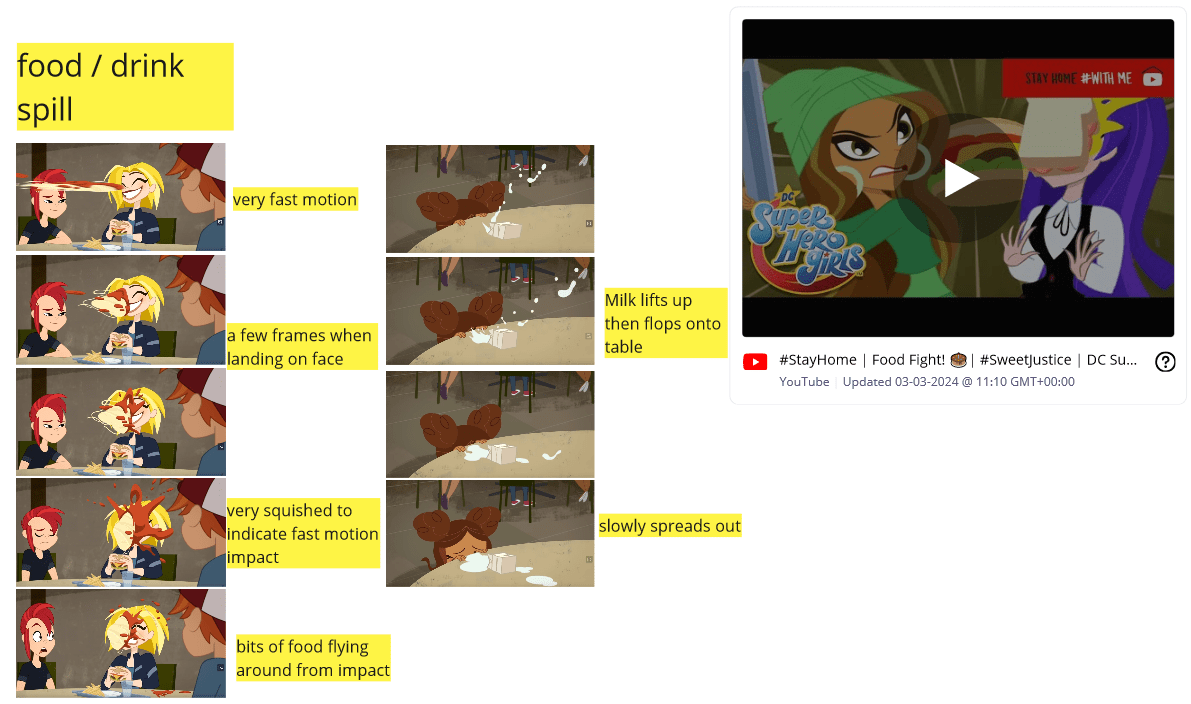
I decided to paint a few frames of this action on Photoshop again using the timeline. It took around 5 drawings to create the path from the top to landing on the ground. I used previous PNGs of the cups and food trays to reference their position, and to paint the smear frames from. Eventually I got an interesting animation of the cup and tray flying to the ground.
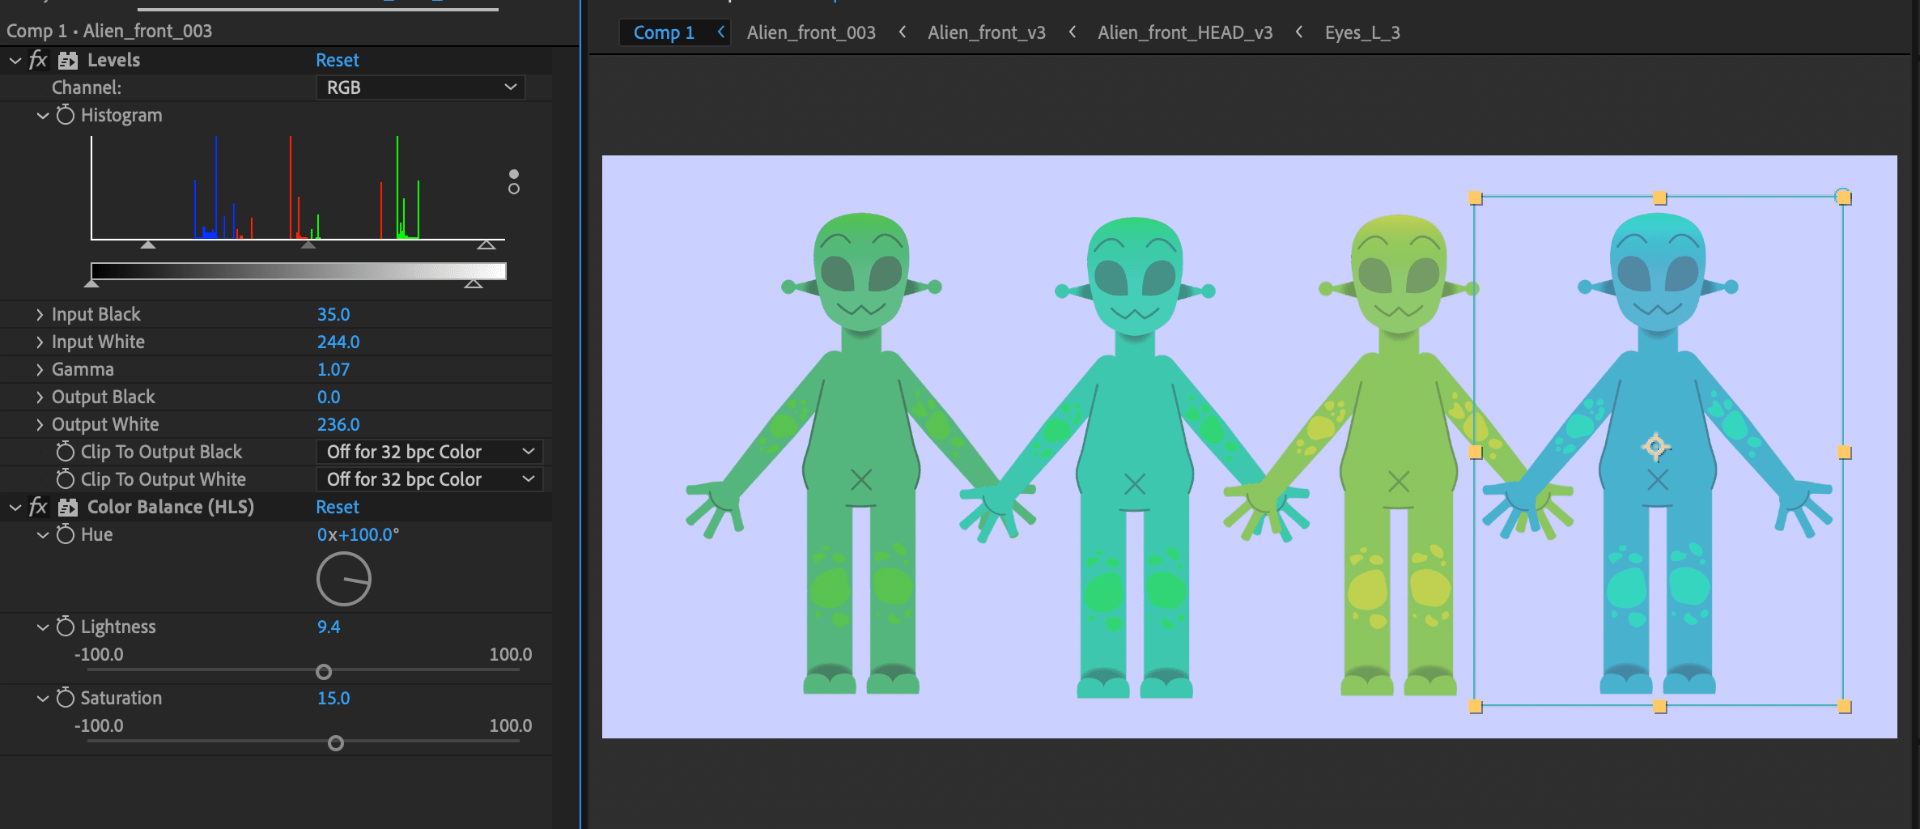
As mentioned in the pre-production blog I wanted to add colour alteration to the aliens in this stage. I did this by experimenting with the effects colour correction and levels. I saved these settings into my own animation presets so I could drag and drop this onto every alien in my shots. This provides differentiation to each alien, separating them apart if they are close together in shots.
First pass animation
I will be reviewing my animation passes using Syncsketch to detail what fixes need to be made, any changes to length, and what should be added / worked on next.
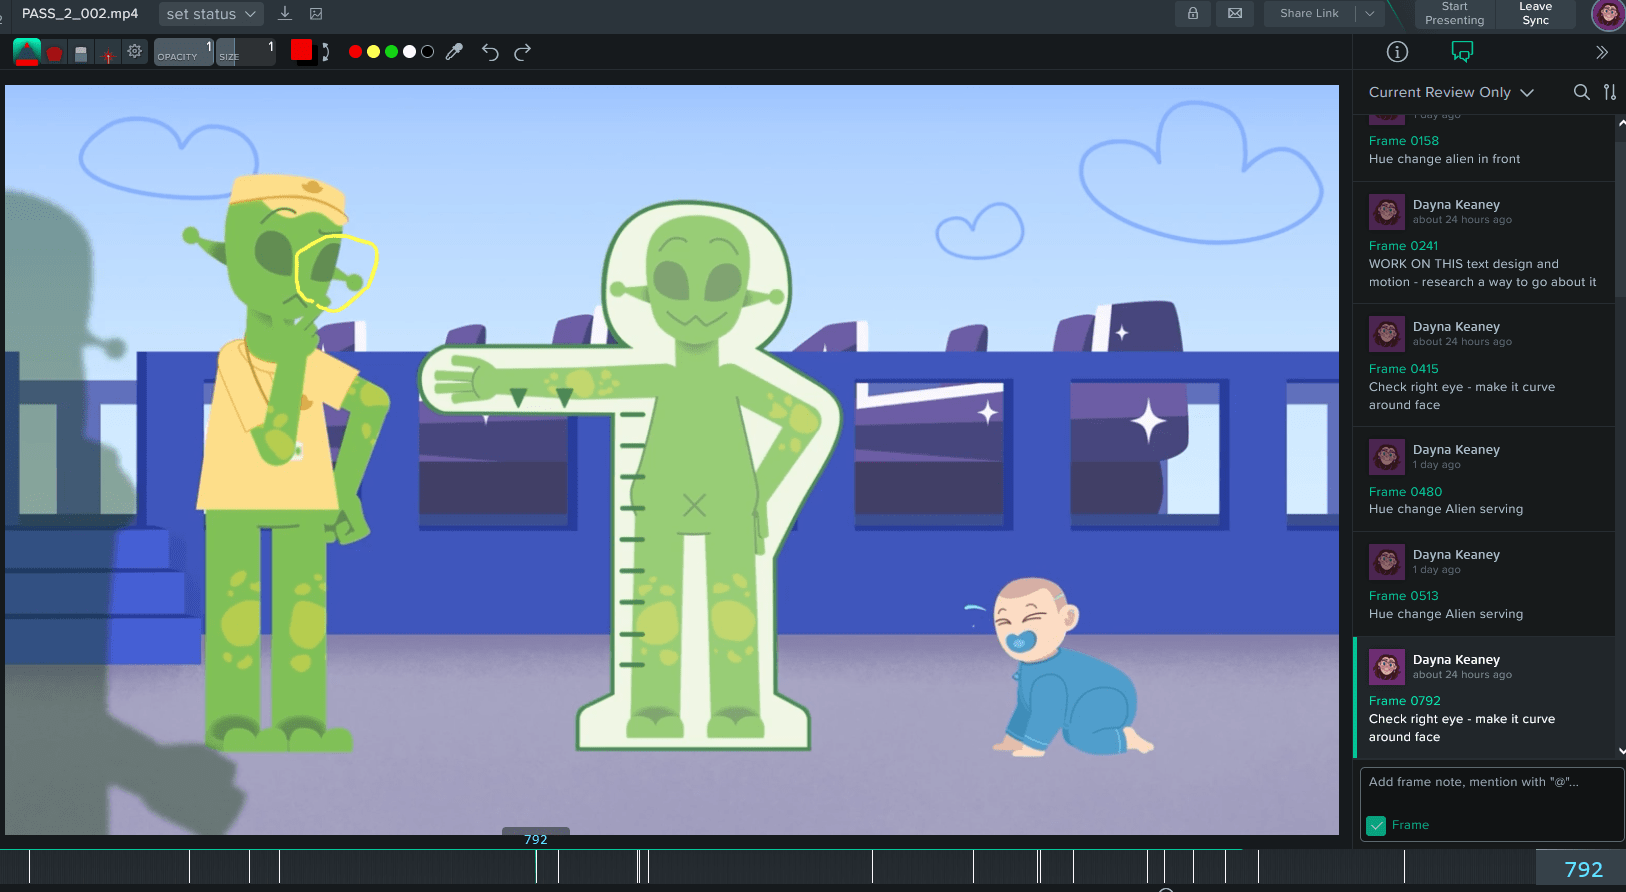
Pass 1, before any fixes.
In my first pass of animation, I focused on how each character is animated, what should change, and what should be added next. These are detailed through these notes:


I made notes on other smaller animation details to add, such as the baby tears, and the food flying from the spinning teacup – important details that would give better context to their scene.
I focused on the flow of each character and adjusting their reactions / body positions, so they read better. For example, in shot 20, when the inspector is turning around angry, beforehand it was too slow and doesn’t read of judgement/anger.
First pass review fixes.
Second pass animation
In the second pass of animation, I focused on framing some shots better, colour correction and any more animation polishes / additions. These are detailed through these notes:


The biggest fixes to make here was colour correcting my Illustrator files. I realised that they all were set in CMYK mode instead of RGB. This meant I had to go back, change each file to RGB and check every scene has the updated colours. I had also been changing the colour scheme of the alien laser gun, as beforehand it blended too much with the background. The darker colours now allow it to stand out better in each scene.
Some further details include changing some side character aliens with a new colour scheme and lengthening 2 scenes which brought the running time to 1.18 minutes.
Second pass review fixes.
Third pass animation
In this pass I touched up on any intricate details I could find, any missing animations and additional details to the backgrounds. These are detailed through these notes:


The most prominent fix was for the neck shadows on the aliens, as they cropped weirdly when converted from CMYK to RGB. I finally added the text message and laser visuals to the scene once I was happy with the experimenting. I added more props to the stalls, and silhouettes to the backgrounds to give the idea there are more customers at the park.
Final pass, with third pass review fixes.