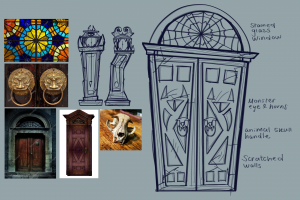
I started modelling the grand door with the use of my concept design page and a couple references to start with.


I started blocking out the shapes of the door with my reference behind. I made each part of the door in a different colour as I got confused with the model in all grey for a while.

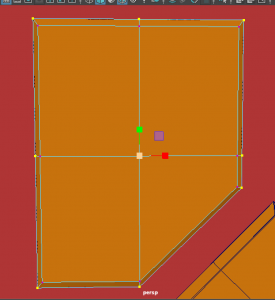
I had been blocking in these parts in the same slanted position as the drawing, though it was difficult to line up the polys in a right diagonal line, so I rotated them back into a straight position so they can sit better together.

I added a few edge loops to the window part and the door parts. I extruded inwards the inside faces of each model by three squares so they both have some depth to them.
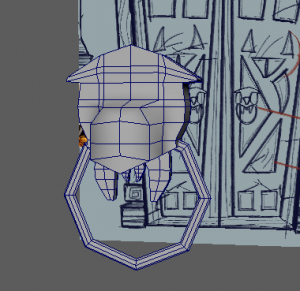

I took a break from the door and started working on the door knocker. We have a running theme of bones of animals around our haunted house, so I wanted to continue this theme with a skull door knocker. I used my image reference and my drawing reference to block out the head shape. I modelled the teeth in the similar way to my grandfather clock. Then I added a torus shape for the door handle.
I wasn’t sure how to go about the eyes and nose of the door knocker as of yet, so I brought back the door to continue working on.

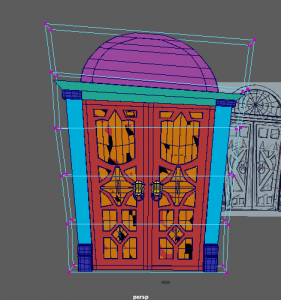
Like my drawing, I tried to recreate the door design shapes onto my model. I made the door part in x-ray view so I could see the reference behind while I block out the shapes. as much as they look like the drawing, I wasn’t happy with the outcome at all. I feel as though I am missing some knowledge and visual of how to design this door. – There is no pattern, and the shapes look out of place.

I took a step back from the model, and researched more on front door designs. This will help me spark more ideas and figure out how to structure this design.
I made a new concept page with some new reference to help spark ideas. I learned that most door designs consist of simpler shapes that slide in together, like squares, diamonds, stars and rectangles. I drew them out and came up with a new pattern for the door.


I ended up redoing the model and shaping them in a regular way as its easier for me to snap each part together and go by the grid to make sure there are no gaps.

I modelled the shapes from my piece, which I had placed in my Maya scene. I gave most of them some more edge loops to create the shape I was looking for etc. the Star shape needed more vertices to be shaped the way it is.
I also extended the back edge loop of each shape outwards to give it an outwards bevelled look.

When copied and pasted to the other side, along with the skull door handle, this is what the model looks like at this point. Next I wanted to UV map the piece, then use the lattice tool later on.


It was quite easy to UV map this piece as most of the shapes were squares. the more difficult polys to UV map were the skulls. I had to plan a edge cut around the head and beak of the skull to break it into four parts.

I combined the model together, froze its transformations and deleted its history. I then started using the lattice tool to warp the shape I originally wanted to capture on the door. I got the position, then I took off the lattice tool. Now the door was ready to texture.

I bake mesh the model and place a few textures on for now to see how the door would look. I showed the group and they liked how it was going so I continued with this look. I used one the wood texture ‘Wood beams’ for the door and the bone materialised material for the skull & pupils.

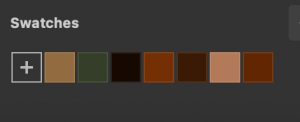
Much like my other assets, I placed two paint layers down, one for highlights and one for shadows. I use these palette saved colours to paint on shadows in sharp corners, and vibrance on the middle of the wood parts. This definitely makes the wood of the assets more colourful and stylised the way we were aiming for.


I had placed the bone stylised material onto the skulls and made adjustments, but I wasn’t happy with the look. I researched door handles to see if I could get colour/material inspiration and I found this image on the right. I wanted to see if I could aim for this look.


I added a copper material with a dark brown colour on, and experimented with the grunge procedural textures to add roughness and gold to the skull.

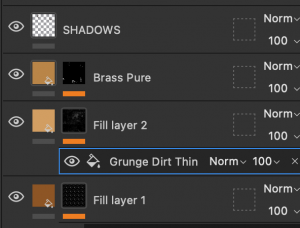
It was a challenge to aim for the look I wanted but I got a result I was happy with. I applied metal edge wear with the brass pure material, the grunge dirt thin texture, and dark shadows.


Later on I started using the blur filter (on the shadow layer) for less detailed parts such as the door shapes. This made for a softer, cleaner look.

I continued the shadow and vibrance applying all around the door where suitable. I have left the window area without a ‘stained glass’ material for now as I am unsure how to create the effect. Our team agree that we will see what we could achieve when we bring it into Unreal Engine.
And this is the finished model and texture of the Grand Door! Again, this was a challenging asset to make, especially at the modelling stage on Maya. I wasn’t sure how to start off the model, and the position on my concept page set me off track a bit, but I got back into it an started a more simpler way to help continue the process. I found the texturing interesting and fun to complete as I had more knowledge of how to design the wood, based on my past assets. Overall I’m happy with the look This will be a key asset for an interesting cinematic shot.
