Monty Rig – Animating

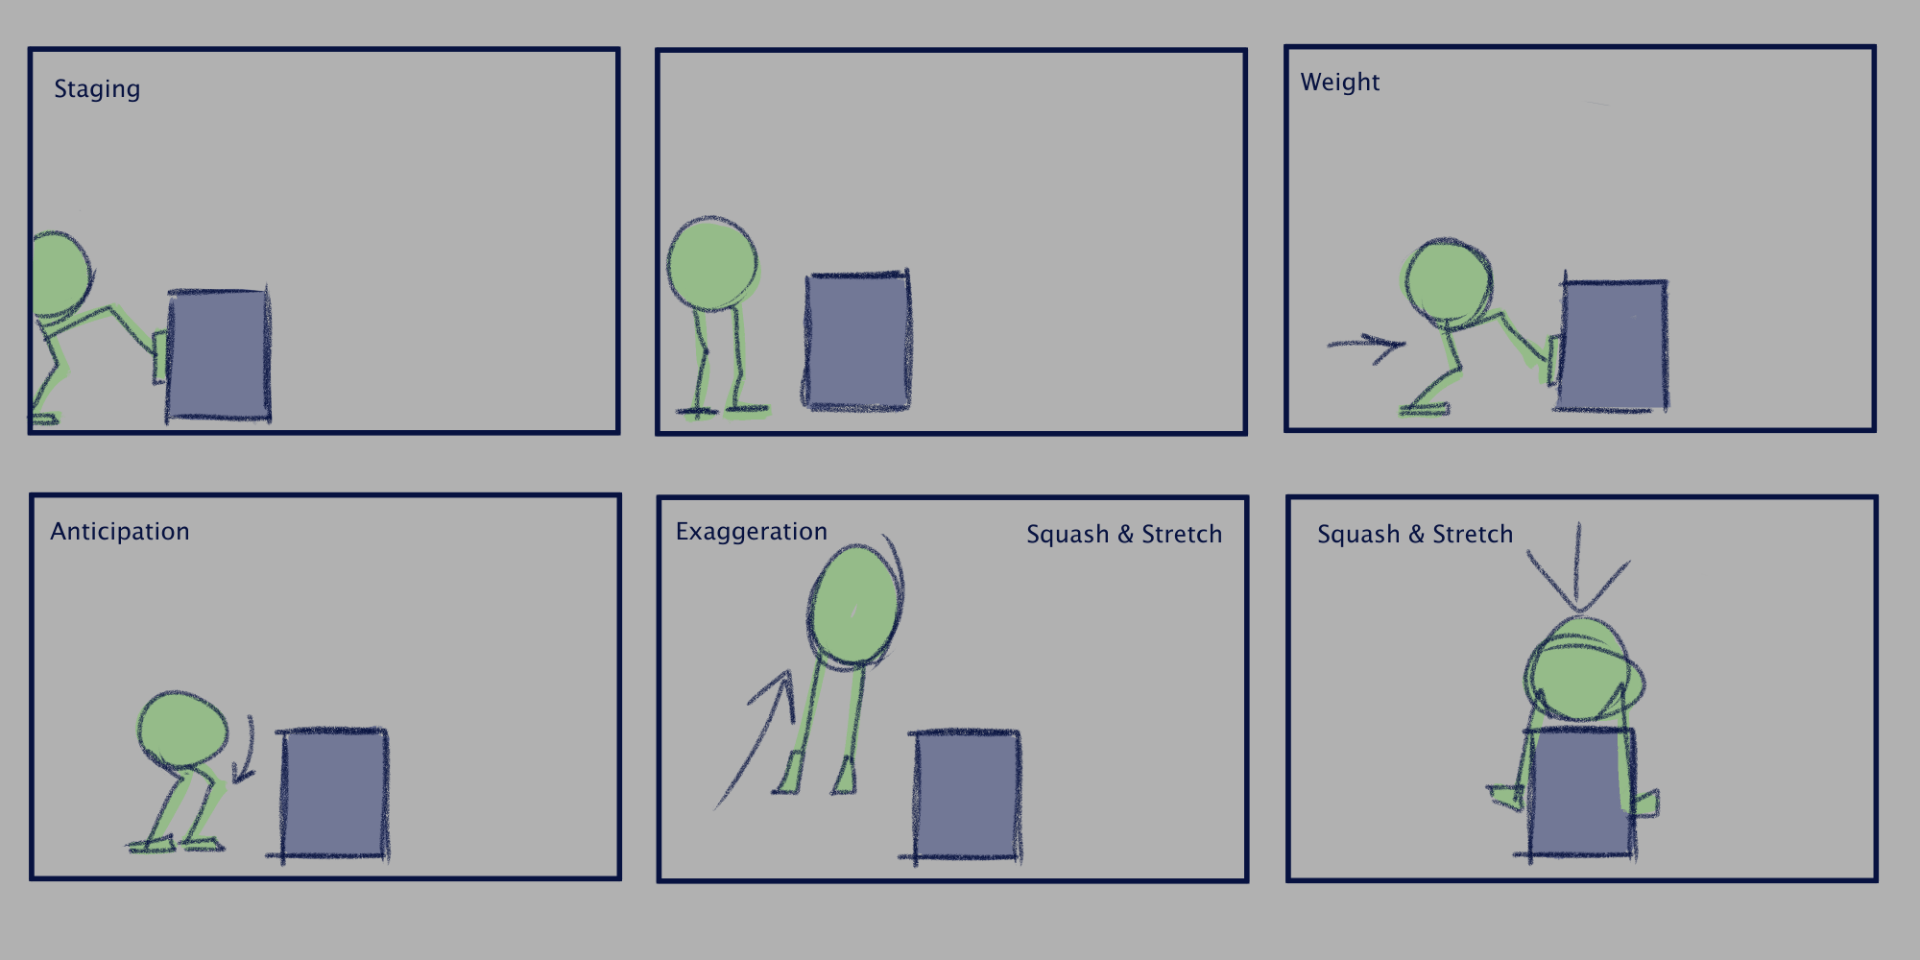
First I will be completing my action animation ‘Pushing box then jumping onto box’. I started off my new scene by using the reference editor to bring in the monty rig. This provides me a fresh, new rig to work with and excludes any other touches It may have included in the actual file it comes from.

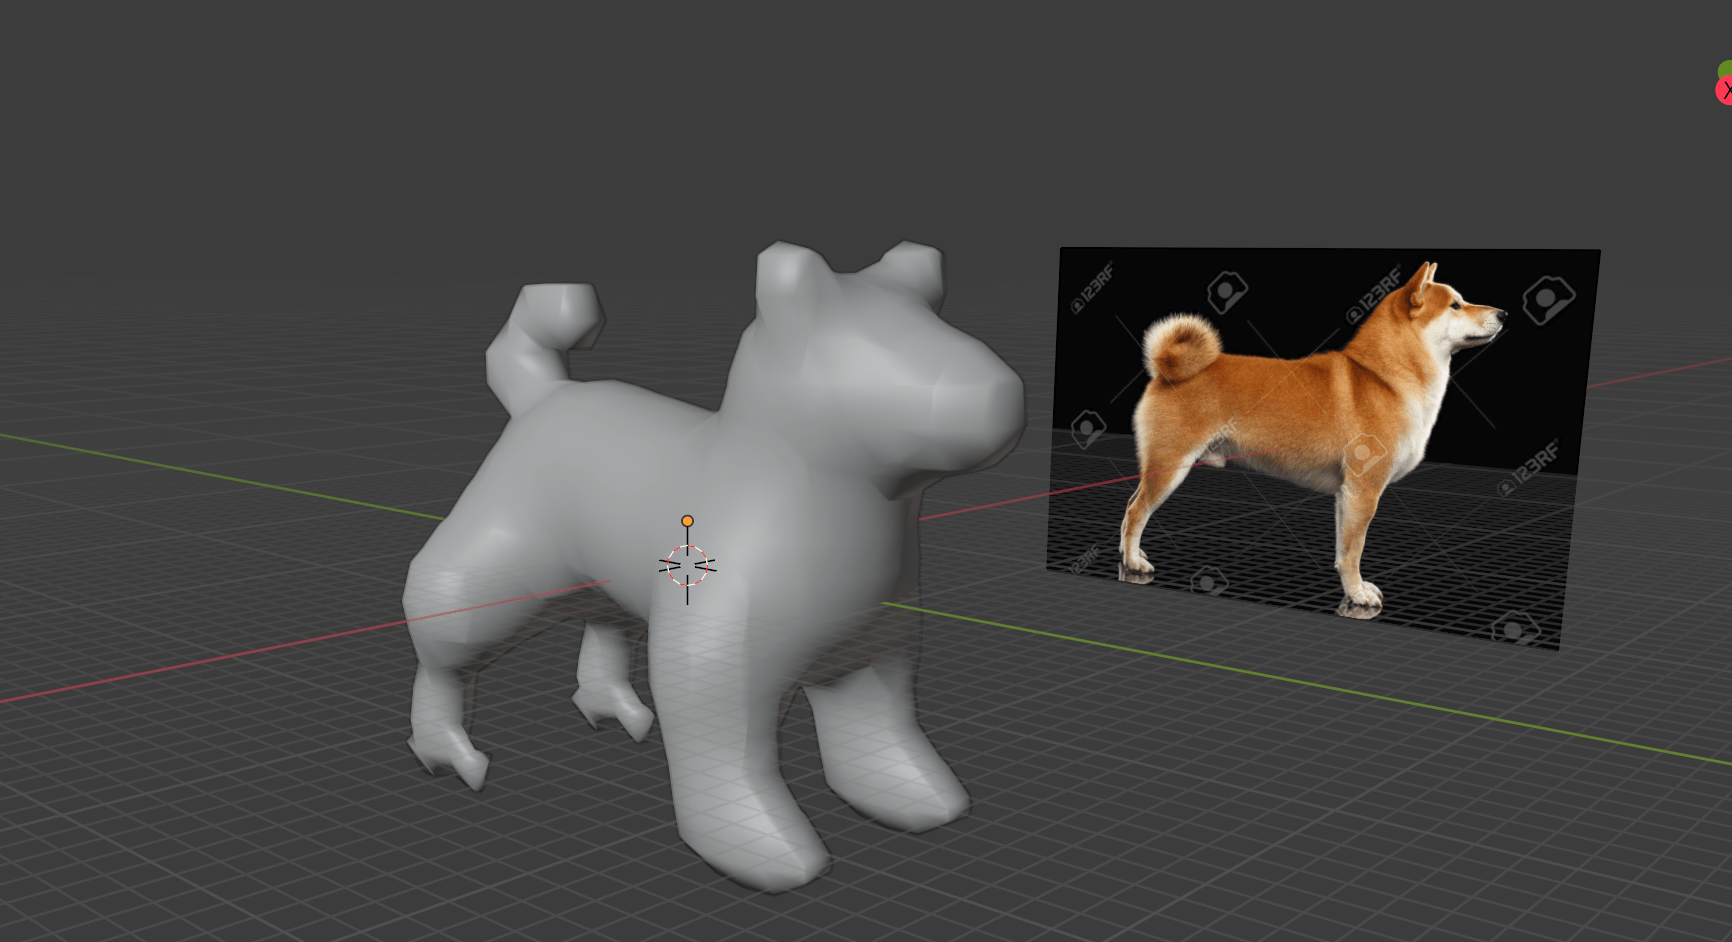
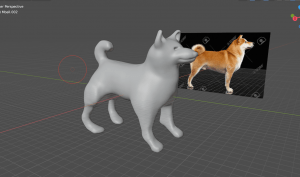
I used my reference of my legs as picture in picture at the top corner of my screen so I could clearly see the video while also seeing my Maya workspace.

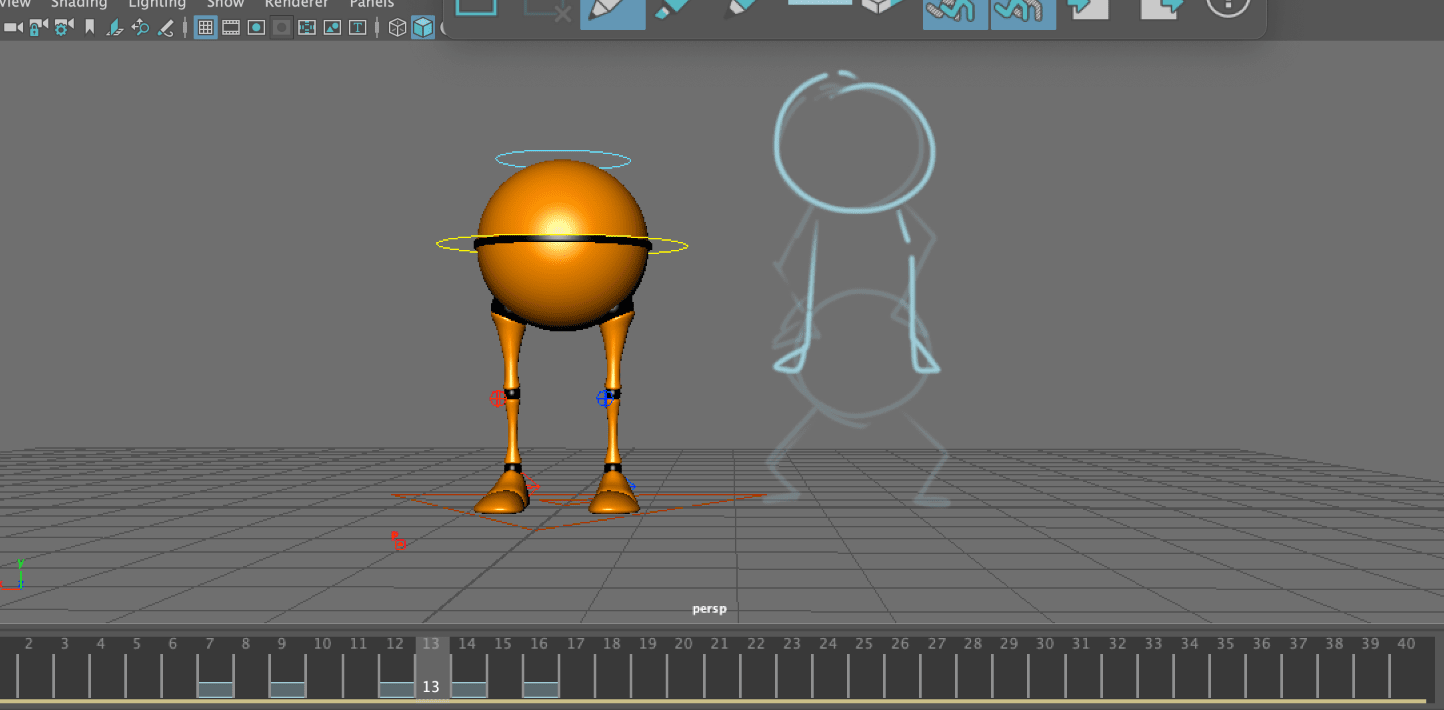
I started blocking out my keyframes, also following my storyboard, to where important key poses are placed. As soon as I added in a few frames I went back to add some more to enhance each keyframe. This provided me with a blocked animation. At this stage no timing, or in-betweens are figured out yet, just simply the overall poses in the action. Here is a quick playblast of how it looks at this stage.

I think so far I’m definitely achieving the look i’m looking for so far, but there so much more to work on and polish up before its properly animated.


Further on, I used the tweenmachine to help me place in-betweens down to smooth out the action. As I first went through the frames and turned off stepped preview to see how it looked, there was lots to fix. Below you can see a lot of errors with the legs and the timing is off too.


Here is the result of looking back on the frames on stepped preview and seeing what went wrong. Below is two versions of the in-betweening process and timing structuring with the use of the dope sheet. The first video is with stepped preview off, the second is with it on.


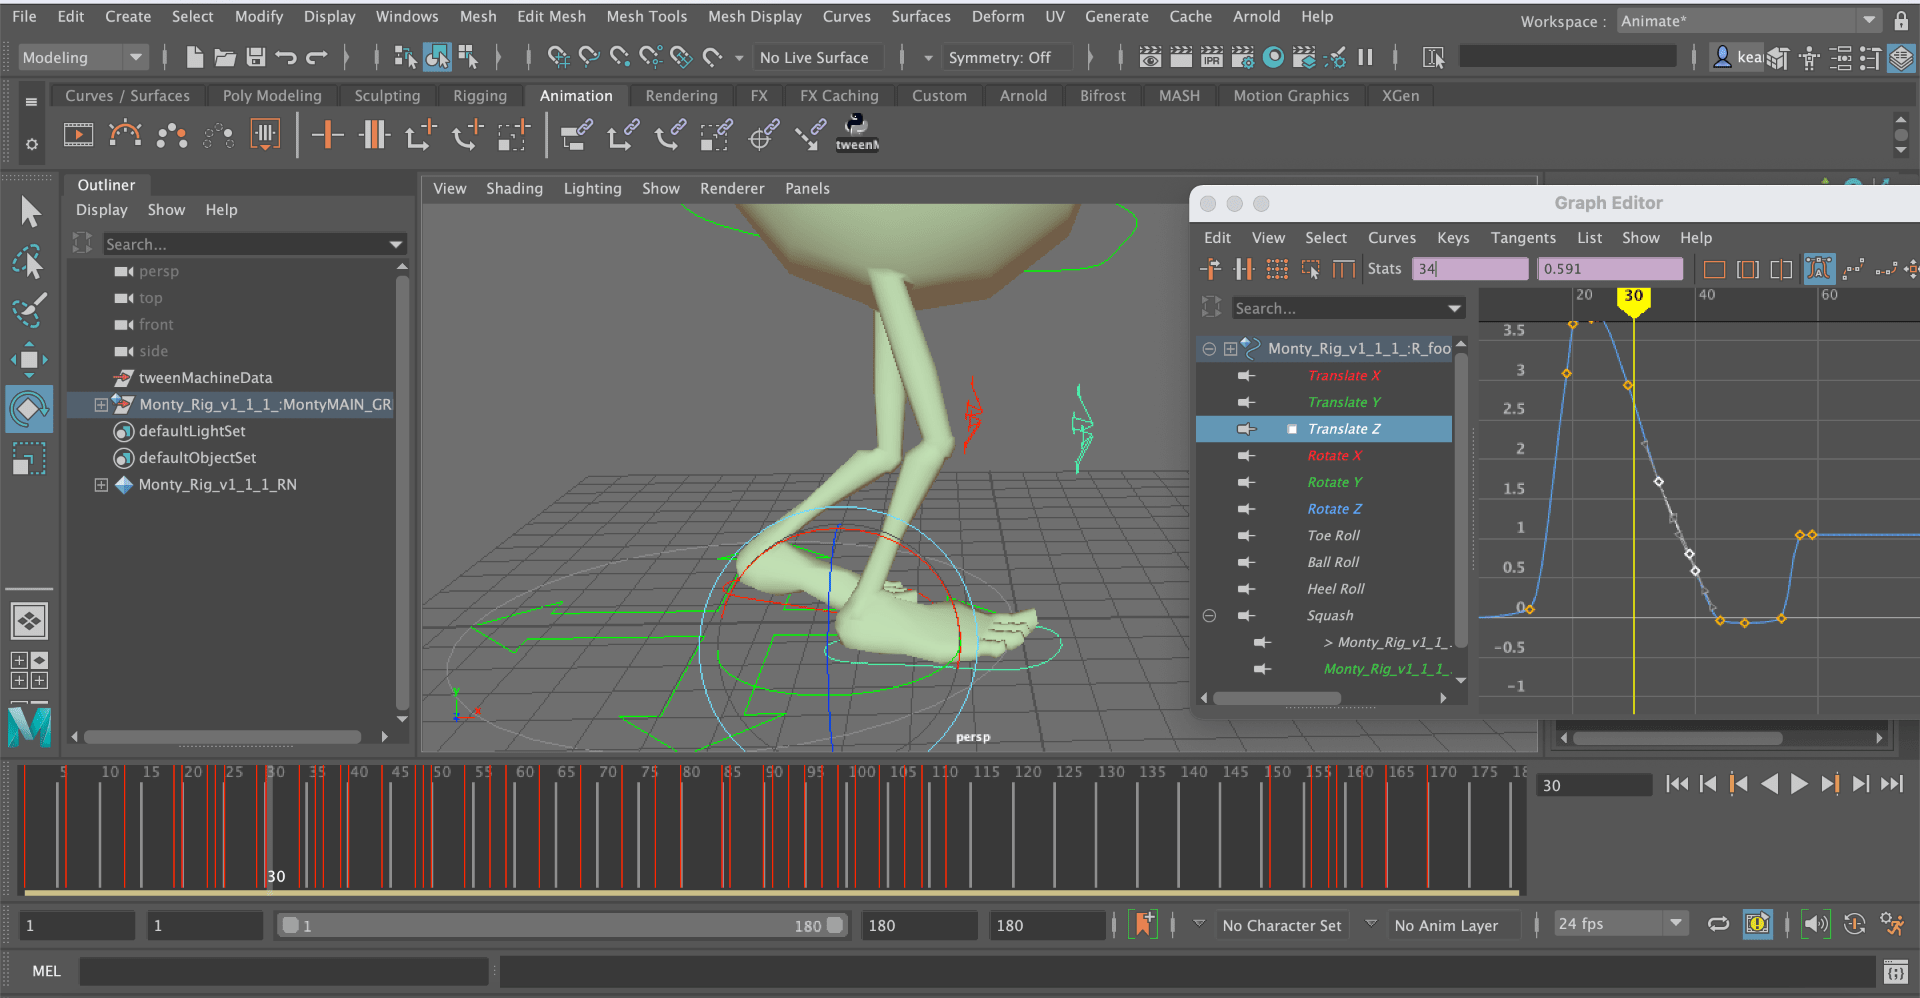
Next, I moved onto polishing up the movements with the use of the graph editor, and added squash and stretch frames for the body. I usually get a little stuck at this part because some of the things I do on the graph editor, don’t usually turn out good. I’ve had some experience before and I feel like I did a little better at handling the graph editor this time around. I also added squash and stretch features just after using the graph editor. This is because that function is what I mess up most in the graph editor. I wanted to make sure I avoided any complications I might have run into. In the end I added the squash and stretch with little problems and it came out looking good.

I also added some more touches to how the monty rig pushes the box, a wobble after it jumps, and the subtle movements of the legs after it jumps. This is to add more realism and spark to the animation instead of solid movements. 

Here is a preview so far. At this point I can now look over the animation one more time, and now plan the position to where the monty rig will move across the screen, and where the box will be pushed to.


I have been working on the feet placement as I thought they were quite off from key-framing I had done beforehand. This is how it looks now. At some points, the left legs knee would stick outwards too far that I thought didn’t look right. I was able to fix this by going through the frames again and pushing up the knee control towards where the box is so that it would straighten out more. However I left in a bit of outwards bend all on a same level of translation because I thought it would add realism to the leg movement. It also fits in with the right leg, where they both stick out a little.


I have now also worked on the positioning of the Monty rig. I could say that this animation is done however I still am not happy with how the feet almost ‘slip‘ as it moves forward. I have been trying to fix this but this is as far as I’ve gotten.


Here is a closer look at the feet movement. As you can see, sometimes when one of the feet is on the ground, it can slip upwards or downwards. I have been trying to fix this by setting their translate positions regularly the same as the last frame but It doesn’t always work. I will need to look back on some tutorial videos to see if this problem can be solved.


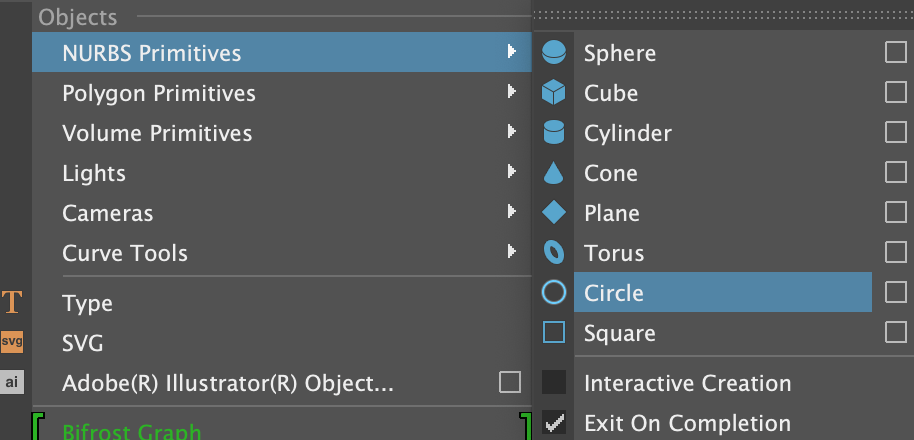
I’ve come back to this action after a while and with more experience with the graph editor, I can figure out the feet placement and the circle tool placement and fix them up as best I can. It was tough to find the key frames on the graph editor a good place to sit when the monty rig is moving forward, but I worked with it until it looked right.

As soon as I got through this, I did one more look through the Monty rig to see where I could improve. I added some eye movements such as a blink, stretching when its jumping, and a wink at the end. I also reset the box translations and did them again so they could line up with the feet again. All of this was done using the graph editor.


Before I wanted to make a proper render of my animation, I wanted to change the settings. I went into the render settings and set the preset to HD_1080 in the Image size option. This allows my previews to appear more clear and better quality. Then I went over to the playblast settings to change the display size to ‘from render settings’ so it will follow the same preset. Since I am on MacOS, my only format option is to go with avfoundation, instead of having the option to go with qt for QuickTime. I searched this up and found out that avfoundation is another name to represent Quicktime so the settings will come out normally anyway.

By setting up my render settings for a better quality playblast video, this is the finished result of the Monty rig Action!


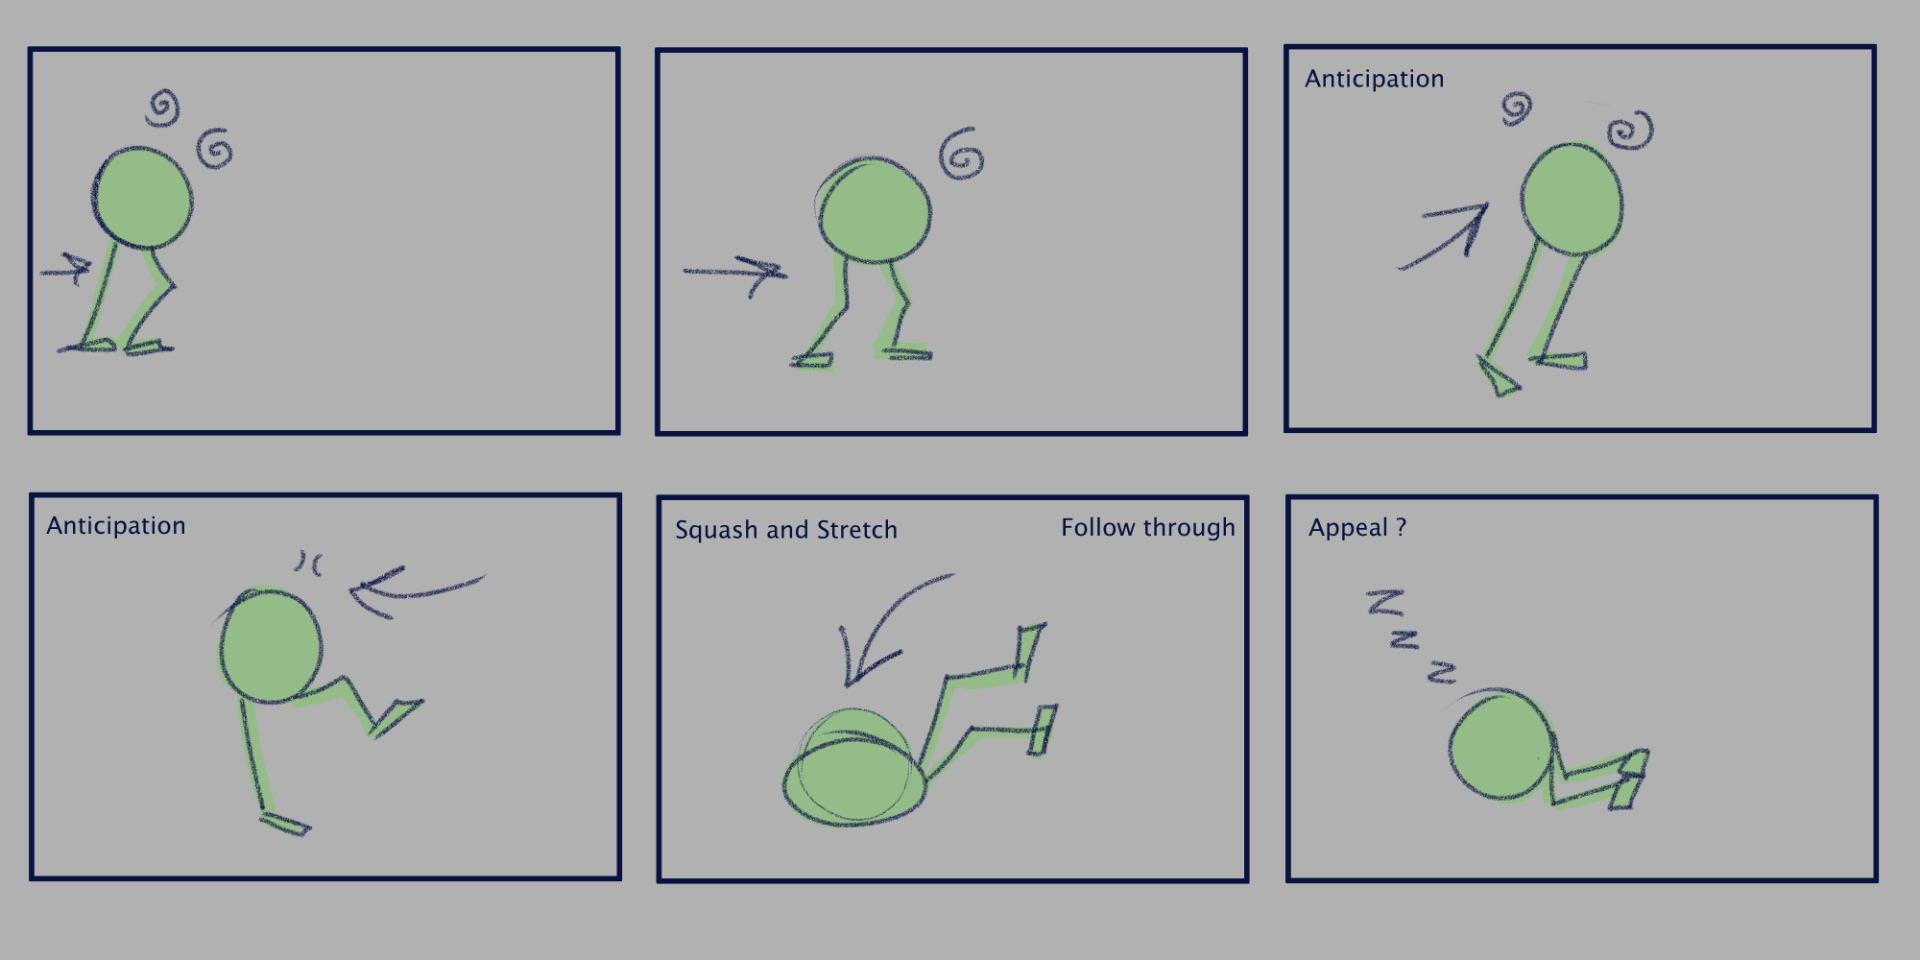
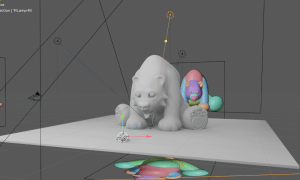
Now, I will be completing my emotion animation ‘Feeling Tired’. I started off my new scene again by using the reference editor to bring in the monty rig, providing me with a fresh scene to work on. I got my reference videos ready to switch between on picture in picture to start working!

I started off with blocking out the major keyframes that will structure out my animation taken from the reference I was using and the thumbnail video/storyboard I made. Again, no timing, or in-betweens are figured out yet, just the overall poses in the action. Below is a quick playblast of how it looks at this stage.


Further on, I used the tweenmachine to help me place in-betweens down to smooth out the action. I also timed out the action at this stage. Here is what it looks like so far in stepped preview. There is still a lot to fix considering the walk cycle, and the fall.


Below is what i’ve achieved in the in-betweening process and timing structuring with the use of the dope sheet. In this preview, I had stepped preview turned off and fixed up a little movement from where the monty rig lifts up the legs as it falls. There still needs more work on especially for the wobble, the fall etc.


Here is a little more work on the in-betweens, the timing and just the translation of parts to fix up any other motion I thought needed adjusting. I slowed down the pace of the walk which made it easier to adjust the legs, the fall works a lot better and I added additional movement to when monty is on the ground – the head bounce and leg bounce. I am thinking of going back to adjust the head a little more at the beginning and fix a little bit of the step up to where the monty rig loses its balance.  I can polish up these parts with the graph editor.


This is the result of going through the animation with the graph editor to polish up. During this time I also added in some more touches such as the left to right wobble at the walk cycle, and a squash action as the monty rig hits the floor. I do want to look over this squash though as it looks a little off (stretches too far to the left) but overall the animation is coming along great. The timing is good now, the leg positioning is at a better place now and the roll to the front finishes off the animation well. I will go through the animation one last time and fix up what I can, and make it a little more appealing.


Heres a little more alteration i’ve made for this emotion action. I almost forgot about the eye function so I added them opening and closing, trying to stay awake. I have also been working lots on the feet placement and overall little touches with the use of the graph editor. During this time I feel like i’m getting better use of the graph editor than I have before so this is good progress.


I took one more look through of this Monty rig emotion to see what can be adjusted. I used the graph editor the majority of the time to alter the feet placement when the monty rig walks forward. Again it was challenging to configure in the graph editor but I’ve become more familiar with it. I also worked on the legs where the monty rig struggles to balance, and when the legs hit the floor, just to enhance the action a little more.

By setting up my render settings for a better quality playblast video, here is the finished result of the Monty rig Emotion!


Monty Rig – Planning

For planning my Monty Rig, I will be taking in the inspiration I researched, looking over the 12 principles of Animation, and going over what techniques I will use, and in what way. Here I will also produce thumbnails and a storyboard to help my progression to the animating stage.

I have implemented a few of the 12 principles of animation into my practice work already. From these I can learn how to achieve said principles and how I can improve them to feature in my Monty rig assignment.


First off I have attempted squash & stretch in this monty rig practice. From the monty rig jumping side to side, I could add a squash and stretch feature into the jump by squashing the head at its anticipation stance, and stretch the head when it is reaching up in the air.

This squash and stretch feature is good to enhance the action and gets the point across that the monty rig is jumping. However, I feel I could improve in this animation overall. I could have left a few more frames for the anticipation and therefore give the jump more of a punch to it. I can see where I tried to achieve this but I feel it could be enhanced more. This way I could get more squash and stretch seen in the action – I would have more time to squash the head etc.

Overall I did a good job, but next time I could focus on the timing of the jump that will allow more space to provide squash and stretch.


I have also attempted anticipation in this Character rig. In this next jump action, I could focus more on the anticipation as I only had the body to work with. I could squash down the head every few frames then made it jump with a stretched head, and land it back with a follow through action. (squashing then returning to normal)

Anticipation is beneficial to start an action before going straight into it, it allows for thinking time and a better-looking outcome for the action executed. I think I did pretty well attempting an anticipation action. This was a very simple task so I could achieve more in many other practices to come.

All I would say is there could be more realness to the movement, I can see in my attempt that the anticipation pose just goes straight down. To add more to the pose there could be a little wobble, a tilt of the head eg. just to make it a little more loose and expressive.


I attempted a follow through/overlapping action with this rig. In this expressive jump, either side of the body would overlap the other as it goes up and then down. There is also follow through when the body lands and the ‘head’ still reacts to the jump until it returns to normal.

Follow through/overlapping action is excellent in adding realism to a character or object. I think this attempt was pretty good in terms of the timing, the additional action at the start and the follow through at the end.

I think overlapping action/follow through will be easier to tackle with a more complex character rather than this shape here. So in the future, I’ll have a better idea of how to go about follow through/overlapping action once I test out a different kind of character.


To help with my knowledge and find more inspiration, I wanted to find examples of the principles of animation (for action and emotion) in any films I could find. This will help me spot them out more clearly and I can also see what kind of scenes they used these principles for.

I know I will be using squash and stretch, so I wanted to find an example of that first. I found this youtube video called ‘How to animate like Disney: Squash and Stretch’ The clip below, from Tangled, is what they used as an example. This is an action performed by Eugene, where he slams into a part of the dam structure. The use of the stretch technique (on his head, neck and limbs) as he hits the surface intensifies how fast he flew there, and how hard he hit it. It also could make the audience feel how Eugene feels too because of how intense the action is.

Source: https://youtu.be/L7okQED-8nM


I also looked for a good anticipation example and found this video called ‘Spider Man: The Anticipation Principle of Animation’. This was a really interesting video analysing the actions of spider-man from multiple films, shows and games the character comes from. As similarly explained in the caption of the video, many actions from spider-man and others constantly use anticipation to build onto what he does etc. punch, jump etc. The first example of Miles pulling back his arm for a more impactful punch adds realism and strength. And the second example of Noir webbing a car, and doing a spinning-jump to throw it to the bad guy, is also a symbol of strength.

Source: https://youtu.be/0MD2jHSYvTc


What popped in my mind was one scene that I love from the film ‘Moana’ where Moana convinces Maui to join her. Here we see a follow through technique made with Moana turning too fast that her hair flies past her face. I clipped this from a Youtube video called ‘Moana – All movie clips‘ Although this is a simple action from Moana as she just turns around, it could also pass as emotion. This is because in this situation, she is frustrated with Maui and desperately wants to get her point across. She turns around quickly with an angry expression, resulting in her hair flying across her face. As a result she becomes frustrated.

Source: https://youtu.be/0ydAYENu1RM


I can now move onto deciding on the actions I want to create! These were quite difficult to choose as I couldn’t find any clear ideas, or any good references to help out for a long time. I had a list of what I could possibly do written down in my notes:

Action and physical motion:

  • Ballet Twirl
  • Running in air Scooby doo style
  • Banana peel fall
  • Pushing box with foot
  • Sitting down on the floor


Type of emotion:

  • Joyous
  • Laughing
  • A wink
  • tired
  • Laughing then straight face


My final thoughts were to go with a combination of ‘pushing foot with box’ and ‘ sitting down’ for the action, and ‘tired’ for emotion.

As i’ve said before it was difficult to find references for what I hoped to do, especially for the action one. I decided I could do a few life references of myself to bring to life the idea I was thinking of.

I don’t have a lot of stuff, or space in my flat, but I made use of what I had. Unfortunately, I don’t have a box to work with.. So I filled up my washing basket with my cushions and that made it easier to push (I needed more weight for the action to work) I recorded myself pushing the basket with my feet similar to how the Monty rig will end up doing so. Again, I didn’t have much space in this room so that is why the camera is quite close to my legs. Though I still think I could work with this to focus on the feet movement.


I also made another video with a better shot of my legs – this time I can see clearly how each leg will react to the push and what will happen in-between the action. These references will really help me out to determine how this animation will play out.


Here is a quick storyboard/thumbnail of keyframes i’ve made of what my action idea looks like and how I will achieve it.

I want to capture the monty rig pushing the box into frame around two times to grasp the idea it is pushing the box. Then I would like it to jump onto this box, spinning around a bit so it faces the camera, and land with their legs in follow through movement.

Aswell as attempting to capture what I was thinking of, I also wrote down the principles that I may use in that certain part of the animation. I write down principles such as Staging, Anticipation, and Squash & Stretch. I added another  feature such as weight. Weight will be a big factor in this animation as the monty rig pushes the box.

I have also made a quick thumbnail video to time out the action and picture how the body and legs will perform.

For the tired emotion, I was thinking of a tired walk into the frame, then the monty rig might fall to the ground to sleep. I found this great reference video of a person walking in a dazed walk cycle with two camera views. This will help me achieve the ‘tired’ feeling to the monty rig and will also help with referencing a walk cycle.

Source: https://youtu.be/Xjg1GijjazE


Here is the emotion storyboard I made, also highlighting the major keyframes and how I will achieve it. I was going for a dazed, tired walk. Then the monty rig will loose balance, fall onto the floor and start sleeping. Again I added in the principles to where I might implement them. I added anticipation, Squash, follow through, and possibly appeal for the last scene.

Again I made a quick thumbnail video to time out the action and picture how the body and legs will perform.

3D Animation Practice Part 3

During week 8 we took some time in class to work with a simple jump animation with the Monty Rig, and using our new knowledge of rigging, and the use of an extension for in-betweening. This exercise would help us out with our Assignment with the Monty rig, and help us think about the blocking process, inbetweening, and the polish process using the dope sheet and graph editor.

Source: Week 8 – Animation Practice & Rigging continued, Morning Animation Exercise, Monty Animation – Blocking.mp4, Monty Animation – Inbetweens.mp4, Monty Animation – Polish.mp4


We followed, and used the same joy action that our tutor used in these videos to create the animation.

Cute Character – Texturing

When I had finished my model, I brought my work into Substance Painter. Substance Painter will allow me to add textures in many versions and styles.

Firstly, I baked the textures of my whole model so Substance has an idea of the UVs and where / how each part of the penguin is placed. I went on to apply some solid colours to each part with only the colour switch on, each on a paint layer.

On the body, I made multiple layers to separate the white tummy colour, the beak colour and the pink/purple skin colour.

I used this reference from my previous drawings to pick out the right colours that I was looking for.

Alternatively, I placed down the Chrome Pure material onto the computer, and a darker colour chrome material for the computer logo. I still plan to add a custom texture onto the computer to give it a screen, and more noticeable keyboard and touchpad. (Later on I notice this I did not like this when exported back onto Maya, so I made my own texture for the computer.)

I continued with Substance Painter and added some highlights and darker tones to the layers of the penguin to add a more lively and cartoon style. After this was done I exported the textures, and brought them back into Maya.

I opened my previous Maya file and placed in my textures and arranged them to the parts they belong to. I feel they look nice here already. I wasn’t a fan of the ‘chrome’ texture I placed on the computer so I thought it would be nicer and easier to make my own texture.

I exported the UV map of the computer that will give me the guide to place down the colour of the computer, the squares of where the keyboard, the touch pad, and the screen is.

I went onto photoshop and added in some colour to the places listed above. I also made an image of a blackboard class call that I painted over with penguins on it. I think it was a cute and unique touch to the model and it connects to the theme and purpose of the computer being in the scene with the penguin.

I added the texture to the Maya file and it fit well! It looks really well with the penguin.

Here is my Maya model with the full Substance Painter textures applied. I think it works very well and the little details Put in etc. the blush, the darker tones, the light in the eyes, makes a big difference in its appearance.

I exported this model to an FBX and uploaded it to sketchfab to test out how the character will be presented. This is just to test it out before I made a little scene for the penguin first.

Again through Sketchfab I went through the process of adding each texture to their PBR map etc. base colour, Metalness, roughness. I also placed down the studio light environment and added a coloured background to give it a bit of life.

Here is what it looks like uploaded. I think it looks really nice here. It looks vibrant and clear with the lighting settings I placed on. Below is the link to the model.

Source: https://skfb.ly/o6oqy

Next I would like to create a quick scene for the penguin to enhance the environment, purpose and intensions of this character.

Cute Character – Modelling

I started a practice attempt in blender during week 9 to get a good idea of what I will be working with on Blender and how to get the overall shape of the penguin.

As you can see, it is not the best modelled penguin out there. This was a quick attempt and I was mostly experimenting with the tools and doing what our tutor was teaching us that week. I see that the head is quite squished, the feet are not positioned together, the arms are too thin, etc. I have learned a lot more from this stage with the use of the tutorials provided on the subject of sculpting characters.

For example, I completed this task recorded by my tutor Henry to create a cute crocodile character basemesh using metaballs. I followed the video that showcased the use of metaballs, scaling and moving them, mirroring them, sculpting them etc. This was a nice process of creating a basemesh that I liked trying out.

I also followed my tutors tutorial on creating a basemesh for a dog using metaballs. It followed the same kind of process with mirroring the metaballs on each side to create the body, head, legs all symmetrical. Then sculpting the mesh with grab tool, sharp edge tool, elastic deform tool, simplify and smooth tool. I feel I only did okay using this process so I moved on to see what else I could work on.

I followed a 2-part youtube tutorial that taught how to create the basemesh of a bear. The first part showed how to block out the main parts of the bear, and sculpt them roughly to get an overall shape to work on. Using rounded cubes, with arc division of 16 that made it a sphere, was also a good way to block out the character as it is much neater and provided more control of the shapes in sculpt mode. In the second part we dove into detail sculpting which was really informative and I know a lot more after it.

The second part I got to group all the body parts together. During sculpting, I would change the voxel size and press remesh to provide me more divisions to get smoother, sharper details on the mesh. I used ctrl + r to reset my mesh

so it would be in a good position. I also used the sculpt tools draw, clay, sharp edge, grab, simple deform and more to follow the steps to make the shape of the bears head, body, claws etc. I used the smooth tool to smooth parts out, and made use of the mask tool to block bits out, then ctrl + I to invert, and work on it with the mesh filter tool (smoothing it, inflating it etc.) Then I also got to work on the render and lighting options, and lastly I added colours to the bear, and even a node to set a gradient on the bear. This was a great tutorial to go through and it taught me a lot about how to go about sculpting and polishing a model.

Source: Week 8 – Blocking out characters, recorded demonstrations – Installing model with speed plugin.mp4, Sculpting a basemesh of a dog using metaballs.mp4, Sculpting a basemesh of a cute crocodile using metaballs.mp4, Using standard geometry to create a basemesh.mp4.

Source: Week 9 – Sculpting characters – video content – Sculpting an Owl, Sculpting a stylised bear, Sculpting a wizard gnome, Masking tools in Blender, Applying textures to maps on brushes.mp4.

After these practices I was ready to start blocking out my Penguin model. I made a quick guide of the penguin below.

I started planning my references for my cute character on this page, and decided I should model the whole body all in blender, and model the glasses, and the computer separate in Maya. This makes for a more simple process and will hopefully be easy enough to bring all together in the end. I picked my colour palette, made a turnaround and sketched what the top and bottom of the character may look like.

I started my Blender scene off by placing down my reference images, cut up into the sides of the penguin drawings, around the area in X, Y and Z axis. This helped me start off the blocking In the shapes with the reference right beside/behind my workspace.

I blocked in some simple shapes using the rounded cube mesh to do so. With this mesh part I could change its presets to either a rounded cube or a sphere, by changing the radius settings and the arc division settings. I made one of the legs on one side at first, then I gave the parts the mirror modifier that allows it to mirror to another side. I let it mirror to the Y axis. At first only one part mirrored from my selection, so I used CTRL + L settings and selected ‘Modifiers’ which applied the modifier to the rest of the parts. I made these parts all separate first then I joined up the body part first, then the legs then the beak.

As the parts I am using are already set as meshes, I could go straight into the sculpt mode to alter the body. I remeshed the body by setting the voxel size to around 0.06, which joint up the head and the body together roughly, so I could go over it with a smooth tool to smooth it out. I also used CTRL + R to reset the mesh positioning, and turned the dyntopo tool on to clean it up and add more divisions.

Next I worked on the feet. I wanted them parts to be joint together so they could create a smooth foot so I used the sculpt tools to smooth them out, flatten the bottom, and inflate the toe parts so it looks more cartoon-like. I used mostly the smooth tool, the scrape tool, the inflate tool and the grab tool (to place the foot in a better position).

From this point, I traced back to what I also may need for this model and figured I should start making the accessories of the penguin on Maya – the glasses and the little computer.

I made my pair of glasses starting with a torus shape. I copied and pasted the glasses part to the other side then combined the two together, and froze their transformations.

I then made a cube for the middle nose part of the glasses and slotted it right in-between the glasses, and deleted the side faces of the cube. I then used the multi-cut tool to add two rows of edge loops around both the torus parts, so that they provide vertices for the middle part to slot into with the use of the target weld tool.

First I combine the middle part with the torus shapes, then I use the target weld tool to drag each vertices together. Because there’s another row of edges cutting through the middle of the torus parts, that meant I had to recreate the same loop around the middle for the cube part. This then helped finish off the target weld action then I could go inside the torus shapes, and delete the faces where the middle part meets the torus part, so they can be one whole shape.

I went through the same process when adding the legs of the glasses to the torus parts of the glasses. Making the shape, adding the edge loops, deleting the necessary faces, using the target weld tool and combining the parts together. I set an assigned material for the glasses and made the colour blue, similar to what my colour palette has.

I also made a little computer on Maya, using bevelled cubes as the base and a cylinder symbol at the back of the computer.

I combined the two rectangles together by their vertices with the use of the multi-cut tool and the target weld tool. I then used the extrude tool to extrude a place for the computer screen, the keyboard and the mouse pad, so they are seen clearly. For both the computer and the glasses, I may make a texture for them soon after I work on the penguin more.

Back to my penguin, I had started on placing down the arms, the eyes and sculpting the beak a little better.

I placed down two separate rounded cube meshes, with radius of 1 and arc division of 16, onto the sides of the penguin body, and worked on one then the other. I mainly used the snake hook tool on the rounded cube to drag out a snake/tail-like shape, to give me the position of the arms that I was looking for. When using this tool, the mesh would break in some parts so I would make sure I remeshed to bring it to a suitable position/shape.

I turned on dyntopo on the arms and smoothed them out when I finished sculpting them to the shape I wanted. The left arm is where the computer will be held, and the right arm is placed on the beak as if they were thinking about something.

I also worked on the beak by using the elastic deform tool to drag it outwards, then used the draw tool and holding CTRL for an inwards effect, to dig out a mouth. For the eyes I placed down a rounded cube, same form as the arms, and made it small and stretched upwards, and placed it where suitable. Then I set it a mirror modifier so it can mirror on the Y axis of the penguin.

Lastly, I added the little detail of the tummy line around the body with the inverted draw tool and stabalized pen turned on, so it was a neat line around. I used the smooth tool to smooth it out after.

As I finished my model on blender and smoothed everything out, I exported it into an fbx file and uploaded the file to Maya so I can repotologise the mesh.

As I placed it on Maya, I also dropped in the glasses and computer and resize each object so that they fit together and suit well.

To do retopology, I should set the high poly mesh into a live object so I can project the low polys onto it. I then turn on Quad draw and place down squares that connect to each other, while I have symmetry on so it would repeat the squares on the other side of the model. I followed some references and a video tutorial my tutor made on Retopology, to help me plan out where I can place these squares and how they will connect together. I started with the face and the mouth and spread outwards to the eyes and head. Eventually when I got the head done, I was able to finish off the body shape with more simple and bigger shapes. During this process, I used SHIFT to relax the polys so that it will fall into place with the model behind better than before.

I separated the arms and feet on my main model because I was cautious of how I was going to make retopology on everything at once. I made the feet together in a pair, and since the arms are in different positions, I did pair them up, but turned off symmetry on the two sides so they wouldn’t appear wrong on one side. To the left is what the retopology process looked like so far.

During a class, I realised I had to redo the arms again as they weren’t all connected correctly in terms of the round edges going around the arms. I quickly redid them and I was then able to move onto UV wrapping this model.

I was given advice on how and where to cut each piece of the model so they could be unfolded on the UV workspace. As soon as I unfolded everything, pressed layout, and straightened what part needed it, I was finished the UV process.

From here the Retopology and UV steps were finished, and I was able to continue to texturing this model and making it presentable.

Cute Character – Planning

In this Assignment I am required to model/sculpt, texture, and present via Sketchfab, a Cute Character of my choice, without exceeding 40000 Polygons in my scene.

I have the choice to think of any cute character I would like to design. I also should think about about their context, their accessories, their pose, and expression.

Before looking into this assignment, I have been following tutorials and videos from my tutors who have shown me techniques and skills of using Maya and Blender to create a character. So going into this, I have general knowledge of the process of creating a 3D character.

To start off, I made a little brainstorming board on miro board to help me plot down some of my first ideas and hopefully develop other ideas in the process.

I was really inspired by teddy bears both from Pinterest and the teddy’s I own. I feel like they could tell a story and therefore I could create a good purpose for them. I looked at what kind of animals or teddy’s I like for ideas on pinterest, and also picked out an image of my dog as I thought making my dog in 3D would be very cute.


After this, I made a couple sketches of my first general ideas of cute characters. I thought about what thing/animal that I like most and put it down on my screen. I mostly focused on animals such as a bear, hedgehog, penguin, dog, and more.

I got help from my sister back at my home that kindly took pictures of teddy’s I had in my room. This gave me alot more to work from and is great real-life reference. I chose these two teddy’s to find their overall shape and think about what texture they would have.

I designed my final four designs: The penguin, my dog Lexi, my childhood bear, and my colourful dinosaur.

I decided to go with the Penguin design as I think It is a strong idea. It includes both a purpose and a cute design that I think I can pull off in creating a 3D model of it.

I also chose the penguin because I actually have a penguin teddy in my Uni flat. Its the one teddy I brought with me here, and it has been with me through all of my online classes. I think of the penguin as a little student buddy. I want to make a cute penguin character that has big glasses on, and may be working on a little computer – this will make the Student penguin!

After I chose the penguin design, I found a few references of different kinds of penguins, and penguins in a teddy form to provide me with few ideas. I drew three different styles in front and side view and blocked out their silhouette to see which one was more appealing. In the end I chose to go with the first design, with details from the other designs.

Next, I picked out some colour palettes from the website colormind.io and tested them out on each drawing of the penguin. On the right, I sketched out some pose ideas that the penguin could be in. I think I like the top one, or the bottom one the most.


Now, I can move onto the modelling of my penguin character, starting on blender.

3D Animation Practice Part 2

During week 7 we took on some animation practices on Maya to further learn about more technical techniques and functions of 3D animation.

Source: Week 7 – Animation Practice & Introduction to Rigging – Morning Animation Exercise – Jump-intro.mp4, Jump-setup.mp4, Jump-blocking-pass.mp4, Jump-2nd-pass.mp4, Jump-polish-pass.mp4.

Introduction to rigging – Exercise 01 – Parent rig, Exercise 02 – Control rig, Exercise 03 – Robot control rig.

Our morning exercise was to make the Rig, Ultimate Walker, do a jump on the spot. We gathered our own reference. I picked out a video reference, a picture reference and I also used the grease pencil on Maya to sketch out a quick storyboard/thumbnail of how the jump will occur.

Video Source: https://youtu.be/t0i72FCq2dM

Image Source: https://martinsammut.wordpress.com/2014/01/10/jump-animation-reference/

As I followed my tutors tutorials, I also added a sphere to block out the keyframes, or position of the head, on the scene. This guided me for animating the ultimate walker.


Eventually, I was blocking in the keyframes of the ultimate walker jump. I positioned them to how the sphere was then I positioned the legs, and body to where it suited best realistically etc. at the anticipation where the body meets the bent legs, the body should be balanced parallel to the heels of the feet. If it was further back, realistically that would make the rig fall backwards.

When I have most of my keyframes down and the animation plays smooth enough, I would use both the graph editor and the dope sheet to polish up the animation. Using these would help me pick out parts that were off and easily adjust them to a better position.

It was quite simple to move around the rigs and parts of the ultimate walker for the jump animation, however I feel like my attempt could have had a more lively action than the one I created – I was mostly trying to find where the legs would be positioned during the jump throughout the animation without thinking so much about adding a personal flair to it. I may work on this in my own time to see how I could improve.


Next, for my afternoon exercises, we looked at the introduction to Rigging. We would be focusing on the two main parts, the Parent tool, and the Control tool.


I followed my tutors tutorial (Exercise 01, Parent rig) on how to constrain objects together using the Parent tool.

I started with the arms of this man model. To connect the three parts of the arm together, I start by highlighting the hand. I shift-select the forearm and I press P for Parent, or find the constraint section and press Parent.

I go through the same process for the upper-arm by highlighting theother parts first, then shift-selecting the upper-arm, and pressing P. When I want to connect the arm to the body, I drag the now arm group I have created, into the middle of the body part in the outliner. This then connects each part together.


I do this technique the same way for each of the arms and legs. For the head and neck however, I only need to drag the hat and shades into the middle of the head on the outliner. I then parent the neck to the body, and then parent the head to the neck. This will give me a simple parent rig of a man model. I can now move their arms, legs and head into any position.

I followed my tutors tutorial (Exercise 02, Control rig) on how to structure the constraints of these three cubes to make a function similar to a moving tail.

First of all we bring out the circle tool from the NURBS section, and place then underneath each cube. I was to make sure the pivot point was directly underneath by holding X to snap it into place.

During this time I also made sure to label all my parts to know what they are later on. I made sure to label them by what position they were in and what function they have etc. Bottom_CTRL, Top_GRP.

I also froze the transformations of the circle control rigs to avoid the change of position later on.

Next, I put each of the cubes into a separate group to keep them as not just a shape, but a constraint. This is so if I wanted to replace the shape to something else, or scale it, I can do that easily while it is in a group. I also labelled each group to what cube its assigned to.

Now, I was able to parent the control rigs to the cubes. I held Command and clicked both Top_CTRL and top_GRP etc. then pressed ‘Parent’ to group them together.

As I had finished this, I bring together the control rigs into their own group. I dragged top into middle, then middle into bottom.

Finished Model & Reflection

Here is my finished model uploaded onto Sketchfab.

https://skfb.ly/6ZwHH

200 word reflection:

At the start of this year, I had no knowledge of 3D work at all. This has been a strange challenge to take on for the first time, however I am quite surprised at how quick I managed to pick up on the basics of 3D modelling. I am moderately confident in building a simple 3D model and using skilled techniques I’ve learnt over the weeks. I really liked and feel I did well in building the model from scratch, the detail process in both Maya and Substance Painter, applying textures and altering its style. I feel like I can improve on and learn more about rendering, avoiding issues through combining/connecting shapes, and UV mapping correctly. The advice and guidance I had got from my tutors over the past few weeks had been very helpful in times I was unsure of the next step or stuck with errors. Also, seeing my class’ efforts has inspired me in my progress as most of us are starting 3D for the first time. I feel I have done quite well to produce this mantel clock with the research, reference, design, modelling, and texturing I have gathered and created.


Texturing

Here I will be explaining my process with texturing in the program Substance Painter.

The first thing I were to do after I brought my model into substance was to bake the mesh maps. This will generate each layer, or material attribute that I applied to my model in maya, with multiple mesh maps that determine the edges, curvature, separate objects, shading and more.

I learnt about the process of baking mesh maps from my tutors teachings. Source: Week 04 – Texturing – Exercise 02 – Baking maps for smart materials.mp4


I started off with placing the smart material ‘Gold Damaged’ onto the cold case/clock of my model, as I thought this would suit best. I dragged the material onto the desired place and it was generated onto it as a grouped layer.


I made a new player on the gold case material so that I could paint onto the face of the clock. I used this material ‘Plastic Matte pure’, changed the colour to light beige and turned off height, to paint the colour straight on he face. There were parts I had to erase the white as it got infront of the hour and minute hands. They were simple to erase off on the UV map view.


I wanted to create a glass pane look for around the clock, and with the help of this video I was recommended ‘Substance Glass shader’ I was able to make it quite easily. I placed the smart material, ‘Glass visor’ onto my model. It also guided me to add an opacity option in Texture set settings to get the transparent look. I changed the colour to a more light beige, and went up to the shader settings where I could pick a shader that would enhance the glass even more.

Video source: https://youtu.be/lfufwfE1rA0


I chose the pbr-metal-rough-with-alpha-bending shader, and it gave me the look I have above.


For more detail, I also added another material on top of the glass pane. I added ‘Iron Old’ because it gave a realistic look and had and old, dirty style to it that fitted my idea that this is an old antique clock.


I placed the material down and it gave me the grouped layer of additions. I turned off opacity as it was giving me an ashy, light look that I was not looking for. I also turned off height for a little less texture that there was on the default setting.


This is what the iron old material added to the glass pane. I think this makes it a lot more realistic and believable that it is an old mantel clock.


I added the ‘Steal Painted Clearcoat’ to the roman numerals on my clock. This gave a dark metal look with minimal scratches and texture. I thought this was nice because it makes it look cleaner inside as it doesn’t get as effected by dirt from being old – its more protected inside the clock.


For the silver mechanics and the back support of the clock, I dropped in the material ‘Cobalt Damaged’ to the both of them. I altered their colours, giving the mechanics a grey/silver, and the back support a dark gold colour. I also dropped in the material for both objects ‘Steel Rust Surface’ that gave them a rusty, old look to the model. 


After I brought my mesh into Substance, some objects would not allow painting of any sort to work on them. I asked my tutor Alec about the problem and suggested I should bring every part of my model into the same UV Island, so that substance did got get confused as to where the other parts were. This ended up fixing my problem however I would have had to restart from where I was. I quickly added in what I had done above and continued with my work.


The biggest challenge for my model was attempting to create this carved design onto my work. I got some advice on how to go about this, and learnt about the use of masked layers and the height feature. I made a new layer, added a fill, which I set to only view the height option, then added a black mask – so when I paint the opposite colour, white, onto the model it will alter the stroke if it goes inwards or outwards.

I was achieving for this sun shine symbol which I think turned out very well. I used the symmetry tool to help create this same design on the front and back of the model. I used the radial symmetry tool on the Y axis, with 2 count and 360 angle span, to achieve this effect.


I had also made this design on the top of my model, which also looks very nice. I used the same radial symmetry tool to achieve this effect. I used the Y axis, with 6 count and 360 angle. To erase any part, I change my paint tool to black on the greyscale. I did this to erase a ring around the bell to separate them and the design for a cleaner look.


I had added some extra detail to my model with a collection of scratch brushes. I picked a side of the clock to add some scratches around the rim and base of the clock to give it a little more backstory and realism – it could also provoke questions: Where has the clock been? Was it dragged about? etc.


Grouping all my UVs into one UV Island allowed me to create this detail. Here I used this hard surface material ‘Screw Slotted Round’ to give the idea that bolts are holding the clock together. I created it by making a new layer, selecting everything off

except for normal, and dragged the material onto the normal area, which then appeared as the paint brush symbol.


I looked at an oval mantel clock for reference of where bolts are placed on and around a clock. This gave me an overall idea and I placed some bolts where I thought worked on the back support. I also placed bolts on the top and bottom of each pillar too as similar to the reference photo.


After all this, I went in to fix up and clean up anything I could, such as the placement of layers, the position of the scratches, the volume of height, rough, and metal in some textures etc. and this is what I have as a result. I looked at render view to see how it turned out and Im quite proud of it as my first big modelling project!


To bring this model into Sketchfab, I would need to export my textures from each of the maps on every part of the object. I did this by going onto file -export textures and altering the settings. I set the output template to ‘PBR Metallic Roughness’ the file type to ‘png’ and the padding to ‘Dilation – default background colour’ with 7 pixels.


I could also go into the individual UV parts of the model and choose which maps I wanted to output. I chose all of them In case I missed any for uploading onto Sketchfab.


Now I can go onto sketchfab and upload the plain fbx file of my model I had before

 to upload onto Substance. Once it is uploaded I could edit the 3D settings. I imported all the textures onto the material settings, and placed the right ones to their parts in the model.

E.g. BaseColour textures go into the Colour section, Metallic goes into the Metalness section, Rough goes into the Roughness section, and Normal goes into theNormal/Bump map section.


I also altered a few settings on lighting to present it well and place it in an environment that suits. I turned on the 3 direction lights and placed them were I wanted, and I picked out the ‘Glazed patio by Restaurant’ environment from Sketchfab’s collection to enhance the models intensity, shadows and colours.


After this, my model was complete! It can be viewed through this link: https://skfb.ly/6ZwHH

Back To Top
Skip to toolbar