Here I will be explaining my process with texturing in the program Substance Painter.
The first thing I were to do after I brought my model into substance was to bake the mesh maps. This will generate each layer, or material attribute that I applied to my model in maya, with multiple mesh maps that determine the edges, curvature, separate objects, shading and more.
I learnt about the process of baking mesh maps from my tutors teachings. Source: Week 04 – Texturing – Exercise 02 – Baking maps for smart materials.mp4

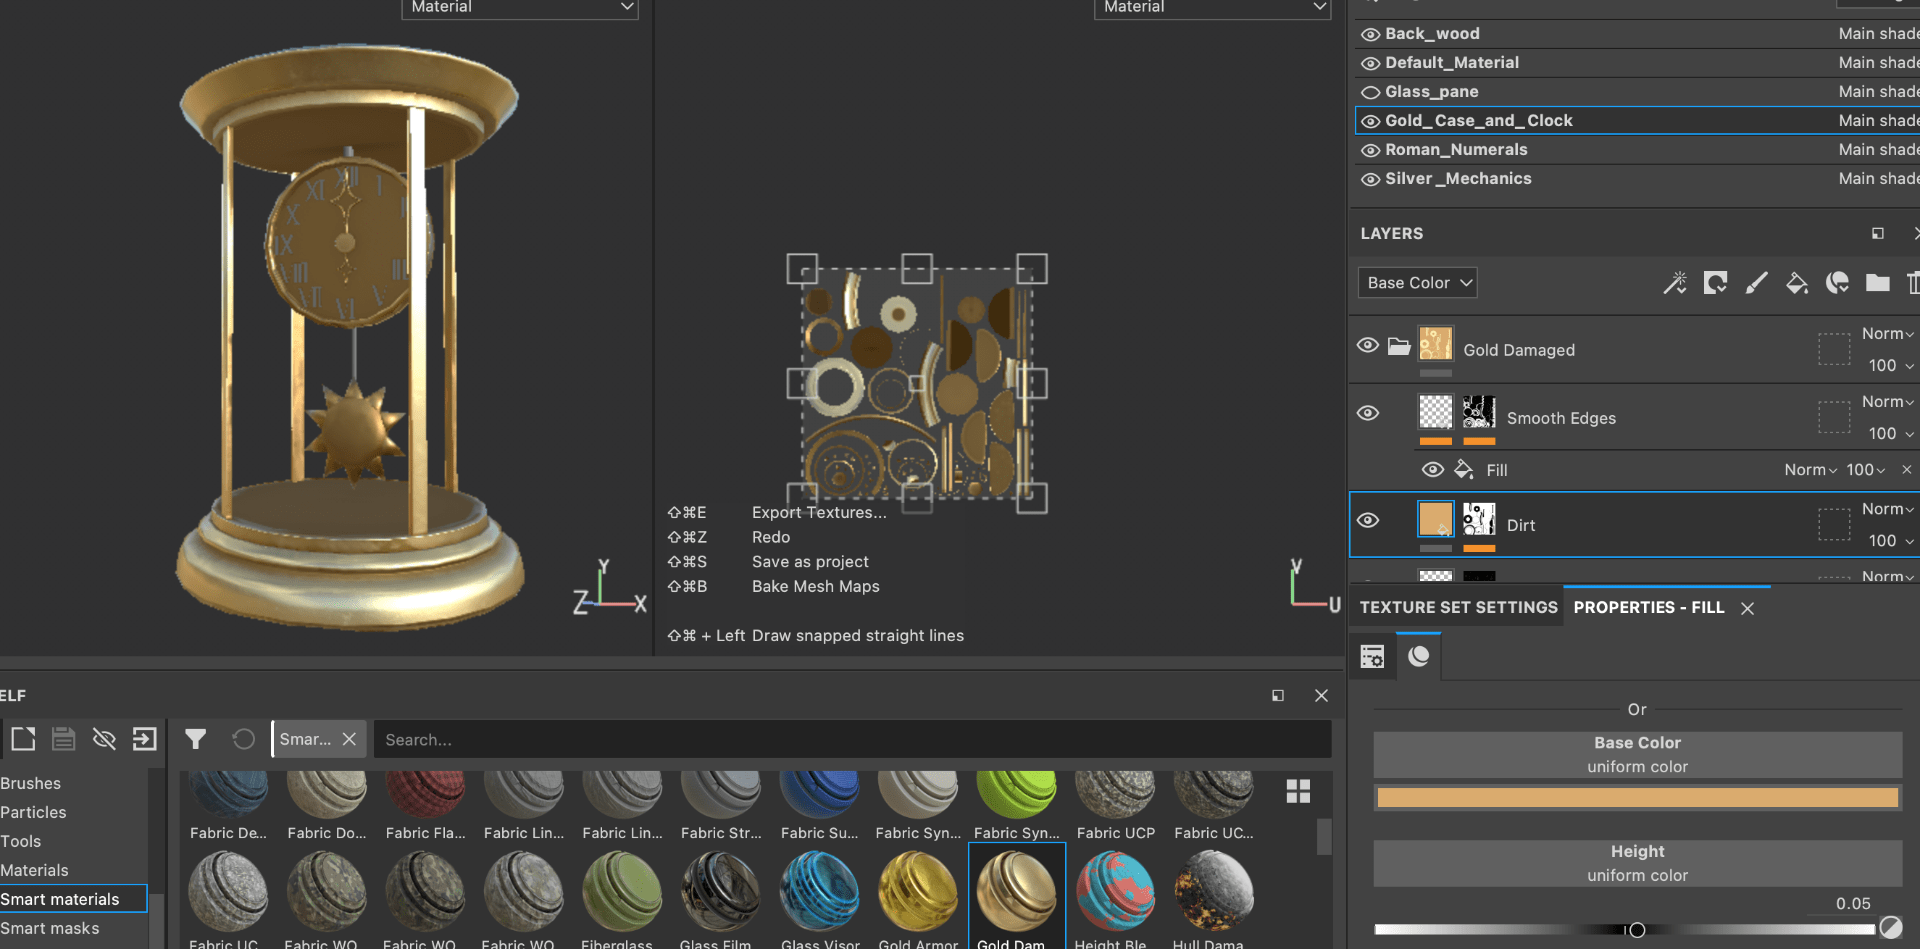 I started off with placing the smart material ‘Gold Damaged’ onto the cold case/clock of my model, as I thought this would suit best. I dragged the material onto the desired place and it was generated onto it as a grouped layer.


I made a new player on the gold case material so that I could paint onto the face of the clock. I used this material ‘Plastic Matte pure’, changed the colour to light beige and turned off height, to paint the colour straight on he face. There were parts I had to erase the white as it got infront of the hour and minute hands. They were simple to erase off on the UV map view.


I wanted to create a glass pane look for around the clock, and with the help of this video I was recommended ‘Substance Glass shader’ I was able to make it quite easily. I placed the smart material, ‘Glass visor’ onto my model. It also guided me to add an opacity option in Texture set settings to get the transparent look. I changed the colour to a more light beige, and went up to the shader settings where I could pick a shader that would enhance the glass even more.
Video source: https://youtu.be/lfufwfE1rA0


I chose the pbr-metal-rough-with-alpha-bending shader, and it gave me the look I have above.
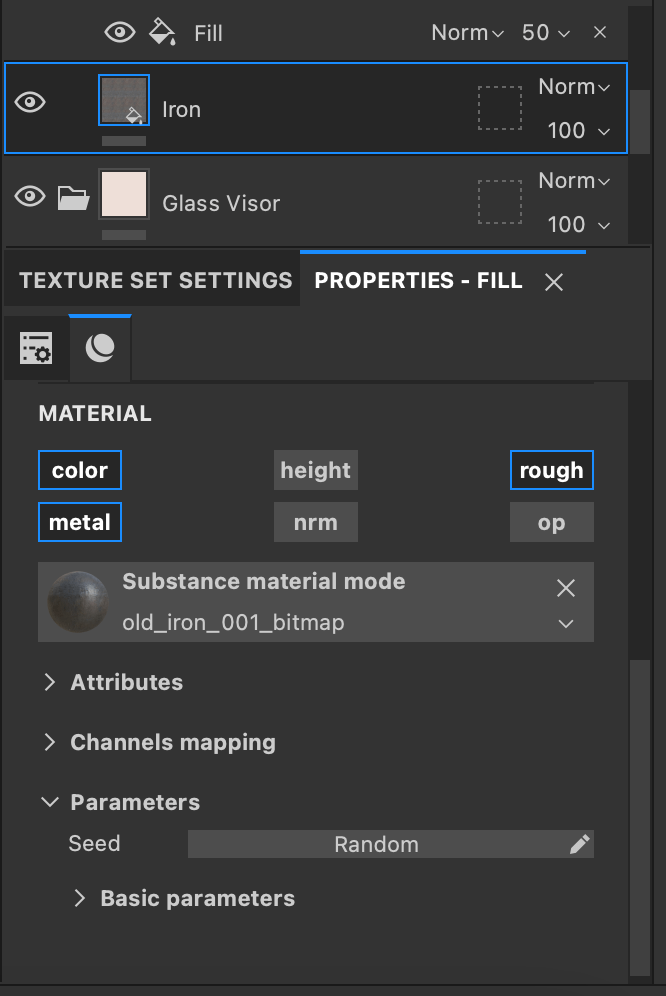

For more detail, I also added another material on top of the glass pane. I added ‘Iron Old’ because it gave a realistic look and had and old, dirty style to it that fitted my idea that this is an old antique clock.
I placed the material down and it gave me the grouped layer of additions. I turned off opacity as it was giving me an ashy, light look that I was not looking for. I also turned off height for a little less texture that there was on the default setting.

This is what the iron old material added to the glass pane. I think this makes it a lot more realistic and believable that it is an old mantel clock.


I added the ‘Steal Painted Clearcoat’ to the roman numerals on my clock. This gave a dark metal look with minimal scratches and texture. I thought this was nice because it makes it look cleaner inside as it doesn’t get as effected by dirt from being old – its more protected inside the clock.

For the silver mechanics and the back support of the clock, I dropped in the material ‘Cobalt Damaged’ to the both of them. I altered their colours, giving the mechanics a grey/silver, and the back support a dark gold colour. I also dropped in the material for both objects ‘Steel Rust Surface’ that gave them a rusty, old look to the model.


After I brought my mesh into Substance, some objects would not allow painting of any sort to work on them. I asked my tutor Alec about the problem and suggested I should bring every part of my model into the same UV Island, so that substance did got get confused as to where the other parts were. This ended up fixing my problem however I would have had to restart from where I was. I quickly added in what I had done above and continued with my work.


The biggest challenge for my model was attempting to create this carved design onto my work. I got some advice on how to go about this, and learnt about the use of masked layers and the height feature. I made a new layer, added a fill, which I set to only view the height option, then added a black mask – so when I paint the opposite colour, white, onto the model it will alter the stroke if it goes inwards or outwards.
I was achieving for this sun shine symbol which I think turned out very well. I used the symmetry tool to help create this same design on the front and back of the model. I used the radial symmetry tool on the Y axis, with 2 count and 360 angle span, to achieve this effect.

I had also made this design on the top of my model, which also looks very nice. I used the same radial symmetry tool to achieve this effect. I used the Y axis, with 6 count and 360 angle. To erase any part, I change my paint tool to black on the greyscale. I did this to erase a ring around the bell to separate them and the design for a cleaner look.

I had added some extra detail to my model with a collection of scratch brushes. I picked a side of the clock to add some scratches around the rim and base of the clock to give it a little more backstory and realism – it could also provoke questions: Where has the clock been? Was it dragged about? etc.


Grouping all my UVs into one UV Island allowed me to create this detail. Here I used this hard surface material ‘Screw Slotted Round’ to give the idea that bolts are holding the clock together. I created it by making a new layer, selecting everything off
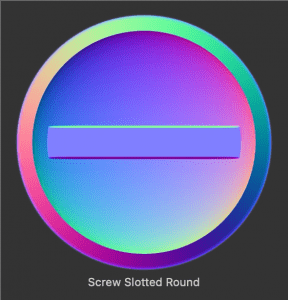
 except for normal, and dragged the material onto the normal area, which then appeared as the paint brush symbol.

I looked at an oval mantel clock for reference of where bolts are placed on and around a clock. This gave me an overall idea and I placed some bolts where I thought worked on the back support. I also placed bolts on the top and bottom of each pillar too as similar to the reference photo.

After all this, I went in to fix up and clean up anything I could, such as the placement of layers, the position of the scratches, the volume of height, rough, and metal in some textures etc. and this is what I have as a result. I looked at render view to see how it turned out and Im quite proud of it as my first big modelling project!
 To bring this model into Sketchfab, I would need to export my textures from each of the maps on every part of the object. I did this by going onto file -export textures and altering the settings. I set the output template to ‘PBR Metallic Roughness’ the file type to ‘png’ and the padding to ‘Dilation – default background colour’ with 7 pixels.

I could also go into the individual UV parts of the model and choose which maps I wanted to output. I chose all of them In case I missed any for uploading onto Sketchfab.
 Now I can go onto sketchfab and upload the plain fbx file of my model I had before
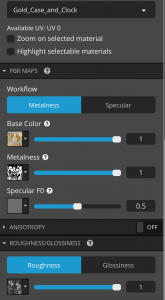
to upload onto Substance. Once it is uploaded I could edit the 3D settings. I imported all the textures onto the material settings, and placed the right ones to their parts in the model.
E.g. BaseColour textures go into the Colour section, Metallic goes into the Metalness section, Rough goes into the Roughness section, and Normal goes into theNormal/Bump map section.

 I also altered a few settings on lighting to present it well and place it in an environment that suits. I turned on the 3 direction lights and placed them were I wanted, and I picked out the ‘Glazed patio by Restaurant’ environment from Sketchfab’s collection to enhance the models intensity, shadows and colours.
After this, my model was complete! It can be viewed through this link: https://skfb.ly/6ZwHH
