Knowing i was in charge of creating the leaves for our project, i set out to find a tutorial of how best to create them as i hadn’t done this before so i needed some guidance. I found this tutorial on YouTube which went at a nice pace, and if need be i just slowed the video down https://youtu.be/Ycu3A_vf-YU
To begin, i opened Maya and created a plane with height and width subdivisions of 4 and 2, these would be the base for my leaf as I now have to switch to vertex mode and manipulate them into a leaf shape by using the scale tool to achieve a symmetrical look.

Of course, I’m not just free handing this, so beforehand i imported my reference image of some concept designs i drew up for the leaves and throughout the whole process I’m constantly comparing them. For this leaf, I’m following my “star” shaped leaf references as pictured below.

To achieve the star look, I moved some vertexes around with the scale tool, pushing two points outwards at the same time, and selecting rows to push them up with the move tool to have a more symmetrical star shape. Unfortunately I ran into problems with the symmetry so with my faces option, I selected one half of the star, deleted it, then mirrored the right side on the -X axis.

Once finished, the star looked good, but there was no where to give it depth that leaves have where they slope in slightly due to gravity, so to fix this, I used the multi-cut tool to create loop cuts around the star where i thought was necessary. Later i can use these edges to manipulate into small dips and folds for the more believable leaf shape i was looking to achieve.
With the plane now shaped, I went to face mode and selected all the faces of my polygons, then pressed shift = e on my keyboard to bring up the “extrude” options. Switching to the move tool with w, I dragged the extrusions up on the Z axis to give my leaf edges and bring it from a 2D plane to a 3D shape.

Due to getting caught up in the work and trying to problem solve, I forgot to take screenshots of some of the process such as extruding the bottom faces of the leaf and tapering them in to create the stem, selecting the edge that runs through the middle of the leaf and pulling that down to create a gentle slope, and having to go through and merge the vertexes on the edges of my leaf because it wasn’t behaving as wanted with double vertexes accidentally placed right beside the true vertexes, so i had to get rid of these, as seen below.
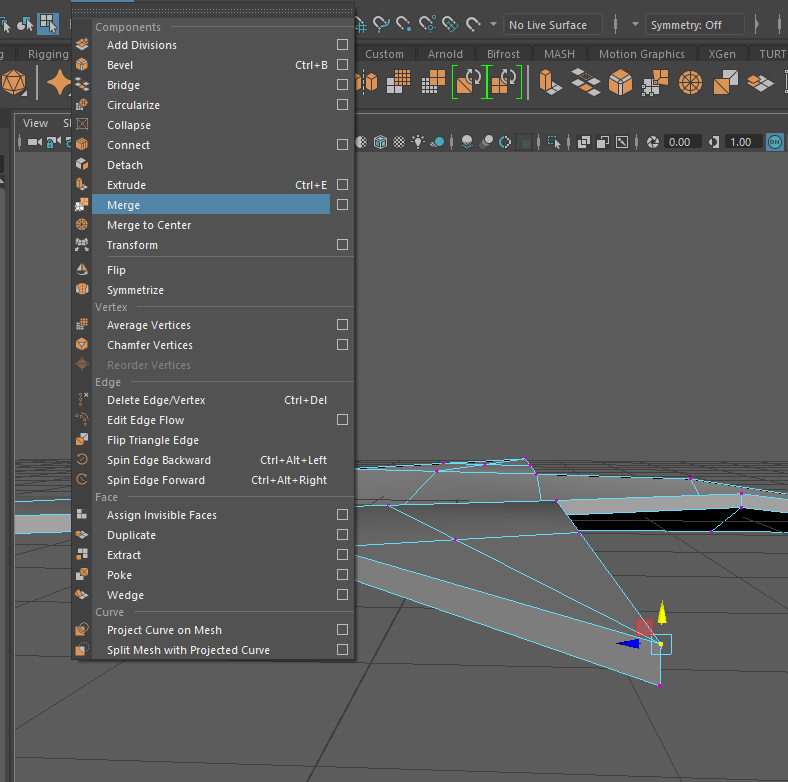
Pressing 3 on my keyboard to smooth out my model, I noticed the stem was looking a little bit strange where it connected to the leaf, so I added an edge loop with the multi-cut tool to make that area more defined, giving me the preferred look in the second image below. At this stage, I also went into vertex mode and started rotating the leaf downwards, using B on my keyboard to get soft selection and then using the move tool to slightly adjust the height where appropriate. Working my way down I adjusted every vertex as I wanted this leaf to look a little droopy as if gravity was pulling it down like in real life, because leaves aren’t stiff and rigid.


Continuing to work on the believability of the leaf, I went back to edge selection and started pulling down the middle edges of each individual point to give them all a slight dip that’d lead back to the middle. After working on the dips I moved back to vertex mode and started pulling down and rotating the vertexes on the points to make them follow the same pull as the rest of the leaf, obviously remaining a little more rigid and supportive near the top of the leaf where it connected to the stem, which i also gave a soft curve to follow along with the leaf.

Once happy with the shape, I tried to select the bottom faces of the points and change their rotation and translation in order to create thickness within the leaf, which i found didn’t really give the results i was after but after a little tweaking, it looked alright and since it was just going to be a small leaf on a vine, it probably didn’t matter too much.
Selecting the vertexes on the end of each point, i used the scale tool to scale them down on all axis to create a better point, this also tapered the end of each tip and made the leaf look a lot better than before, so it was a real trust the process here.

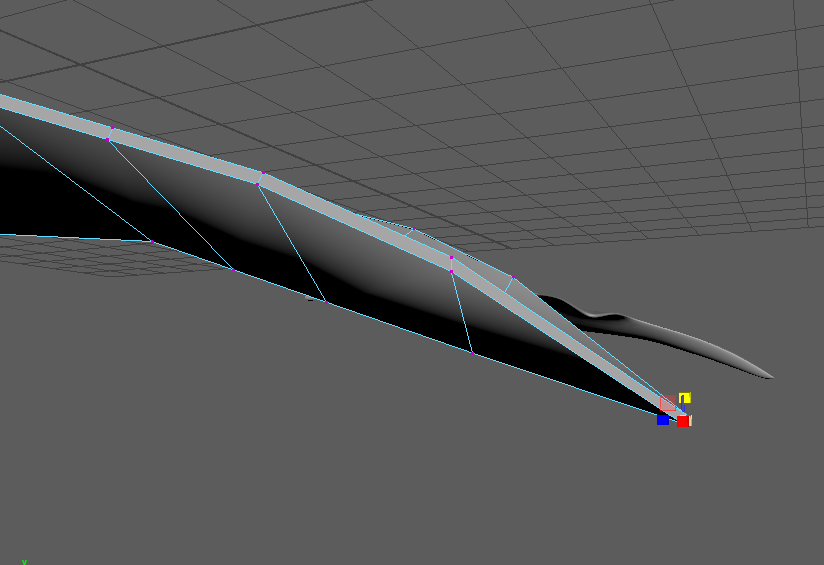
Following along with the rest of the tutorial, i bevelled the edges of my leaf the whole way round to give it a defined edge helping create thickness so it wasn’t just paper, as seen below with a few more angles thrown in to let you see it better.


Before exporting my model, i have to UV unwrap it to ensure the textures will work correctly in substance and it helps me to create more accurate details in Zbrush. With my model selected, i navigate to the UV editor and select all the faces, creating a planar on the Z axis then using the edge selection mode I found the edges i thought most suited to placing cuts as they need to be placed with the smooth mesh in mind which can sometimes change how the uvs look compared to the original model. For this model, i placed cuts on the top and bottom edges of the leaf, and all four sides of the stem. When I had made all my cuts, i then selected all my uvs and unfolded them and used the layout button to fit them all neatly in the box.
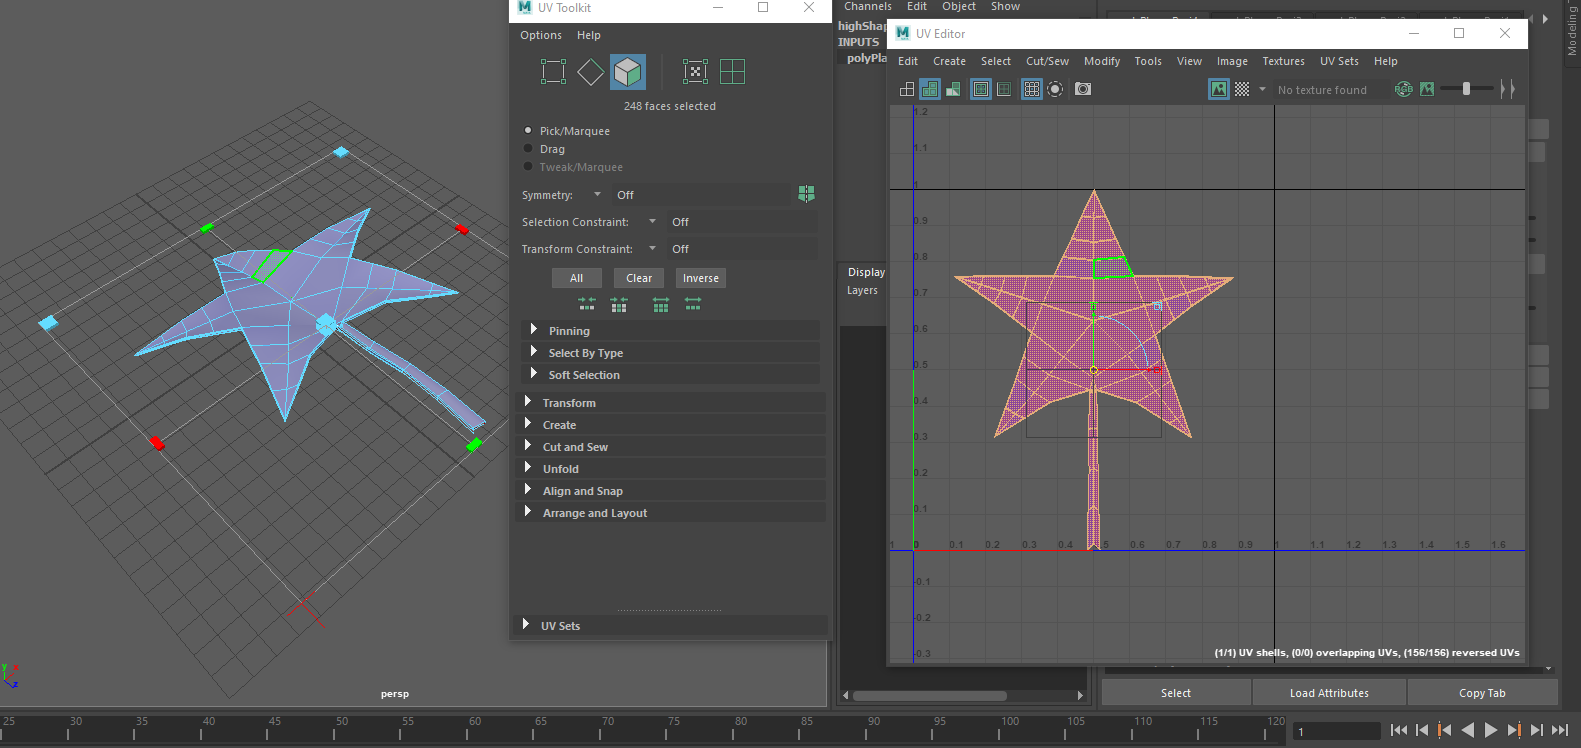

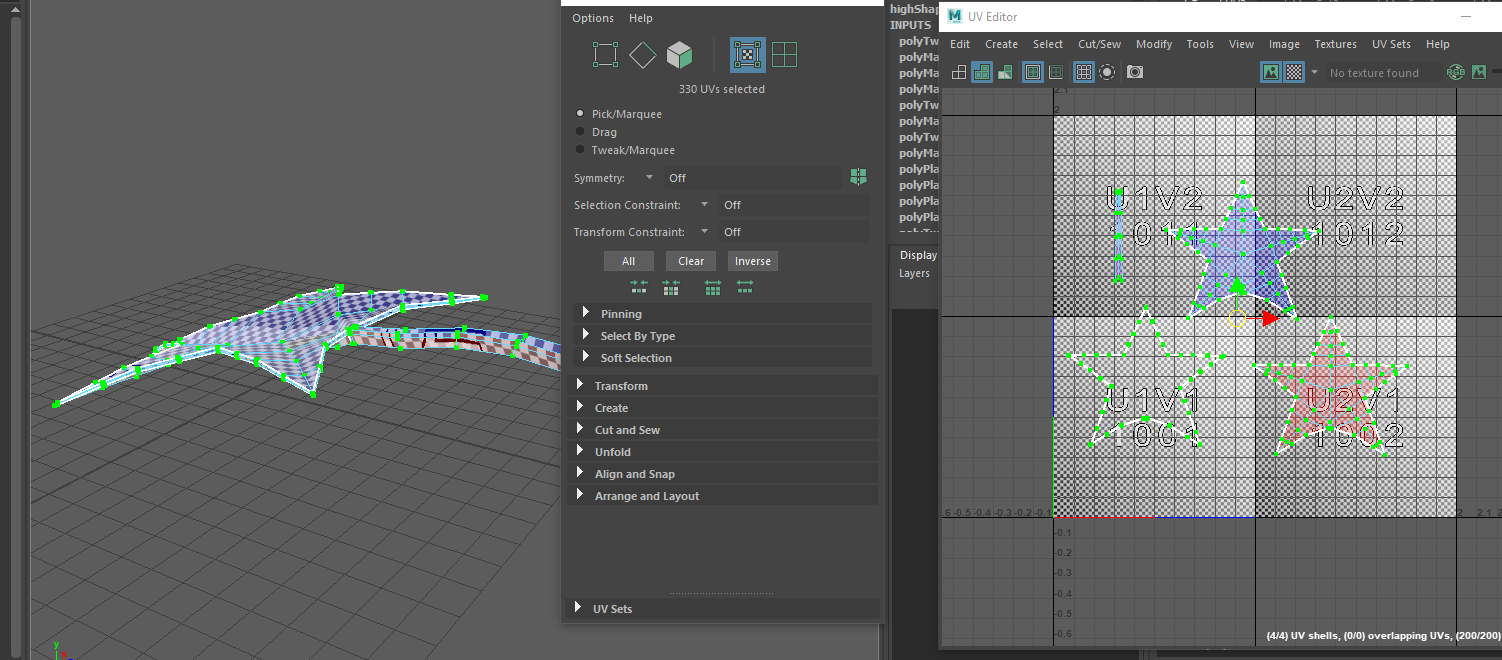

The first time i did this, i did it wrong as i didn’t realise this so after sitting here confused for some time i messaged my tutor henry on Discord for some advice and he was very quick to answer telling me that the uv maps needed modifying because my cuts should be on the bottom of the leaf, creating two uvs for the top and bottom of the leaf and the same with the stem, so in total i should have about 4 or 5 uvs. He sent me a video to go along with his written advice to help me understand it better which i really appreciated because I’m more of a visual learner so this helped me understand where i went wrong and how to fix it in the future. Below you will find my fixed UVs.
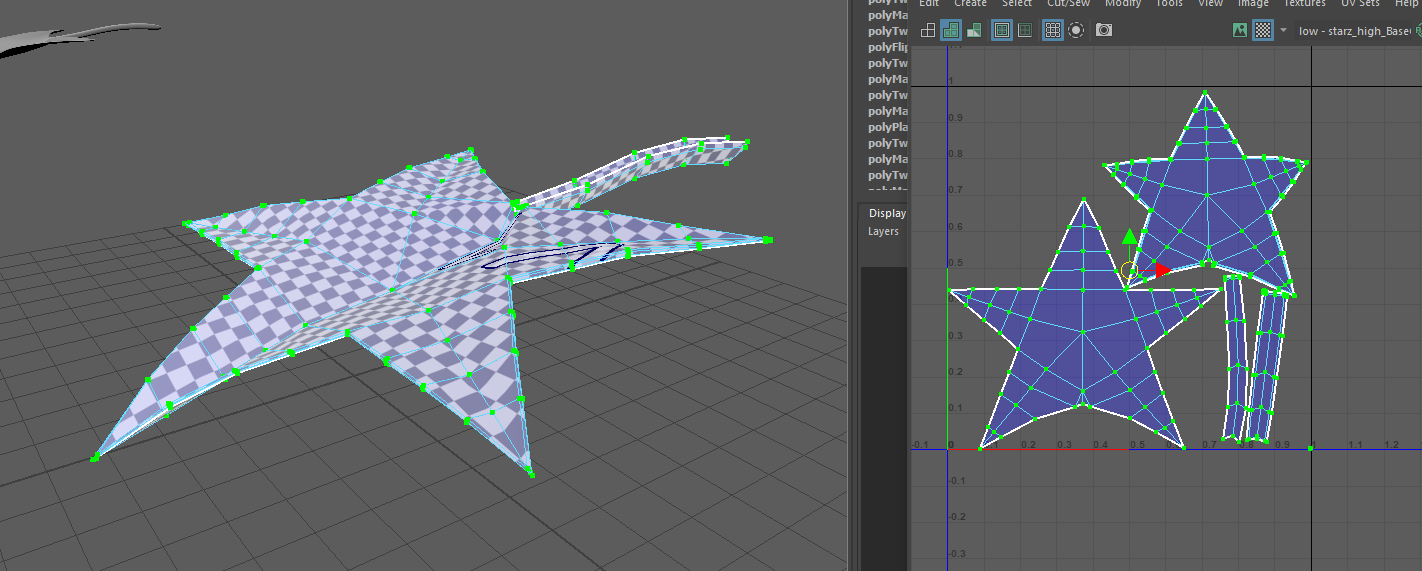

For reference in the conversation: I’m Leaf and my tutor is Henry


This helped me fix my other leaf uvs as i had done them the same way, but that was an opportunity to learn more and create a better texture which I’m a lot happier with compared to the old one, so not all mistakes are bad mistakes!
Now that the mesh of the model is finished, i can delete the history and freeze the transformations before exporting it as an FBX to import into Zbrush for some detail. To start the detail, i had to import my FBX into Zbrush with the FBX importer under zplugins and draw my leaf into existence, using the edit mode button to have it recognised as a 3d model and not a 2d plane. Rotating the model to face me using the alt button, i navigated into the geometry menu and hit the subdivide button about 4 times, giving my model 5 subdivisions for me to work with as this would make my sculpting easier and more accurate.
To begin sculpting, i hit the lightbox menu button and chose brushes, heading over to the “scratch” folder where I selected the scratch 2 brush as i thought this would help me easily create veins in my leaf to give it more believability. Changing the size of the brush to reduce the radius, i got a reference of a real leaf that was as close to a star shape as i could get and tried to mimic the veins in the points so my star didn’t look strange. The scratch brush was still a bit too harsh even with the intensity turned down so i had to hold shift and use the smooth brush, much like in blender, to give the original model back some of its shape and to make the scratches blend in a lot more naturally so they didn’t stick out like a sore thumb.
Once finished sculpting my details, I headed back over to the zplugins menu and used the FBX option to export my mesh as a low poly with one subdivision and a high poly with 5 subdivisions, as this brings my normal maps as well to allow me to bake them in substance painter afterwards.
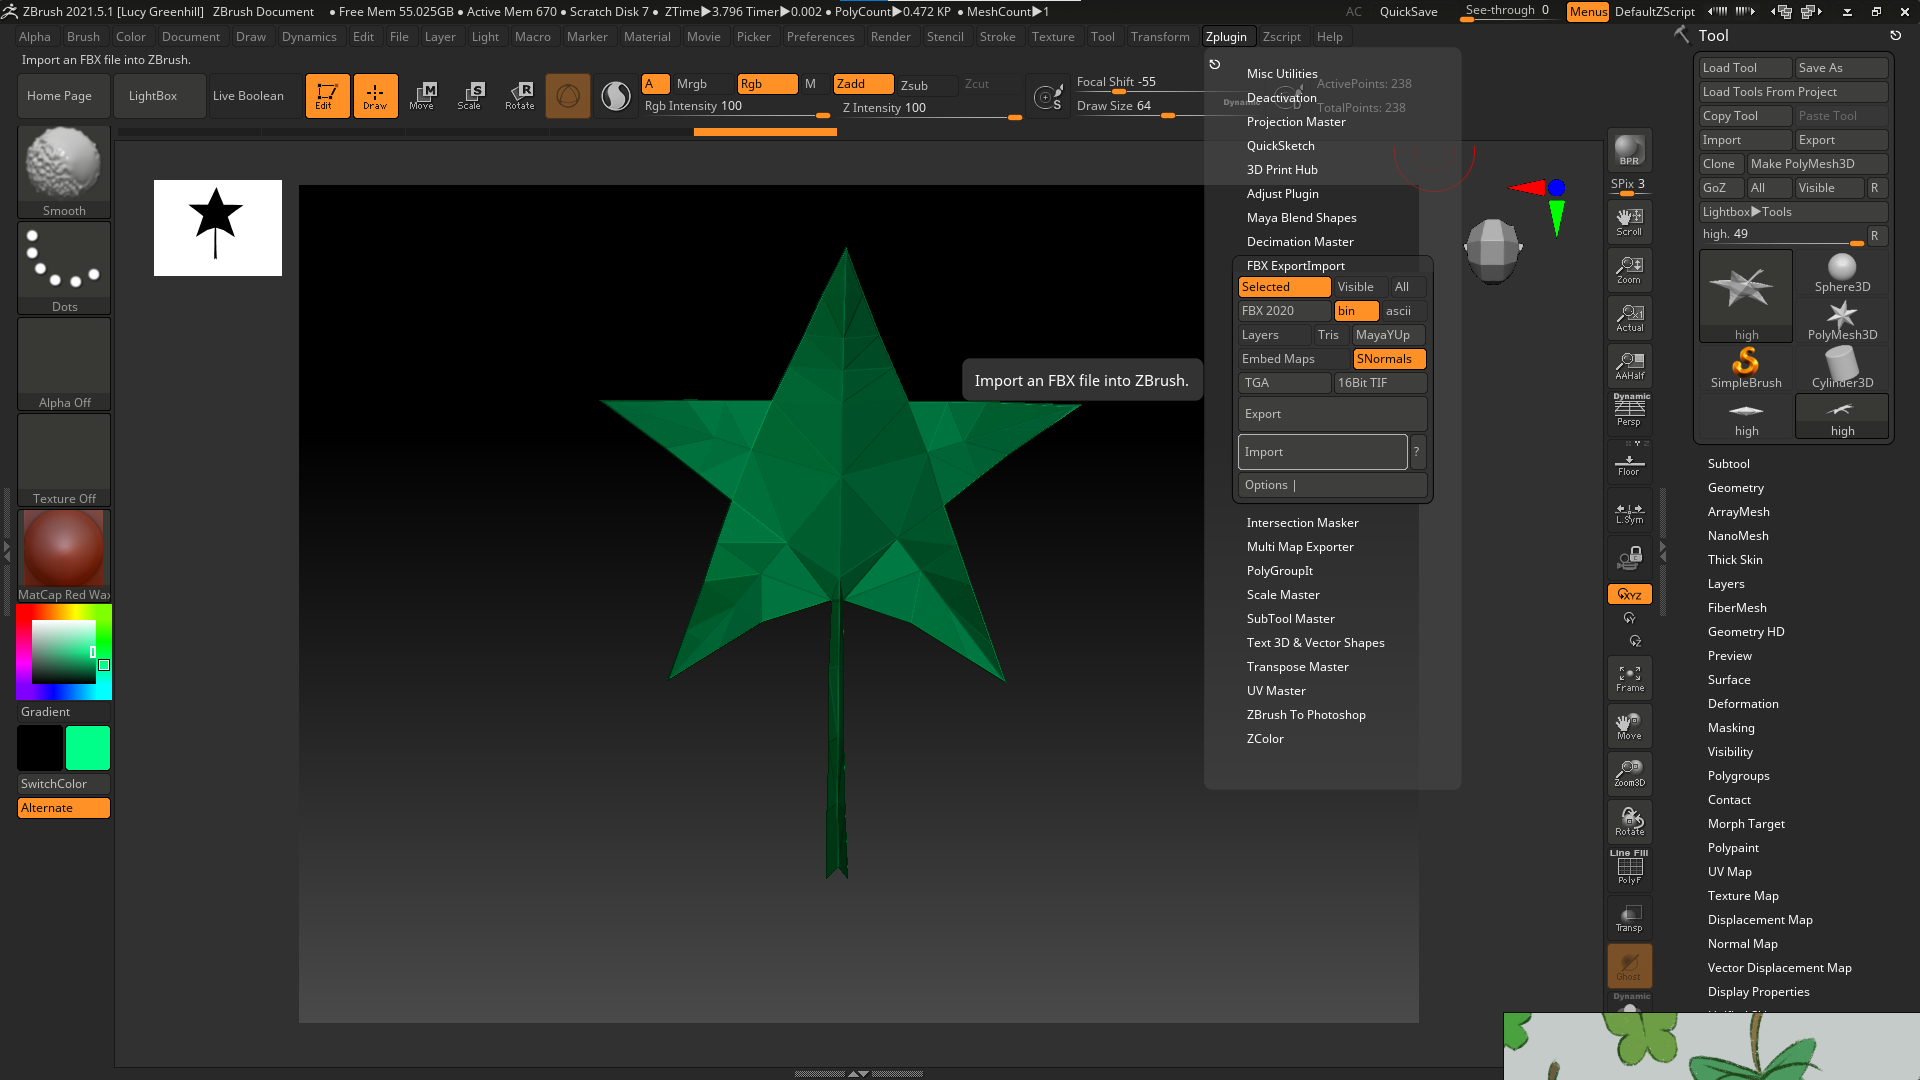

Below is the result of my sculpting on the leaf.

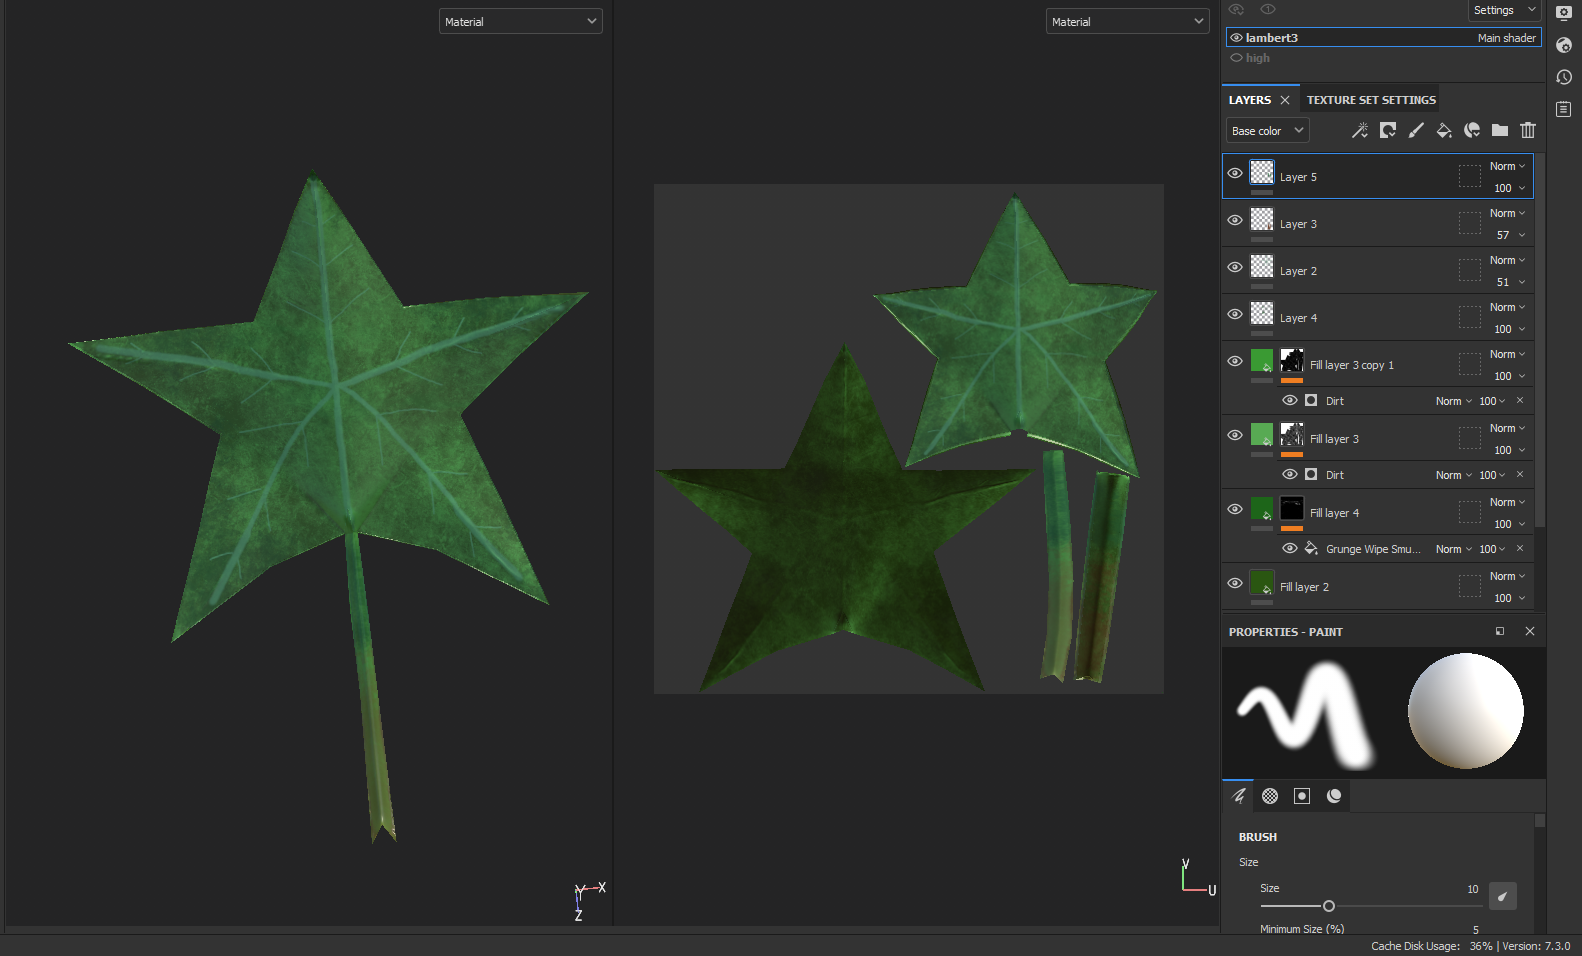
Now i can take my model into substance painter and texture it to be more like a leaf. Opening substance painter, i select file, new, and select my low poly leaf model from my computer files, setting the resolution to 2048 and hitting ok to start texturing. Thankfully the tutorial i was watching also covered a little of the texturing process so i mostly just followed along with this, using my own settings for the generators and such. Before i got to texturing though, i have to bake the mesh textures from the high poly to the low poly model with the texture settings so simple enough, it runs through all the maps quickly after i select the high poly model and all the sculpting details show up.
With a new fill layer, i selected a colour of green i thought would look nice for the base colour, adding another fill layer on top of this an right clicking, adding a black mask then adding a dirt generator and messing around with the parameters such as contrast, dirt balance, rotation, scale, etc as each setting helped to make my leaf look different and more realistic. Duplicating the previous layer, I adjusted the dirt parameters to be slightly different to what i thought looked nice then created another fill layer with a darker shade of green and added a black mask with fill rather than another generator, then looked for the grunge smeared wipe heavy and messed with the parameters on that until i felt i had a nice ivy look to my leaf with all the different coloured splotches and spots.
To finish off my textures, i used three paint layers to add details such as a bit of dark green around the edges, a bright cyan type of colour for the veins so they were more visible and adding more realistic colours to the stem like a lighter green and a reddish brown near the bottom of the stem where it would connect to the vine. I then exported my textures after choosing a save file destination for them and headed back to Maya for my final preparations.


Above are four screenshots of the textured leaf in substance painter from before i got advice from henry on the UVs, with the below picture being the new texture with fixed UVs so it came out much cleaner and that was the one i actually used.
Finally, loading up my model in Maya again, i applied a new lambert material to it and selected my colour file as the base colour texture i just exported from substance painter. Once everything was placed on my leaf texture-wise and the mode was smooth meshed, i went to the game exporter and saved my FBX to be used in Unreal Engine.

Below are examples of the old leaf in Unreal Engine beside the other old leaf i created, as i was looking at the improvement in such short time.

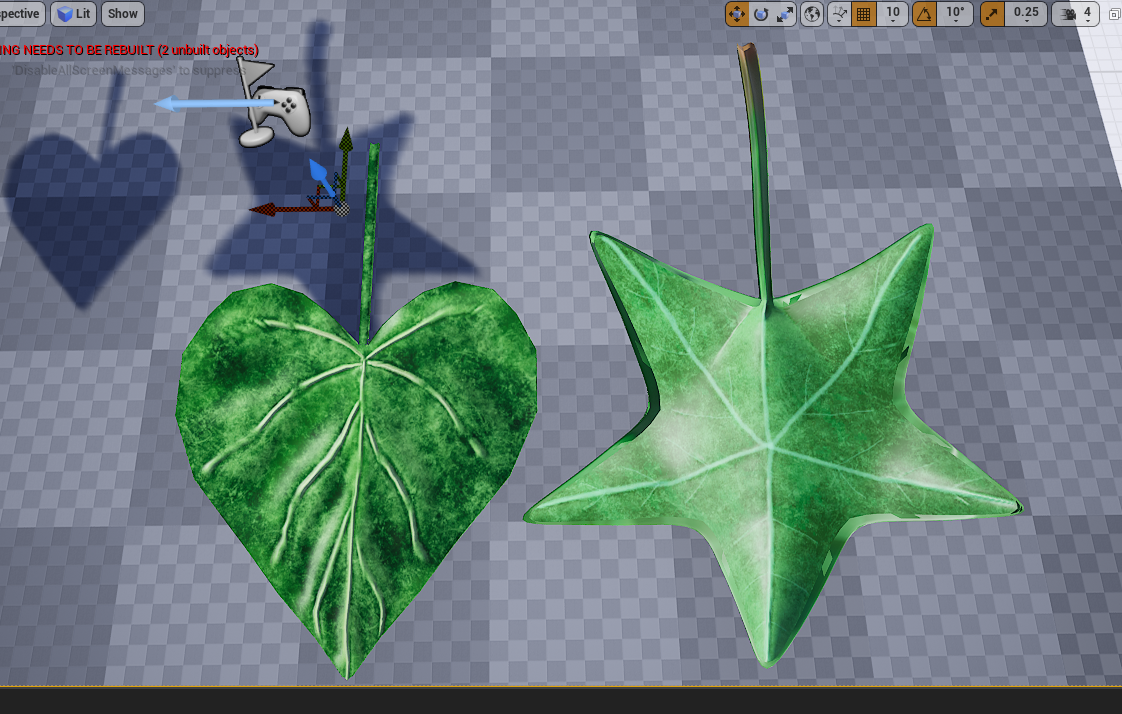
Below is the finial rendition of my leaf in Unreal Engine with the proper UVs and fixed texture, I’m quite proud of it, especially since the tutorial i was following was for a basic shaped leaf and having this be the first time I’ve modelled something like this, i think i did well, i learned a lot of new things and it came out good! The background behind the leaf is a texture i made for the ground, its meant to be seen smaller and look like Irish moss, since we used Thyme in the actual foliage i wanted to still incorporate this somehow.

For my other leaf, i made a heart shaped ivy leaf to give some variation between the leaves on the tree and make it look more interesting. I created it basically the same way as the last last leaf, just making a different shape at the start and whenever i extruded the plane to make a 3 dimensional object, i used the rotate tool to give the leaf varied thickness instead of waiting for the bevelling process later on. I also had to go back and fix the UVs on this model because i made the exact same mistake so it was an easy and quick fix regardless.


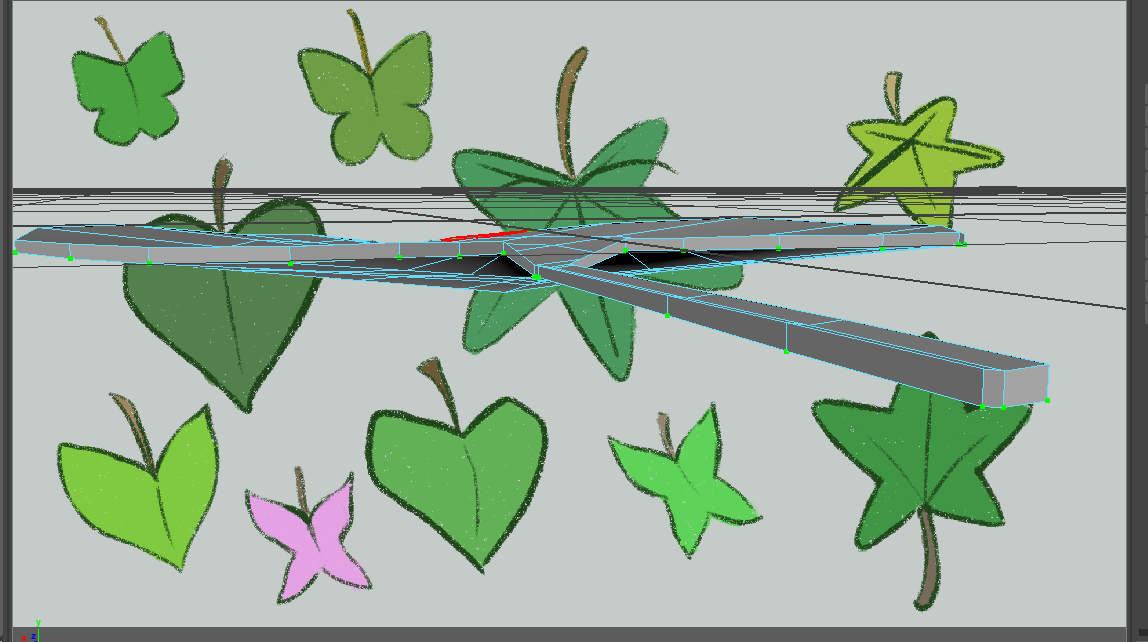
refs:


These helped me see how i could shape my leaves and how to place them on the vines as well as how to place them on the tree so they look as if they’re growing on the surface.
