In reflection I have joined with a group of animation and game design students to create a game prototype. I took on the role of texturing / hard-surface modelling, to develop artistic elements of this game in each production stage till the final test. This was a new experience for me as I have never made a game before, however it was quite an interesting project to work on.
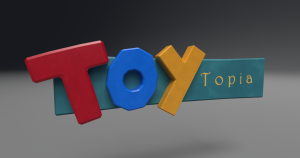
I had teamed up with 9 other students to bring about a game idea and produce it in 16 weeks for this module. We brainstormed for the first few weeks, then came up with our horror toy store idea, ‘Toytopia’. We built ideas on what type of game it will become, what style it can be in, what its narrative or backstory is and how do we play it.
At the start of the project I took on the role to design the textures for the environment e.g. floors, walls, ceilings and other assets. I researched how horror game environments are designed, how I can implement that into a toy store, and gathered inspiration from other toy related horror games. During this stage I discovered Substance Designer, as it was a software that could help me make the textures I was looking for. I taught myself the software and produced a variety of materials for the game.
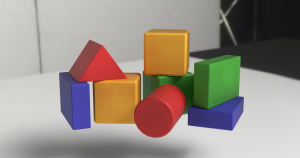
Further on, I produced environment layout pieces to help the game design students to blockout the layout and visual of some rooms in the game. Later into the project, I broadened my role to a hard-surface modeller. I aided my team with their models or textures, and would make my own models and textures for general models such as the toy store logo sign, the wooden blocks, screwdriver and more.
Lastly I produced a variety of art assets such as decals, signs and paintings to decorate the areas, and guide players for navigation. During the last few weeks I helped my teammates to produce any missing elements, and watch over how the mechanics were working to problem solve if needed.
I am happy with the outcome of the game and my input to the artistic elements. I am proud that I taught myself a whole new software to produce textures for this game. I am happy with how the textures turned out and how they appear in the environment. I am also happy with my development in modelling and texturing; becoming more confident in the tools on Maya, and using more skills in Substance Painter.
What I think I could have done better would be to have assisted with more modelling tasks, as some teammates with the modeller role did not participate as much for us to have the amount of models we wanted at first. There could have been more quantity, and better quality models if so. I feel I could have experimented more with horror themed art assets to make the game spookier than it is right now.
I was happy working with my teammates however some were quite insufficient in participating throughout the project. Most of the group worked hard in each of their roles to produce this game, and communicated well throughout the past few months.
In conclusion, I have participated in creating a game prototype from scratch with animation and game design students.
During these two weeks is mostly finishing all the tasks that we have, structure the game to the way we have planned, and to play test the game to see what else may need fixed or changed.
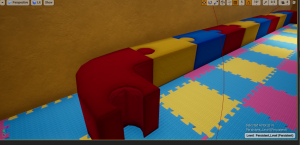
During week 15 I had prepared my seat textures, and remaining banner textures to add to the game.
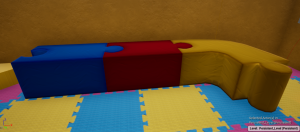
I placed in the two fbx’s and scaled them up. I placed them all around the room connecting to each other, then set up the textures – the blue was the main material, and the yellow and red were made as instances.
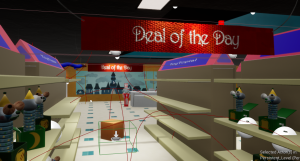
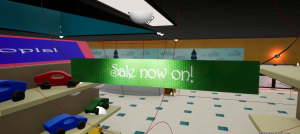
I added in the new second and third banner fbx’s into the project. I added in the three signs for the second banner / two signs for the third banner into the folder and assorted them into materials and instances. I placed them downwards through the isles of the toy store hanging from the ceiling, and they look great.
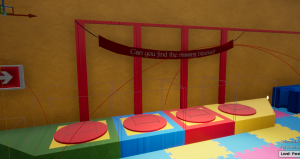
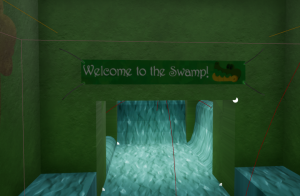
In addition, the block sign is placed In the maze puzzle area, and the swamp sign is placed in the entrance to the swamp room.
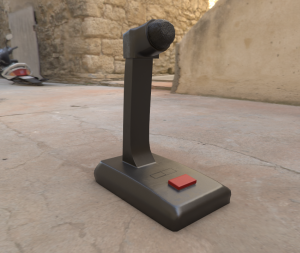
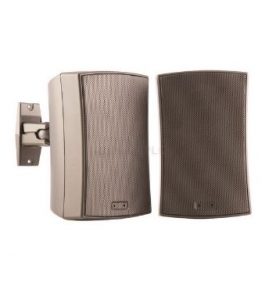
I was asked between the group to model a few more assets for the game. We have developed a concept that the ‘mother’ of Benjamin would be guiding him through the store, talking to him through the speaker microphone. We have voice acting of the mother from the sound designers.
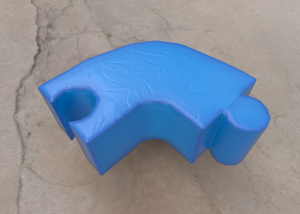
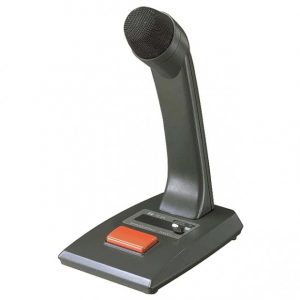
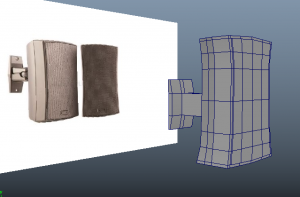
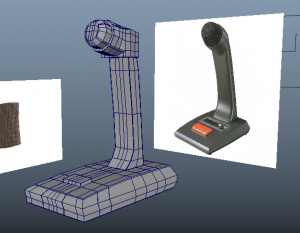
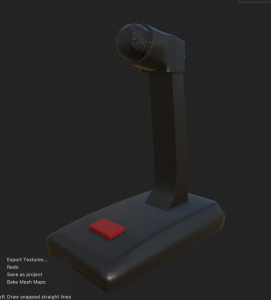
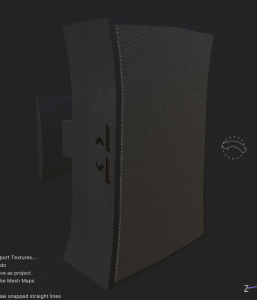
The team asked if I could make a speaker microphone and a wall speaker for the store. I collected these references and started modelling.
These models were quick to produce, although the microphone had some complicated geometry to fix, though was solved fairly quick. I UV mapped them and brought them to Substance Painter.
I designed these assets with similar materials so they stay consistent. Both have an iron rough body with a dark colour. The mic/speaker parts are made from a fabric material – I turned the colour dark and turned down the roughness to become more specular. For additional details I placed down alpha shapes to act as volume buttons with heightness, and a red button to turn on the microphone.
As a result they came out very well and the team are happy with the look. They have already been added to the project at this stage.
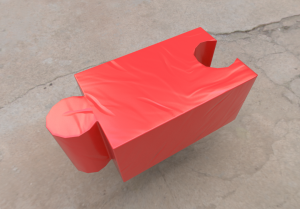
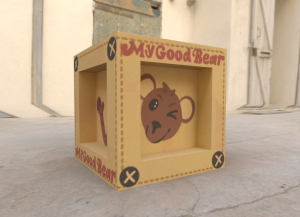
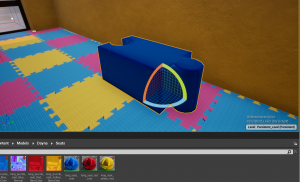
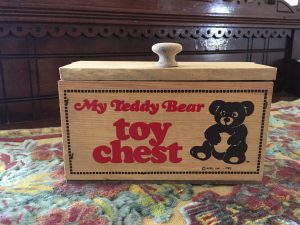
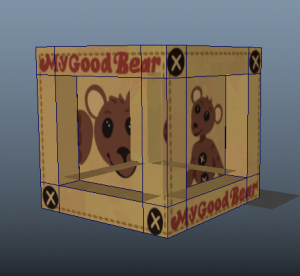
Next I was asked if I could design the toy box for the good bear, an asset for the start of the game. I first researched the style of toy boxes in the 80s and how they are presented, and looked into our good bear design to see how I can incorporate the bear into this style.
References:
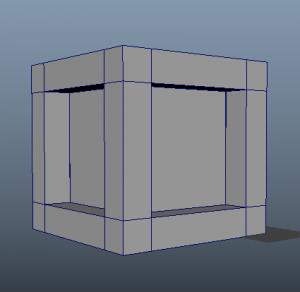
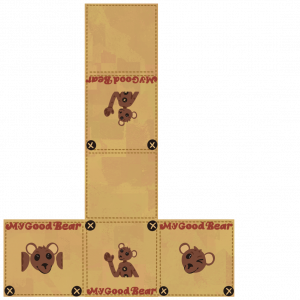
I modelled a simple box with the middle faces extruded inwards to replicate the same shape of box that is already in the game. I exported an image of the UV map of the box and decided to paint my texture on my painting software.
I mostly took inspiration from the toy chest image for the colour of the box and the font style. I designed the bears face all around the box, along with the buttons on the corners. I showed the team and we are happy with the result.
I went back into Maya to see how the texture looked on the box however it would display very weirdly. Although the texture fits perfectly, the actual cube is clipping the inside as it rotate it around. I will test this on Substance painter to see if there is the same problem.
Fortunately the texture and model are working fine on Substance Painter, so it could be brought into the UE project.
On week 16 we have been preparing our game with our tasks to finally finish it up. The animators have finished their characters animations, the art assets and textures have been implemented, and lastly the game designers are working hard to fix up the last details of objectives, AI behaviours, sound effects and jumpscare cutscenes.
Most of us have been joining into call meetings almost everyday to check on our progress and help each other out to add work into the project.
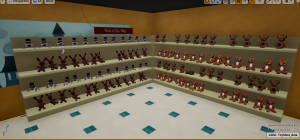
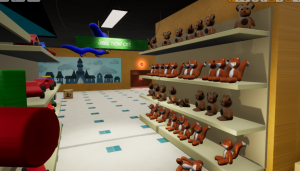
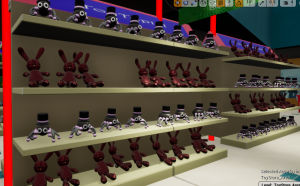
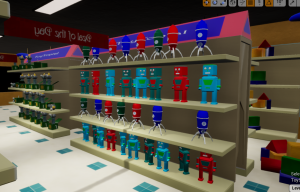
The last touches I made to the project were to place the toys all around the shelves in the toy store. I organised them by max two toys per shelf and placed them on with irregular rotations and positions, so it looks more natural. Patrick’s blueprint to randomise colour variation of some toys helped to give some variety on the shelves too. After this I had finished all I could do for the project.
During the last day the final touches were made to the game. Here is a game play through that teammate Patrick recorded:
Audio from Jenna Marbles YouTube video – I Gave Myself A Claire’s Makeover: https://youtu.be/wLVMrpByb_Q
Reflection:
This was a refreshing and fun project to work on. I was able to develop my 2D animation skills by bringing in performance, lip-sync, audio and principles into one 8 second animation.
I am very happy with the outcome of this project. I was determined to try my new and old skills in one project and it combined well. My style of animation was inspired by how animators are able to produce traditional looking sequences that look sketchy and fluid. I enjoyed researching peoples approaches such as entries from the 11 Second Club website, show-reels of work from a variety of artists, and studio projects from the likes of Studio Meala. These inspirations helped me grasp a look, a setting and a unique approach to my chosen audio.
Both my reference of study and my reference of performance helped tremendously. From the YouTube videos by Bam animation and Toniko Pantoja, to the linked-in course on photoshop animation, I learnt lots of skills to produce good 2D animation throughout this project. I attempted to make use of anticipation, overshooting and squash & stretch (smear frames), based on my previous experience and from what I learnt in these videos.
The reference I recorded was super helpful in grasping the motions and expressions that I was looking to show. it was definitely beneficial to use my own reference, as It would have been difficult to find reference that fit what I was looking for.
What I like most about this animation is the natural and casual motion/expression I was able to capture in these two characters. I am happy that I was able to create a scenario that fits in context with this audio, as it makes it more fun to watch. I am also proud of pushing myself to be able to handle two characters to animate.
If I were to complete this assignment again, I would have spent more time on the motions to look more fluid, or worked on my ease ins and outs more. What I wish I could have done better was the flower placement on the characters shirts – they are animated differently to the rest of the animation and look slightly off along side them. I would have also worked to make the hands look better than they do right now – I feel during the production I may have neglected the hands quite a bit, just so I could keep going to further stages. Overall, I am still very proud of the work I made and am excited to show it around.
In conclusion, I enjoyed making, and successfully produced a 2D animation highlighting development on lip-sync and performance.
Once my line-art pass was finished, I started to think about the visual and colours for the scene. I also made sure I had different versions on my work saved on multiple files so If I lose anything I can go backwards.
For example, my first photoshop file has only the line-art final animation. My second file will include this and my colouring, and my third file has my rough sequences and thumbnails. This helps to ensure I have saved my work multiple times, and my files won’t become too big to work on or download.
File 1
File 2
File 3
After this, I wanted to design a simple background. Like before, I imagined this audio is something that could take place in a dressing room, trying on wacky clothes. So I looked for a simple dressing room reference to go from, that also fit the same perspective as how my characters are standing.
These references worked very well and in this specific perspective. I also liked the yellowish tone of the images as seen in most dressing rooms, giving that sense of familiarity.
With the reference I painted this dressing room. After this I ended up adding small details to the back like a hanger and some slippers, then added into the Photoshop file.
This is how the background looks with the image sequence of my line-art animation applied.
In my own time, I painted a piece of the two characters, I decided I could use this to reference my colour scheme in the animation.
I painted the animation on a separate video layer for each character. I went over them in one solid colour then coloured them same as the reference drawing.
I wanted to give them their flower prints on their shirts so I went back to animate them on. While doing this I went over the colouring one more time to see if it was neat and in the line-art.
Since the mouths are in a different pace than the rest of the animation, I had to make a new video layer to paint them.
I added some more touches and polishes to the animation such as cleaning up any off-looking line-art, some colour alterations, and to the flowers on the shirts as I animated them differently to the original animation.
After all this, I had finished my animation. The result is below.