Now that I have chosen my audio clip it is time to do some research on how I would like to approach the performance of the animation. Below is the audio clip script written down for reference.
Script:
CH 1: ‘Does that feel good though?’
CH 2: ‘Yeah I kinda feel dope right now.’
CH 1: ‘You look dope!’
CH 2: *Heavy breath*
CH 1: ‘What was that?’
CH 2: ‘Breathing…’
CH 1: ‘Oh…’
Following the advice I got from Toniko Pantoja’s video, and Dermot O’ Connor’s course, I will start analysing my audio clip. I will then pick out key words that are best to express the performance, then thumbnail all my ideas of posing and expression.
First of all there are two characters to analyse. I will start with the voice that talks first (which is Jenna in the video). She says:
‘Does that feel good though?’ ‘You look dope!’ ‘What was that?’ ‘Oh…’
I have highlighted the words That, good, look, and oh; I feel they would be where the emotion is most impactful.

I sketched out different emotions and reactions that can tie in with this audio line for character 1. I have gone for four types of pose and expressions for each word, and I’ve made it so each number links with a similar recurring emotion. e.g. 1 is an enthusiastic character, 2 is quite grumpy and sarcastic. This was a great way for me to put onto paper what I imagine the kind of performances this audio can create. I mostly used myself to reference from acting out these poses to make sure they make sense.
Next is the voice that speaks second (which is Julien in the video) He says:
‘Yeah I kinda feel dope right now.’ *Heavy breath* ‘Breathing.‘
I have highlighted the words yeah, dope, ‘the breath’ and breathing; Again I feel they would be where the emotion is most impactful.

I sketched out different emotions and reactions that can tie in with this audio line for character 2. This time I went for three types of pose and expressions for each word, and I’ve made it so each number links with a similar recurring emotion. Again this greatly helped me put on paper the ideas I had in mind of how this audio will play out.
Next I sketched out some of these actions in a storyboard format to get an idea of how the performance will play out. This helped to figure out where the characters could move and position themselves, and how I could plan it so they face each other to communicate. I think I will go with the second sequence as it is a lot simpler and eye contact would be present.

Now that I had these options I started to record myself for my own performance reference, which will give me a great guidance to work from if get the right actions.
I played the audio on loop so I could keep attempting the type of actions I thumb-nailed before, and recorded myself with a phone. In time I got the actions and a few videos. I clipped out the better performances from them; for the first character I had three attempts, but chose the second one as it looked the best to me. for the second character I only had one attempt that I thought looked best, so I stuck with it.
Next I brought each video into Premiere Pro along with the original audio sound. I slightly edited the clip to match the sound – first the clips were too slow so I changed the speed duration to 120%, and this matched well. I held frames at certain areas if the breaks between words were too short to fit with the audio. Since I was planning the first character to face right, and the second to face left, I had to horizontally flip the first clip to get that same position to reference from better. Lastly, I altered the brightness and contrast of each clip as bringing them into Premiere Pro they became too bright and difficult to see.

After this I had two performance references to use as my guide for my animation:
(I cannot act sorry XD)
Lastly before I start animating, I wanted to produce design of the characters so I have them ready for when I clean up my work later on. I made sure to stick to a two day deadline to do this so I had plenty more time for animating the performance.
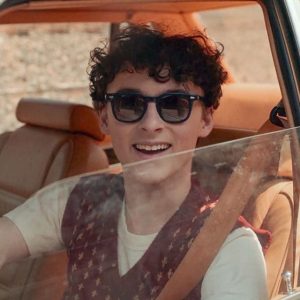
I also wanted to stick to a theme, and go original with the visual of the characters. In the context of the audio, I thought it suited to be taken place in a fitting room where the characters are trying on clothes. Going on from this, I wanted the characters to have cool outfits that they are trying on to correlate with the theme. I started with making a mood board on Pinterest to gather some reference and inspiration.


I am really interested in the Bang on the Door brand that make this cute groovy style of characters in cool clothes. I was inspired by the way they dress, so I searched around and combined an outfit for the two – mainly from the two cropped images above.

Then I got some regular reference for the type of people/visual I wanted to go for, and for additional clothes reference. I wanted one of the characters to be wearing cool sunglasses, and one to be wearing a long skirt.
Next I started to sketch out some design ideas. I experimented with some poses and face shapes to see how they looked.

Once I was happy with the sketches I drew out a full body design of the two characters. This reference will help me in capturing the style and look of the character later in the animating stage.

Now that I have gotten my character design, I was ready to start my animation. I first watched through my reference videos and screenshotted the main key poses I do in each performance, so I can transfer these poses into my drawings in photoshop. These poses will guide my animation and act as the most important poses in the sequence.


Character 1


Character 2
When I opened my file and set it up for animating, I drew on a thumbnail layer my plan ahead. I sketched out the key poses for both characters in a separate layer so I can always go back and revise my work to this plan.


I had a change of plan going into animating in photoshop and decided the ‘video timeline’ is more useful than the ‘frame animation timeline’. This is because in the video timeline I am able to add in my audio clip in line with the frames I’m working with, and I can turn on onion skinning in this timeline, whereas in the other timeline I cannot. So for now I drew out my key poses again this time in 1 frame each across the timeline.

I timed the poses to the audio clip of where they would be placed based on my video reference, and got this first version below.
The timing is rough at this stage but further on I will focus on the timing using the audio line very carefully.
Using my video reference, I looked over what kind of first in-betweens I could sketch out. I mainly focused on where I lift my arms, when I bring them down, and where there are slight arcs in the movement.
Between these two videos I had developed the key poses and added in-betweens where necessary to plan mostly how the arms are moving from each pose, and their anticipations.

I wanted to start the next character at this stage so I could see where to position them/how it looks with both characters in the scene. I got my references on the side and got working.
I started drawing out the main key poses for the second character. Again using my video reference and the screenshots of the key poses, I am able to add this in following the audio line.
The two above videos are my development with the key poses and adding in-betweens, again planning how the arms are moving from pose to pose, and their anticipation. I spent quite some time on this stage to get the arms moving e.g. from pointing to themselves, to sitting on their hips. It was quite difficult to predict it by eye so I made sure to look over my reference deeply to find a better motion.
At this stage I am missing a starting motion for the second character, because I decided I would like to see them walk in while pushing a door away – as if they’re walking out of a dressing room. This meant I had to make a new video reference to help me out with this.
I started the same thing I did before with my other reference, trying to get this ‘walking through the door’ motion right. After a while I had one or two videos that had good motion in them. I cropped out one motion that I liked most and stuck with it. I edited it a similar way to the other reference videos relating to the speed duration, and the brightness/contrast. After this I had a new performance reference for the second characters entrance:
For further reference, I wanted to screenshot the main motion of this video, where my hand moves over to the door.


I wanted to capture its arc by drawing over and arc line on top of these images, and to picture how my hand makes contact with the door. I started this motion without looking into this before and it did not look right. However with these images I am able to understand where the hand is moving to and correctly capture the motion.
Using this reference greatly helped with capturing this motion. I first drew in 2-3 key poses from this action, then used reference to see how they flow into each other with in-betweens. I polished up any other poses in each character and now I have a good rough base to use for my clean-up.
In these drafts I started drawing out the characters I made onto the main key poses of each performance. I made sure to have my character model sheet on another tab to refer to, but I also made use of it inside the animating file to ‘trace and shift’ the structure of the character into each pose – what I learnt from the video that Bam Animation created.


At the moment the characters feel lifeless as there is no face expressions yet. I will try start the rough lip-sync process at this stage. To the left is page 307 of the Animators Survival Kit book where they go over the uses of vowels in dialogue.
Looking through these images will help exaggerate the expressions and personality in my characters moving forward. It will also help indicate how I can tie the facial expressions and body movements so they look well together.
To plan my lip-sync, I set up the script on a photoshop file and placed down mouth shapes from this lip-sync model sheet by ‘Wolf-shadow77’ on Deviantart, to help structure how each word will be pronounced. I will follow this, starting on my key poses then branching onto the in-betweens.


Reference:


So far I have only placed down the key mouth expressions throughout each of their dialogue in the main key poses of the body. This will give me a good structure to work on for developing the lip-sync later on.
In this draft I was focused on getting some arcs correct by drawing an arc line in a separate layer to guide my motions, for example the arms in the girl character moving up and down. This trick I learnt from Dermot O’Connor’s tutorial greatly helped my arcs flow better than before.
Moving forward, I spent lots of time adding in breakdown poses and polishing key poses/in-betweens so the animation becomes smoother than before. I made sure to always refer back to my recorded reference to help with arm and head positions as they were the most difficult to work with.
At this stage I have more or less finished animating the body movements, though could require some more polishing. I am happy with the motion of it so far. I even started the first characters lip-sync on a new video group, following the structure I made earlier. The lip-sync is slightly slow at the moment however I will go backwards to fix the timing very soon.
After this I moved onto the second characters lip-sync, all while referring back to the lip-sync sheets I made. I revised the mouth shapes where needed and made sure they synced in time to the audio.
Next to do was the eyes/sunglasses on the characters. I made a new video group for each so they could follow the same frame length as each character, and drew on the eyes and sunglasses straight ahead on each pose. This was an easier approach at this stage as doing pose to pose would be tricky considering the amount of drawings there are now. They look quite well, though I may need to add more expression to the eyes of the first character such as eyebrows, and rub out the lines underneath the glasses to make the line-art look cleaner in motion.
In this final video I had added the eyebrows to the first character for more expression, I altered the lip-sync and body motion where needed, and made the line art cleaner for the sunglasses on character 2. I even added earrings to character 1 as a little touch from the character design.
Now I am happy with the overall animation, I would like to present it in a nice way, with a background and possibly a colour layer.