During this week we presented our first game update, got some feedback and had a change of teammates within our group. Katie had to leave our group, and Simas joined our group to take her place. We got a few days to introduce Simas to our idea and produce some art style concepts for the game/narrative.
From our week 2 presentation, we were given feedback. The tutors were interested in our idea and liked where the narrative was going. The class gave feedback on our progress for mechanics, talking about what will give the player stamina, or if its better to hide and rest to gain stamina. They also gave us an idea to add multiple torches to collect throughout the game such as a wind up torch, a flashlight, a glow stick etc.
Later on as we were gathering some more concepts for the gameplay, the tutors came over and we asked questions about how to end the gameplay, and how to effectively portray the childs phobia of dolls. The tutors showed some examples of horror/psychedelic media, such as the clip of Fight Club where a figure flashes between frames. The game students have taken the role to build the narrative and gameplay progression taking inspiration from the references they have found already.
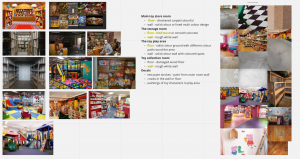
This week we made to-do lists on Miro Board for everyone to fill out each week what they will be working on. I filled out mine talking about what textures I will be making. I am focusing on creating floors and walls of the toy store building. I gathered my reference and listed out the type of design or material for each room in the toy store I can make. e.g. Carpet checkered floor for the main room, rough white painted wall for the storage room, and more.

I started designing these textures on Photoshop mostly using brushes and filters to create the same look as my reference. I also gathered a few tutorial videos to help me start out with filter techniques.
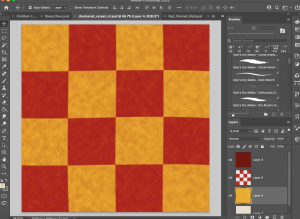
First I made a carpet checkered floor. Since this was my first design It took me multiple tries to get it right. The first few attempts looked too flat and regular, but on my third attempt I tried a different approach that looked more like carpet.

Next I made a tiled floor design. I placed a grey background down, placed in grain, and added motion blur to create a lined grain look. I added multiple roughness brushes across the page. I added the lines to make four tiles, and added some slight brush strokes for texture.

Next was the rough white wall texture. I made a grey background with grain, and experimented with my brushes to create roughness. I used the filter-offset tool to alter the position of the brush texture layer, so I could create a seamless pattern. I used the stamp tool to block up the seams and brought it back to the original position.

After this, I worked on the wooden floor texture. This took some tries to create but eventually it looked well. I used a wood floor template from the internet, and altered the look with a filter for it to fit in with my other textures visuals. With reference beside me, I added darker edges to the corners of the wood planks, then picked a colour and textured brush to paint dirt/moss bits in these edges. I used a brush shaped as hair and painted on light scratches as if the wood is worn. I used the filter-offset tool to alter the position of the brush texture layer, so I could create a seamless pattern.


In addition to the main toy store room, I wanted to make a store wall display, made to hang toys and shelves up. I used a grey colour and grain for the background. I made a dark line, duplicated it and distributed even space across the page.


For now, my last major texture made was a vent wall tile. I added a 5-point gradient of a light grey and dark grey colour to give a shiny metal look. I used brushes again to add roughness to the metal. I followed the same process as the lines for the display wall lines, with the screws of this vent wall.

I made a few smaller, less detailed textures if they are needed for paths, smaller room walls etc.


By the end of the week in preparation for Mondays (week 3) class, we produced our second update presentation. The group added in the details of the game idea, and their progress from this week. The group added their necessary elements for this game, such as enemy/puzzle research, narrative development, 3D modelling, level design and AI mechanics. I added my work in the presentation as our texturing progress. Our teammate Turlough made a video of the game room showcasing the new mechanics he was testing.
Source: