During this week we did not need to prepare a presentation, but we all took more time to take on tasks and build our game. During the afternoon of this Monday I communicated with the rest of my group online to catch up on the tasks they were working on. I continued my practice and progress with creating modular textures, and the group have started a list of assets of models to make, any more game design elements that need work, and level design progress.
I spent lots of time on Substance Designer this week and continuously learning from the range of videos I collected. On YouTube, I had found interesting ways people had created different materials like tiled floors, fabric and basic techniques. These were good to watch to see how these type of materials are constructed.
The LinkedIn Learning course on Substance Designer, made by Joel Bradley, helped me mostly with displaying my file, exporting my work, and altering the options of nodes. During this week I created a lot more from my list of modular nodes that we can use for the floors and walls of our game.
Sources:
https://www.linkedin.com/learning/substance-designer-2020-essential-training/menus-and-preference-settings?autoAdvance=true&autoSkip=false&autoplay=true&resume=false&u=35574164

Here are some of the textures I made this week:


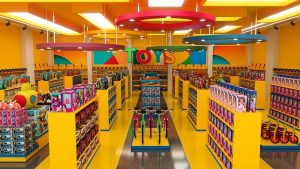
I recreated a checkered carpet design with the help of a fabric design tutorial, and some help with another tutorial on how to make a checkered design.


I created the stone tile design for back rooms or bathrooms, with help from a tutorial but using my own set of options to create a different pattern.
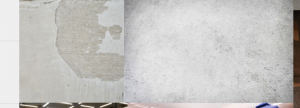

I made the concrete material based from a YouTube tutorial, though modified it throughout to give it a more cream colour, and with less holes and chips.


Eventually, I was able to start this basement floor design from scratch and make the node system with my new knowledge. I worked on this with references a teammate collected on the side. I made use of levels nodes, grunge and crack textures, and the gradient map to pick the colours.
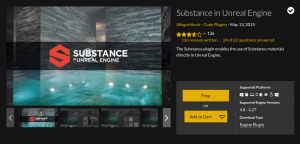
To make sure these textures were working okay, I tested them in an Unreal Engine project. First I was recommended by the linked in Learning course to download the plugin ‘Substance Designer for Unreal Engine’ which will help in importing my substance files and organise the parts them into the engine with ease.
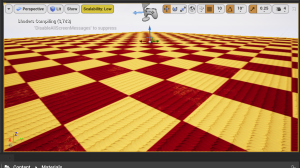
I tried this out with my checkered carpet design. I exported the texture as a .sbar file, and opened up my UE project. I dragged in my .sbar file into a suitable file, and the system worked well. I have the texture file in green, the instance of the material in red, each of the texture maps e.g. base colour, metallic, normal, then I got my texture material node at the end, where I could drag this onto a surface. As a result the texture looks really nice in UE.

I have more textures that I plan on making from next week onwards. These are the warehouse floor, the vent metal wall, and solid bright colours for any other walls.
This week we had a meeting on blackboard and us animation teammates discussed our tasks with our tutors. They gave feedback when needed, and encouraged us to keep going. My tutor recommended me alternatives to substance designer if I wish to move and create more simple made textures if needed. This is good to know if I have any trouble with Substance Designer in the future.