After modelling and texturing my organic model, I decided I wanted to make a nice scene to present my model in on Sketchfab. Before I go into attempting this, I wanted to gather inspiration and research on how other 3D artists have done this. First I looked through sketchfab of peoples cute characters’ look, and how they presented them in the website.
Here is a few that stood out to me:

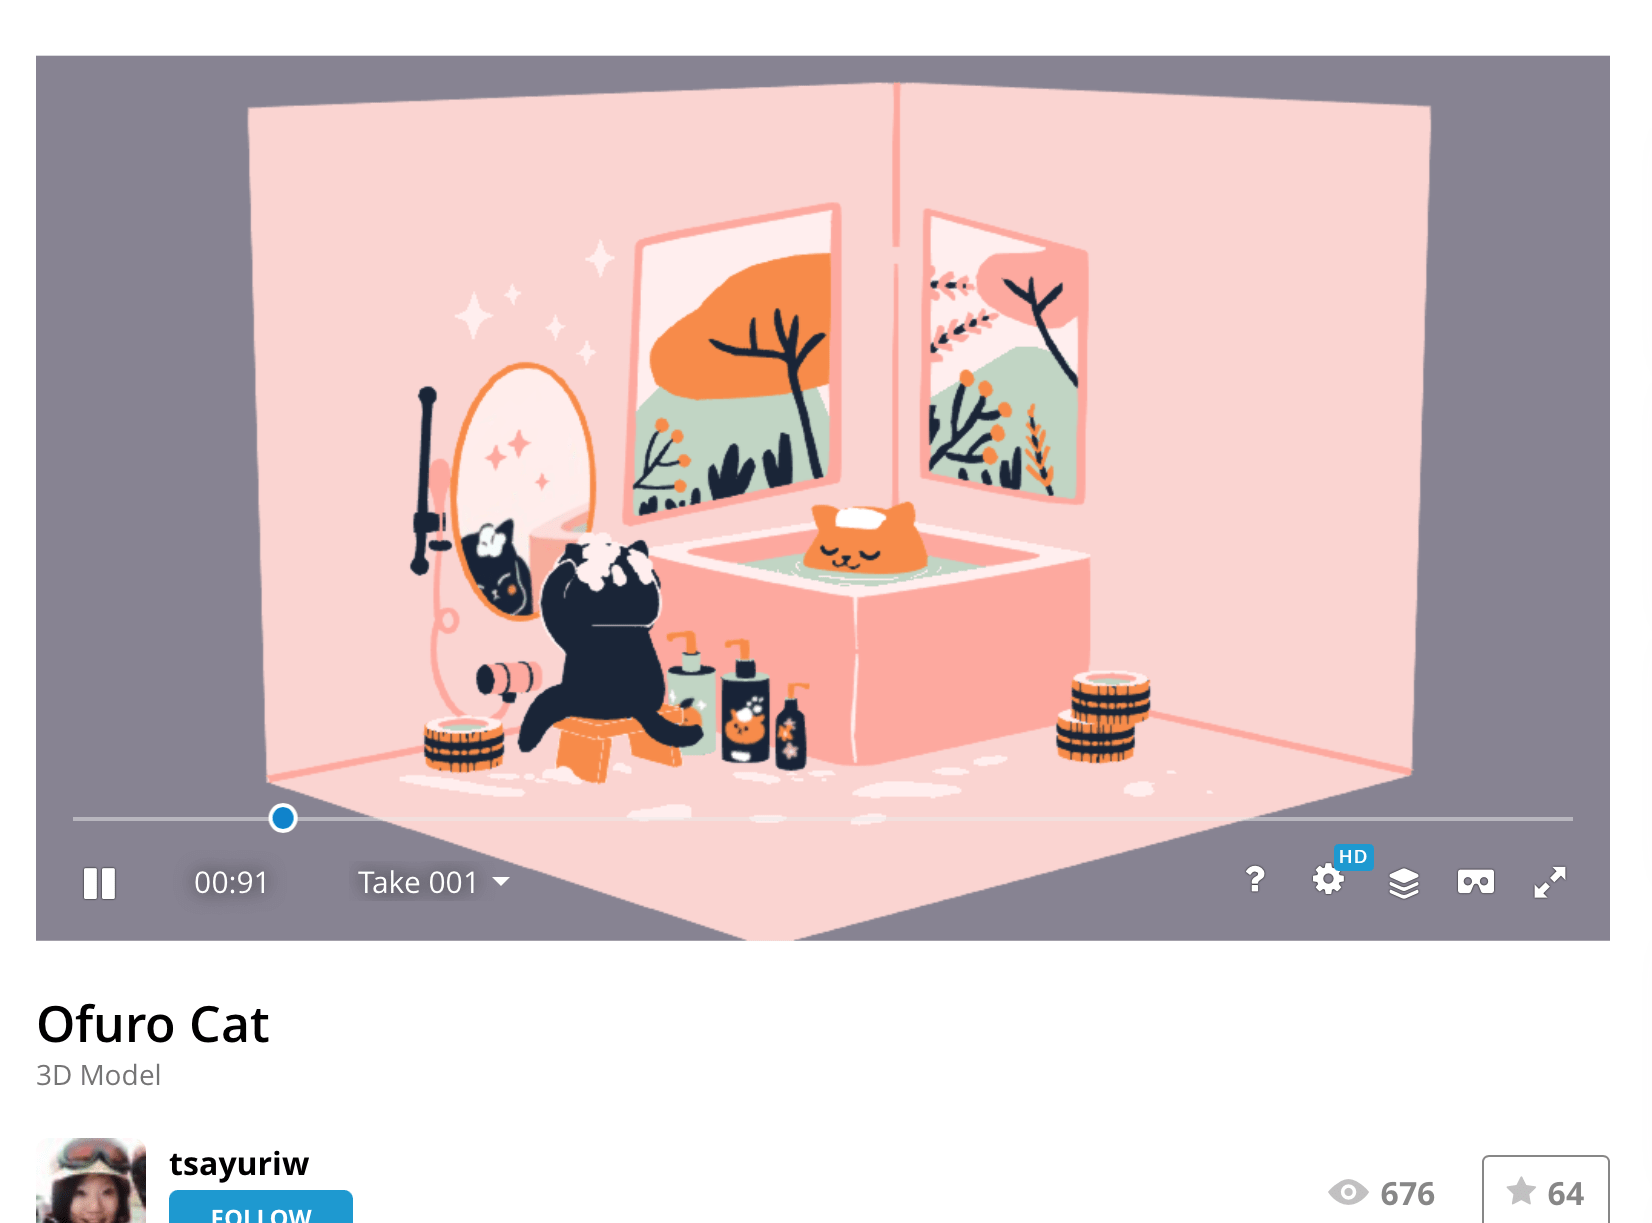
I could go for a simple solid colour style like these two set ups for characters by ‘Demidog’ and ‘Tsayuriw’ I also like their simple scenes – the sofa, the bath – it connects to the style and also gives the characters a purpose /an activity to do.
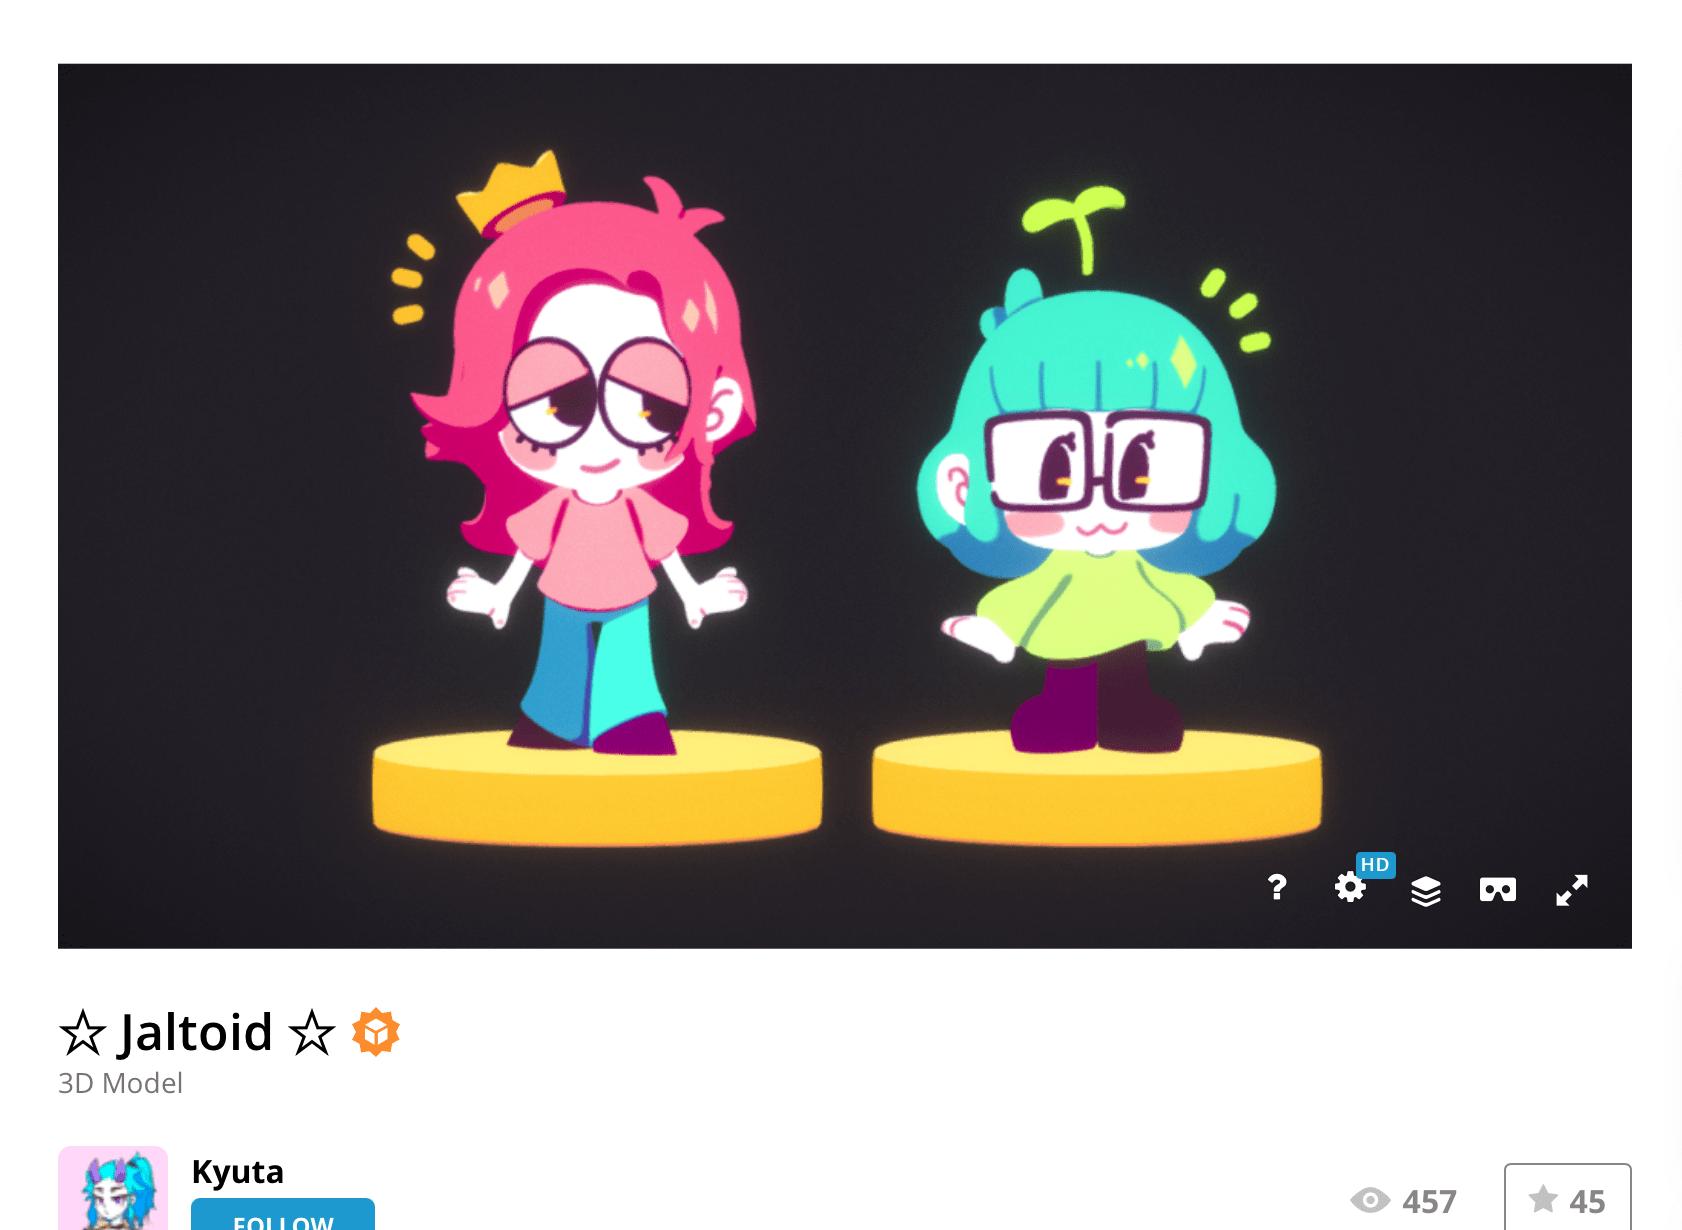
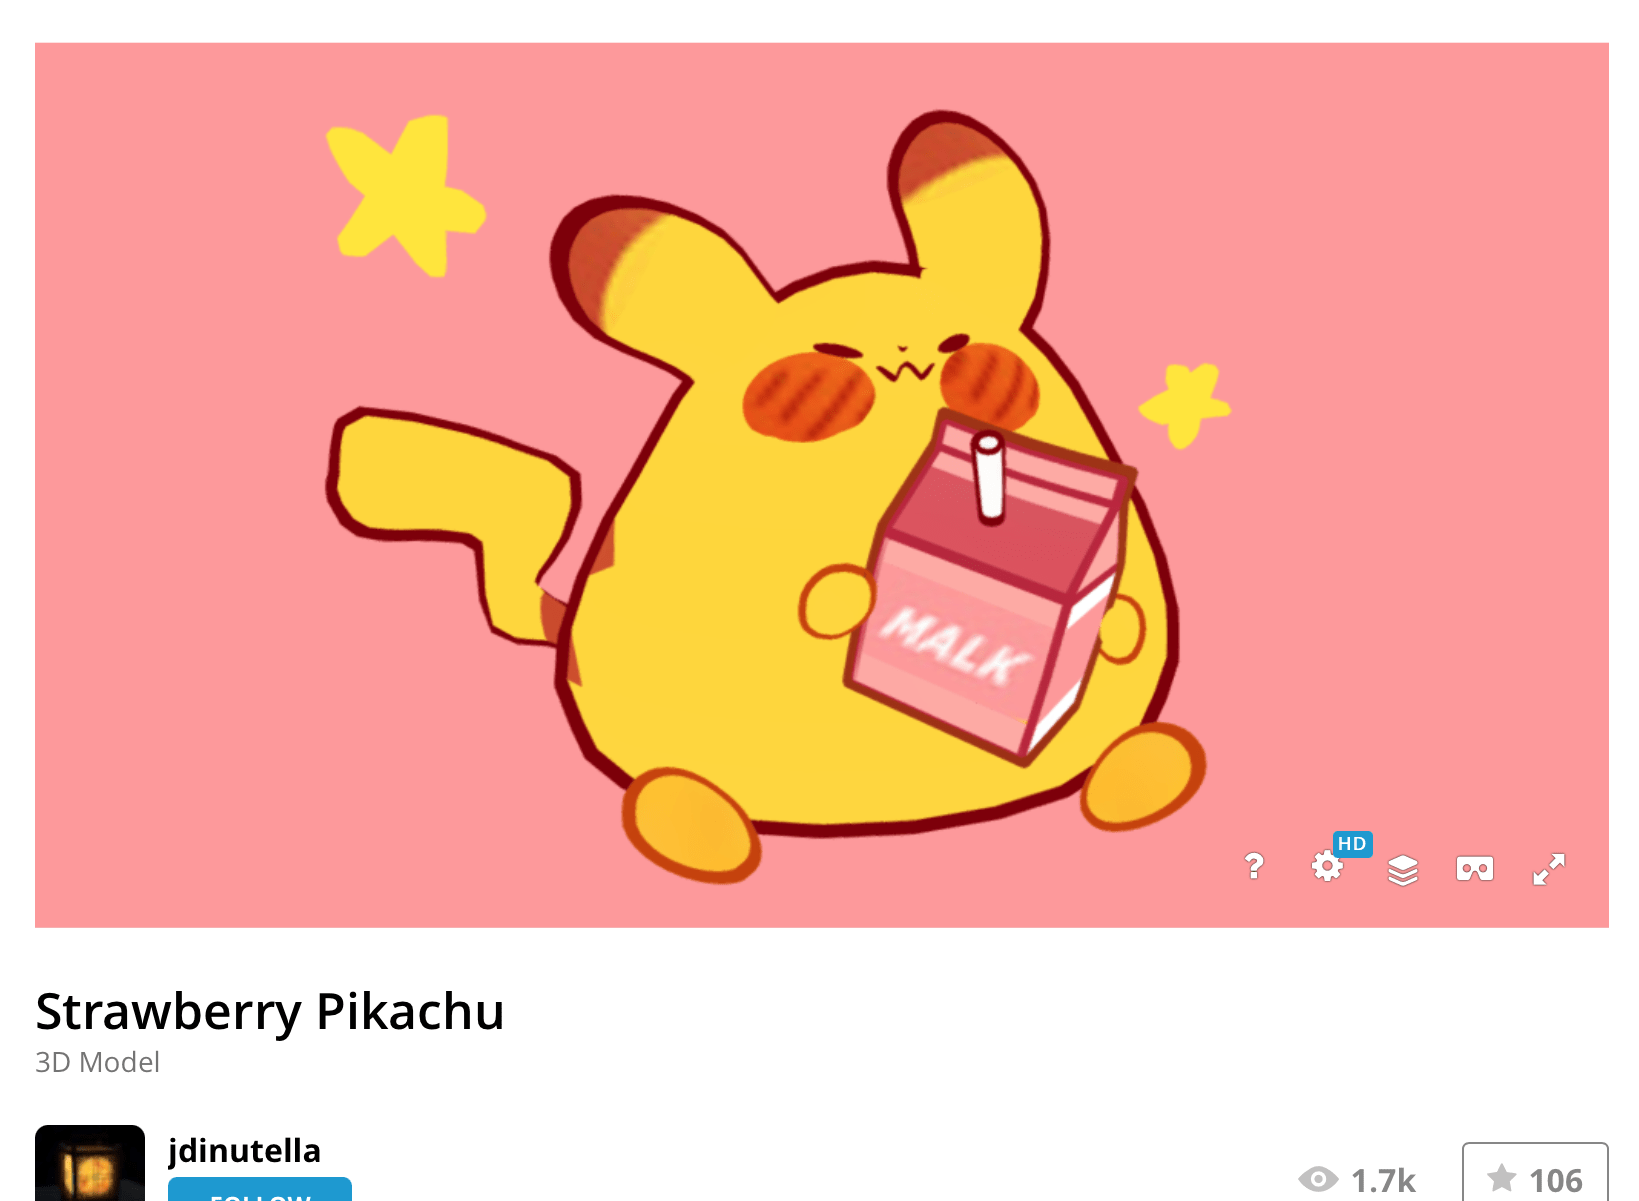
I could also go for the toon shader look that these scenes have made by ‘Kyuta’ and ‘jdinutella’. I like the shade style and the outline style as it could go well with my penguin. Along with the penguin, like these scenes, I could add tiny designs around the model to make it stand out more.
I wanted to try out a scene much like Tsayuriw’s modelling of the ‘Ofuro Cat’. I liked the square room scene and how the objects are rounded and stylistic. It would be fun to see how I can achieve a look for a little office room with a desk.
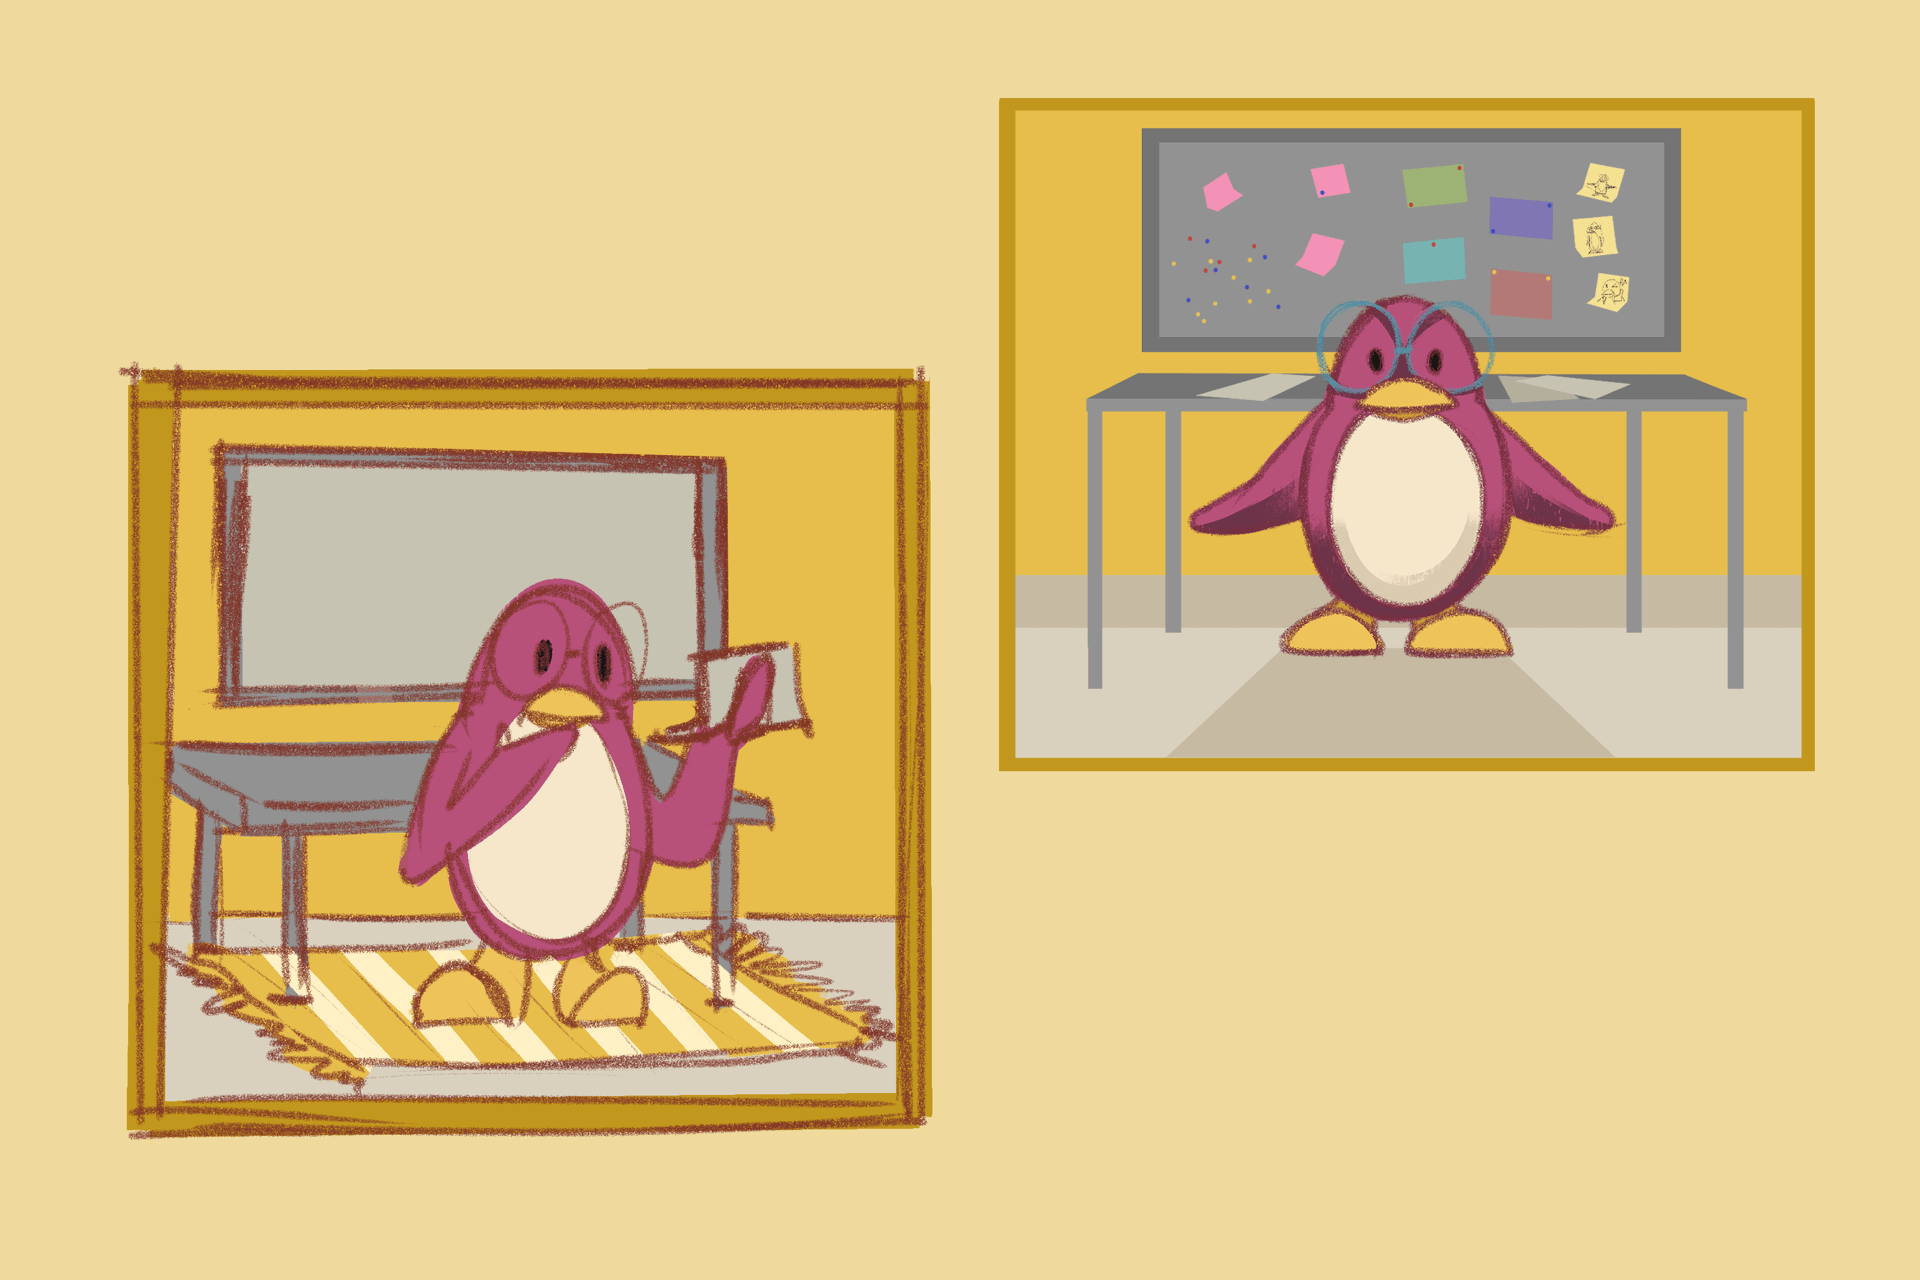
Here I made a few sketches with the ideas I had in mind. I knew I wanted some sort of office/desk furniture in. I also thought the pinboard was a cute idea but it also contains a lot more detail to make it seem interesting. I also wanted the scene to have a little carpet to fill up the room more. In addition I could possibly add a chair, a window or posters on the wall, If I have time.
I am mostly using life reference from my own flat room. This is where I got the idea of the yellow walls, the carpet, the desk and the big pinboard from.
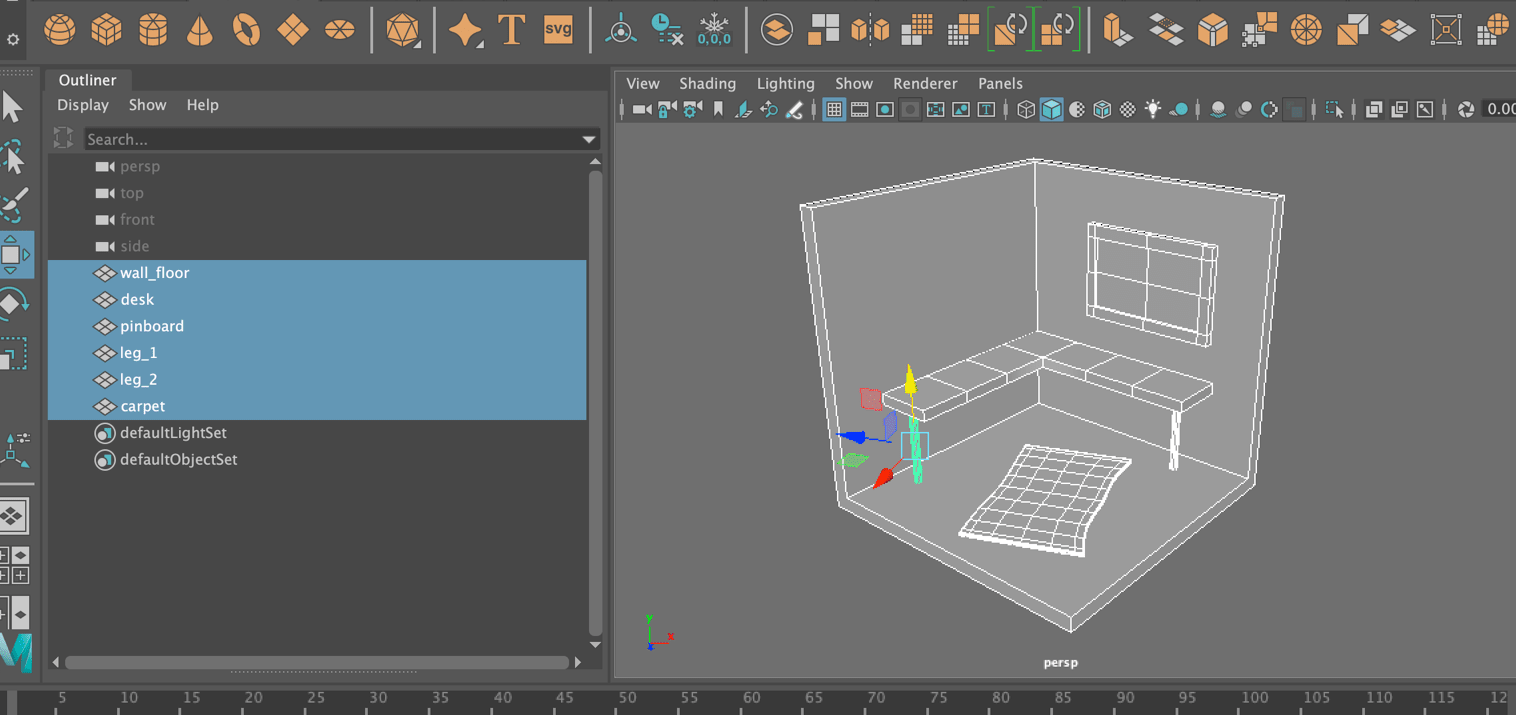
I got back onto Maya and started to mess around with these ideas and see what could work. At this point I had the square room shape placed down. I made a desk, the pinboard and a carpet shape.

I made sure going through this that all my meshes had correct UVs by going into the UV editor and unfolding each object. I also made sure they fit in this UV map, and that they were straightened any laid down properly. This made my process a lot quicker and easier to go through.

I also imported my penguin model to compare the sizing of the scene to the model. This was helpful in keeping a consistent size of each object in the scene with the size of the penguin.
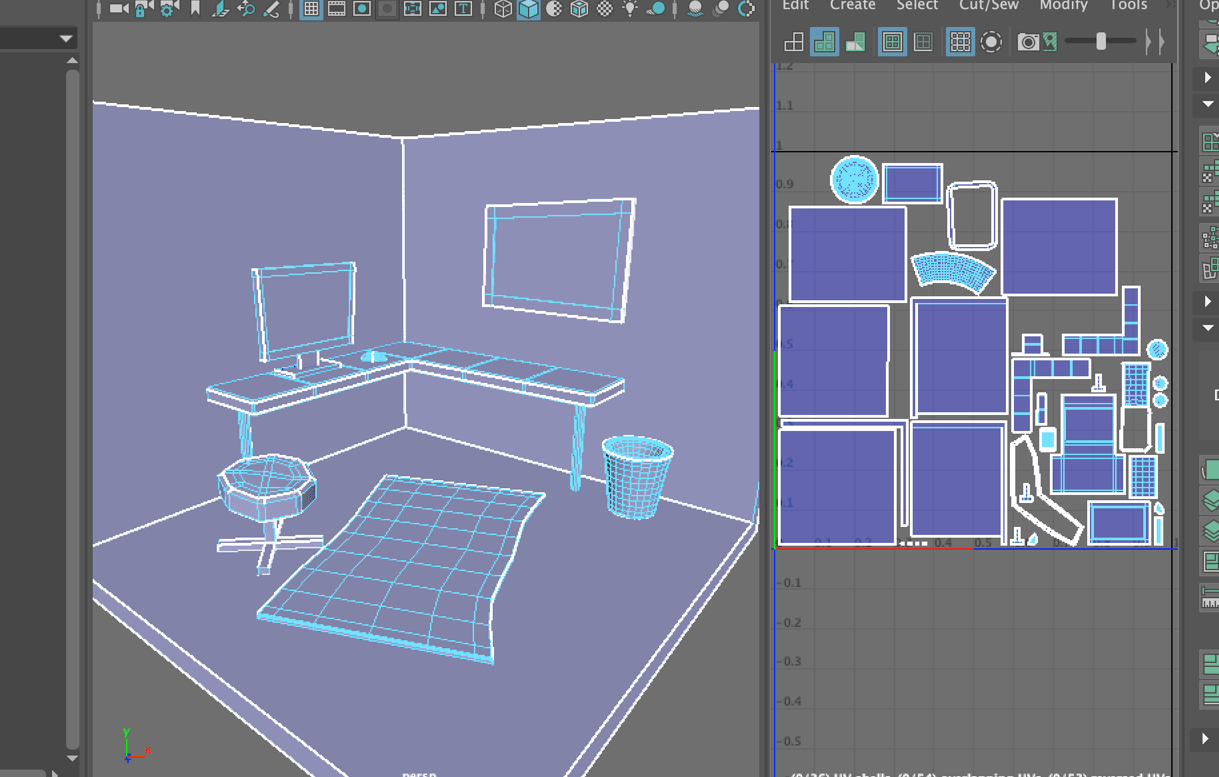
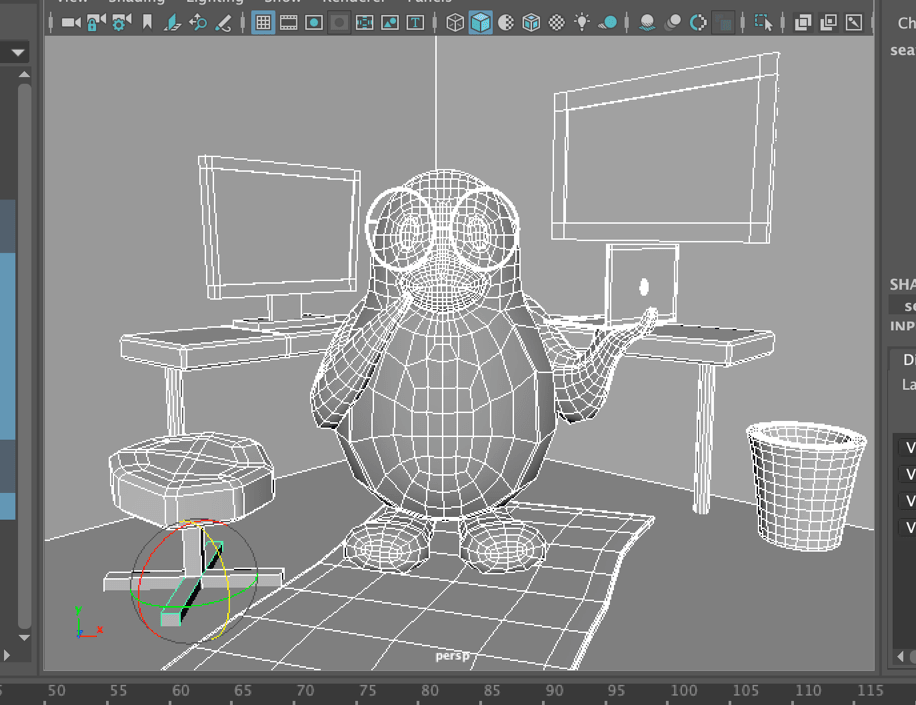
Here I had added a few more bits of decor/furniture such as a bin, a seat and a mouse for the computer. After I modelled everything I UV mapped the rest of the mesh to clean up and make sure they work for texturing.

Here I assigned each part a Lambert material so they can be separated from each other on Substance Painter for texturing. I named each one what they were and kept each object with multiple meshes together, such as the table and the monitor.
I brought my scene into Substance painter by exporting it as an FBX file, and as soon as I go on, I baked the textures so they could be painted on and have textures placed on them.

Here I had experimented with the colour assorting and design. First I painted the walls and floor a yellow colour and a cream colour. I then experimented with a wood smart material and placed it underneath the colour layers, so that the colours would show on top and the wood line texture shows through. I also used a secondary colour to clash with the yellow, a teal blue. I painted it on the seat, the bin, the pinboard, monitor and mouse. For metal parts like the seat stand, monitor stand and the desk legs, I painted on Metalness and low roughness to get a shiny metal look. In addition, I experimented with the pinboard and the monitor screen with the use of images and alpha shapes. I used square and triangle alpha shapes with a colour to create sticky notes. I dragged in a desktop background image onto Substance and used it like the alpha shapes, to place down on the monitor screen. Lastly, I painted on stripes on the carpet to give it a pattern.
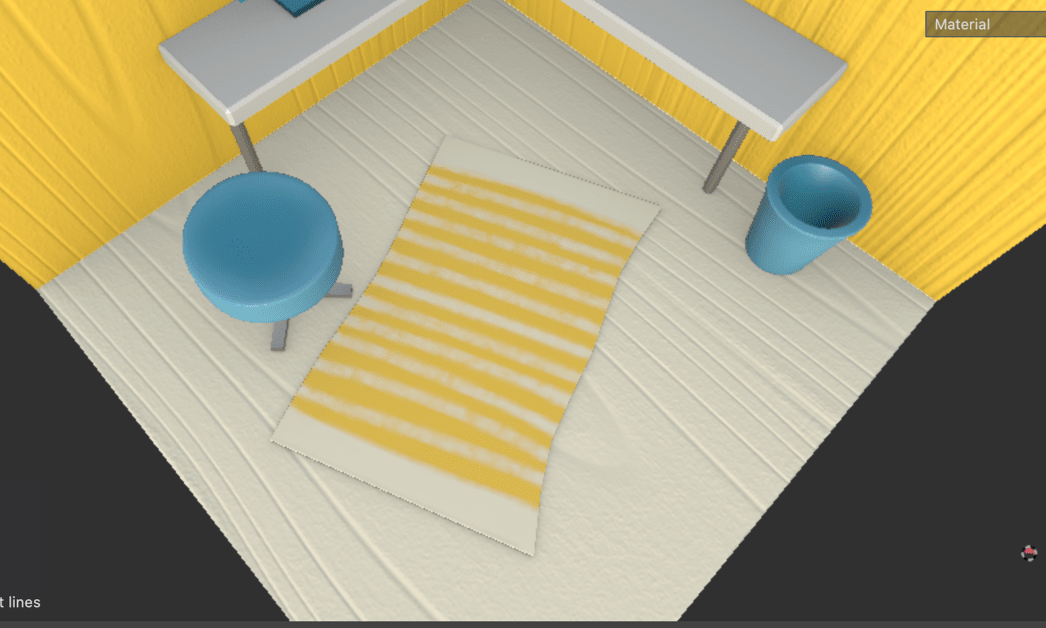
Similarly to how I painted the penguin, I added lighter and darker tones of the teal blue colour around the seat, bin etc. to give it more vibrance instead of just a single colour on it.

I liked how this was going however I did want to add and change a few things for this scene. I moved on to test out the textures and presentation anyway just to see if it works, then I would make my changes after.
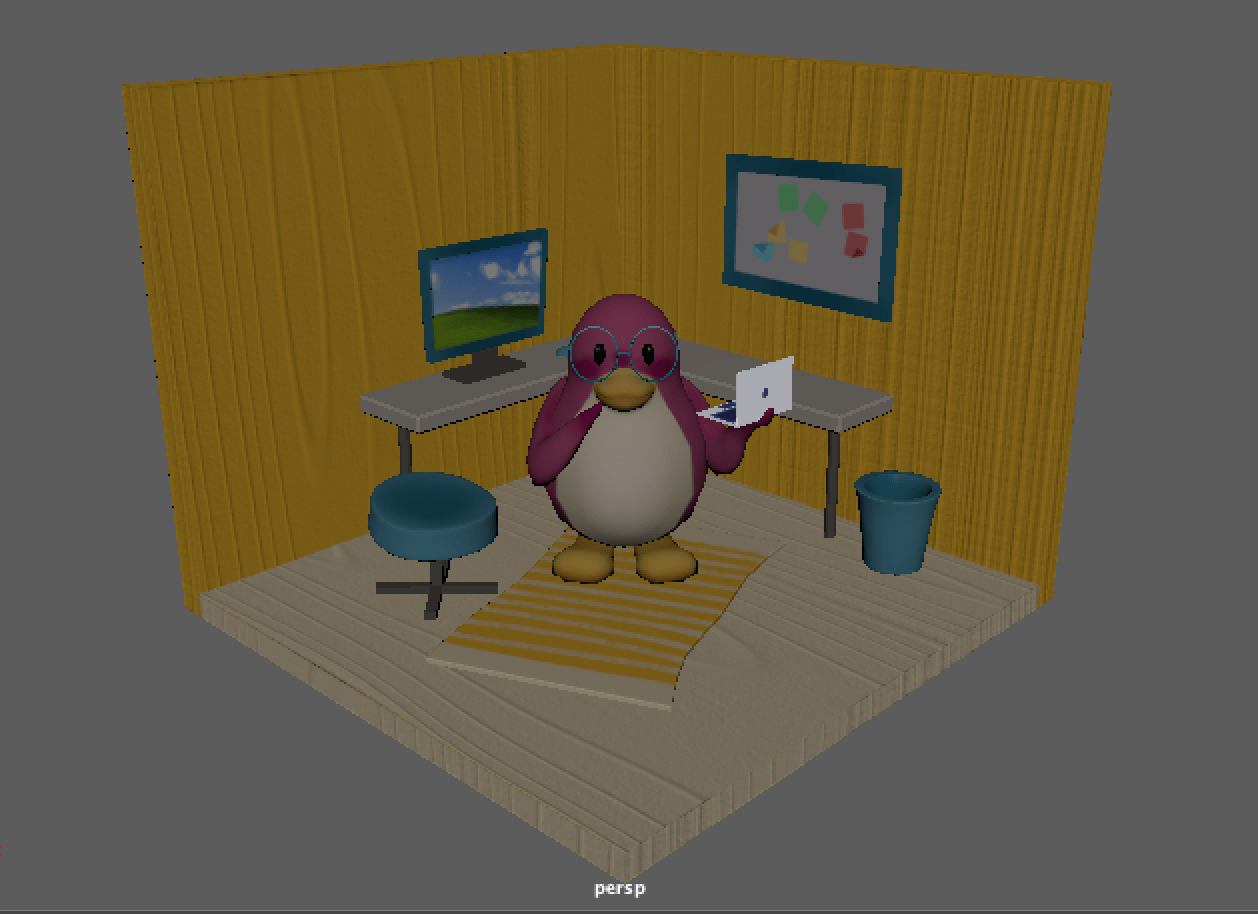
First of all, it worked well when brought back into Maya. All the textures were working and the penguin fit well in the scene. I made a new FBX export Including both the penguin and the scene so its an easier process in Sketchfab.


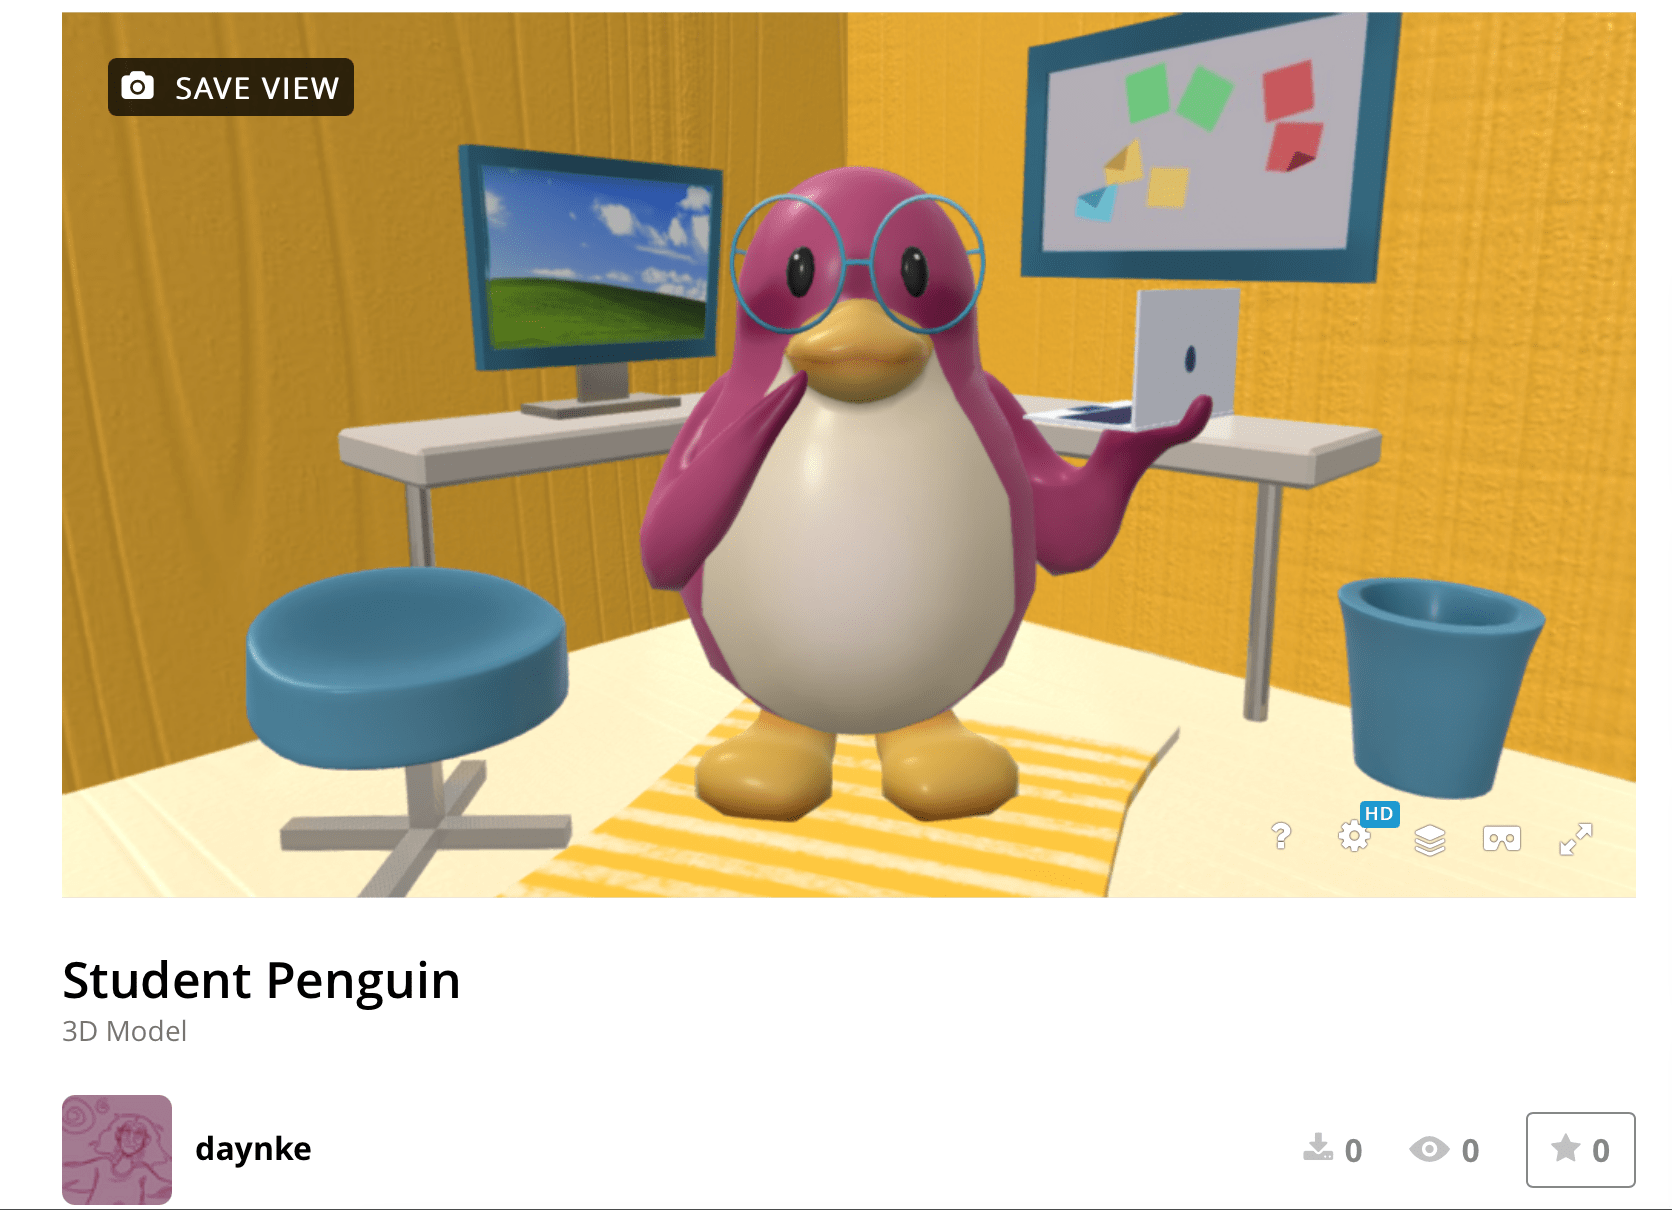
Working on Sketchfab was a straightforward process where I would slot in each texture to their PBR maps etc. Base colour, Metalness, Normals. I also added in a lighting environment (Studio Soft) and made sure the intensity was correct before publishing.
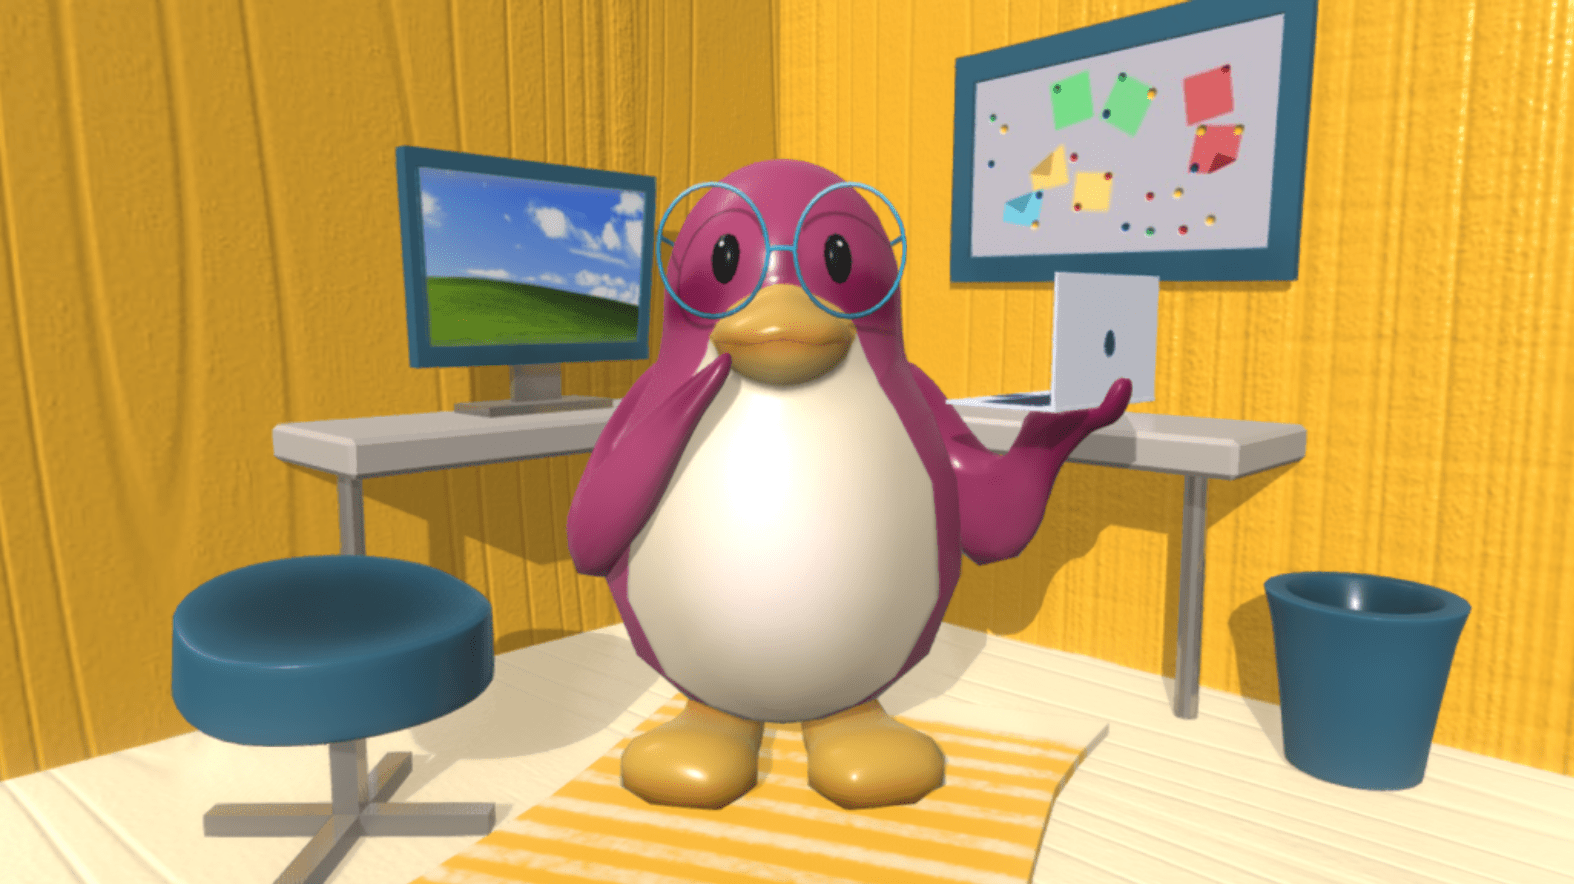
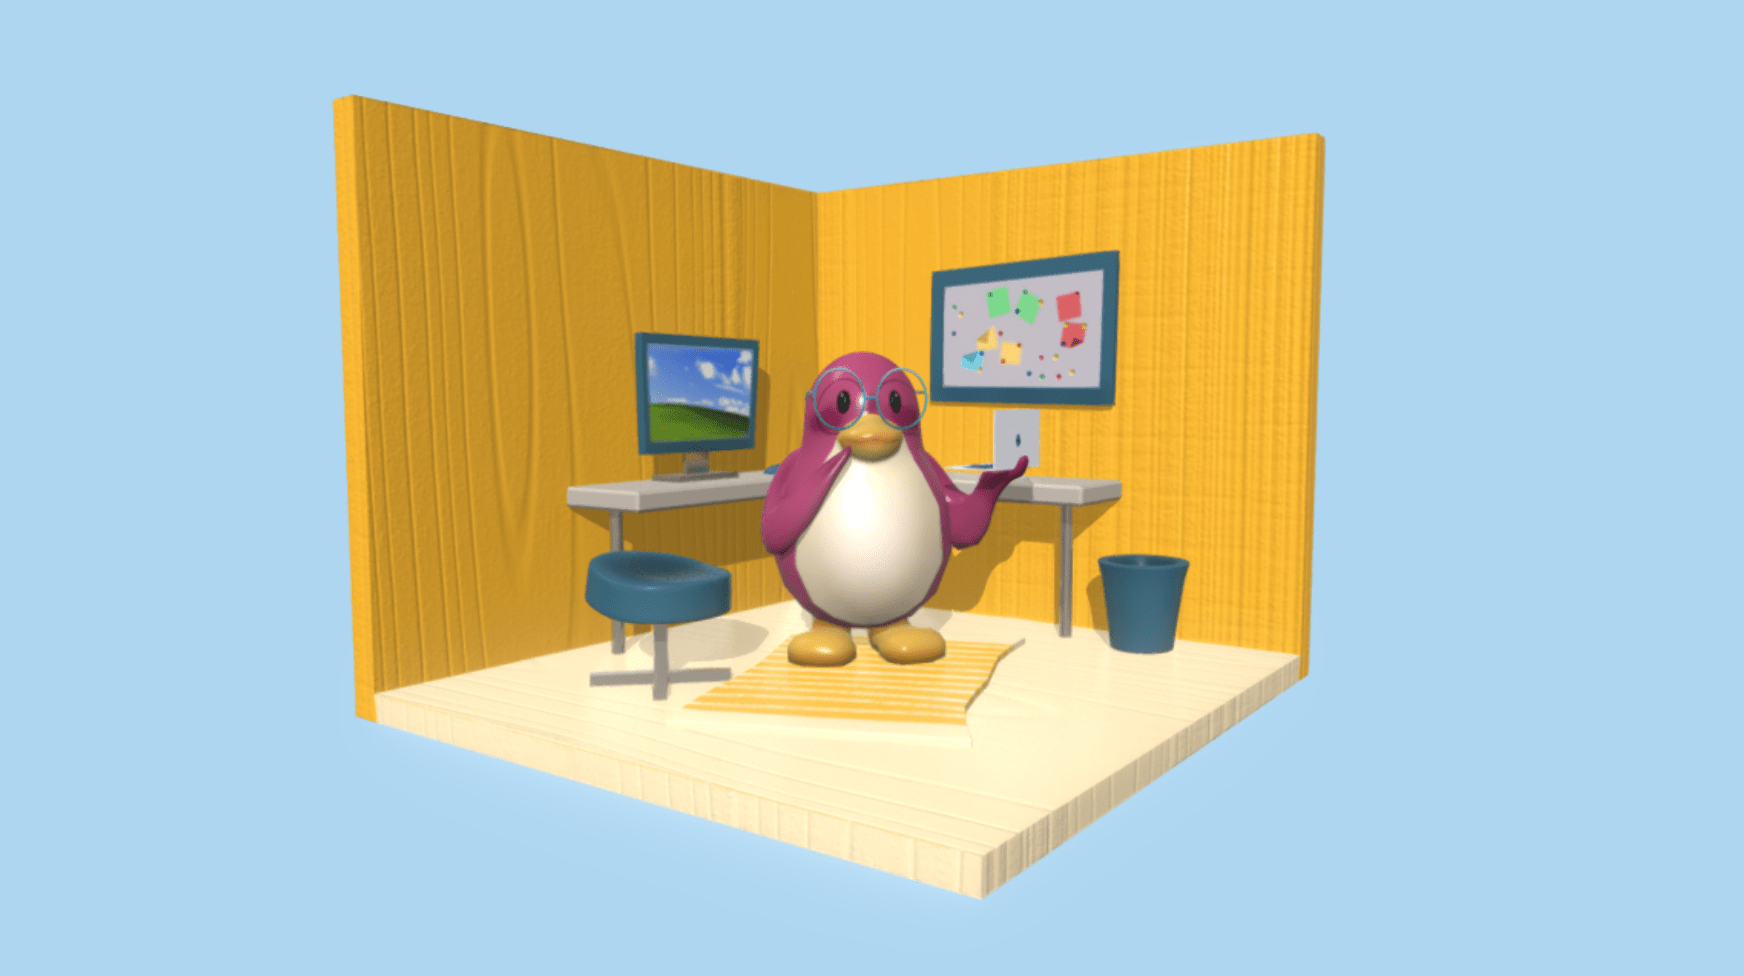
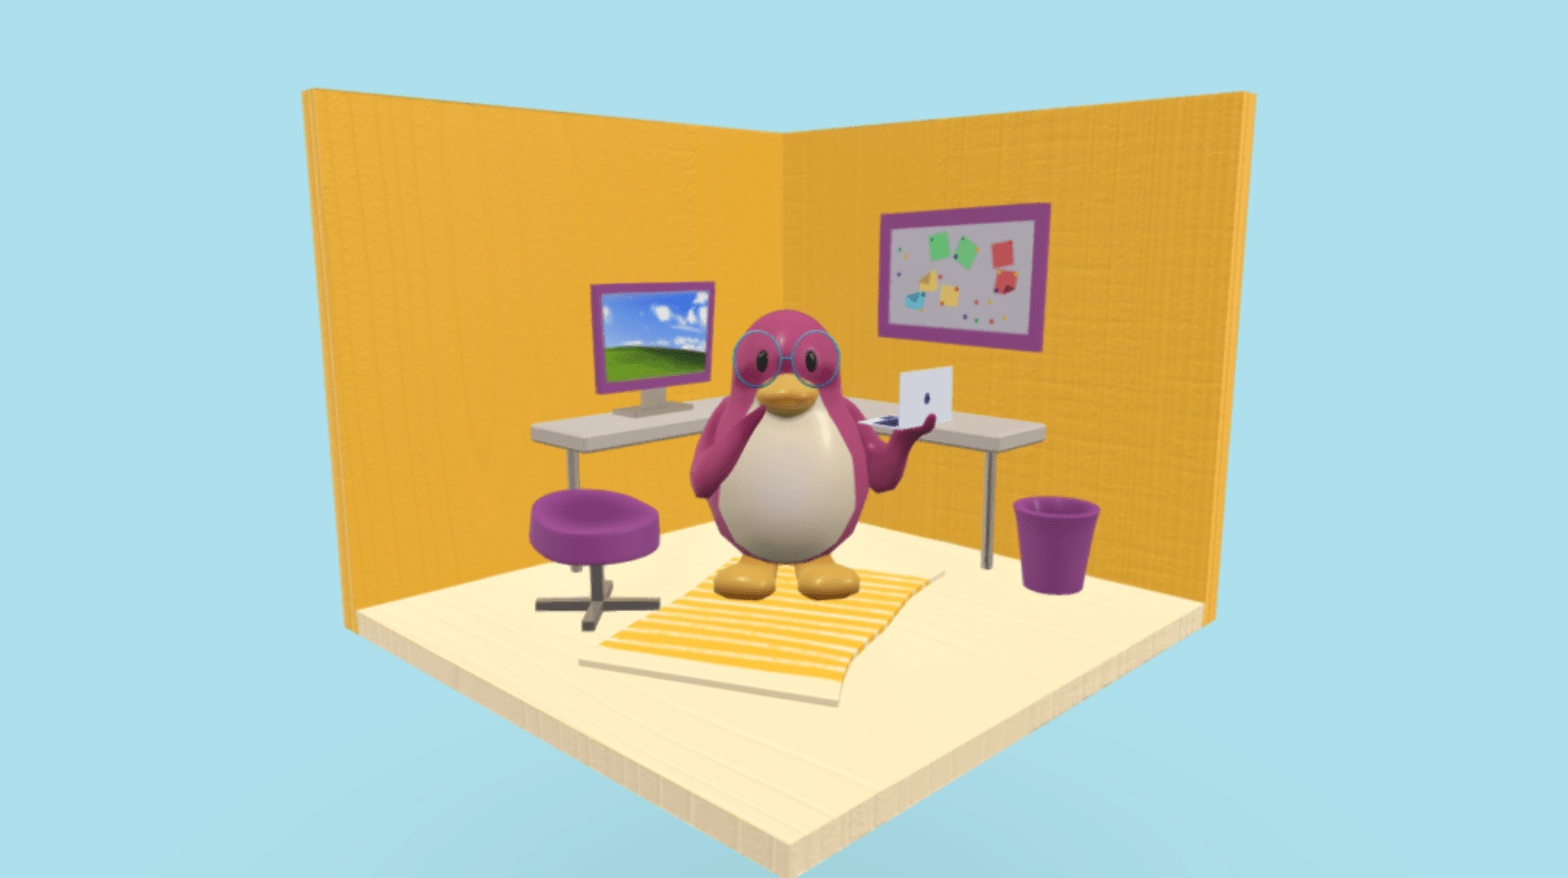
This is how the scene looked after publishing. It was a little tricky to get a good angle of lighting as the walls block it, but the scene lights up okay anyway. The textures are all on and work well, and the models look clean. After publishing this test I would like to go back to the Substance Painter stage and add a few changes and details to make this scene a little better.
At first I wanted to try out a different colour to replace the teal blue to see how that would look. I painted on a purple/pink colour but soon realised it blends in too much with the colour of the penguin, so I switched back to a teal blue colour.


I also wanted to add detail to the pinboard tomake it seem more like a pinboard. I worked with a height fill layer and a black mask (with the fill layer in different colours) to create dots around the board which makes it look like pins holding up the sticky notes. This was tricky to find a way to recreate but I think this works well in the background.
And here are screenshots of an updated version of my Cute character scene. I followed the same process of adding textures onto Sketchfab and adjusting the lighting of the scene to present the model well.
Overall I think this looks really nice and although I could have experimented more with texturing and materials, I think this looks appealing and cute as it is. The Sketchfab link is below.
Source: https://skfb.ly/o6rp6