In week 9 we studied Animatics. Animatics are essentially moving storyboards, but hold much more purpose in calculating the timing, fixing up essential scenes and deciding what pace the sequence will go depending on the mood of the scene. An animatic is quite rough and simplistic but should include enough detail to determine what something is and what is going on. All that should be focused on is camera angles, simple lighting, shapes and forms and timing/pacing. Animatics is important in animation as it helps to understand from your storyboard if you have added too much or too little to the idea that can cost or leave out many seconds. Animatics help to grasp the overall idea of how the final animation could look like.
Source: Week 9 – Lecture videos, Animatics and secondary actions, Animatic lecture.mp4, Secondary actions – principle of animation lecture.mp4
For homework we were asked to make an animatic for our part/scene in our animation idea, based on our storyboards. I am working on the second scene of the animation and had designed it myself. I followed Alec’s lecture on how to use after effects to make an animatic. Source: Create a shot for an animatic using after effects – tutorial.mp4
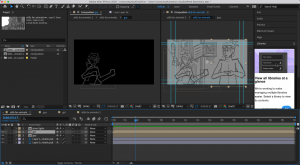
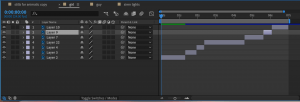
First of all, I drew my scene on photoshop. I made grouped layers for each frame/movement of the characters or objects I included. When I finished this I made a new composition in After Effects and added the photoshop file. The software organised the layers into easy spots so I could navigate my frames easily. I worked on After Effects and using layers as frames once before so this was familiar to me. I resized the layers into how long they would play for – I do this to sort the timing of the movements. I also had to test the pacing of the sequence as the guy in the video is running, so it would have to be fast, but not too fast so we can capture the presence of the side character. Next I added flashing lights to resemble what the guy is running from, the police. I organised this so it would all play together in seven seconds.
Of course I needed some reference to help me out with the running sequence, the background setting etc. I made two attempts at the animation. The first one is using reference for the background, and the character designs. I realised after I made the first attempt that the running sequence was not the best. In my second try I had a video of a running sequence with me as I drew out the running frames again.
References: Running sequence – https://youtu.be/lCpotGr0TB4
Chase scene example – https://youtu.be/5qSgoZPnTuw
Try 1:
Try 2:
I see for myself there is a lot I can improve on in this animatic, such as the perspective of the scene – its hard to tell if where the girl is standing is a corner, or if she’s in the middle of the street,, the background could look a lot better etc. However, when I bring this animatic into a full animation, i’ll recognise the problems and work hard to make it great!

