During this week I took on a new task to build on our environment visuals and layout for the game. The team worked on lots of more assets, and AI mechanics within the game engine. On Tuesday we had a call meeting to discuss what we will be doing next and what other parts of the tasks needed discussing. I let them know I would take on the environment layout role and help bring our design ideas and assets into one visual for us to replicate on UE.
I used 1-point perspective to plan out the layout of each room. I started with the toy store main room, as it is the first room we will be introduced to. It will display many toys and look very vibrant, playful and engaging for a child protagonist. Though I will add misplaced toys, essential equipment (for starting gameplay) and clear routes to add to the puzzle and level play though end.
Toy store main room

My first draft was most of all blocking out the main shape of the store and the biggest asset in there, the shelves. I wanted to make sure they were in a suitable scale before adding any toys into them. I did come up with a few props when starting such as the lollipop stand and the teddybear handing out of a cardboard box.

Here I did small alterations to the shelves and ceiling for lights and possibly an upstairs section, but I also blocked out the marketable boxes inside the shelves and some toys that do not include boxes, like the teddy bear and robot. I also designed a concept for the toy store sign at the very back for filled space and knowledge of our whereabouts.
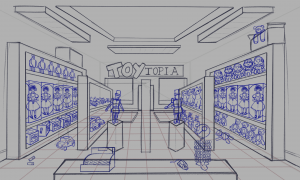
In draft 3 I added in the toys that others in the group have wrote down or designed for the game, like the porcelain doll and the jack in the box. The scene looks quite busy now which is good – like the toys on the floor indicate that children in there beforehand had played with them, or the idea that they had moved on their own in the main characters mind.
I sent this draft to the group to let them know what position I was at, and if they had any ideas to make anything stand out more.
In discussion with my teammates we concluded that we can make the toy store a lot bigger, and also when we decided on making an upstairs addition. I spread out the room in a neat way, and redrew any lines that needed adjusting. I changed about some of the toys for more variation and added a fence up around the exposed ceiling.

In my last draft I worked with a team-mate to brainstorm where the access to upstairs would be best placed, and decided on stairs on the our left hand side of the store. I adjusted the perspective where needed and finished off the positions of the props.
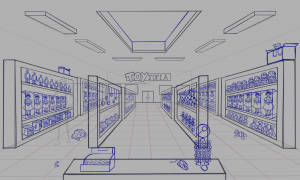
Toy store upstairs

We decided to go for an upstairs section for the toy store for more exploration aspects and more detail to the game. I designed how the place would look. I incorporated a drop down view of downstairs and path around it for more access to toys. I also made sure there was some kind of fence around the edge.

In this draft I had added some toys to the shelves, the porcelain doll to the ‘toy of the year’ section, and a preview of the shelves from downstairs looking through the open area.

After presenting my current work and discussing with teammates we decided to make the toy store a bigger environment, which meant the upstairs would be made bigger too. I adjusted the positions and perspective of the shelves first of all, making space for the stairs to travel up to this floor. I then worked on the toys to let them fit into the shelves again.

In my last draft I made additions to the props around the scene, making it seem more like a toy store. I added wall paintings of familiar toy faces that would excite young children, toys around the floor, and stacks of boxes on the side to give the idea that stock is being placed in. I may come back to this later to play around with the props.
Bathroom
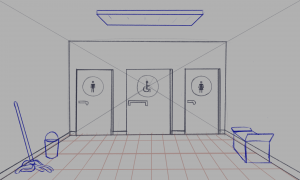

Next I designed the layout for the bathroom and the stalls inside the bathroom. I followed the map design my teammate created and added in three stalls – mens, womens, and disabled toilets. I added the essential types of props needed for a bathroom, such as the mop to clean up, the toilet, sink, tissue holder and more. This room connects with both the toy store and the play area for better accessibility.
Apart from the environment layout progress, I continued my progress with textures in Substance designer. I made some variations of already created materials, and made some of my own from my learning experience.

First of all I made a new variation of the toy store carpet with colours green and blue. Again this was made using a tutorial on how to make a fabric material, for when I started learning Substance designer. In this version I modified my noise settings to get a new pattern. This could possibly be used for the upstairs part of the toy store.

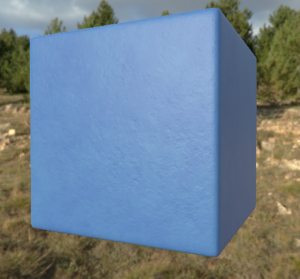
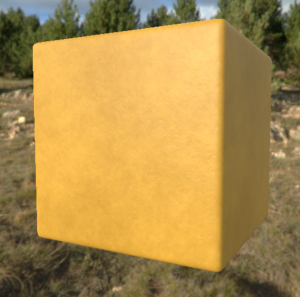

I made 4 variations of solid concrete coloured walls for different areas in this game. These are to give more vibrance to the area as it is a toy store and play area. I hope to use the plain wall for possibly the warehouse, the yellow for the toy store, and the blue and red for the play area.
For this texture I used a grunge texture and a cloudy noise texture to get this rough but flat look that some walls have in public spaces or houses.


I created a bathroom wall texture based on this picture I took of this bathroom wall that inspired me (lol). I used the tile sampler node to create tiling, then duplicated it and shrunk its size to make it seem the bigger part was a bevelled part of the tile.
 I made an alternate version of the concrete wall that did not include the large divots within the material. This could be used for a more scruffy room like the storage room.


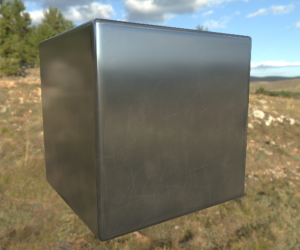
I created my own texture, based on collected reference pictures, for a warehouse floor. I made sure the hard floor looked slightly glossy with the roughness output. I added a noise texture, along with a gradient map and collected some colours from the reference, then added subtle scratches within the metallic output.

Lastly I had been working on the vent walls inside the toy store. This particular
texture is quite difficult to try replicate into a vent slot, though I have been experimenting with my knowledge as best as I can. I may place this to the side for now to move onto more textures.
Again we did not have the option to present a weekly presentation due to studies advice, though our game design teammates presented their part of their work to their own class for some advice and feedback.