Week 9- Animation Practice

This week we were introduced to a new type of rig, the Inverse Kinetic, or IK rig as well as how to use the grease pencil tool.

The grease pencil tool allows you to draw out the movement you want your 3D animation to follow. This helps with the block out of your animation. For this exercise I used the ultimate walker rig which had already been provided. The grease pencil tool was really helpful here as I was able to mark out what position I wanted the rig to be in for the jump. Once happy with the placement of the grease pencil markings, I created a single sphere to the side of the rig which I could use to help get more of a 3D sense of placement. I made keyframes of what position I wanted the body of the character to be in at each keyframe.

After this I moved onto the blocking pass. This involved looking closely at the jumping references and making keyframes of the big movements first. One thing which I struggled with at first was trying to get a natural pose for the character when it was bent down, getting ready to jump. I originally had the body bent back too far and so if it happened in real life, the character would fall over backwards. After some work and a couple of tries, I managed to find the correct center of gravity for the model. I tried to capture some leaning into the pose to make it look more natural. For the initial blockout of the rig I used the sphere which I had already keyframed to help me with getting the timing right. Getting some of the details such as the points of the feet when the character jumps came next as these details really bring the animation to life and you want them to be accurate. After I was happy with this, I went back to do the in betweens. This really helped to fill in the gaps which made the animation look strange. When I was happy with this I went to add a few more details, such as having the feet lift to different heights and at slightly different times. I had a bit of difficulty with this as when I tried to do the keyframes for the feet they moved in a strange way. It took me quite a while to figure out where the issue was, but eventually I was able to fix the keyframes and get it to a natural movement. I also initially had some issues with the knees, possibly as I was not yet used to working with inverse kinetic leg rigs. After trying the exercise a few times and using different positions I was able to get it fixed and to move the way I wanted it to.

Once I was happy with how the rig and animation looked at this point, I moved onto the 2nd pass. This pass really helped me to improve the movements of the character and make the jump feel more natural. I was able to fix the details such as the position and points of the feet both in the air and when it landed back on the ground. This really helped ,e to bring the animation to life and incorporate more of the principles of animation. I added some more anticipation into the character to build the jump up a bit more. I also added in a little bit more time at the top of the jump to give the movement a bit more influence.

The polish pass was done to ensure that I was happy with the final animation, as well as the timing of everything. This was my first introduction to the dope sheet and how you can use it to edit your keyframes and in the beginning I found it very difficult. I couldn’t quite work out how to move the frames to the correct place. I was able to get the hang of it better after requesting some extra help from the lecturers. I was happy with how the rig ended up looking, but I do think it could be improved further with practice.

Week 5- Animation and 3D Previs

This week we were introduced to 3D previs and how it works. I had never heard of the concept of 3D previs before so it was really interesting to learn about how all animated movies have a previs to help with planning. There are also some high budget movies which have previs made for them, as it helps directors and film makers to plan out shots ahead of time.

We were given the chance to do a 3D previs for Jurassic Park as practice. This was a great practice and it was my first time to learn the skills. I struggled a lot at first as the key frames would not set no mater where I set them. I couldn’t figure out how to fix this so I decided that copying the meshes into a new scene might help. Surprisingly this did mean I was able to set the keyframes and I could get to work on making the previs.

It was difficult to get the frames quite right but I was able to get a draft of the Previs done with some good timing and not too bad animation. Obviously it will be improved with practice and as I get more used to 3D previs.

Week 7 and Week 8 – Rigging

WEEK 7: AN INTRO TO RIGGING

Rigging is a crucial part of 3D animation so we had two classes on it to learn. We started with the basics, learning about the different elements which make up Rigging, such as hierarchies, kinematics and joint skinning. It is important not to move the mesh when animating, but instead use the controls which means that anything in your scene which moves, will have to have a very simple rig to make it work for your animation.

We started with the very basics of hierarchy structures, such as parenting one object to another to allow them to move together in an FK chain. These rigs behave much like your own joints would, e.g. you upper arm controls you elbow, your elbow controls you forearm and your forearm controls your wrist.  This makes it a very useful rig for animation so it is important to understand it well.

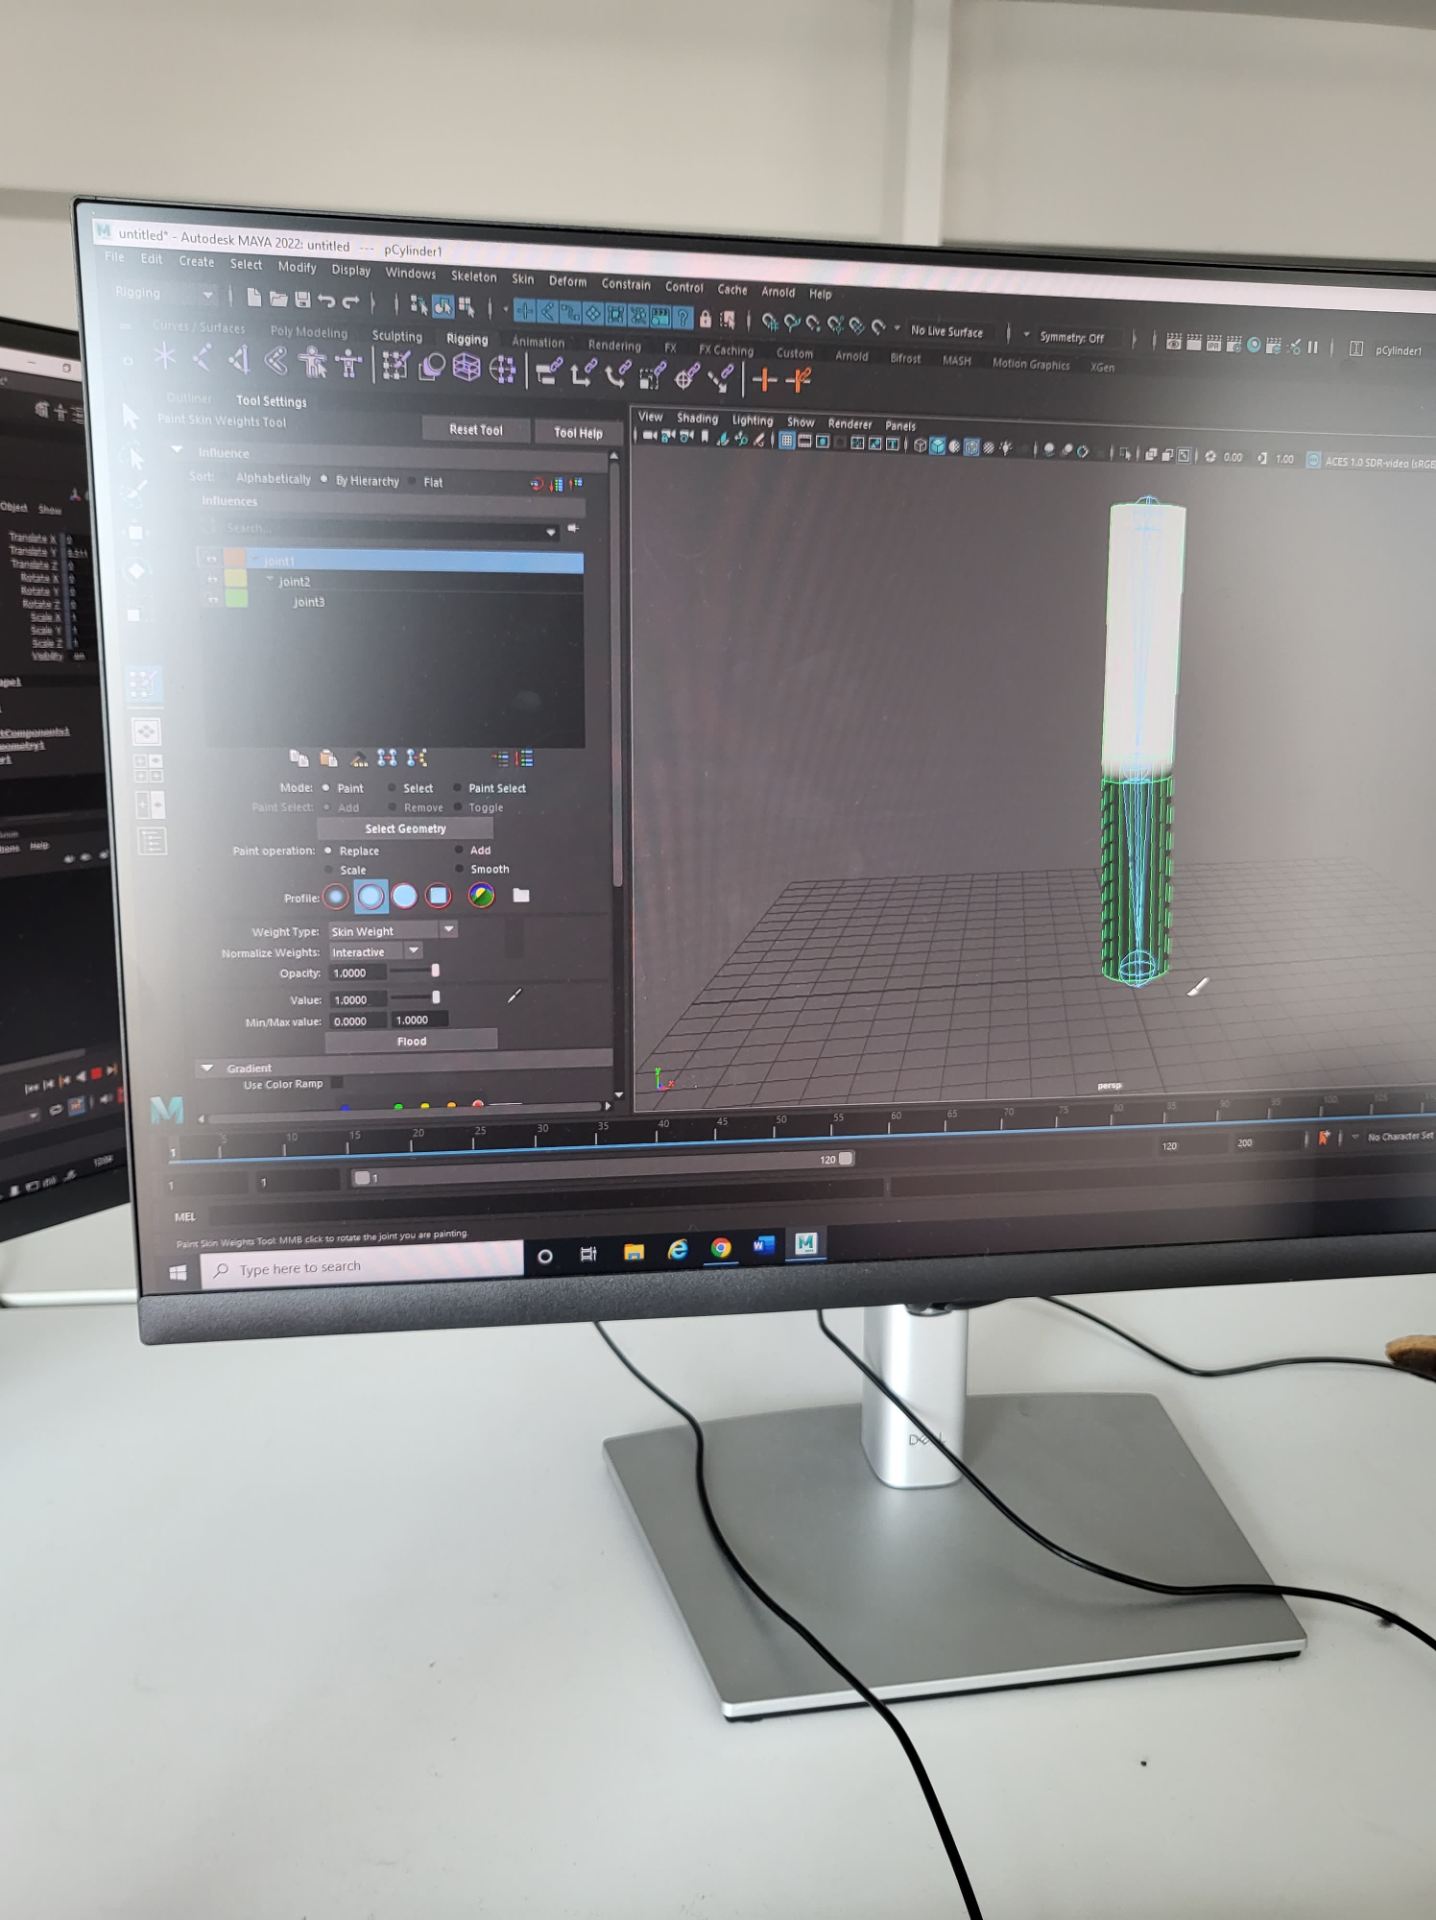
We did a practice exercise to try and get familiar with FK rigs, using a very simple  arm. We used a simple cylinder, with some cuts around the middle to allow it to bend. Then, we applied the joints using the rigging tab of maya. It is important to parent the joints in the correct order otherwise it will not behave how you wish. The arrows between the joints are a crucial way of seeing which way the joints are parented but they are not actually part of the joint.


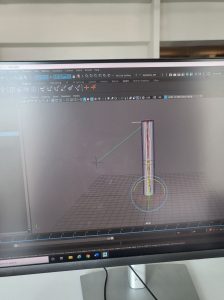
After you are happy with your joints, you have to bind the skin. You do this by opening the rigging menu, selecting the bones and then the mesh, and clicking ‘bind skin’ from the skin menu. This connects the bones to the mesh, and allows them both to move together.

There are times when you want to clean up the way your mesh moves with the joint, such as if you are getting a pinching motion when you try to bend it. This can be adjusted using the skin weights tool. This allows you to adjust the influence of the bones on the mesh. It is important in order to keep your mesh looking natural and moving in a realistic fashion.

The second exercise we looked at was how to use joints, constraints, points and orients. This exercise was a lot of fun as we got into some more of the principles of animation, such as follow through. There are cases when objects want to follow a different orientation from their parent. This makes things a little more complicated but it does provide a much smoother animation.  A constraint allows us to do this. So in this case, instead of using a parent constraint, we looked at using an orient constraint. This will then connect the object you want to move with the constraint you have created. However, this will result in the object being set to the coordinates as the constraint so if you wish to avoid this, then you can simply open the orient menu and unclick the maintain offset button. This means now when we turn our example wheel it will simulate gravity better.

Again, we do not want to be animating the mesh so we have to create a control for the wheel to follow so as to not interfere with the mesh. Following this, we will create a point constraint so that we can have everything connected to one point and move the control and constraint from the one point. This is helpful for moving your model about your scene.

You can then create your animation by setting the key frames. This allowed me to add in some extra animation, such as having some wind in the scene blow the water buckets a little unevenly.

The next exercise we looked at was a control rig for a tentacle model. Control rigs are very important for animation, particularly as you often share files with and you want to have a nice clean rig which teammates will be able to maneuver. We started with creating the bones for the tentacle to follow, and made sure the parenting was correct. Next is binding the joints and mesh. This will allow us to move the tentacle, but it would be easier to attach a controller which will allow for more interesting animation. It will also make the animation better.

To create our controls, we use a nurbs curve which can be scaled up to surround the object. Then we need to freeze the scale of the nurbs so that we don’t get any deform on the objects. We can then change the colours so that they are easier to see against the mesh. Once that is done, and we have created enough nurbs curves for each joint we can use the match transformations to make sure that the controls are placed at the same level as the joints which will be better for the animation.  The next step is to do the constraints.  We can use a parent or an orient but in this case we want to use an orient constraint. The contraints will allow the joints to move when we use our controls, instead of having to use the joints or mesh for movement.

I did an exercise in parent constraints which involved having an arm pick up a cup and lift it up to take a drink. We started with making a simple IK arm, which will be used to pick up the cup. The cup was created with a base control and a second control which will allow us to move the cup also. This is helpful as it will allow us to add animation into the cup even after we have locked the hand with the base control. If we do the animation of the arm and hand moving up before we move the cup it will be easier to find the key frame where we wish to have the cup go with it. We first select the controlling object, and then shift select the cup and add a parent constraint. In this case we want the maintain offset button to be ticked. We have to keyframe the object we want to move with the parent (which in this case is the cup) in order to stop it from moving along with the arm when we don’t want it to. This will create a blend parent node in the channel box which we will need to set to ‘1’ when we want the motion to start. Then on the keyframe before, set the blend parent to ‘0’ which will allow the cup to only move whenever we want it to. Next, repeat this with the keyframe where the cup is put back down on the table and the arm lets go. It is the extra control above the main control which allows us to add more animation into the scene.

WEEK 8: BLENDSHAPES

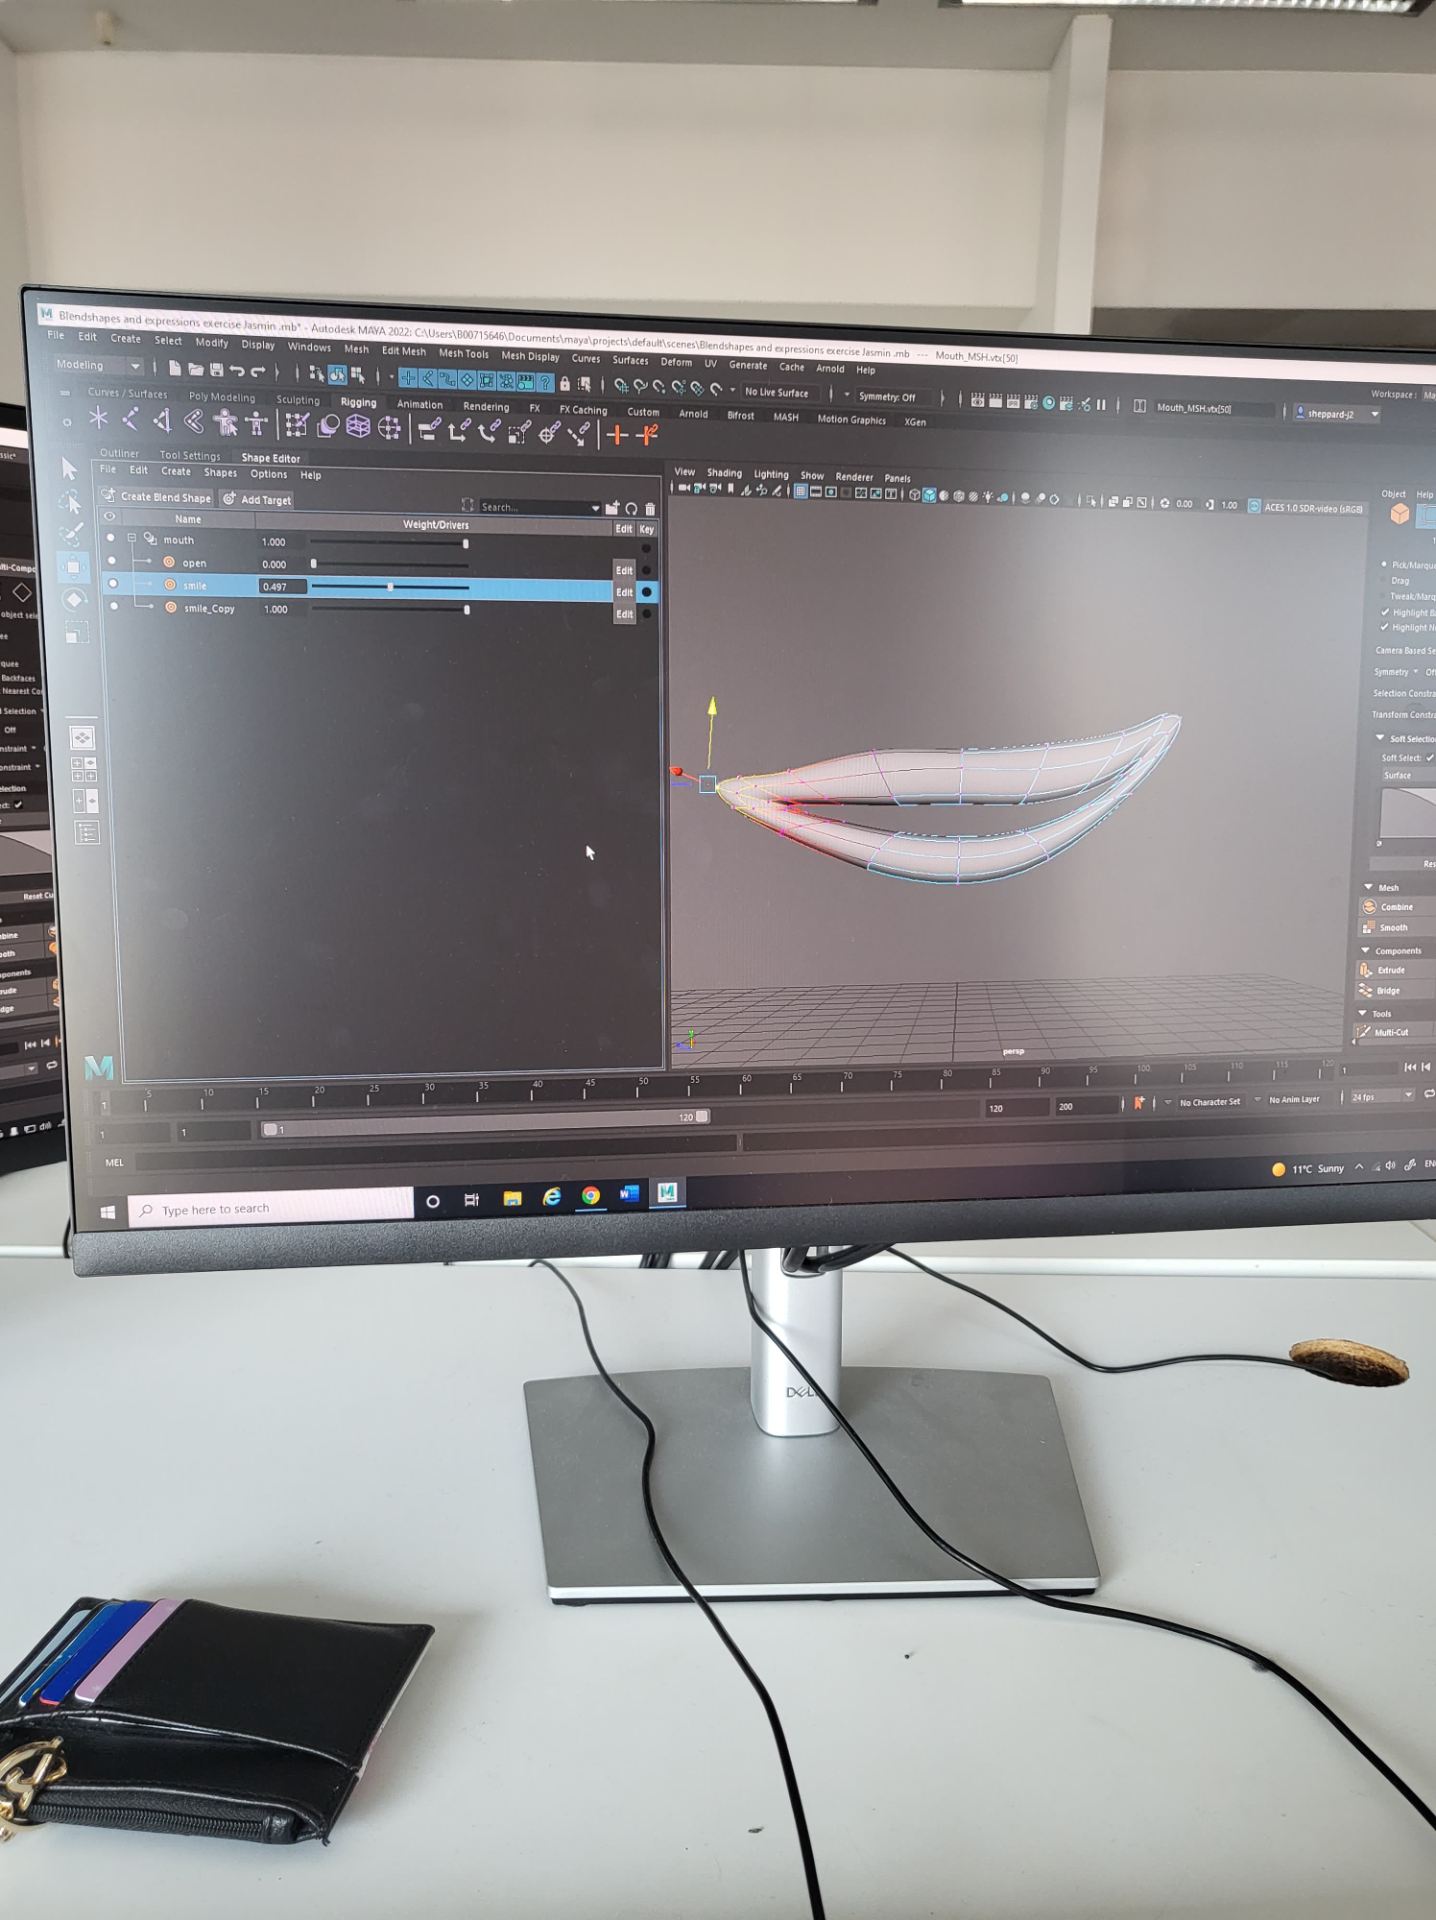
Blend shapes is a very interesting part of animation, as it allows you to create a number of different expressions. It was interesting to learn about the different relationships objects have and the use of the shape editor. It is important to set a target for your object, otherwise your blend shapes will not work properly. You can use different areas together to create a variety of expressions which makes blend shapes very useful for character animation.

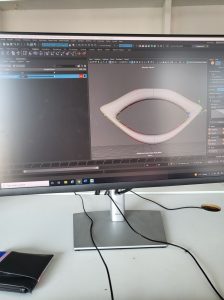
I started by making myself a mouth shape which I would use to create the expressions. Using the soft selection when selecting your vertex points helps to create a more subtle change and helps make the expressions look better. When I wanted to make the mouth open I selected the areas I wished to change and moved them up and down to create the shocked expression I was after. You can also duplicate the target if you wish to mirror a smile for example on the other side of the mouth.

You can use more than one slider at once, so you can experiment with the variety of different expressions you can make by using different blend shapes together. I made different expressions by only tweaking one side of the mouth compared to the other to experiment with  a smirk or a full smile. It was also interesting to add on the opening and closing of the mouth with the smile.


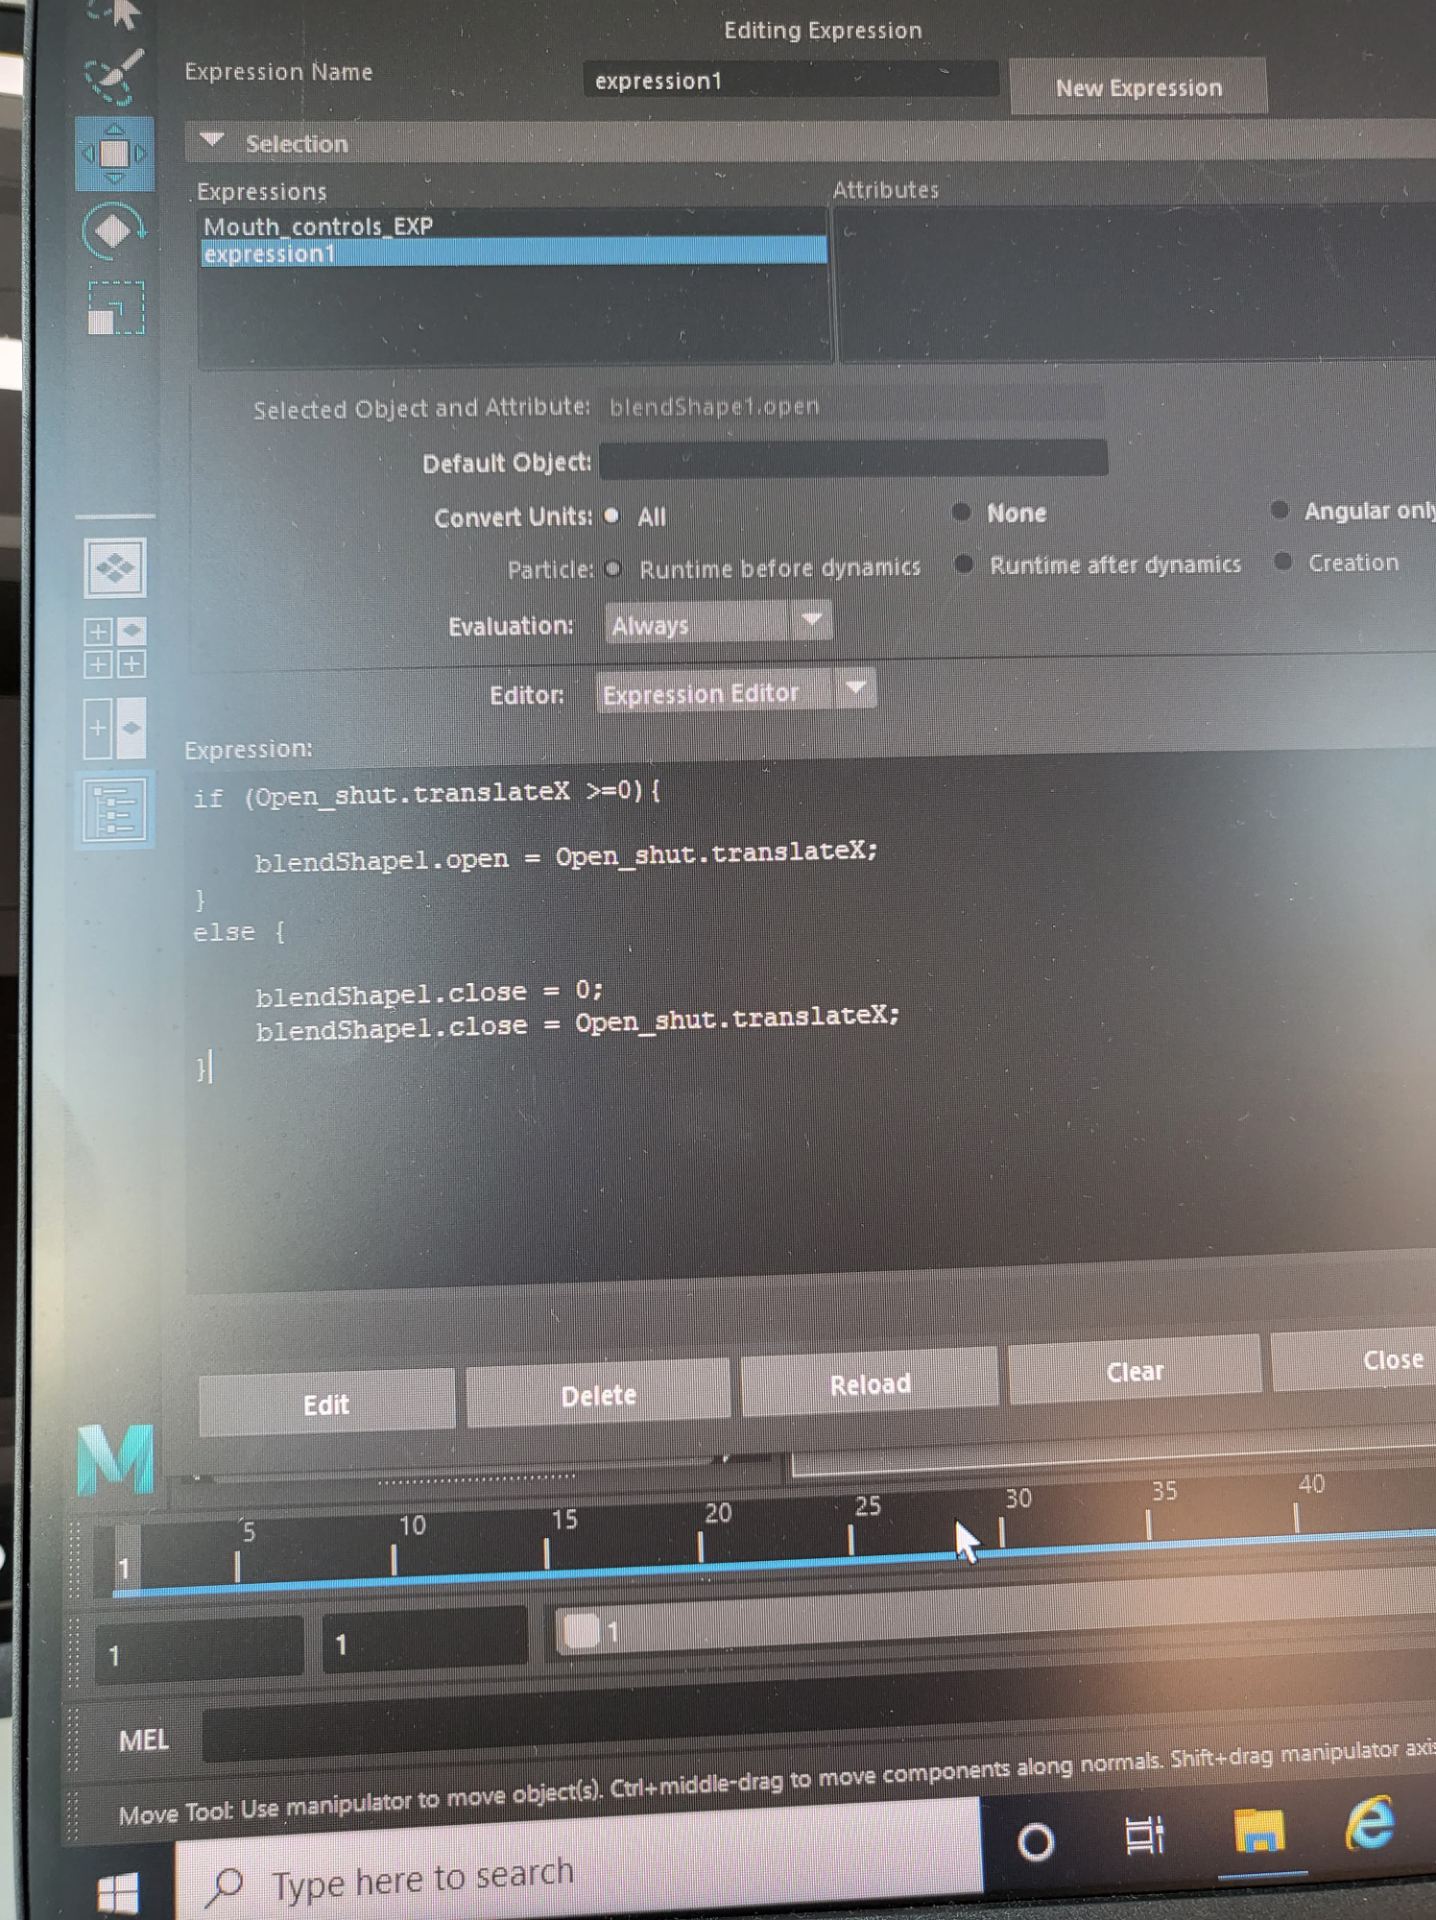
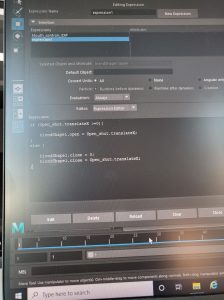
Next I looked at connections and expressions for UI. It is very handy to be able to connect attributes such as scale between objects. You have to use the connection editor of this. I started with a cube, and a circle. This allowed me to simply see how the sphere could be affected by the cube. You can also use the expression editor to do the same thing as the connection editor. With the expressions editor you have to create expressions which gets a little bit more into the coding and programming side of animation which is not my strong suit. I struggled at first with this as I was not able to get the expressions to change but I was able to make it work on the second attempt.

This is an area which I still need to work on as I feel there is a lot more to learn and explore but it was good to start to explore getting a grasp on the basics.

Extra Blender practice: Piloswine model

I decided to do some extra practice on blender. I wanted to make a Mamoswine as I love Pokémon and I thought that the characters would provide a great challenge to improve my blender skills.

Once I was happy with the initial block out I started to add the details. I used separate objects for the tusks, eyes, eyebrows and the nose and nose fur were the same object. When I initially did the eyebrows I thought that they were not furrowed enough for the character and so I pulled it down to make it look more like my reference picture.


Week 7: Introduction to Blender

For our second assignment we will be using blender to create a cute character. The software is new to me, but I found it a little easier to pick up initially than Maya.

We started off simply getting used to the modelling tools and some of the other options blender has to offer. This was a good way of exploring the different modelling tools, such as clay strips, draw, pinch, grab and snake hook tool and learning what they can do. I tried to make a simple fish shape to get myself used to things. I got the body ok but the fins were a little to big.

Following this we learned about the importance of the remesh tool in blender. You want to start bigger and more broader, with a higher voxel size when you do your first initial blockout of shapes and then reduce it when you are ready to add in the finer details.

I made an alien creature, following a step by step guide which helped me to develop my own learning and explore the modifier tab. I used the modifier tab to duplicate the sphere on the top of the aliens head. This allowed me to have symmetry in my model.

I used the elastic deform button to push a space in for the eyeballs of the creature, and used the draw tool to create a space for his nose and mouth.

I had to remesh the model after this to make sure everything was at the same count. I wanted to smooth it out after this so I used to smooth tool to create a much softer appearance.

In order to make the mouth and nose more like I wanted I used the pinch tool to make it more defined until I was happy.

When I was happy with the creatures shape I decided to develop it further using the snake hook tool as well as the elastic deform tool. I used the elastic deform in order to lengthen the chin/ body of the little monster. Then I used the snake hook tool in order to pull out two arms for him. The snake hook tool allowed me to pull both at once and keep the symmetry.

When I was happy with all of this I decided to add final details such as eyeballs and wrinkles below his eyes. I think that the little lines I drew under his eyes give him moer character and the eyeballs make him look more finished.

I decided to change the mouth, and have it go in as opposed to poke out as I thought it would make him look a little more realistic.

Overall I thought it was quite cute and not a bad first attempt at using blender, though I will obviously continue to improve with more practice.

Week 4- 3D Animation

This was the first real start into 3D animation so we started with the simple bouncy ball, much like when we started covering 2D animation. We kept it quite simple initially, with having a bouncy ball jump into the frame and hit a wall before bouncing back. This exercise was not too difficult to follow and I managed to get the initial movement of the ball hitting against the wall. Unfortunately, this is where I ran into a problem. Maya suddenly stopped working and would not open properly. I was working from home at this time, as there was a strike and so it was hard for me to get my laptop back up and running for using Maya for about a week. This was quite stressful so I began to panic a little about the animation, however after attempting the exercise’s using the school computers (and the 2020 version of Maya once I was able to get it installed on my laptop) I was able to start learning properly about the processes of 3D animation.

Week 8: Blender Exploration and character development.

I made an elephant character to get some more practice of the software. I followed the same steps at the beginning as the alien, including using the duplicate modifier to create the symmetry of the ears, and then pushed them back to create a curve in the ear.

For this creature however, I added a trunk onto the front as a separate object and then joined it together, and smoothed. I was again careful to do a remesh here to make sure that the objects were all the same.

I smoothed out the ears first until I was at a point I was happy with, before adding the eyeballs on to bring the character to life. I had the symetry button on so that every change applied to the left side would also affect the right and therefore keep my model as symmetrical as possible.

Initially I had some trouble with getting the nose shape the way I wanted it. It was too thick for the face and the bend was not where I wanted it but with a lot of smoothing, grabbing and use of the elastic deform tool I was finally able to get it to the shape that I wanted.

I also started working on the blockout for my Whale Shark character. Initially I made it too complicated for myself, choosing a lot of separate objects instead of just manipulating all that I could with the one large object.

After I tried to smooth it I saw that it was not going the way I wanted it to se I decided to start again. However, I still used too many objects and therefore it ended up going the same way as I did the first time.

I asked for some advice and Henry was able to show me a way which made the block out look much better, using much less objects.


This attempt worked much better as the model started to resemble a whale shark, though there was still plenty of work to be done on it. I was not happy with the shape of the front of the head, and the back of the body so I decided to rework it. I also decided to redo the fins on the back of his body.

I started by changing the shape of the body as I thought it would make it easier to place the fins once I had the shape of the body the way I wanted.

I made his mouth a little wider and his eyes a little bit bigger in order to emphasize his cuteness and I think it worked well. I did think however that it could be emphasized even further so I decided to do a bit more work to get it right.

The image below shows how flat I originally had the model, which looked too much like a regular shark but not like a whale shark so I knew I needed to fix this part.

The next image shows the improvement and how it made the whale shark look much better, but puffing out his body and head. This also helped in making him appear cuter.

Once I was happy with the shape I was able to add some more details. I added little gills to the side of the fins, as well as the lines which run down the back of whale sharks. I used the draw and pinch tools in order to create these details. I also added a tongue to the character as I thought the hole for his mouth looked unfinished.

I also added a ray character to help build more of a world to my characters scene. I started simply but blocking out the shape, before moving onto the more detailed areas, such as the mouth and eyes as well as the tail. I made sure to make the ray a lot smaller as Whale sharks are very large and I wanted to capture this in my model.

Once I was happy with my models, I was ready for retopology.


Concepts

I had a lot of initial ideas on what to do for my cute character, so I decided to narrow it down to doing three different concept sketches to help me decide which one would be the best and I could tell the best story from. I made myself a pintrest board to help me gather initial designs for my ideas:

The first design I did featured a whale shark character. I find whale sharks very cute, due to their large flat heads and slow, gentle movement through the sea so I thought it would be interesting to try to create my cute character based off this. I added a smiley expression as well as some extra sea creatures to help build the scene. I liked this design and I thought that there was a lot of opportunity to build the scene with extra elements in order to tell the story.

The second design was of a cheeky cat pushing a vase off the table. I thought this one would be fun to do as the little cat has some character which would build the story and I thought the angle of the vase would be fun to work with. I thought it would also be interesting to try to model the model falling out of the vase, and use a transparent material. I also thought it would be interesting to work with hard surface material and soft surface materials on the cats fur and also the hard vase. The cats fur would perhaps pose a challenge however, as I would have to sculpt it all.

My final design was both of my dogs fused together into one two headed creature. They are both from the same litter but they are very different and I would be could be fun to work with trying to show the contrasts in both their personalities and physical appearances. It would however be difficult, as just like the cat I would have to sculpt all of the fur which might prove challenging.


In the end I decided to go with the Whale Shark as I think it has the most potential for development as well as texturing in substance painter.

Extra inspirations for designs

As well as Pintrest, I used other places to gather ideas and inspiration. I’ve included them here, so that all of the images are in one place.

A lot of the inspiration for my whale shark character came from ‘Finding Dory’ and ‘Finding Nemo’ which had a great ability to create strong characters and expressions on fish. The use of added eyebrows, and wide expressions really captures the audiences attention, despite the main characters being fish which I exactly what I wish to create with my main character.

I also looked at Jinbei-san,  a Japanese cartoon character of a whale shark as I think it is very good and a perfect representation of a cute character.


For the design of my two headed dog, I looked at the cartoon characters CatDog. These characters are also stuck together but the show does a very good job of showing them moving independently while stuck together, which I thought would be good for me posing my character if I chose to do that design.


Evaluation post

I think I have definitely learned a lot of the basics of 3D modelling through this module. From starting this assignment with no prior knowledge of 3D to being able to build and texture my own well is definitely rewarding for me and I cannot wait to expand my skills further and develop knowledge of some more advanced techniques.

One area which I do believe I still need a lot of improvement on it creating UV maps and particularly working out where the best place is for creating cuts. This is an area which I will definitely focus on going forward as it is a fundamental of 3D art and I know the only way to improve in it is to practice.

Overall I was happy with the different techniques which I applied to the model and I feel I experimented with a lot of the different elements which we learned about over the course of the module. One of the major issues which I learned was to unwrap your models as you go, especially if you are duplicating an object as this will save you from unwrapping every single one. In a way I am glad to have made this mistake at this early stage so that I can learn from it and not make the same mistake again.