Category Archives: 3D Digital Literacy

Concepts

I had a lot of initial ideas on what to do for my cute character, so I decided to narrow it down to doing three different concept sketches to help me decide which one would be the best and I could tell the best story from. I made myself a pintrest board to help me gather initial designs for my ideas:

The first design I did featured a whale shark character. I find whale sharks very cute, due to their large flat heads and slow, gentle movement through the sea so I thought it would be interesting to try to create my cute character based off this. I added a smiley expression as well as some extra sea creatures to help build the scene. I liked this design and I thought that there was a lot of opportunity to build the scene with extra elements in order to tell the story.

The second design was of a cheeky cat pushing a vase off the table. I thought this one would be fun to do as the little cat has some character which would build the story and I thought the angle of the vase would be fun to work with. I thought it would also be interesting to try to model the model falling out of the vase, and use a transparent material. I also thought it would be interesting to work with hard surface material and soft surface materials on the cats fur and also the hard vase. The cats fur would perhaps pose a challenge however, as I would have to sculpt it all.

My final design was both of my dogs fused together into one two headed creature. They are both from the same litter but they are very different and I would be could be fun to work with trying to show the contrasts in both their personalities and physical appearances. It would however be difficult, as just like the cat I would have to sculpt all of the fur which might prove challenging.


In the end I decided to go with the Whale Shark as I think it has the most potential for development as well as texturing in substance painter.

Extra inspirations for designs

As well as Pintrest, I used other places to gather ideas and inspiration. I’ve included them here, so that all of the images are in one place.

A lot of the inspiration for my whale shark character came from ‘Finding Dory’ and ‘Finding Nemo’ which had a great ability to create strong characters and expressions on fish. The use of added eyebrows, and wide expressions really captures the audiences attention, despite the main characters being fish which I exactly what I wish to create with my main character.

I also looked at Jinbei-san,  a Japanese cartoon character of a whale shark as I think it is very good and a perfect representation of a cute character.


For the design of my two headed dog, I looked at the cartoon characters CatDog. These characters are also stuck together but the show does a very good job of showing them moving independently while stuck together, which I thought would be good for me posing my character if I chose to do that design.


Evaluation post

I think I have definitely learned a lot of the basics of 3D modelling through this module. From starting this assignment with no prior knowledge of 3D to being able to build and texture my own well is definitely rewarding for me and I cannot wait to expand my skills further and develop knowledge of some more advanced techniques.

One area which I do believe I still need a lot of improvement on it creating UV maps and particularly working out where the best place is for creating cuts. This is an area which I will definitely focus on going forward as it is a fundamental of 3D art and I know the only way to improve in it is to practice.

Overall I was happy with the different techniques which I applied to the model and I feel I experimented with a lot of the different elements which we learned about over the course of the module. One of the major issues which I learned was to unwrap your models as you go, especially if you are duplicating an object as this will save you from unwrapping every single one. In a way I am glad to have made this mistake at this early stage so that I can learn from it and not make the same mistake again.

Extra blender practice #1

I did some extra practice on blender, creating a pear. I found it a little more challenging than I expected, due to the variety of different angles I had to fix as I worked though. I started with a very basic block out of a pear to give me a good starting point. I started with a simple sphere which I manipulated by using the elastic deform tool to pull the top upwards into a rough pear shape.

The hardest part was making sure the pear looked accurate from all of the angles. I am more used to 2D drawing, only really starting to develop my 3D skills this year and so I am still getting used to the process of checking everything from every angle. This is great practice though and not only will it help me with my 3D work, it should also help my 2D work and perspective. I had to do quite a bit of tweaking the model to make sure the wider parts of the pear sat the way I wanted. Once I was happy with this I moved onto the leaf which I made from a separate object. I thought this would be easier than trying to manipulate the clay into the small thin twig shape I needed.

Overall, I was pleased with the result of the pear. It looked like the model I was using for reference and I was happy with how I created the leaf to have a bit of movement. I still need to improve before I take on larger models but this exercise was great for getting in some practice.

Final project Work in Progress

This final assignment was filled with a lot of struggles as I tried a lot of different techniques which I was still getting used to.

Initial Designing 

Initially, for the well base I started by creating a cube primitive, which I beveled, duplicated and stretched, before duplicating again to create a line of 6 bricks. Then, I used a non linear deform tool to create a circular shape. Then, I duplicated this and layered it up until it resembled bricks.

However, it was later pointed out to me that this would result in quite low quality poly when it came to texturing so I decided to change it and create a well shape using only one cylinder primitive and extruding. This worked better when it came to substance painter as I was able to add in my own texture of a mossy brick wall and apply that to my well base.

For the water in the well, I used a cylinder primitive which I fitted to the right size in the well and applied a blinn material which allowed me to change the colour and transparency. Unfortunately, I did not realised that this transparency would not carry over onto sketchfab as it was not exported in the right style, but I did still like the colour which was created and how I was able to get it to look like there was light coming off the well in the end.

The next part which I worked on was the supports of the well which would hold the roof. These were very straight forward as it was only a cylinder primitive which I manipulated to the right size, and most of the detail would come from the texture on these. What I only realised after I had completed the model and was unwrapping it was that it would have been easier to make one support, unwrap it and then duplicate it but I will know for the next model.

The roof and the walls of the house proved to be quite challenging as I was not used to creating smooth bends. I did a lot of manipulating the vertices in order to create a nice shape for the front of the house. The roof was also very challenging and I had some problems with beveling. I managed to create quite a few N-gons in my object which is obviously not what you want and so I have to figure out how to fix these, by using the connect tool the bridge tool and deleting cuts. I was thankfully able to work it out in the end and get rid of all the N-gons.

The pebbles were a very big part of the model but they were also quite difficult to get right. I made them by creating a single sphere primitive and then editing the vertices to make it look like a pebble. I wanted each pebble to have a bit of a different look to them so I changed the size and rotation of each one slightly to make them a little bit less uniform. This was taking a long time, and I finally realised that I could group the stones and then duplicate them and move them around the sides of the model. This was much quicker and it didn’t look too uniform.

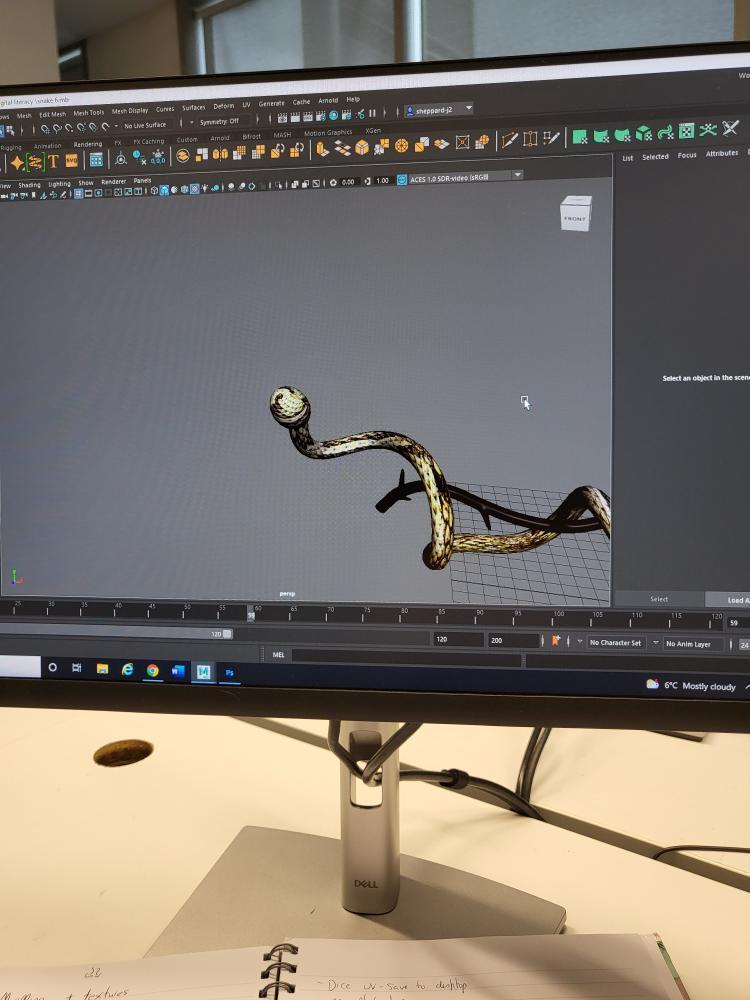
Once I had done the pebbles I decided to create the branches using the sweep mesh tool. It was quite difficult to get each branch to go where I wanted it to, as it would sometimes cut through the roof or the wall. Eventually I was able to get all of the branches placed where I wanted but it was not without it’s challenges. sometimes I would have trouble when it came to beveling the tree, and N-gons would be created which I would then have to go back and fix. There was one branch where this was so bad that I ended up deleting it and doing it again which I think worked out for the best as the final one was much smoother. Another problem I had was that the end of the branch would be a gaping whole on the side which I had not tapered and so I used the shortcut to close vertexes. Sometimes I closed them to the middle which was fine as triangles were created, but a few times I forgot and just created one face which left the problem of N-gons. Thankfully I was able to remember this and fix them. When I was finished I was very happy with the placement of my branches.

The mushroom was quite hard to create as I knew I wanted it to be very smooth and round. I started with a sphere primitive and moved the bottom half of the vertices upwards using the soft blend tool. I was really happy with the shape I created for the top of the mushroom and so I moved onto the mushroom stalk. The stalk was easier to do as I just had to create a cylinder primitive and remove the bottom and top faces (As they would not be seen and I already had a high polygon count). Then, I inserted some more edge loops to the middle of the shape and pulled them inwards to create a dip in the middle. This combined with the top created a mushroom shape I was happy with.

Finally I created a bucket to go alongside the Well. I used the sweep mesh again to create the branches to hold the bucket and controlled the vertices to make the shape how I wanted. Creating the base of the bucket wasn’t too difficult as I simply extruded a flattened cylinder primitive and then beveled it but I did have some difficulty when it came to creating the metal to wrap around the bucket. In the end, after practicing a few times and not getting anywhere I asked for some advice and was shown how to use the NURBS circle tool to create what I was after. I was then able to duplicate this first one and move it to the placement I wanted.
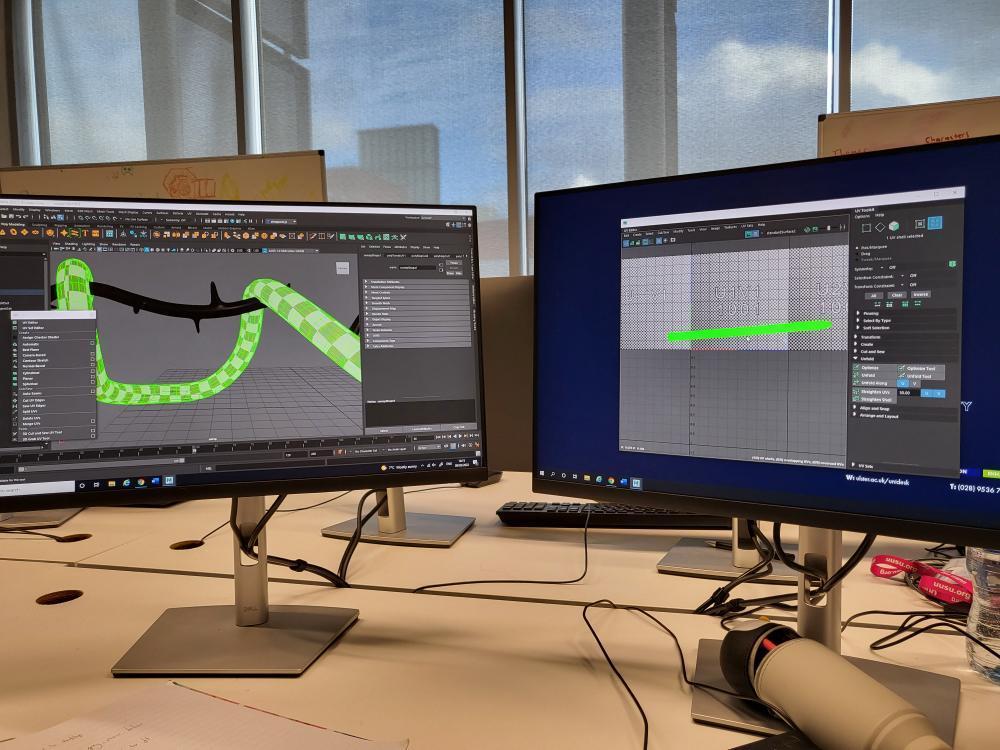
UV unwrapping

UV unwrapping was where I had quite a few difficulties as I have still not got completely used to where and how to make the right cuts and unwrap a model. One of the major and time consuming problems I had was that I did not unwrap my pebbles before I duplicated them and therefore I would have to unwrap each one individually. Thankfully I was shown a trick to transfer attributes onto the different stones which sped up the process. However, I still had a few stones where this would not work and therefore I had to unwrap these separately. Once I had finally finished this, I grouped them all together so that they were in one space on the uv map.

I had a similar problem with the supports as I had not unwrapped the first one before duplicating but this was a much easier fix as it was a simple primitive. For this one I decided to delete the supports, make one again and unwrap it first before duplicating. This was easy to unwrap as it was a simple shape and I had already deleted the faces at the top and bottom which would not be seen.

Most of the other shapes were simple enough to unwrap but I did have some problems when it came to unwrapping the bucket and the windows. I struggled a little with these because of their shapes and knowing where to put the cuts. Some of the unwrapped UV’s looked a little messy and it was hard to get them straightened out. Whenever I struggled to unwrap a shape for a very long time, I ended up deleting the UV map and trying again which thankfully helped me to clean things up a lot.

Substance painter 

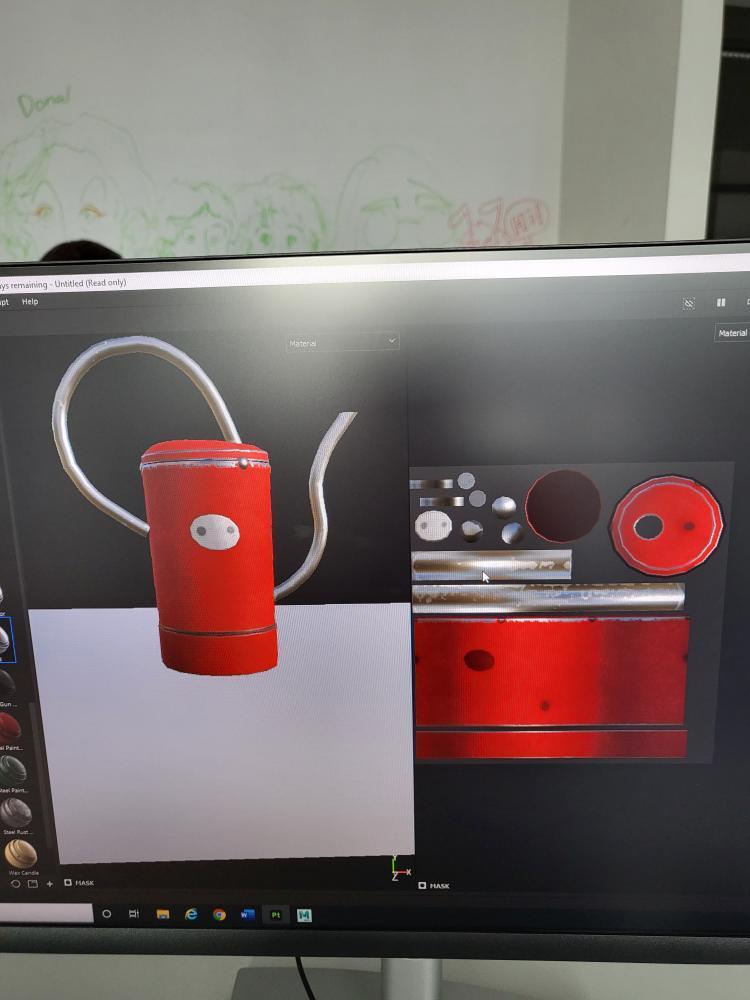
Substance painter was a lot of fun as I was able to add textures and really bring the model to life. I was sure to re-watch the lecture tutorials a few times before getting started so that I was clear what I was doing.

For most of the parts of the model I used textures and materials which were already included in substance painter but certain areas I wanted to bring my own textures in, such as the pebbles and the well base. This allowed me to have the look that I wanted, without having to work with what substance already provided.

I did make the mistake on the first element which I tried to texture of not exporting the texture as a sketchfab file but I realised this early on and was able to do it again.

One element which I was really happy with was the door knocker I textured in sketchfab. Using a paint layer and the the paint brush of a hand I was able to add a tiny little detail to my model where it looked like a fairy hand on the door knocker. I really think this tiny detail helps to sell the story of the model and I was very happy with it.

The mushroom was also fun to create in substance painter. I wanted it to have a very organic feel to it, so I ended up using the skin material to create the texture of the musroom. I used to different ones for the bottom of the musroom and the head as I wanted them to have slightly different surface textures. For the base, I changed the colour to a cream/ white colour and for the top I used a red colour for the mushroom. I also played with the roughness on the top of the mushroom as I wanted it to be quite detailed. Overall I was very happy with it.


For the roof I tried a few different textures before I found the one that I wanted. Initially I wanted to put some dust on the roof so that it would be a little more detailed. However, once I had created the substance painter texture and uploaded it to sketchfab I wasn’t so fond of it. The dust sort of took over the roof and it was a bit too much so i decided to go back and create a new texture in sketchfab which would not be so overwhelming.

SketchFab

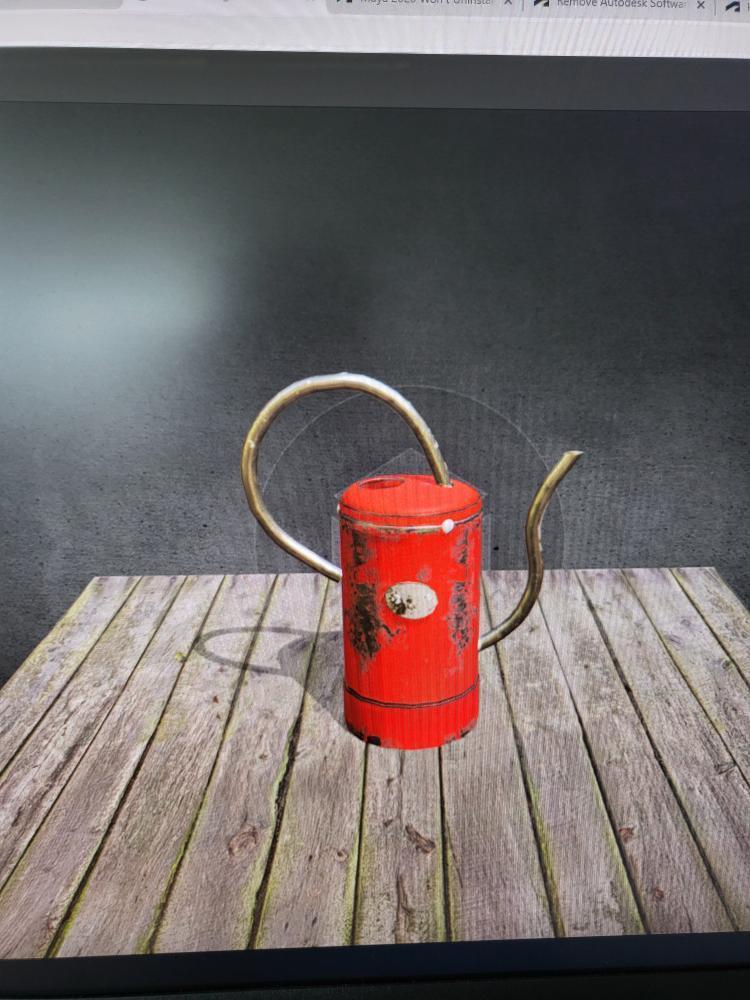
Uploading the model to sketchfab had a few challenges of it’s own which I had to work around. For example, when I uploaded one of my models, there was still a branch which I had deleted from my Maya file which was showing up on sketchfab. It would also not accept the texture from the branches I had done on substance. I ended up having to reopen the Maya file, freeze the transformations and delete by type history before reexporting it into an FBX file type. This did solve the problem but it resulted in me having to do the textures over again.

I also had an issue where not all of my textures would load, particularly the branches. However, I found that by reuploading the file and starting again I was able to fix this issue. When I had imported all of my textures I was able to look at the different effects such as bloom and colour balance to make my model look as finished as possible. I set the environment to ‘Muir Wood’ as I thought this would be an excellent setting for my Fairy Well. I also adjusted the vignette so that there was a little bit of a shadowy blur around the model. The element which I liked the most about the finished model was the bloom tool. Through this I was able to create a look of sunlight hitting the water in the well and creating quite a whimsical atmosphere. Once finished, I was able to just hit save and publish to upload my model.

Week 5- Sketchfab

This week we got a reintroduction to UV mapping which was a big help for me and I am still finding it difficult to master in my head. We also got to learn about sketchfab and how to real time render.

I liked this a lot as it meant a little more practice at substance painter as well as finding out about different file types and how they can be used. We already knew about the FBX file type in Maya, and how to bring it into substance but it was good to learn the new settings needed for bringing your substance textures into Sketchfab.

In order to practice this, we used a model of a watering can which we textured in substance painter. I chose to go with a painted red body of the watering can, with metal extra parts. After I was happy with the base, and the roughness, I decided to add some rust to really bring it to life and to make it stand out more.

Once I was happy with the model and I had baked my mesh maps, I exported my textures as a sketchfab file. This then allowed me to upload my FBX file (which I had exported from maya) onto sketchfab where I could apply the different maps such as Albedo, roughness, normal and AO. Once I was happy with the final model, I was able to play about with the different settings sketchfab offers, such as depth of field and shadow, midtones and highlights until I was happy with my piece.

https://sketchfab.com/Jasmine_Sheppard

Week 4- Substance Painter

This week we were learning about Substance painter and how useful is can be for adding texture to your models. We were able to learn about how Masks can be used to add texture to only certain parts of you model and not others as well as how fill layers and paint layers can be used. We started off using a model which Mike had already unwrapped for us which was helpful for me as I was able to focus on picking up the substance painter techniques as I am still unused to modelling.

We were making a war hammer and so I knew that I wanted to have some areas of the hammer be metal and some be wood. This is where the masks came in very handy. I played about with how the metal should look, trying out a variety of different roughness levels. Finally I decided on one which was a little bit rough but not too completely bent. I wanted it to look like the hammer was used but not too destroyed.

Once I was happy with the colours and textures on the main body of the hammer I decided to add a some blood, to give it a bit more of a used feeling. I think this choice really enhanced the item and made it seem much more believable.

Week 3- Independent practise

I was trying to challenge myself to add UV maps to some of the work I had already created in order to give it more of a finished appearance. I applied textures to my Vase, snake and cart.

I started with the Snake as it was the project I most enjoyed completing and I wanted to see it fully completed. It was suggested that by adding some eyes to the snake it would look more realistic so I decided to do the UV wrap for the skin and eyes together on the same map to make it look more complete. Firstly, I started by creating a groove in the snakes head for the eyes to sit in. I thought this would make it look a bit more realistic as opposed to them being just placed on top. Once I was happy with this, I worked on unwrapping the model and finding a good skin which I could use to texture. I used a yellow snake skin for the body and a picture of a snakes eye for my own. I was happy with how the uv map turned out overall and it definitely made it look more like a real snake.

Next, I practiced on the Vase as I thought it would be better to practice on a model with only one piece before jumping into the cart. I wrapped the model fairly easily in this case as I had a little bit of practice and it was only one piece. I first pattern I used did not work so well on the vase as it was too stretched and the pattern did not line up properly.

I decided to change it for one which I liked better and I was much happier with the final result.

Finally I worked on the cart. It was more of a challenge to unwrap each piece of the cart as it was comprised of a lot of different primitives’ but I was able to eventually. I used a shiny red for the body of the cart as I wanted it to have a nice surface texture which would stand out. For the metal parts I used a shiny silver skin so that it also would look a little bit more impressive than if I had used a dull finish. I think that by adding the skins to the cart I was able to make it look a lot more finished and completed which was good and it will definitely help with my 3D work going forward.

Week 3- UV mapping

Learning about UV mapping was a process which I found quite difficult in the beginning and I struggled to work out for to unwrap the models. My first attempt at the dice took a lot longer than I would have liked, as it was quite an easy starting point.

Once I had worked out how to unwrap the model it became a bit clearer however, I still struggled initially with the sizing of the dice faces, as the face with just 1 dot was much larger than it should have been. I did manage to make the other faces a better size, and successfully transfer the file from photoshop into Maya.

Next, I moved onto the coke can. I still had a little trouble with this as I was still quite new to the process, however eventually I was able to unwrap the model myself and use photoshop correctly to make the new UV wrap. I was happy with how the coke can turned out as the wrap worked well.

The hammer was quite difficult to unwrap as there was more pieces of the model which needed to be unwrapped. I did manage eventually to get the pieces unwrapped and then placed onto the UV map fittingly. I was happy with the texture I managed to get onto the hammer and I think these exercises were very useful in getting used to 3D.