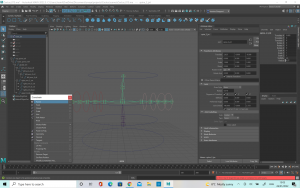
We were given the task of creating a 3D moving cactus as a way of getting us used to the processes involved in 3d modelling. This was a whole new area for me as I have no experience in 3D but I found the process quite exciting. We followed a tutorial which helped me to understand each step of the process and why we were doing it.
It was tough at first to get my head around how to extrude the faces to make the plant pot so I had to start over again at first. This was helpful to me though in the long run as the second model was more successful and it meant I didn’t end up getting into the habit of bad practices. The above screenshot shows my second attempt at the model, after I had finished adding the spikes. For this I used the scatter brush tool. It allowed me to add the spikes in a randomized fashion around the body and arms. I did however, have a slight problem with the model not being big enough and there for the spikes did not fit. To fix this I simply used the r button and then made the model bigger. This solved most of the problem, but there was still a few spikes which were pointed in different directions so I individually had to go through and fix these few points. I didn’t notice at this point, but one of the spikes was pointed at an angle, into the pot at the bottom. This was fine at this stage, but it caused me problems later on when I got to the animating. To fix this then, I had to go back and select the individual spike so that I could delete it. This ended up fixing the problem.
The adding the colour was a little tricky when it came to the gradient because I was new to UV mapping but in the end I managed to fix it and I was happy with the result.
Once I was happy with the model scale, colour and spikes I decided to add a small touch of personalization to my cactus. I decided to add a tiny mouth to make it look a little bit cuter. When I was happy with it, I arranged the eyes and mouth until I was aesthetically happy with the cactus’ face.
When I was going to start adding skeleton joints and rigging I changed the perspective and realised that I had been making the cactus from the side and not the front. To correct this, I selected everything and rotated along the x axis by 90 degrees.
When it came to the rigging and joints I had a few problems. I didn’t parent the joints properly and the skeleton joints were not in the right places. This caused me problems when I tried to make the character move, as the arm was connected to the base of the spine joint, which in turn made the cactus pot move. I asked for help from my lecturer which was very helpful as he explained the areas I went wrong and I was able to work through my mistakes and correct the issues. This problem helped me to be aware of what had gone wrong and therefore it will help me in the future when I am animating the models.
This was my final product for the cactus. It was very challenging as I had never done anything like this before but I was very happy with the outcome. Being able to create the cactus following a tutorial was quite inspiring as it made me see that if you break down the steps of 3D work it is not as complicated and scary as it may seem at the beginning. I’m looking forward to learning and improving in 3D digital literacy.


