The first independent practice I tried this week was to create a snake on a branch. I started with the snake first of all, using the EP curve tool. I manipulated the points as much as I could but there was still a few points which did not have the smooth curve look. Next, I created the branch. To do this I used the same tool, followed by the sweep mesh to create the branch. I edited the size down until I was happy with the thickness. Once I had done this, the snake was nowhere near the branch so I tried to move the whole snake over using the ‘W’ button. However, I learned that this does not work and to move the snake you must manipulate the points on the sweep. I ended up deleting the first snake as I was not happy with it in the first place and I thought I could create a better one. I gave this one more points using the EP curve tool which meant it was easier to manipulate and get the smooth shape the snake. When it came to editing this snake I was more adventurous with the shape, giving it a long hanging down portion, as well as making sure it wrapped around the branch. I was much happier with this and I was able to get the curves a lot smoother and natural. Finally, I tapered the snakes tail so that it closed into a point and added a primitive of a sphere which I edited to look like a snakes head.
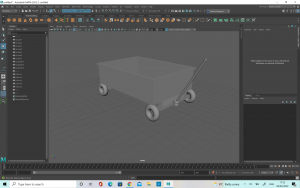
Next I tried to make a childrens pull cart as I thought that it would be a good way to practice extruding and also since it was the beginner level I thought it wouldn’t be too complex for me to complete. I started with a basic cube which I flattened and then extruded the sides upwards to form the walls. Next, I extruded the faces out to create a lip on the side of the cart, like in my reference photograph. Once I was happy with this, I started to break down the shapes which came together to form the mechanism under the cart. I noticed there was quite a few different sized rectangles on the front portion so I did my best to recreate these by deforming cube primitives’. For the back of wagon, I noticed there was two thin rectangles, connected by a long, thin sphere so I made these out of a cube primitive and a sphere primitive.
The wheels were the most interesting part to work on but there was also a bit of a challenge in getting everything to line up correctly. I started with a cube primitive which I smoothed and changed the dimensions to 2. Then, I duplicated it four times and tried to match one up at each point of the cart. To make the wheel shape, I used a torus primitive, which I resized and then maneuvered to cover the spheres I had placed. Once I had done this, and I checked the reference I realised that the wheels were not perfect torus’s and there was a second part which was visible inside the wheel. I decided to make my original torus shapes into this inside part and create a new torus for the outer wheel. To do this, I started with the original Torus primitive but I select the face at intervals along the face of the object and used the w button to pull them up. This created the exact texture and appearance I was looking for in the wheel. Once I was happy with the size, I duplicated them four times and placed one on each wheel. After doing this I realised that the wheel placements were not quite right so I had to go back and resize the under parts of the cart so that the wheels would be sitting out from underneath the body, but still be attached where needed. Once, I was happy with their placement I started on the handle.
The handle was the most difficult for me because I found it difficult to get the shape right. I started with a sphere primitive which I stretched out long and thin. Next, I put the object in vertex mode and used the multi-cut tool to add more dimensions along it so that it would bend easier. Once I was happy I selected only the top half of the objects vertex points and used the e button to bend it. Once I was happy with the angle, I had to use w to make the object line up again. When I was happy with this, I repeated the process lower down to create a second bend. After I was happy with this shape, I took the object and duplicated it, before turning it 180 degrees to make the other side of the handle. I matched the two up and created a thin, flat rectangle to join the two and create the final part of the handle.
One way in which I think the cart could be improved would be to maybe have a thicker handle, which might fit better with the other elements of the cart but overall I was happy with the cart design.
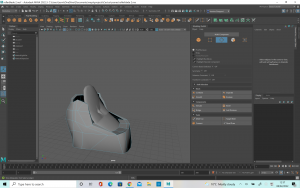
The rollerblade was definitely the most challenging model so far. I really struggled with it at first, because I couldn’t work out how to get the square object to have soft edges and so this was causing a lot of problems. I tried to use the ep curve to do the shoe laces but ultimately this did not work. I believe I did not have enough joins in it in order to make it flexible enough and so I could not bend it the way I wanted. After asking for some advice I have been shown how to do this a lot better and so when I try again I believe it will be better.
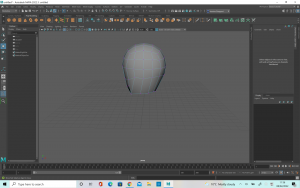
Finally, I tried to make the Vase, following the tutorial posted. This vase was a lot more successful than my first attempt as I am getting to be a lot more familiar with the software.


