—Wand Concepts—
I have chosen to model a Magic Witch / Wizard Staff with a clock/time theme.
-References-


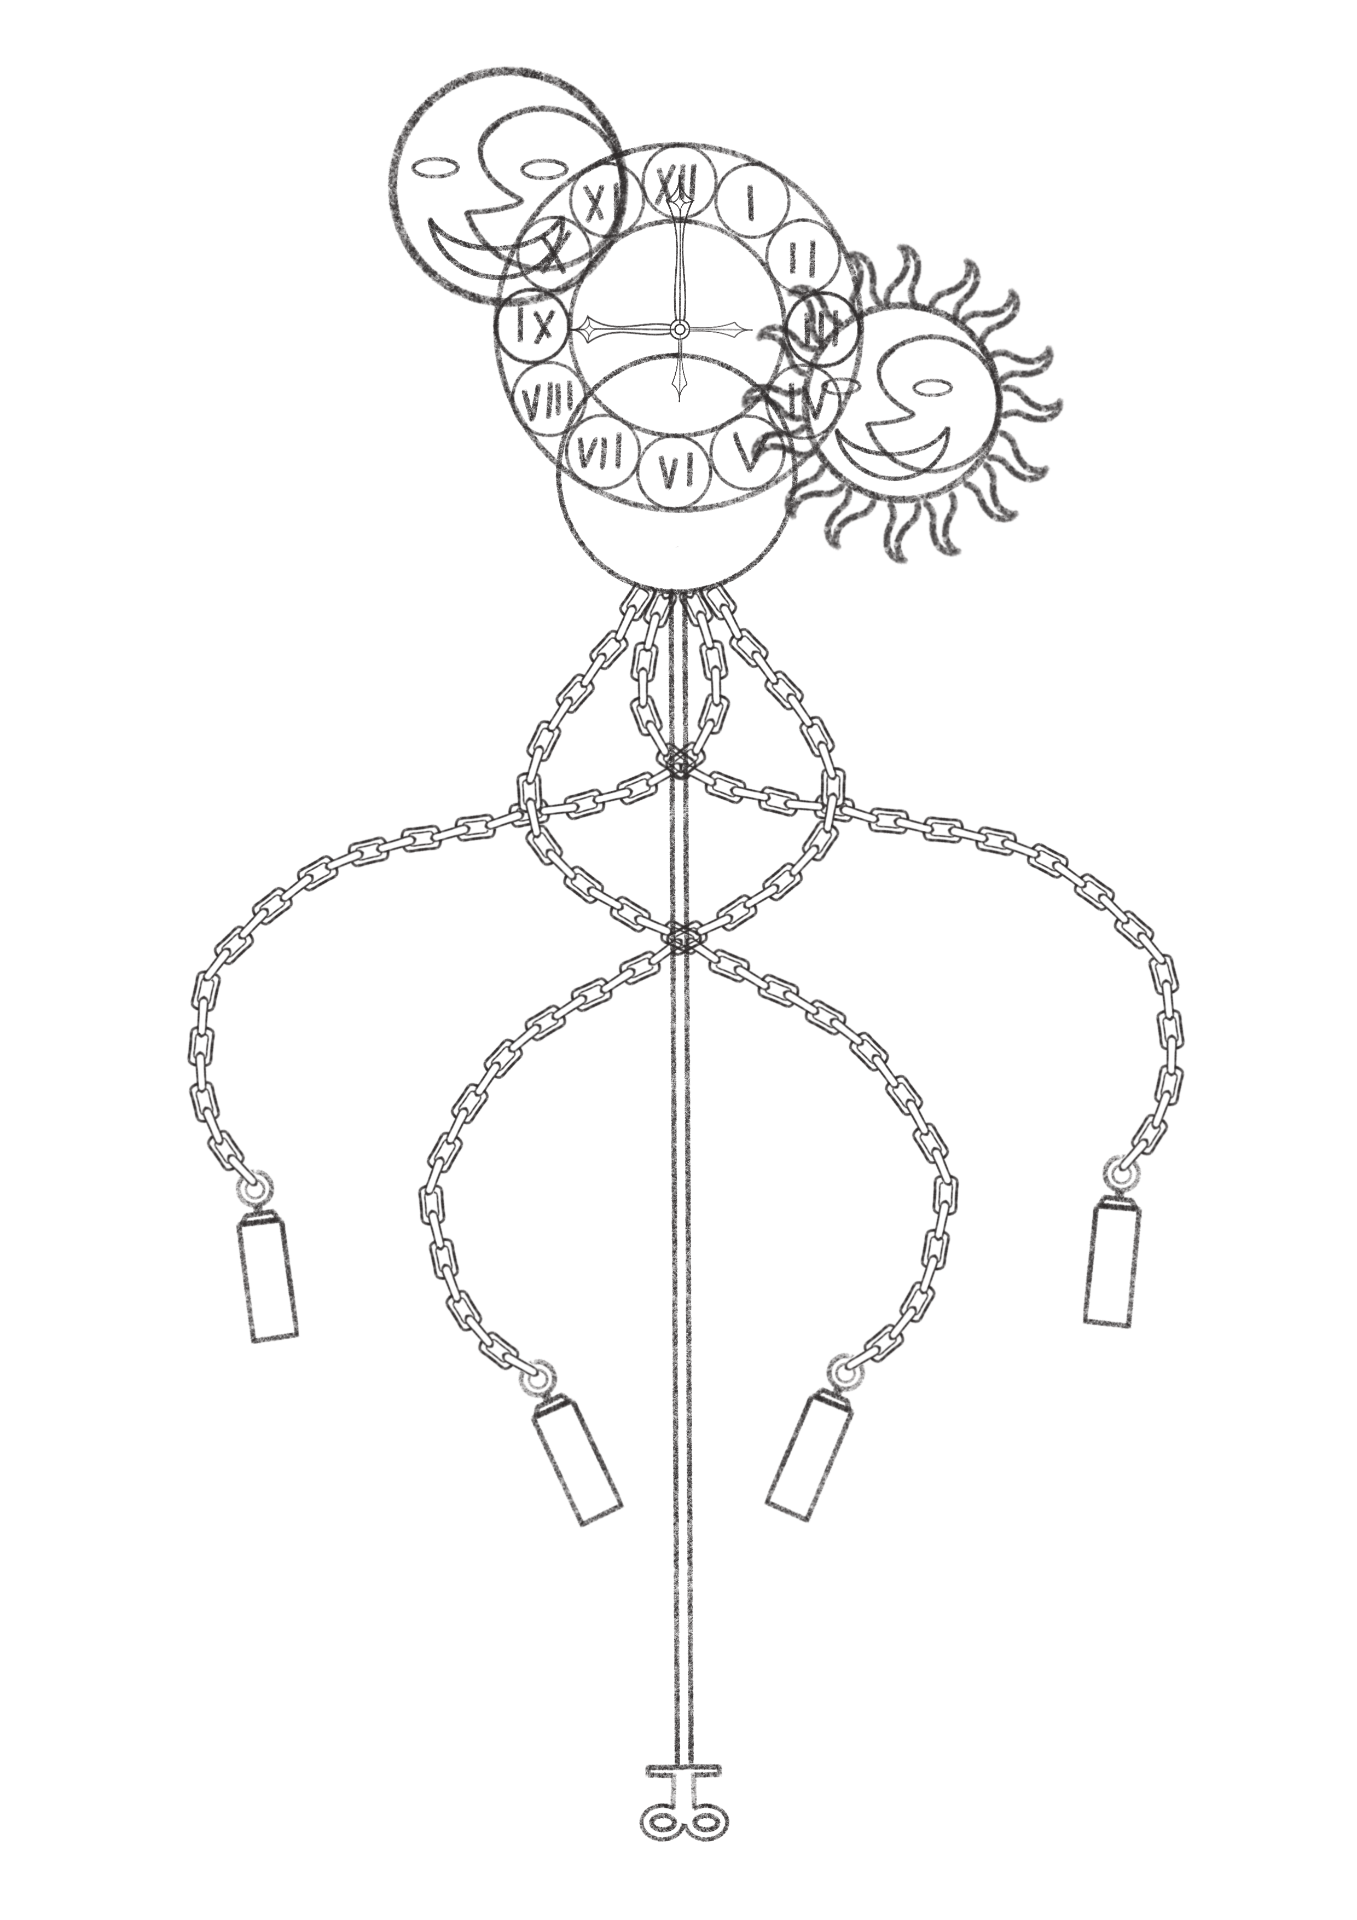
Using the references I gathered I made some concepts for possible wand designs. I used the parts of the reference images that interested me the most.

I cleaned up all of my designs and silhouetted them to see which design was the strongest in terms of composition and how easy it was to read the design with minimal details.


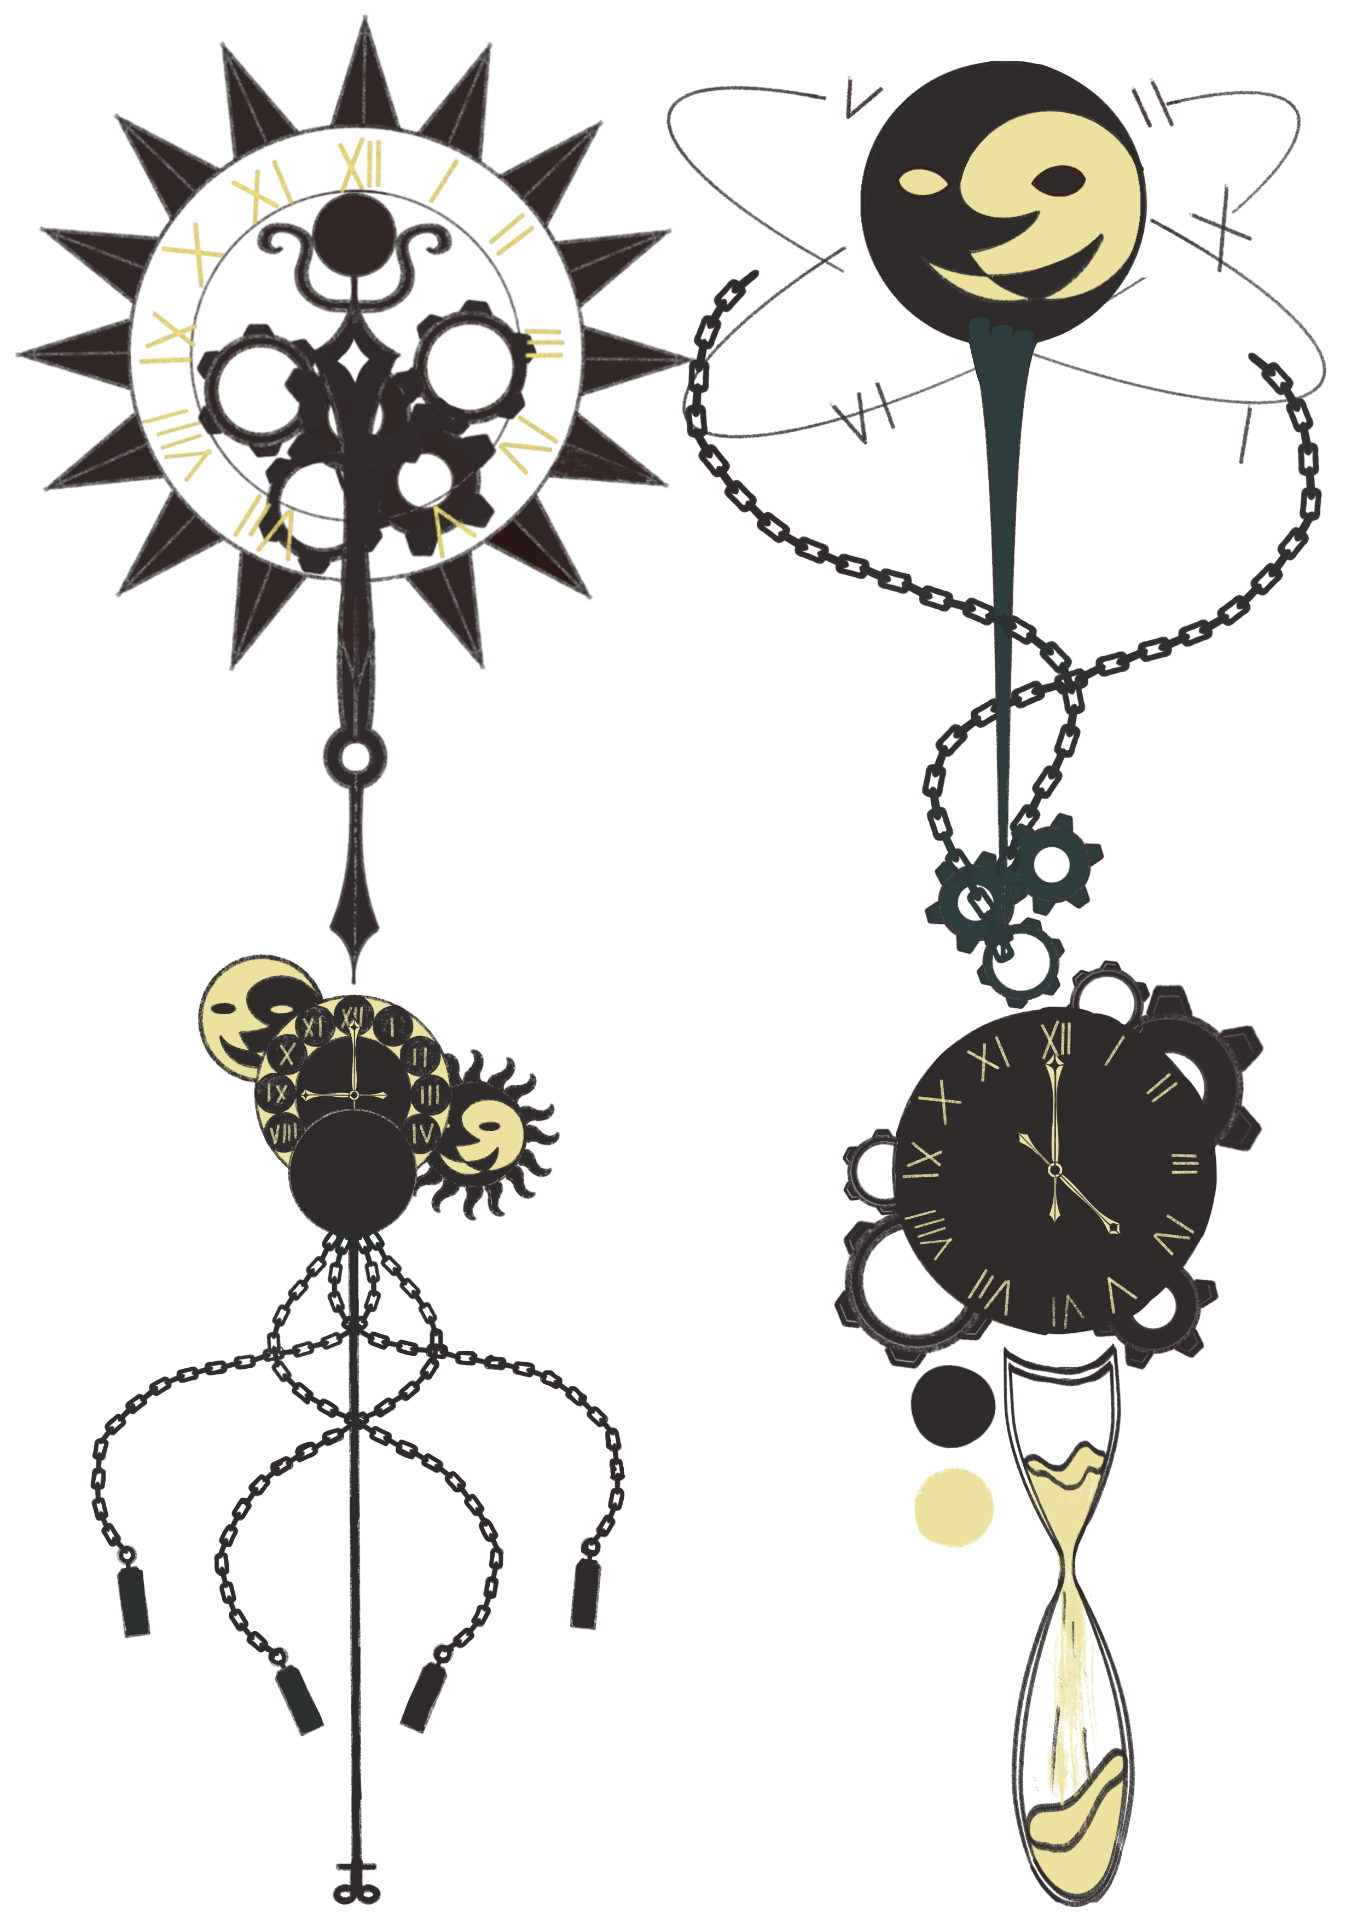
After a lot of thought I chose to model the spikey one as I really like the overall shape of the staff and the idea that it could be used for magic or as a weapon.
I made a turnaround of the wand and a breakdown of where the pieces sit when disassembled.

____________________________________________________________________________________________________________________________
—Wand Modelling Process—
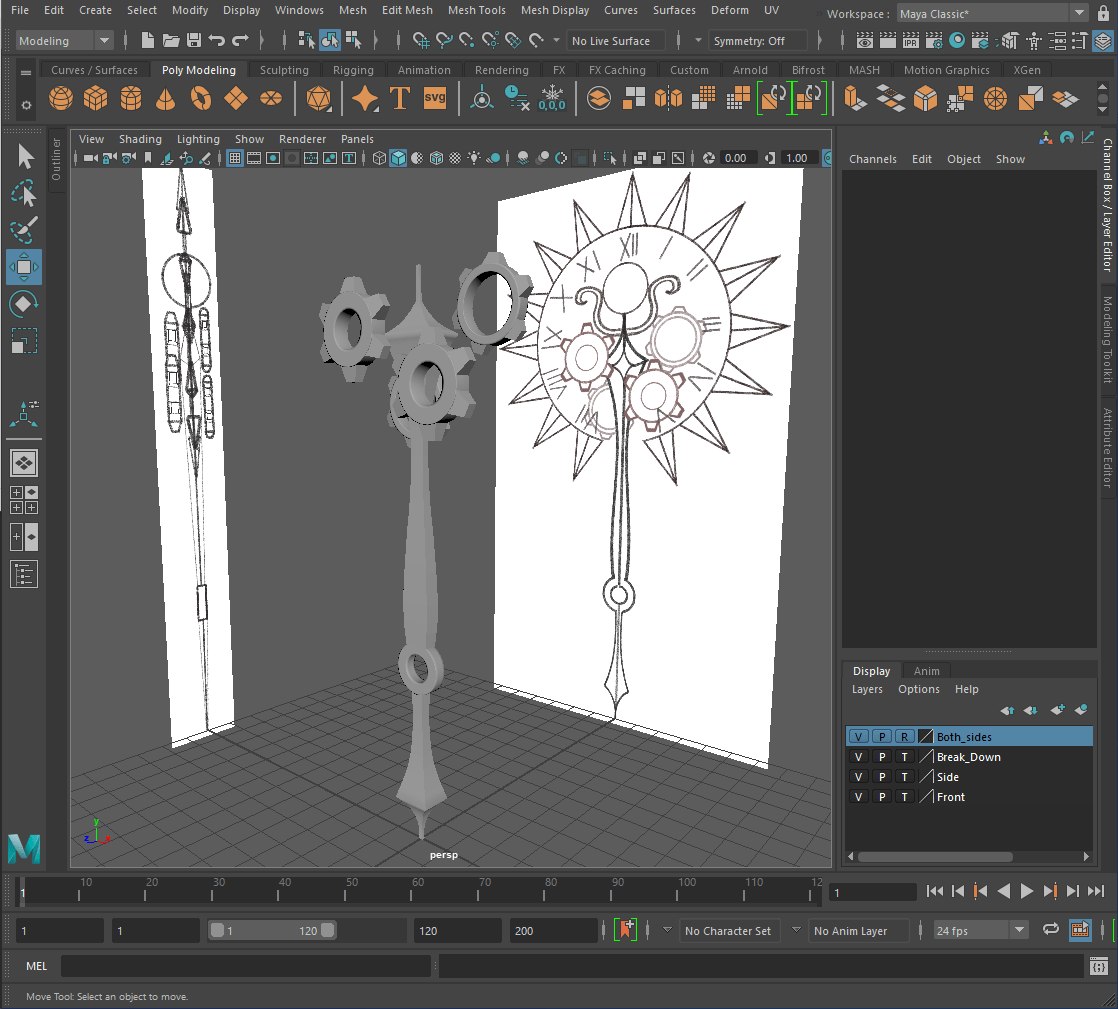
Added my concepts as a reference plane
.
—Clock Hand: Part 1—
-Lower Piece-
Created a cube, scaled it to the size of the lower part of the hand and added some edge loops to contour the bottom of the hand.

Scaled the edge loops and added more to refine it further.


Added even more edge loops.


Froze the transformations of the lower hand.
-Handle-
Created a cylinder and cut a hole in the middle.
I wasn’t really sure how to do this so I did a bit of research and found a few helpful videos.
https://www.youtube.com/watch?v=nc50WFjyynQ
https://www.youtube.com/watch?v=DRD8fDK4WXQ


Froze the transformations of the handle.
—Clock Hand: Part 2—
-Upper Piece-
Created a cube, scaled it and added a few edge loops to rough out the shape.


Second pass of edge loops.

Added even more edge loops to the model.

Froze the transformations.
—Cog Type 1—
Created a cylinder, rotated it and positioned it to align with my reference image.

Scaled the cylinder and cut a hole in the middle of the cog using the method from before.

Froze the transformations of the cylinder added some cubes that I scaled to make the teeth of the cog.

Rotated, duplicated and positioned the teeth around the cog.

Duplicated the cog, rotated and positioned it then froze it’s transformations.

—Cog Type 2—
Repeated the same process that I did for ‘cog type 1’ but positioned them in different places. [18 – 20]


Froze the transformation of the cogs.
—Break 1—
Took a step back to see my progress! I’m liking how the model is turning out so far.


—Pendulum—
I made a custom sphere by using a cube that I smoothed the edges of and changed the divisions to 2.

Scaled and positioned it.

Created a cube to make the pendulum support, scaled and positioned it.

Added edge loops to block out the shape.

Added even more edge loops to refine it.

Duplicated and flipped the piece.

—Spikes—
Created a pyramid, positioned it and scaled it.

Duplicated the spikes and positioned them.

To create the ring that the spikes are mounted to, I created a pipe and scaled it to the size I needed.

Froze the transformations.
Used some edge loops to cut out a section at the bottom of the ring, added a plane on both ends and combined them to the mesh.

—Break 2—
Took another step back and assembled the parts of the wand that I have finished! I really like the way the wand is turning out thus far. [34 + 35]


—Beveling the Edges—
To sharpen the edges of the model I will be adding bevels at ‘fraction 0.3’.


The bevels on the cog teeth and spikes are at ‘fraction 0.1’.
—Small Tweaks—
Repositioned the cogs a bit.
Before After


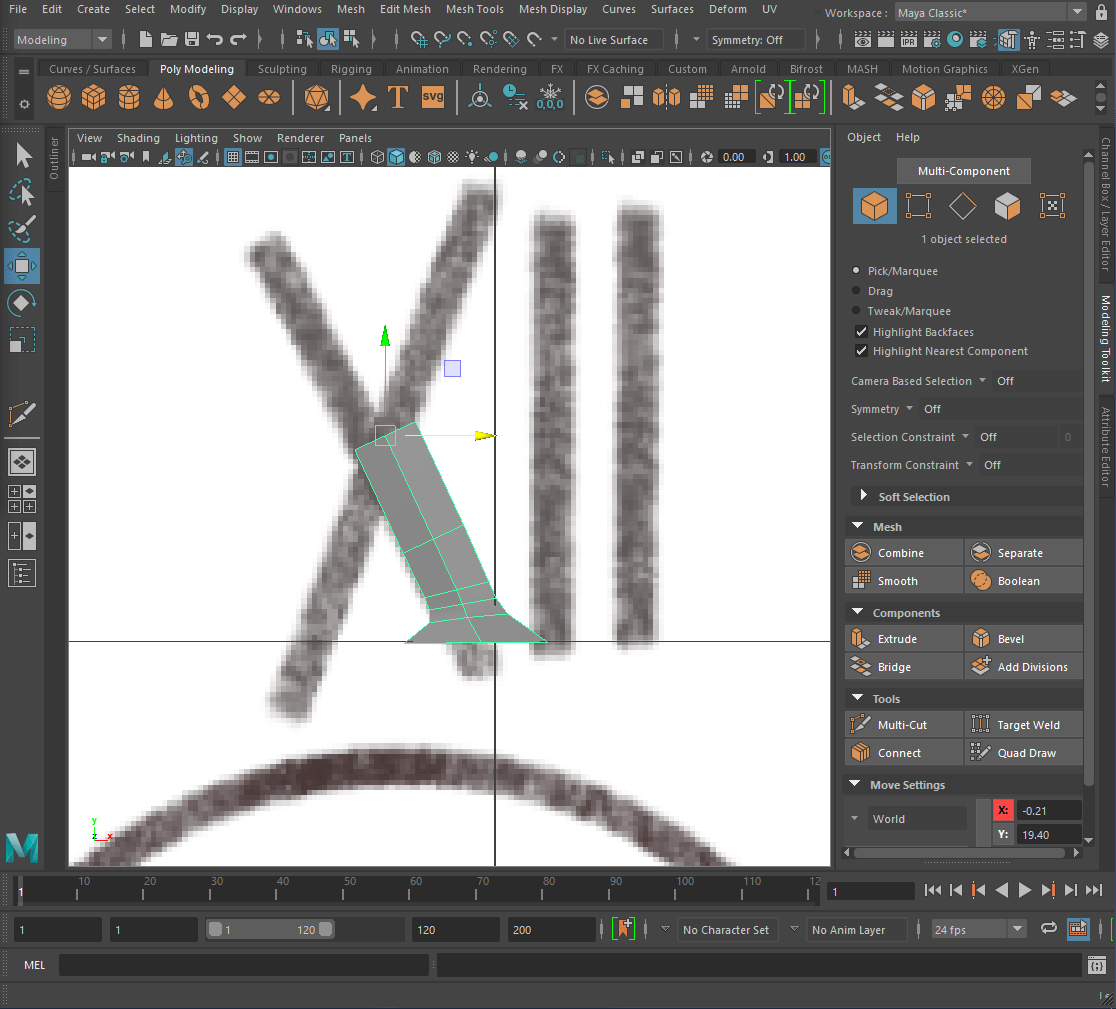
—Roman Numerals: Attempt 1—
-I-
To start, I created a cube that I scaled and rotated.

Added edge loops to refine the shape.

-X-
Used the I, cut it in half and angled it.

Adjusted the bottom of the X.
Duplicated it and positioned it to make the full X shape. Combined the pieces.

-V-
Used the piece from the X, duplicated and flipped it.

I liked the way the numbers looked but the mesh was a bit messed up in some areas and I couldn’t figure out how to fix it so I tried again.
—Roman Numerals: Attempt 2—
Used the type function in Maya but the mesh got messed up when smoothed.

—Roman Numerals: Attempt 3—
I was more careful when making the numbers this time and used the extrude tool which seemed to work.

Added bevels to the edges of the numbers.

—Placement—
Duplicated, rotated and placed the numbers.
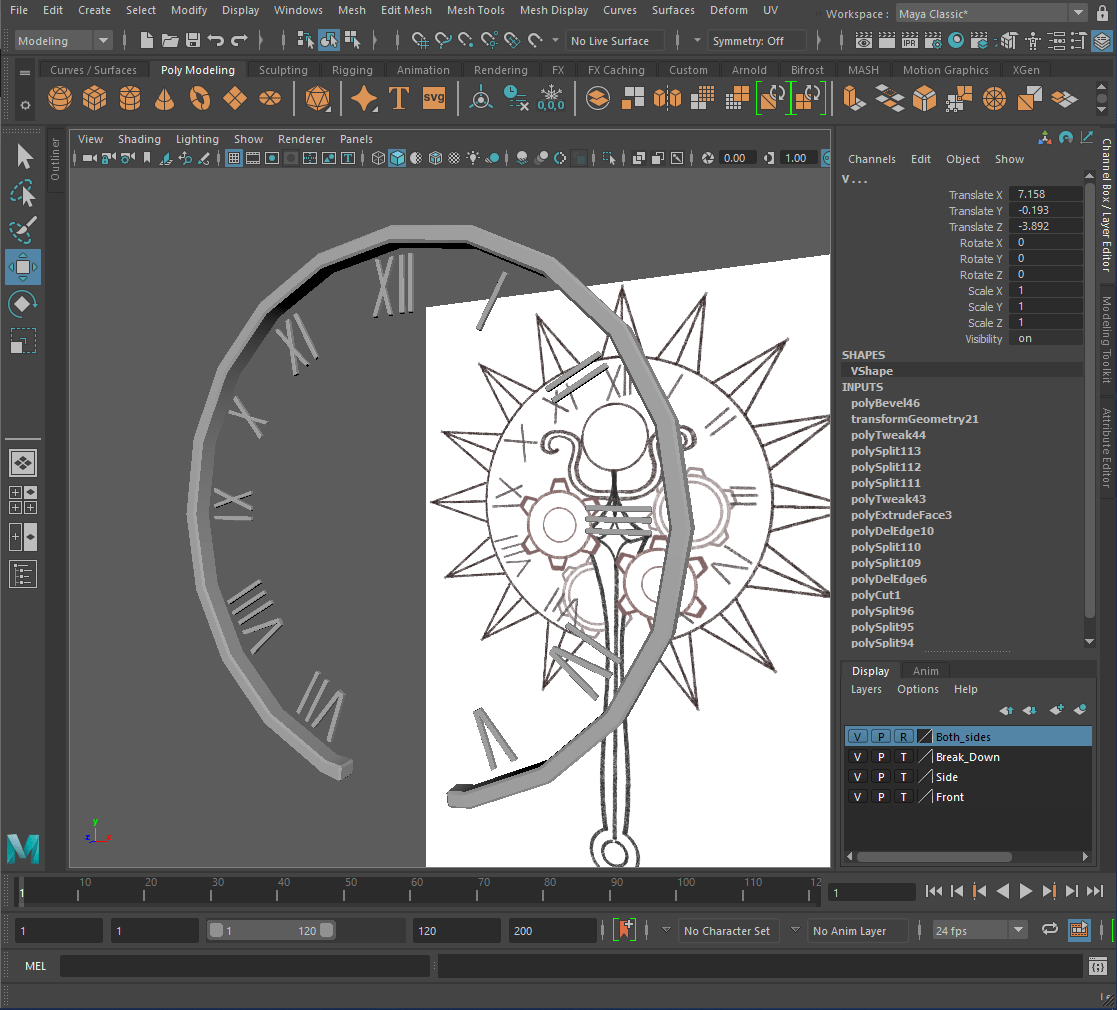
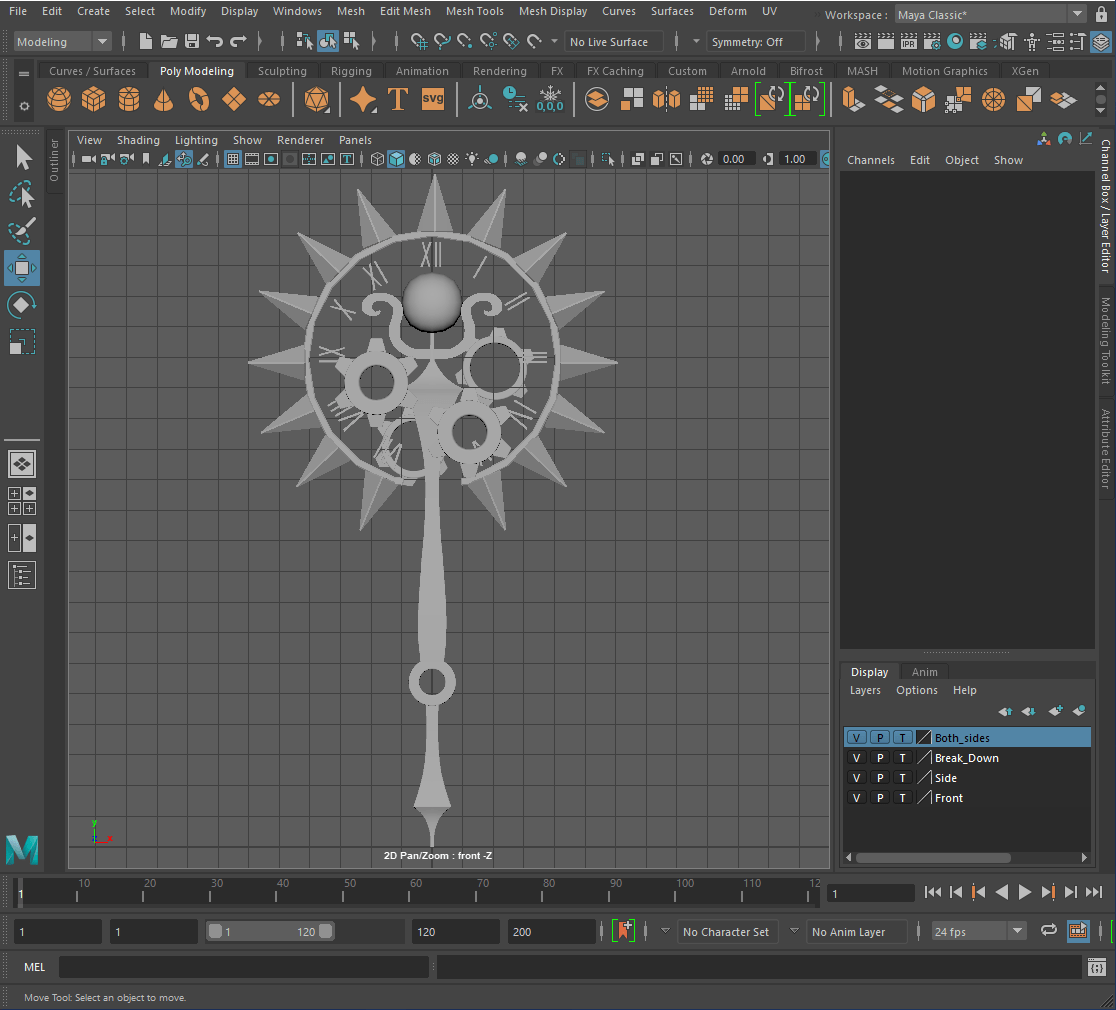
—Final Product—
Assembled the whole staff.


Before and after the smoothing.

____________________________________________________________________________________________________________________________
—UV Unwrapping the Wand––
—Clock Hand—
-Top part-
Cut down the back of the clock hand.
Separated the top and cut up the back.

-Middle Part(Handle)-
Cut the two circle faces of the handle from the sides.
Cut a seam along the inside and underside of the handle.

-Bottom Part-
Did the same process as the ‘top part’ of the Clock hand.

Selected all of the handle and clicked the Layout tool.

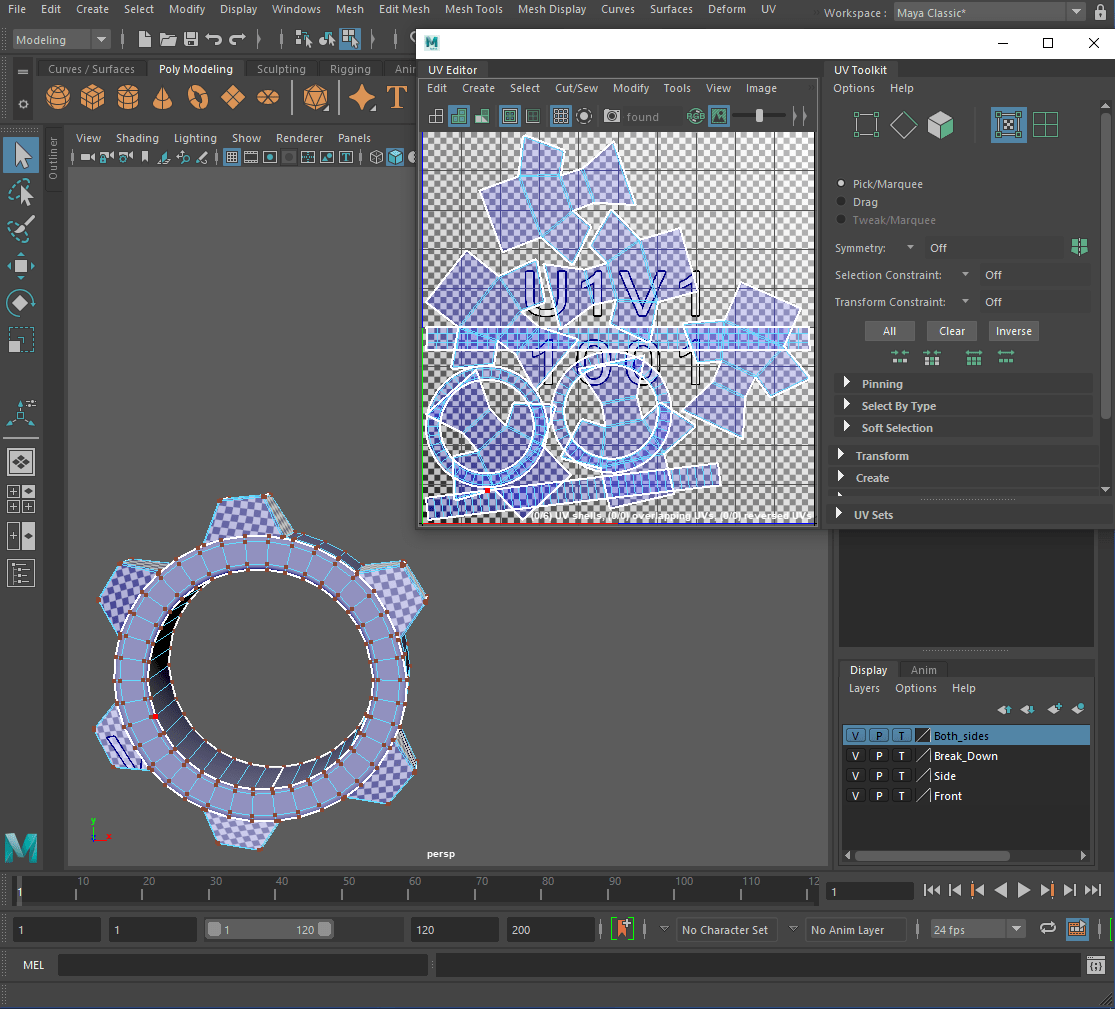
—Cog Type 1—
Cut the circular faces from the sides and cut a seam along the inside and underside of the cog.
Had to straighten the outside piece of the cog. (Selected piece)

-Teeth-
Cut a seam along the bottom edge of the tooth and a few seams up the back of the tooth.

Repeated the same process for the rest of the teeth.

Repeated the same process for the other ‘cog type 1’.
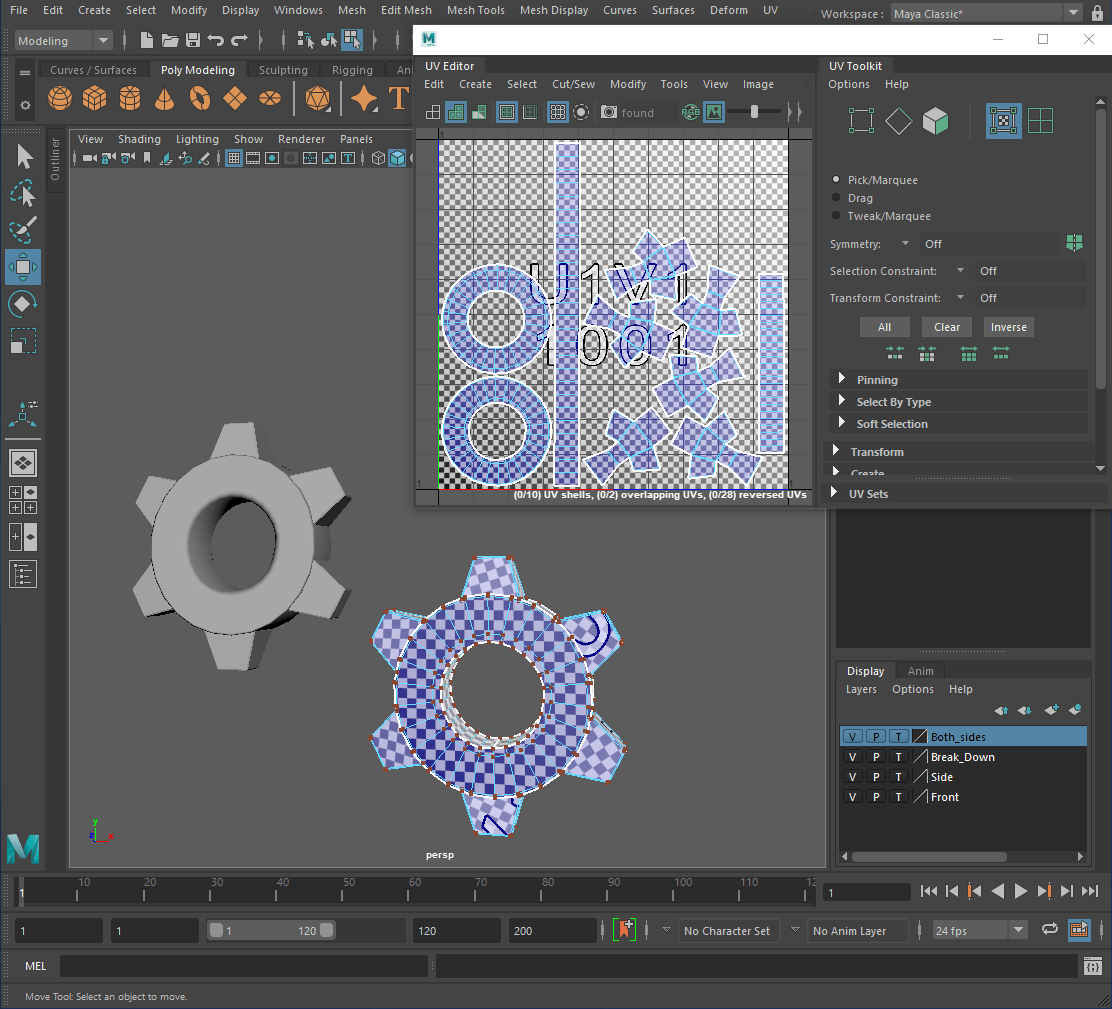
Used the layout tool to arrange the pieces of both cogs.

—Cog Type 2—
Repeated the exact same process as I did in ‘cog type 1’ to ‘cog type 2’.


____________________________________________________________________________________________________________________________
—Texturing the Wand—
—Exporting from Maya—
Renamed all the materials of the model.
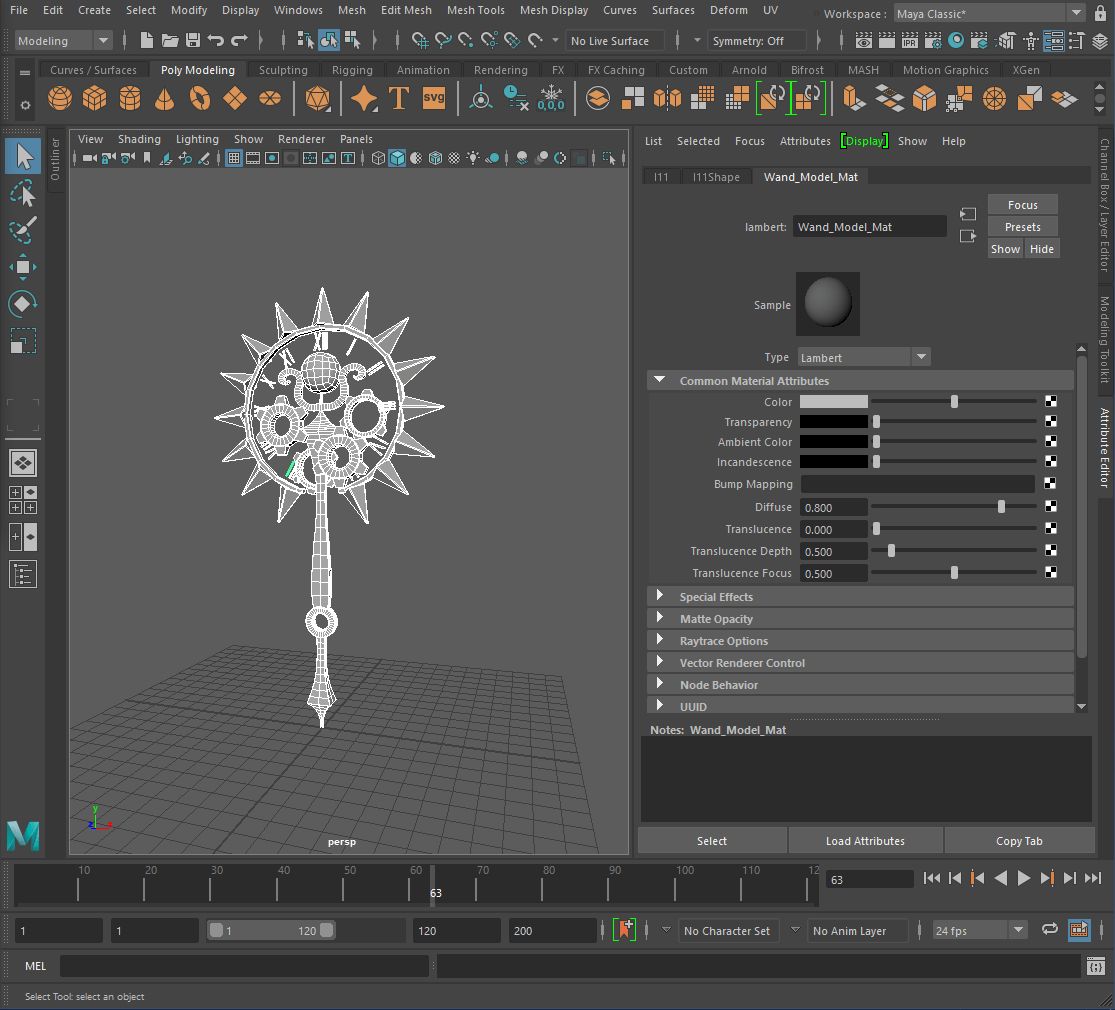
Exported the model by selecting all the parts and clicking ‘export selection’.
—Importing into Substance Painter—
Clicked ‘file -> new’. Adjusted the settings and clicked ‘ok’.


Baked the model.

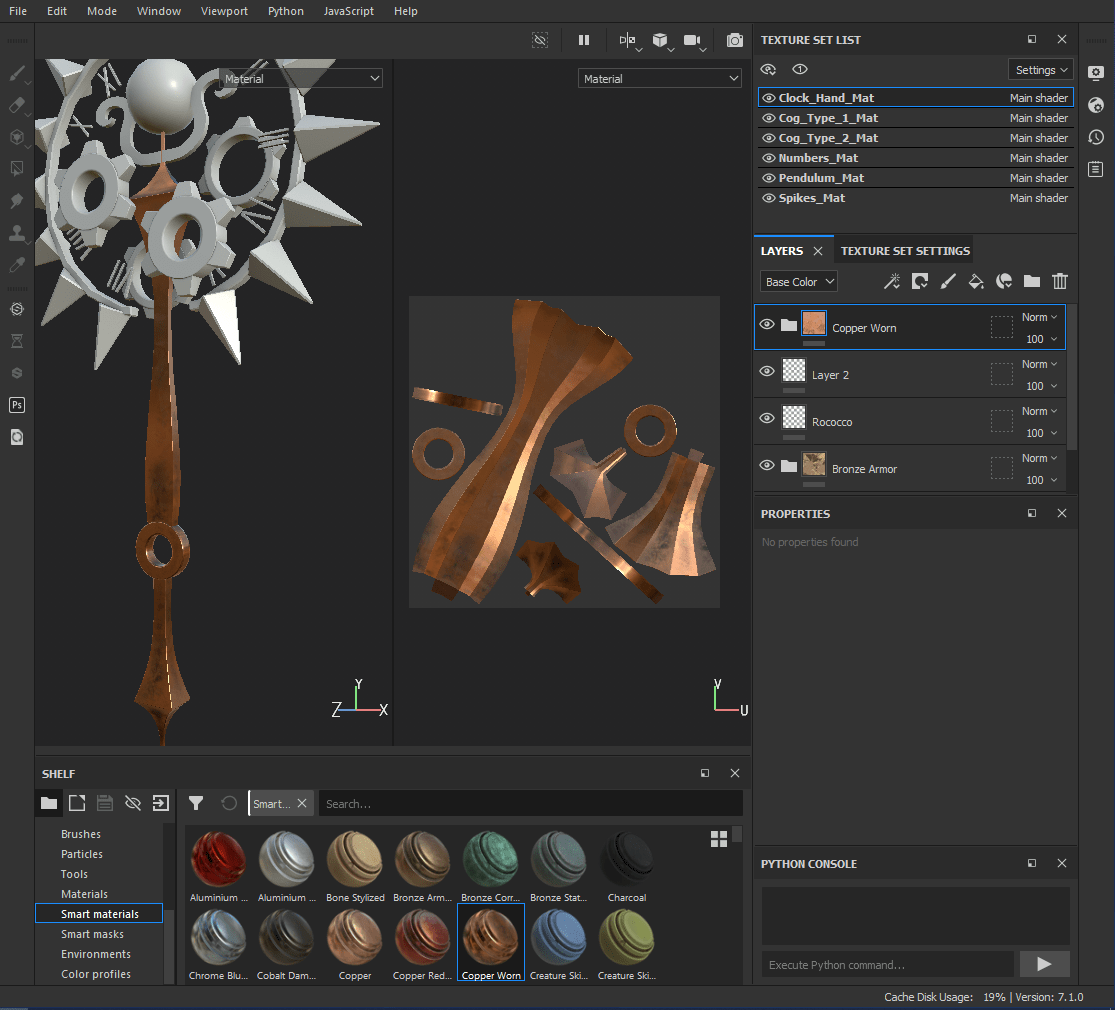
—Clock Hand—
I used the smart material ‘Bronze Armor’.

Used the particles ‘Rococco’.

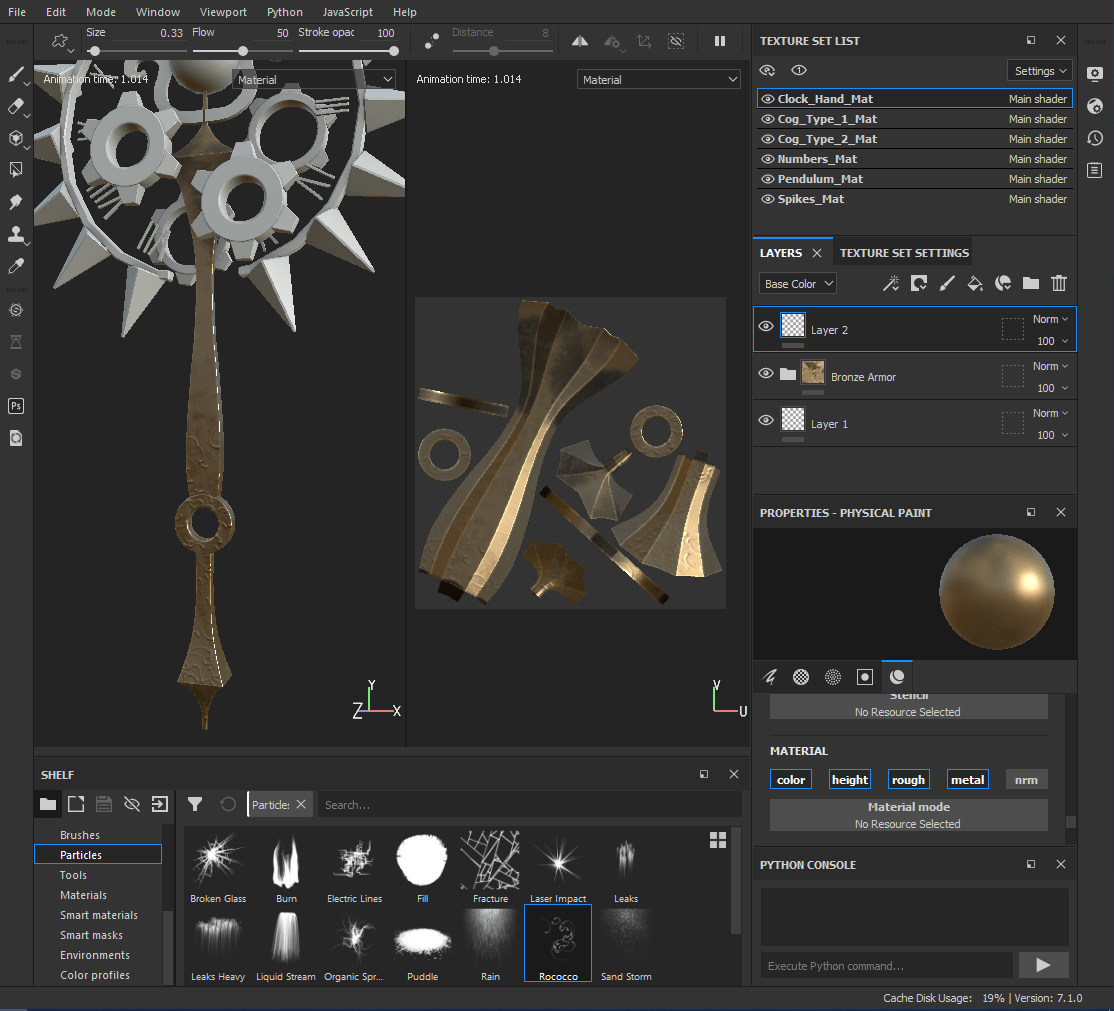
Added the smart material ‘copper worn’ and the smart masks ‘stain scratches’, ‘dirt cavities’ and ‘edges scratched’.


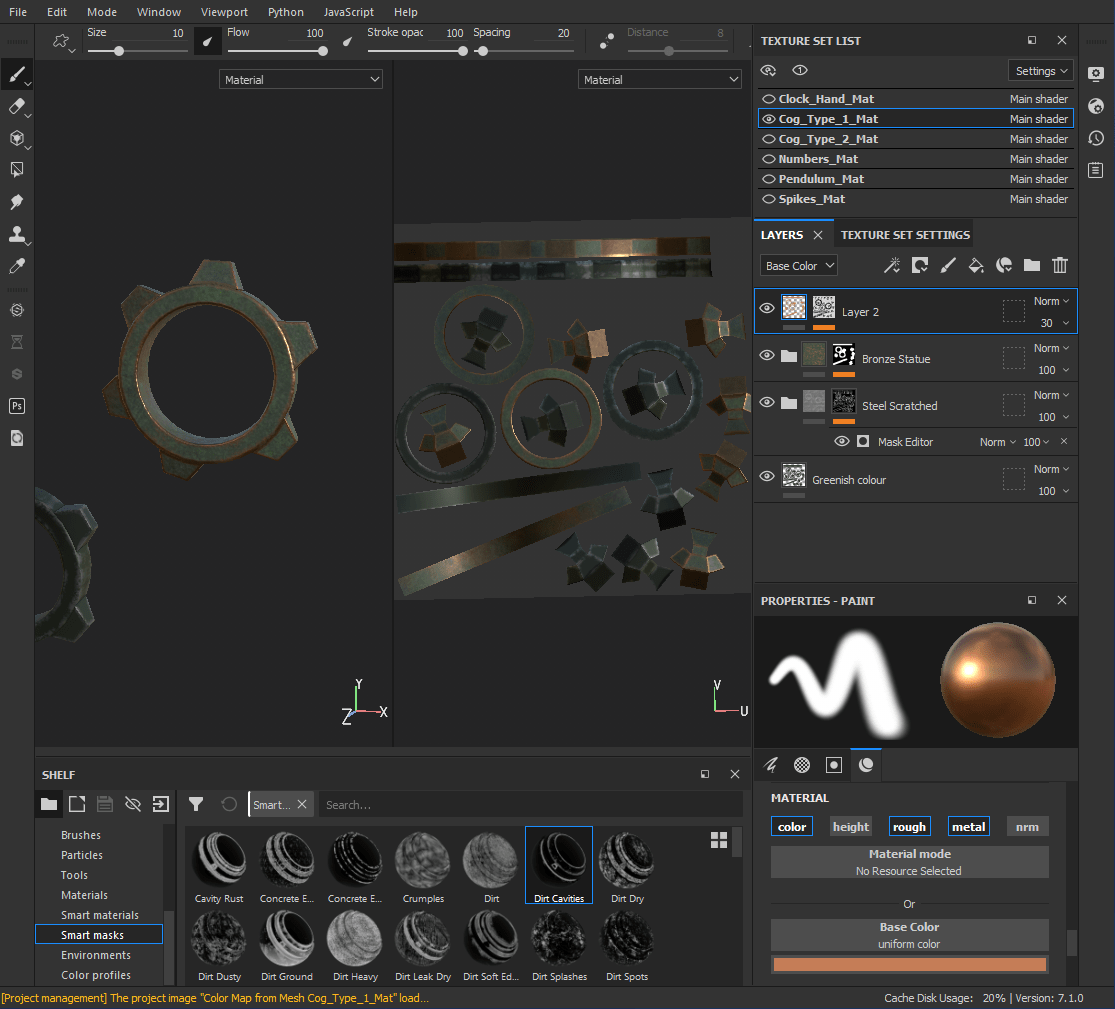
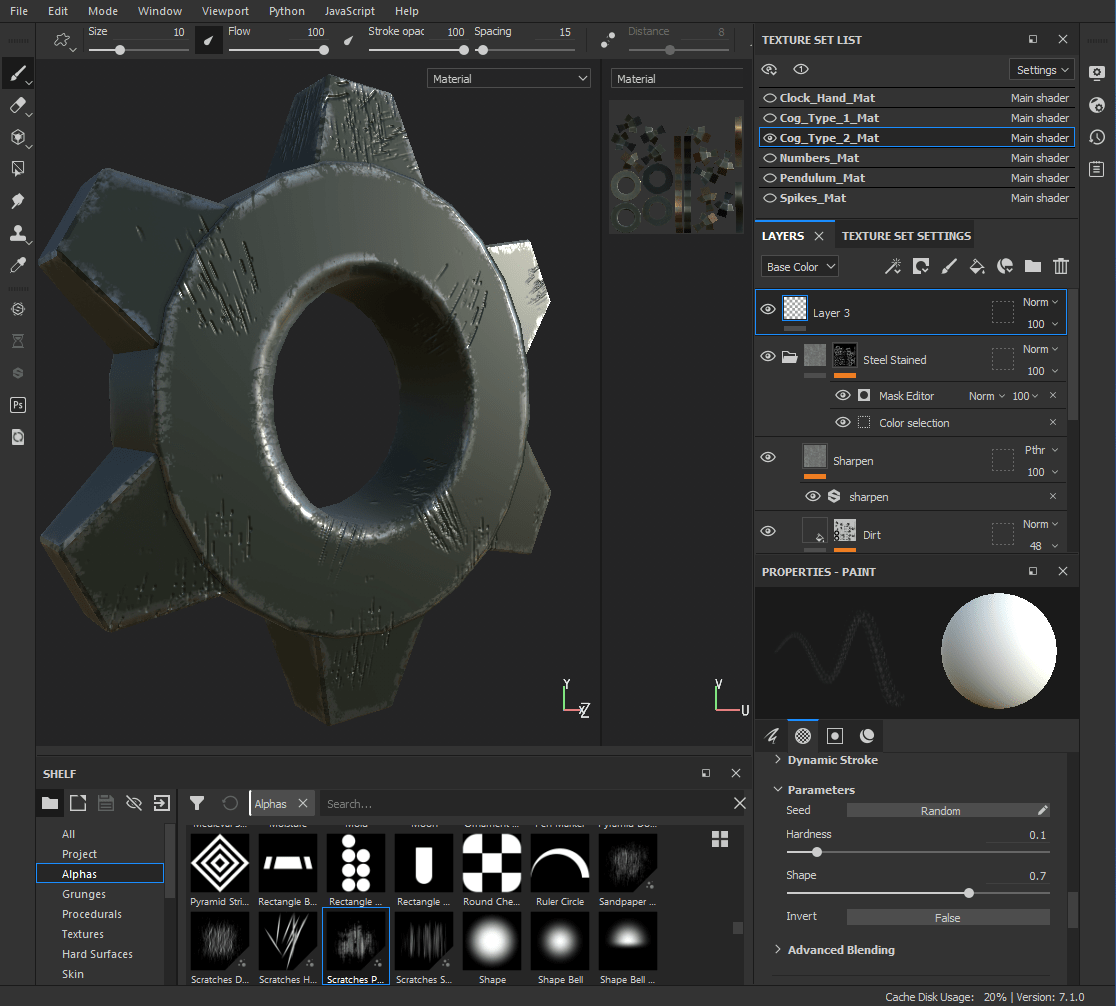
—Cog Type 1—
Added a custom colour to the cogs.

Used the smart material ‘steel scratched’ and used the smart mask ‘concrete edges 2’.


—Cog Type 2—
Added the smart material ‘bronze statue’ and made some adjustments to the material.

Added a custom colour to the cogs.
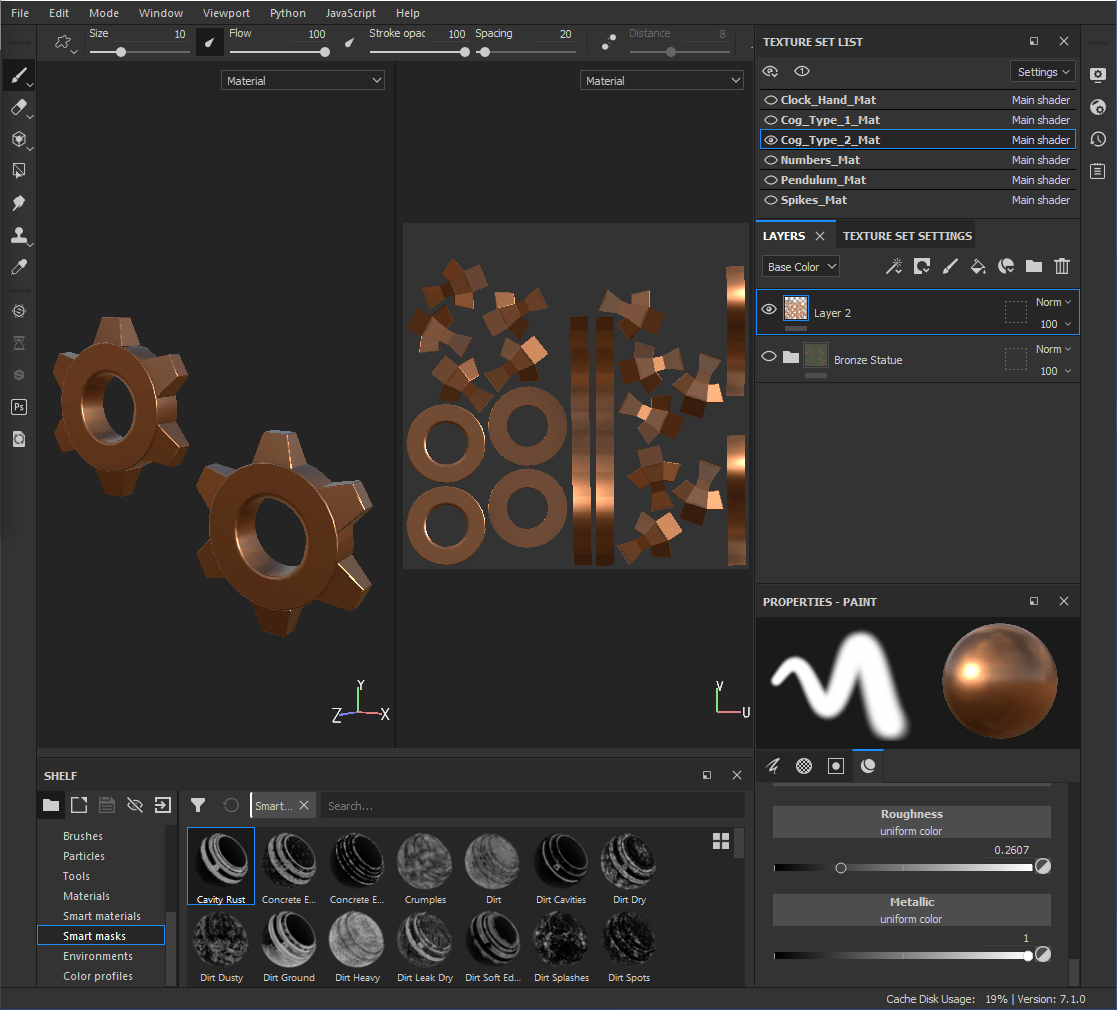
Used the smart mask ‘dirt cavities’ and lowered the opacity of the layer.

—Break—
Took a step back to look at the texturing thus far.

Liked the way that it looks but wanted to try making opposite cogs opposite colours.
Selected the layer that I wanted to use and clicked ‘add mask with colour selection’.

Selected all the colours and repeated for the other layer.

Repeated the same process for the other cog.


I like it better this way.

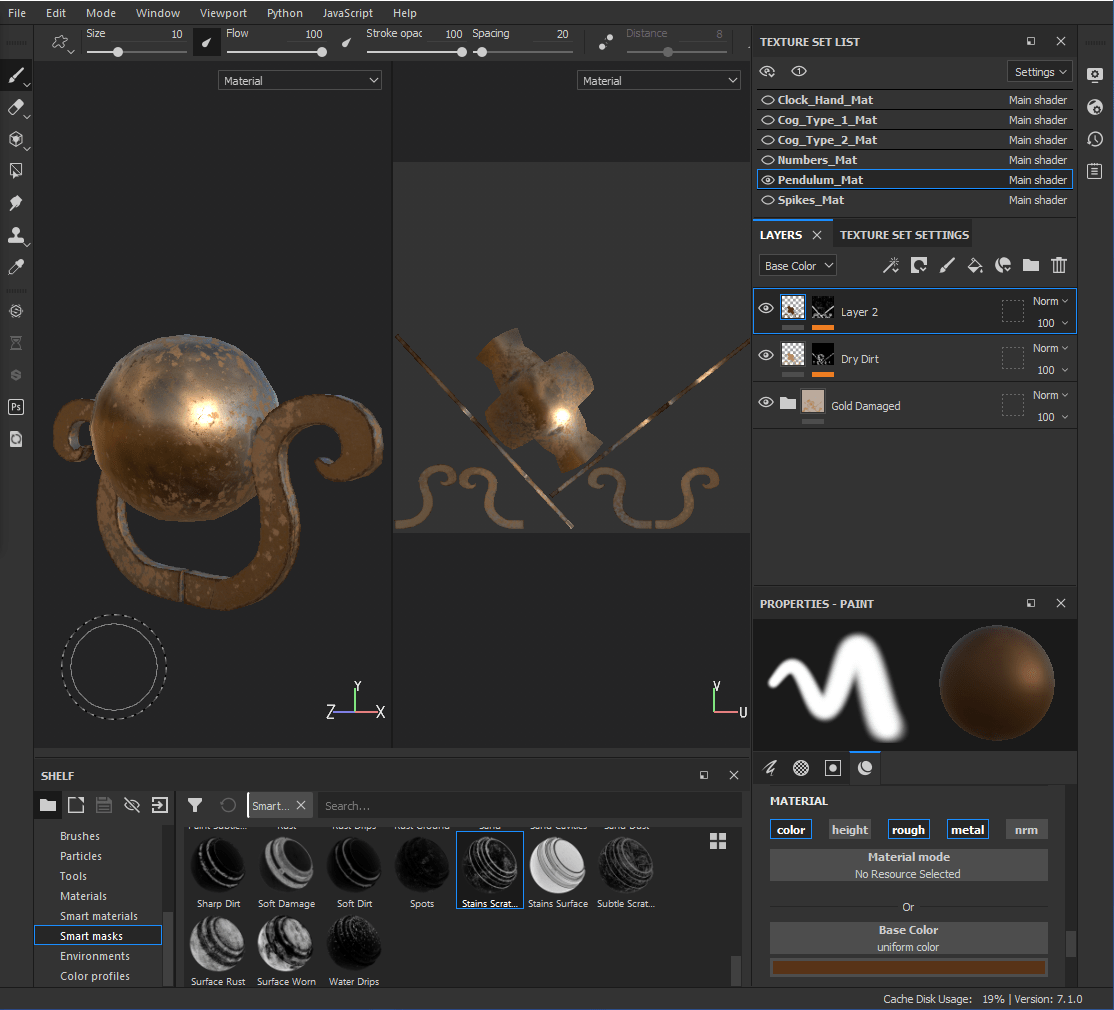
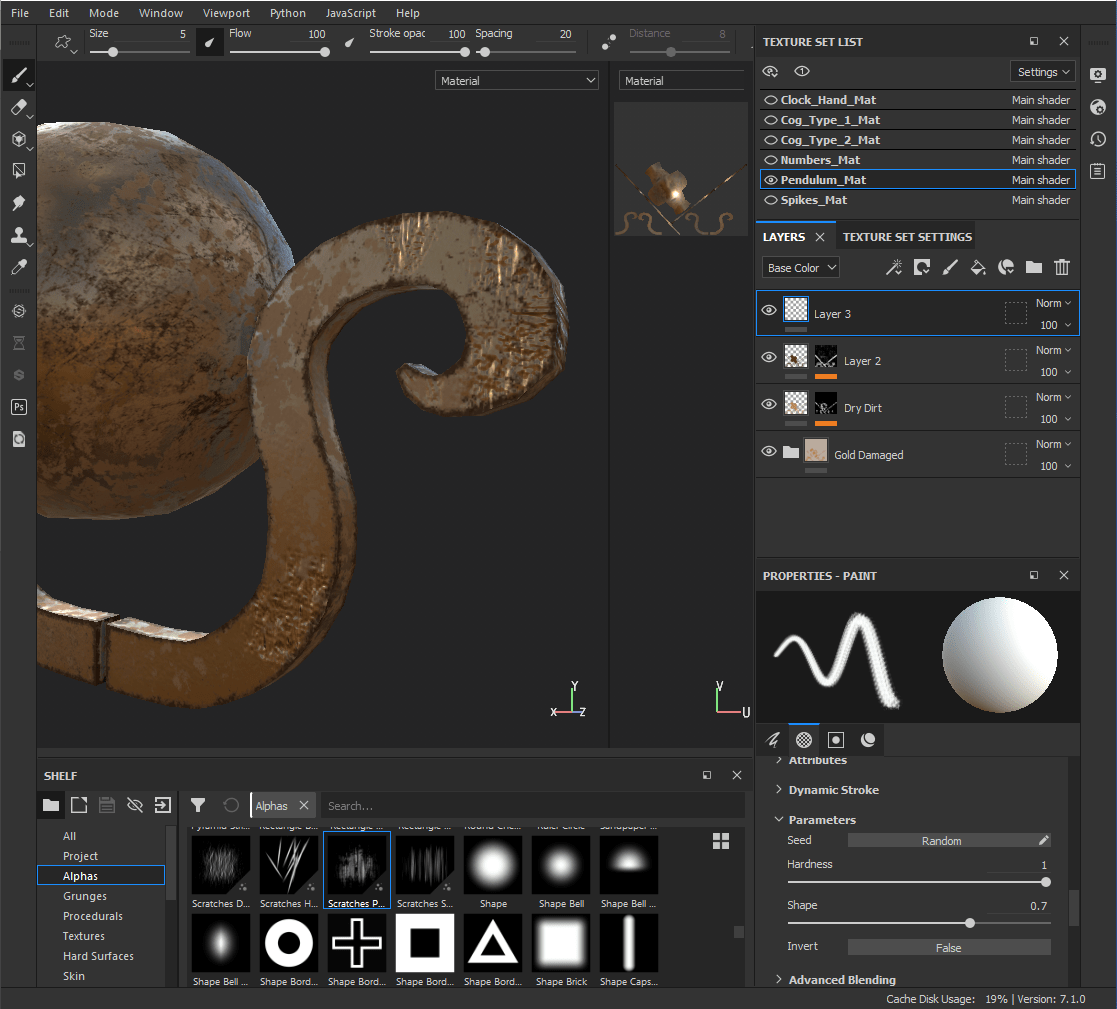
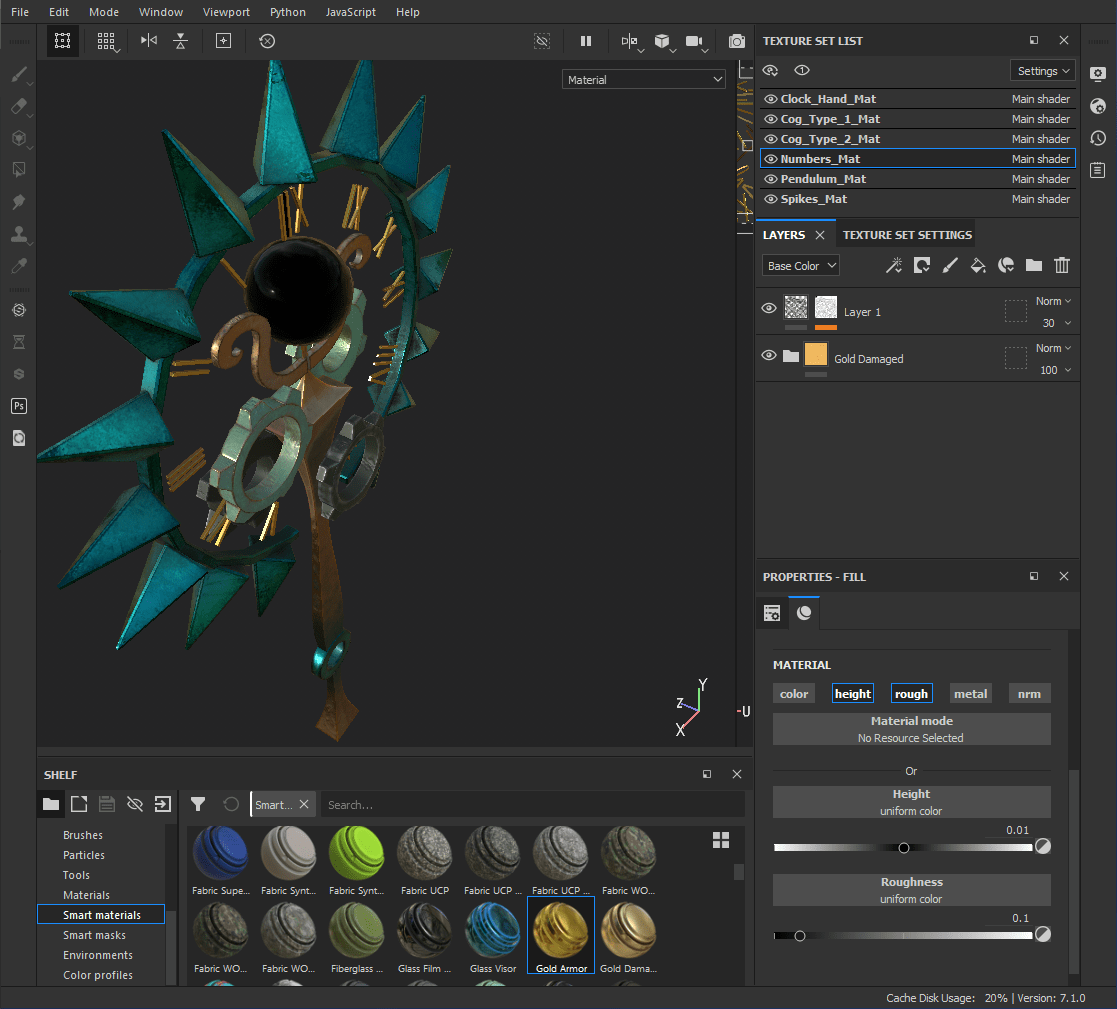
—Pendulum—
Added the smart material ‘gold damaged’ and used the smart mask ‘dirt dry’.

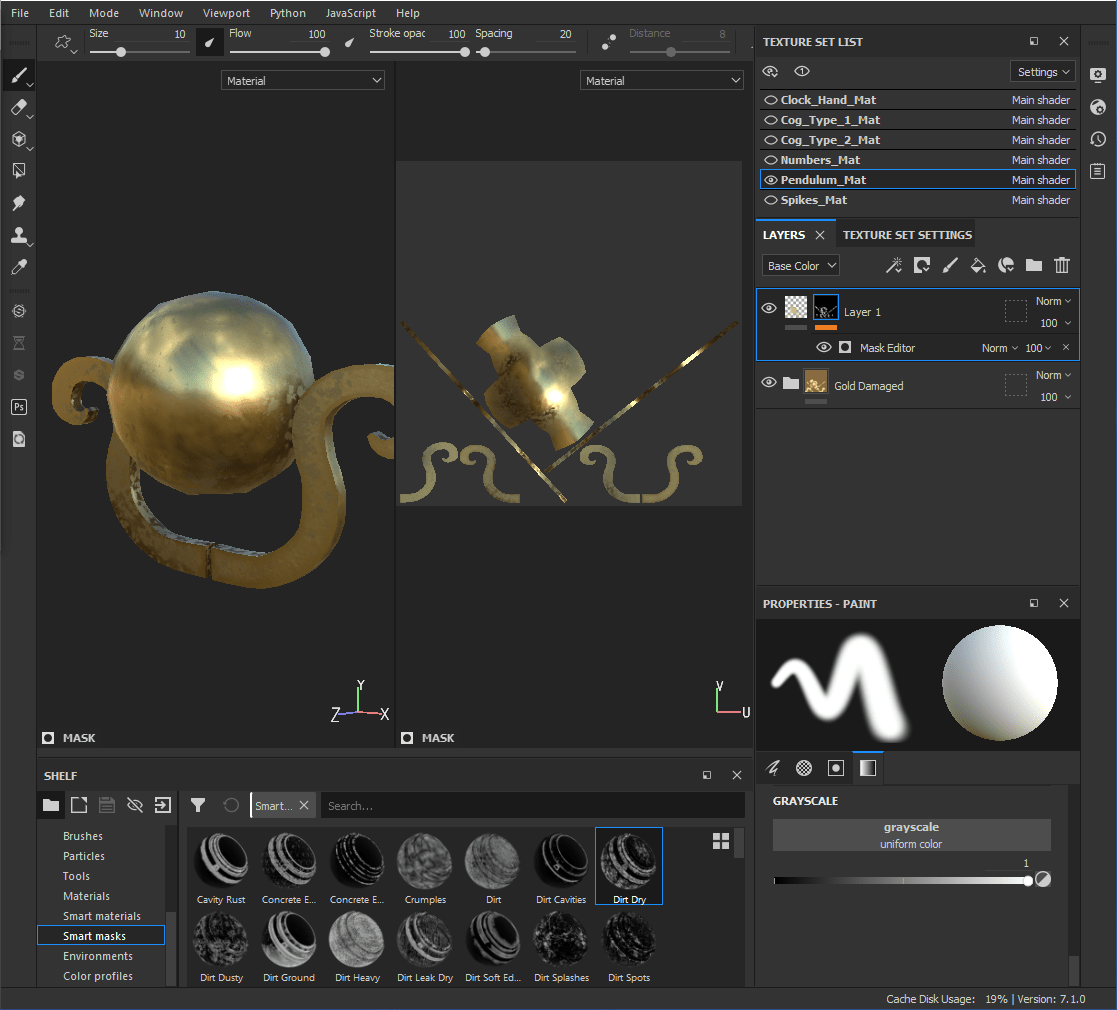
Selected the supports of the pendulum with a ‘colour select mask’ and added the smart mask ‘stains scratches’.


Adjusted the colour of the layers.
—Spikes—
Used the smart material ‘glass film dirty mirror’.

Added the smart mask ‘edges scratched’.

Adjusted the colour of the smart material.

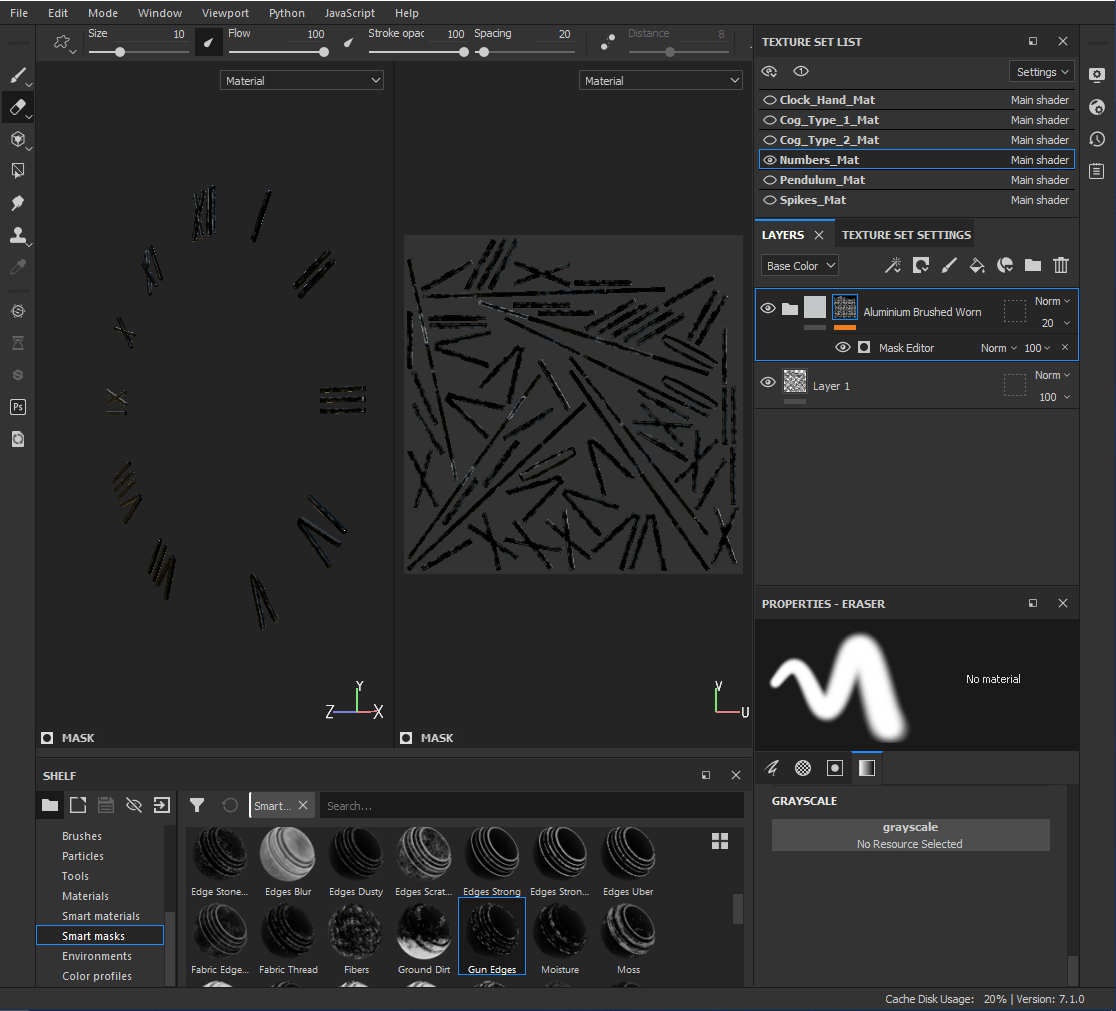
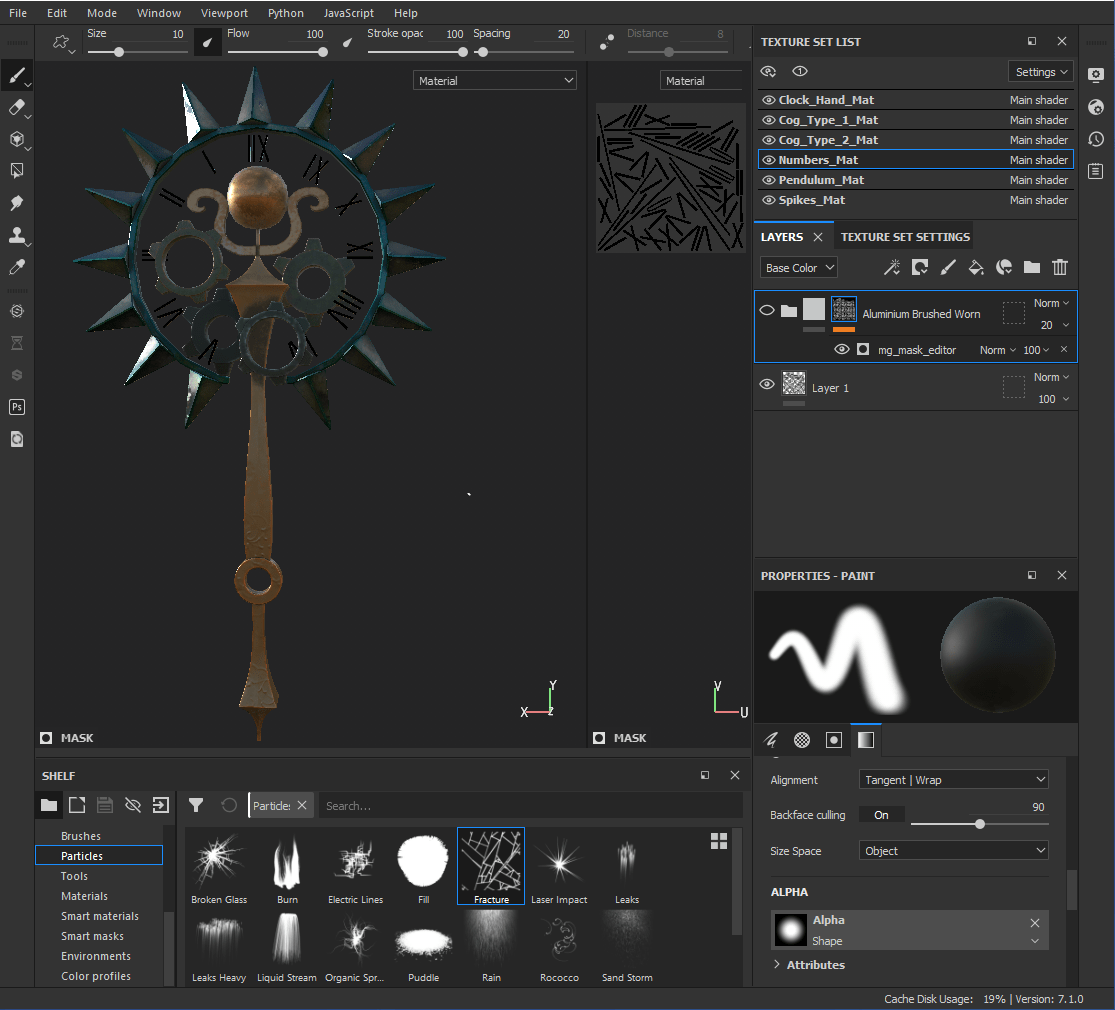
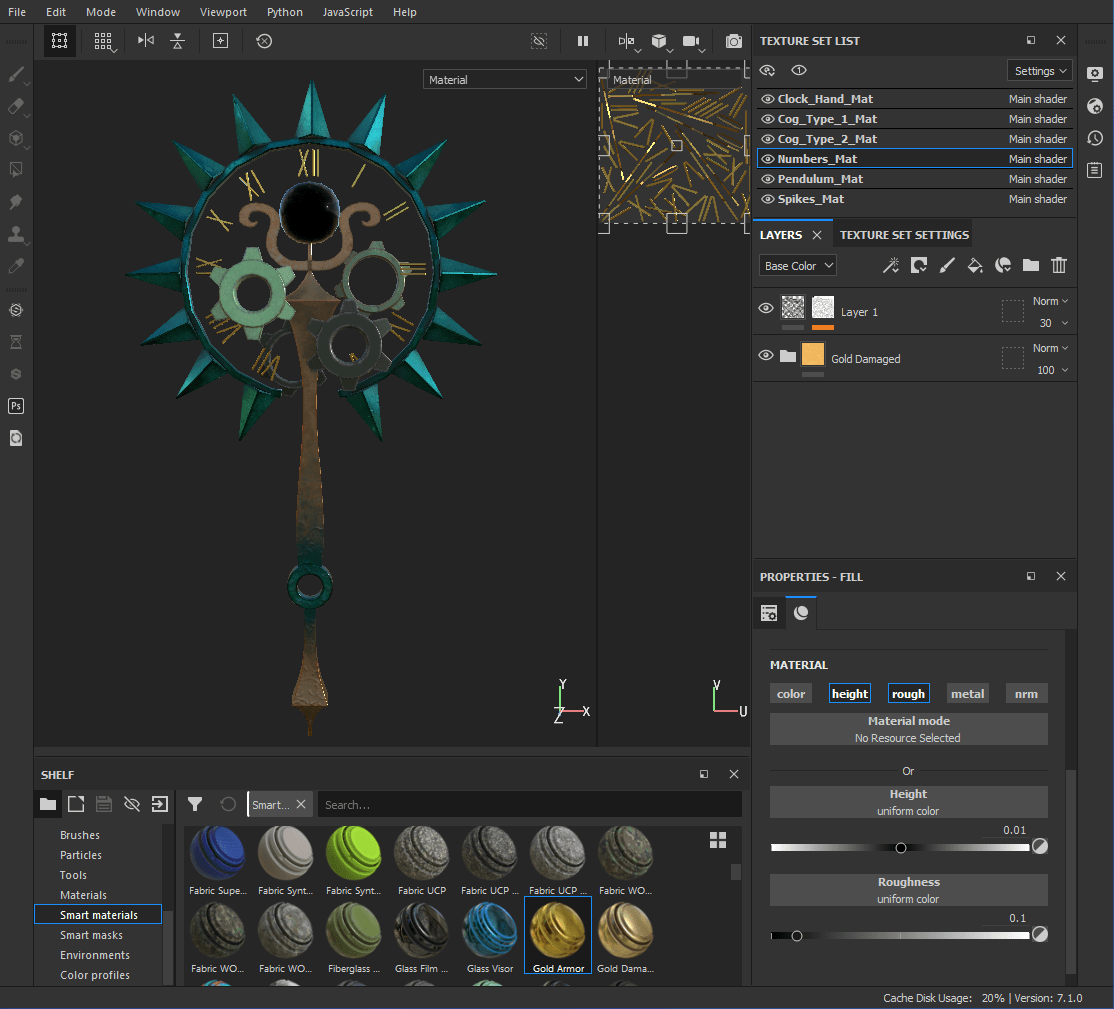
—Numbers—
Created a custom colour for the numbers.

Used the smart material ‘gun edges’ and adjusted the opacity of the layer.
—Tweaking—
Before tweaking.

Used the alpha ‘scratches partial’ to add wear to the wand. [36 – 37] [38 – 39] [40 – 41] [42 – 43] [44 – 45]


—Colour Schemes—
I wasn’t overly pleased with the colours of the overall wand so I adjusted the colours of the materials that I already used.
– Colour Scheme 1
– Colour Scheme 2

– Colour Scheme 3
I liked colour scheme 3 the best!
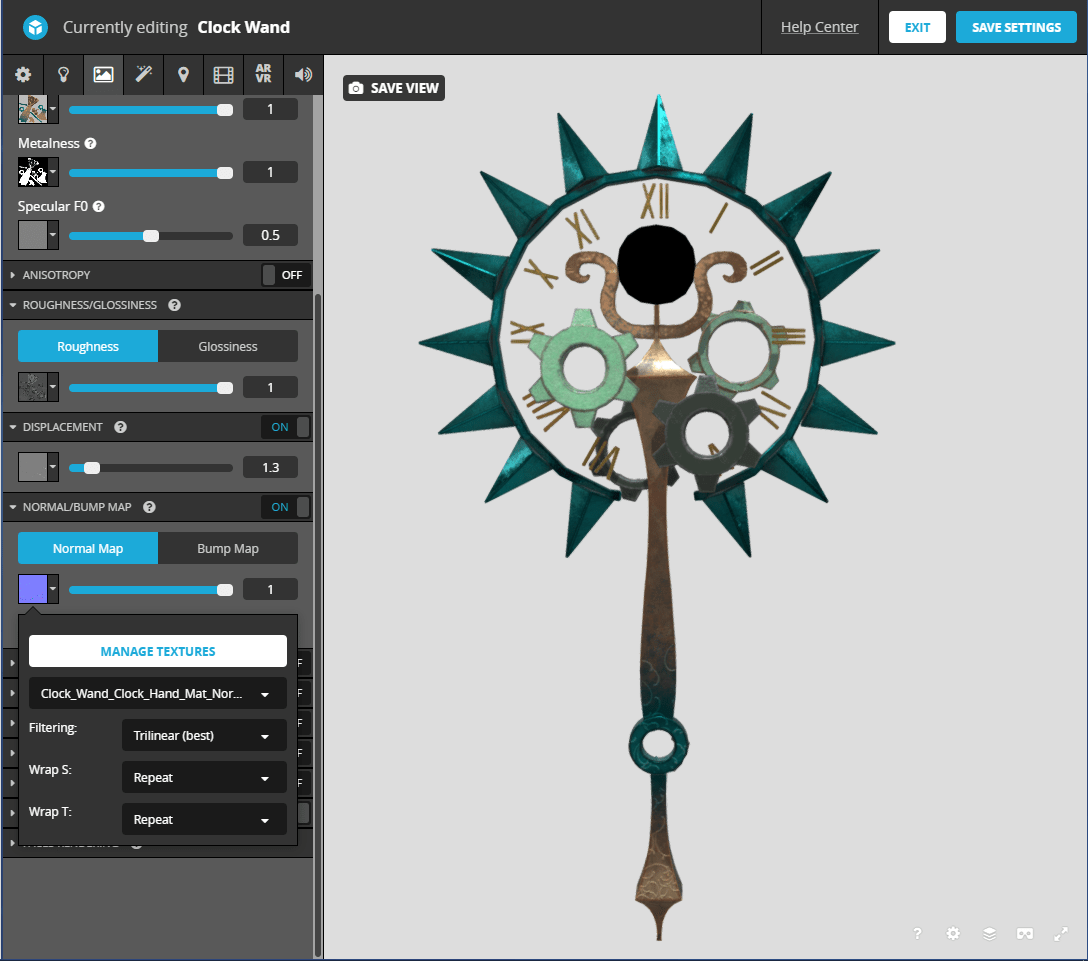
—Final Wand—
I really like how the wand looks.


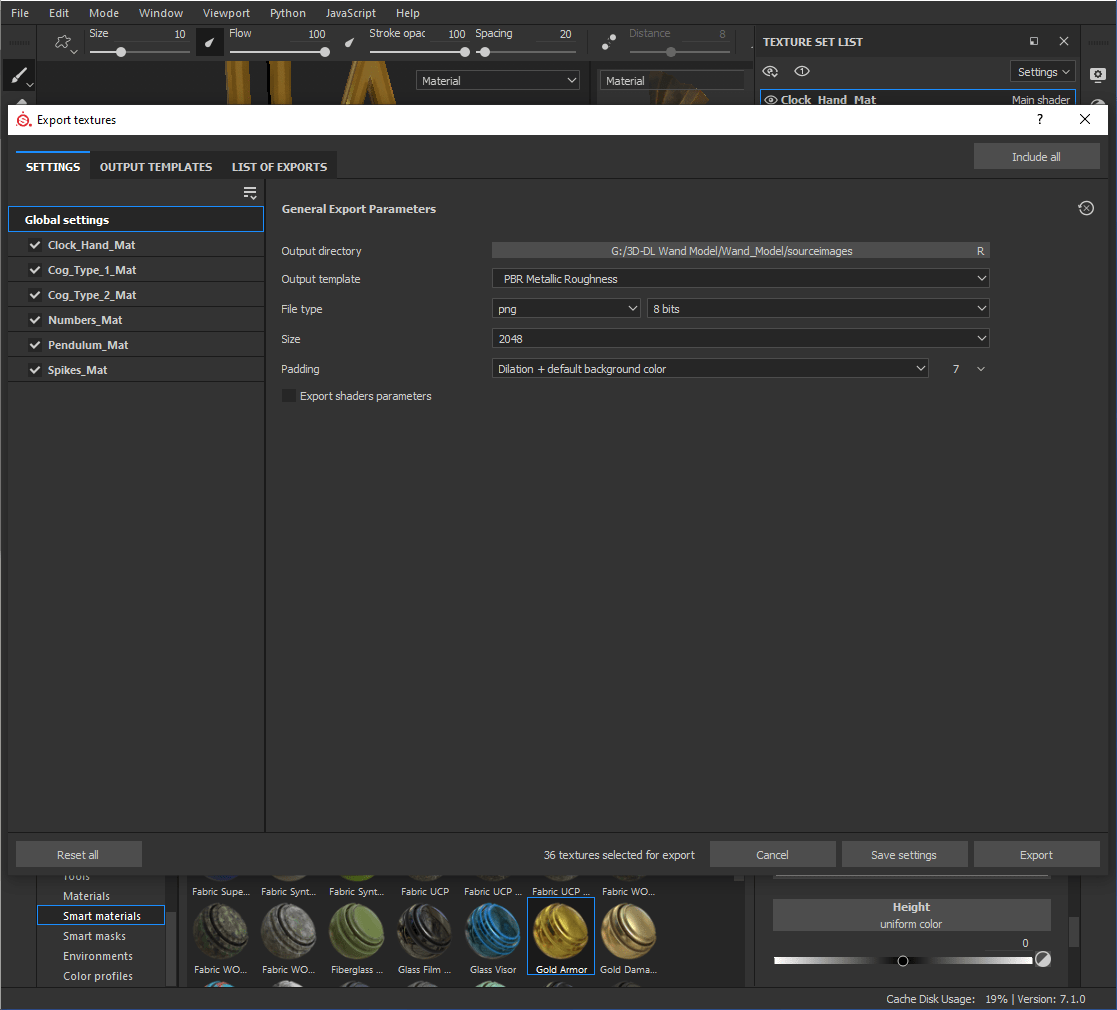
—Exporting from Sketchfab—
Go to ‘file -> Export Textures’ and adjust the settings.

____________________________________________________________________________________________________________________________
—Rendering the Wand—
—Uploading onto Sketchfab—
Uploaded the FBX file of my model on to Sketchfab.


—Adding Textures—
-Materials Tab-
Click onto the ‘materials’ tab and select what UV map that I wanted to upload the texture of.

Click on the ‘base colour’ box, ‘texture’ and click ‘import textures’.

Repeated the same process for the other Texture maps.


Repeated the same process for the other sections of the model.
– Pendulum
– Numbers

– Cog Type 2

– Cog Type 1

– Clock Hand
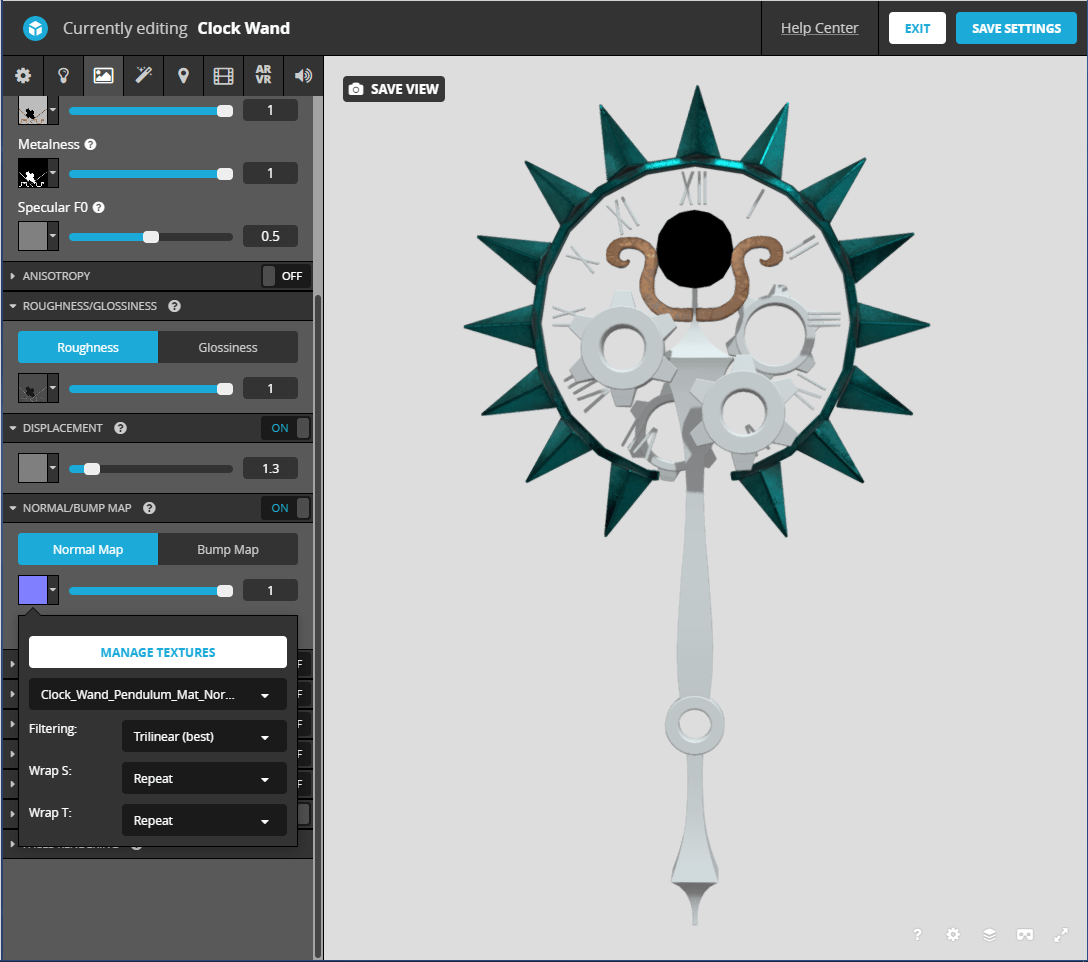
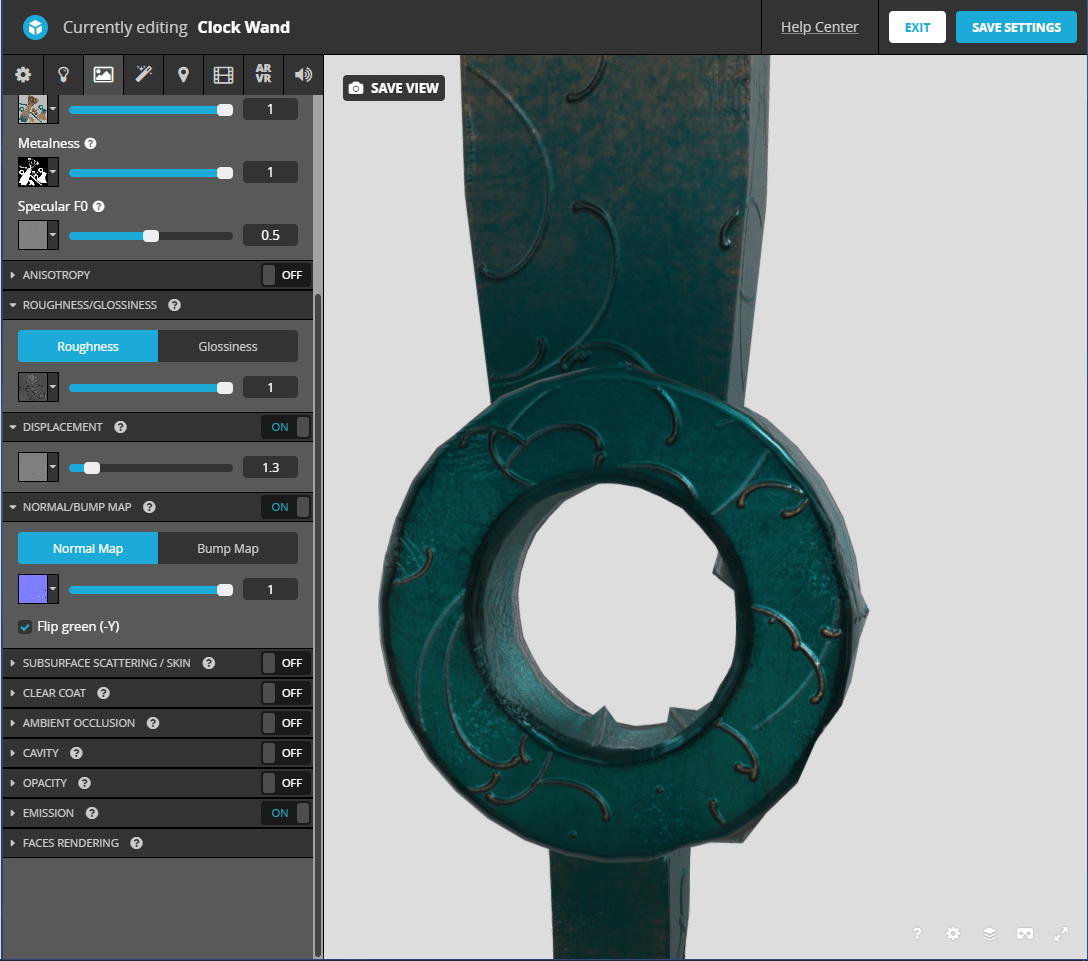
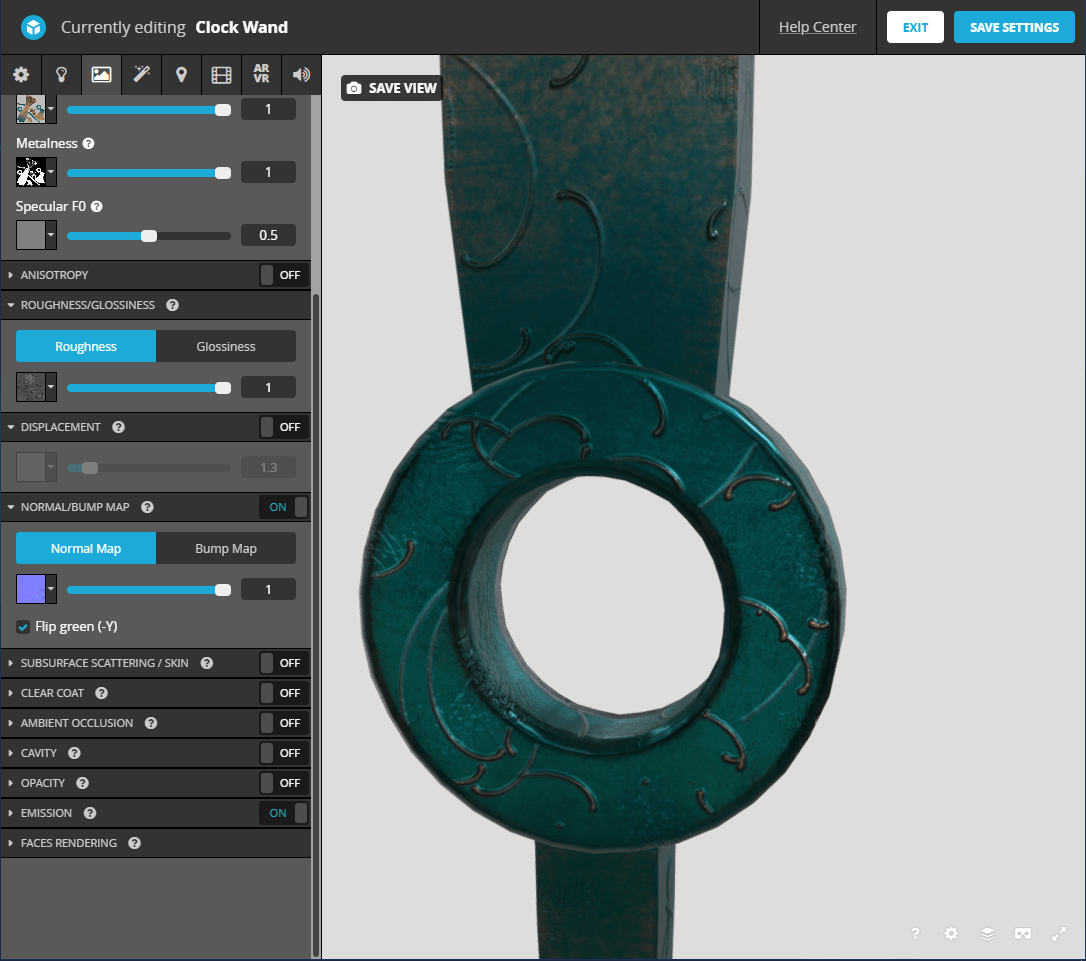
Discovered that the displacement map was causing a bit of warping to the model, so I turned it off.
—Adjustments—
-Lighting Tab-
Clicked on the ‘lighting’ tab and adjusted the settings.
– Added directional lighting.

– Ground shadows.

– Changed the environment to ‘Tokyo Big Sight’.

-Post Processing Filters Tab-
Clicked on the ‘Post Processing Filters’ tab and adjusted the settings.
– Added ‘sharpness’.

– Added ‘vignette’.

– Added ‘bloom’.

– Added ‘screen space reflection’.
-Scene Tab-
Clicked on the ‘Scene’ tab and adjusted the settings.
– clicked on the ‘background’ menu, turned off ‘ambient environment’ and clicked on ‘blur -> 3’.

—Tweaking—
Made some final adjustments.


—Daryl’s Feedback—
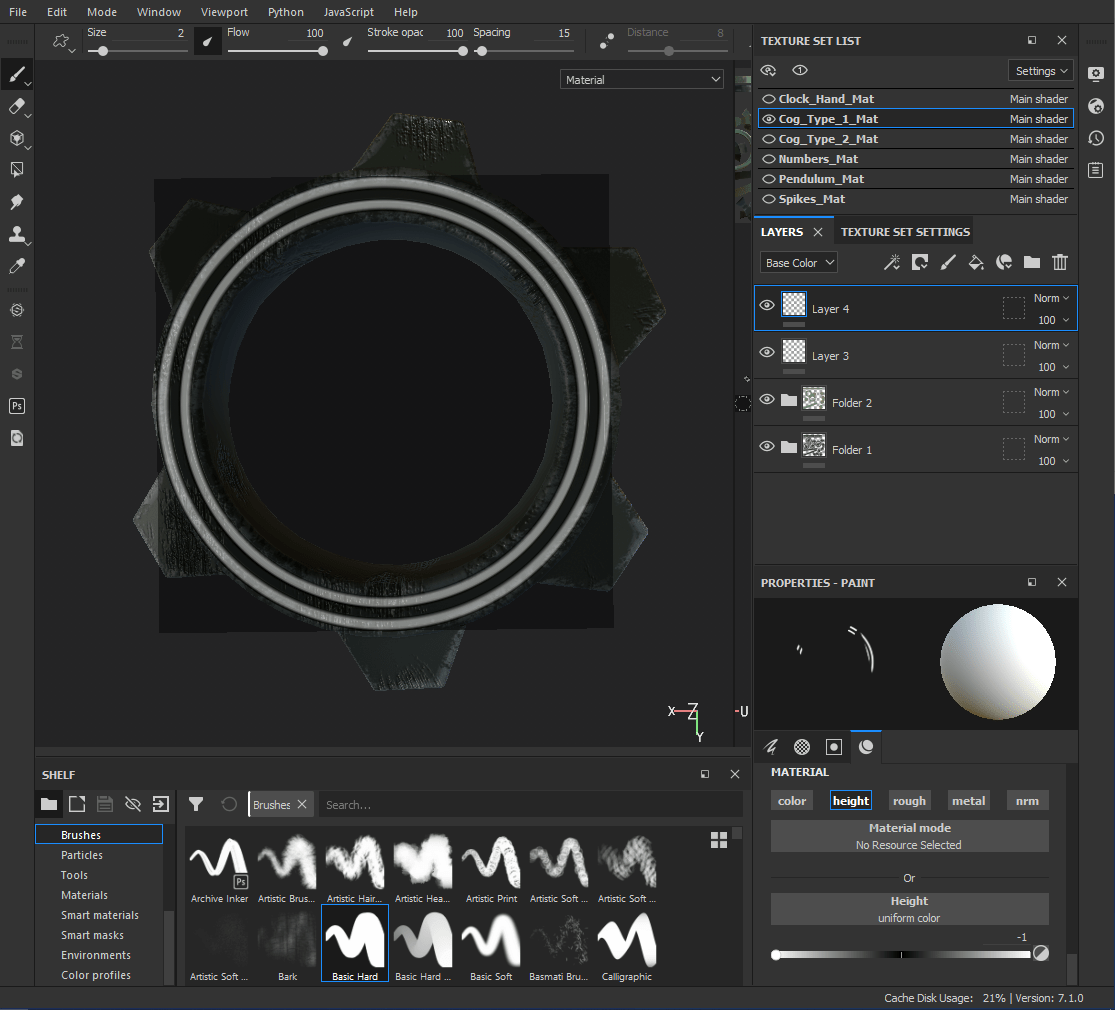
Had a meeting with Daryl on the 3rd of March. He reviewed my model and gave me the great idea to add more detail to the cogs using stencils and height maps.


—Sketchfab—
Uploaded my model onto Sketchfab.
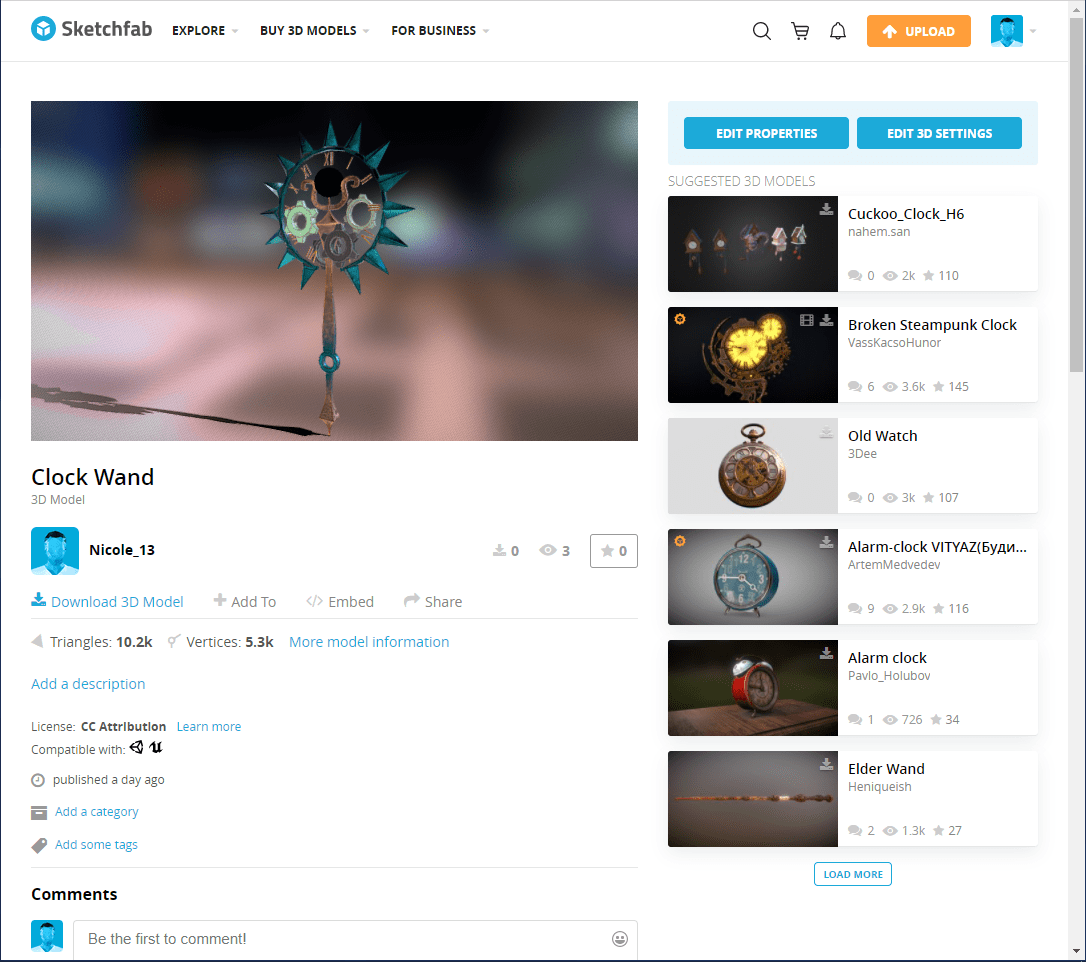


Sketchfab Link:
____________________________________________________________________________________________________________________________
—Reflection—
At the start of the year I had no experience with Maya and wasn’t sure how to use it correctly but due to the weekly modeling challenges and video tutorials that were put up on Blackboard I learned the basics and felt much more confident in using the system and my modeling skills.
Picking the theme of the wand was easy for me as I love the style of Steampunk. It was interesting to look at wand designs from other people and see what they did.
I really enjoyed designing the wand as I had plenty of ideas. The designs varied in complexity from a modeling standpoint and since I was a beginner modeler with limited experience I chose to avoid my designs that included faces as I wasn’t sure how to even approach a face.
After I picked the design that I liked the best I made a 3D turnaround of the design. This came in really handy in the modeling process as I didn’t have to guess any of the thicknesses of the pieces and knew how the wand was layered.
At first, I felt a bit overwhelmed by the modelling stage but once I did the first part of my wand I realised that it was the same process as making the vase or the table from the weekly modeling challenges.
After this realisation the modelling became a lot less intimidating and a lot more fun as I got to try some new techniques and see my 2D design become 3D, piece by piece. It wasn’t entirely smooth sailing though as I ran into some problems; for example, the roman numerals, I went through quite a few changes in how I made them but i like how they came out in the end. It was interesting when problems came up as I had to research how to fix them, ask the rest of the class for help or refer back to previous tutorials.
I found the UV wrapping of the model to be one of the easiest processes for me, I think it is because I sew in my free time. The hardest part was finding the best places to put the seams so that they wouldn’t be too noticeable when texturing the model.
I assigned different materials to different parts of the model so that the texturing process would be easier but after my meeting with Michael I learned that it’s better practice to keep all the maps together.
I found the texturing process to be fun especially when I made parts of my model metallic and worn looking. I really liked adding the ‘smart masks’ to parts of my model as it added extra details and made some parts look more like the way that I wanted them. I really liked how all the parts were looking separately but when I looked at it all together I didn’t like it as much so I altered the colour scheme a few times and really liked the last one.
During the designing stage of the wand I should have experimented with some colour schemes as it probably would have saved me some time when texturing so I will be doing that next time I design a model.
The rendering of the model was easy enough but it took quite a long time to import all the texture image files and put them in the correct places. I will definitely be taking Michael’s advice on keeping all the texture maps as one instead of separating them. I had a lot of fun choosing the background and adding different lighting positions and effects.
Overall I believe this assessment went quite well. I enjoyed learning, exploring and experimenting at each different stage of the process with my designs and how I created them.