Intro:
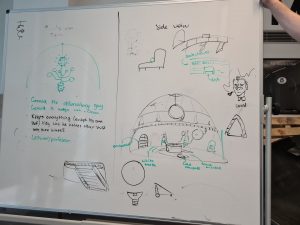
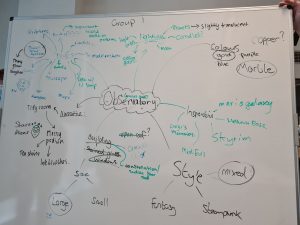
When I first found out what this assignment was I was very excited, as its the exact area I’m interested in. I had also been practicing creating environments in unreal engine 5 using quixel so I already had some experience with the software and task. Once we had split up into our groups, we started thinking of different concepts and styles for how to observatory would look. We put all of our ideas on a whiteboard. After we had settled on designs and style we decided to create a list of all the assets we would need for the environment and delegate them between us. This would then be put into a spreadsheet so we could keep track of our progress. After we settled on an art style, I started working on some concept art on how my assets would look.


Draft Models:
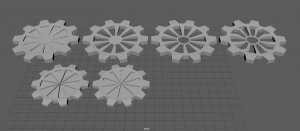
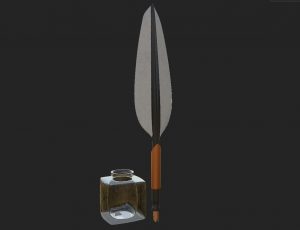
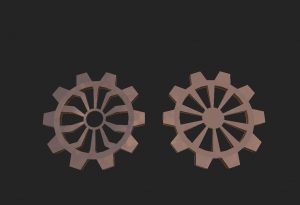
Once I had an idea of how I wanted my assets to look, I began modelling. All of the props were created in Maya except from the candle, which was sculpted in blender. I decided to sculpt to candle in blender so I would be able to achieve a better look and shape. This was straight forward and once the candle was done I imported it to Maya to retopologize it. This is where I ran into a problem. When ever I tried to do anything within the Maya scene like scaling or even opening the project, it would take a very long time to load. I first thought it was because the mesh was high poly but my computer has been able to handle much higher poly meshes in the past. After some time I realised it was the objects history that was slowing the project down. Once it was deleted, it was fine again. Originally I modelled different variants of the gears. I quickly realised these would be quite time consuming to UV. So with the team we settled on two designs.


UV’s:
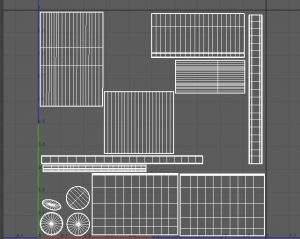
A big problem I had last year was with my UV maps. I struggled a lot to create good UV’s which resulted in my models having bad textures, as they were distorted and stretched. I spent some time over the summer creating assets and practicing my UV mapping, and I think it has paid off. My UV’s and now much more clean and straight. While practicing I found a technique that works for me. Basically I start my deleting the default UV’s then create a new one by camera. I then select the vertices where I want my seams and cut, then unfold. Usually this is the point where I struggle, but now I rotate and scale the vertices about until I create a roughly straight UV. I then use the straighten UV function and straighten shell. I then finish by completing the layout. I’m actually quite proud of my progress as its something that really bothered me, and asset creation is a big part of the role I’m looking into. Once the UV were finished the next step was to import them into substance painter and add some smart materials. I didn’t want to do anything to crazy with it as I’m still quite new at Substance, but I still think they turned out nicely.
Below is an example of my old UV’s, and beside it is an example from my current work.

Finished assets:


Importing to unreal:
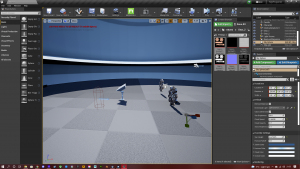
Once all of my assets were finished, I created a new unreal project and started importing both my assets and my teams. My next step was to scale all of the props to the right size. After I got them all to roughly the right scale it was time to add all of the textures. Once All of the textures had been setup it was time to set the layout of the scene. I wanted to differentiate my scene from the rest of the group, so I went for a slightly different layout than what we had planned. I placed all of the smaller assets together on one side of the room to emphasise this is where someone had been working and studying. Bookshelf’s are placed around the room to help break it up a little. Then the main asset is placed directly in the middle of the room. Once everything was setup, it was time to do post processing and render.

Post processing and rendering:
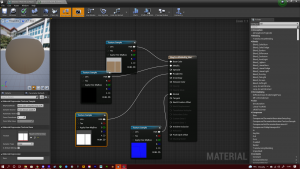
So I knew I wanted to have the scene take place at night. I began by searching for a HDRI night time picture and using that for my sky. Then I added a post process volume and change the max brightness to 7.0 and minimum to 5.9. I had to make the scene darker than how I actually wanted cause a render test show that it was turning out slightly brighter than the actual scene. I had already picked out royalty free music I wanted to use for the cinematic so I already have a an idea for the tone I was after. I also tried to add some flickering lights around the candles. I did this by creating a light function and used a series of nodes. I could then control the speed to my liking. Once the lighting and post processing was done I set up some cameras and played about with the depth of field and different types of shots. I referenced the music so I knew what types of shots i wanted and where to cut. I used a 21:9 aspect ratio as I feel this gives a more cinematic feel. After My shots were rendered I began editing in premiere pro. Below is the final outcome.
Cinematic:
https://drive.google.com/file/d/18x2e2UUzXX44xYrI0xdbEDlBLnoxvVpX/view?usp=sharing
Conclusion:
I really enjoyed working on this assignment, along with my team and I think I’ve made some progress in quality in certain areas of my work. However, I don’t think the final outcome is as good as it can be. Watching back I can see a lot of areas to improve upon. Such as the post processing, lighting, layout and camera work. But these point can also be improved upon over time and I will be doing so in my own personal work. Overall this assignment has helped improve my work towards the career I want to follow.