Class:
Morning class:
Left to work on the videos on Blackboard.
—Video 1: Blocking—
Shown what we will achieve by following the videos.
Ensured that the settings were correct and shown how to open the file as a reference file. This makes it less likely that the rig will break and turns the character to read only.
Blocked out the key poses and used the ‘Dope sheet’ to adjust the timing.
—Video 2: Inbetweens—
Shown how to install the ‘tweenMachine’ to Maya and how to use it and added some inbetweens to the animation.
—Video 3: Polish—
Used the ‘Graph editor’ to further adjust the timing of the animation.
Afternoon Class:
After lunch we worked on the exercises uploaded on Blackboard.
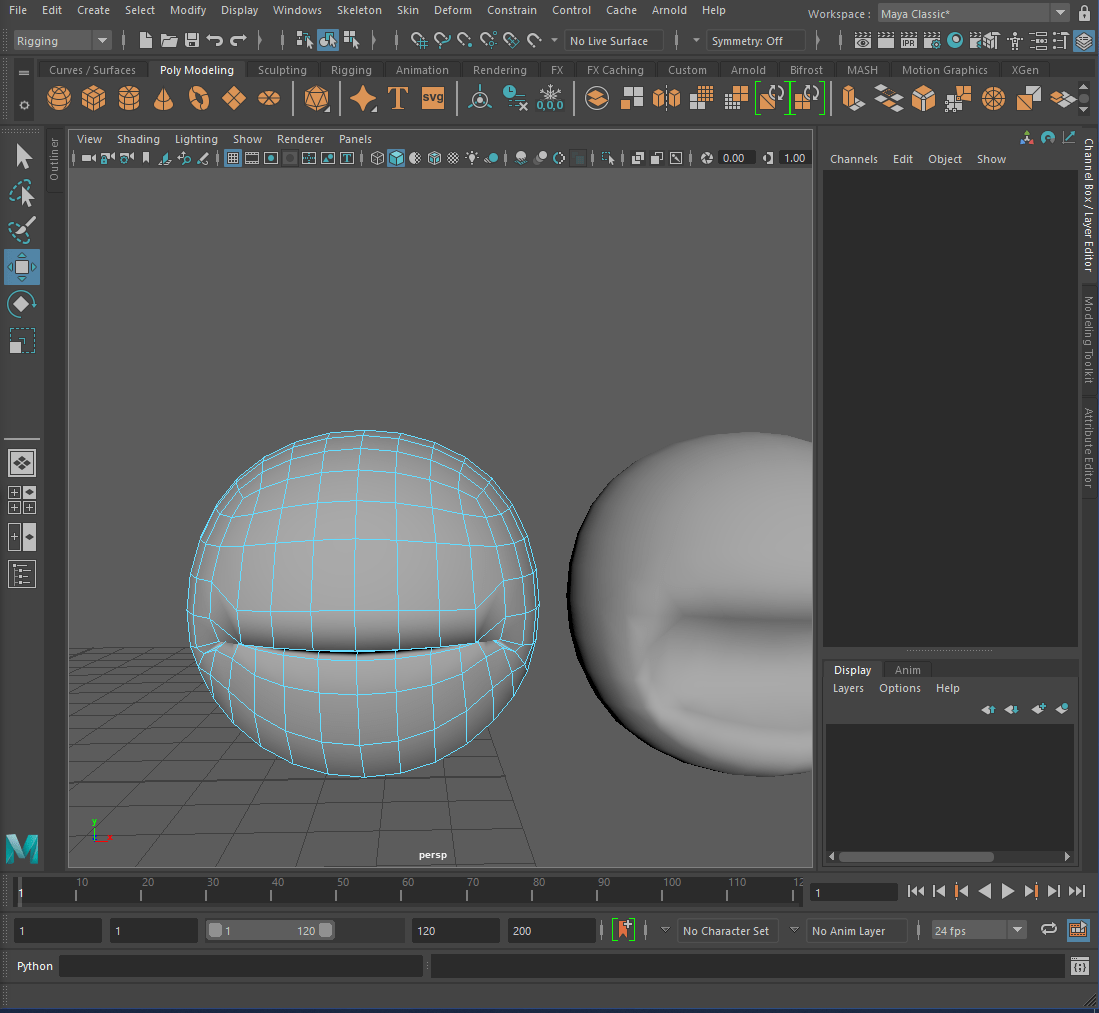
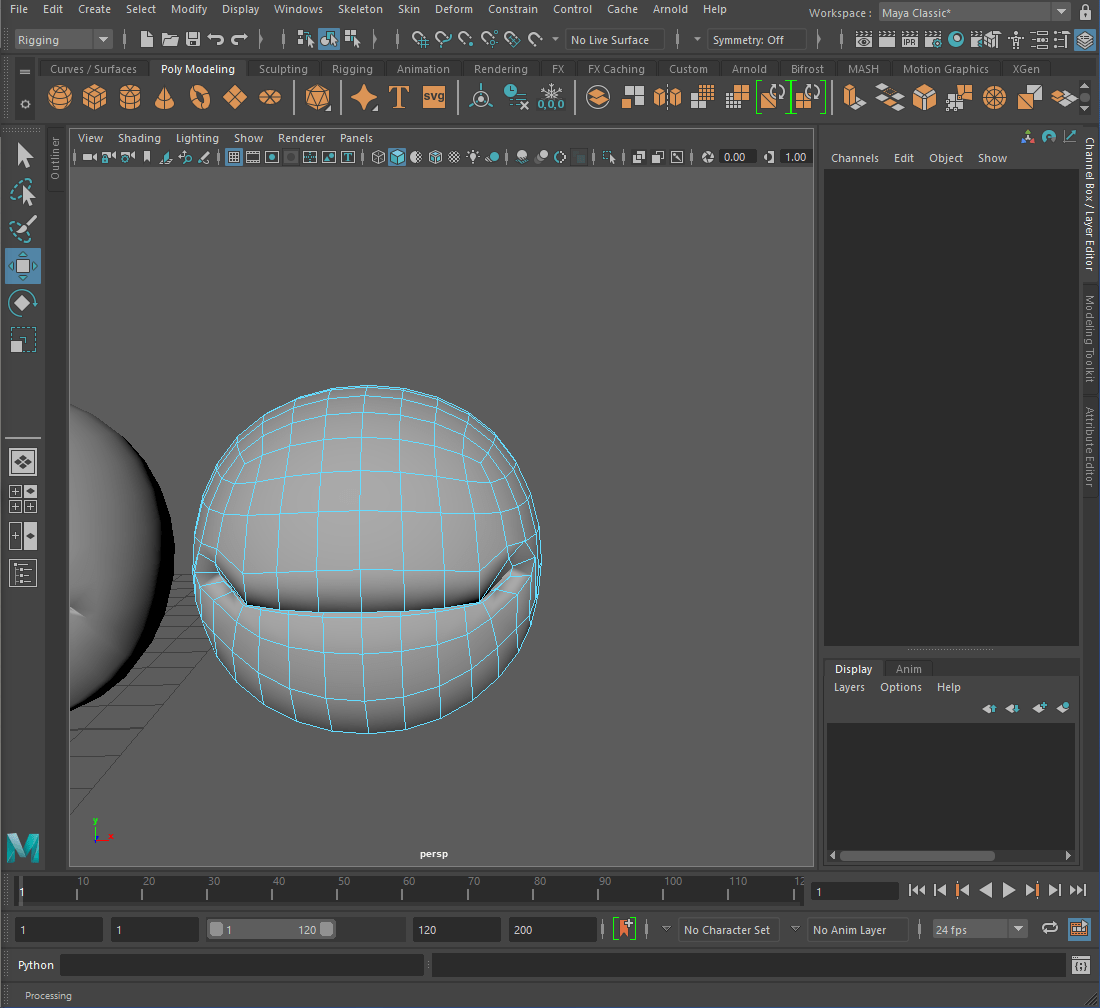
—Exercise 1: Blendshapes—
Duplicated and renamed the ‘Character’ model, switched to the ‘Rigging Tab’ and clicked ‘Deform -> Blend Shape -> Create’. Clicked ‘Windows -> Animation Editors -> Shape Editor’.
NOTE: When using ‘Blend Shape’ you cannot change the divisions or add more polygons.

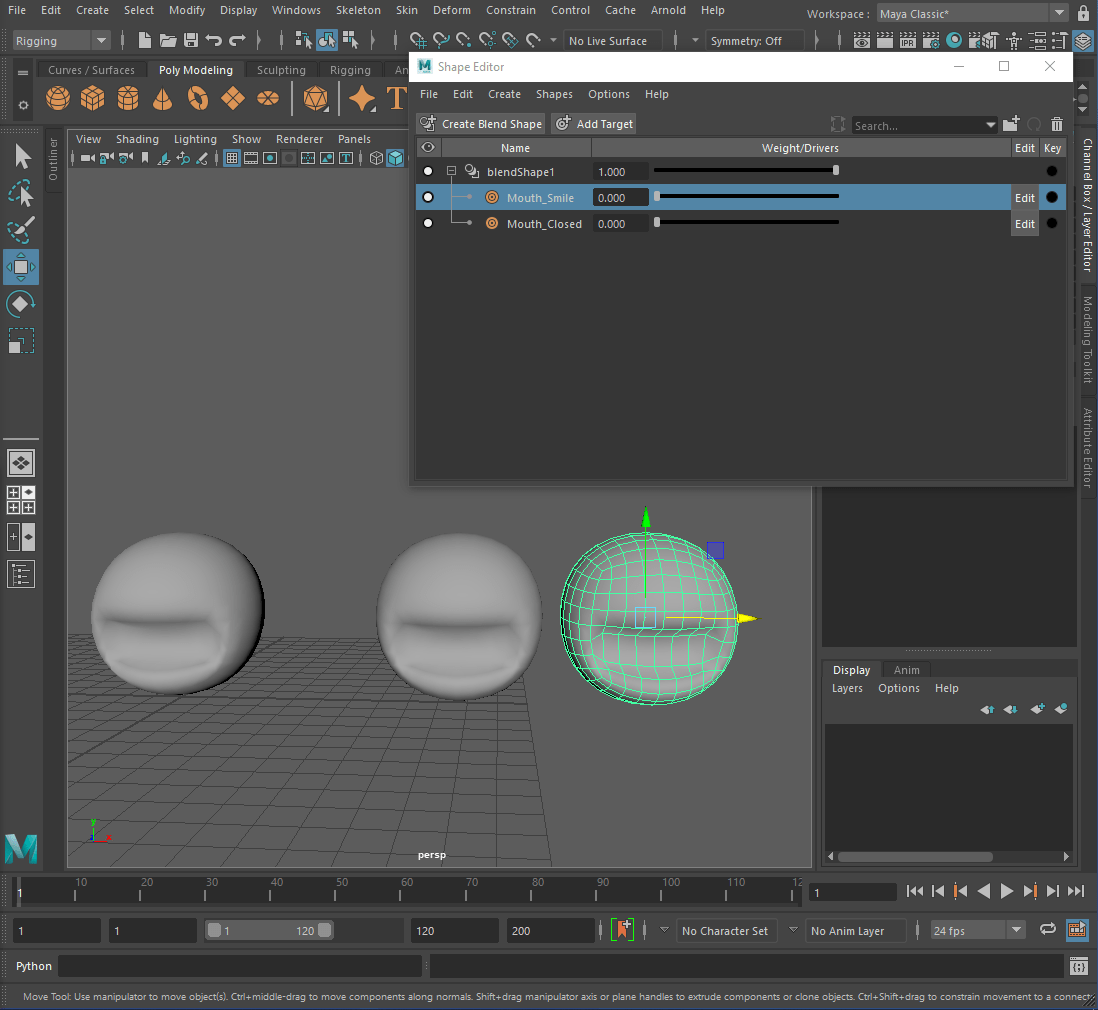
Closed the mouth by selecting faces and using the ‘Soft Selection tool’. (B + Middle Mouse) Repeated the same process for the ‘Mouth_Smile’.
Added a ‘NURBS Circle’ and some attributes for the mouth. ‘Character-> Edit-> Add Attribute’.


Switched to the ‘Animation Tab’, clicked ‘Key-> Set Driven Key-> Set’. Clicked ‘Select by Name’ and pasted in the blend shape name. Clicked ‘Load Driven’ on the ‘Set Driven Key Menu’, selected ‘Mouth_Smile’ from the menu and clicked ‘Key’. Changed the value of ‘Mouth_Smile’ to 10 and under ‘blendShape1’ changed the value to 1 and clicked ‘Key’.


Repeated the same process for the ‘Mouth_Closed’.

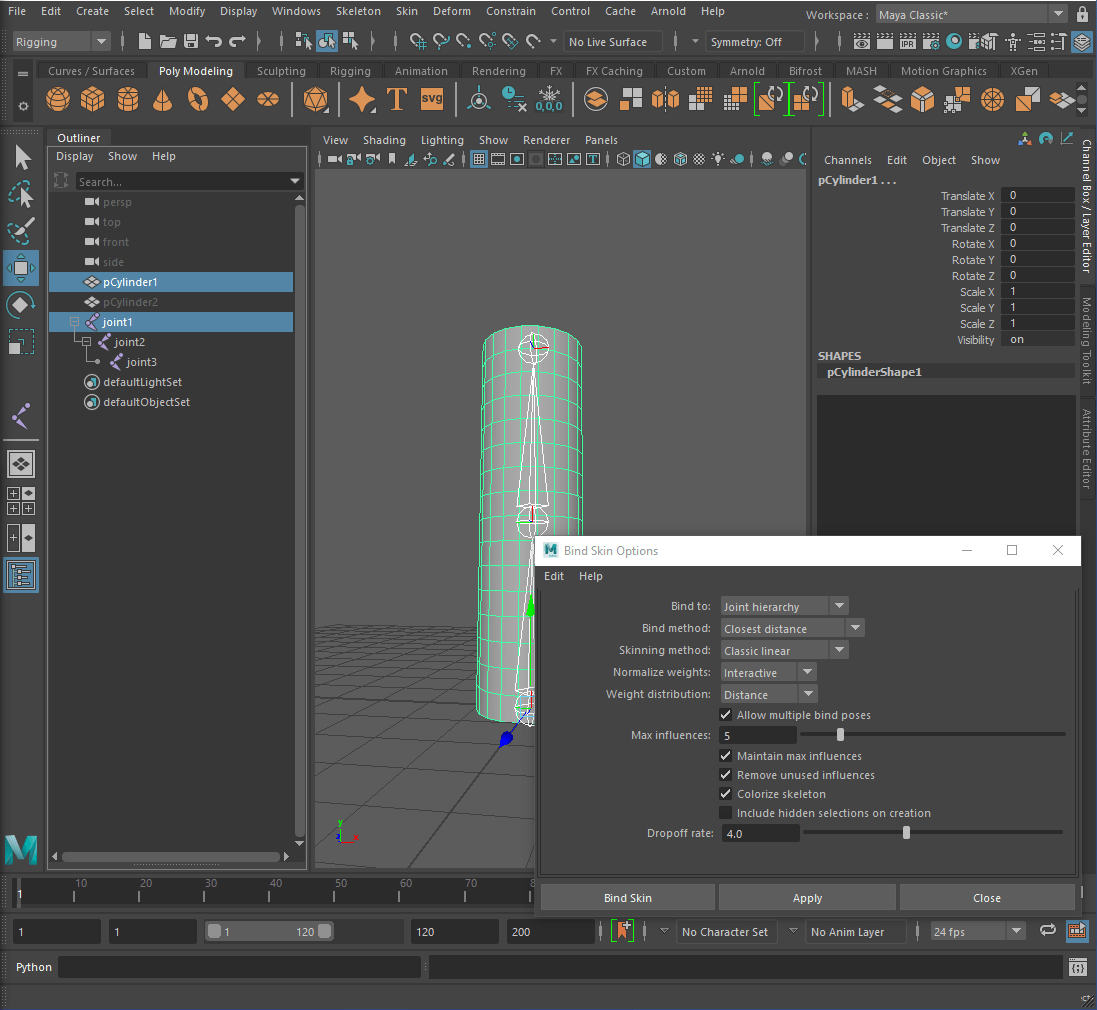
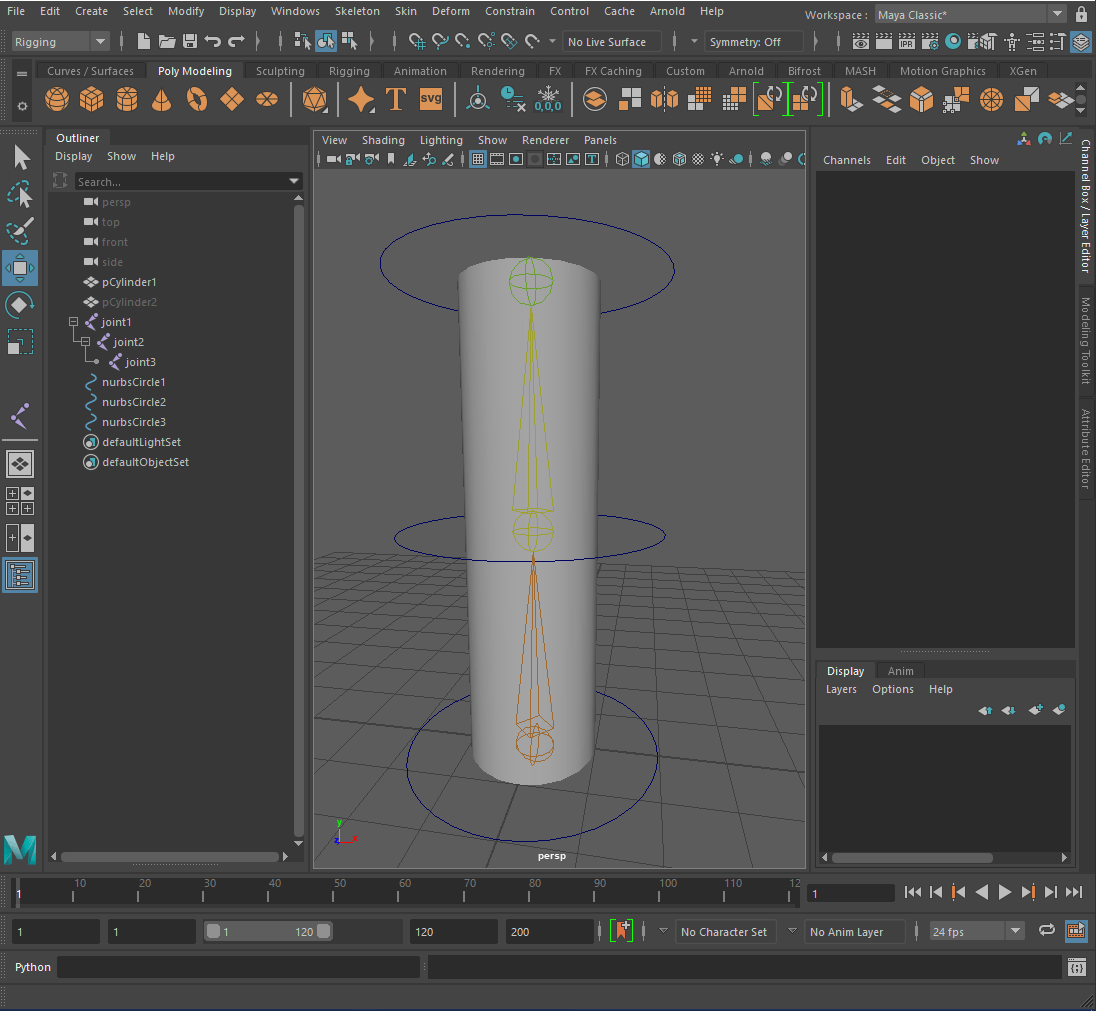
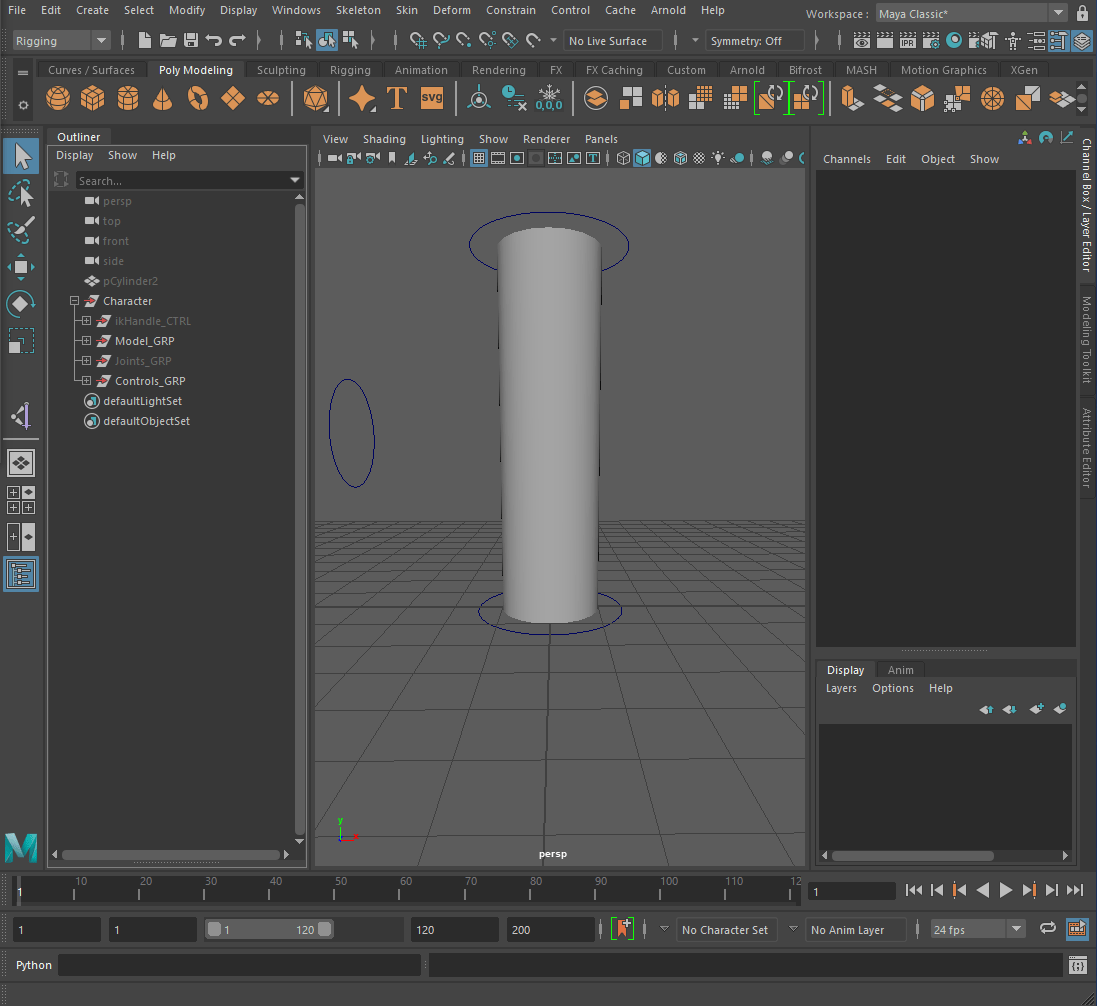
—Exercise 2:Rigging With Joints—
Turned on ‘Shading-> X-Ray Joints’, switched to the ‘Rigging Tab’ and switched to the ‘front -Z’ view. Clicked ‘Skelton-> Create Joints’ and placed one at the bottom. Holding ‘Shift + Left Click’ allows you to place joints in a straight line. Clicking ‘Enter’ stops creating more joints.
NOTE: NEVER rotate your joints if you want to move them, use the translate tool instead.


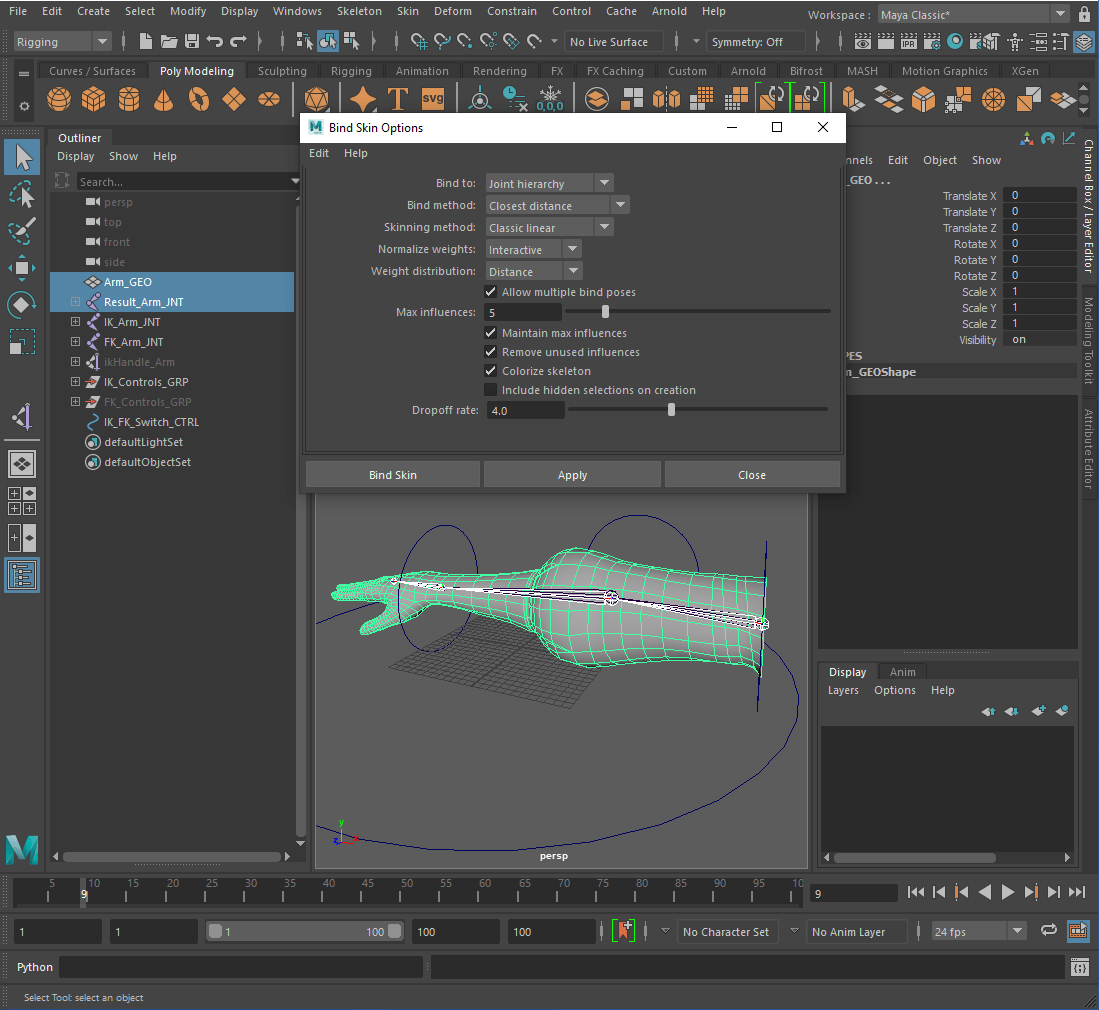
‘D’ allows you to move the joint more independently. Selected ‘joint1’ then ‘pCylinder1’, clicked ‘Skin-> Bind Skin’ and clicked the ‘Bind Skin’ button.

Added some ‘NURBS Circles’ to the joints. Parent and renamed the Control Curves and joints.
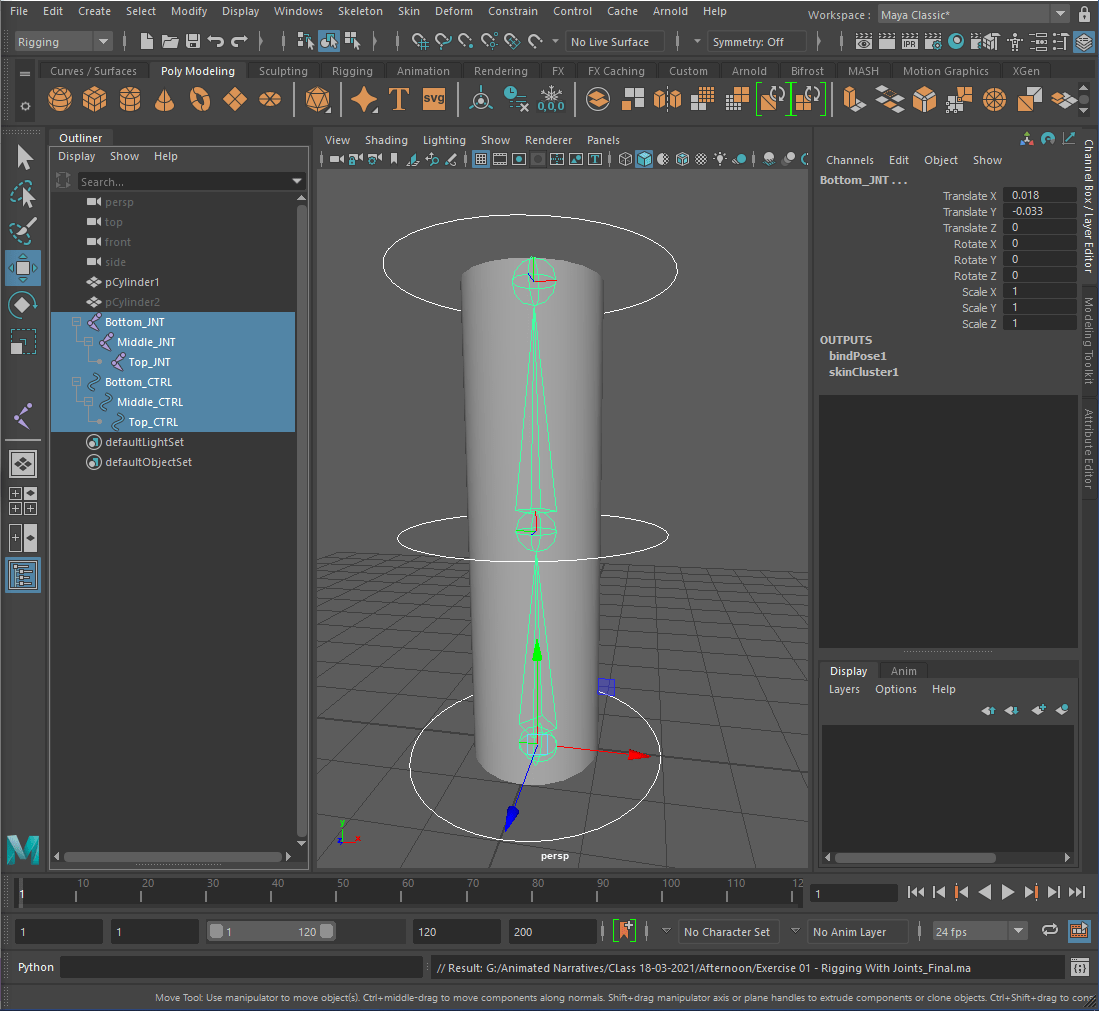
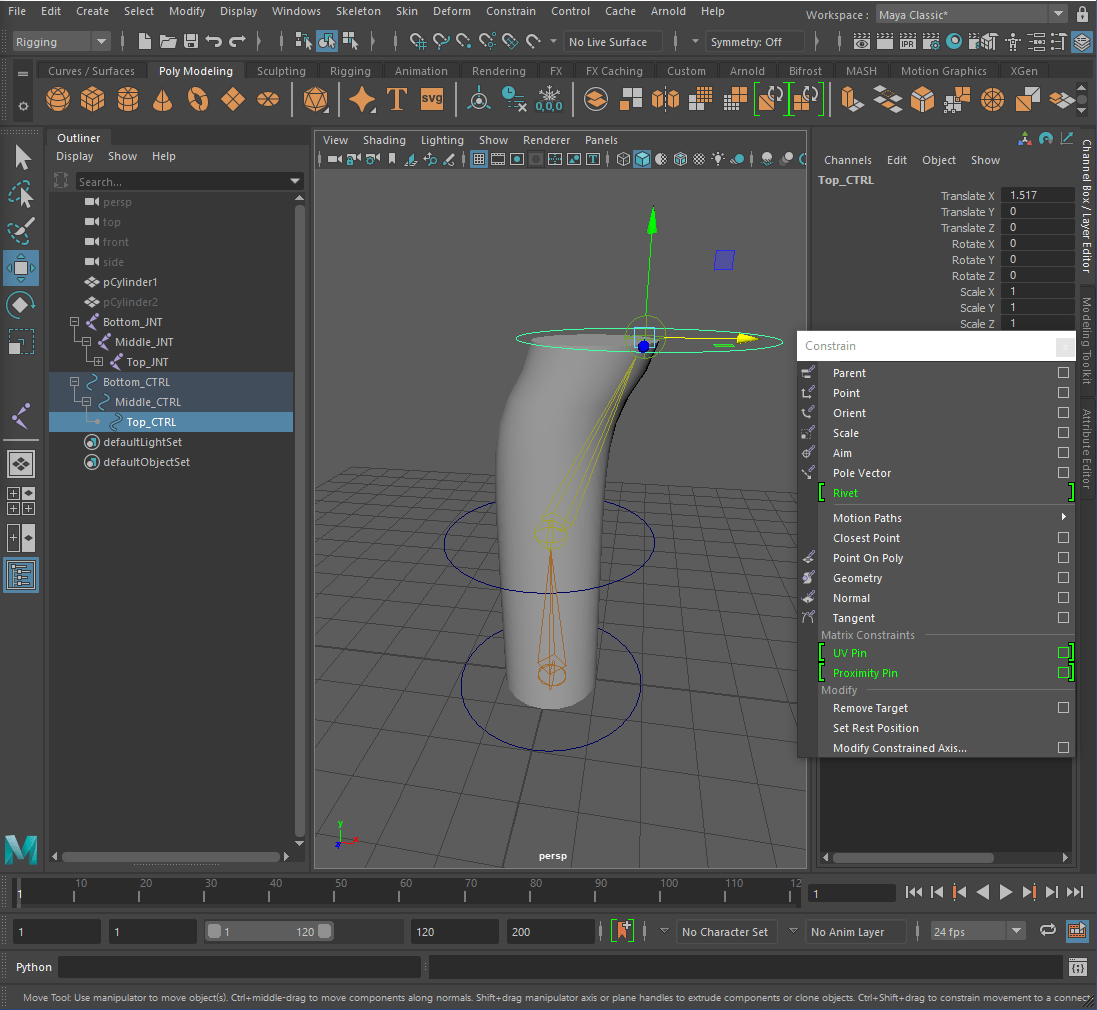
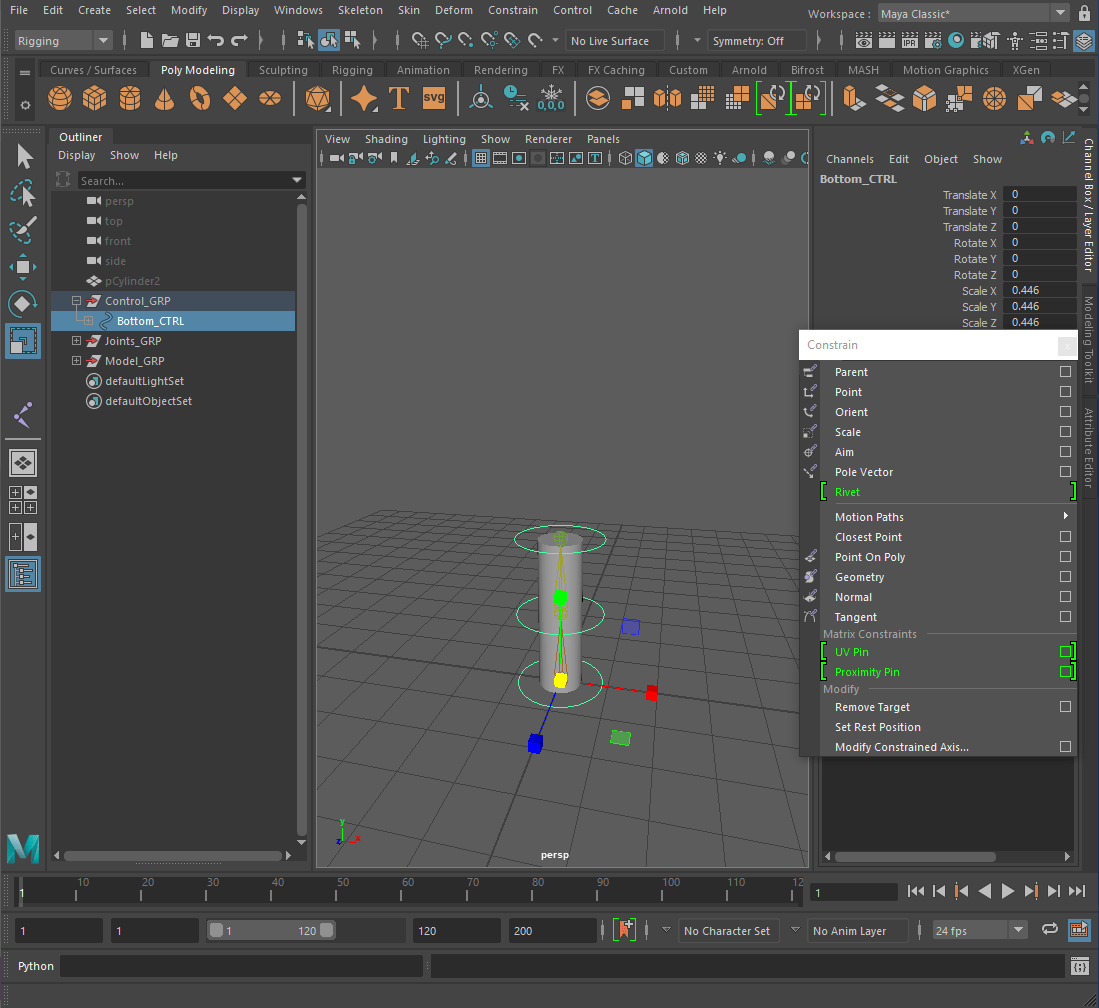
Created ‘Parent Constraints’ for the control curves. Selected ‘Top_CTRL’ then ‘Top_JNT’. Clicked ‘Constrain-> Parent’. Repeated for the middle and top controls.
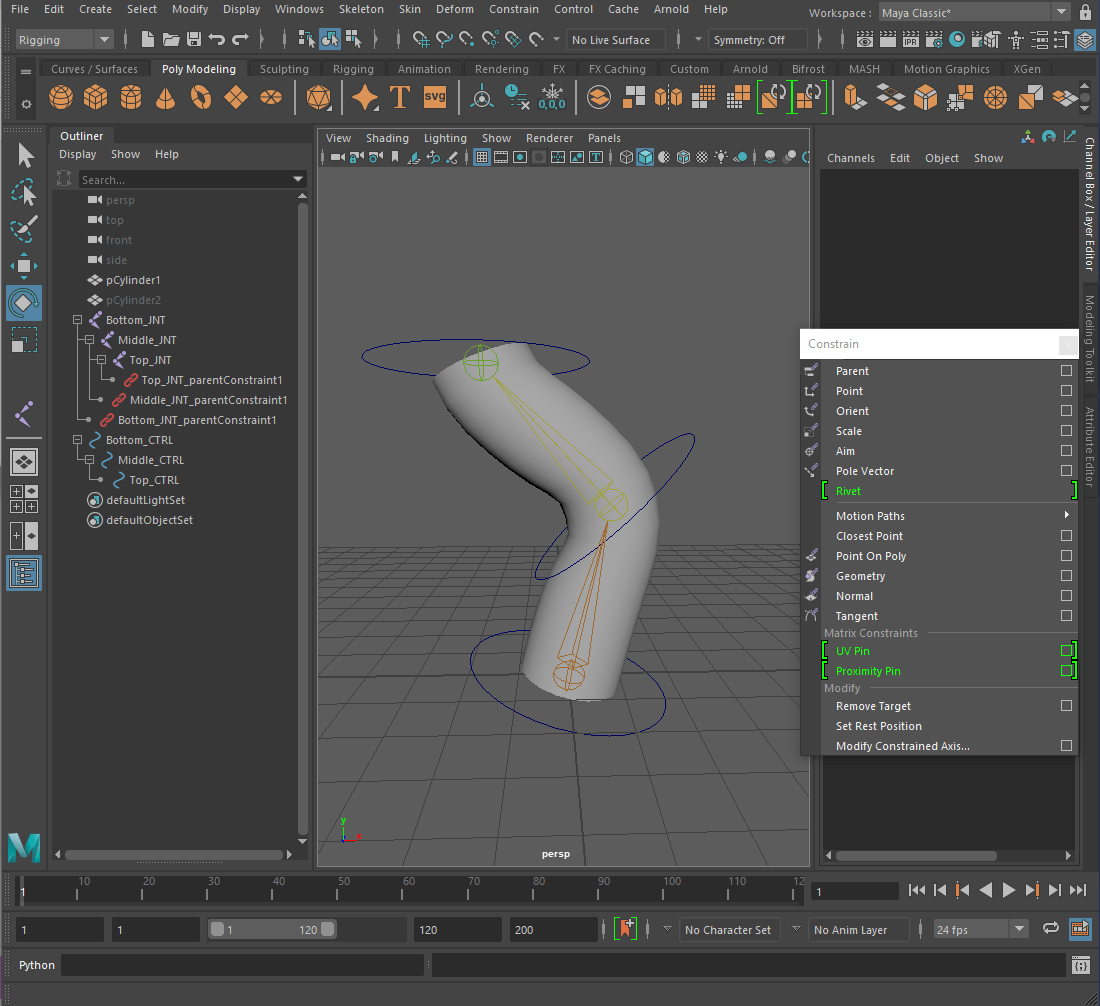
Cleaned up the outliner a bit. Added a ‘Scale Constraint’. Clicked the ‘Bottom_CTRL’ then the ‘Joints_GRP’ and clicked ‘Constrain-> Scale’.

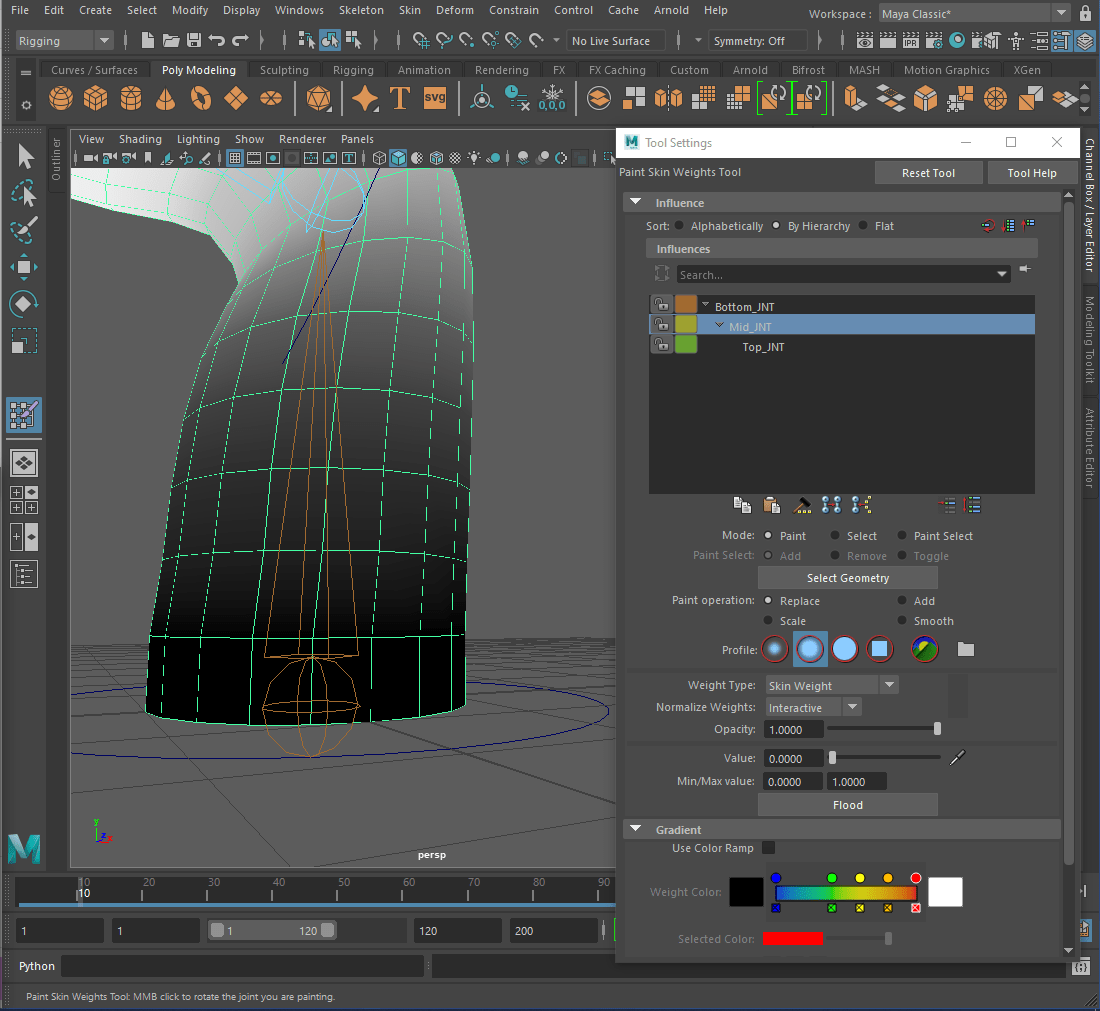
—Exercise 3: Editing joint skin weights—
Added some keyframes to make it easier to see the effects of the skin weights. There are two methods to adding skin weights, ‘Paint Skin Weights and Component Editor’.
Select mesh, Right click + Paint Skin Weights Tool. Brings up a menu. Clicked on the ‘Mid_JNT’ and changed the ‘Opacity and Value’ and painted around the bottom and first edge loop of the model. Adjusted the ‘Value and Opacity’ and painted other areas of the model.


Deleted the keyframes and made new ones for the top joint. Selected all the top vertices and changed the value of the ‘Top_JNT’ in the ‘Component Editor’ to 0.95. Selected the next ring of vertex and adjusted the slider at the bottom of the ‘Component Editor’.

Repeated the same process to taper off the bend.

____________________________________________________________________________________________________________________________
Homework/Assignment 3 :
For homework we were tasked with completing any of the video tutorials and exercises that we didn’t finish today and continuing work on the Assignments.
—Exercise 4: Inverse kinematic rig with joints—
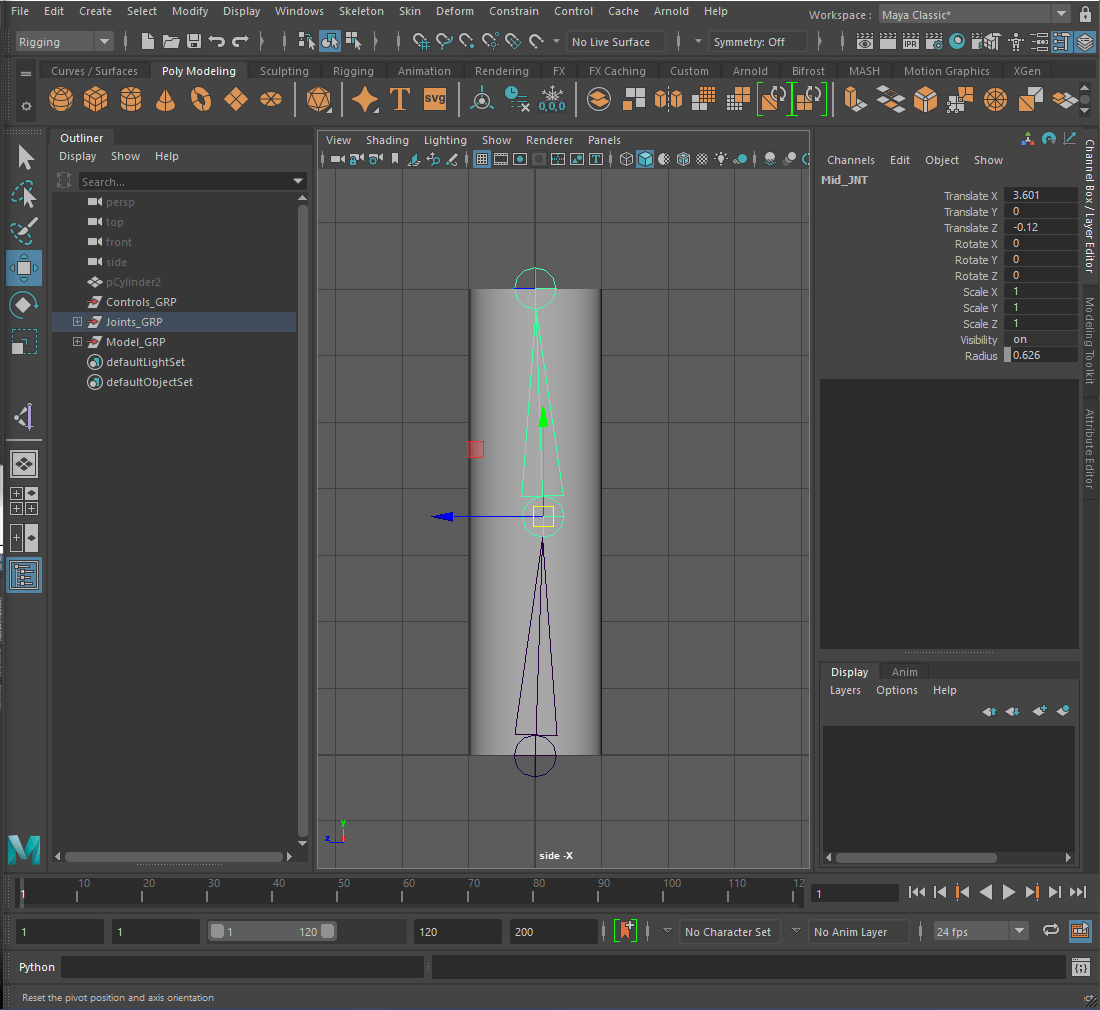
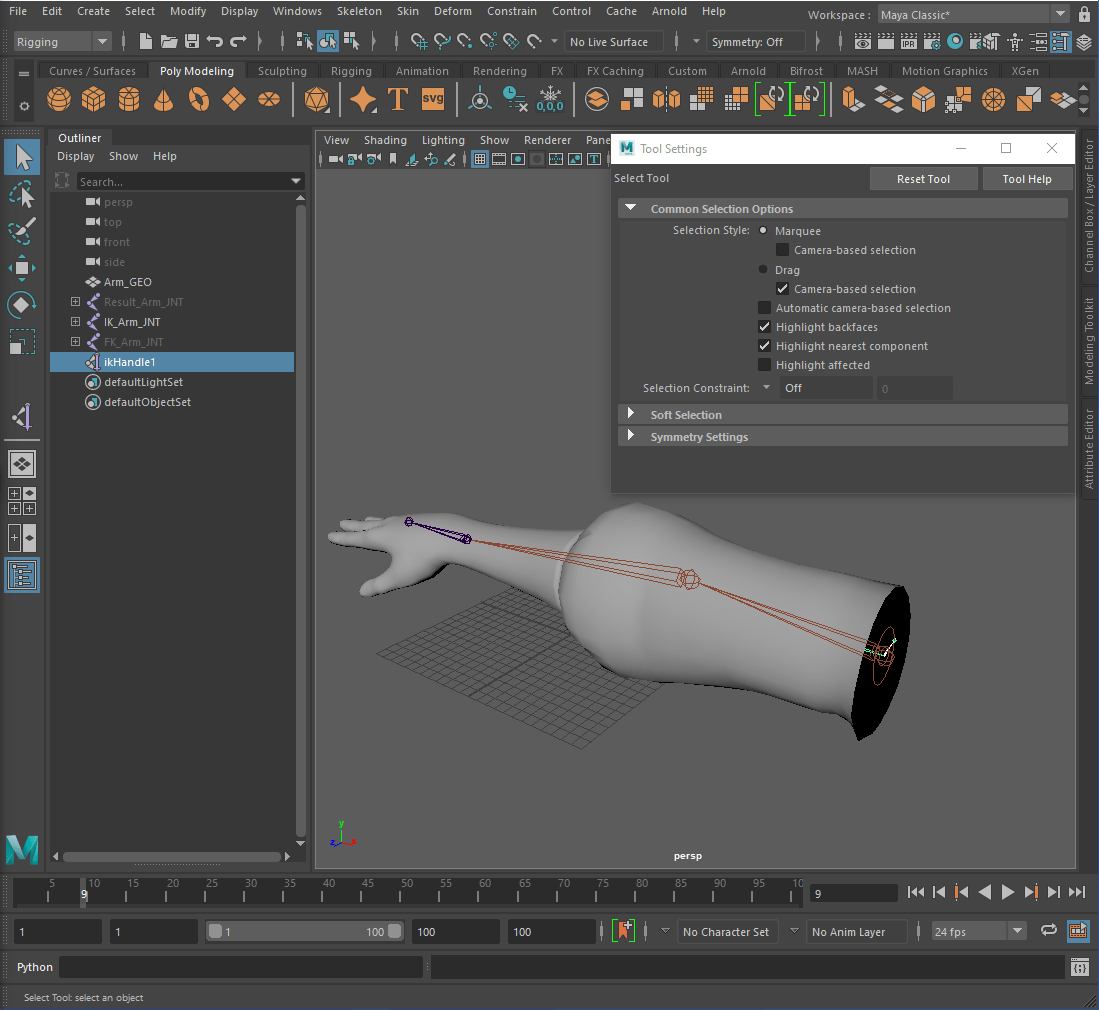
Switched tabs to ‘Rigging’ and clicked on ‘Skelton-> Create IK Handle’. Using the pivot point of the middle joint, I moved it to make a slight curve in the joints.
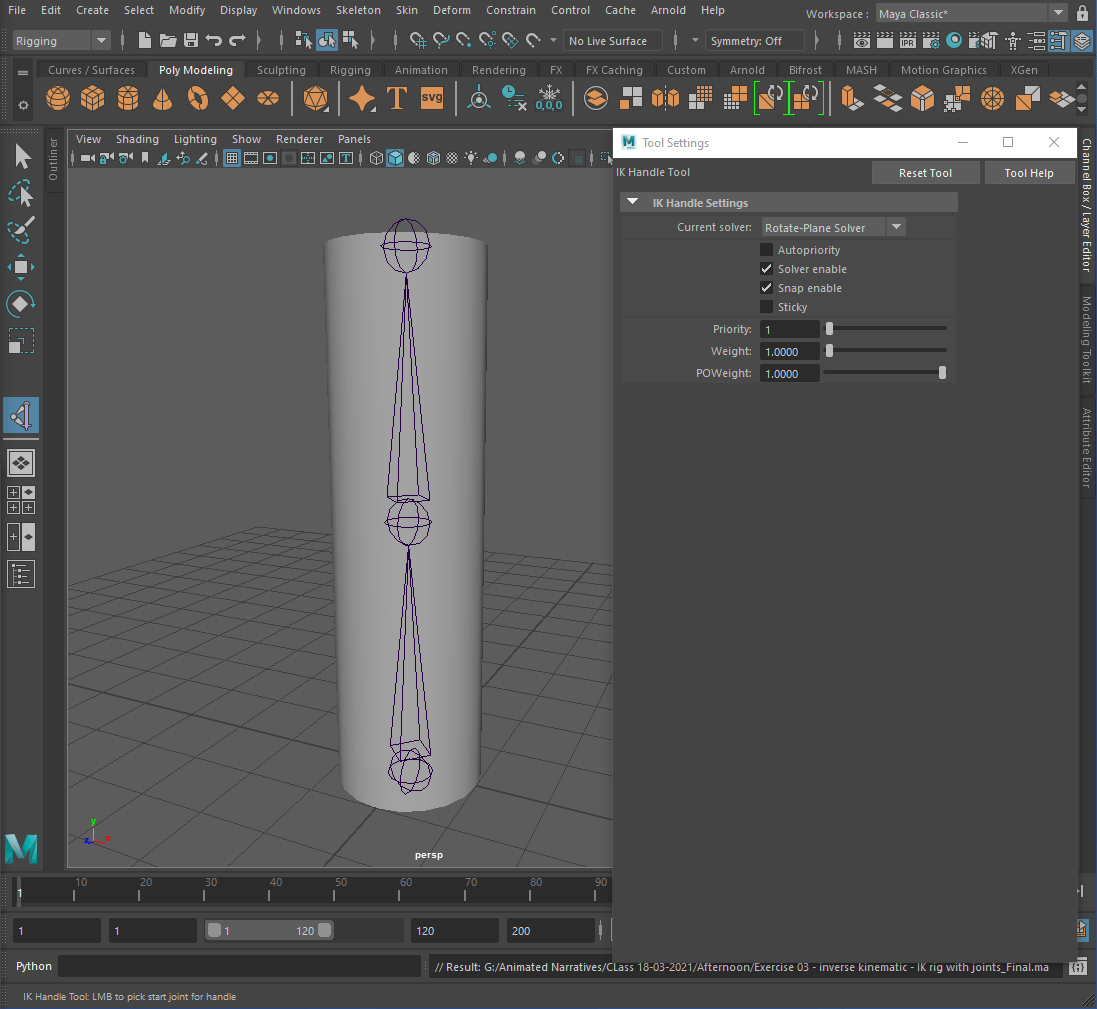
Clicked the bottom joint then the top joint to make ‘ikHandle1’. Created a ‘NURBS Circle’ and snapped it to the top joint.
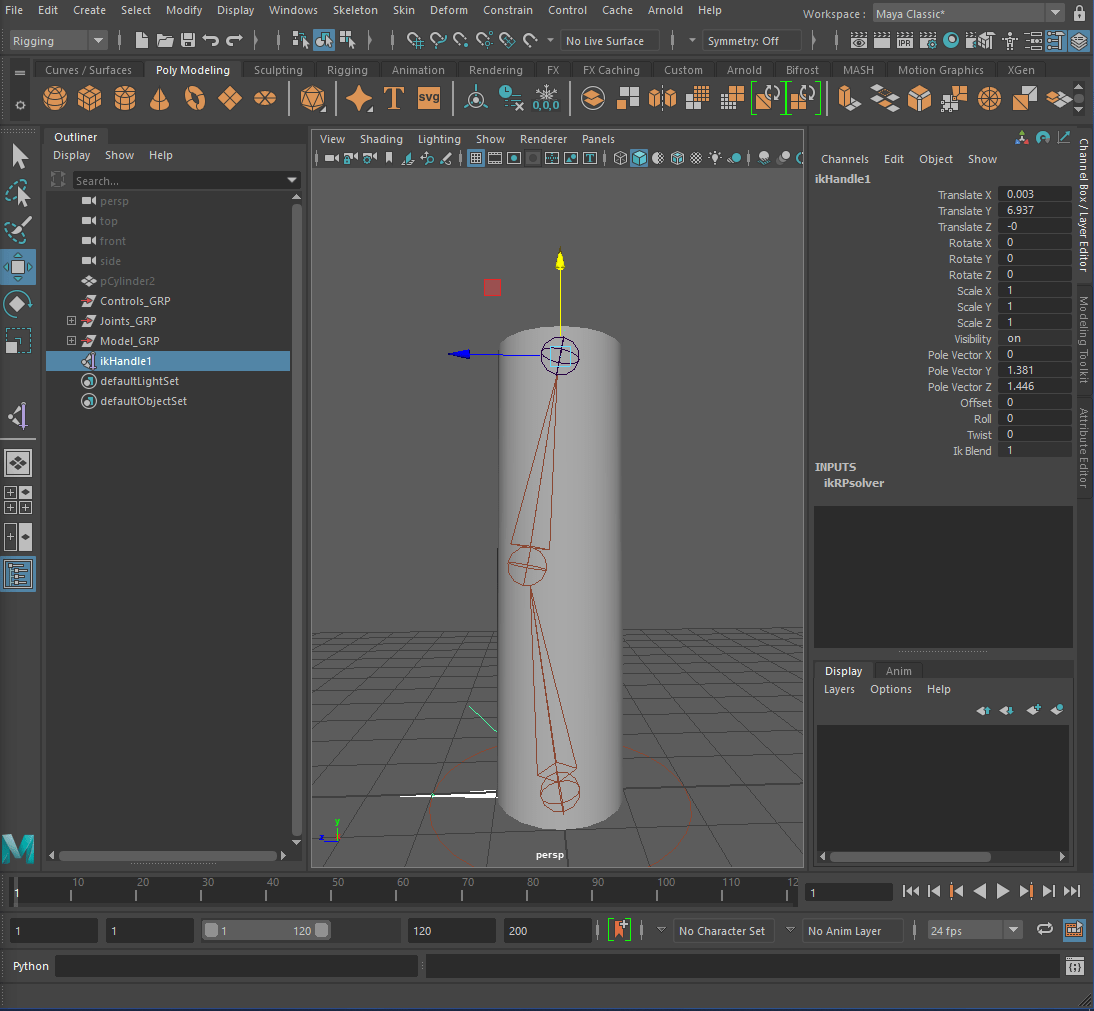
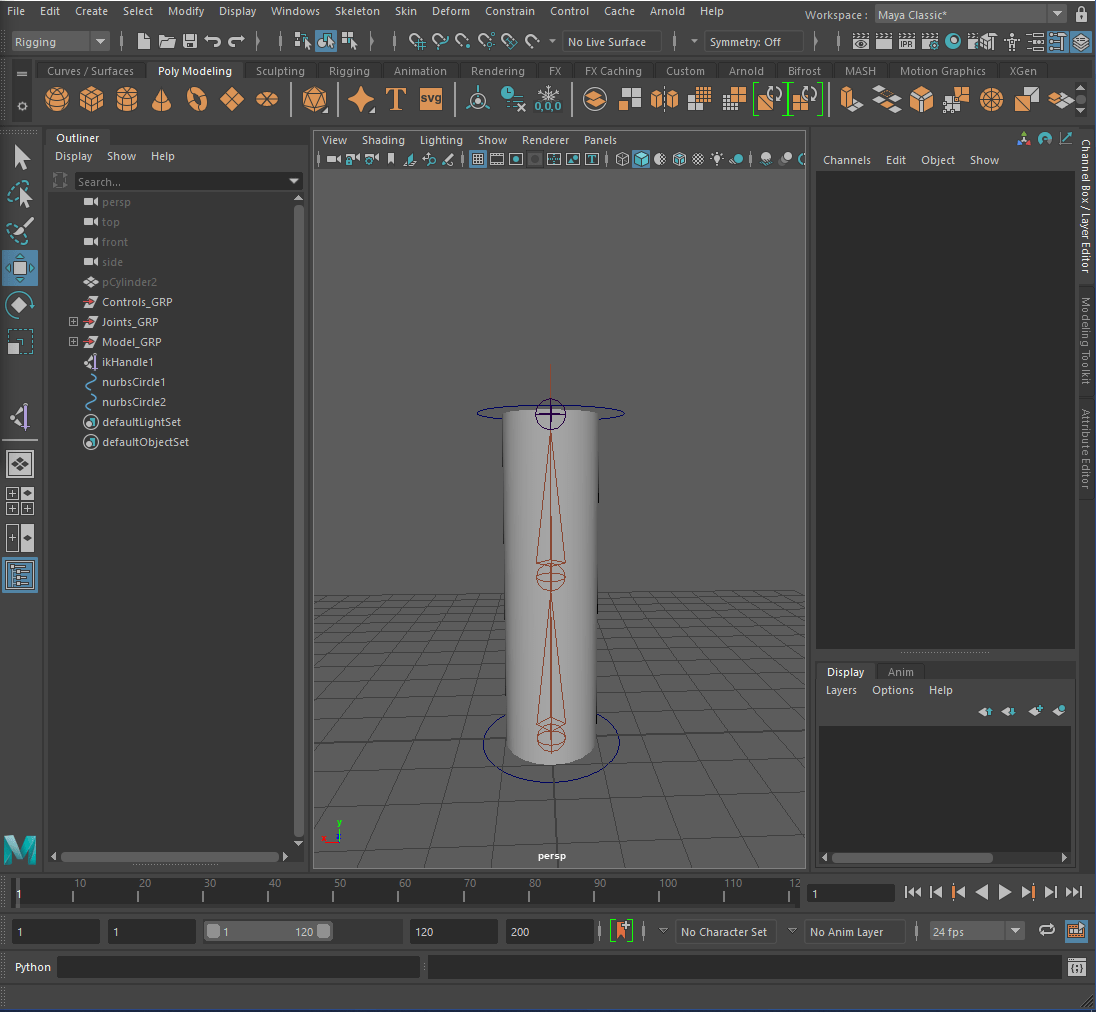
Parent the ‘Top_CTRL’ to the ‘ikHandle1’ and parent the ‘Bottom_CTRL’ to the ‘Bottom_JNT’.
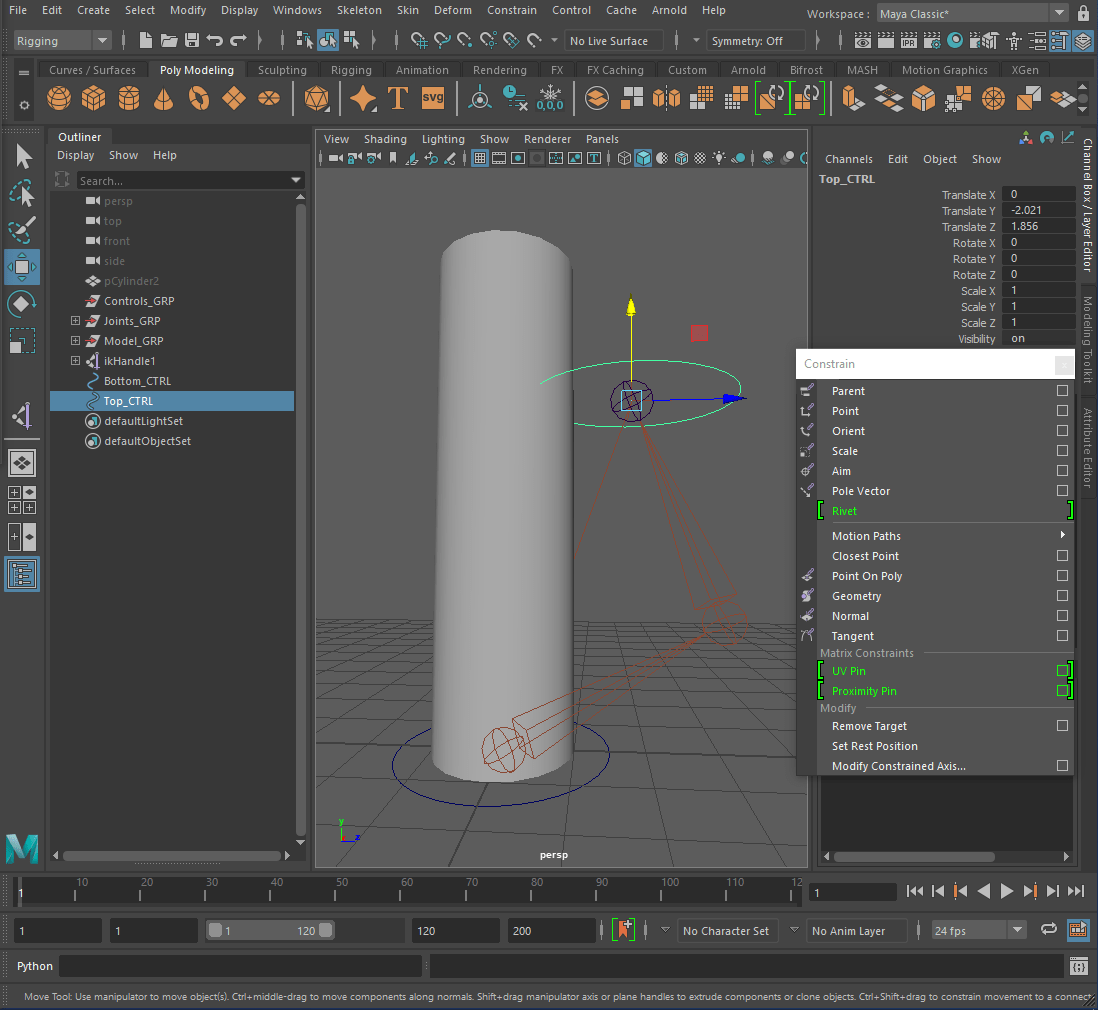
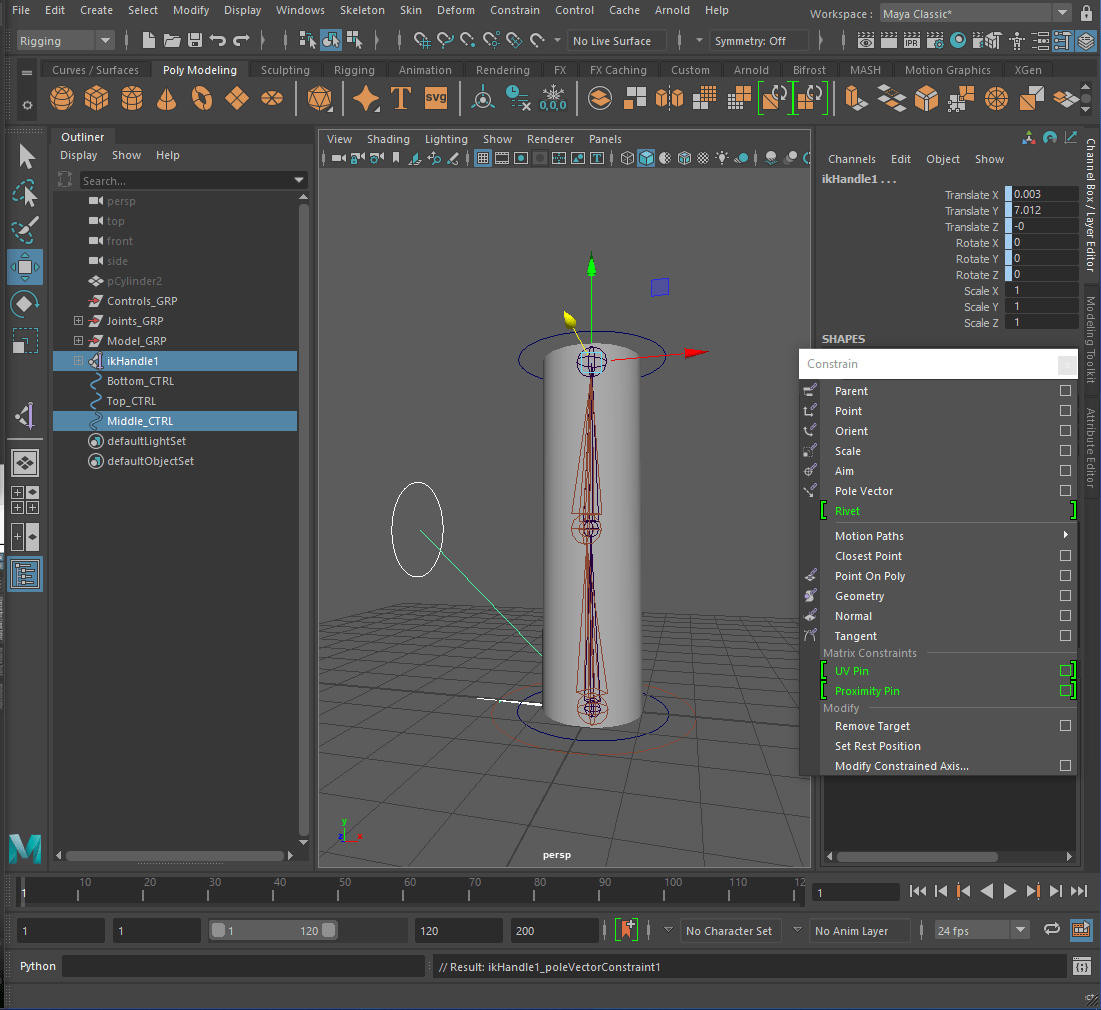
Added another ‘NURBS Circle’ aligned with the middle joint. Clicked the ‘Middle_CTRL’ then the ‘ikHandle1’. Added the ‘Pole Vector’ Constraint. Clicked the ‘Bottom_JNT’ then the mesh and clicked ‘Skin-> Bind Skin’. Cleaned the ‘Outliner’ a bit and hid the ‘ikHandle_CTRL’ and ‘Joints_GRP’. Turned the mesh into a ‘Reference’.

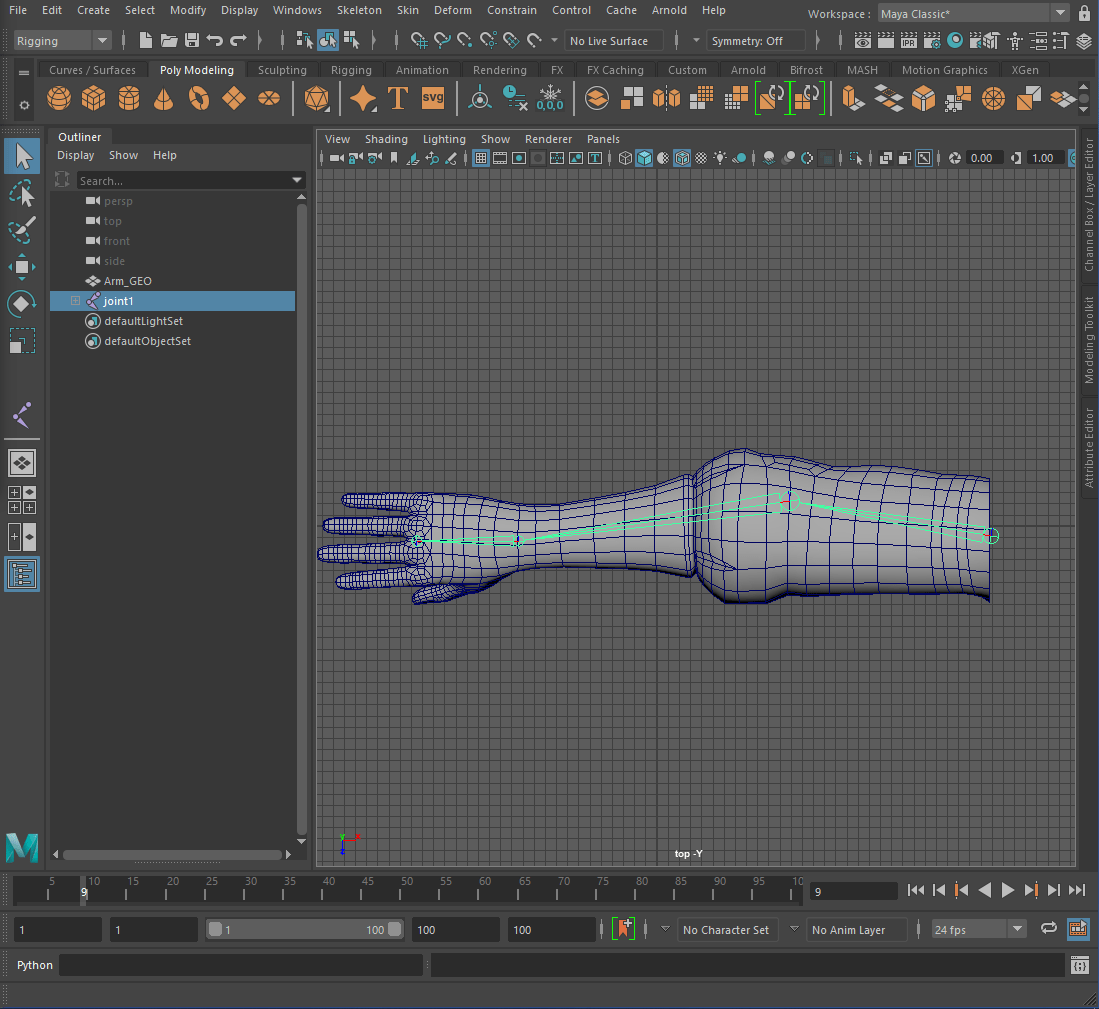
—Exercise 5: Arm-IK FK Switch—
Switched to ‘Rigging’ and clicked ‘Skelton-> Create Joints’ and placed it at the base of the arm. Placed the joints at the elbow, wrist and between the fingers. Positioned the joint inside the arm. Duplicated and renamed the joints.


Clicked ‘Windows-> Node Editor’. Selected all the arm joints and clicked the ‘plus’ button. Spread out the ‘Nodes’ and clicked on the three lines on the ‘Nodes’. Clicked the ‘plus in a square’ beside rotate on each.
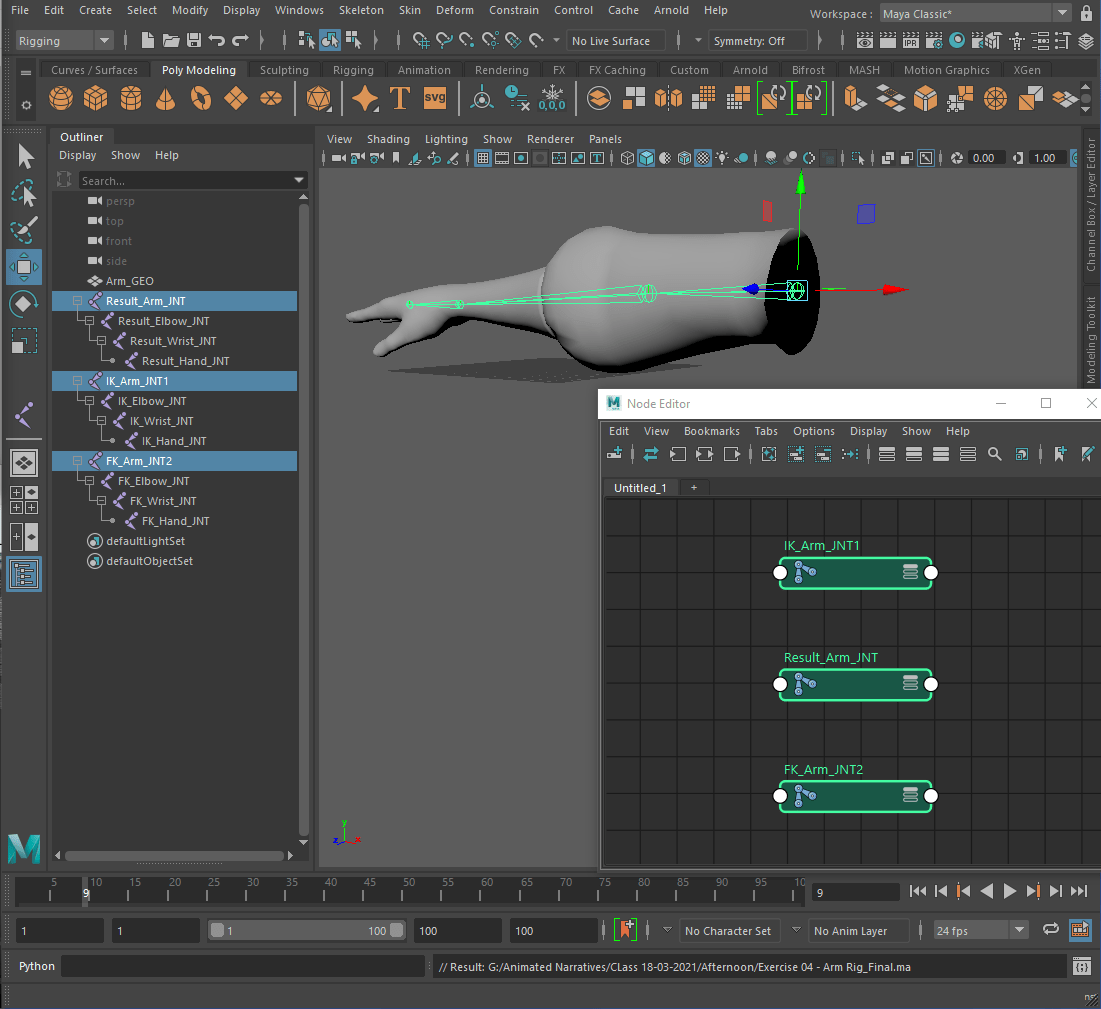
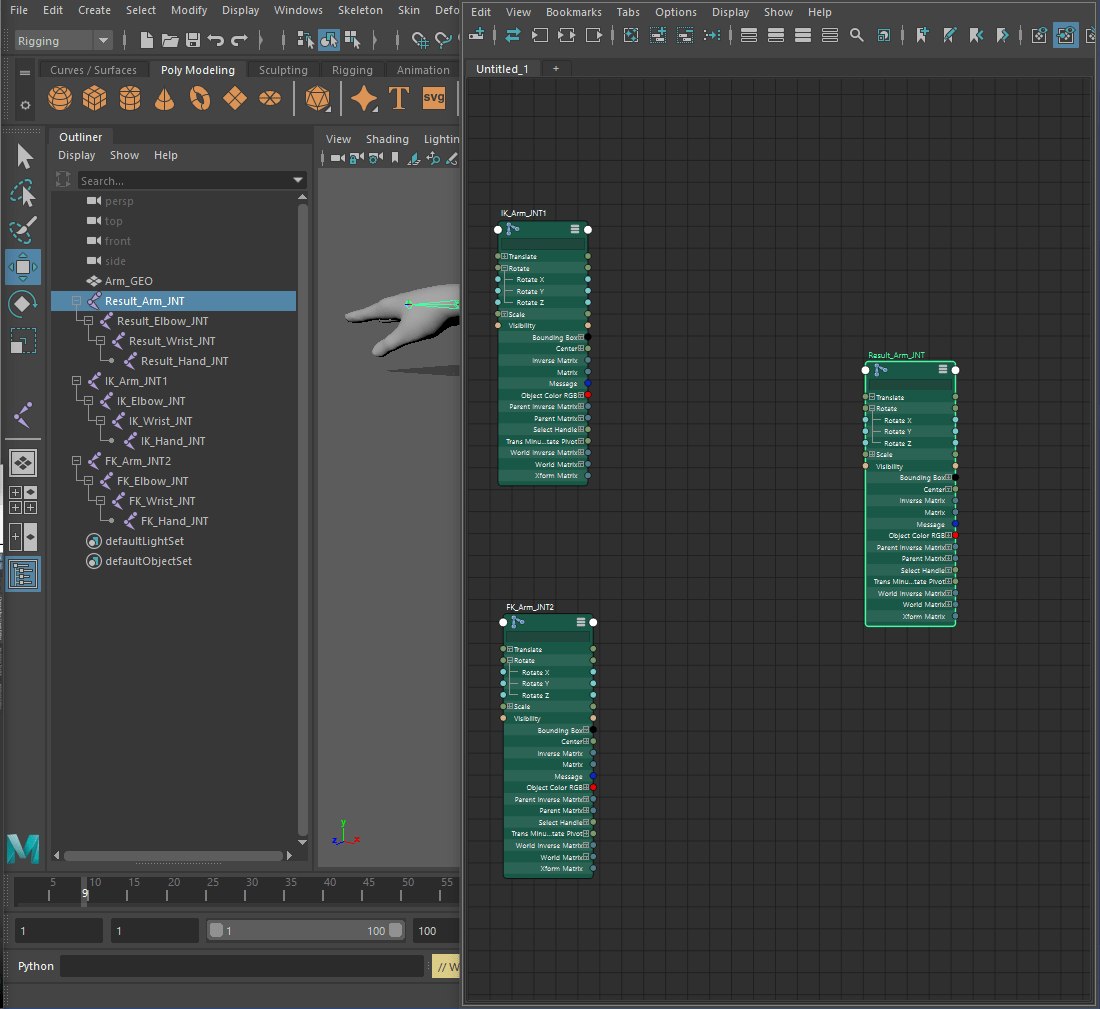
Click ‘Tab’ on the keyboard and searched ‘blendcolours’. Renamed it, clicked on the three lines and opened up ‘Colour 1’, ‘Colour 2’ and ‘Output’. Put the ‘Rotate’ of ‘IK_Arm’ into ‘Colour 1’. Repeated the same process for the ‘FK_Arm’ except into ‘Colour 2’.

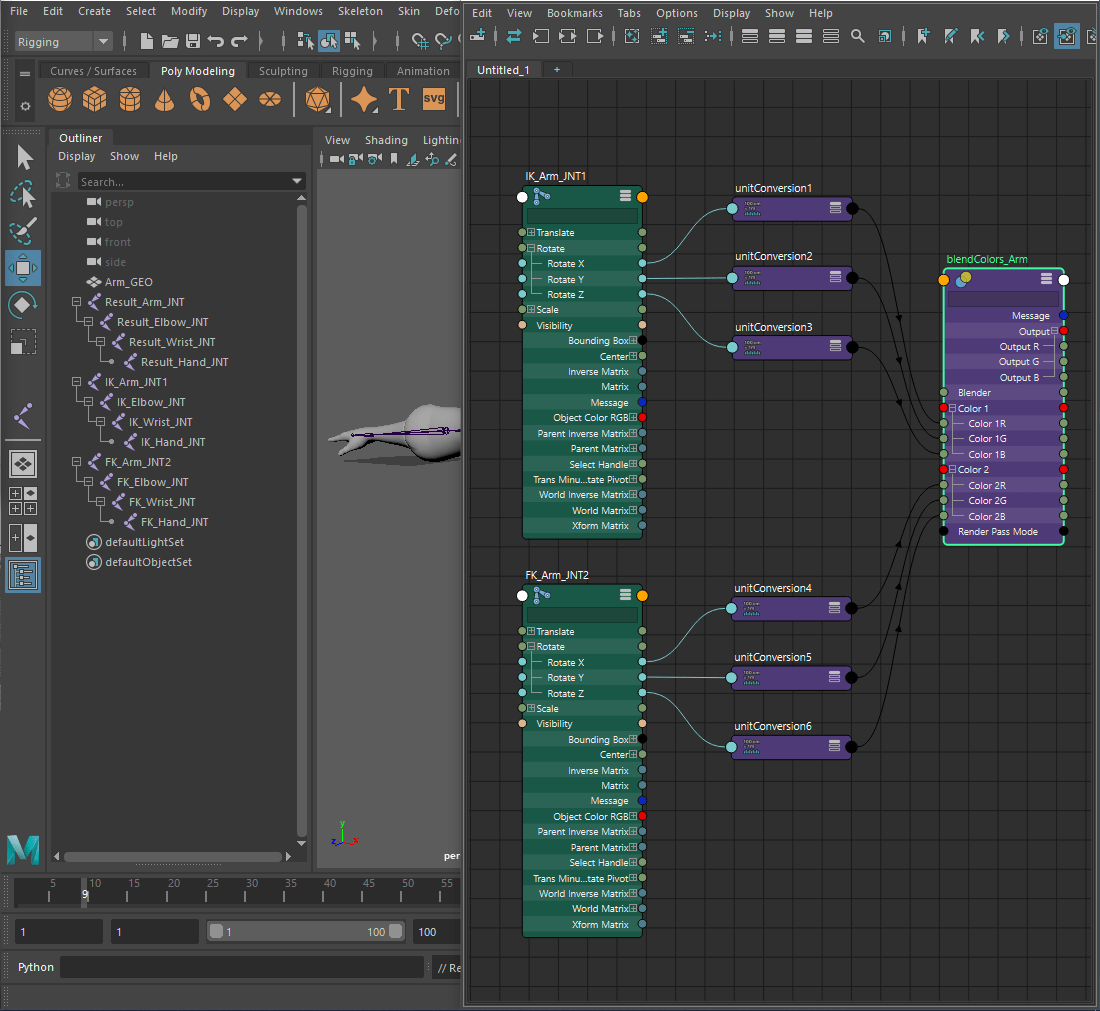
Put the ‘Output’ of ‘blendColours_Arm’ into the ‘Rotate’ of ‘Result_Arm_JNT’.
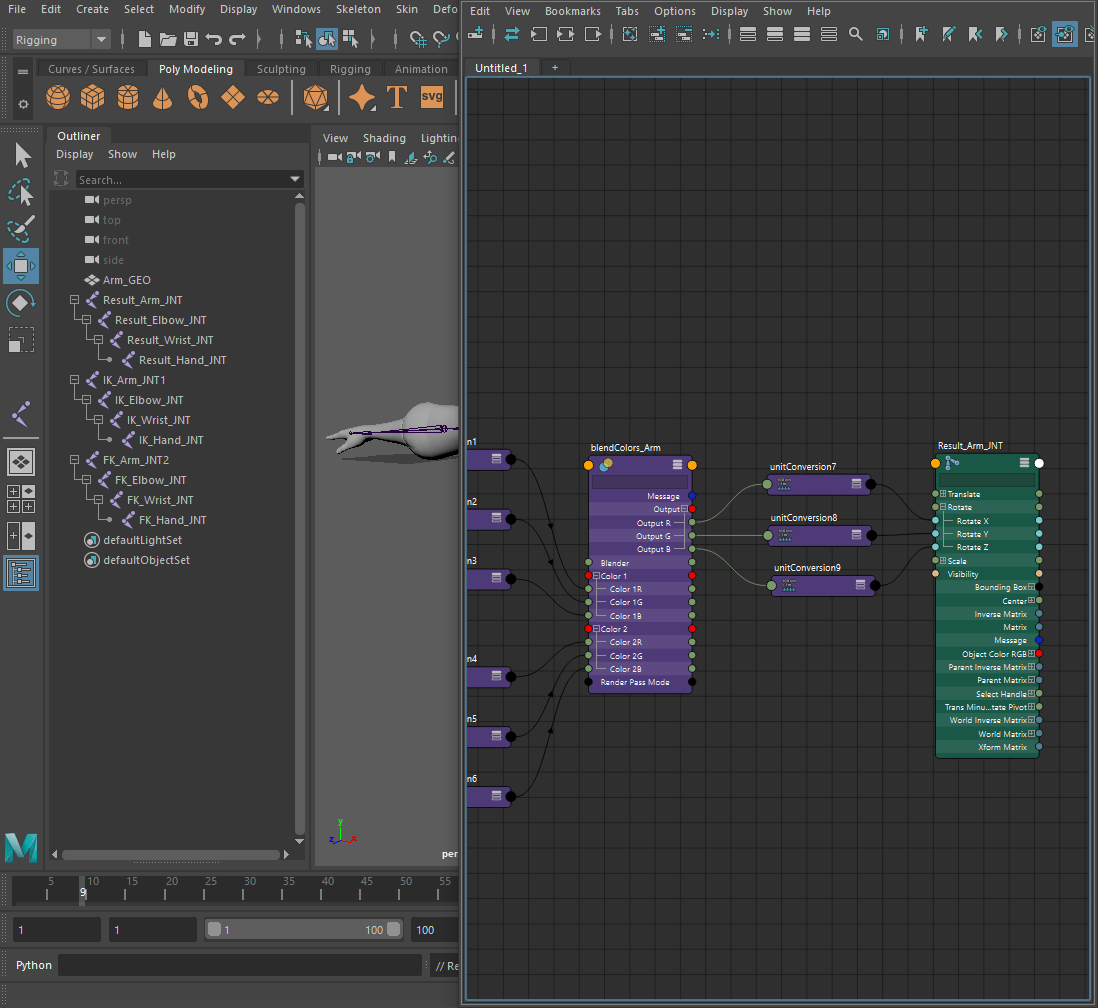
Cleared the ‘Node Editor’ by clicking the ‘minus’ button. Repeated the same process for the Elbow joint and the Wrist Joint.

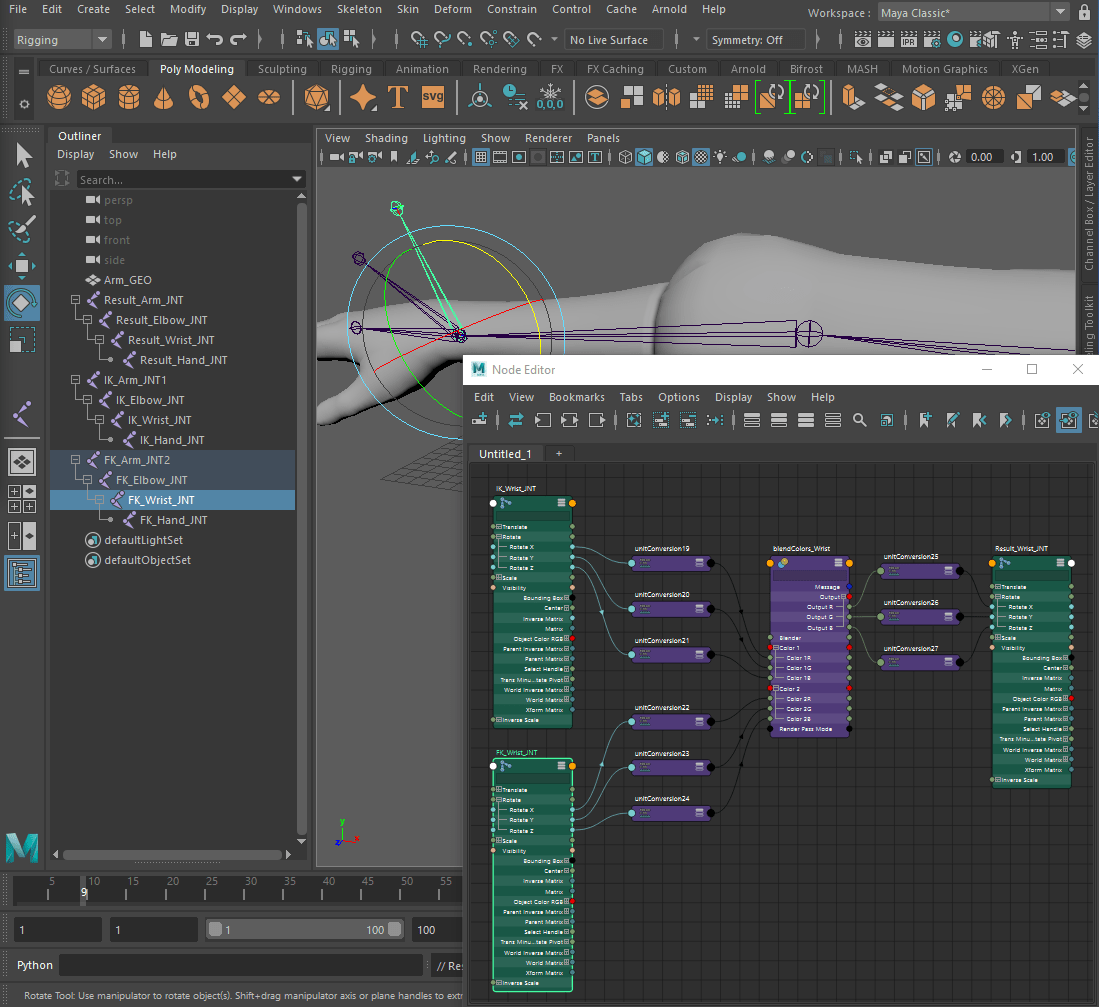
—Exercise 5 Part 2: Arm-IK FK Switch—
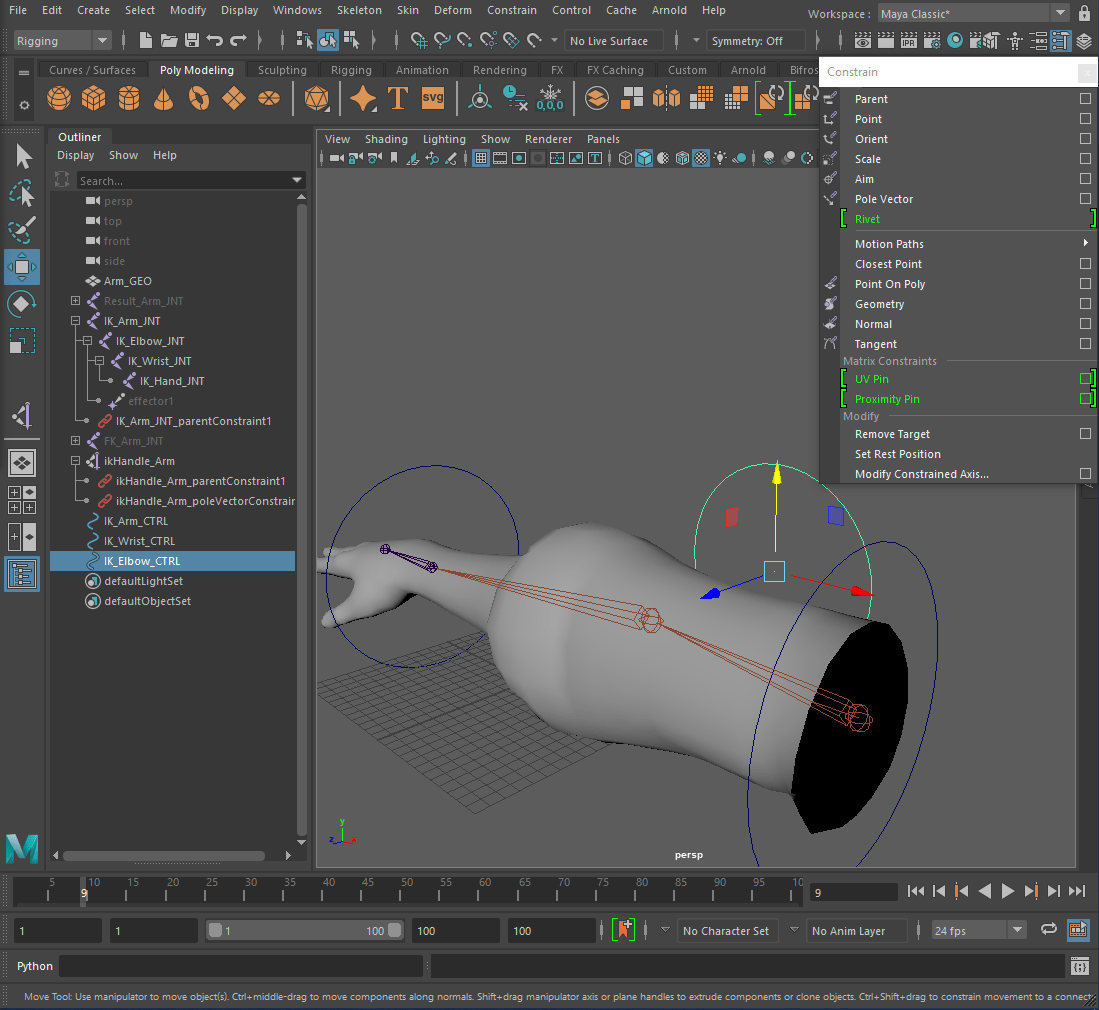
Opened the ‘IK Handle Tool’ and clicked on the elbow joint and the wrist joint. Added some ‘NURBS Circles’ to the joints. Parent the ‘IK_Arm_CTRL’ to the ‘IK_Arm_JNT’ and the ‘IK_Wrist_CTRL’ to the ‘ikHandle_Arm’.


Added a ‘Pole Vector’ to the ‘IK_Elbow_CTRL’ and the ‘ikHandle_Arm’. Hid the ‘IK_Arm_JNT’, the ‘IK_Controls_GRP’ and the ‘ikHandle_Arm’ and unhid the ‘FK_Arm_JNT’.

Added ‘NURBS Circles’ to the arm, elbow and wrist. Parent the Control Curves to their corresponding joints and parent the control curves together. Added another ‘NURBS Circle’ and added an attribute.


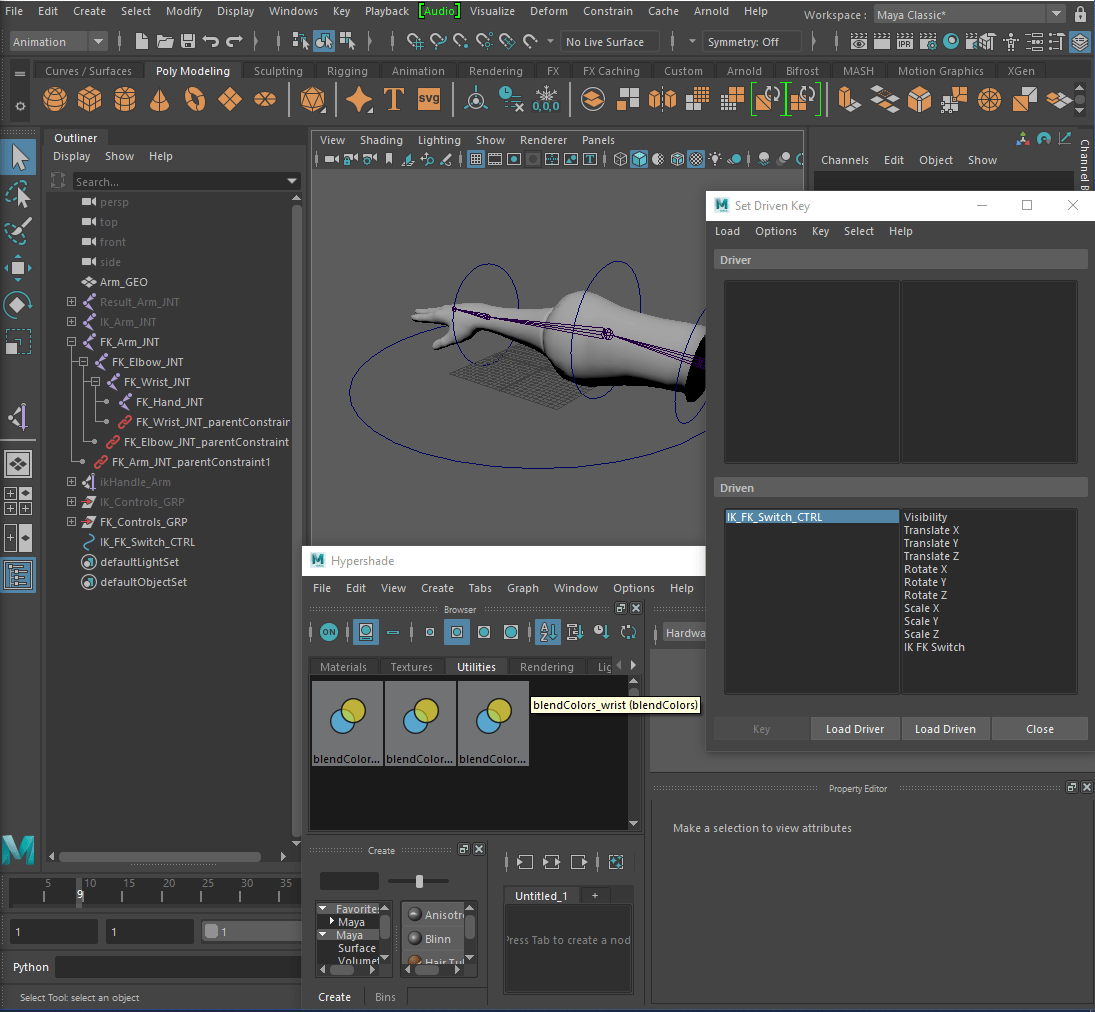
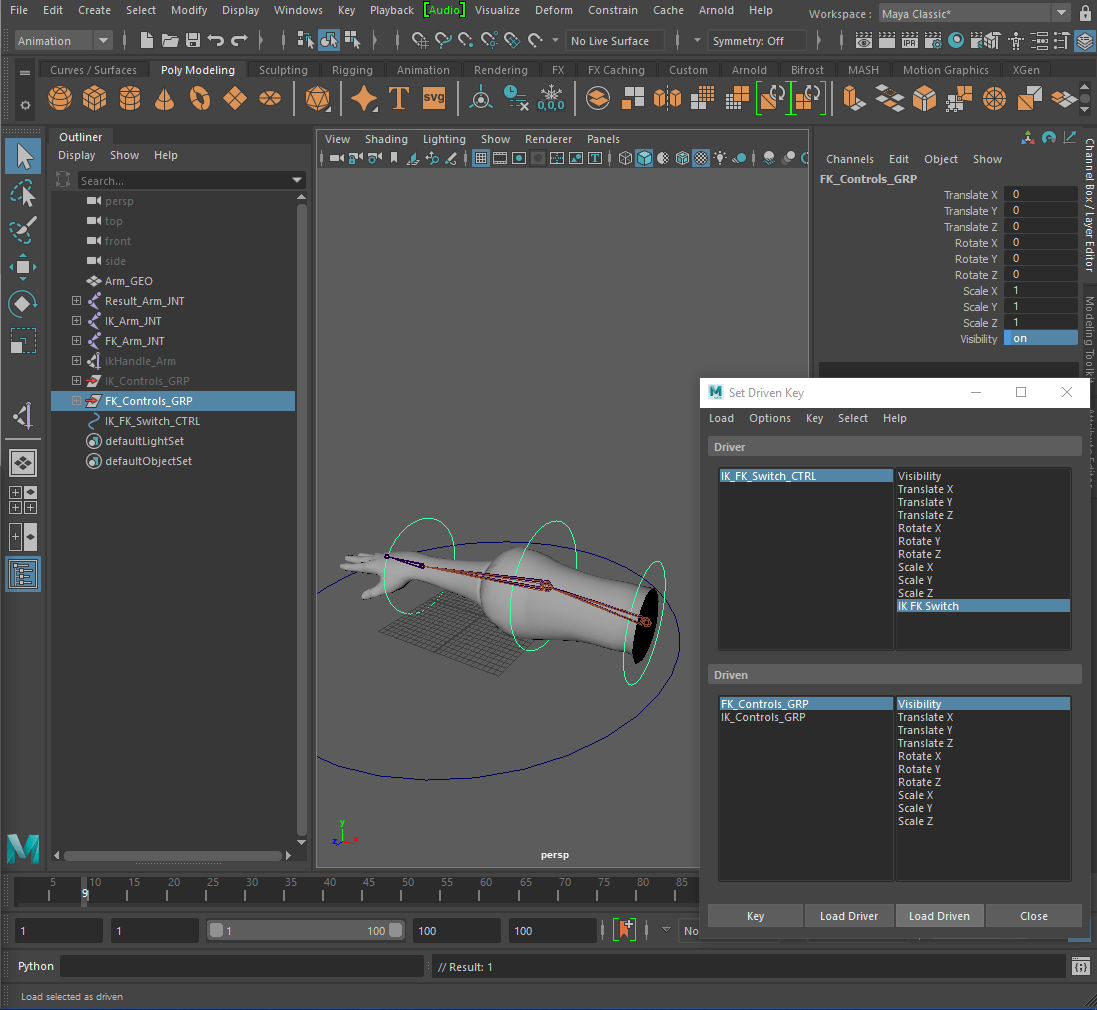
Opened ‘Hypershade’, switched to the ‘Animation Tab’ and clicked on ‘Key-> Set Driven Key-> Set’. Selected the ‘IK_FK_Switch_CTRL’ and clicked ‘Load Driver’. Shift selected the Colour Nodes from the ‘Hypershade’ and clicked ‘Load Driven’.

Selected ‘IK FK Switch’ and ‘Blender’ from the menu and set the value of the ‘Blender’ to 1 and clicked ‘key’. Changed the ‘IK FK Switch’ value to 10 and changed the ‘Blender’ value to 0 and clicked ‘Key’.


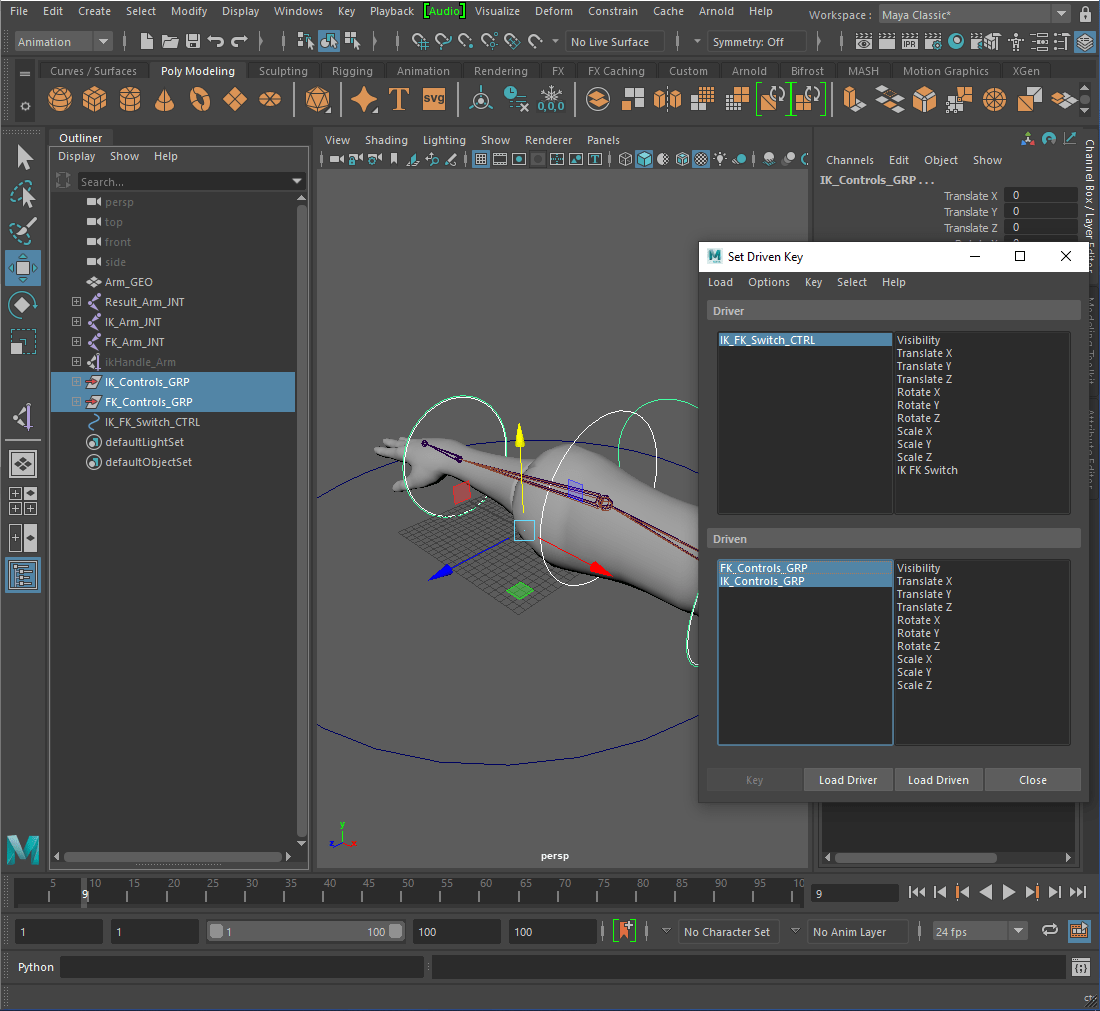
Unhid the ‘IK_ARM_JNT’ and the ‘IK_Controls_GRP’ and closed and re-opened the ‘Set Driven Key’ menu. Selected the ‘IK_FK_Switch_CTRL’ and clicked ‘Load Driver’. Selected the ‘IK_Controls_GRP’ and ‘FK_Controls_GRP’ and clicked ‘Load Driven’. Selected the ‘IK_Controls_GRP’ and ‘Visibility’ (on), selected the ‘IK FK Switch’ and clicked key.
– Changed the value of the ‘IK FK Switch’ to 10 and changed the ‘Visibility’ of the ‘IK_Controls_GRP’ off and clicked ‘Key’.
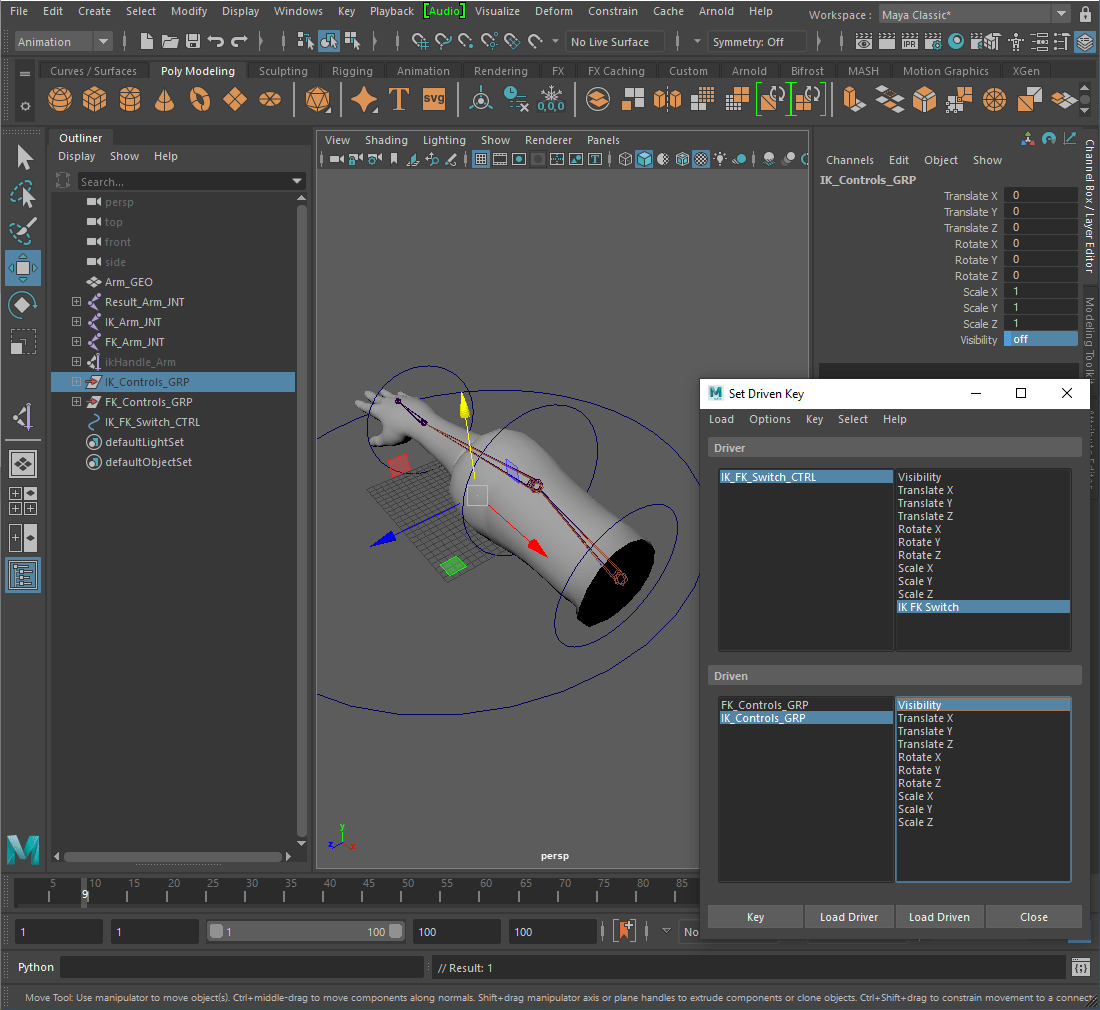

Repeated the same process for the ‘FK_Controls_GRP’ only with opposite values.

Switched to ‘Rigging’. Selected the ‘Results_Arm_JNT’ then the mesh and clicked ‘Skin-> Bind Skin’. Hid the joint groups and turned the mesh into a reference layer.
____________________________________________________________________________________________________________________________
Assignment 3
Progress:
For this week I focused on UV Unwrapping the furniture that I modelled last week and creating the new presentation for class on Thursday.

Final Thoughts:
I am happy with the progress that I have made on Assignment 3 and plan on working on Assignment 2 next week.