The HTMLs and the CSSs

Building a website with Webflow

By now I have completed the following areas of my design process:

  • Research
  • Discovery
  • Planning (sketches)
  • Content audit
  • Mock-ups

Now I have to focus on building a good and responsive website using Webflow.

Responsive Web design

This ensures your website will work in every device.

Book: Ethan Marcotte – Responsive web design.

Every website is made using HTML using an Editor like brackets or atom. When writing HTML it should all be in lowercase. HTML just basically wraps up your content in tabs to tell your browser how to display the information. There is always an opening and a closing tag.

Example <title> My website </title>

The only things that are seen in a website are the things within a body tag <body>

What to include under <head>

  • page title
  • CSS links
  • Other abstract things

What to include under <body>

  • Headings
  • Paragraphs
  • other things you can view

Having a good heading is vey important and useful as they help you structure your content and give the website a nice flow. Users skim the websites by headings so guide them to what you want the to see.

HTML links are very important <a href=” URL here  ” >This is a link</a>

HTML images    <img src= “name of image”   alt=””   This is a screen reader that will read the content for hearing impaired people.

HTML buttons: by only using HTML it would look very ugly but once you add CSS and add the proper code it will look more aesthetically pleasing.

Always add comments to your code to help other designers and coders. Be a team player.

Images are pulled into the website whereas links take you to a different place.

Link targets: this decides if once you click the link if you are taken to a new browser window or if the link opens in the current window being used. use target=’_blank’   to open in a different window.

Naming conventions; HTML spaces are bad. Do not use spaces for page names; its ok to do so for titles though.

Image format

Do not use a JPG file for your logo as if they are meant to have a clear background they will replace it for a white background. Use a PNG for images that need a transparent background.  PNGs keep the image quality better than JPG – these are all pixel based so once screeched they will lose their quality. SVG images however are vector based so they will not loose quality

Image dimensions: Consider image sizing very carefully as a very large image can make the website heavy and slow. Be considerate. If you need to resize an image, do so in Photoshop – it will make your life easier. They should not be over 600MG.

Always provide a text alternative to your images – Think accessibility.

Never style your content with HTML, always use CSS for this. HTML does not have the terminology to make the kind of design decisions CSS makes. For the HTML and CSS files to ‘talk’ to one another you must link them; that is why the CSS file is normally called “stylesheet” for easy access and linking.

CSS allows you to set up multiple properties within an element. It also allows you to select the sizes of your headings. Units of measurements used are PX (pixel), EM (this tells the text to scale and in what ratio to do so) This makes things easier to manage.  The EM tells the text to be that much bigger than the base size which will be shown in PX.

When writing your font family, make it so it applies to all your text at once so if you ever need to change it later on it will be easier.

In CSS   a {   means links.

Sectioning elements. These are defined in HTML (<nav>   <section>   <body>   <article>   <aside>) Aside is a sidebar. These are the primary links. When using the <nav> tag never use the actual word in the label as it will show up as “navigation navigation”.

The <main> element is were the content goes.

CSS Box model: this applies things like padding, boxes, boarders and margin. Padding is an essential element and if not well defined it will add padding to all the elements of the website. If you want to change it you would then have to specify with ‘top’ or ‘bottom’. Border, these can be added to a section. Margins are defined in the same way as padding. Margins are transparent and are not included in the click are of an element; paddings behave in the opposite manner. Explicit dimensions must be given at times to avoid an element taking up all the available space.

CSS selectors allow you to define an aspect of the content while keeping the rest normal. One does this by using class selectors. Using class styles allows you to  create different styles and apply it to many different sections.


Summary/Reflection

A nice and simple HTML file is invaluable as it will not break. As a designer the temptation to be super visual can be overpowering; a solution for this is CSS. When saving the files for the website it must always be well organized.

Making my website

I decided to use Webflow instead of coding it myself due to time constraints so I also kept notes of links so I would be able to organize my site correctly.

I had tried to make a mock-up of my website in Figma but truthfully I was inpatient and instead jumped right into Webflow – looking back I regret this as I would have been able to avoid some silly design decisions and saved myself time and effort if I had put in the work and made the mockups.

I realized early on that Webflow was a lot easier than having to do it yourself. It look a bit of learning and for that Webflow University and some YouTube videos were a great help in informing my process and teaching me how to more efficiently use the software.

During my 1st year I had purchased my domain name; this is something I am very glad I did as it fit in so much better into my CV than some random Webflow URL – it did however take me a very long time to figure out how to connect my website to my URL; cue in customer support for Webflow and Ionos (my domain provider).

I kept the home page simple and clean. I was however struggling with the layout options and alignments. It took a lot of tweaking but eventually I got it there. I made the navigation bar sticky as I thought it would make it easier to navigate the page. I also decided to add a ‘Hire me’ button to the menu bar that when clicked opens up my CV – I figured this would make me stand out?

I also added the illustration of myself as part of my introduction section of my home page as I thought it would bring across my playful and artistic personality as well as showcasing my skills.

I am having trouble fixing the blending of the button outline and the footer background colour. I do think that while the footer works it might be too simple and not informative enough.

I quickly realized that trial and error was my friend here as that is when I learnt the most.

I think it is really down to refining my ideas at this point and continuing to process.

IXD104 – The interface – Week 4

Should have done and posted

  • master apprentice exercises
  • mind maps
  • initial sketches
  • Research

————— Week 6 group critique and hand-in ——————–

It’s important to separate yourself from your final product to evaluate it – Is it functional? Does it answer the client brief?

The interface

  • A minimal, consistent colour pallet can be quite successful.
  • Show the design inside your selected device
  • Try not to make it too typographically busy
  • Create a brand for it also
  • UI cards

— DO NOT use photoshop, stick to Figma and illustrator —

Why illustration in UI?

A picture is worth a thousand words.

Illustrations can clarify by giving examples. It is a great way to convey ideas.

It is an efficient way of providing info to the user quickly and to many.

Think of onboarding screen of McDonnalds – great example.

Tips for sketching interfaces

  1. Its not about being a good artists but a good thinker.
  2. Use a thicker pen – forces you to draw bigger and eliminates unnecessary details – Sharpies. It’s about getting the ideas down as quickly as possible at the beginning.
  3. Draw straight lines – it shows confidence. Practice by joining dots and making circles – eventually muscle memory will kick in.
  4. Be thoughtful about colour
  5. Make them comprehemsive
  6. use the right equipment – muji fine liners look up, dotted paper can be helpful.
  7. time yourself – try doing crazy 8th – fold a piece of paper into 8 and spend 1 minute create a quick scketh in each sections

Illustration should be

  • Meaningful
  • recognisable
  • claryfiable
  • attractive
  • improving of the user experience and usability
  • not overloading the page or screen
  • Harmonic and corresponding with general stylistic concept

They can solve problems

  • Mark Boulton ( typographic designer ) Understand the problem, thoughtfully considering the client, the business, the market, the goals, the audience
  • Look at Apple website and how they narrate and use storytelling through visuals to sell their products
  • Quentin Blake

Mascots and characters

  • They can add a personality to any brand or product
  • Meomi look up
  • Can be iconic
  • Can be diagrammatic
  • data visualisation
  • Hyper realistic
  • Simple vectors
  • hand drawn – can add a certain charm

Illustration for UI

  • Onboarding – great way to introduce people to apps – eg tutorial pages
  • They can be used as achievement badges
  • Consider the audience and what approach would be appropriate
  • They can be simple and gently – don’t overdo it with gradients – it can become overpowering

Research

  • Focusing too much on one area can cause you to have a narrowed focus. Search different varied sources, this way you will develop a more diverse approach.
  • google image
  • Flickr
  • Dribble
  • StumbleUpon
  • Pinterest
  • Blogs
  • Brand guidelines
  • Books
  • Sketching – always start on pencil

Book recommendations

  • Visual families

Tasks

  • Netflix abstract tv show is a MUST watch. At least evaluate the Ian Spalter: Digital Product Design episode.
  • Create icons
  • Consider UI
  • Create visual mock ups from your wire frames (Illustrator/Figma) minimum of 3


Visual identity and drawing – week 4

In 3 weeks (week 7) we will have a group critique ***

Recap

Bio, word associated with our values and tone of voice. We created unique marks based on our initials and investigated appropriate typefaces that encompass our character and personality. What am I doing and why am I doing it? To get an understanding of the foundations of branding so that we can create authentic branding for ourselves and for potential/future clients, to solidify our ideas and develop our skills. To be unique and stand out in industry. We are trying to make ourselves look desirable/employable. 

In my course alone there are 22 people, they are competition in the industry, that is why standing out is so important. I will be in competition with many people, I NEED to stand out. Who I want to work with will find me through my brand. MY brand will also dictate how people will perceive me.

Kinds of identification: uniqueness, value, holding power, description, association, tone of voice, graphic excellence (quality) reputation, discretion, repetition (& recognition). Which ones will my brand be focused on?

The power of identification and recognition – think of McDonald, Apple, Nike, Twitter, PlayStation, even if you don’t see the full logo in its original colour it is still easily identifiable.

Design program

When a trademark is used to identify an organisation it works together with other graphic elements in a design programme, each part of the plan for a visual identity. Through this a company can inform how it is (its values) how it wants to be seen (it’s image). A large part of it is informing people/the customer.

Includes basic elements like:

  • Name mark: company’s name written in a special way (typography)
  • Symbol: A picture mark or decorative abbreviation.
  • Colours: Selected colour(s)
  • Type: Selected typeface(s)
  • Fifth element: An extra, decorative element. ( example 1 monogram used to create an icon set; this gives an expansive tone of voice)

Note —> you would never use a name mark and a symbol, it is one or another not both.

Pictorial & abstract

Pictorial marks are non-abstract and iconic in nature. They depict a stylised version of something – anything’really: a fruit ( like the Apple logo), a mythical beoing ( like the Starbucks logo), an animal


This kind of logo may be preferable when your brand is a bit abstract or open to interpretation. Pictorial marlks can also be really efective is your brand lends itself to a specific image: Apple and Jaguar are good examples


Abstract marks arre abstract, they usualky consist of very simple geomatric shapes


They lend themselves to brands thata are more descriptive because their logog just needs to be  recognisable by repetition


Combination marks

A wordmark combines with either a letter mark or a symbol. They are versatile and can use the symbol or the wordmark in isolation as well.


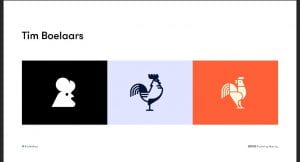
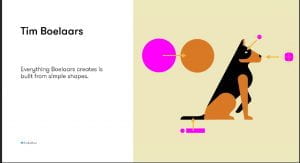
  • Tim Boelaars – forms and shapes are key for his designs
  • Jeroen van Eerden
  • Fabio Basile
  • Vic Bell
  • Ivan Bobrov
  • Airside
  • Jason Santa Maria

Process

Thinking by drawing – drawing loads and loads of ideas. Thinking it through as you draw. How can I represent it pictorially. You should put EVERYTHING down, it is an important part of the design process; put down your mistakes, realistically your idea stage should be 95% mistakes.

Pictorial Superiority effect

Humans process visual info 60,000 x faster than words


Sketch noting

The 5 basic elements: circle, square

Always keep a sketchbook with you; a good sketchbook will have a mixture of words and drawings.

Containers, Shadow & highlights, line and dividers, shapes, compound shapes, objects and icons, type styles, layout and structure (3points x 3 bullets).

Mind Maps: Helps put it all together.

Think outside the box

—-

Task

  1. Doodling talk by Sunni Brown – watch and analyse
  2. Book – Ed Emberley ( Make a world)
  3. Penguin drawing task on slides
  4. Make a mind map with words about yourself and use that as a guide for your word mark. Select the ones that are important. Find the important word and sketch out what you think it is.
  5. Sketch the following objects using the techniques talked about today _ iPad, Laptop, Camera, Sketchbook, Pencil, Browser, USB stick, Paper, Tv and Radio. ON PAPER.
  6. Pick 5 key words from your week 1 word association mind maps/bio (these could be your values) and explore a range of ways to represent them visually.
  7. Research visual marques – design a symbolic
  8. Look up brand new blog

Next week – Brand guidelines and colour.


Tutorial:

look up venezuelan type foundries

quirky – duality of 2 words organisation but whimsical nature. visually have loads of variety. ditot thick and thin lines.

type foundries that have quirky aspects. Fonts myths look up

variable fonts – more technical, google pioneered them.