On Monday we were tasked with watching 7 videos explaining the basics of Blender and how to navigate the interface, I found these videos helpful as I have never used Blender before. After watching the videos, I realised that Blender is similar to Maya in the way you move around the 3D space and the amount of menus.
Class
In class we were discussed the next assessment, it involves creating a simple cute character in Blender. In class we were tasked with modeling an apple.
Apple:
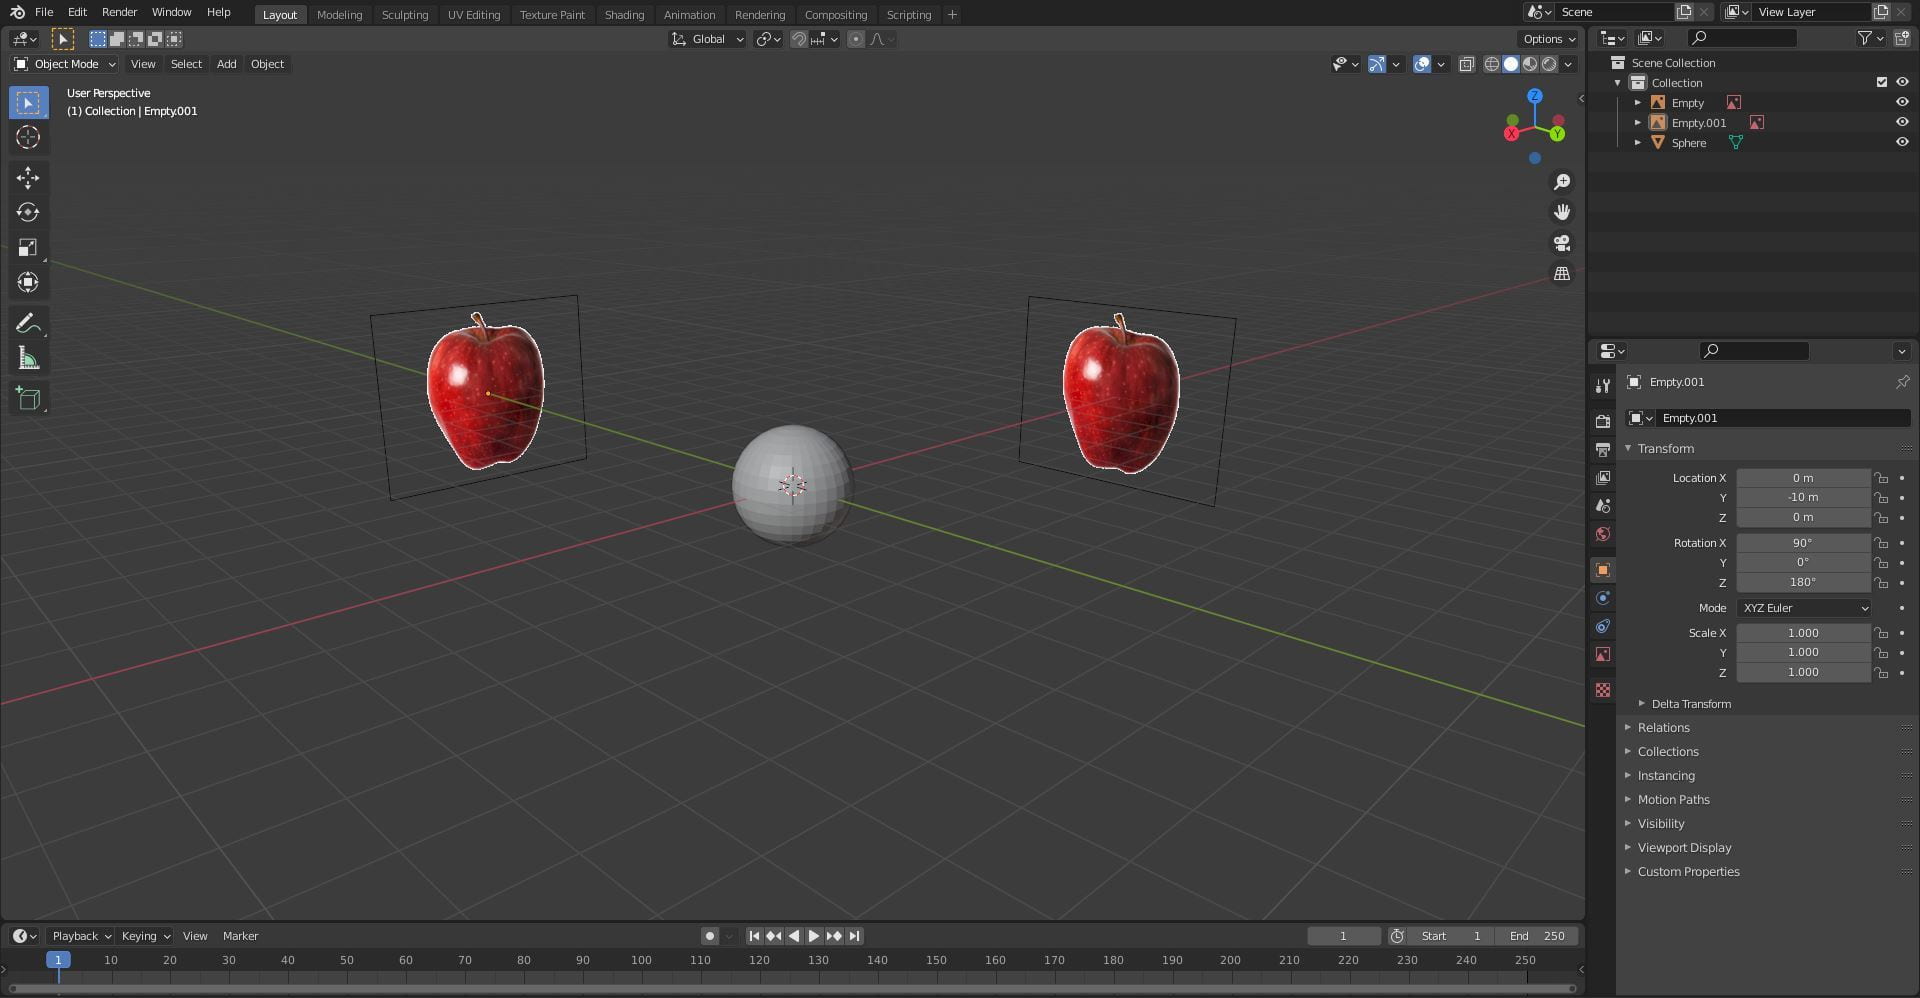
To start I deleted the light, camera and the cube as they were not necessary. Next, I add a UV sphere to the scene, this will be the base of the apple, I also added my reference into the scene and moved it to –10 on both the x axis and y axis.

I then scaled the sphere to better fit the size of the apple and began to shape it using the grab brush located in the sculpting menu. After sculpting the rough shape on the y axis, I changed my view and sculpted it on the x axis.

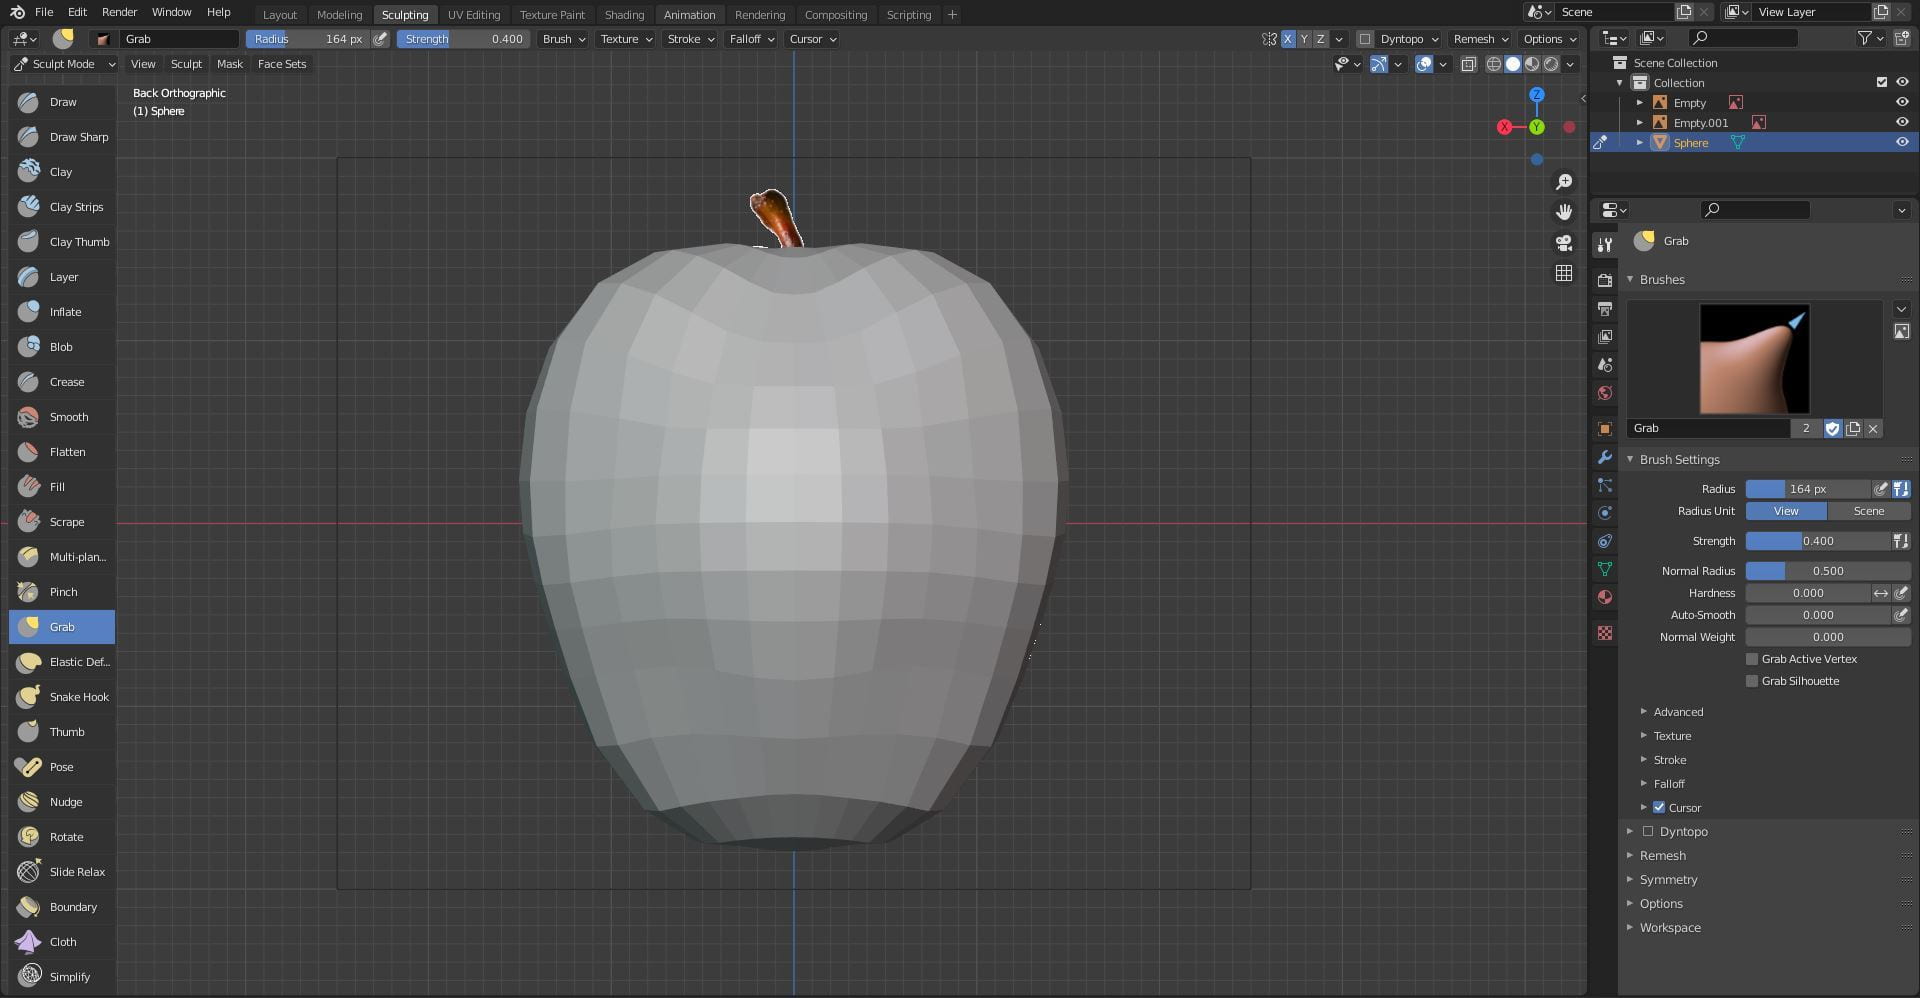


Next, I looked at the z axis to round the shape of the apple, when sculpting on the x and y axis it can cause the model to become square and not very organic. I spent a while on getting the shape right as I wanted the apple to look rounded and natural.


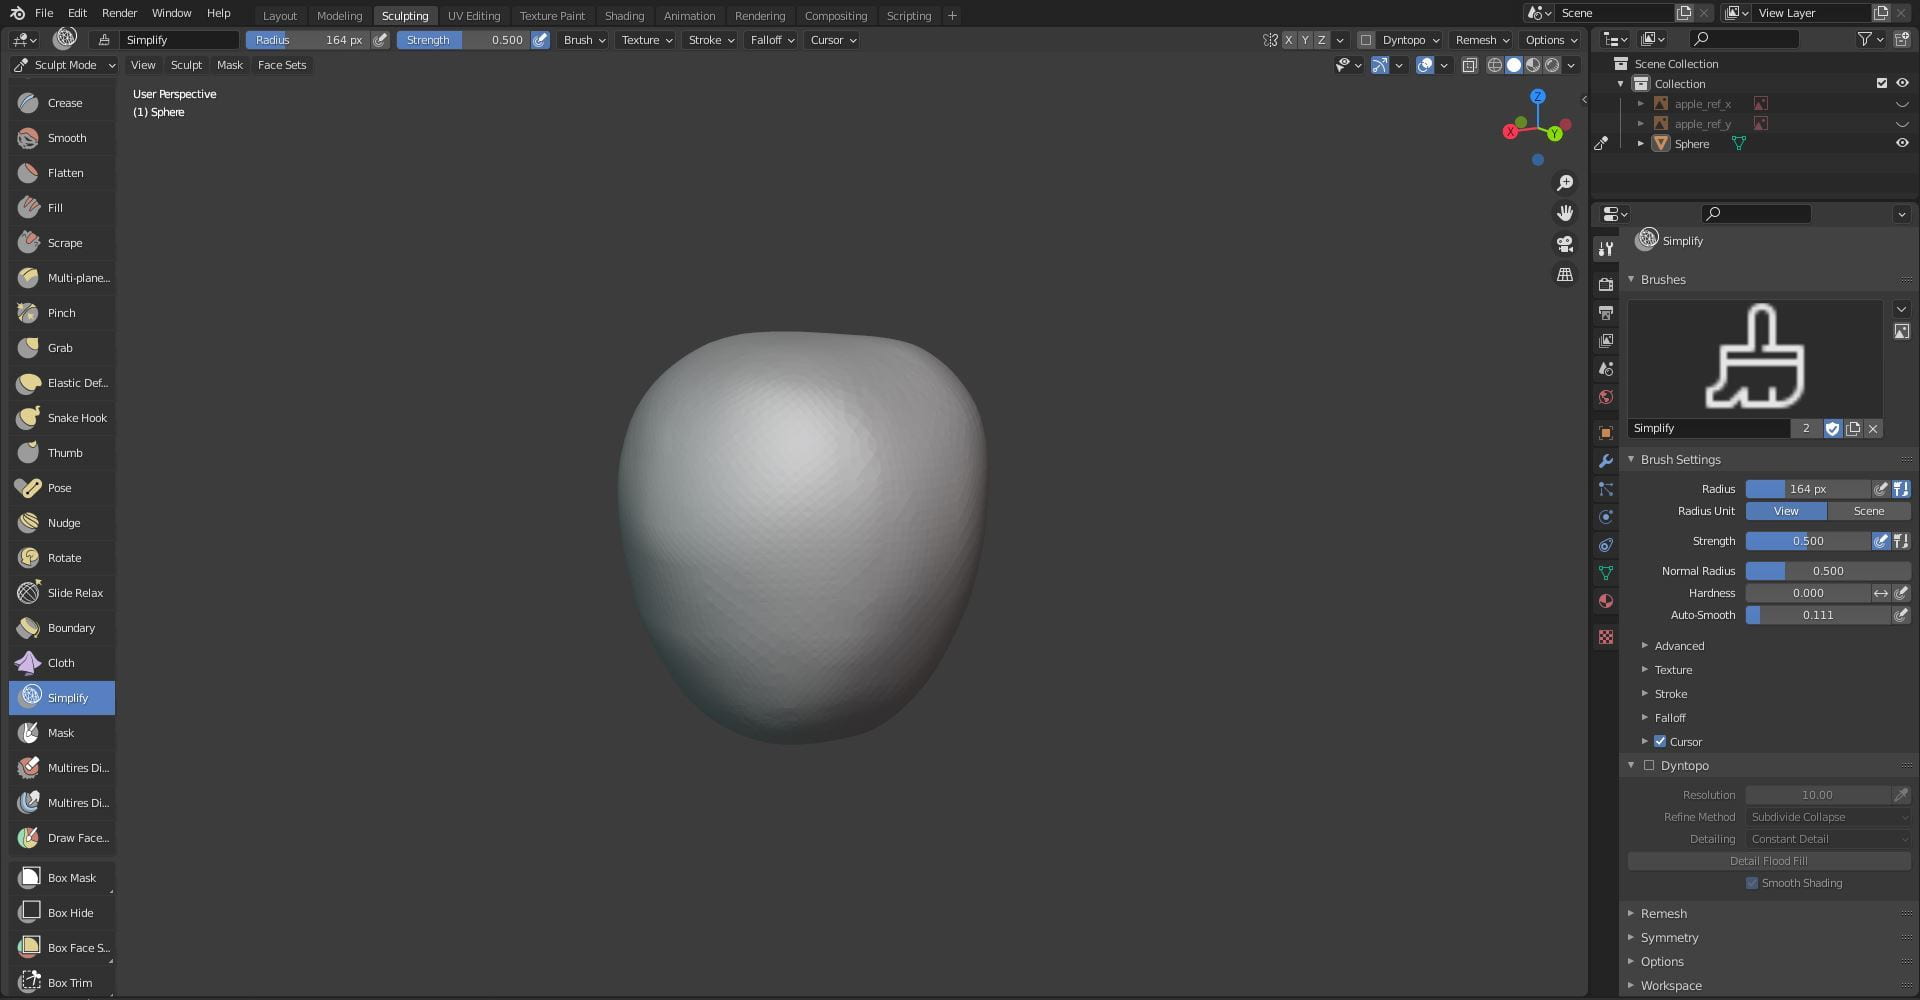
Once I had achieved the shape I wanted; I turned on dyntopo, turned the resolution to 10, changed detailing to constant detail and ticked the smooth shading box. I then clicked detail flood fill; this increases the poly count of the model.


To smooth the surface of the model I used the simplify brush and turned the auto-smooth to a low value to not distort the model.
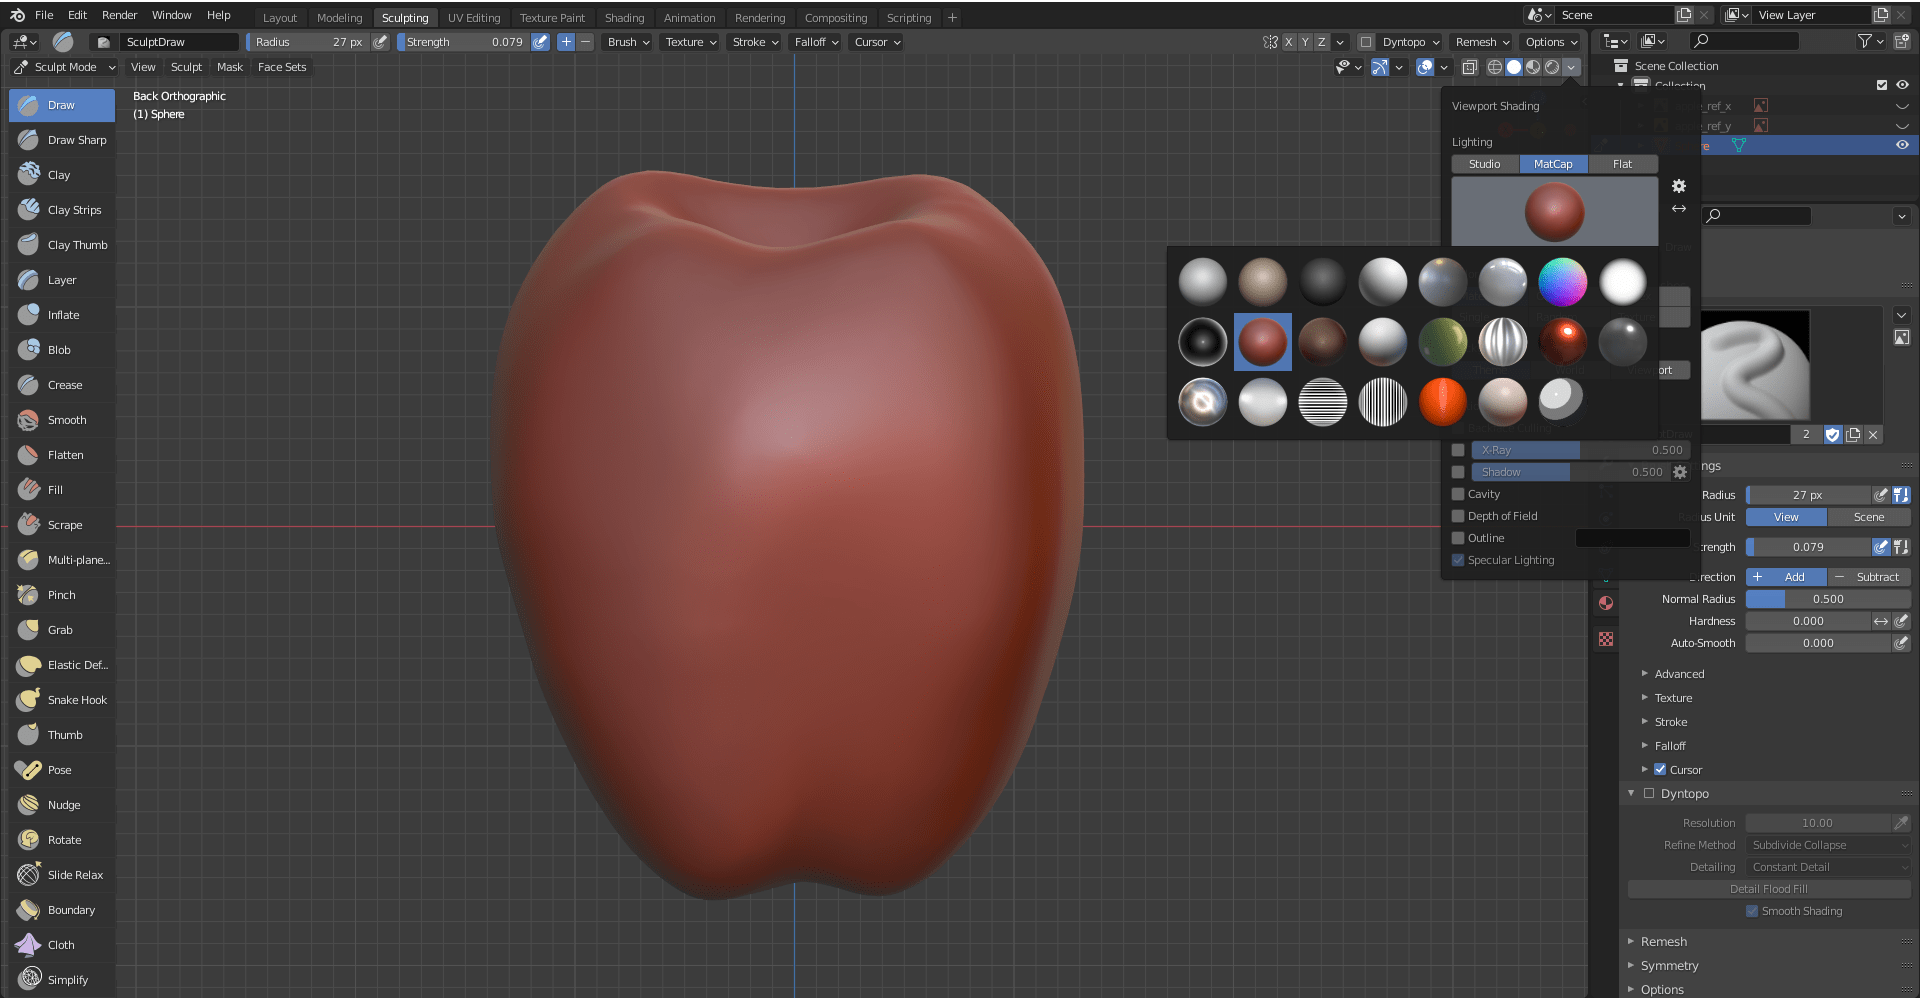
Using the draw brush hold control to make it cut into the model, I cut the whole for the stalk at the top of the apple, I did the same for the creases and the dent at the bottom of the apple. I continued to work on the dents and the shape of the apple.


Next, I organised my scene by making a collection for my references and a collection for the model. I also changed the colour of the model to red to better match the apple in the reference. I was still not happy with the shape of the apple so I continued to work on it, I scaled the apple down a little as it looked a little long in my opinion.


I added a cylinder into the scene and turned on dyntopo, this time I changed the resolution to 15 and clicked detail flood fill. To bend the stalk, I click the blue wrench, clicked add modifier, selected simple deform and selected the bend option. To make it bend at the bottom I add an empty axis and move it to the bottom of the stalk. Then I click the pipette logo and select the empty axis, I then changed the degree of the bend till it matched the reference. I then hit apply and deleted the empty axis.


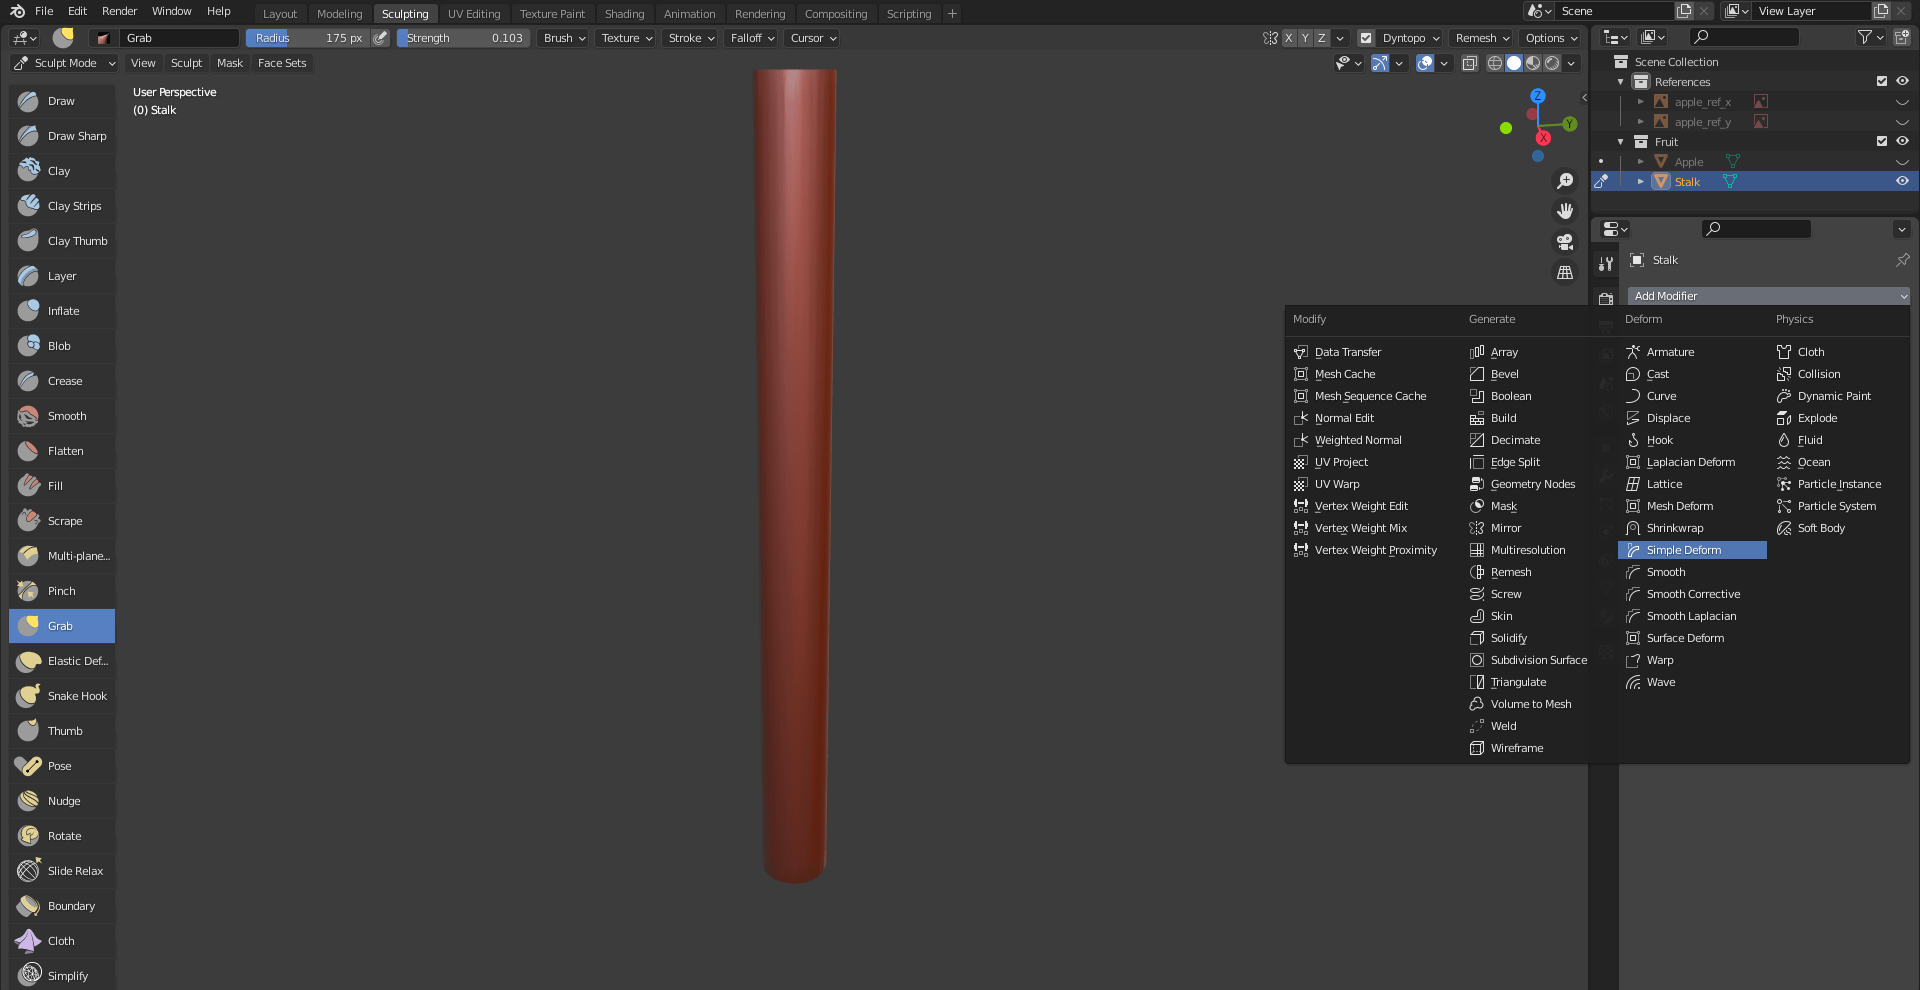

I added some texture to the stalk by using the draw brush, this make it look more like a piece of wood rather than looking smooth.

This is the final apple:


Overall, I am happy with it, I do think I have a lot of improving to do but I do like how it came out. If I was to do this again, I would try to make the shape less clumpy, it is not overly noticeable but it is there so I will try to do better in the next tasks.
Homework
For homework we were tasked with sculpting a pear and a bell pepper. There were no video tutorials for these tasks as they followed the same principles as the apple.
Pear:
I started the by cleaning up the scene and adding a UV sphere and my reference.
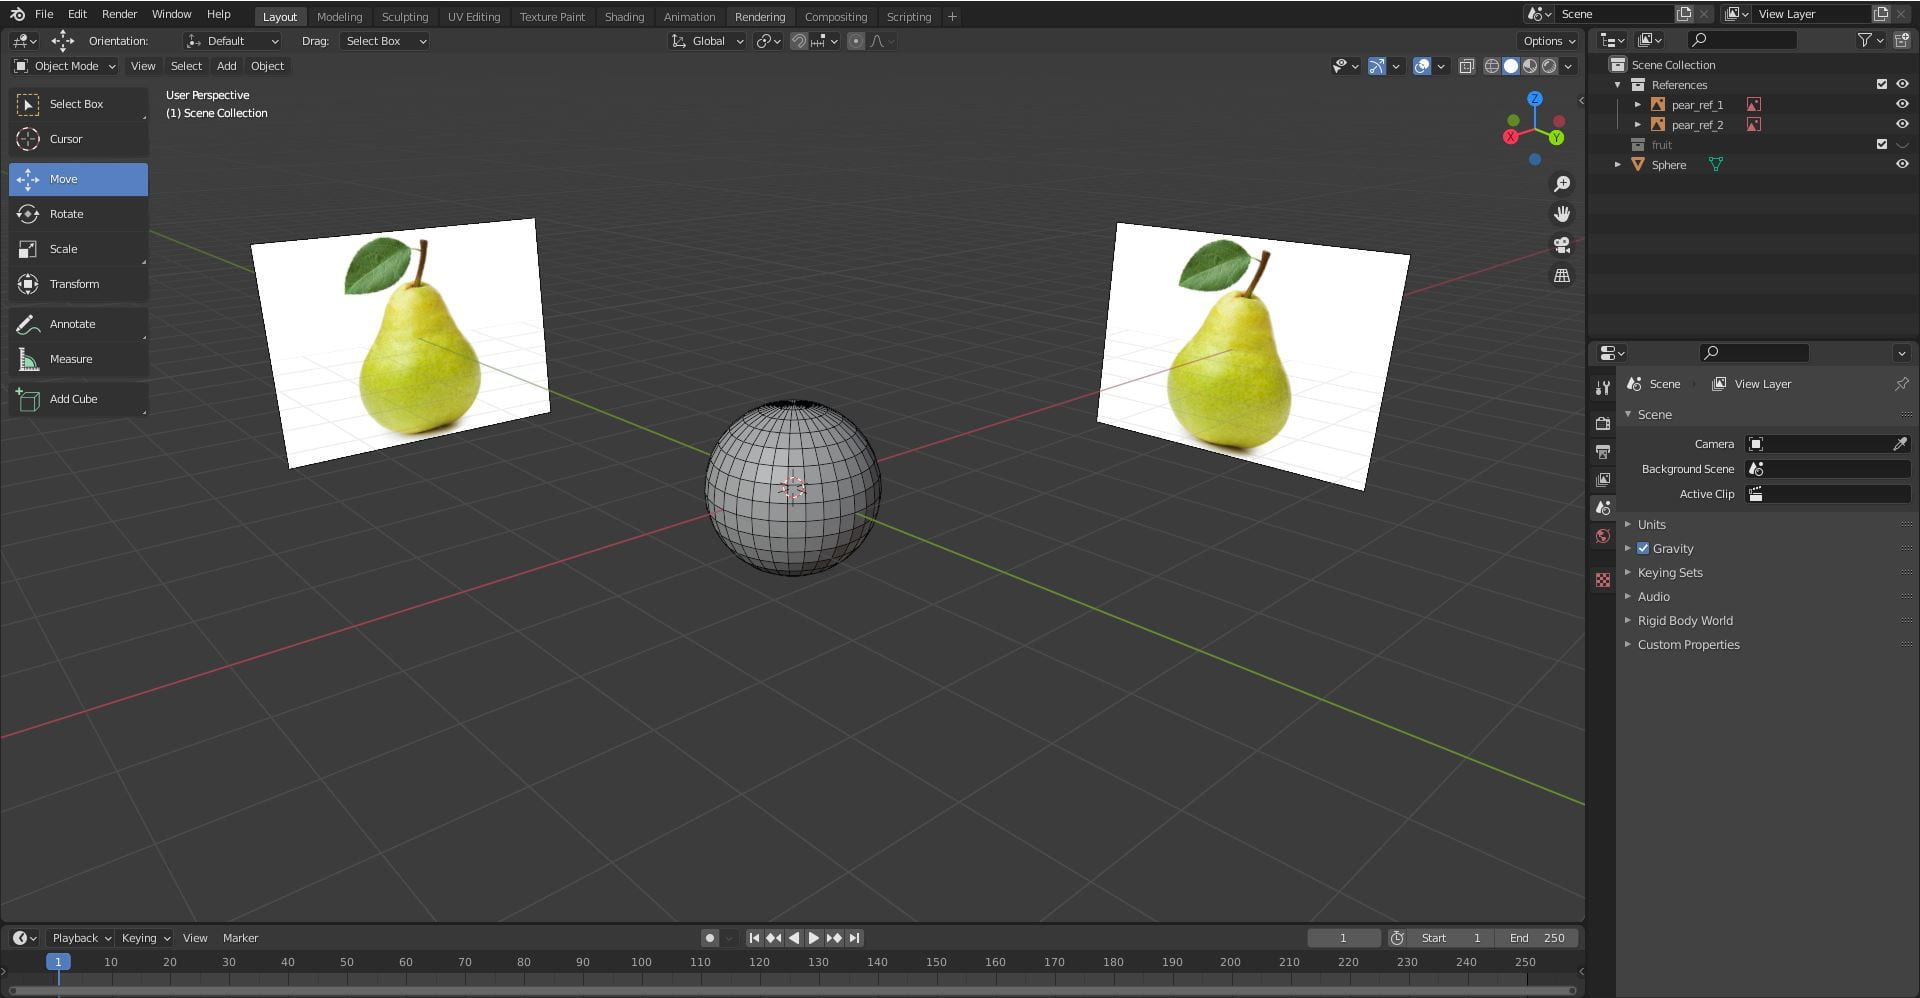
I then scaled the sphere into an oval to better fit the pears shape. I used the grab brush to form the base of the pear. I then repeated this on the x axis.


Next, I looked at the pear from above and using the grab brush I rounded the shape.


I then turned on dyntopo to increase the poly count of the model. I also used the simplify brush to smooth the surface of the model.

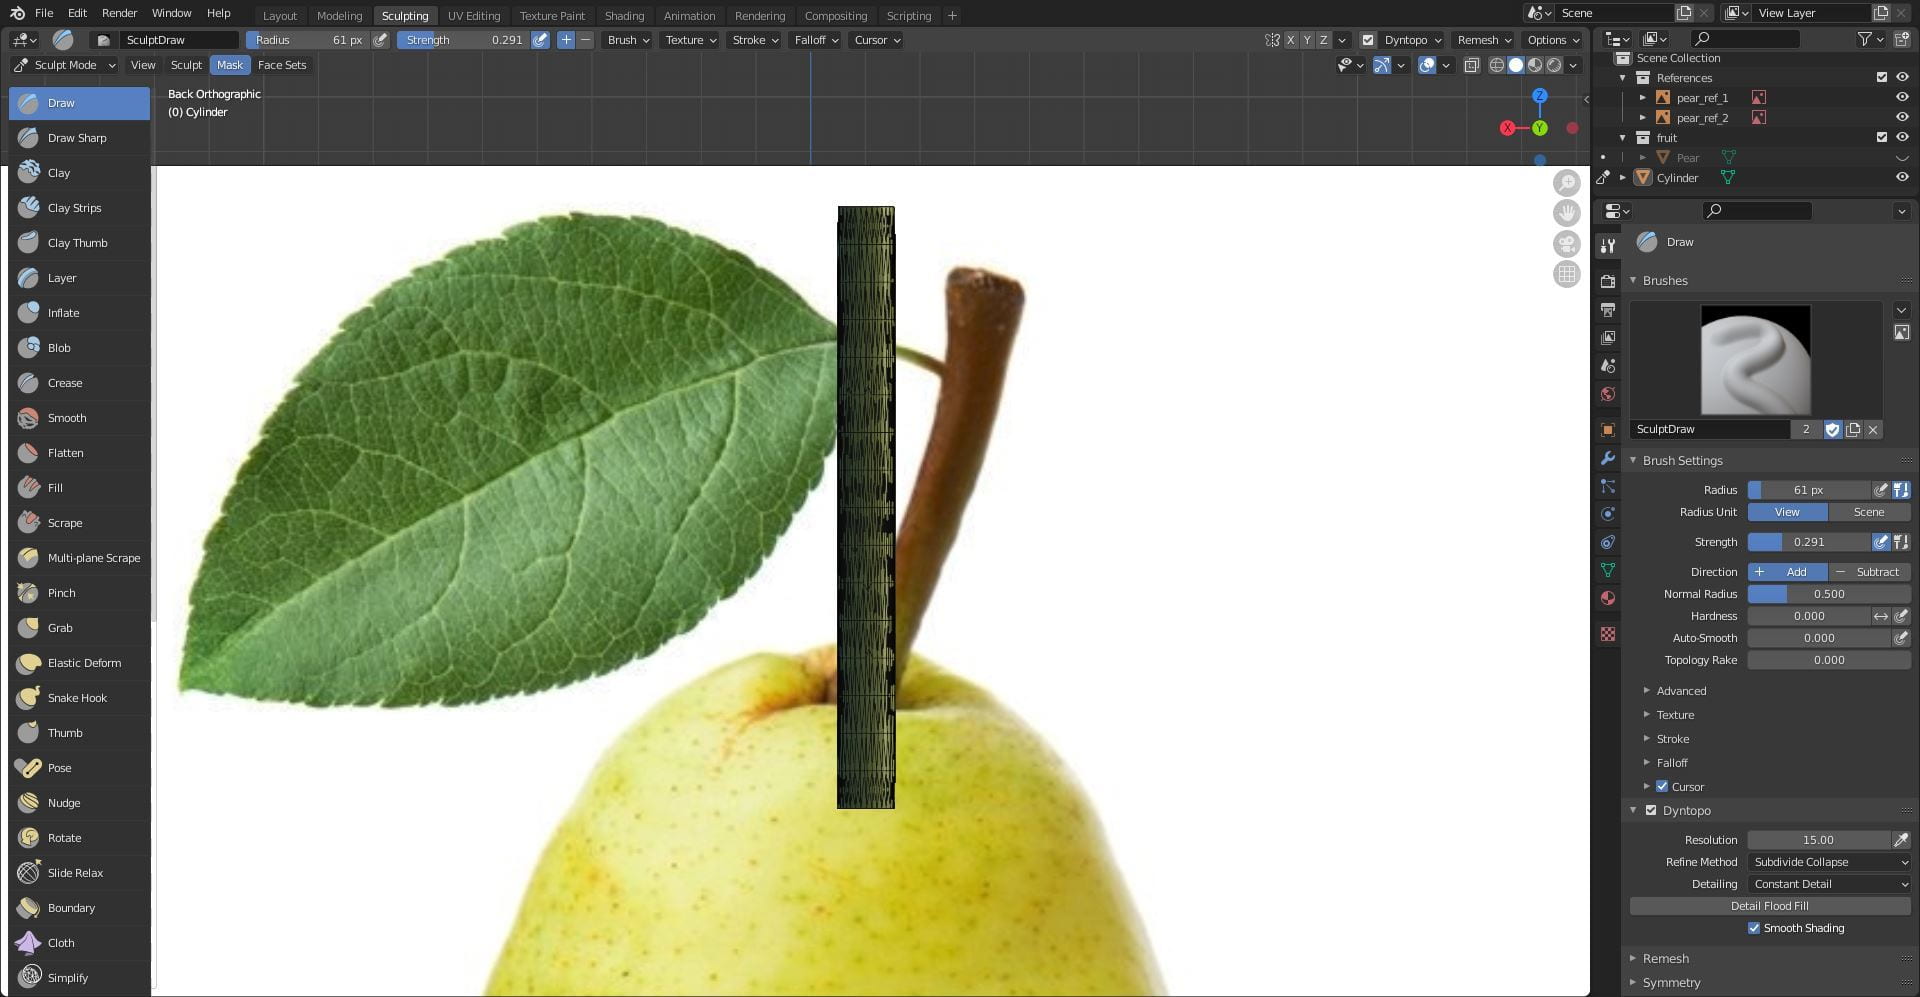
I used the draw brush and held control to indent the top to make the space for the stalk. I also made the dent in the bottom and the creases using the draw brush. I changed the colour of the pear to green.


The stalk was the same process as the apples stalk. Add a cylinder, turn on dyntopo, turn the resolution to 15, and click detail flood fill. I then click the blue wrench, clicked add modifier, selected simple deform and selected the bend option. I add an empty axis and move it to the bottom of the stalk. Then I click the pipette logo and select the empty axis, I then changed the degree of the bend and clicked apply. I deleted the empty axis. I did not add as much texture as the pears stalk looked smoother in the reference. Lastly, I used the draw sharp brush to make the creases at the top and bottom sharper and deeper.


Here is the final pear:

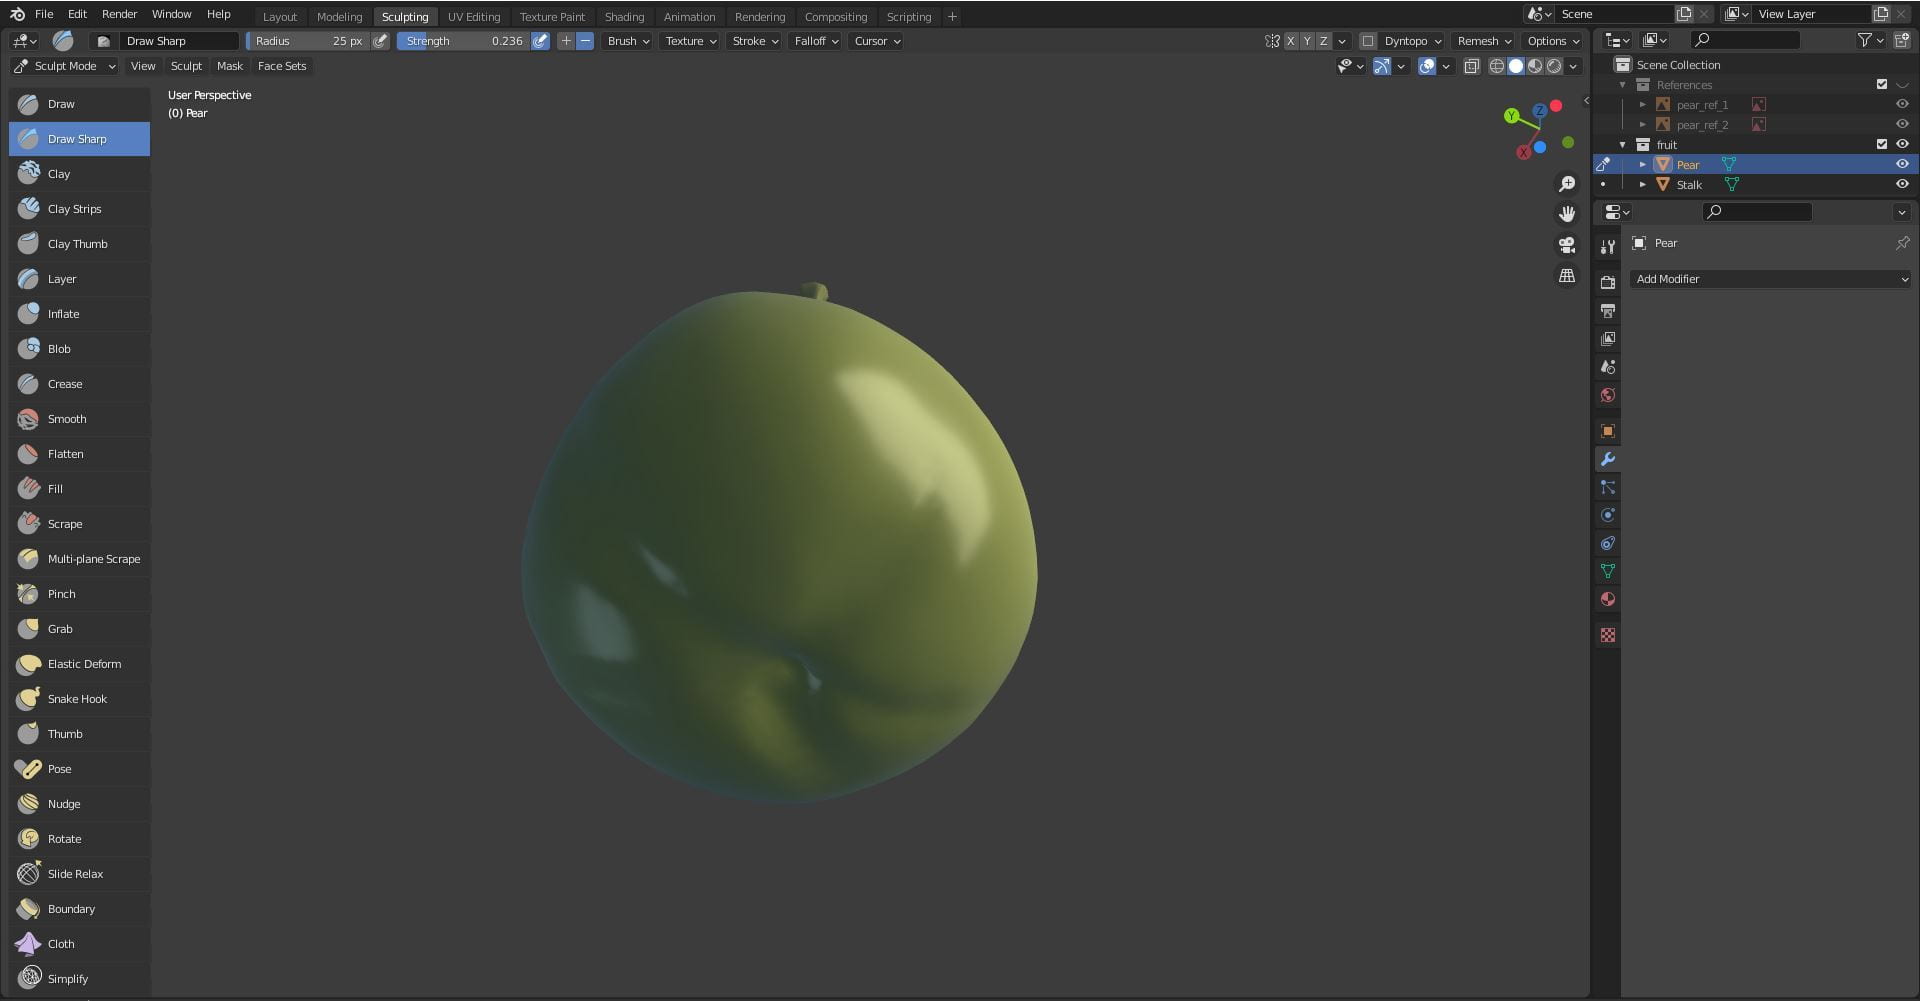

Overall, I like how it came out, I think it is an improvement from the apple as it looks less clumpy. If I was to do this again, I would make the creases a little more defined as they are a not a deep as they could be, I think it would help the shape of the pear.
Bell Pepper:
For me the bell pepper was the most difficult to sculpt I had a few problems with shaping it. To start I cleaned up the scene, added a UV sphere and my reference.

Next, I started to shape it using the grab brush, the shape was coming out well. I repeated this on the x axis. When I looked at the top it looked warped and distorted, I tried to fix the shape, but I could not so I restarted.

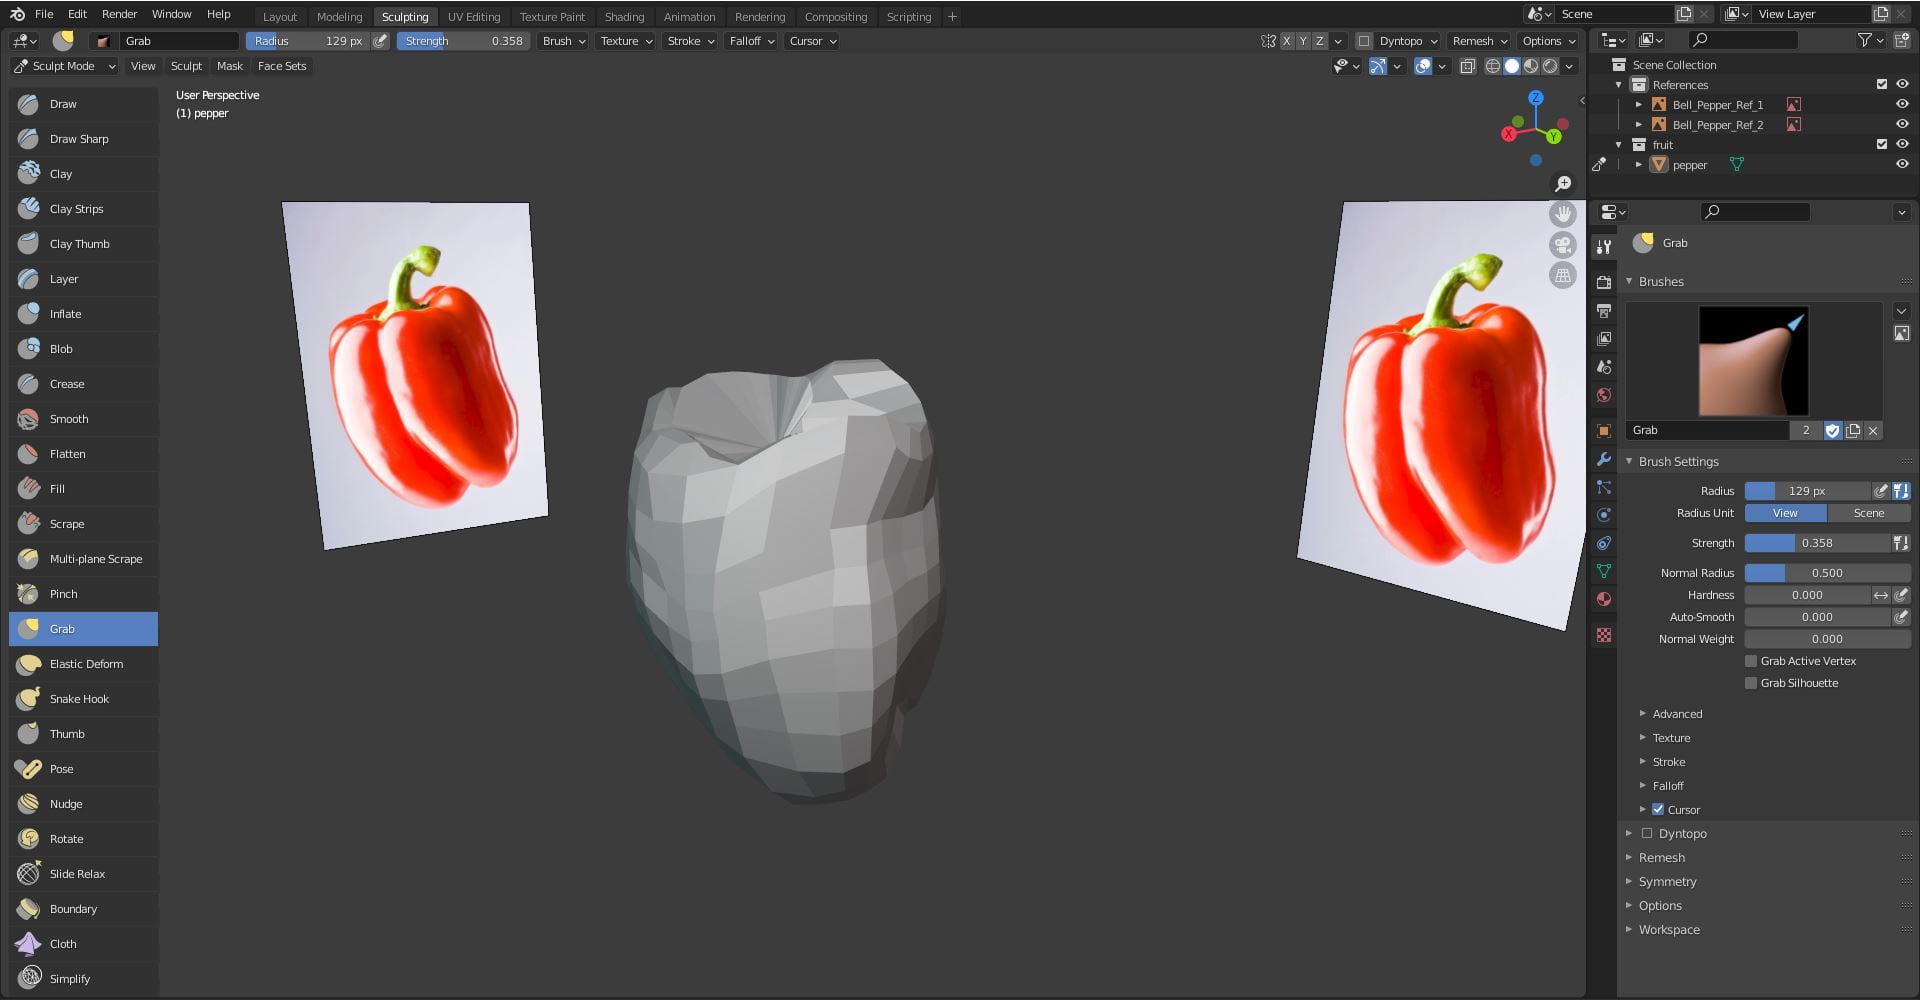
I added a UV sphere and scaled it to be an oval to better match the shape of the pepper. I then began to shape it using the grab brush. This attempt came out a lot better as there was not any large distortions on the mesh. I then rounded the shape from above.


Next, I turned on dyntopo and clicked the detailing tab and change it to constant detail, I change the resolution to 10, clicked the smooth shading option and click detail flood fill.

To make the dent in the top I used the draw brush and held control to cut into the model, I did the same for the bottom. To make the large bumps I used the inflate brush to build the shapes and the draw brush to make the deep creases. I also changed the colour to a red, orange.
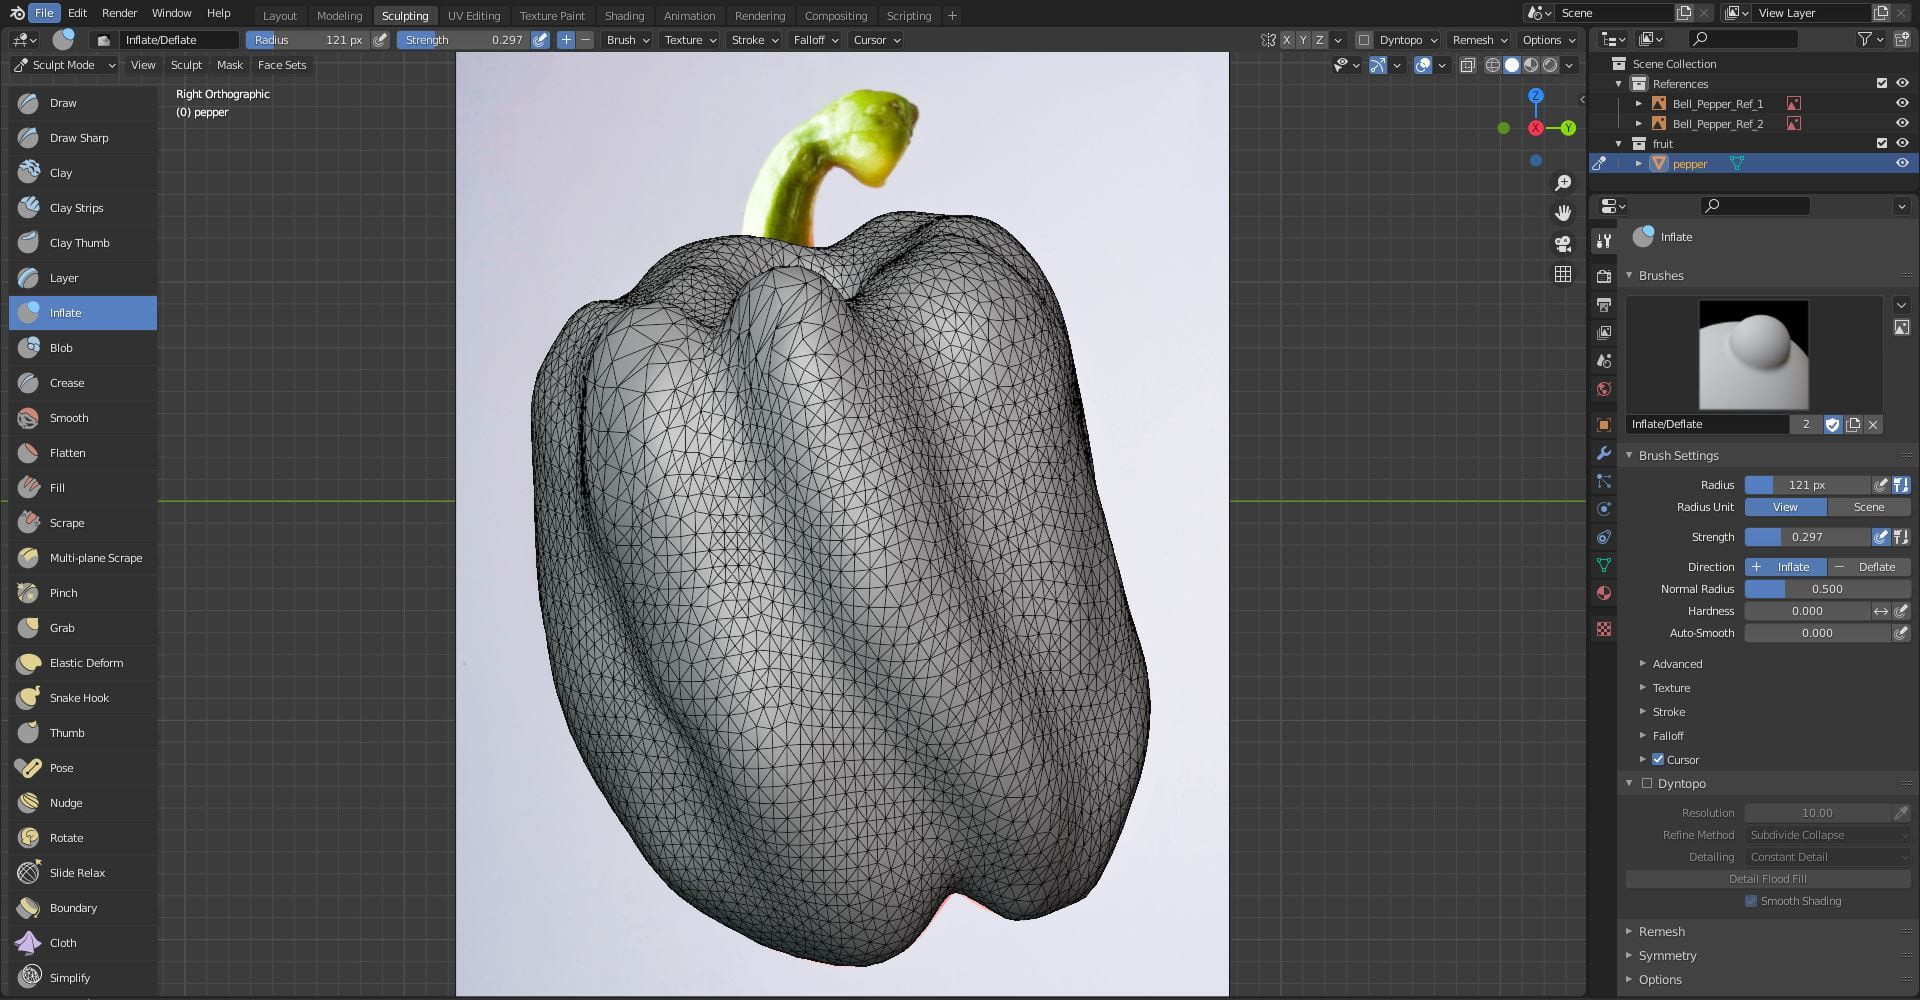
To make the stalk I added a cylinder. I then turned on dyntopo, changed the resolution to 15 and click detail flood fill. Next, I added the simple deform modifier and selected the bend option. I add an empty axis, moved it to the bottom of the stalk, clicked the pipette logo and select the empty axis. I then changed the degree of the bend and clicked apply. I deleted the empty axis. To shape the stalk, I used the grab brush and the inflate brush, I pulled the cylinder out at the bottom to make a larger base to better match the reference.


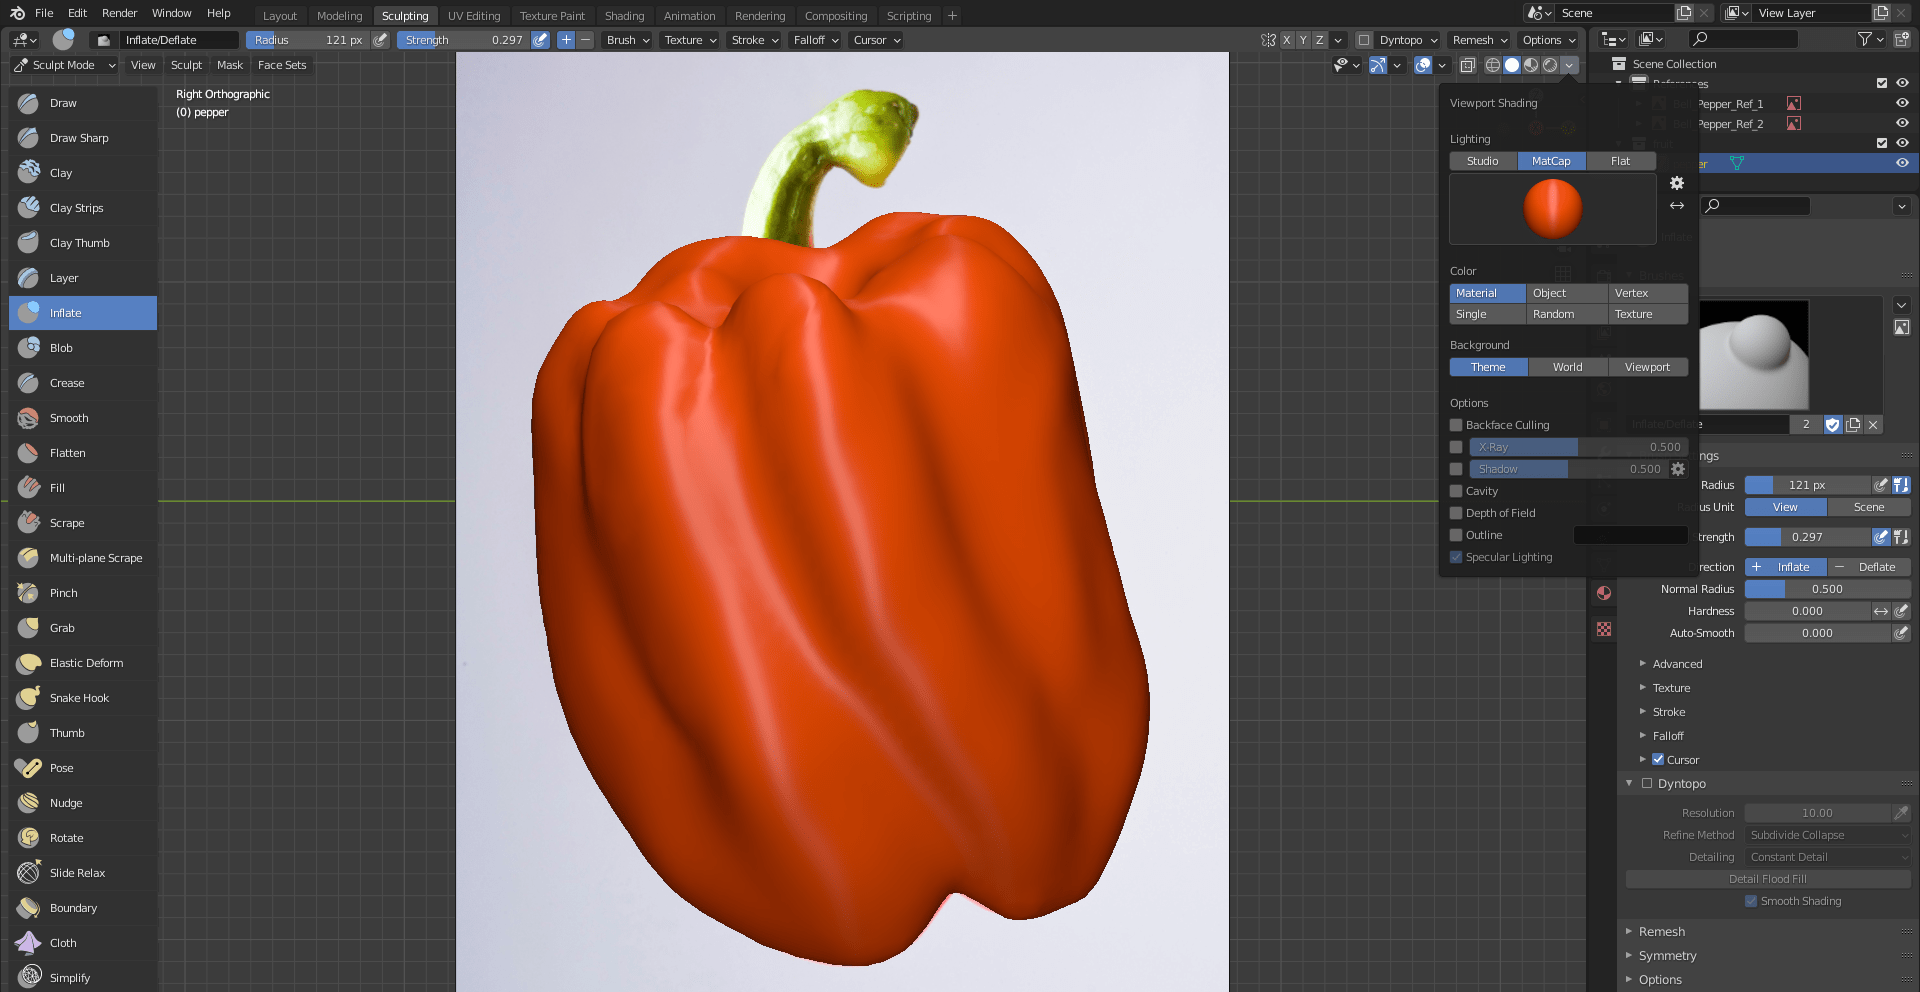
Here is the final bell pepper:


Overall, I really like how it came out, I think the stalk looks good and I am really proud of the form of the pepper I think the bumps look good. If I was to do this again I would try and improve the bottom as the dent came out a little big and the overall shape of the bottom looks a little funny.
Assessment 2
The next assessment involves creating a cute character that I can model in Blender. This is my initial research, all of these images were found on the internet. I mainly looked into popular well known characters from Games and Movies. I looked at companies such as Disney, Sanrio and Studio Ghibli.