

Source: blenderartists.org, 2012
At last I’d made it to week 11, and the final stage – adding armatures in Blender, which allow a model to be posed, and presenting a character in Sketchfab; the world’s largest 3D modelling platform, where the content of an artist’s portfolio can be published and seen by millions.
Armatures are an essential component of 3D modelling; used to create a framework that mimics a skeleton of interconnected ‘bones,’ which when manipulated, enables a model to be posed, and animated in a way that brings it to life. Formed in an hierarchical structure, each bone is placed in a specific location, and has pivot points that allow it to be moved and rotated in 3D space, and unique to Blender, the entire ‘skeleton’ is treated as a single object.
Given that, as part of our overall assignment we will soon have to pose our own creations in Sketchfab, our workshop consisted of understanding the process of to do this, starting with how to add armatures to the existing 3D modelled alien superhero character below that we downloaded from Blackboard.
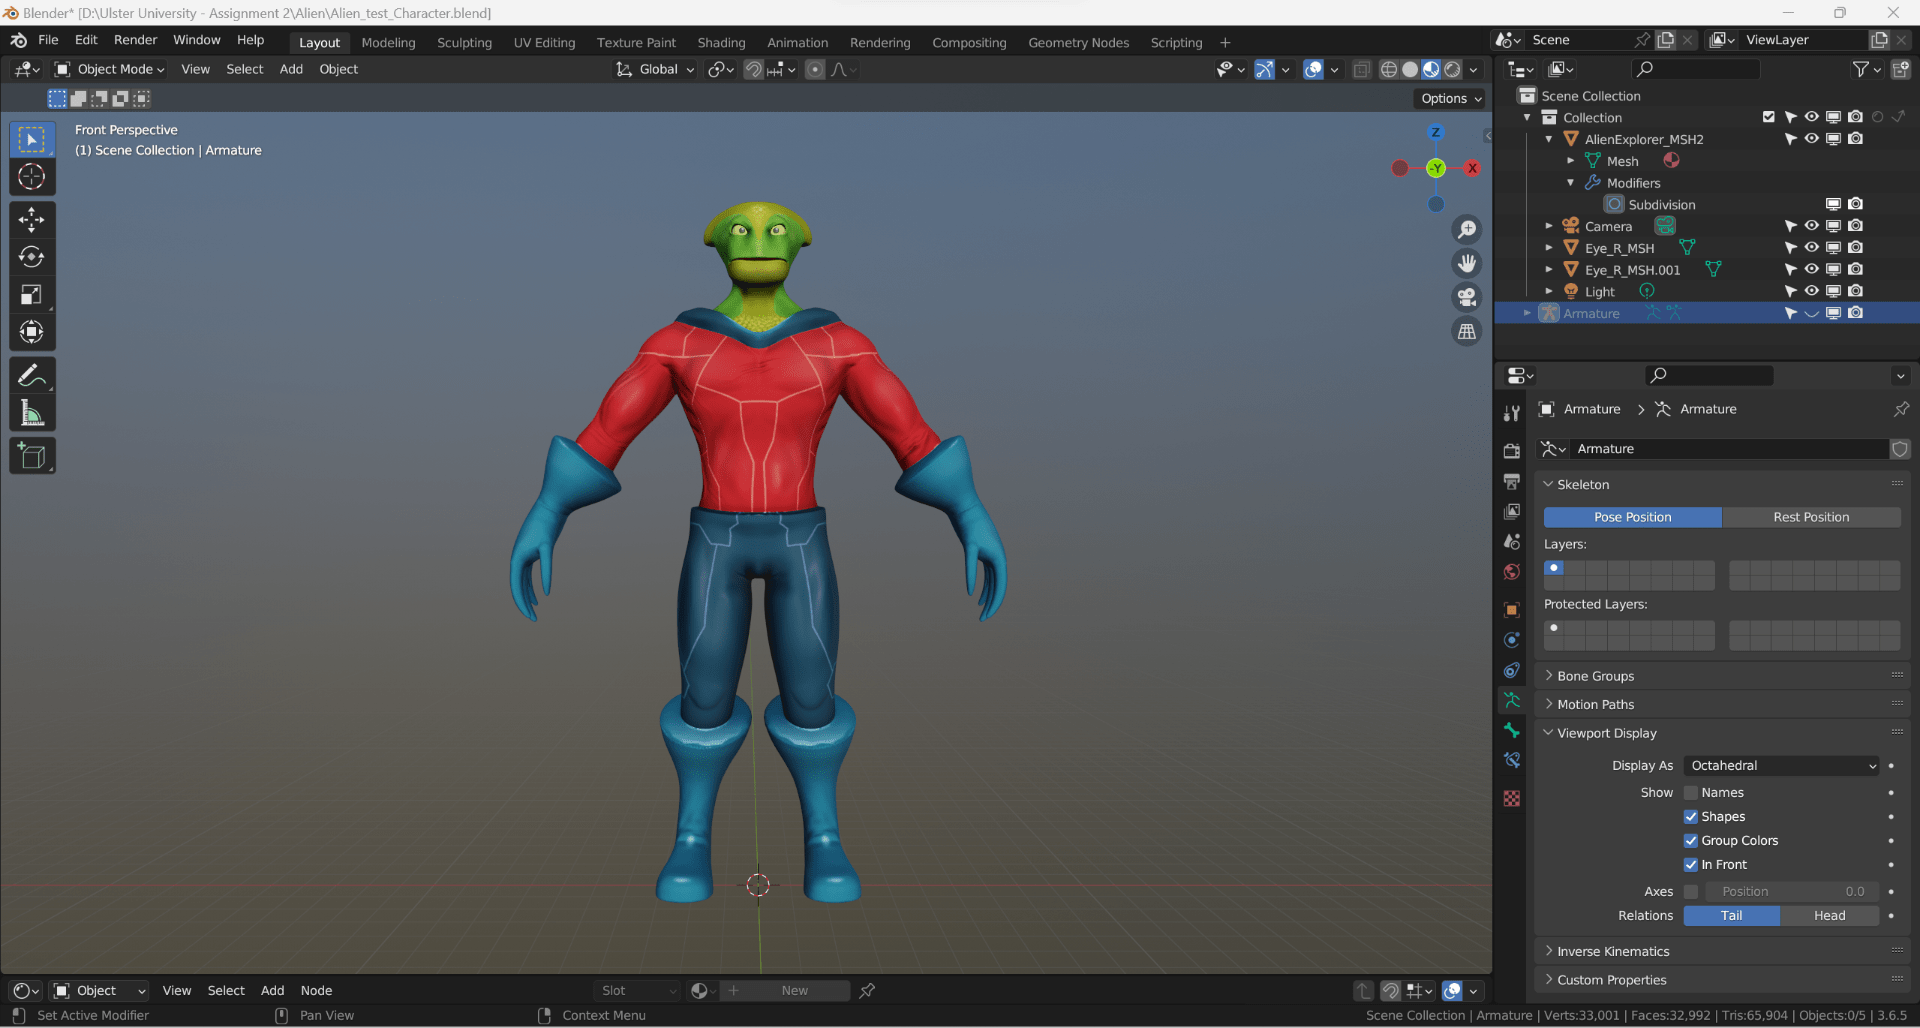
Completed in ‘edit’ mode, the first ‘bone,’ which is placed in the pelvic area, is created using the Shift + A shortcut, and additional ‘bones’ extruded in sequence from this location, using the ‘extrude’ tool from ‘pivot points’ found at either end of the previous ‘bone,’ with this framework only completed on one side of the model. As maintaining symmetry is essential for the model to eventually move and pose correctly, similar to a ‘mirror modifier,’ the ‘symmetrise’ option is used to create a perfect replica on the opposite side.
Once the framework has been started, the ‘viewport display’ function can be used to help visualise the armature placement, and the ‘magnet,’ and ‘volume’ tools, to help find the centre of the ‘volume’ of body parts, such as arms and legs. Finally, enabling the armature to be adjusted in ‘pose’ mode, and to see the deformation effect on the mesh, once complete, and ensuring the armature is set as the active object, it can be linked to the mesh using ‘control + P’ and ‘armature deform’ with automatic weights.
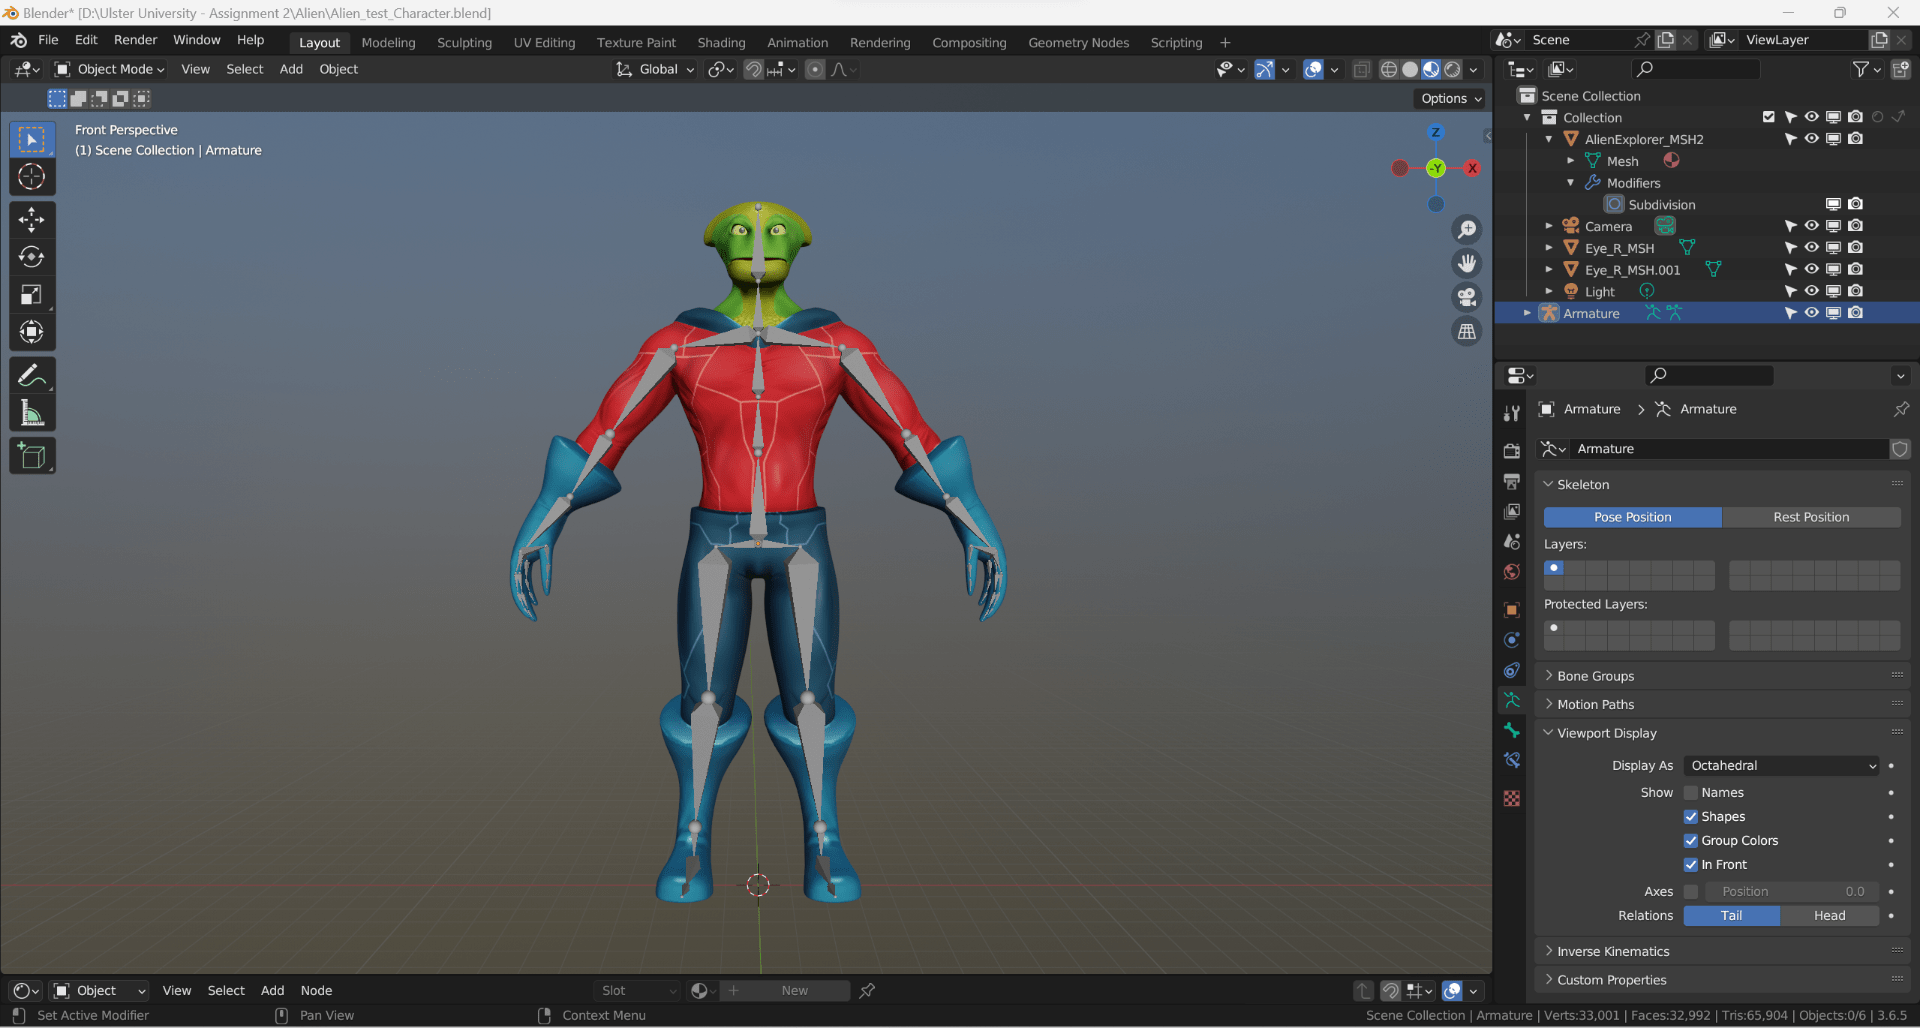
Here’s the same model as above, only with the armature added.
Finally, it was time to pose the model and export it to Sketchfab. Given that the character was an alien superhero, I chose to pose him in an interesting, exaggerated, and dynamic way that I felt would not only best reflect his outgoing personality and superhero status, but also attract attention on Sketchfab.

Once happy with the pose, as it was no longer needed, I hid the armature, and similar to the process previously learned to export a model for use in Substance 3D Painter, exported my superhero character as an .fbx file, that I then dragged along with my texture files into Sketchfab. An important point to note which will prevent issues, is that all textures must be named correctly, as Sketchfab uses their specific names to apply the textures. Normally, the texture map in .fbx format would also need to be exported at the same time, but this had already been done for this character.
Once processed in Sketchfab, the normal map can be checked, the background changed, and various settings be adjusted to achieve the best presentation and required mood, with the embedded link below my final final Sketchfab upload.
Overall I found this process quite straightforward, and am now enthusiastically looking forward to posing my own Genndy Tartakovsky inspired character and props, and am excited by the prospect of publishing my work on a creative platform where it can be seen by so many.
References:
blenderartists.org (2012). Animation and Rigging Support. [online]. [Accessed 20 December 2023].
Available at: https://blenderartists.org/t/rigify-help/532751