This week, we all worked individually on our websites in the classroom. This was a great way to focus on progressing through our work while also allowing us to get help from others in our class as well as our lecturer.
I used this time to get my silver screen section added into my website. In a couple of hours, I did succeed in adding all of my silver screen content to my website.

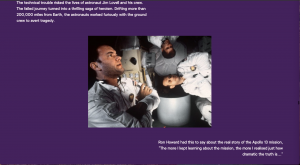 Most of the content looks exactly how I planned it, like these images above.
The problem came when I was creating the horizontal scroll.


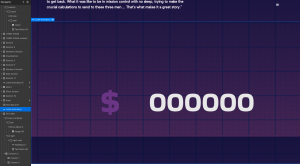
I made the images take up the whole viewpoint height as I felt this added to the immersive effect. The problem was the ‘camera’ moves down quicker than the last image appears. I started working with all of the numbers making sure the width and heights are correct and it looks like they are. This will require more work. The grey box under the horizontal scroll is a placeholder for a lottie file I will make for the number animation.
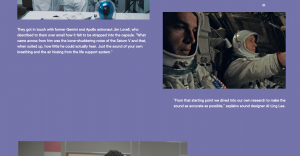
The next section I added was the ‘First Man’ content.

This was the start and title of this section. In my prototype the poster image is sticky and moves with the scroll. This interaction is not working on webflow, I think I will try a scroll animation instead.

The next part came out well and I think this is a nice, organised layout.

The part after the full screen image looks good as well. This section will have an individual vertical scroll that I need to learn how to create on webflow.

This section requires my top images to arrange on top of one another and this is proving to be very difficult to look right. I can make it look exactly as I planned on my smaller laptop screen but when I view it on a larger monitor It doesn’t work. I’ve changed the padding and positions countless times but they do not arrange the way I like on larger screens. I might create a different effect here. Another problem that occurred while I was creating this section was that my nav menu disappeared. It’s still present with all the links working when I look at my layers but visually you cannot see it or interact with it. I think it may have got lost underneath all of my content as I was experimenting with the z-index of my content.
I ended up having to recreate the nav bar but it is working as usual now.
After adding in all the content to this section I now needed to work on the interactions. The following are what I plan on finishing this week.
- Vertical scroll animations
- Number animations
- Section breaker animations
The first thing I decided to do was watch a tutorial on how to create a vertical scrolling animation. I watched this tutorial on sticky layouts to learn how that function worked. I wanted to use this on my poster image of the First Man as I wanted the image to move with the scroll until it met the next section. This worked well and I was able to complete this.

 This is how the the feature looks as you scroll down. The poster moves down to being in alignment with the title.
The next scroll animation I wanted to do was for one the images in the First Man section. I wanted it to scroll down and fade in above a piece of text.

I achieved this using timed scroll animation as the user scrolls.
The next animation I wanted to add in to these sections was a recreation of the number counter from my prototype. I thought to use after effects for this and export as a lottie file which I had used before in my website.
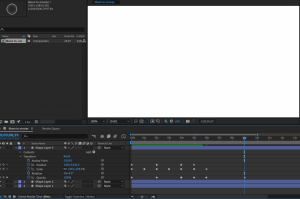
I watched this tutorial on number counting in after effects. This video explained how to use a slider effect and coded expressions in after effects to create the desired effect of a number counting. There were a couple of things that went wrong with this. Firstly the slider only allows the number to reach 1 million, so I had to look through comments and forums to find out you can multiply the end number, so I multiplied the number by 52 to get the desired amount. This worked perfectly in my after effects document. However after I exported it and added it to my website the numbers glitched and didn’t count the whole way.

The number would just flash between these two states and not actually count. I thought this might have been a glitched caused by it counting up to too big of a number. Therefore I went back to the after effects file and added the text ‘million’ to the end of the number effect. This would mean the number slider would not be counting too much in too little time.

 Above is how it looks in the file, with the expression. Below is how it looks in the website- also not working.
I then tried my last bet and tried just exporting it as a video and adding it to the site that way. However the only way to add a video from your own files to webflow, is to add it as a background video. I left it uploading for. a long time just to see. However it never transcoded and it wouldn’t have had the effect I wanted if it did. I decided to leave the number animation in the prototype.
I am planning on adding other animations to my website, to add an immersive effect similar to XD’s prototyping animations.
I wanted to create an animation between each section to break them up a bit more as I have had to use a single page website for this project.
This is something I wanted to from my first sketches before starting to build on webflow. The first one I decided to do was a rocket flying across the screen before the ‘Crew’ section. I thought it would be easy as I already have a drawing of the Saturn V for reference.

This is how the finished drawing looks.
I then wanted to create a sort of flame cloud behind the rocket.
 This is how the cloud looks.
This is how the rocket and cloud look animated.

I filled the rocket with colour as I thought the flame cloud colour stood out too much. This animation worked as planned.
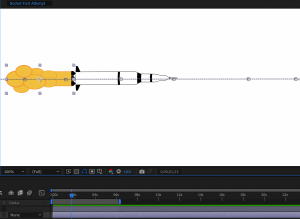
The next animation I wanted to create was the rocket flipping and expanding. This is an animation used in my prototype that appears when I smart animated between two screens. I really loved this animation and wanted to create it in whatever way I could for my website.

This is how the rocket looked after I traced it from my original drawing. This took me a long time but I’m very happy with how it came out and I’m getting more comfortable with after effects as I do this.

After this, I set its initial state by making keyframes at its initial position and rotation.
I then set the final state keyframes. The animation then creates itself. I exported this as a lottie file and inserted it into my website before the ‘Crew’ section.
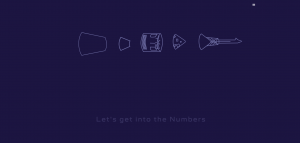
This is the finished animation in webflow. I also made a sub heading to explain that the user will scroll down into the ‘Numbers’ section. I am very happy with how this animation came out.
The last animation I wanted to create as a section breaker was before the ‘Silver Screen section’.
I already had an animation before this section in my prototype so I sketched out what it would look like in my website.

The animation would show the moon getting bigger and bigger until it filled the section with solid white. The title ‘Apollo 13’ would then appear and the user could then scroll into the content.

This is how the moon looks. I wanted it to look similar to the one used in my project. This took 3 shape layers to create.

This what the moon looks asI started animating it. I enlarged it and also added a solid circle layer behind it so the moon would fill with white.

This is what the animation looked like near the end.
This is the final state.
When I inserted it into my website I made the original title I had for this section relative. I then moved it up to the centre of the lottie file. I then created an animation, where the text would fade in after the animation was complete.
This was a very productive week for me and I feel I am prepared for the final critique in next week’s class.