—Ideas for the Animation—
During this semester our group arranged to meet inside and outside of class to discuss ideas for Assignment 3. We all settled on the idea of a ghost looking for a snack in the middle of the night.
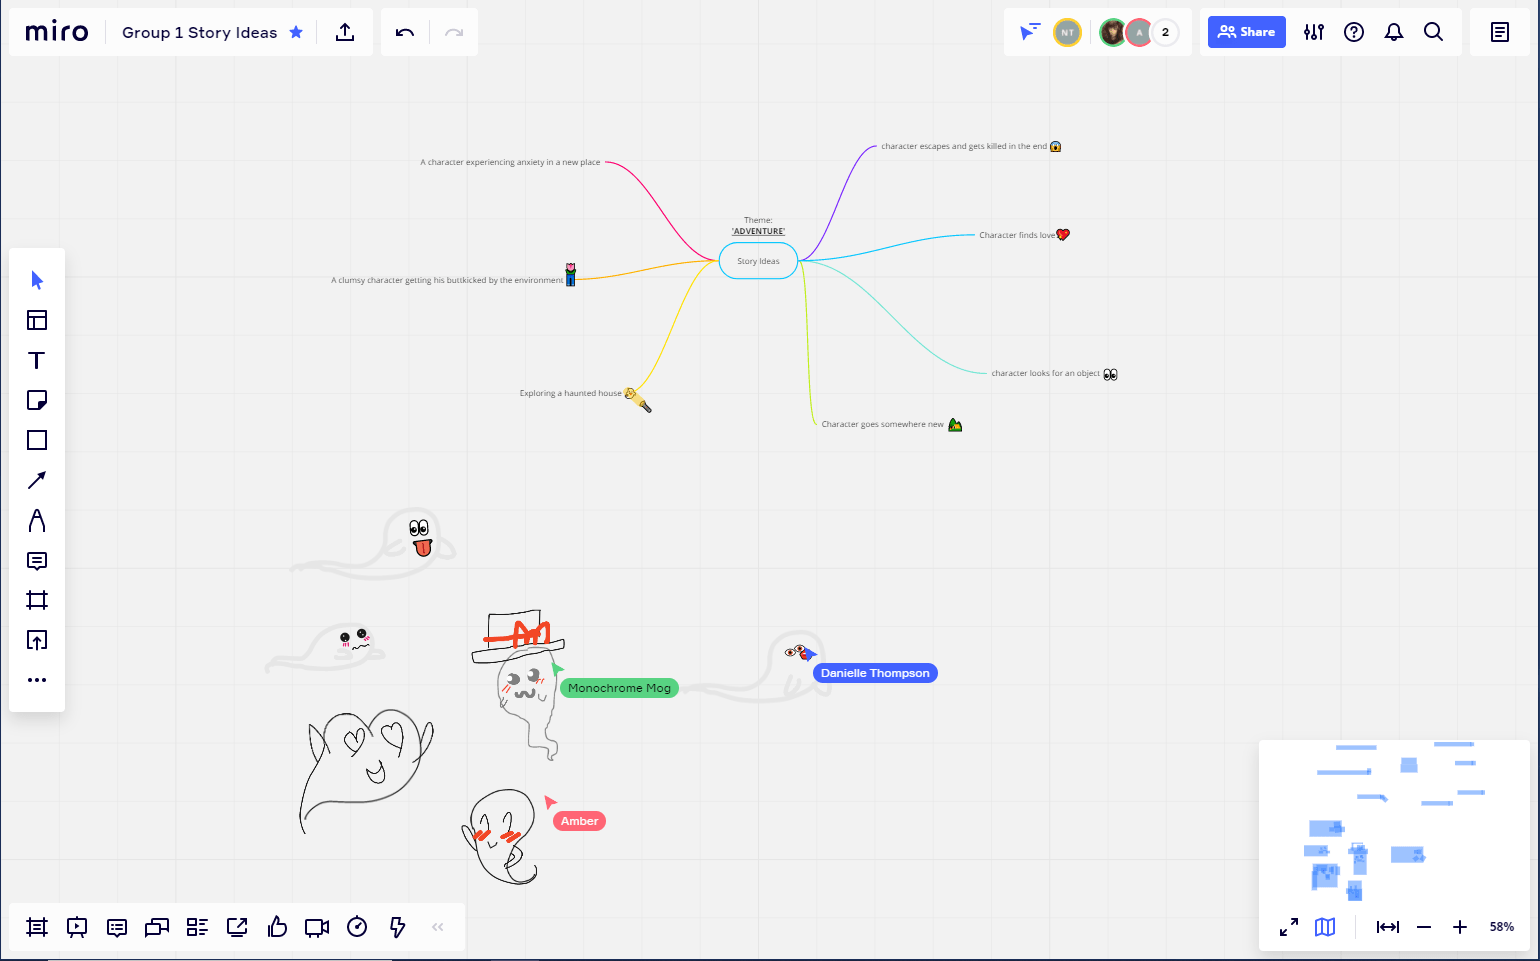

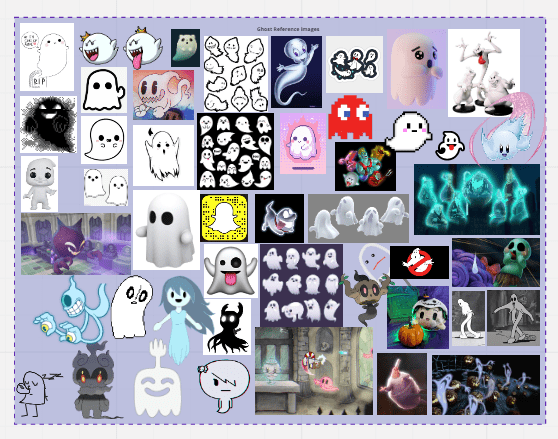
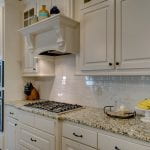
After deciding on the idea for the assignment, we all made a giant mood board for the ghost and the environment.
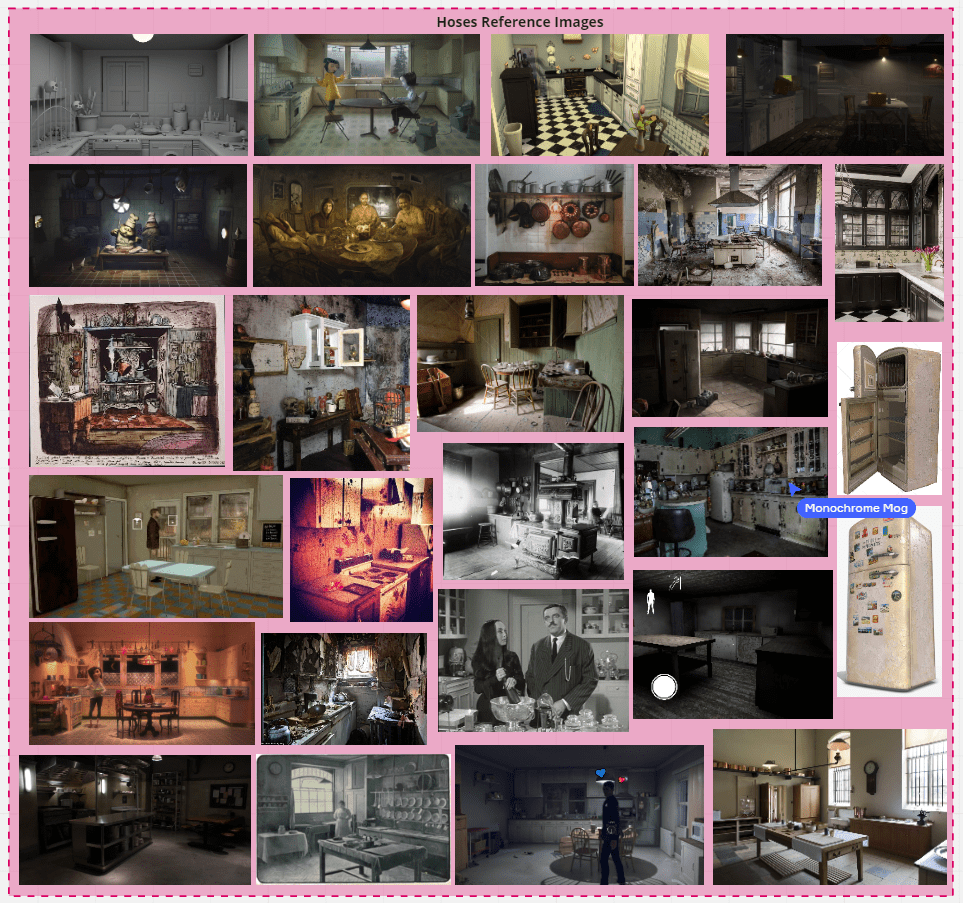
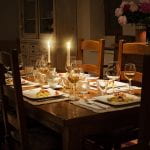
I found a few extra references for the furniture that I later used during the modeling process.


____________________________________________________________________________________________________________________________
—Assigning Roles—
During a meeting with the group we decided on the roles that each group member will have.
Amber: – Character Design
– Storyboards
Tori: – Character Design
Curtis: – Character Design
Danielle: – Environment Design
– Presentation Editor
Nicole: – Environment Design
– Presentation Designer
____________________________________________________________________________________________________________________________
—Concepting—
Based on the mood board for the kitchen environment, Danielle and I sketched some simple kitchen designs that we showed to the group and asked for feedback.
Based on the feedback from the group we made the adjustments and came up with an improved design that Danielle sketched up and sent me the lineart of so that I could create a colour scheme.


-Tori and Amber-
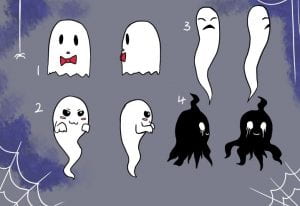
While Danielle and I designed the environment, Tori and Amber came up with some really cool and unique ghost designs.
Tori
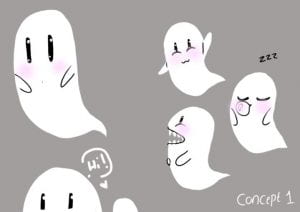

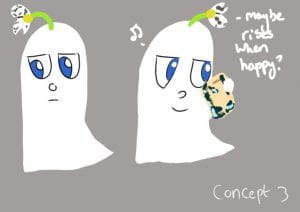
Amber
____________________________________________________________________________________________________________________________
—Storyboards & Animatics—
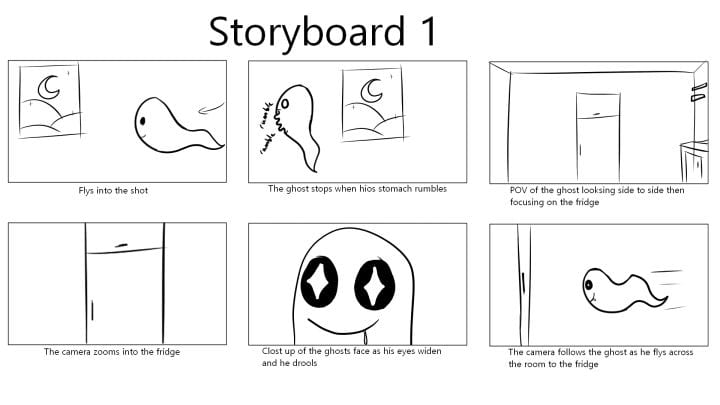
Amber created the first set of storyboards based on the story idea that we had and the environments that Danielle and I designed.

Danielle made the second set of storyboards based on feedback that we received from Alec and Aodhan during class.

I created the animatics based on the storyboards and edited them together.
____________________________________________________________________________________________________________________________
—Assigning Modelling Parts—
Our group met up again and assigned who was modeling what for the assignment.
Amber: – The ghost and his expressions
Tori: – The sandwich and its fillings
Curtis: – The hallway
Danielle: – The kitchen
Nicole: – The kitchen
Danielle and I took the lineart of the environment and colour coded it with who was modelling what.

____________________________________________________________________________________________________________________________
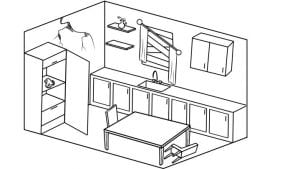
—3D Previs & Block Out—
-Block Out Process-
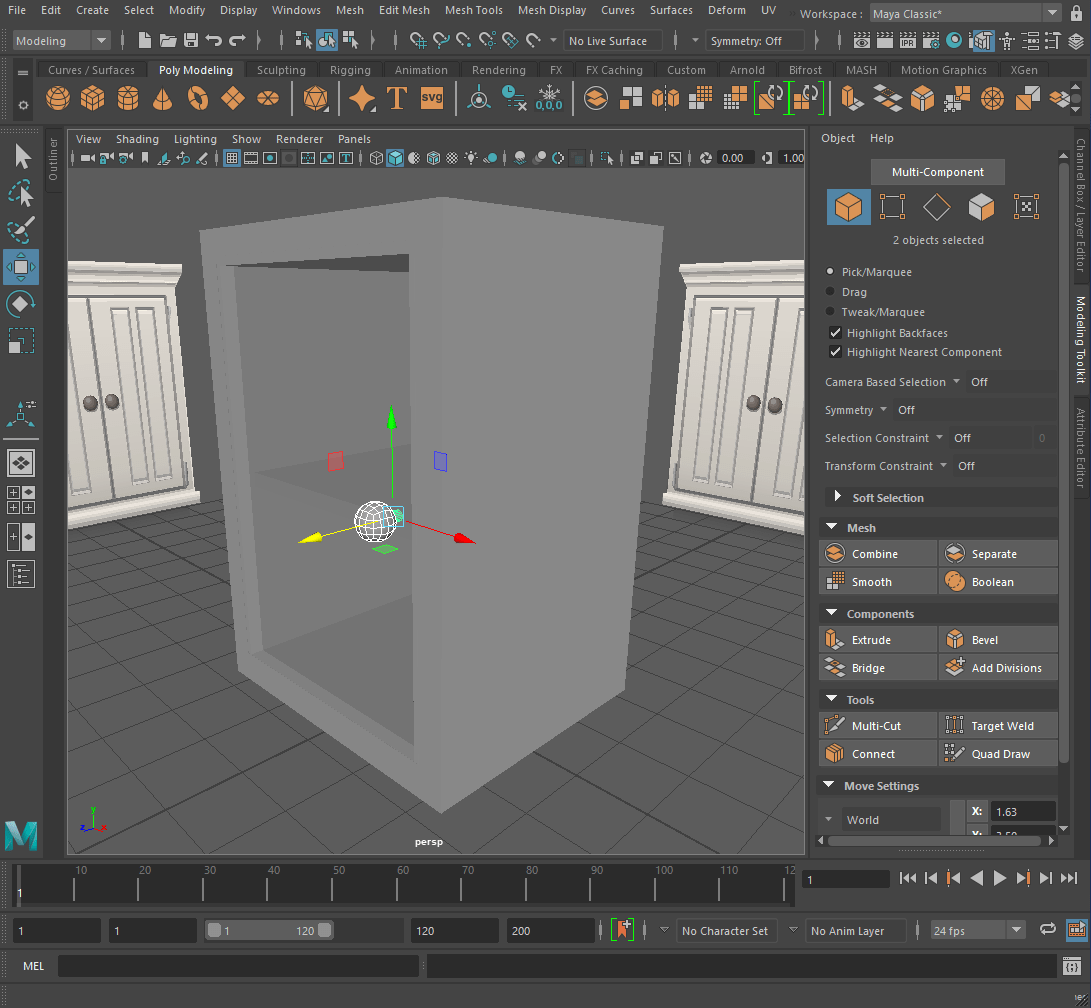
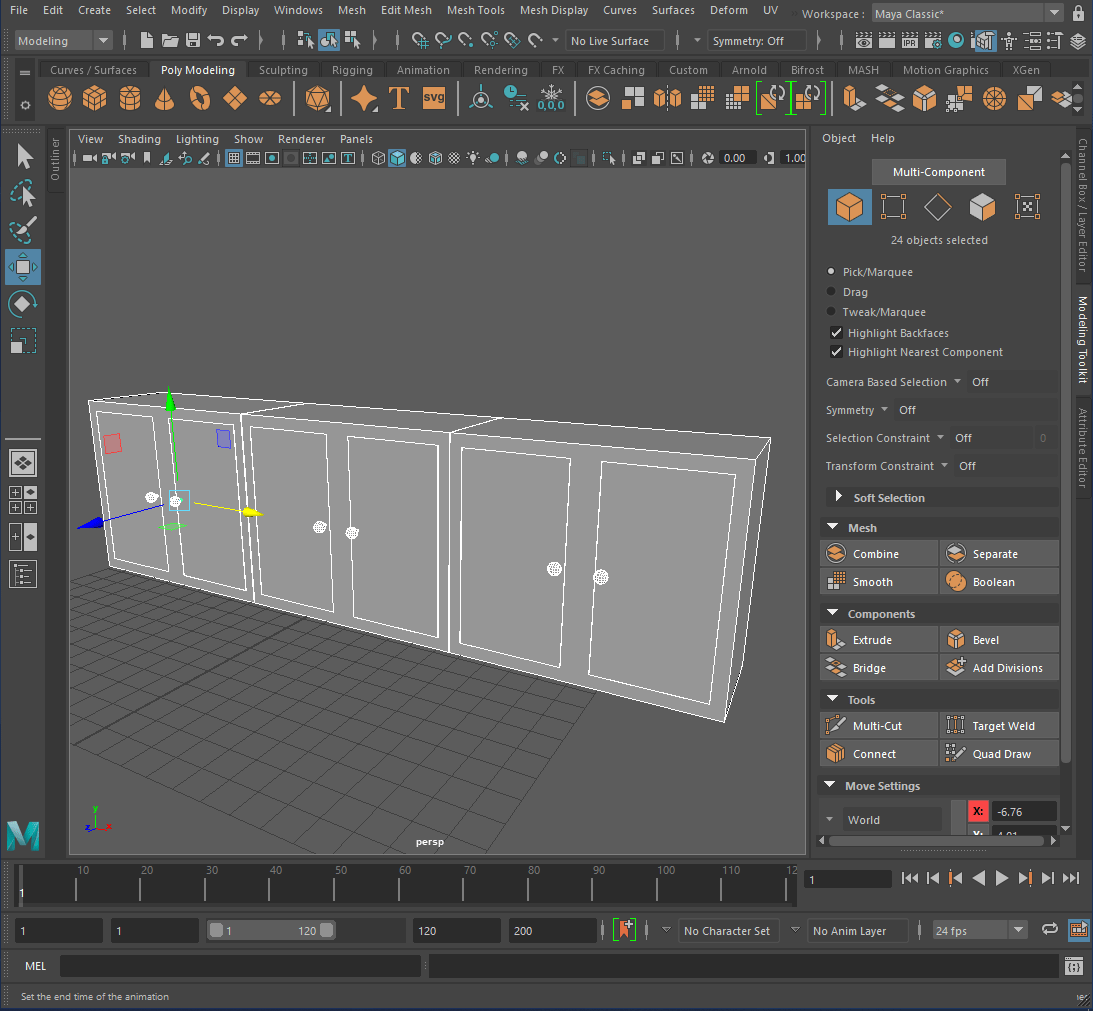
I used cubes and cylinders to make the general shapes and sizes of the furniture that would be used in the room.

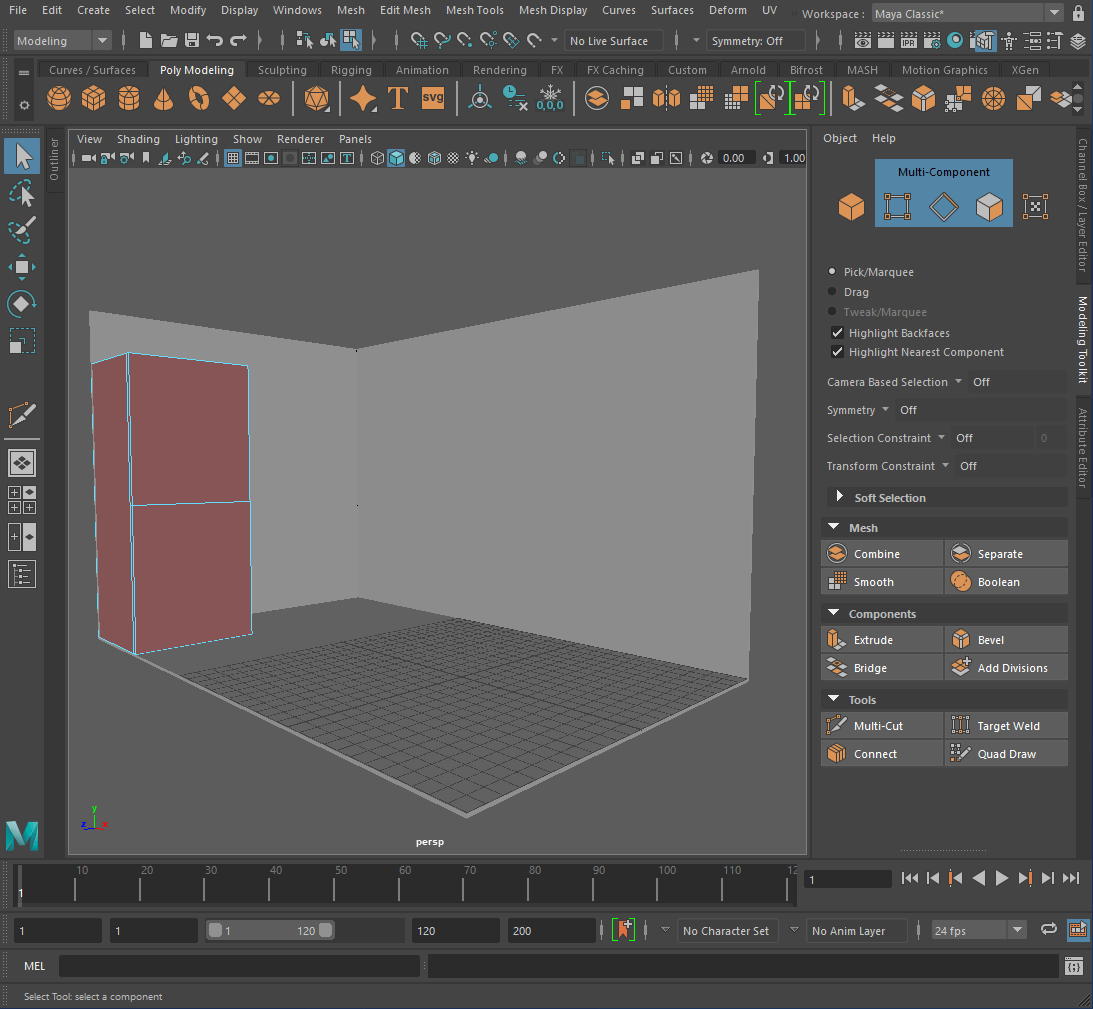


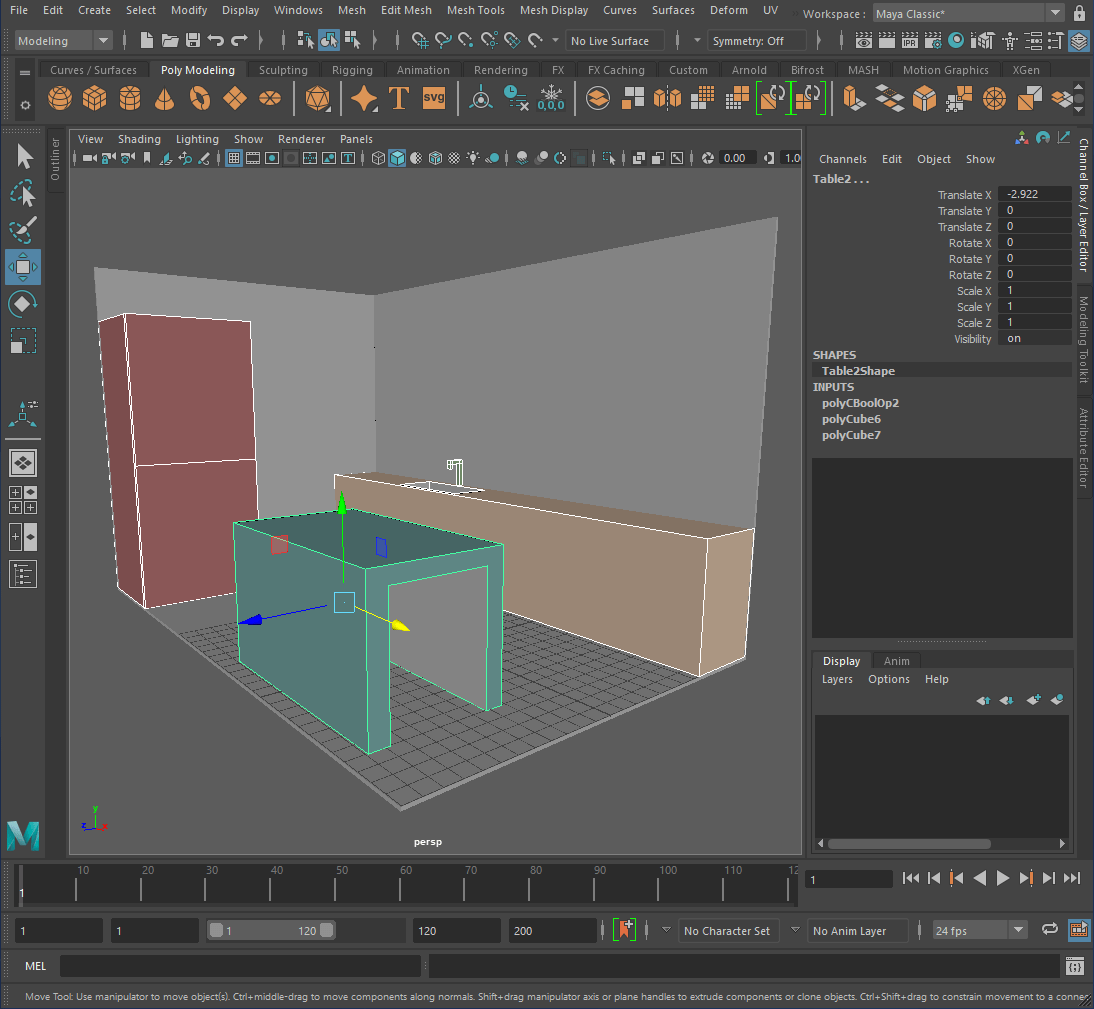

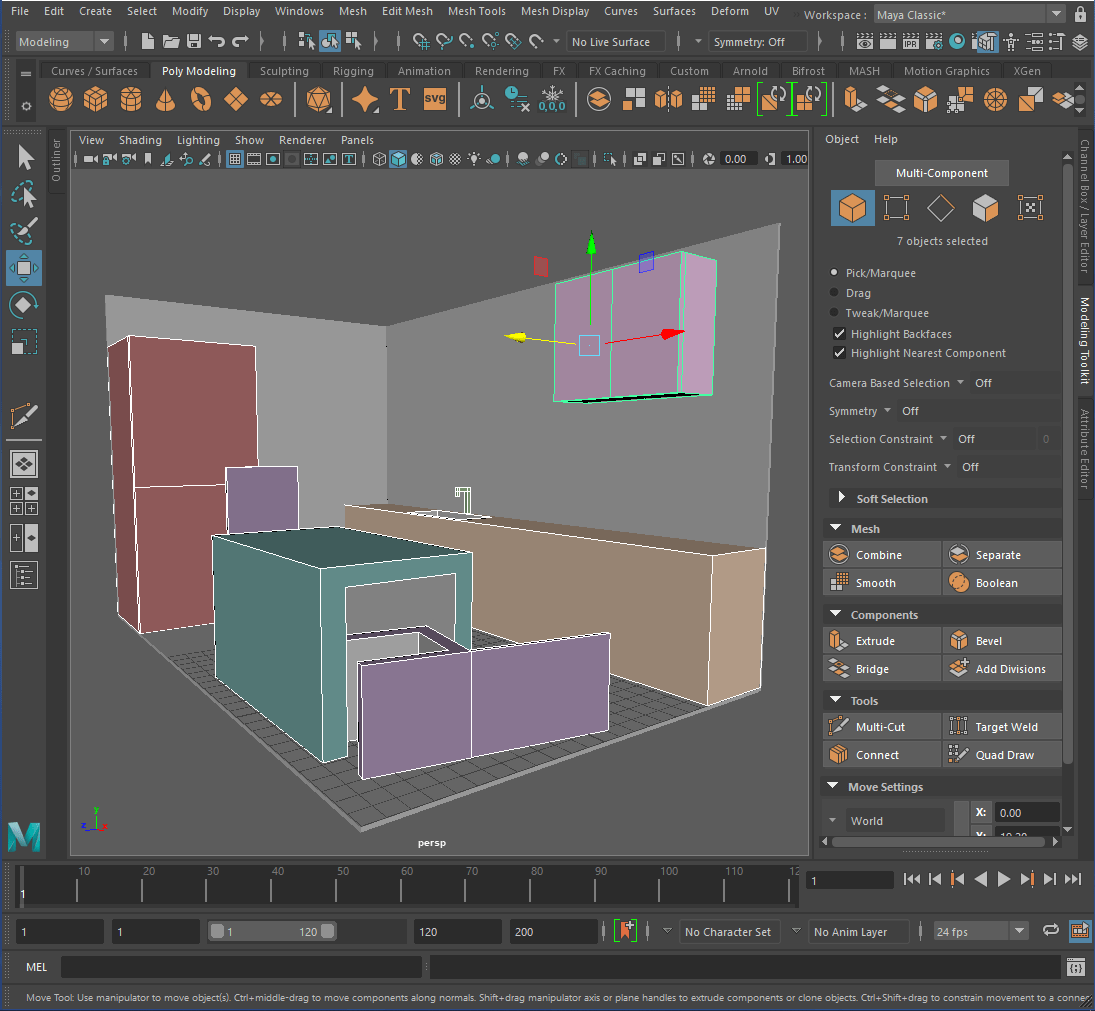


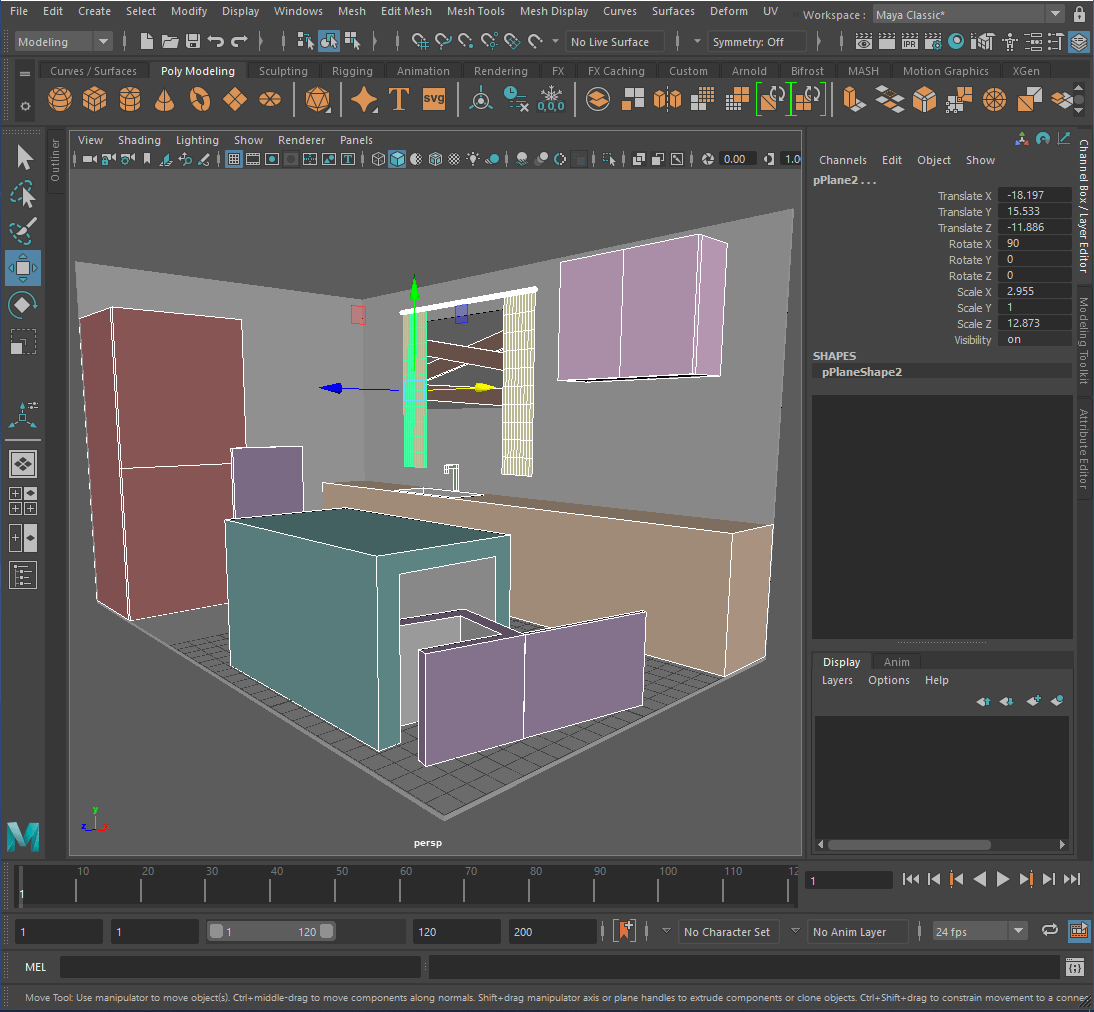


I applied bright colours to each different piece of furniture to make it easier to see against the grey walls.
-3D Previs-
Danielle was tasked with creating the 3D previs of the storyboards in Maya.
____________________________________________________________________________________________________________________________
—Modelling Process—
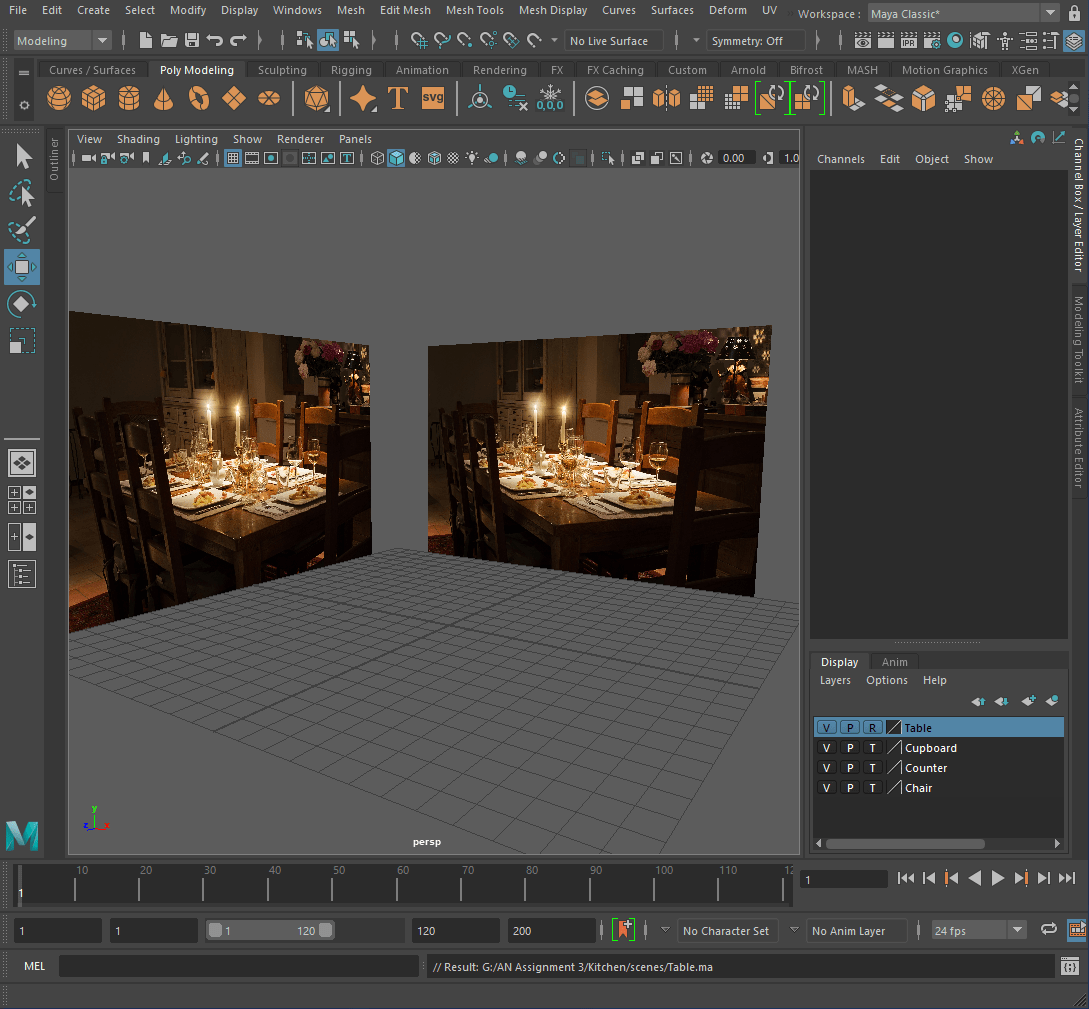
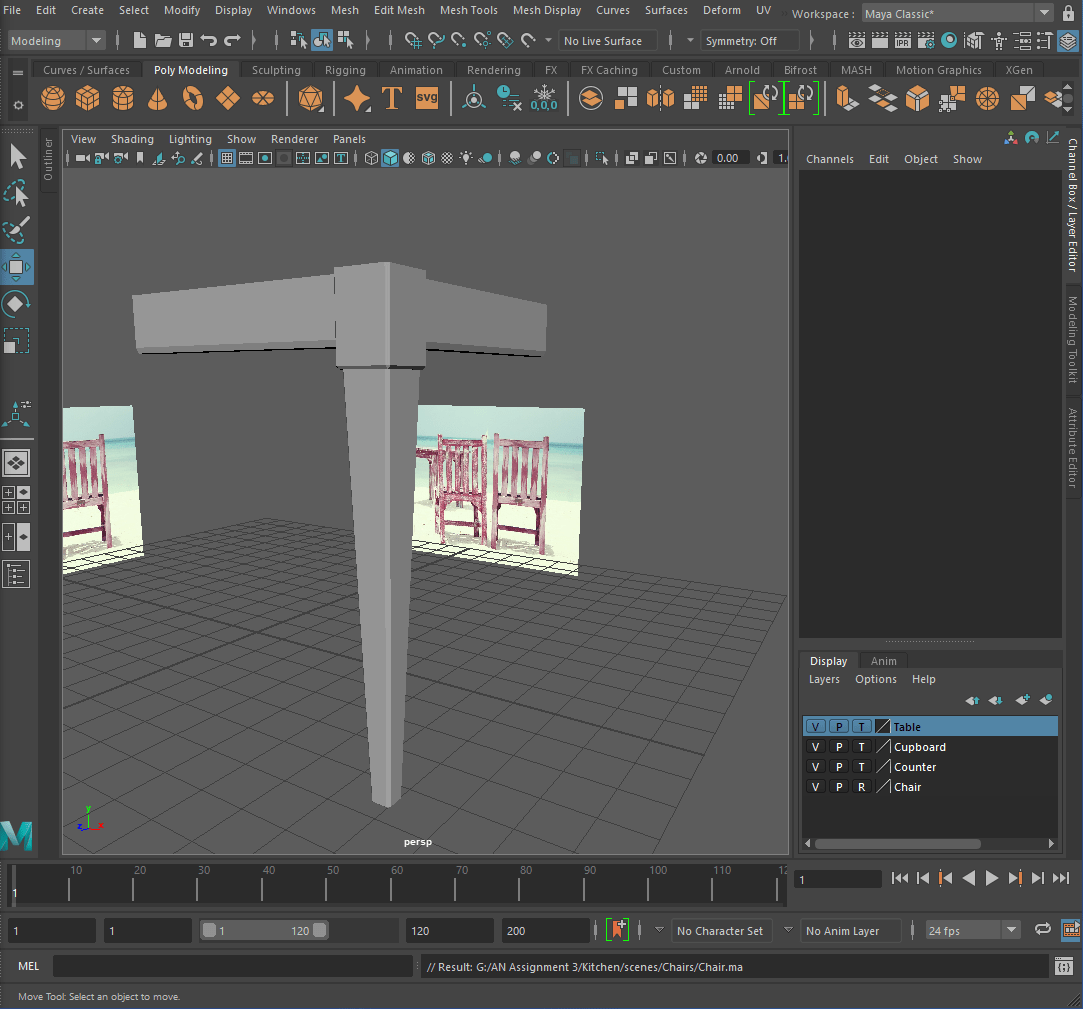
To begin I opened Maya and added all my references as ‘reference planes’.
—Table—
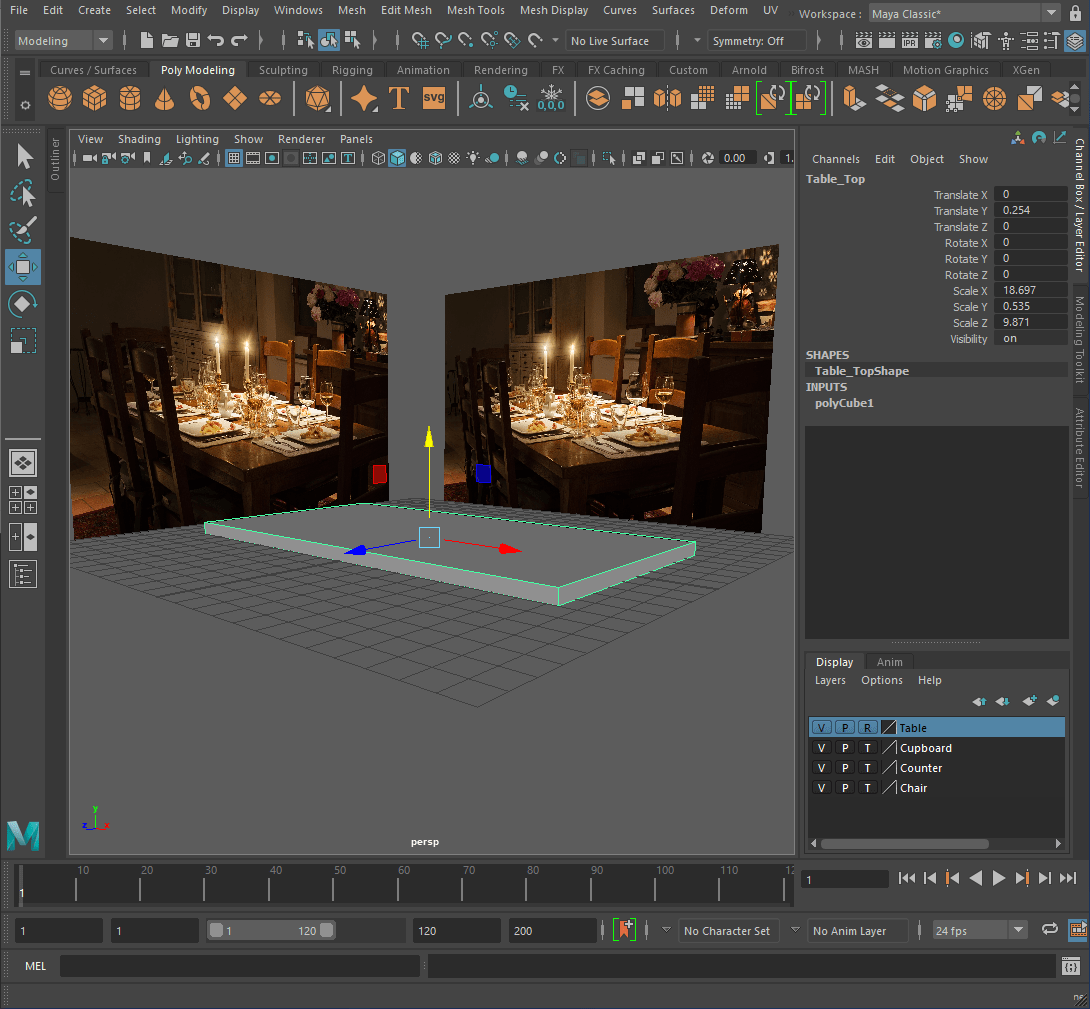
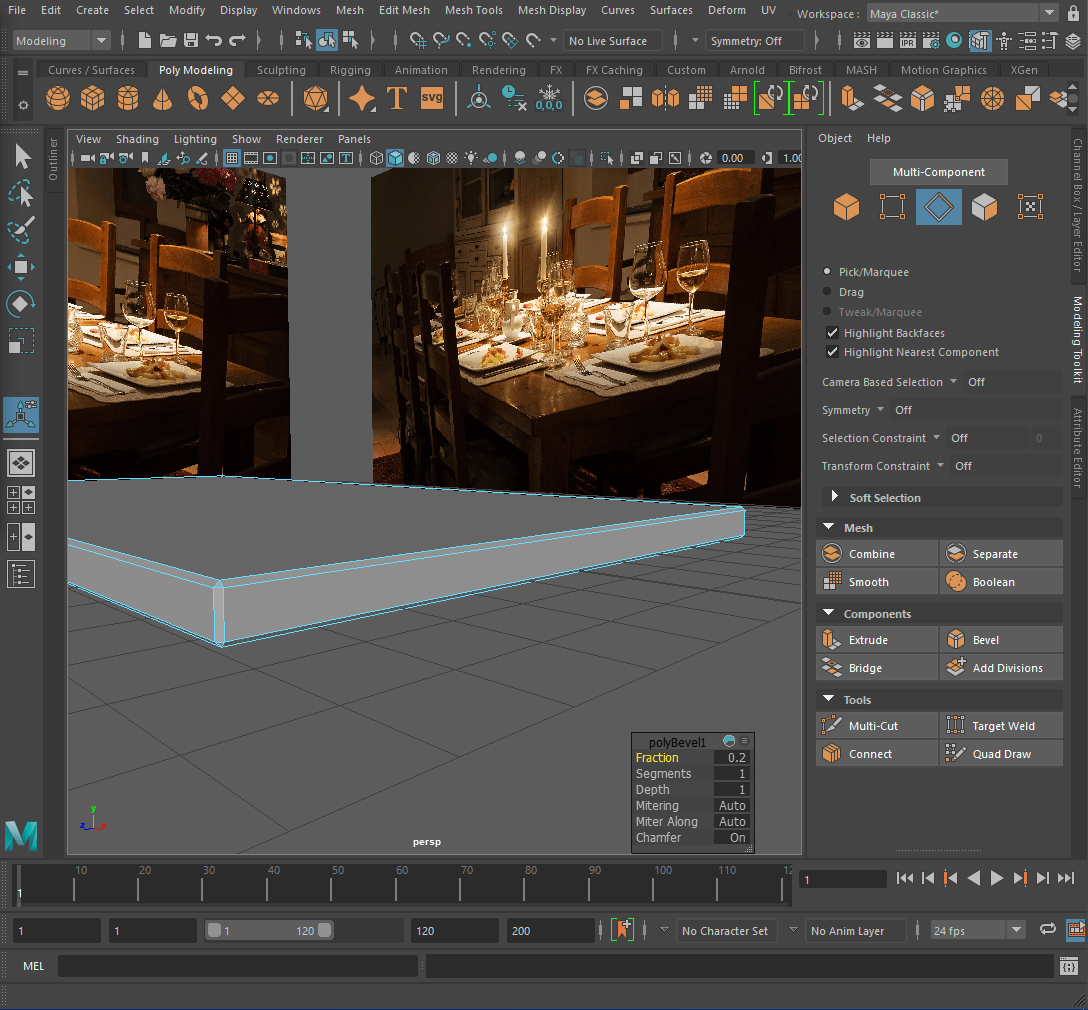
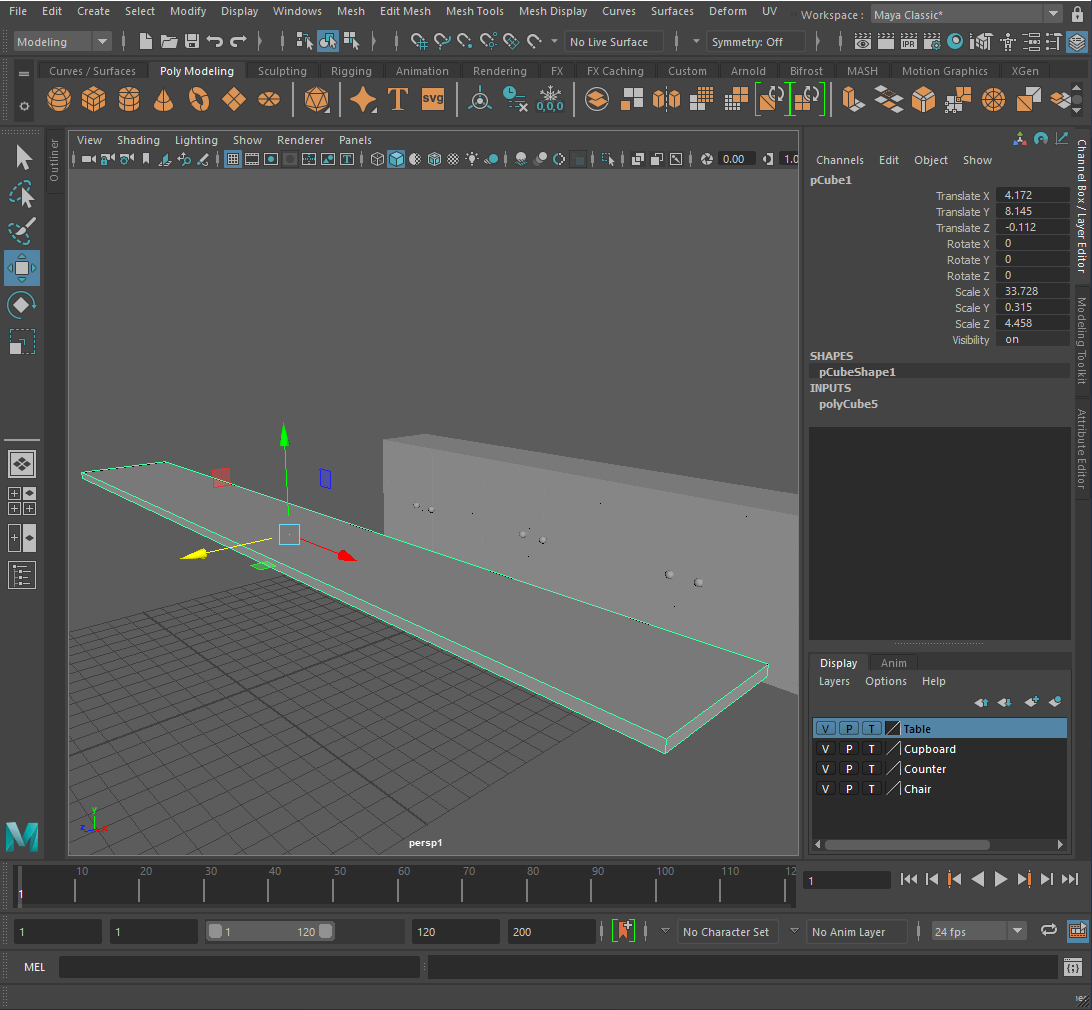
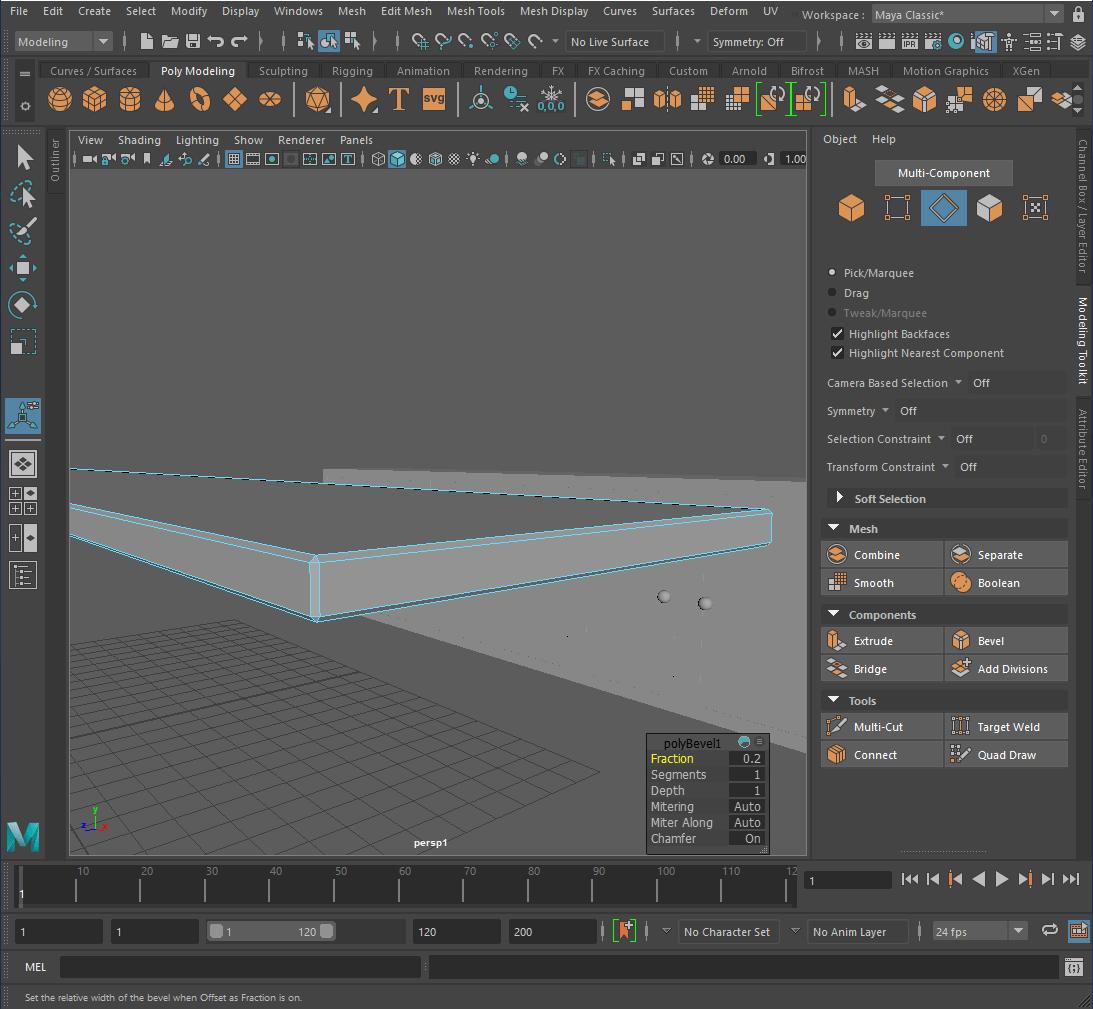
-Top-
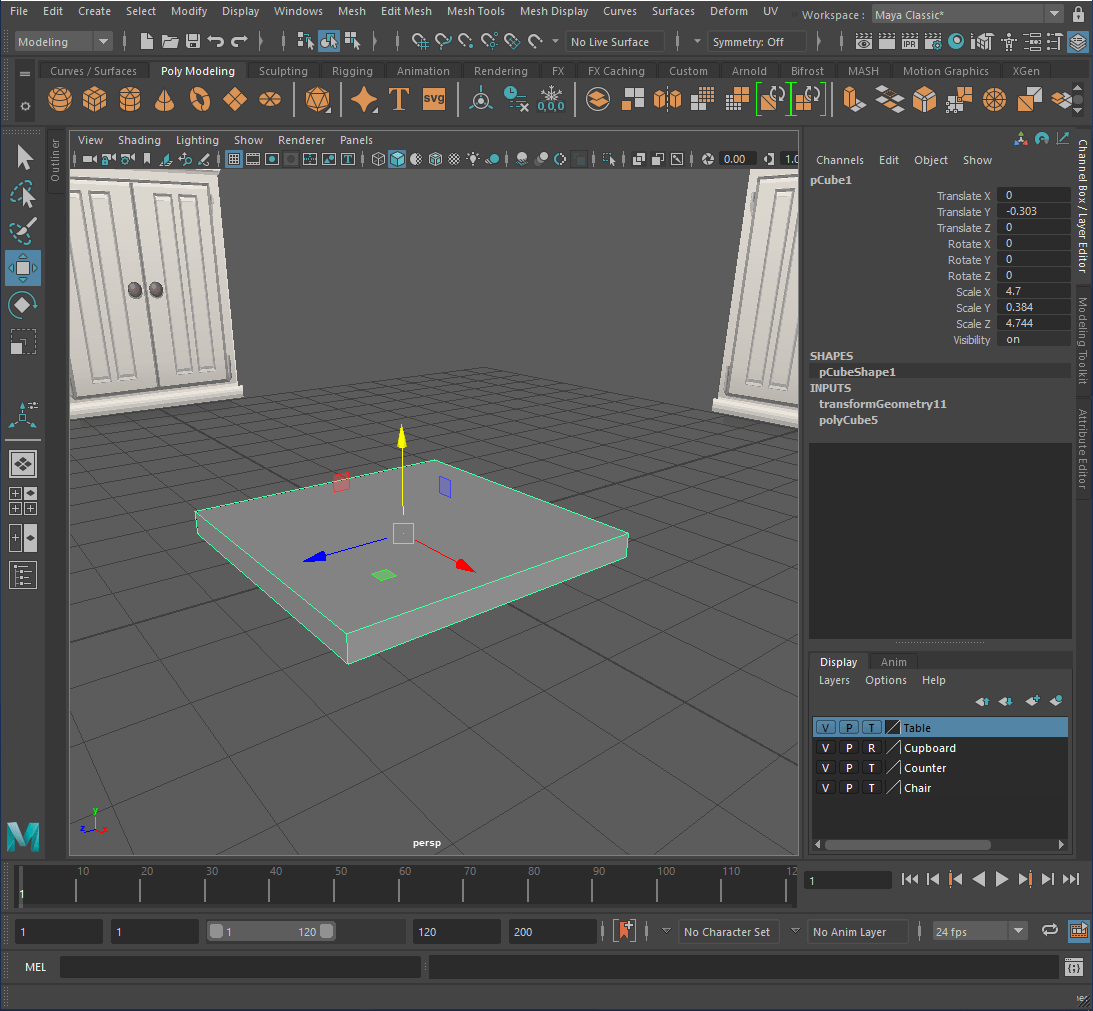
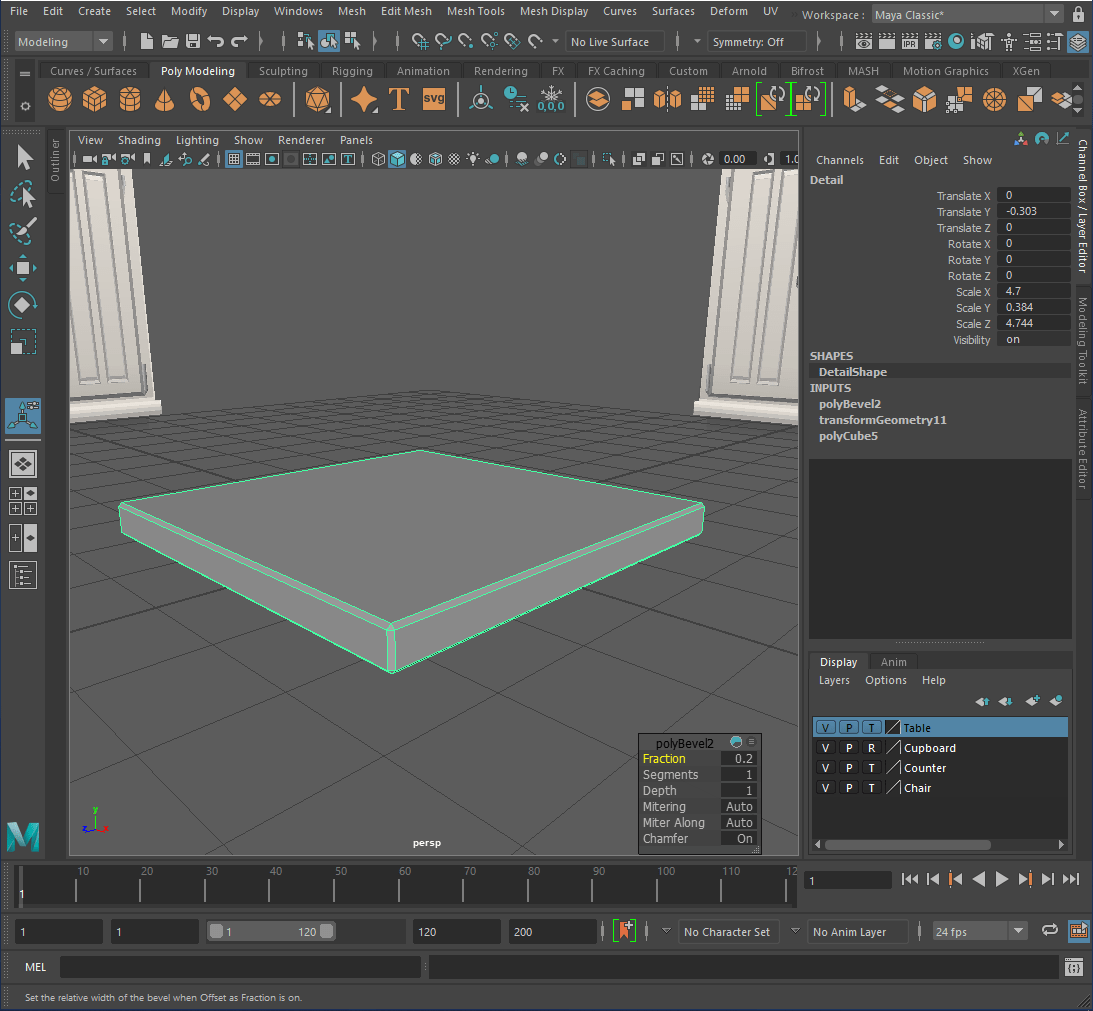
For the top of the table I created a cube and scaled it to the size of the table top, beveled the edges and froze the transformations.
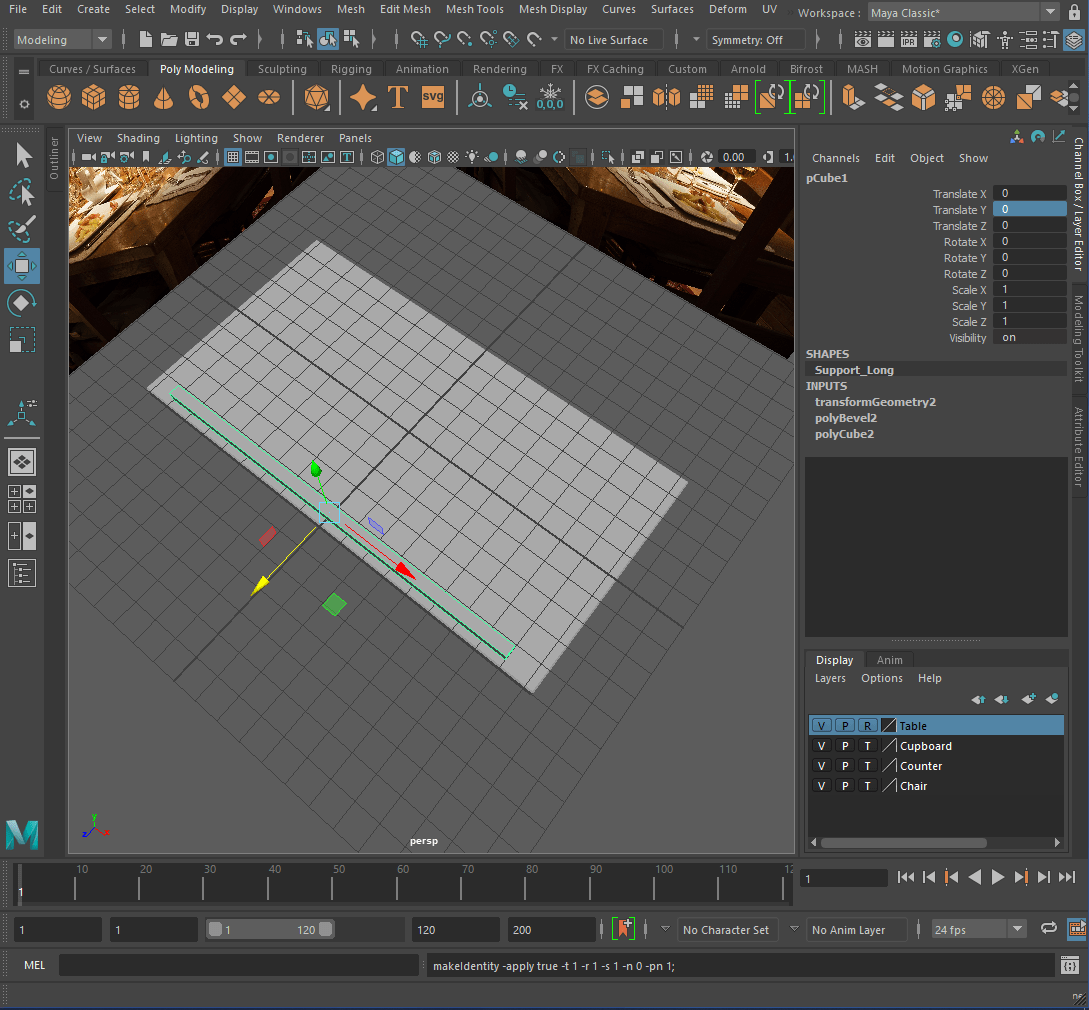
-Support-
For the supports I created a cube, scaled it and beveled the bottom edges. I then positioned the support and froze the transformations.

After I duplicated the support, resized and rotated it.

Next I froze the transformations, grouped the supports and duplicated them.
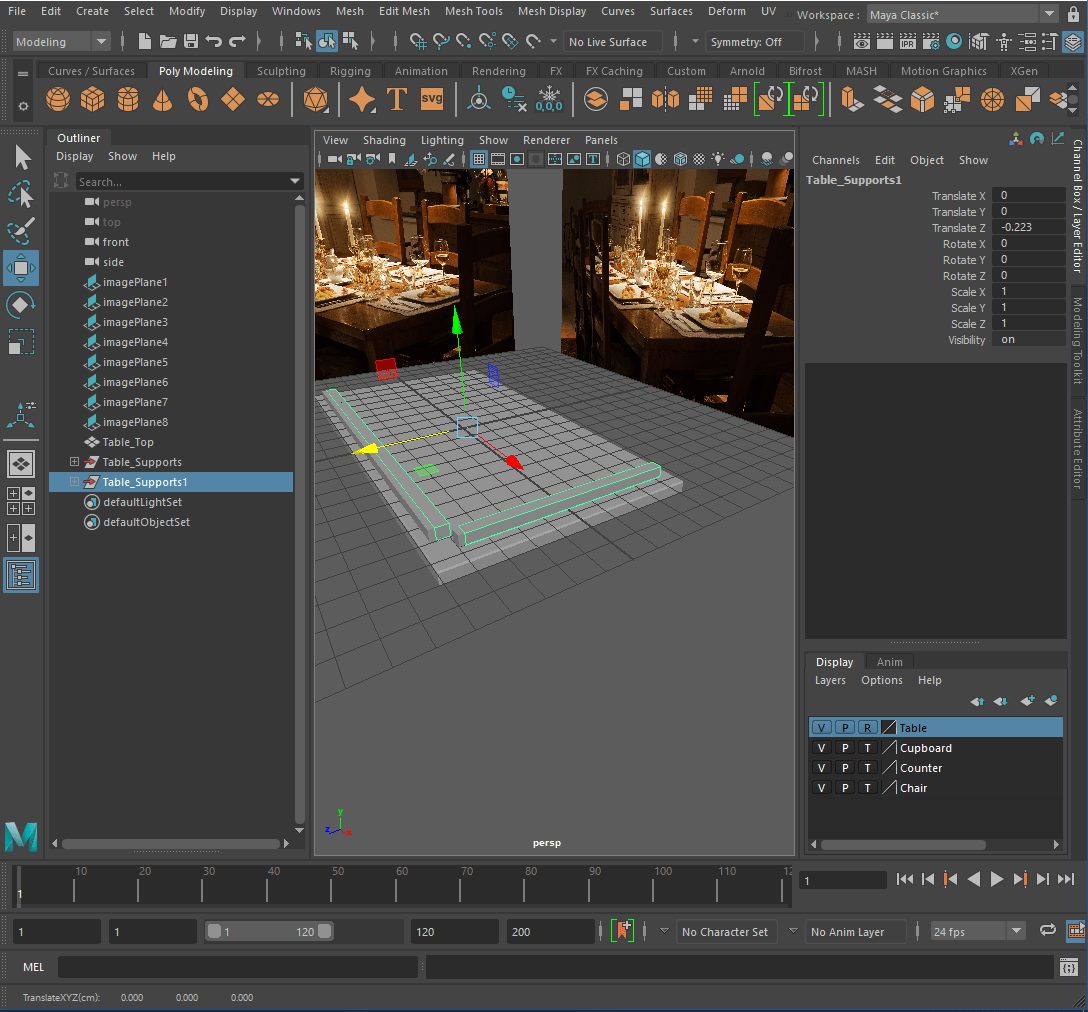
Finally, I rotated and positioned the supports, grouped the supports together and froze the transformations.

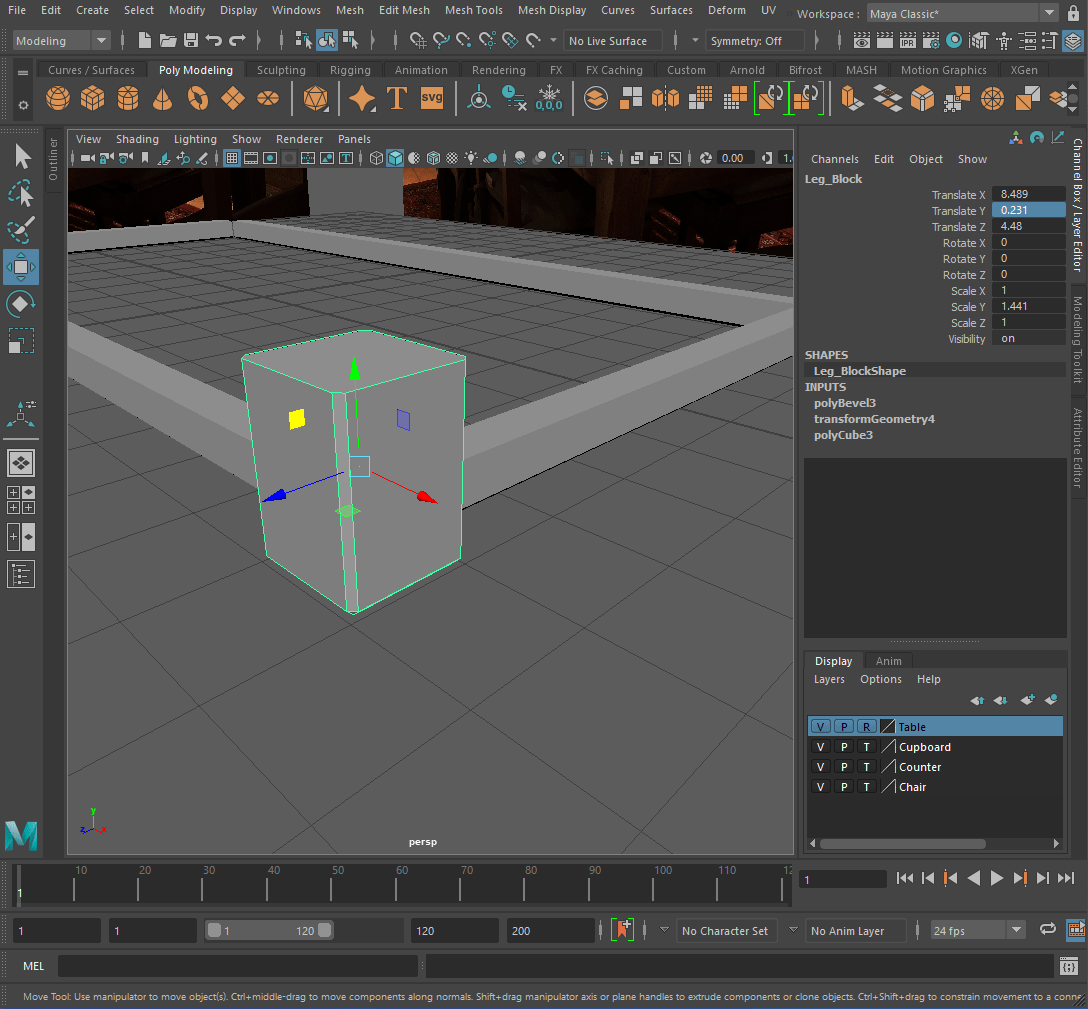
-Leg Block-
For the leg block I created a cube, scaled it and beveled the edges.


Then I positioned the block and froze the transformations.
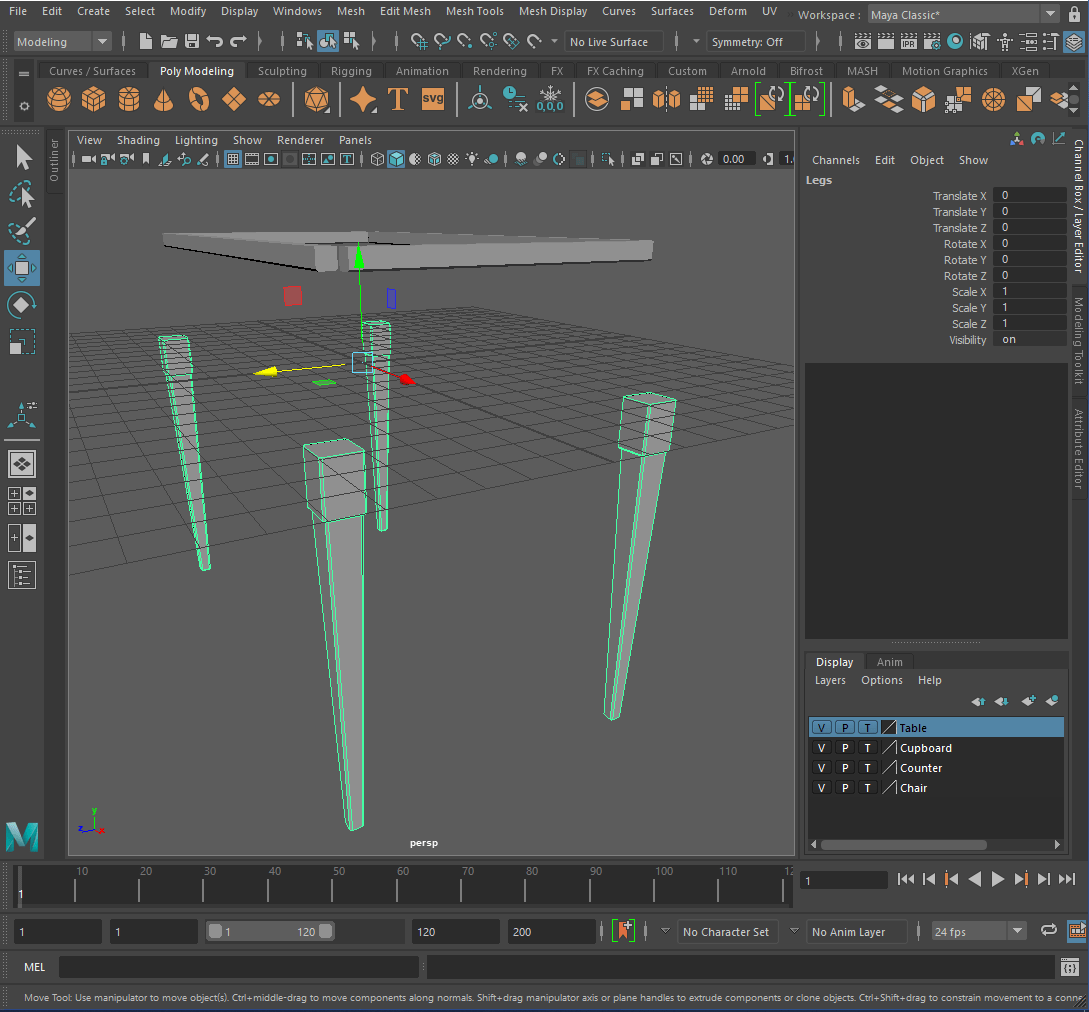
-Legs-
For the legs I created a cube and scaled it.
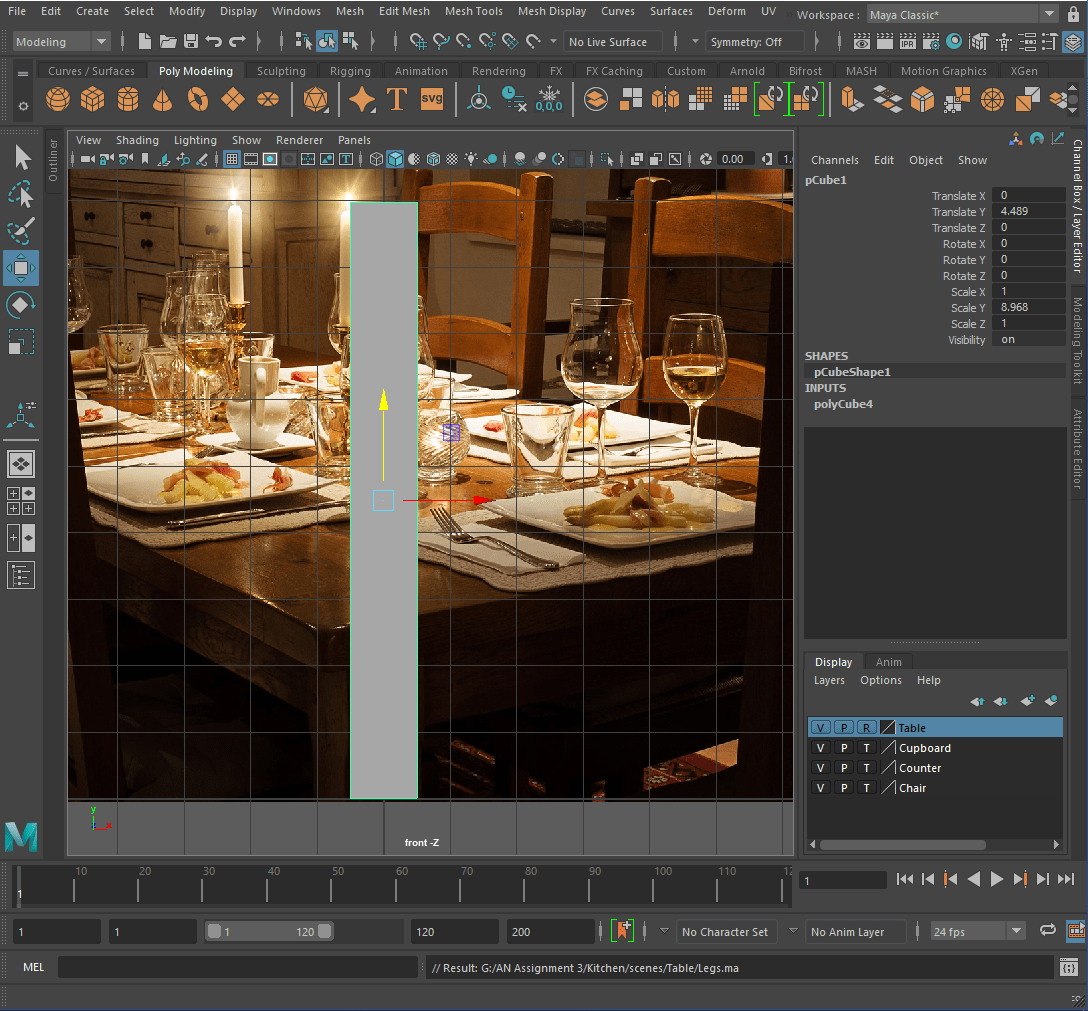
I then scaled the bottom to taper the leg and I beveled the edges.
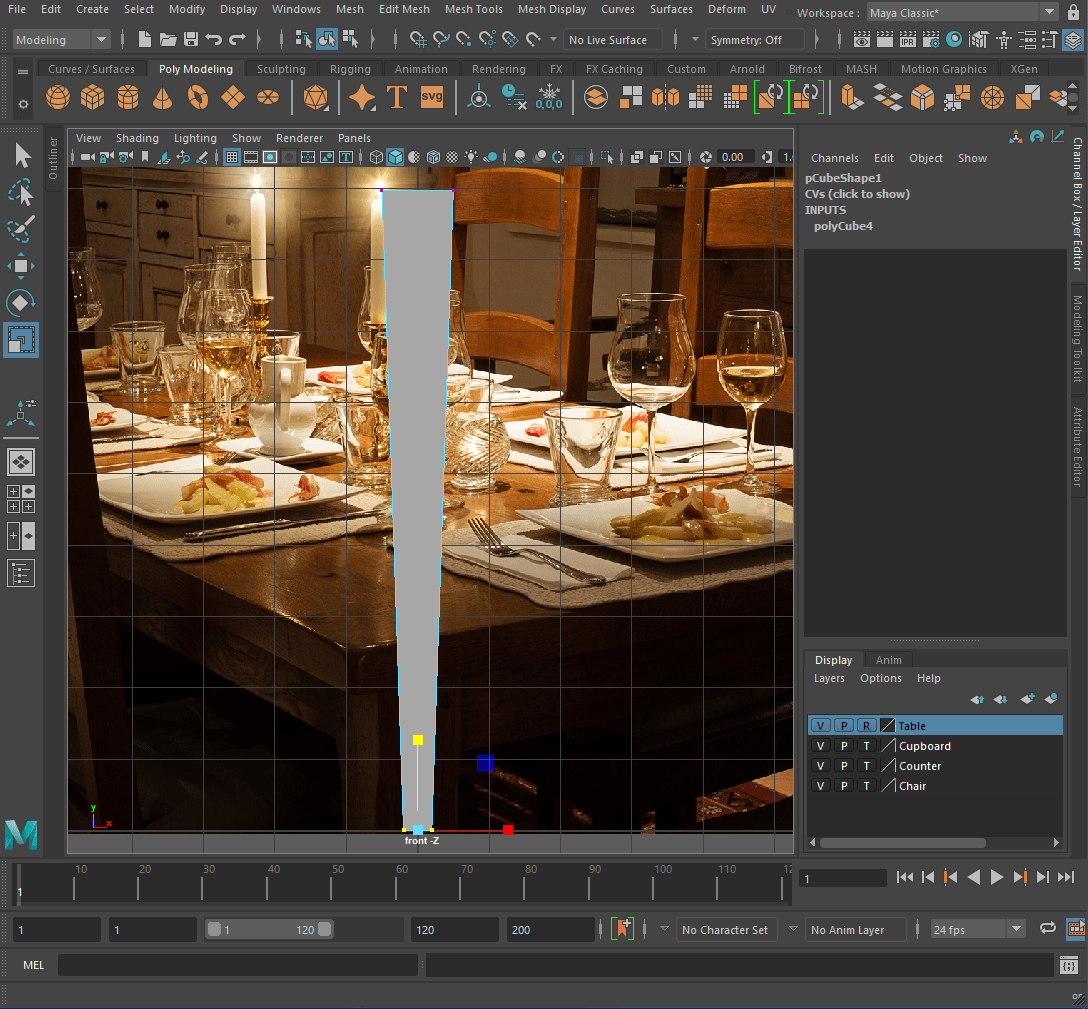

Next I positioned the leg under the block, grouped them together and froze the transformations.

Finally I duplicated the legs and positioned them.
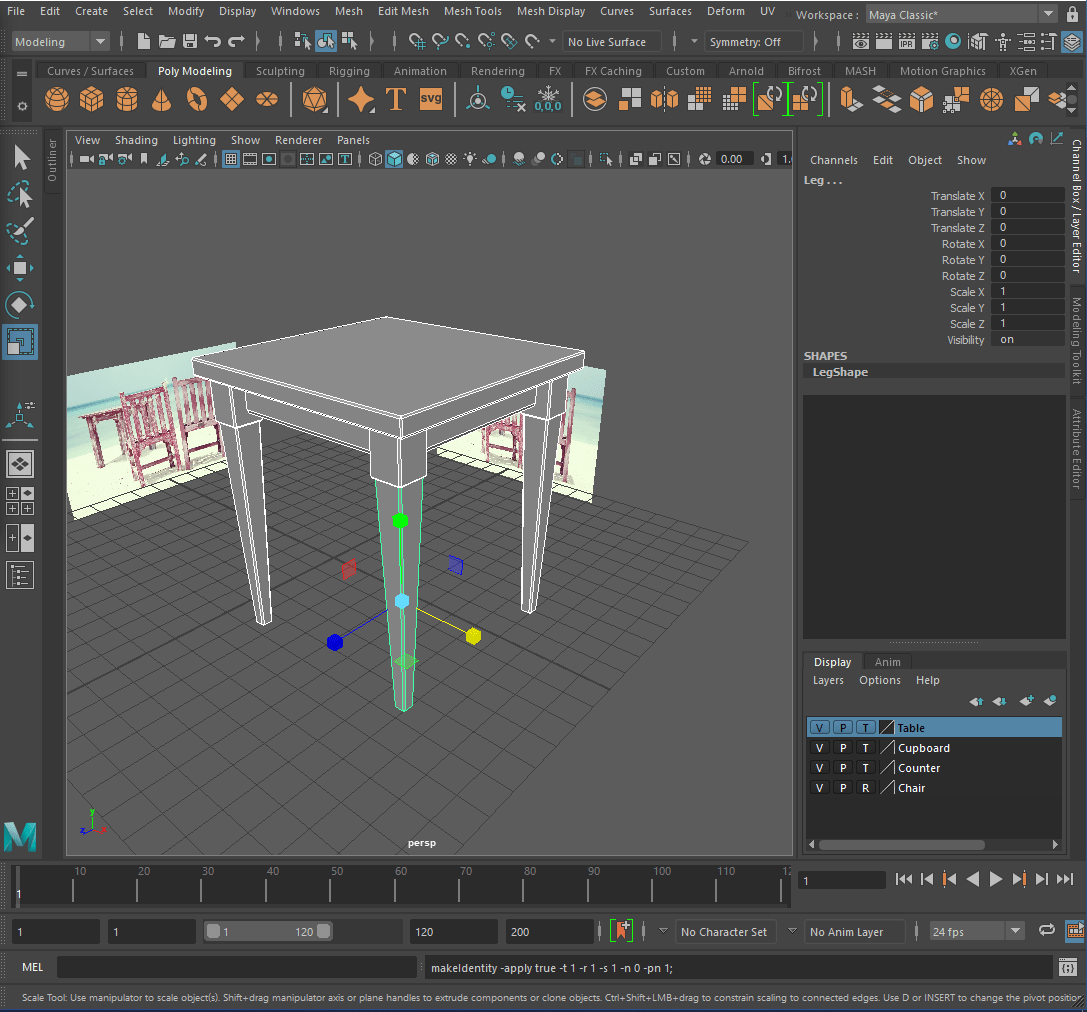
-Final Assembly-
For the final assembly I positioned all the pieces together and froze their transformations and deleted all the unnecessary faces.


After I reassembled the model, grouped it and deleted the history.

—Chairs—
-Seat & Legs-
For the chair, I used the table model and resized pieces to make the different pieces and make it seem more like a set of furniture.

-Back-
For the back I created a cube, scaled it and beveled the edges. I then duplicated and positioned it.


Next I duplicated the chair support (selected), scaled and rotated it to make the backrest of the chair.
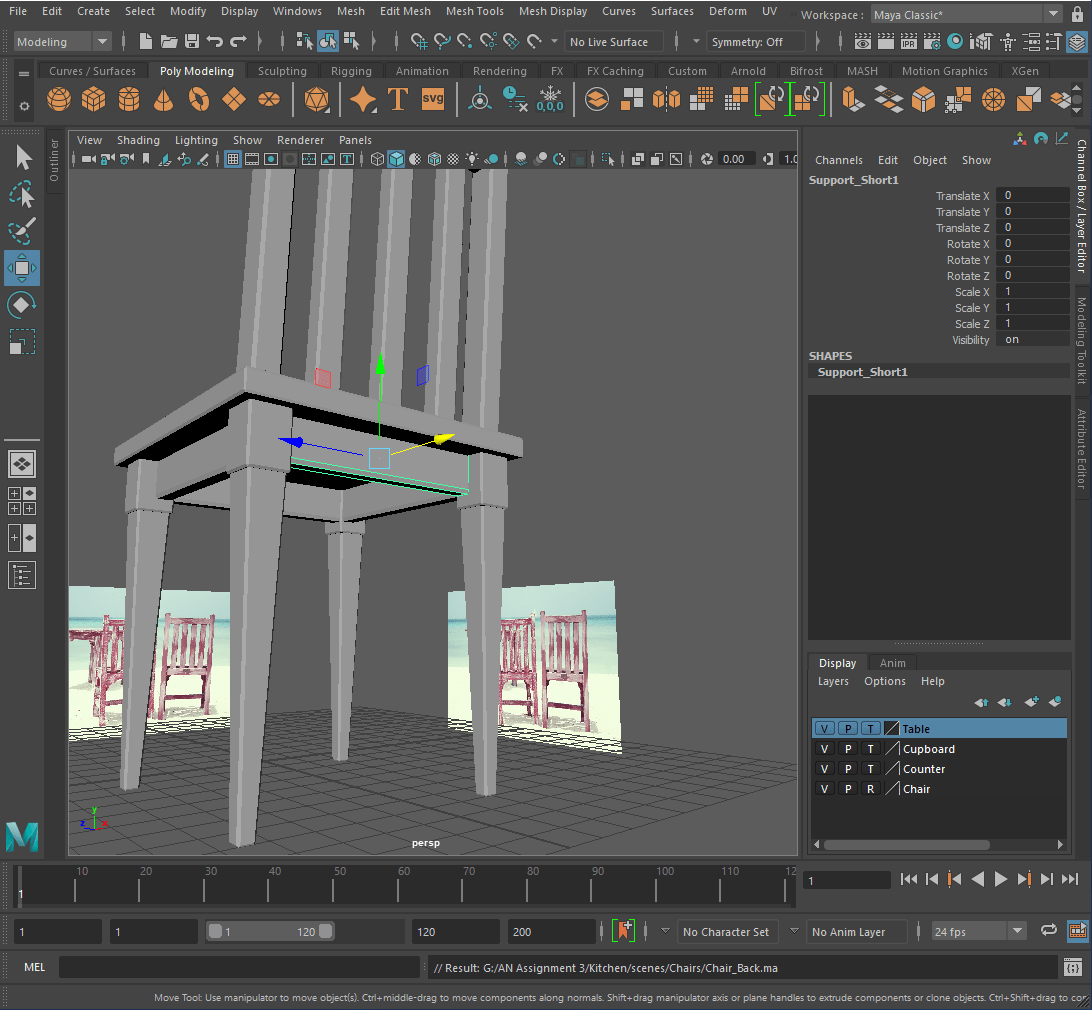
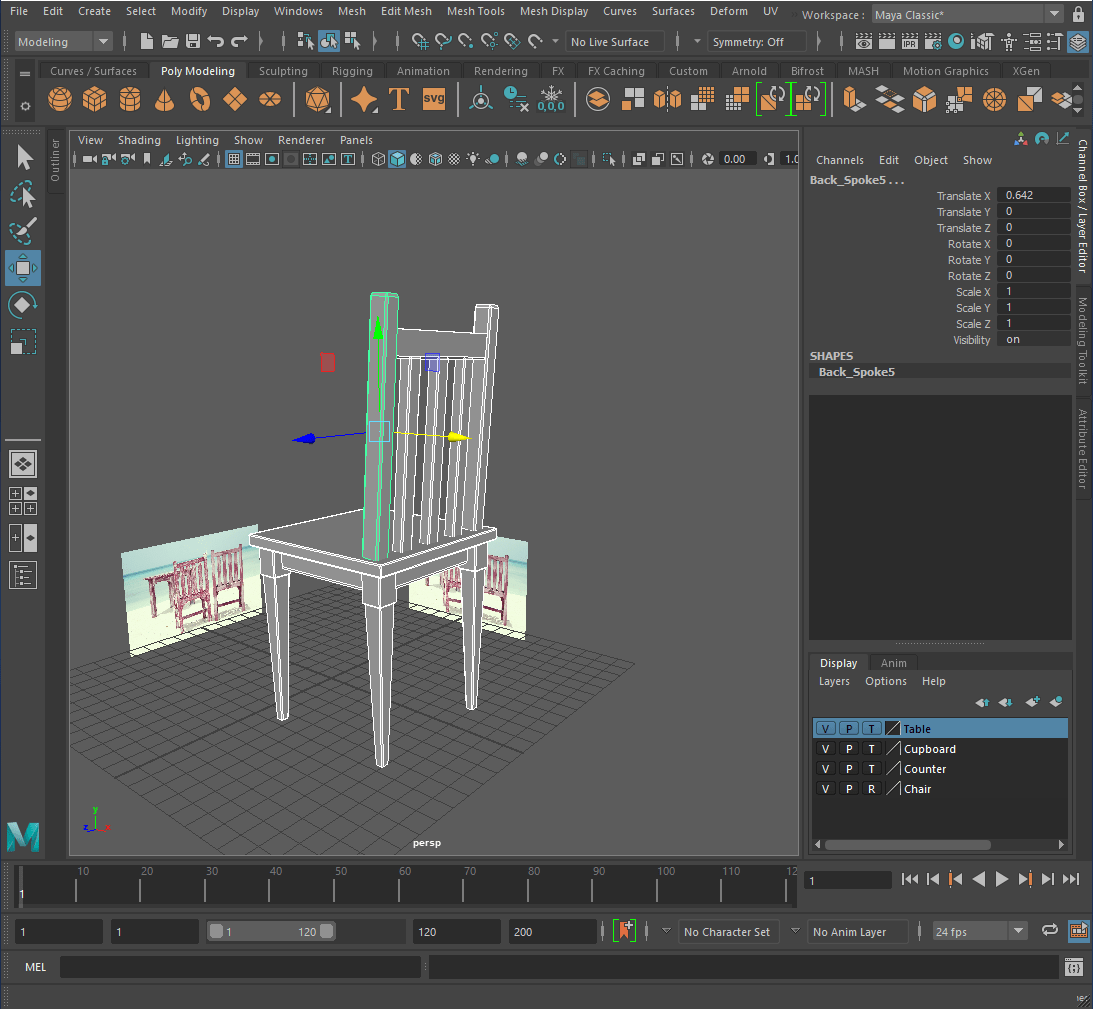
I froze the transformations, deleted all unnecessary faces, reassembled the chair and deleted the history of the model.
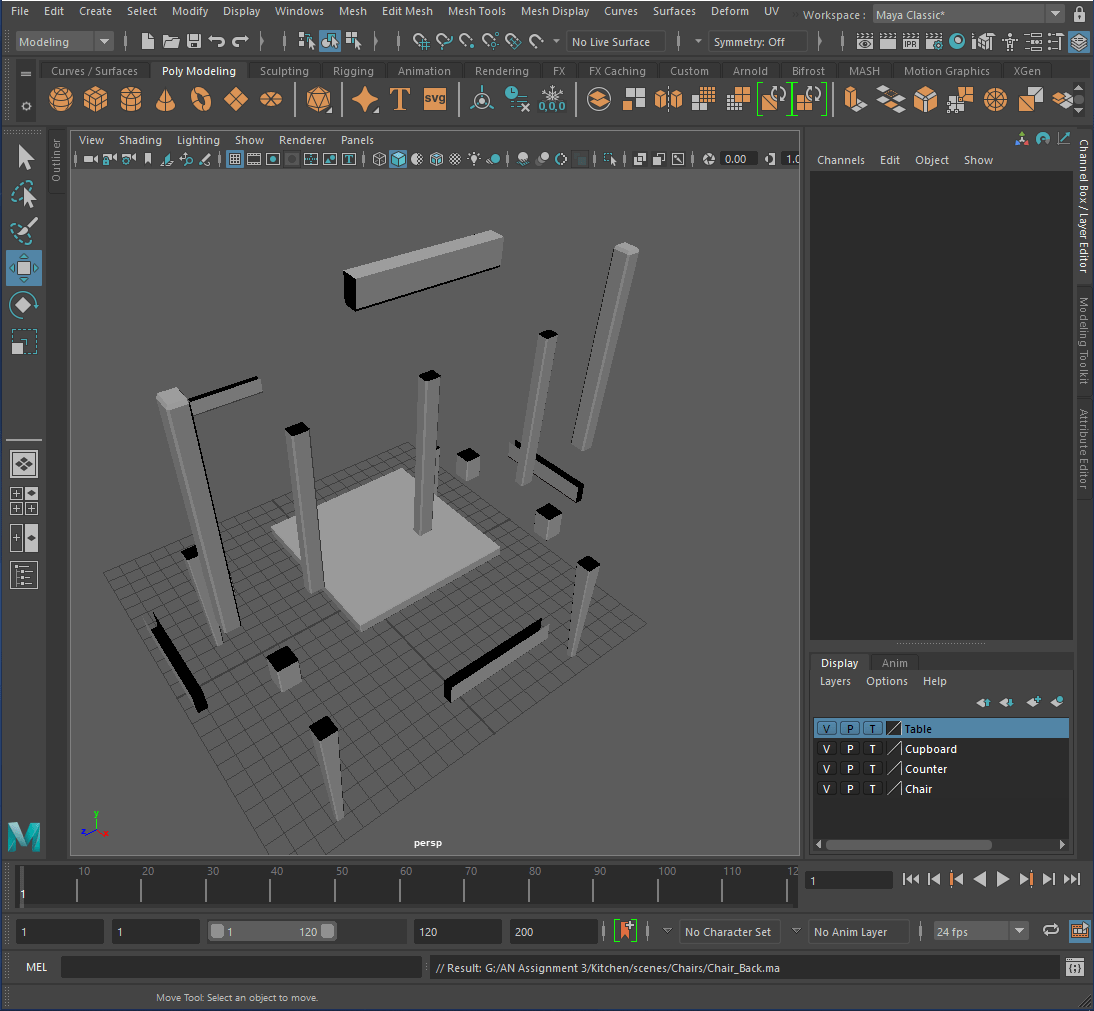

Table and Chair together.

—Cupboard—
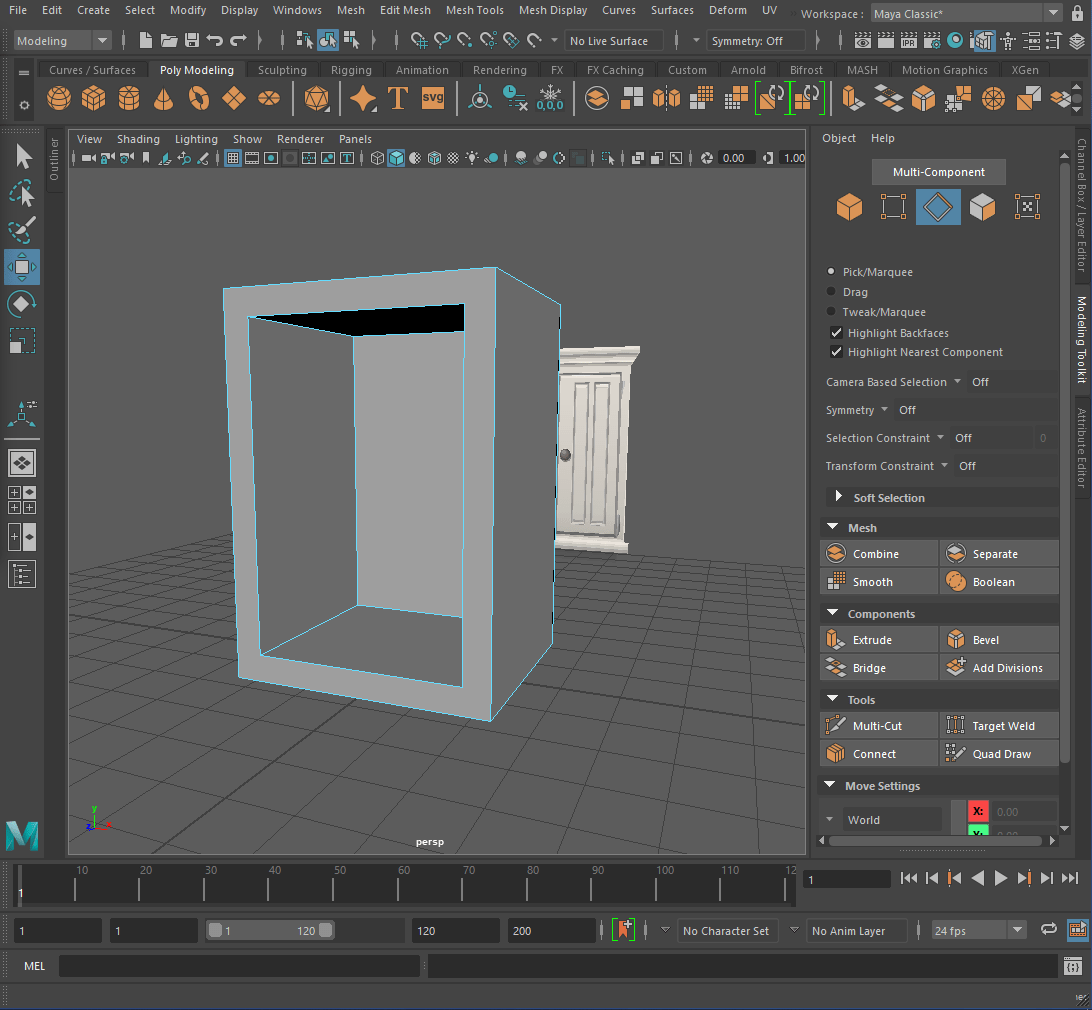
-Shell-
Firstly I created a cube and scaled it.

Next I beveled the front, flattened the face and extruded it to make the inside of the cupboard.

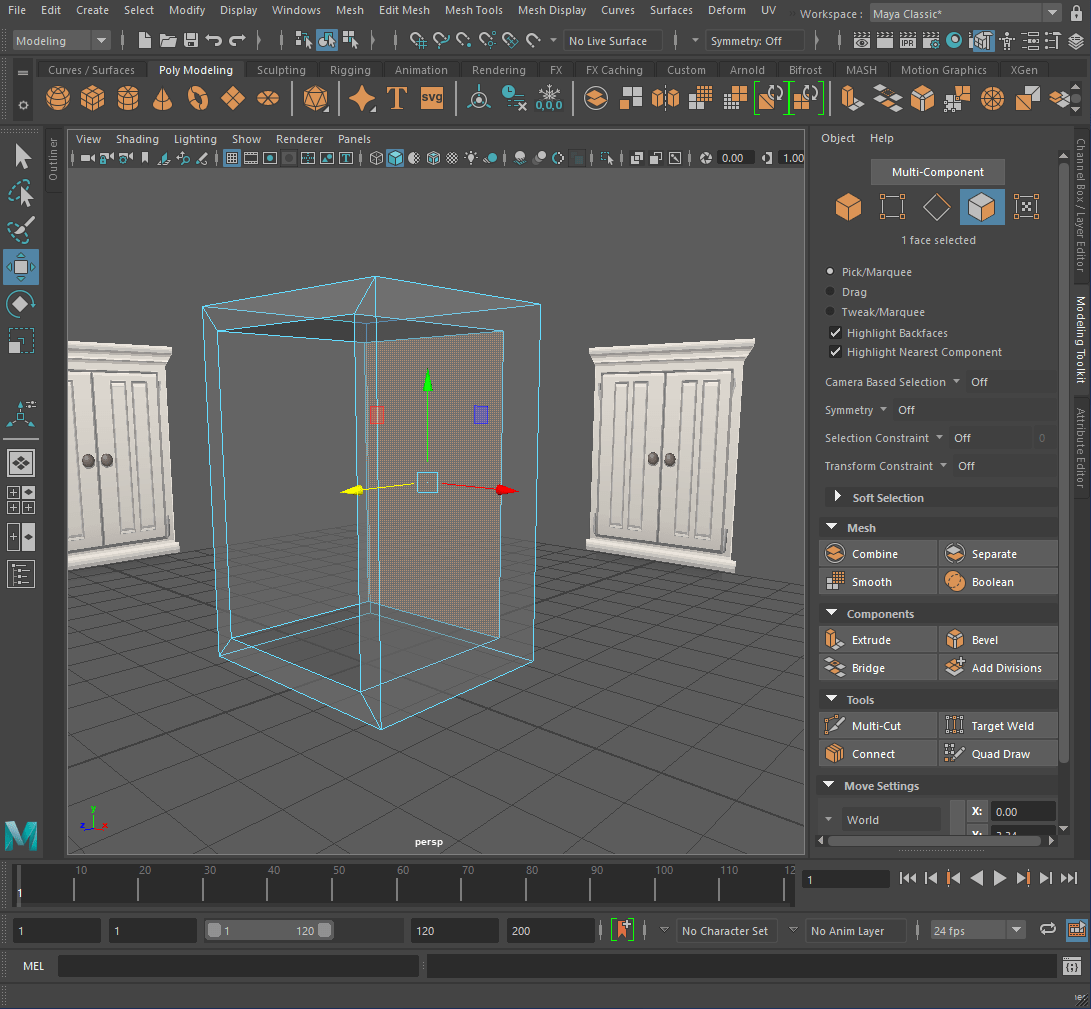
Then I deleted the extra edges and froze the transformations.
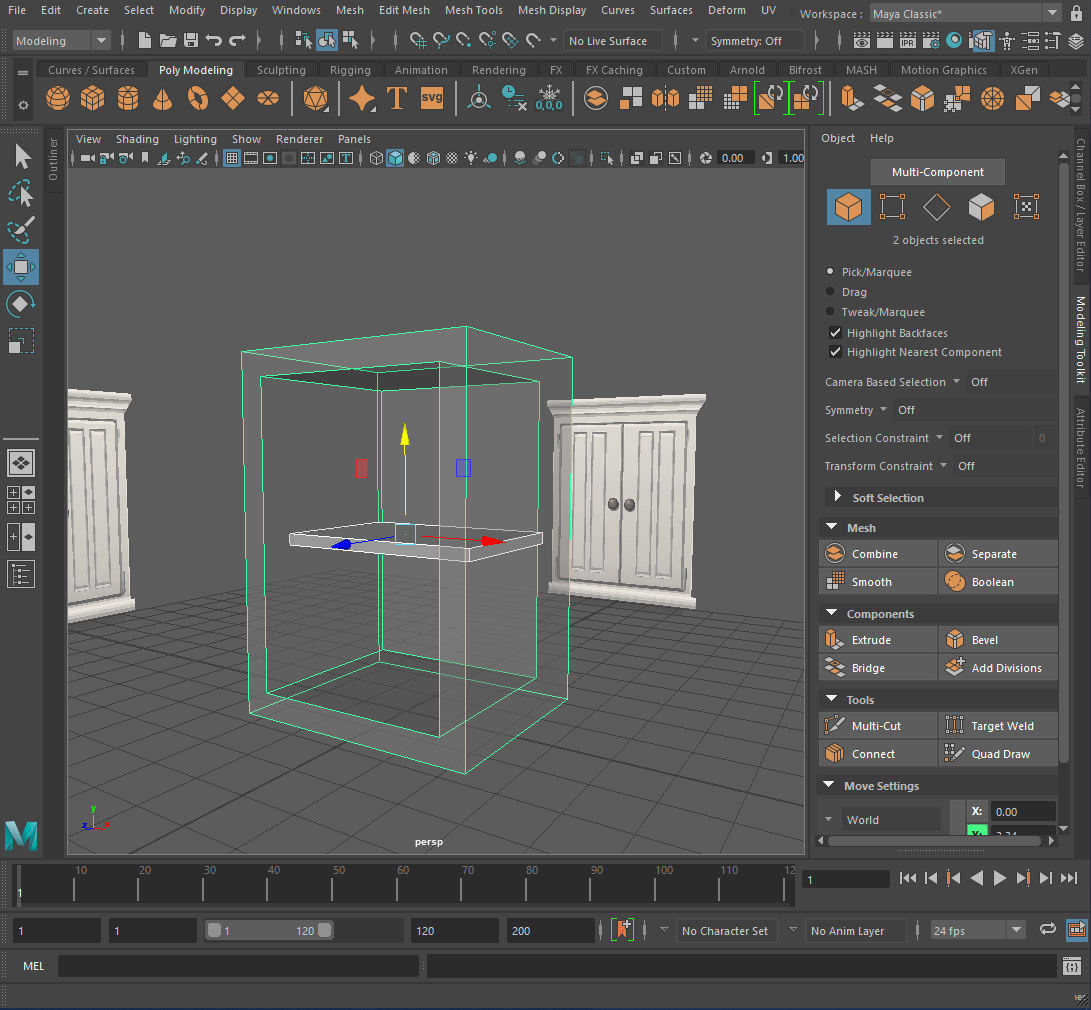
-Shelf-
For the shelf I created a cube, scaled it and positioned it inside the cupboard shell. I then froze the transformations.

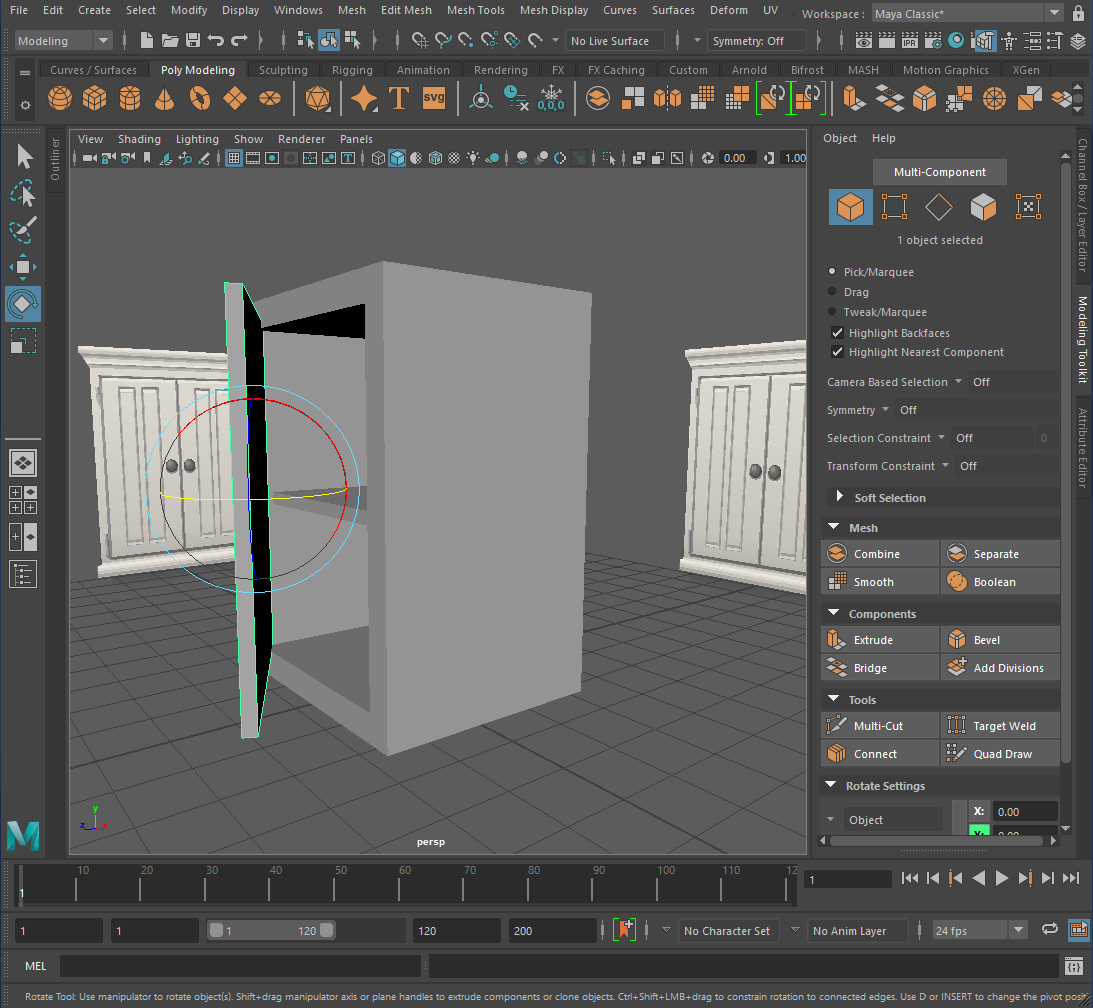
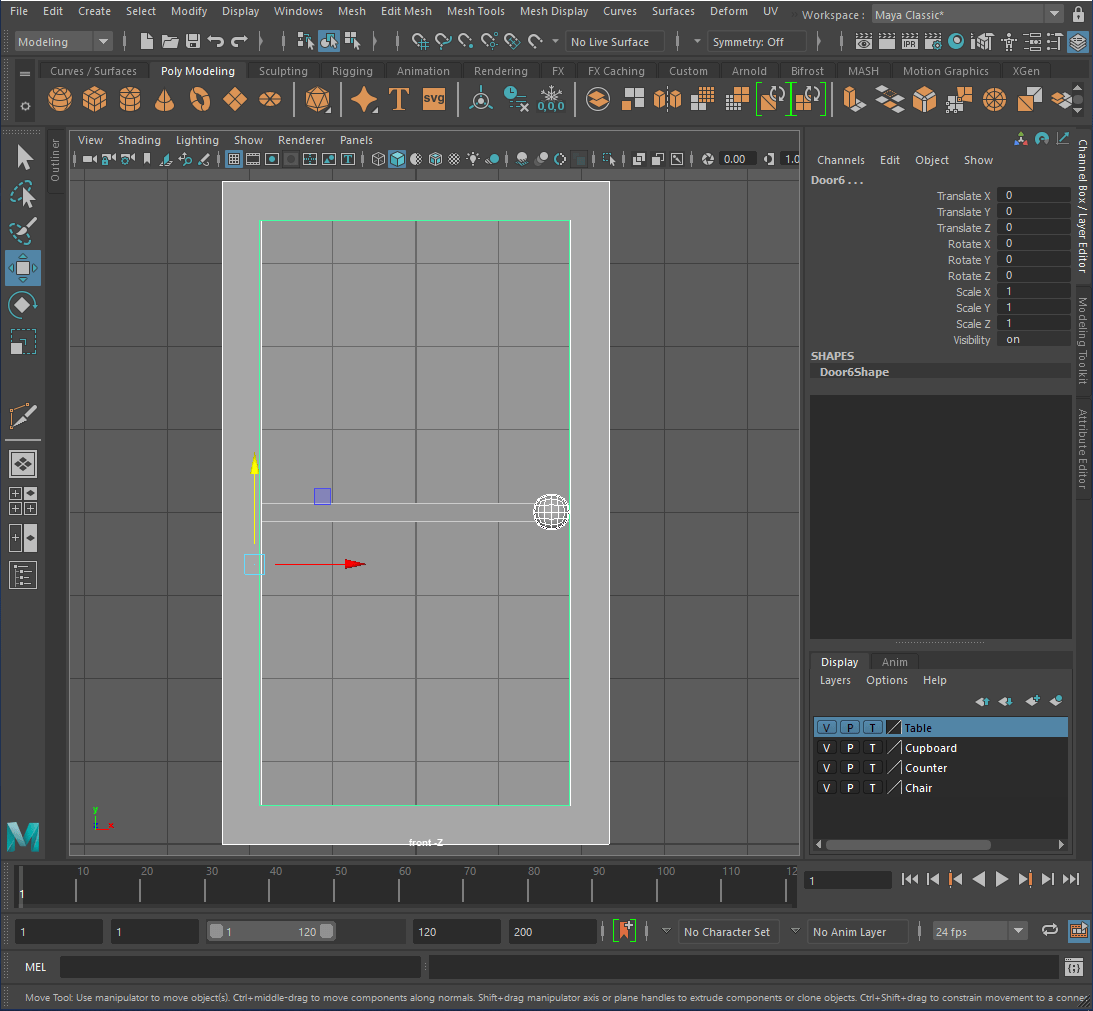
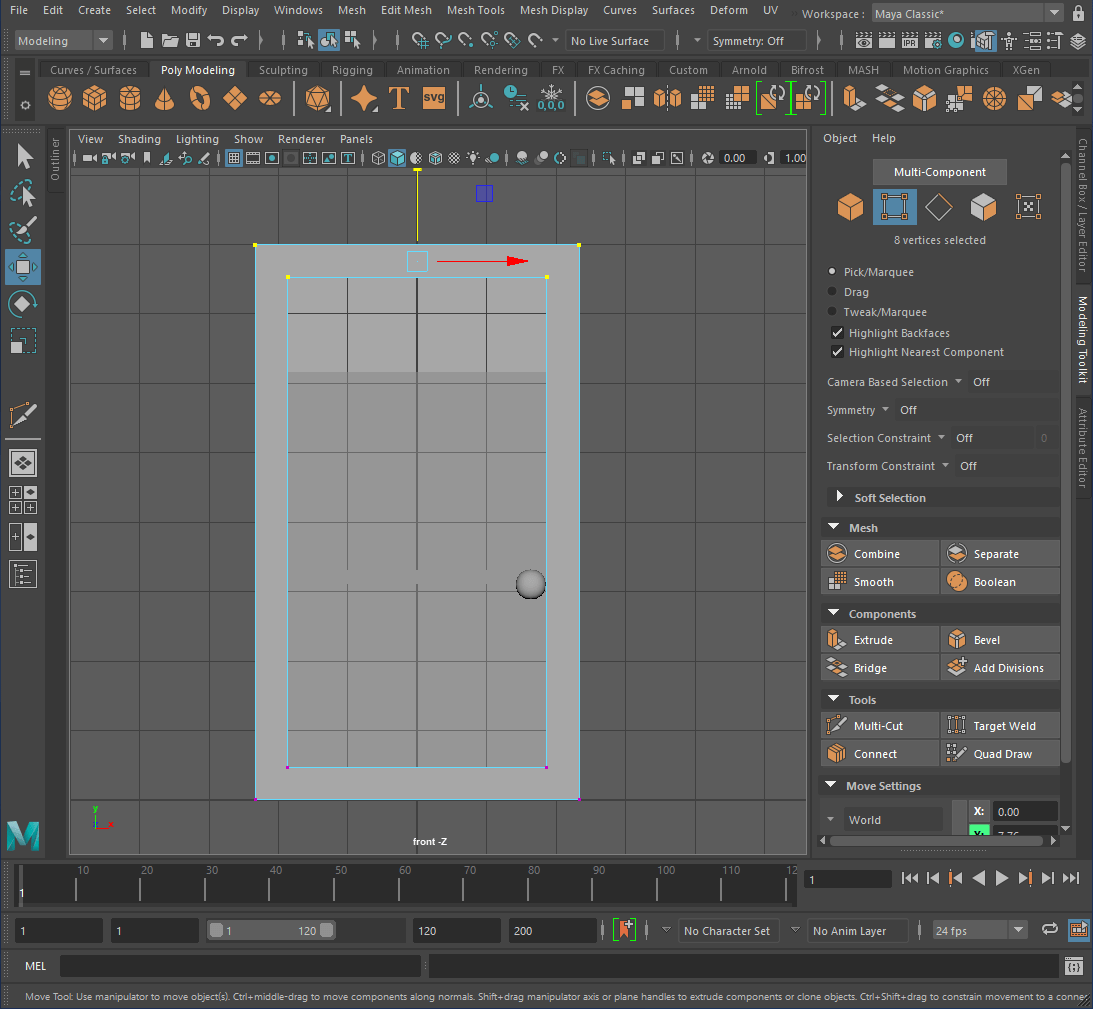
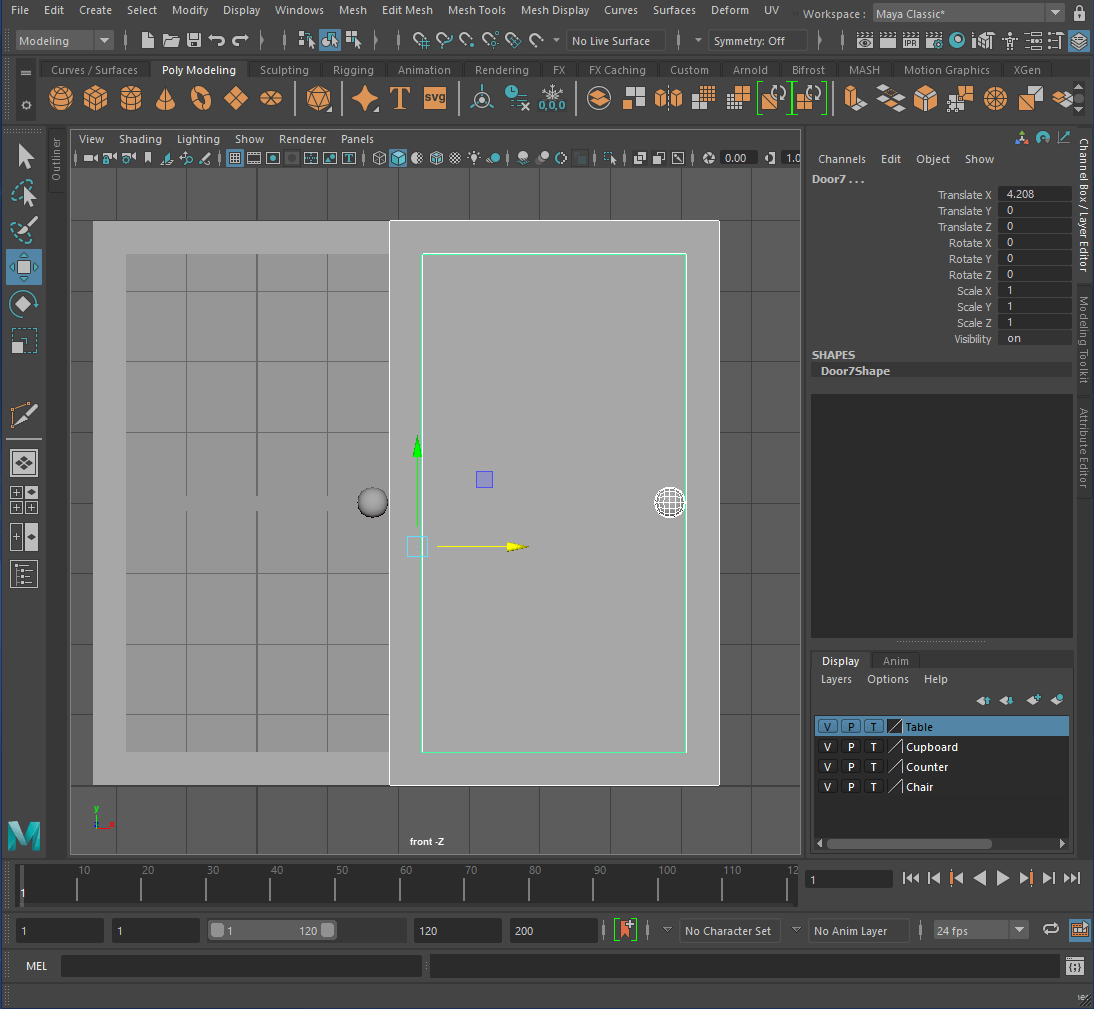
-Door-
I created a cube and scaled it, positioned it in front of the cupboard, moved the ‘pivot point’ and froze the transformations.

– Handle-
Firstly I created a cube, smoothed it and turned the divisions to 2.
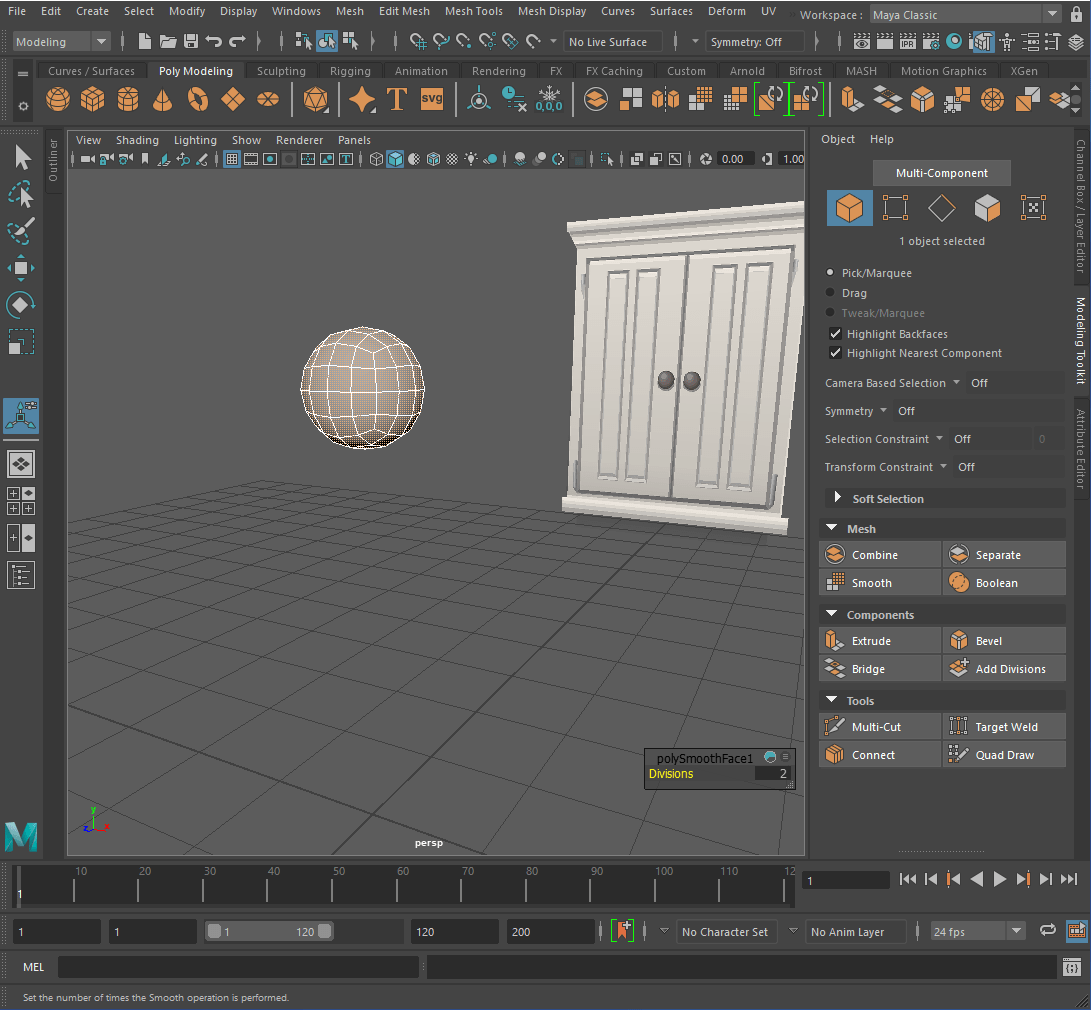
I scaled the sphere, added a scaled cylinder behind it and positioned it on the cupboard.

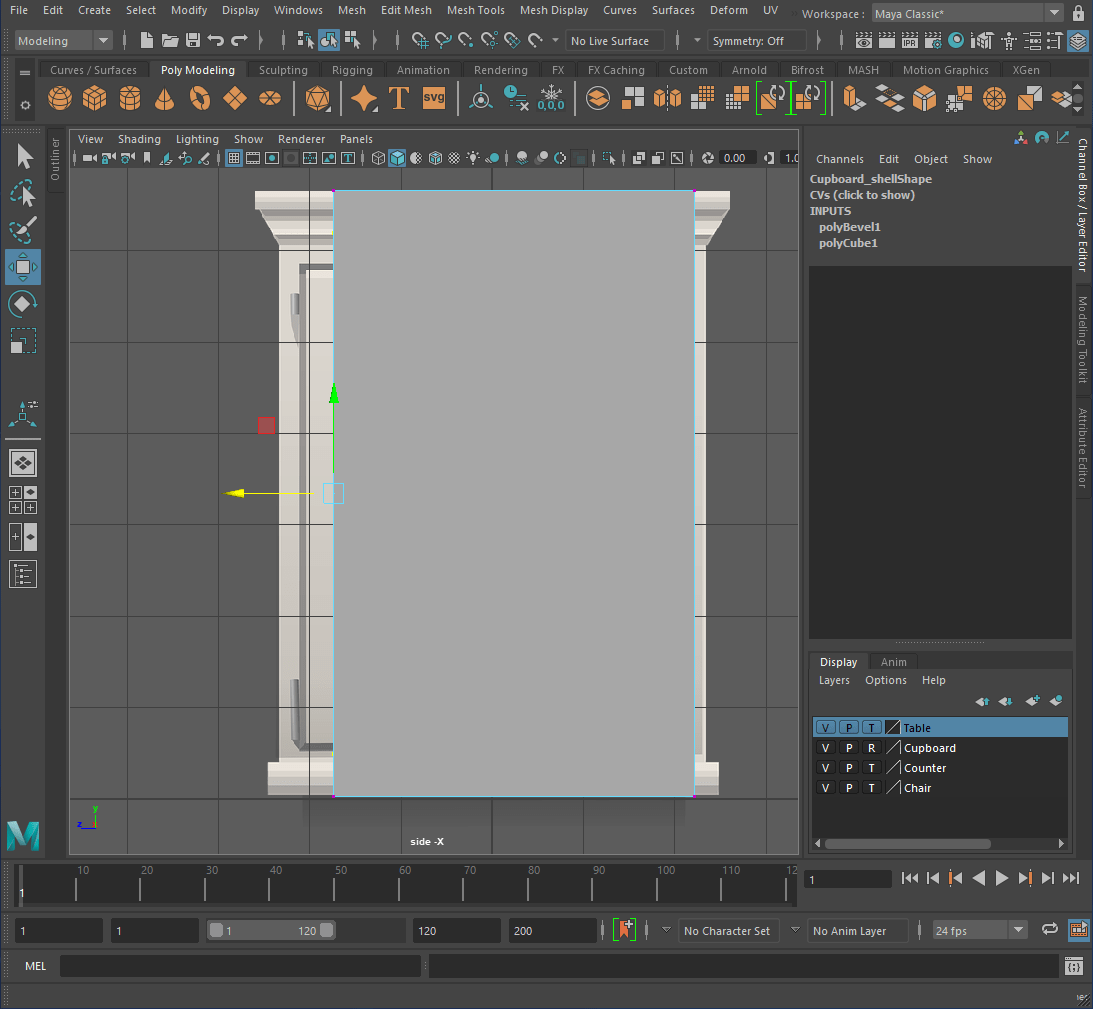
-Details-
For the details I created a cube, scaled it, beveled the edges, positioned it under the cupboard and froze the transformations.

I then duplicated the piece and positioned it above the cupboard. Finally I duplicated it again, scaled and positioned it above the cupboard.


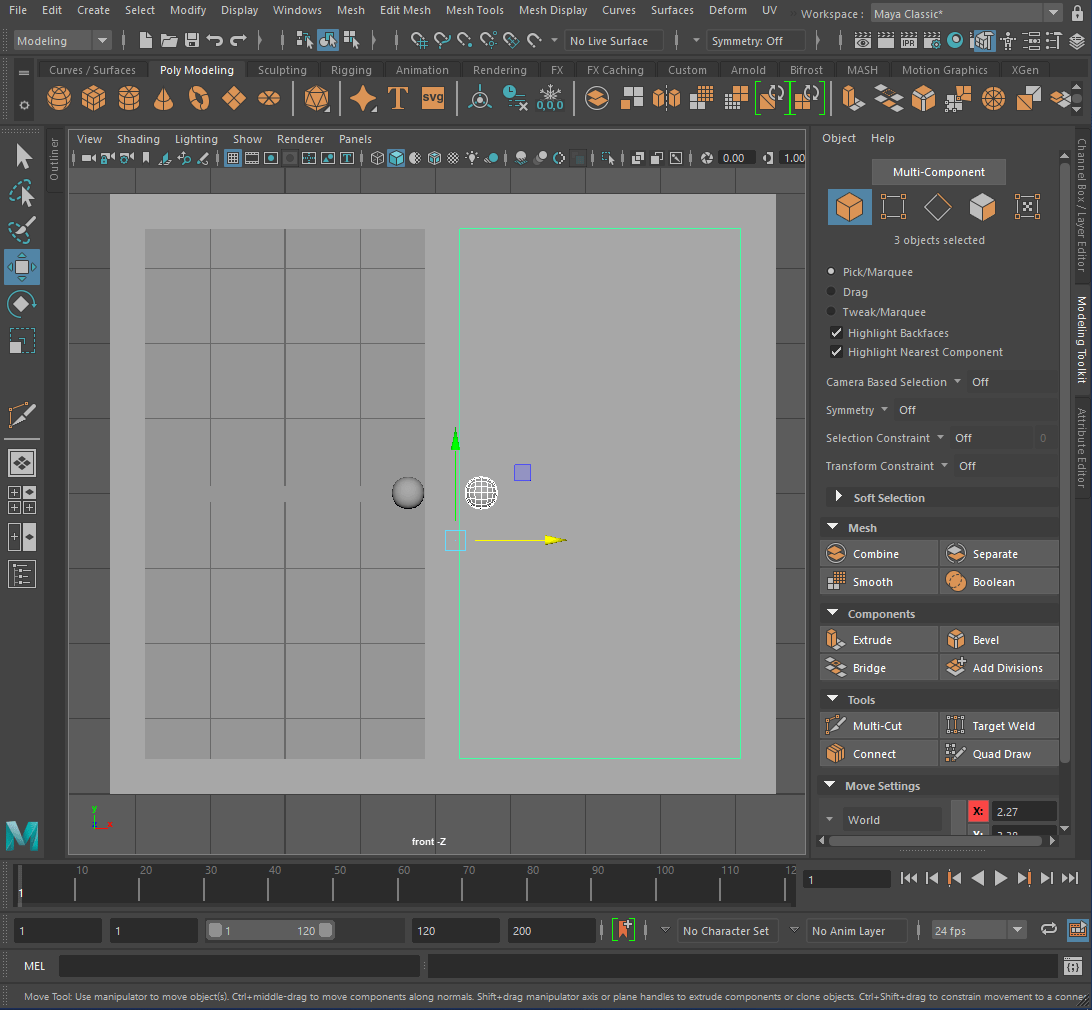
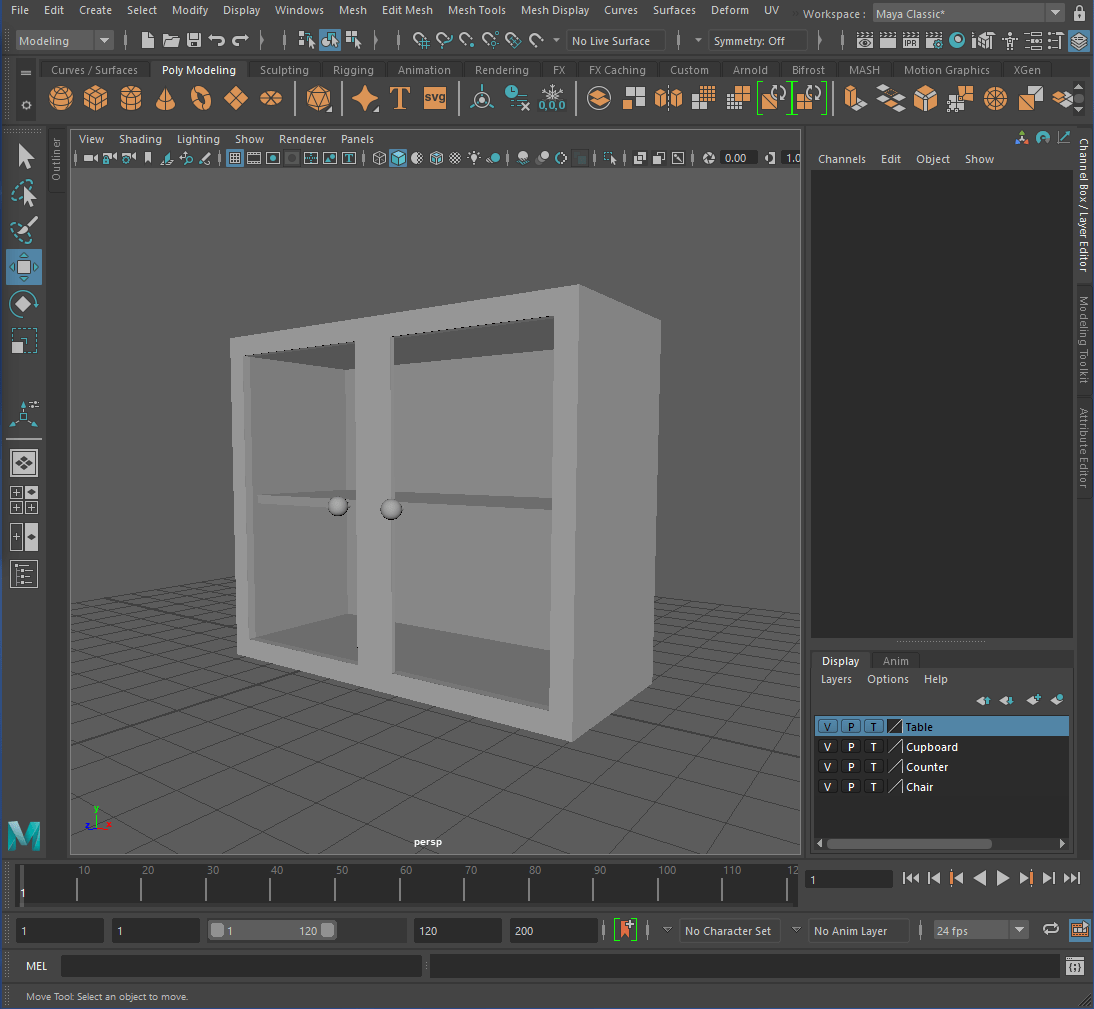
-Double Cupboard-
I duplicated the cupboard and flipped it. I pushed the two cupboards together to get the rough size of the final cupboard and scaled the cupboard to make it bigger.

I deleted the unnecessary faces and froze the transformations.

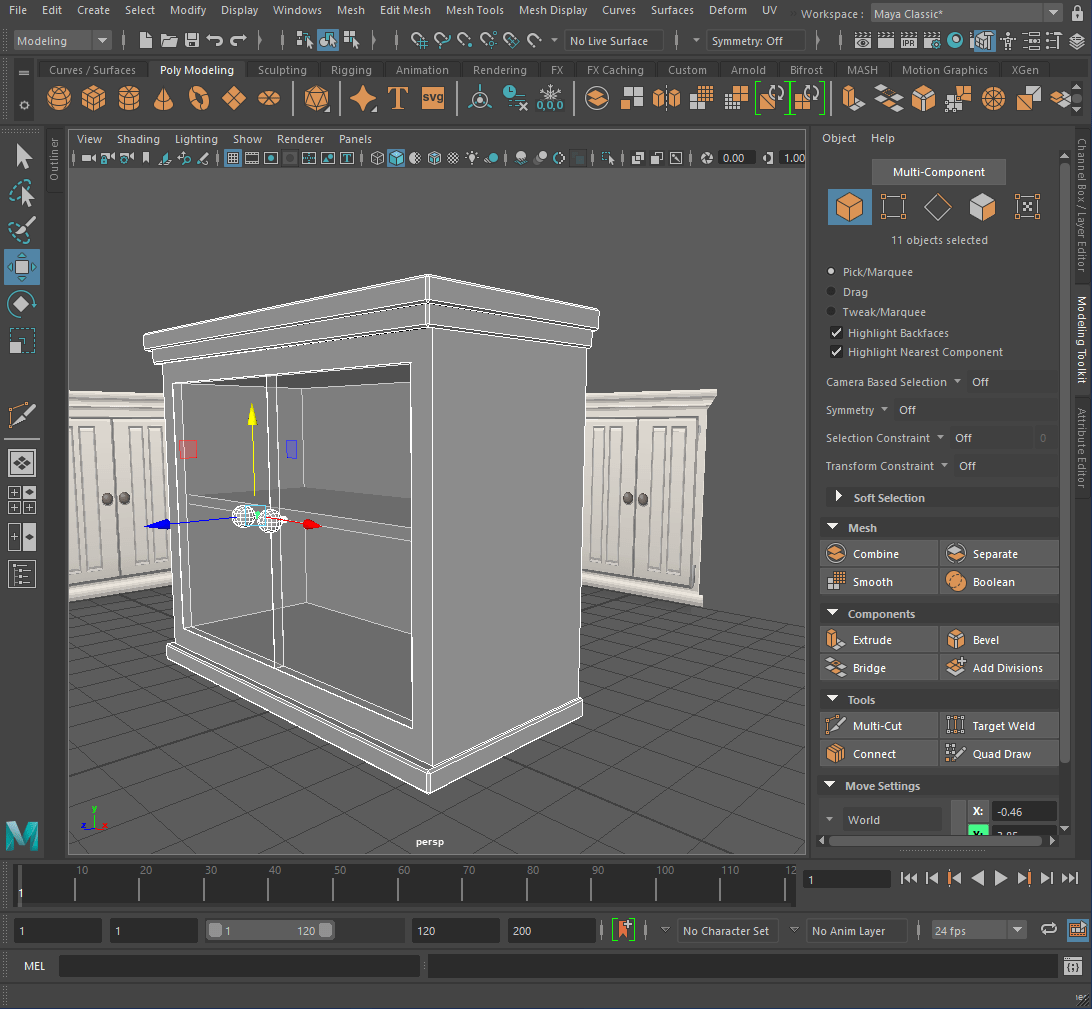
—Counter—
-Cupboards-
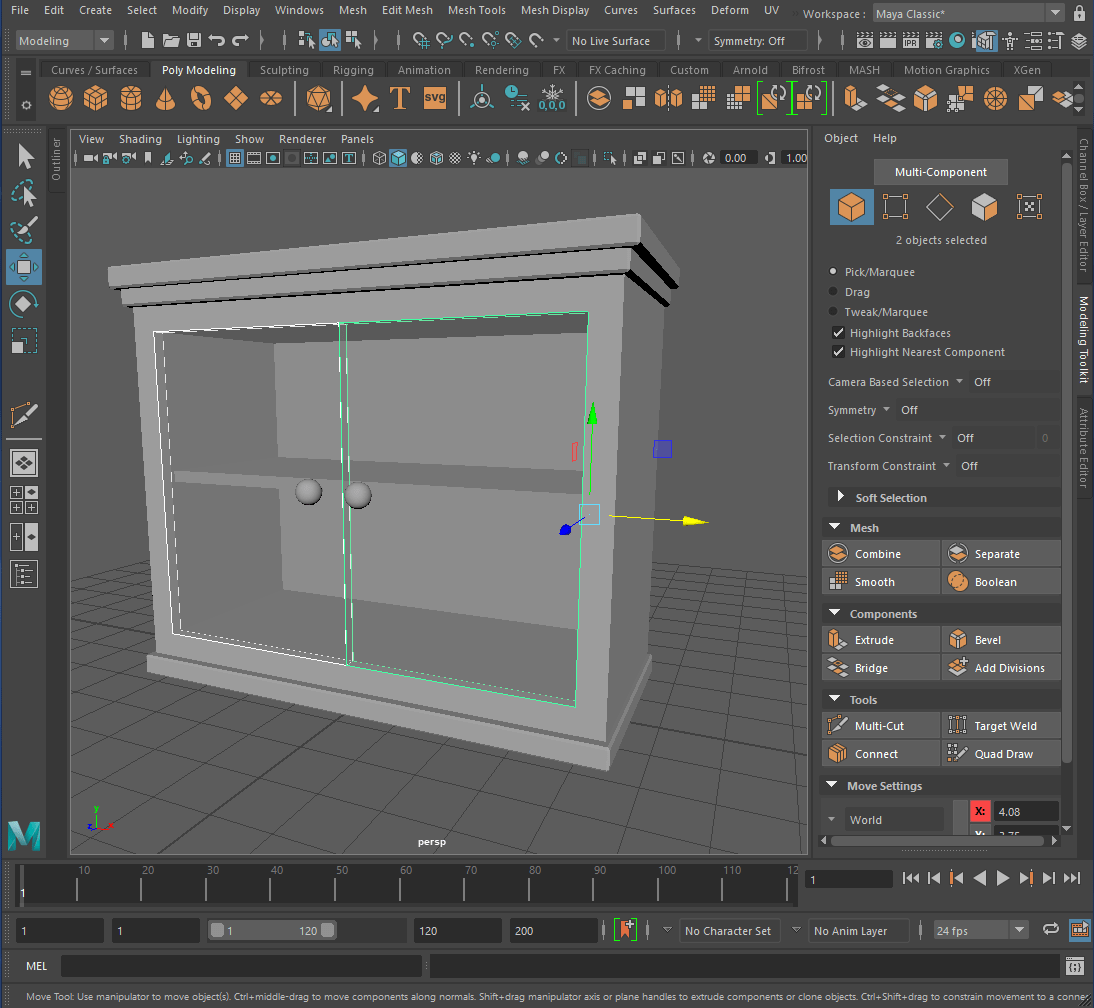
For the cupboard I used the single cupboard from before and removed the top and bottom parts, scaled the shell and repositioned the pieces.
Next I duplicated the cupboard and positioned it and repositioned the handle.
I deleted the unnecessary faces, combined the objects and merged the vertices.

I then deleted the extra edges, faces and reassembled the pieces of the cupboard.


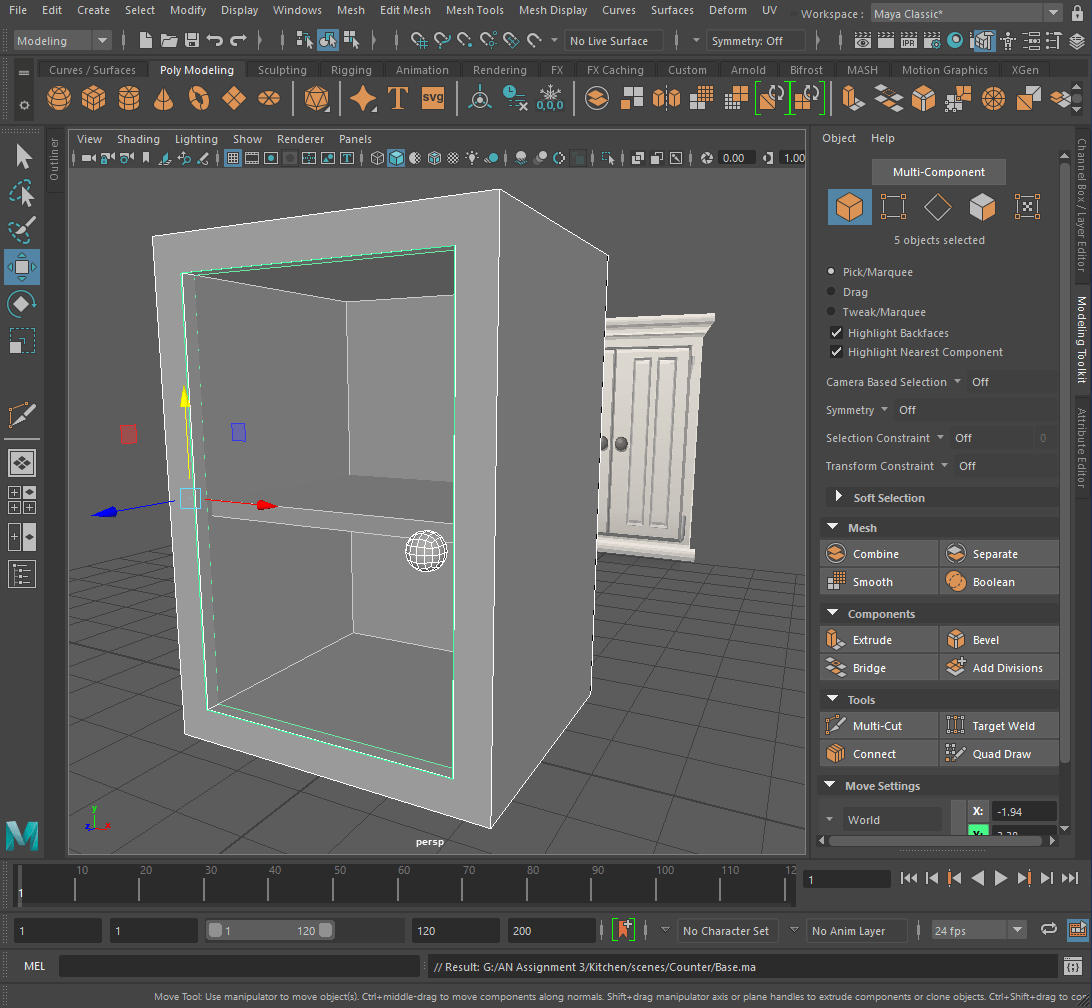
-Counter top-
For the counter top I duplicated the cupboards to get the length of the counter and froze the transformations.

I then created a cube, scaled it to the size of the counter top and beveled the edges.
Finally I deleted the unnecessary faces and reassembled the counter.
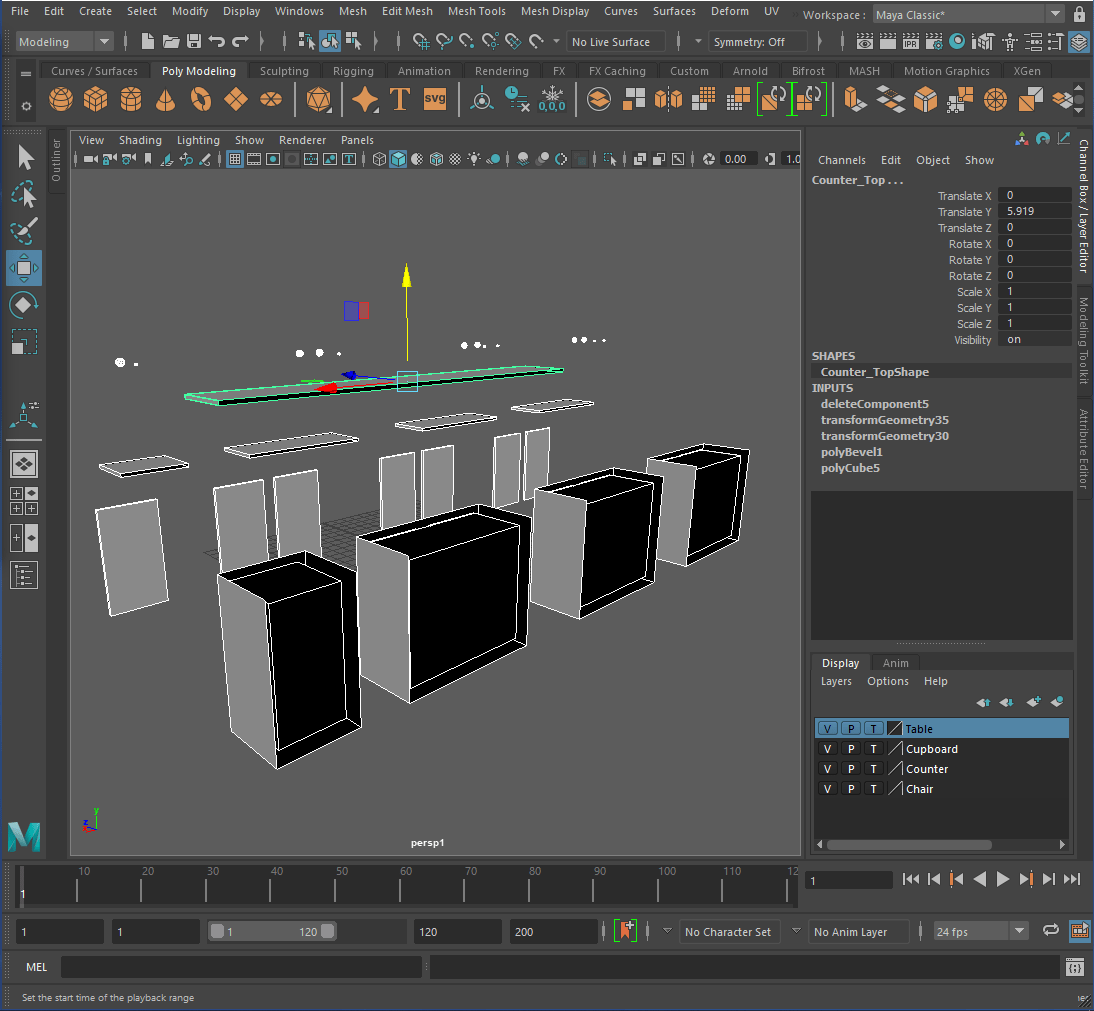

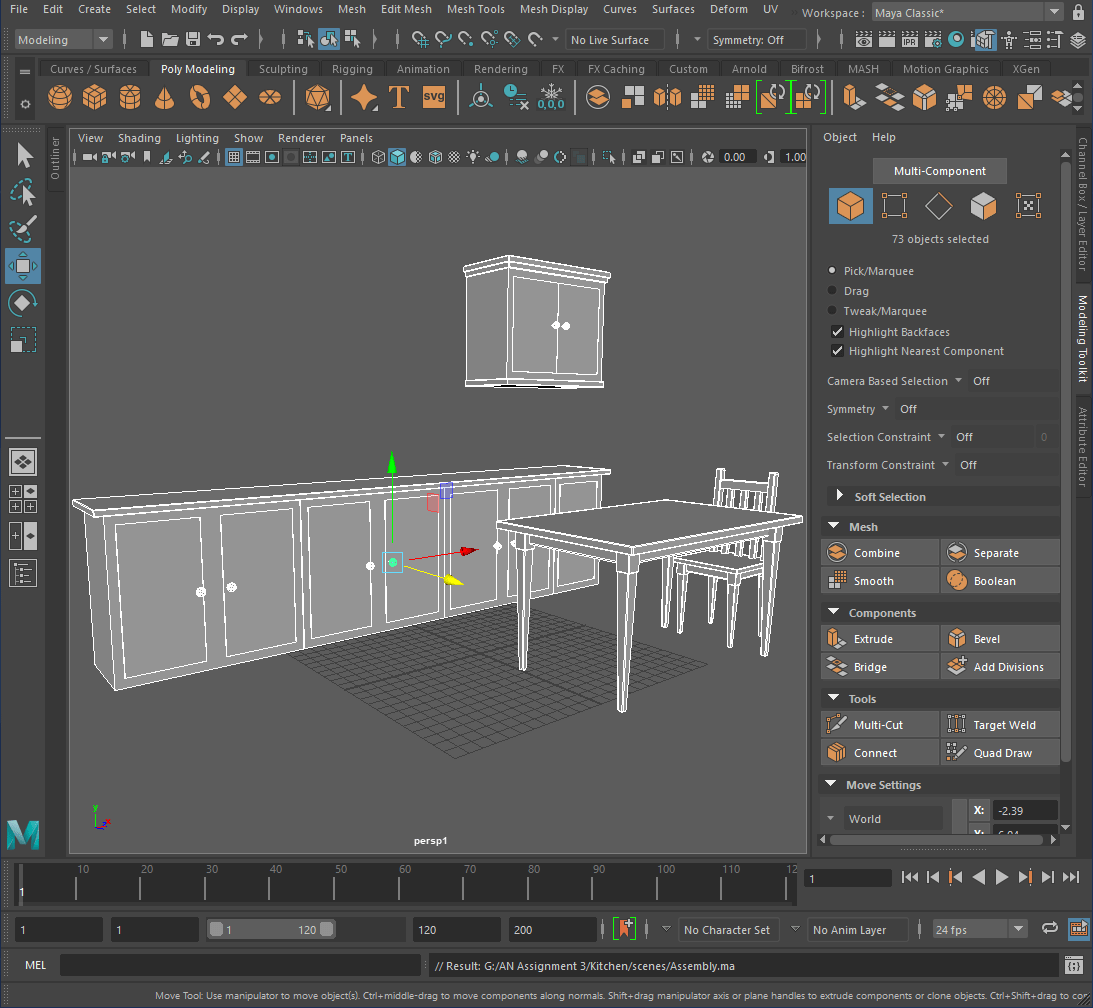
—Assembly—
I placed all the model pieces together and scaled them.

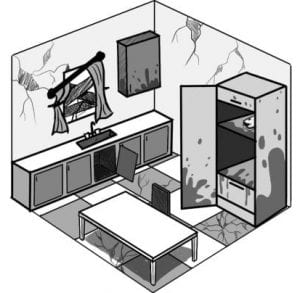
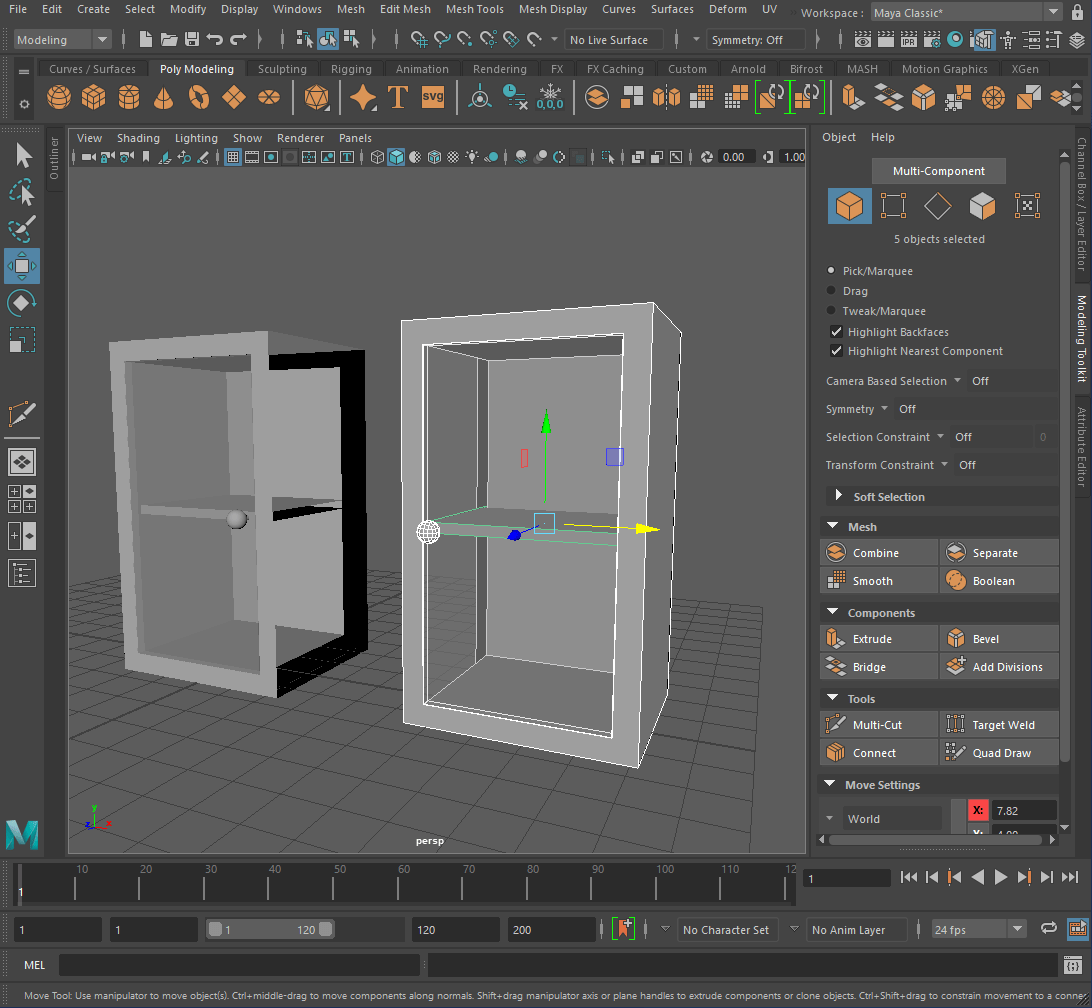
—Deteriorate—
-Cupboard-
I combined the cupboard door and the handle, altered the pivot point and rotated it.
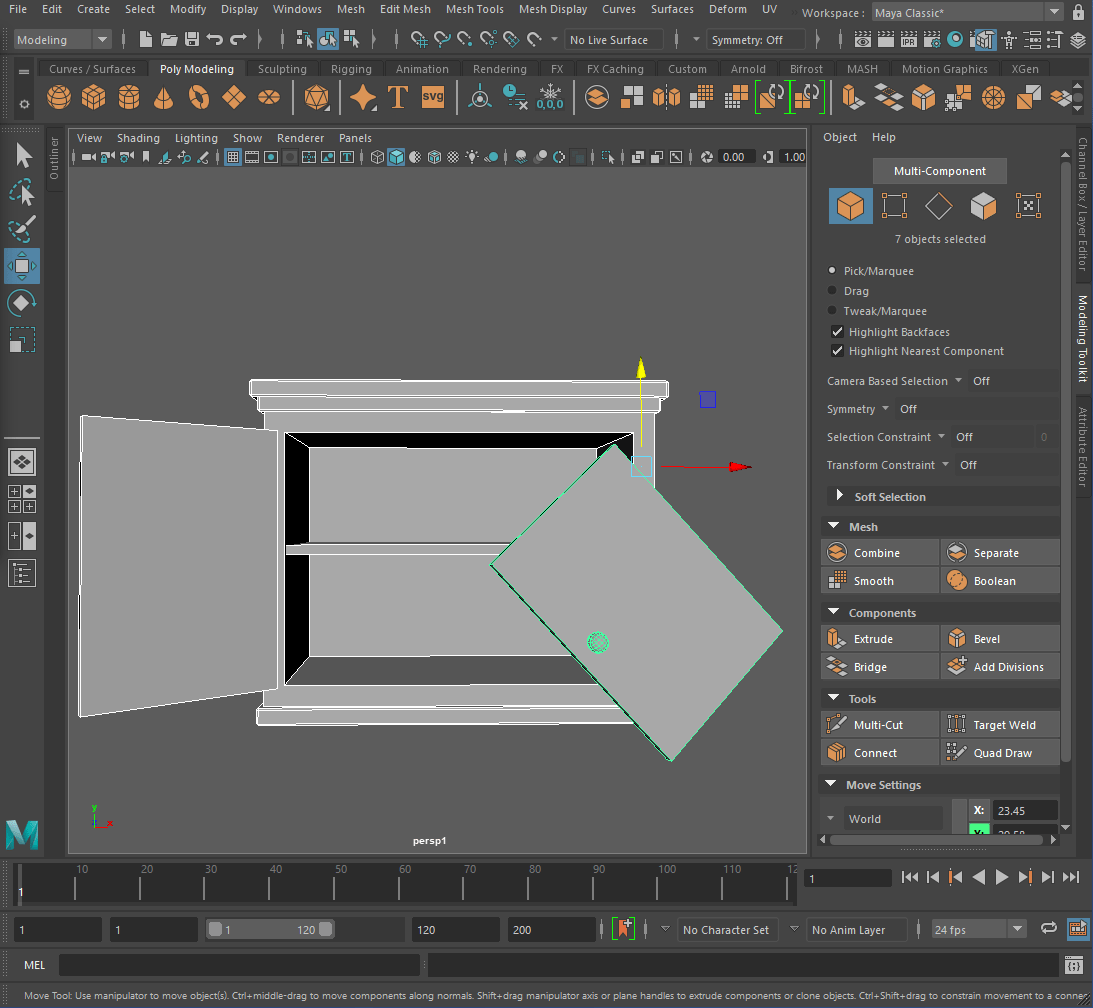
Then I rotated the shelf and repositioned it.

-Counter-
For the counter I deleted some of the cupboard doors, handles and shelves and rotated some of the pieces.

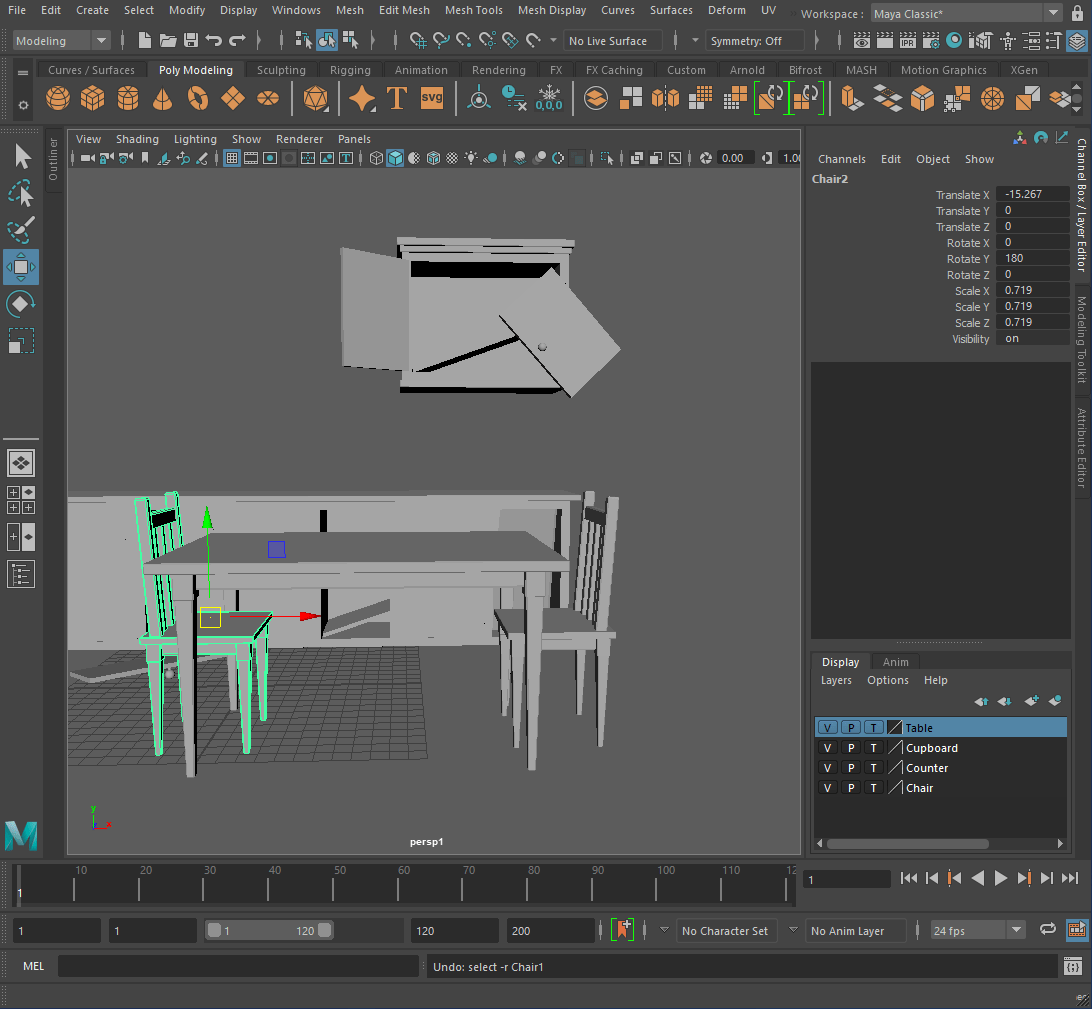
-Chairs-
I duplicated the chair and positioned it at the other side of the table. Then I rotated the other chair and deleted one of the legs.

—Finishing Touches—
Finally I froze the transformations of the pieces and deleted the history.
____________________________________________________________________________________________________________________________
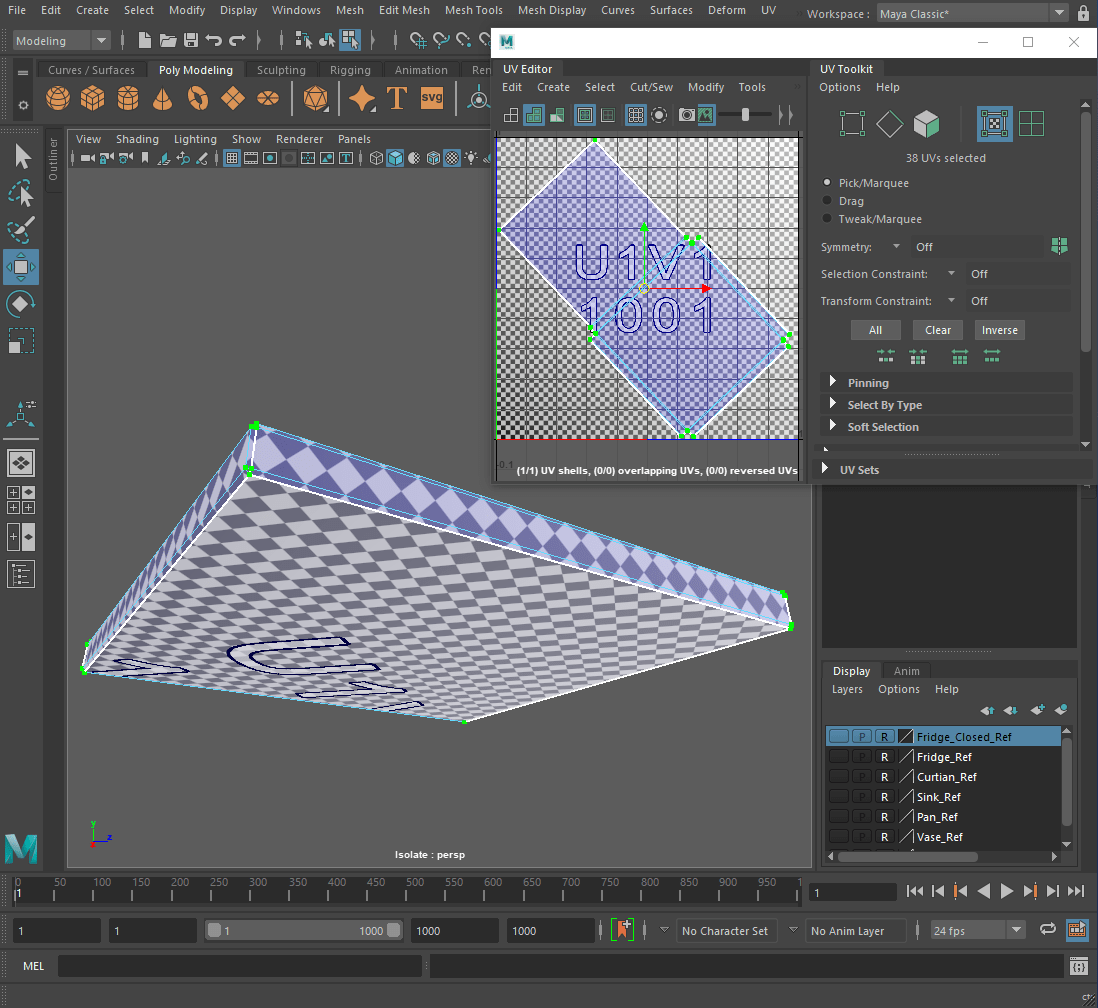
—UV Unwrapping—
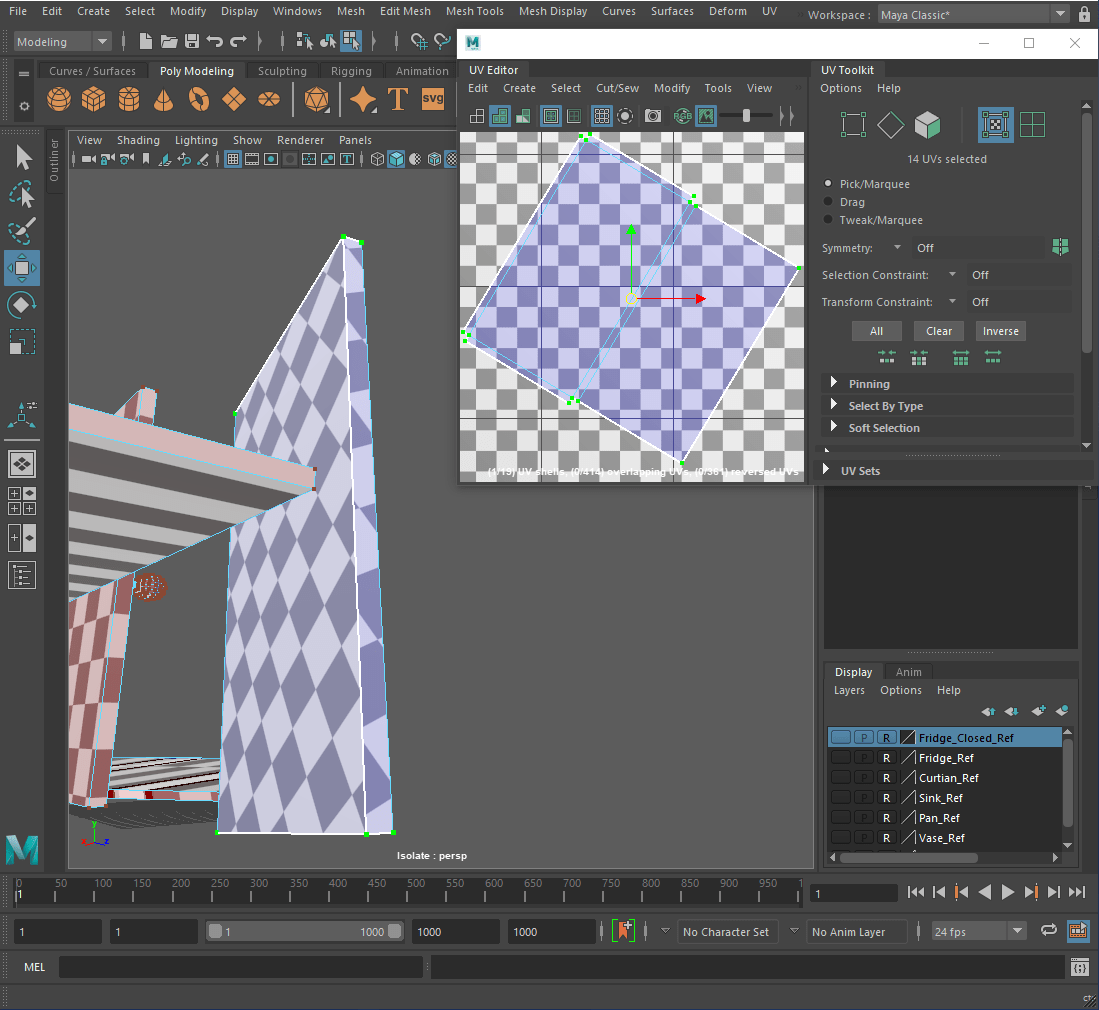
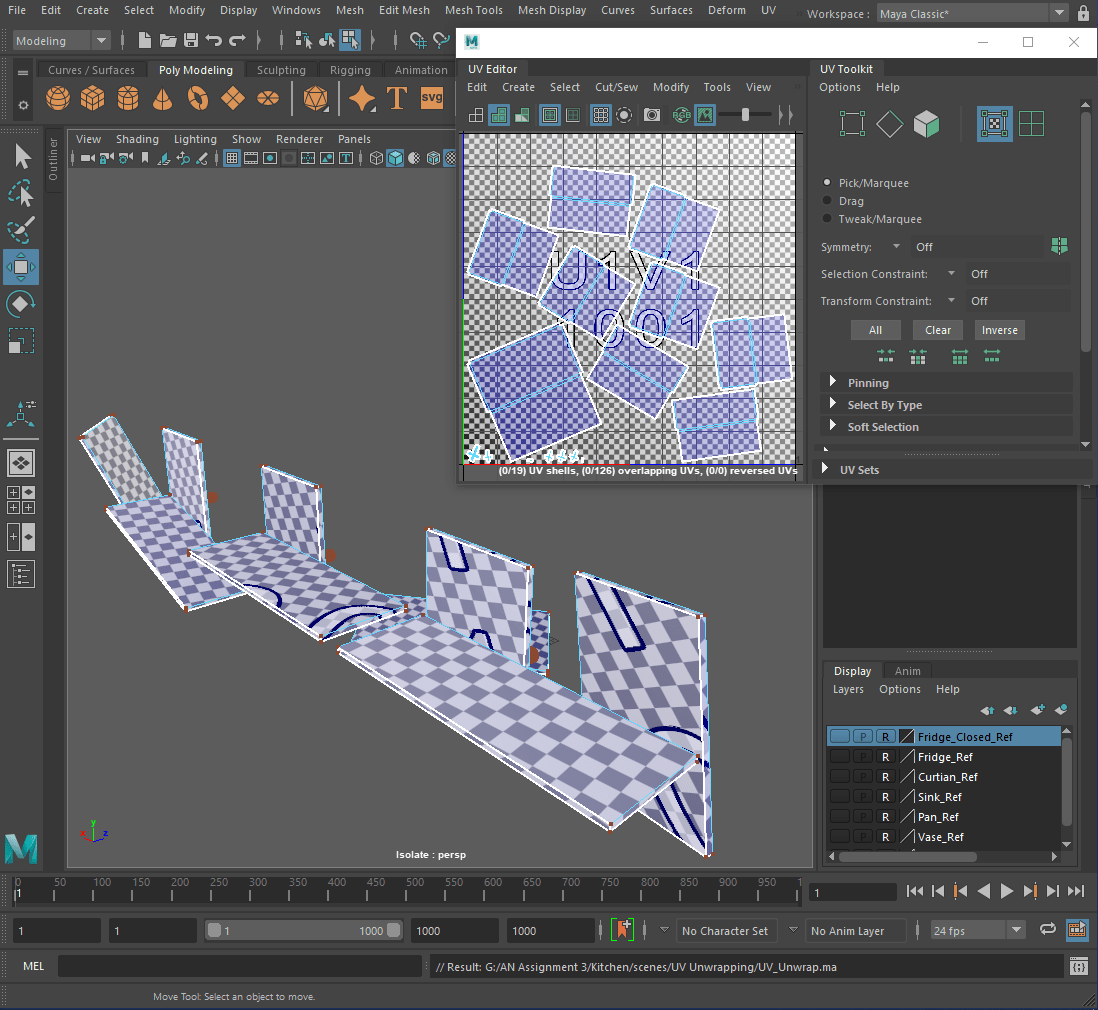
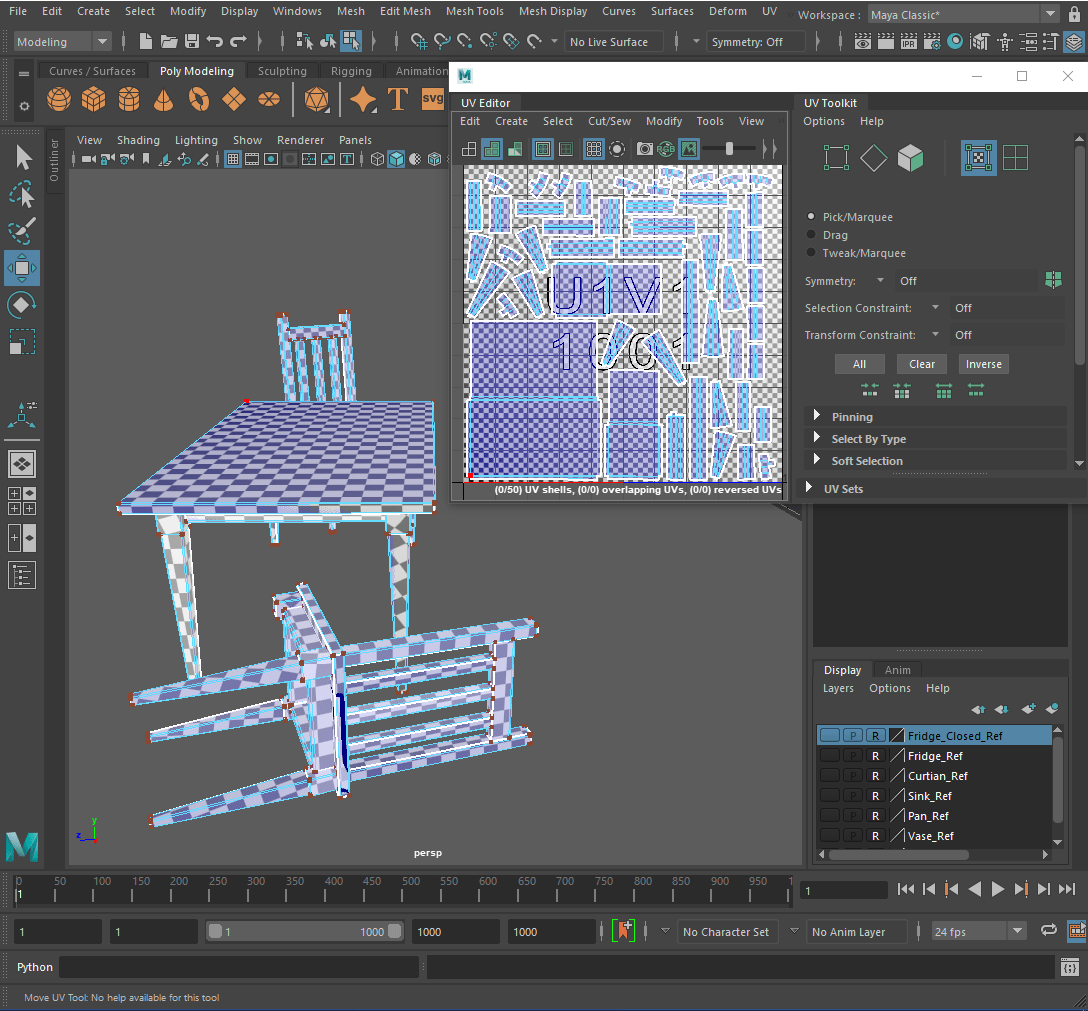
—Table—
For the table top, I cut along the bottom of the table top and along the corners.
For the supports, I cut up the inside of the blocks and along the bottom and I repeated the same process for the rest of the blocks.

For the legs, I created a seam along the underside and inside of the leg and I repeated the same process for the rest of the legs.
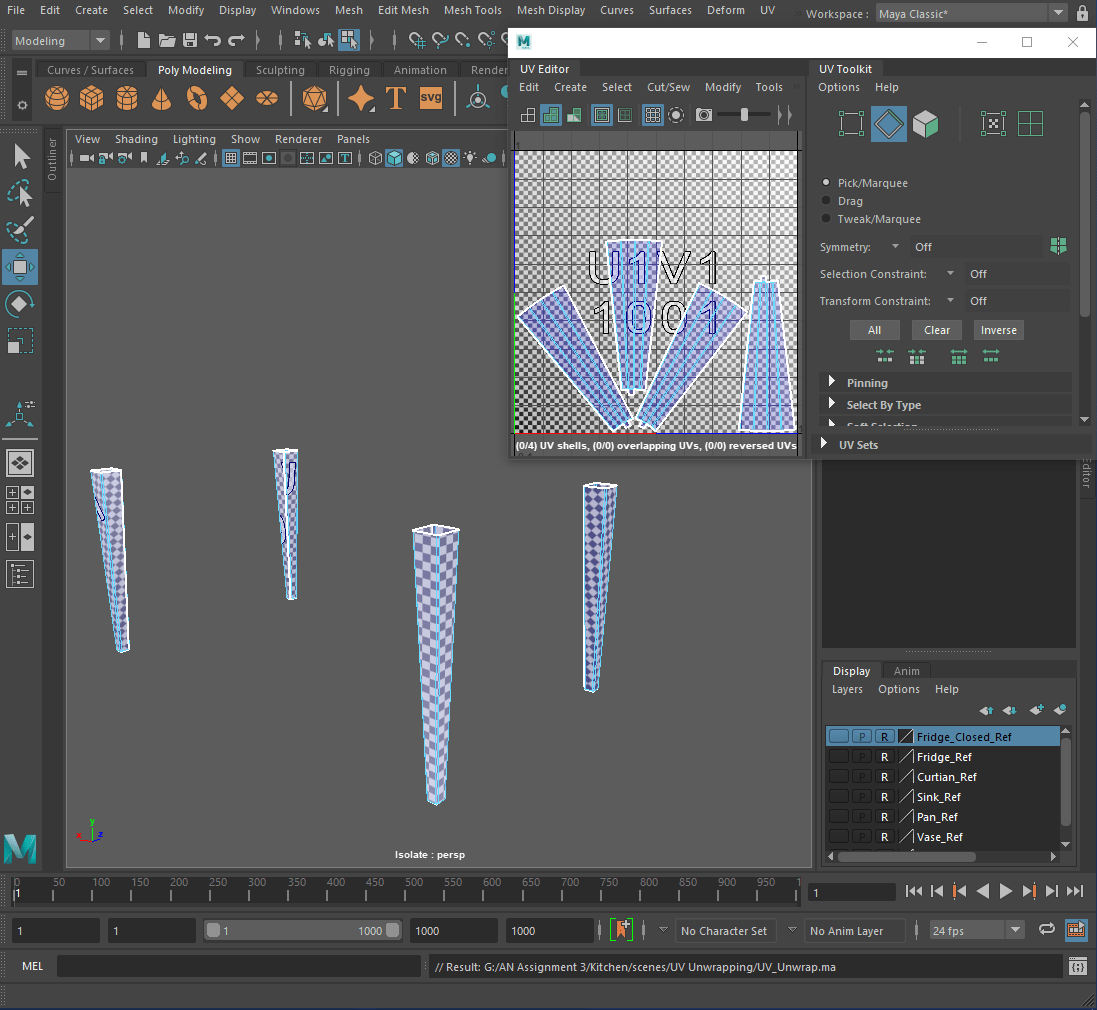
Finally I selected all of the table and used the ‘Layout Tool’.

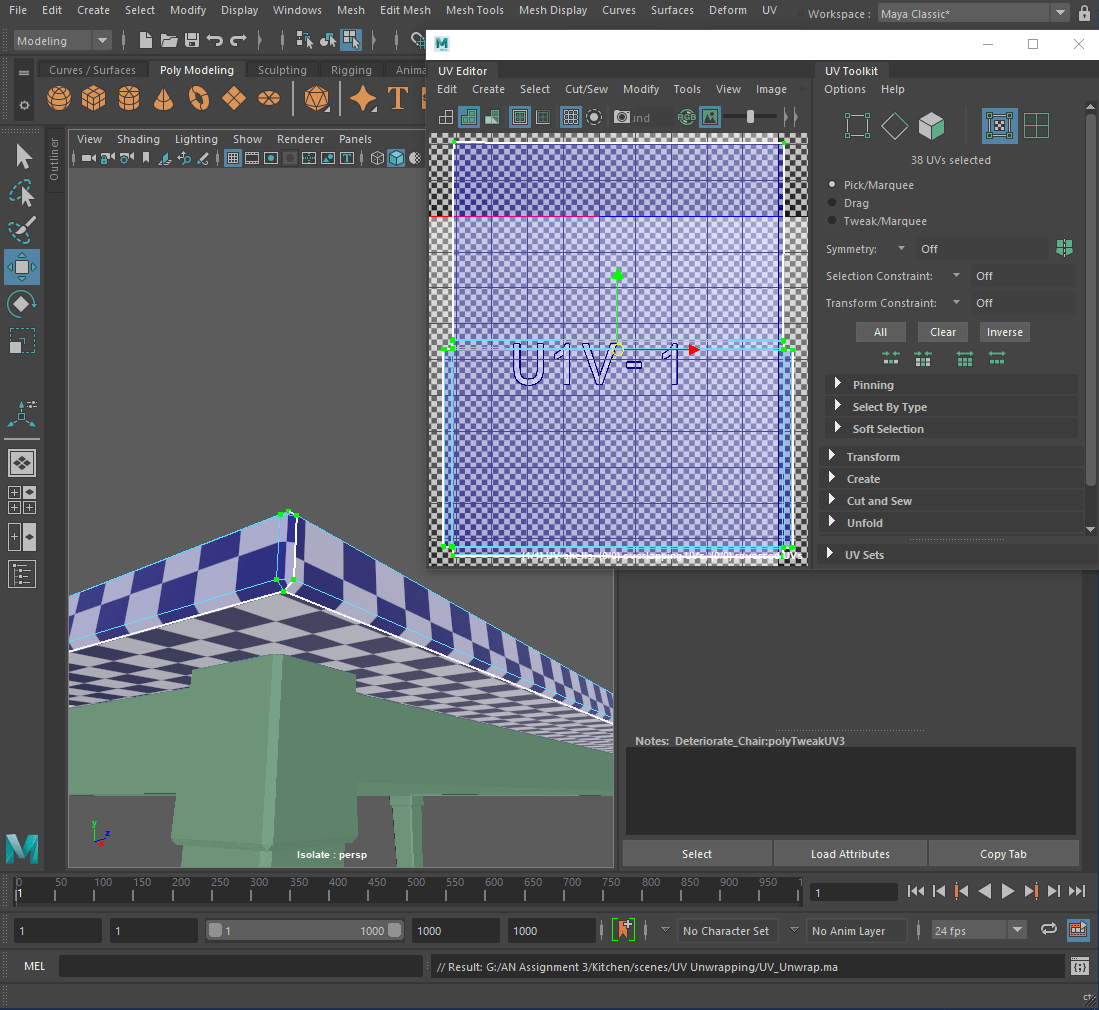
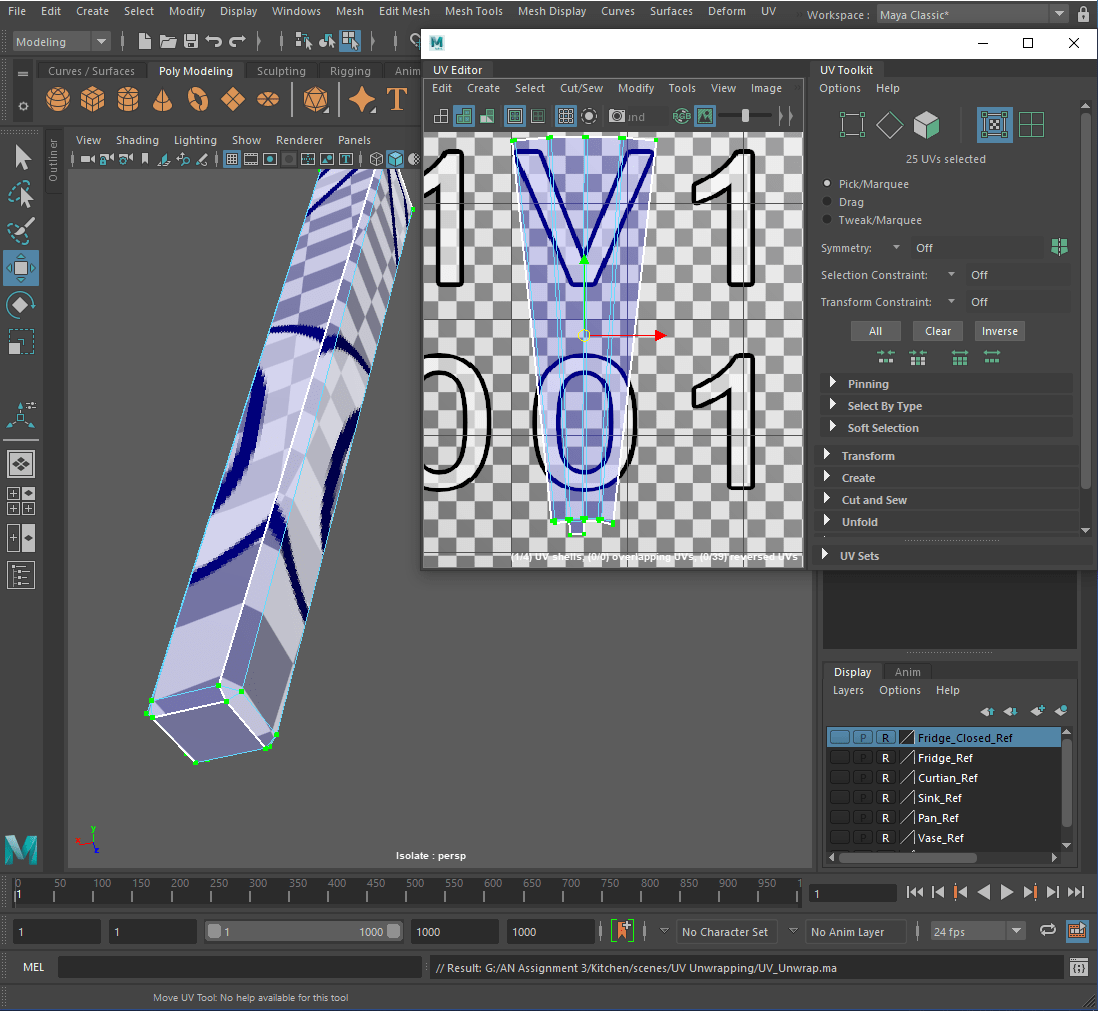
—Chairs—
For the legs of the chairs, I created a seam along the bottom and inside of the leg and repeated for the other legs


For the supports, I cut up the inside of the block and along the bottom and repeated the same process for the rest of the blocks.

For the seat, I cut a seam along the bottom of the seat and on the corners.
For the back, I cut seams along the top and back of all the pieces.
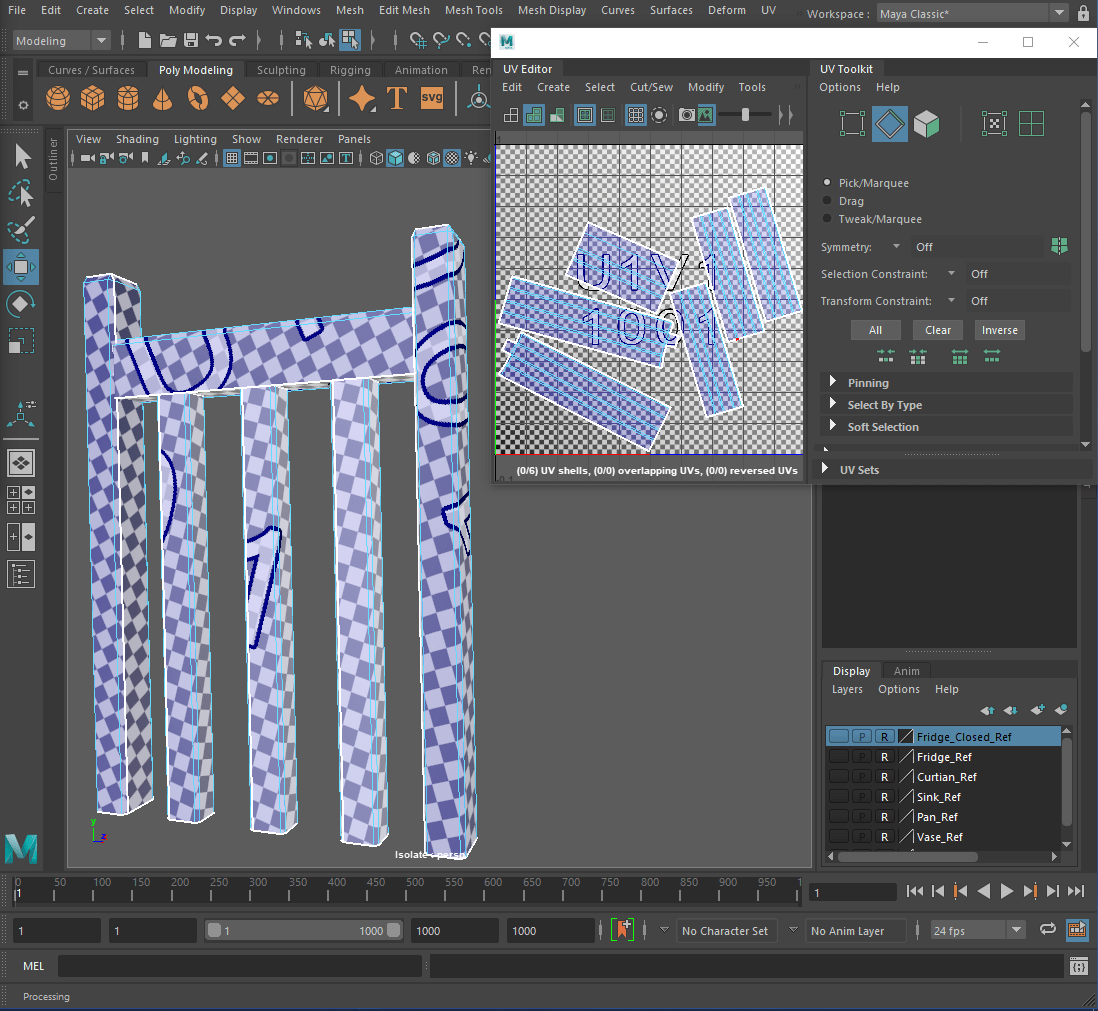
Finally I selected all the pieces of the chair and used the ‘Layout Tool’.

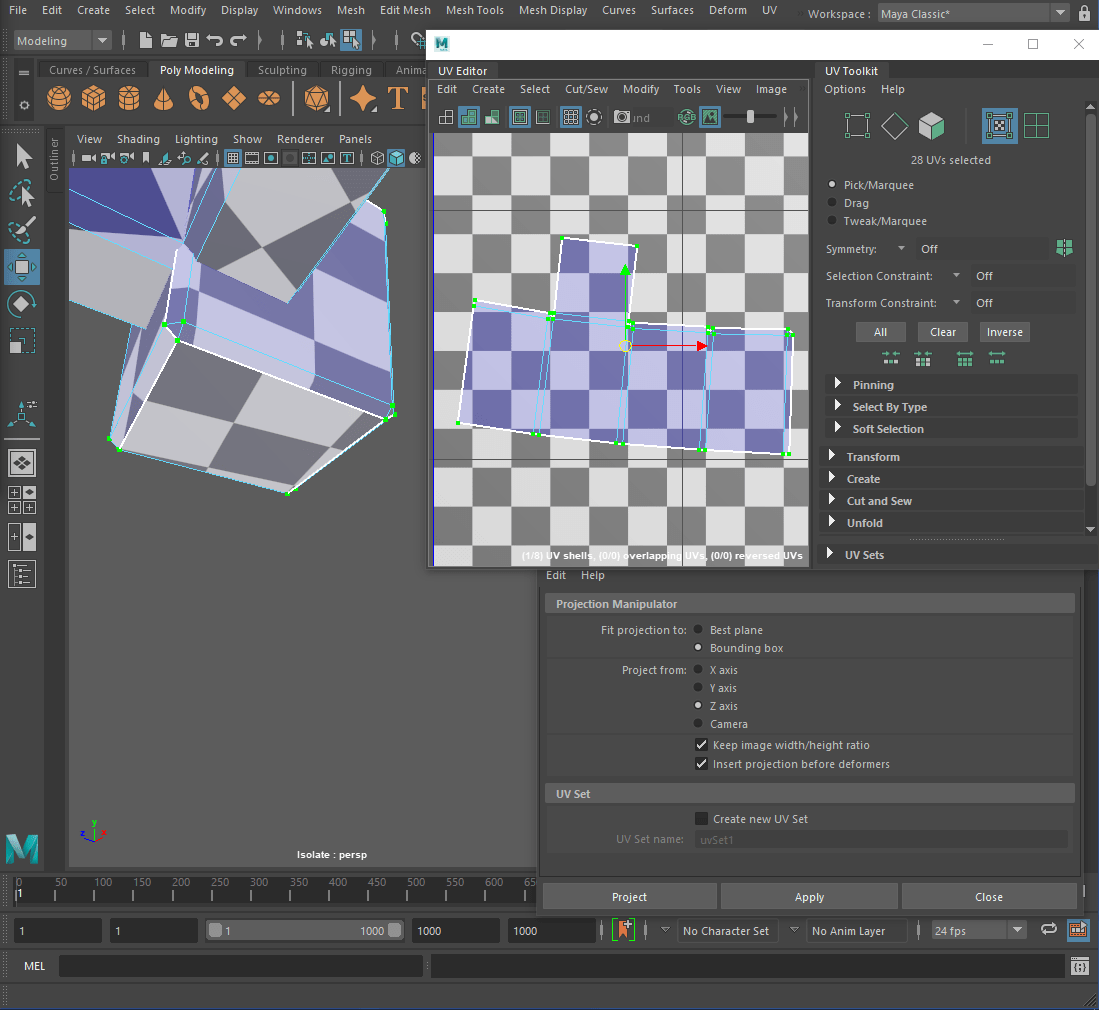
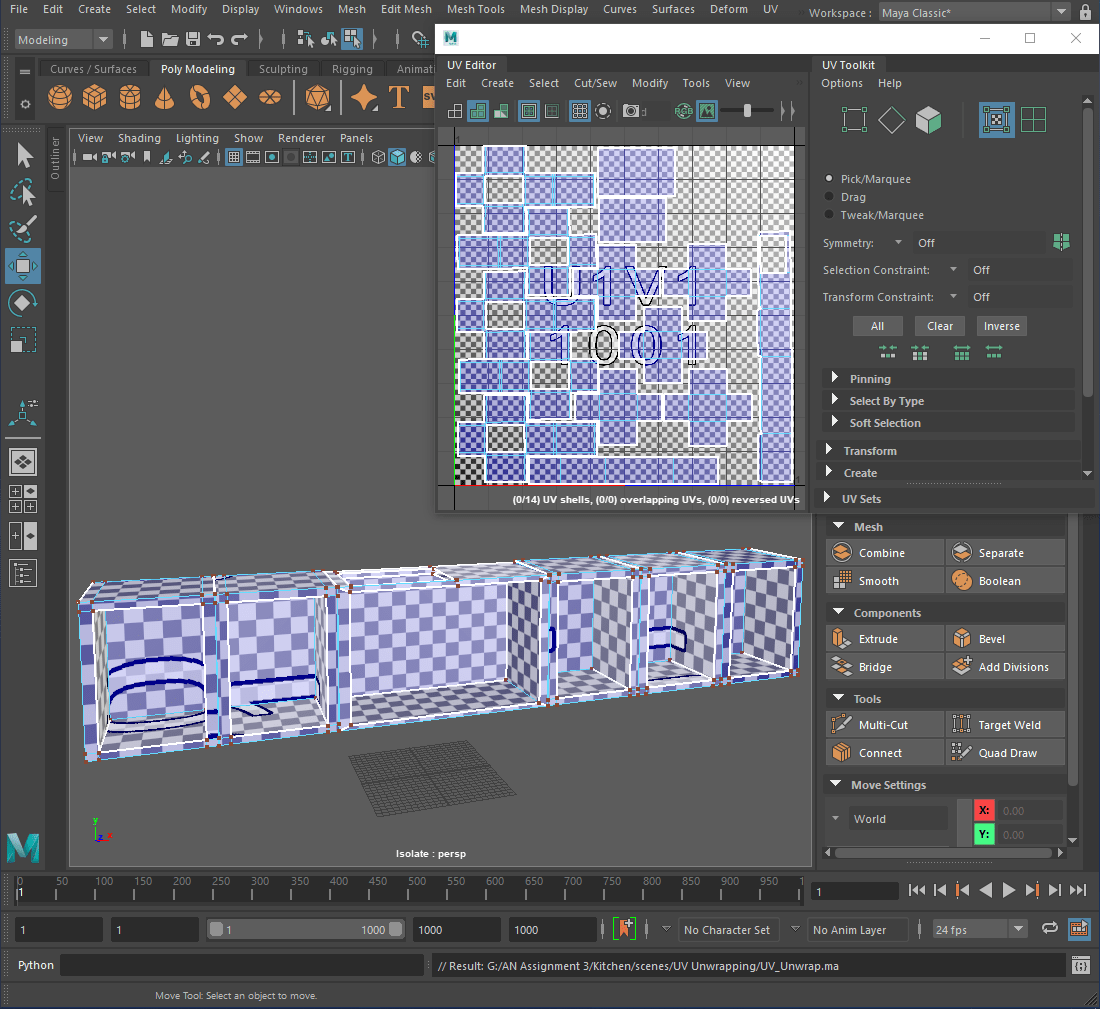
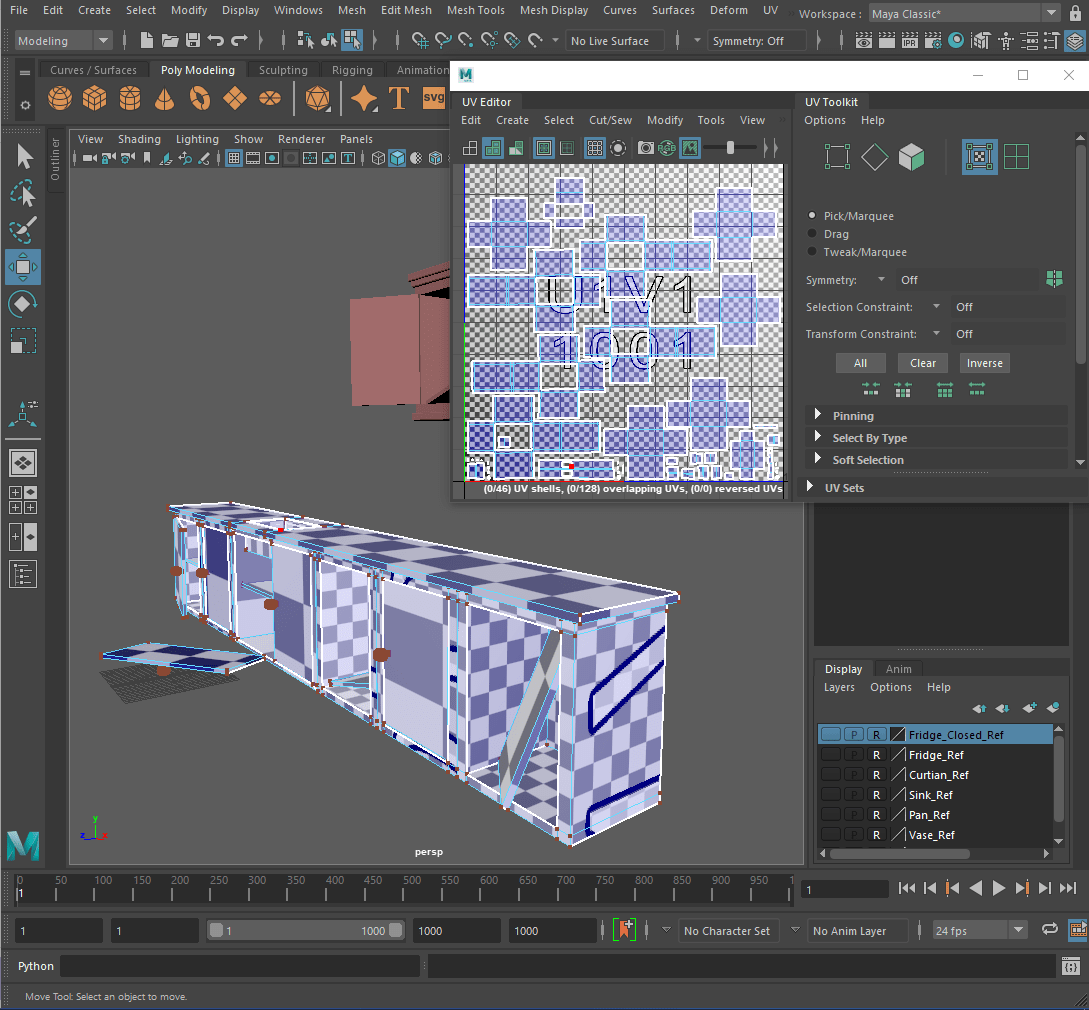
—Cupboard—
For the shell of the cupboard I cut along the inside corners and cut the face from the inside of the cupboard.

I cut seams along the corners and underside of the bottom of the cupboard and repeated the same process for the top part of the cupboard.
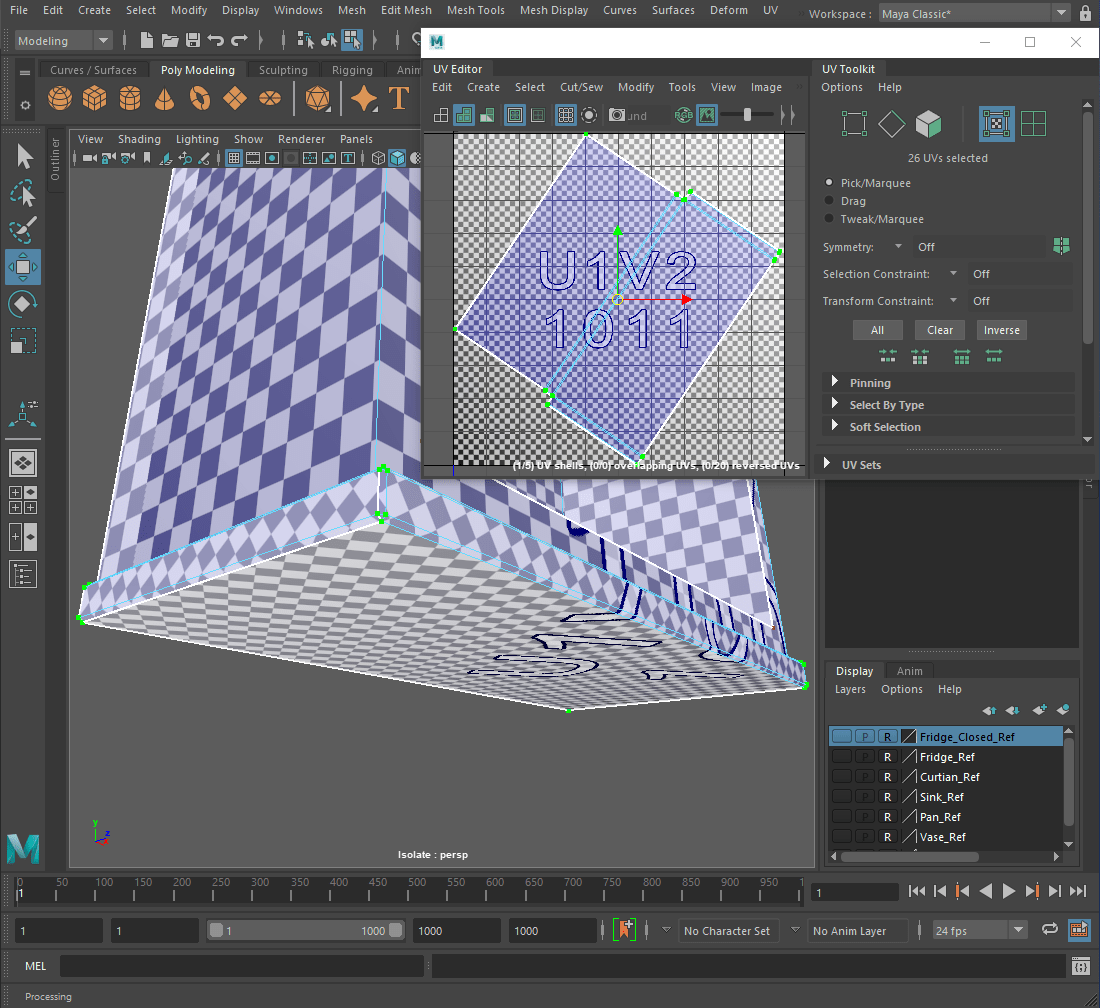

For the shelf and doors, I cut along the corners and the back of the cupboard door.
Then I cut a seam on the underside of the handle stem and the sides of the knob.
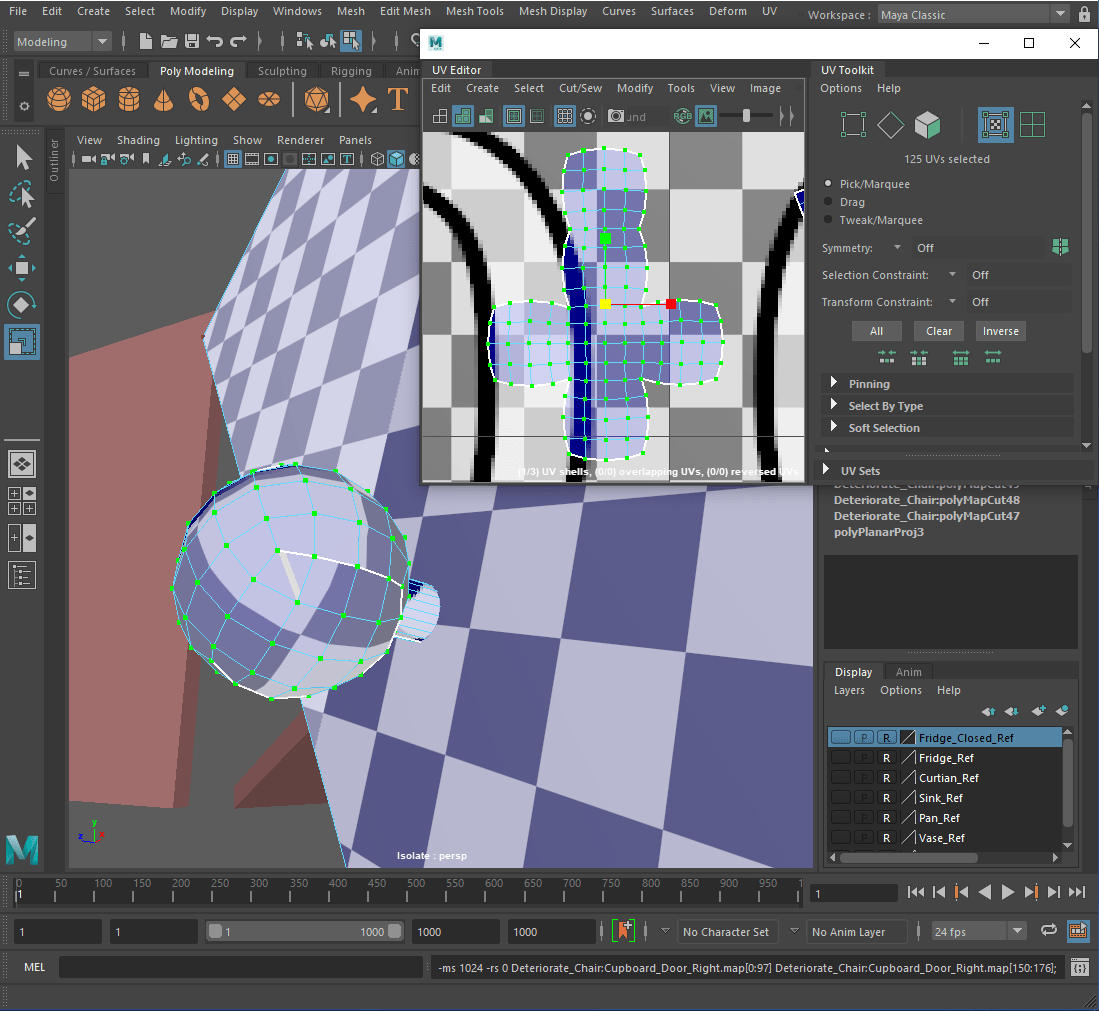
I straightened the UV map of the knob and cut along the corners and the underside of the shelf.
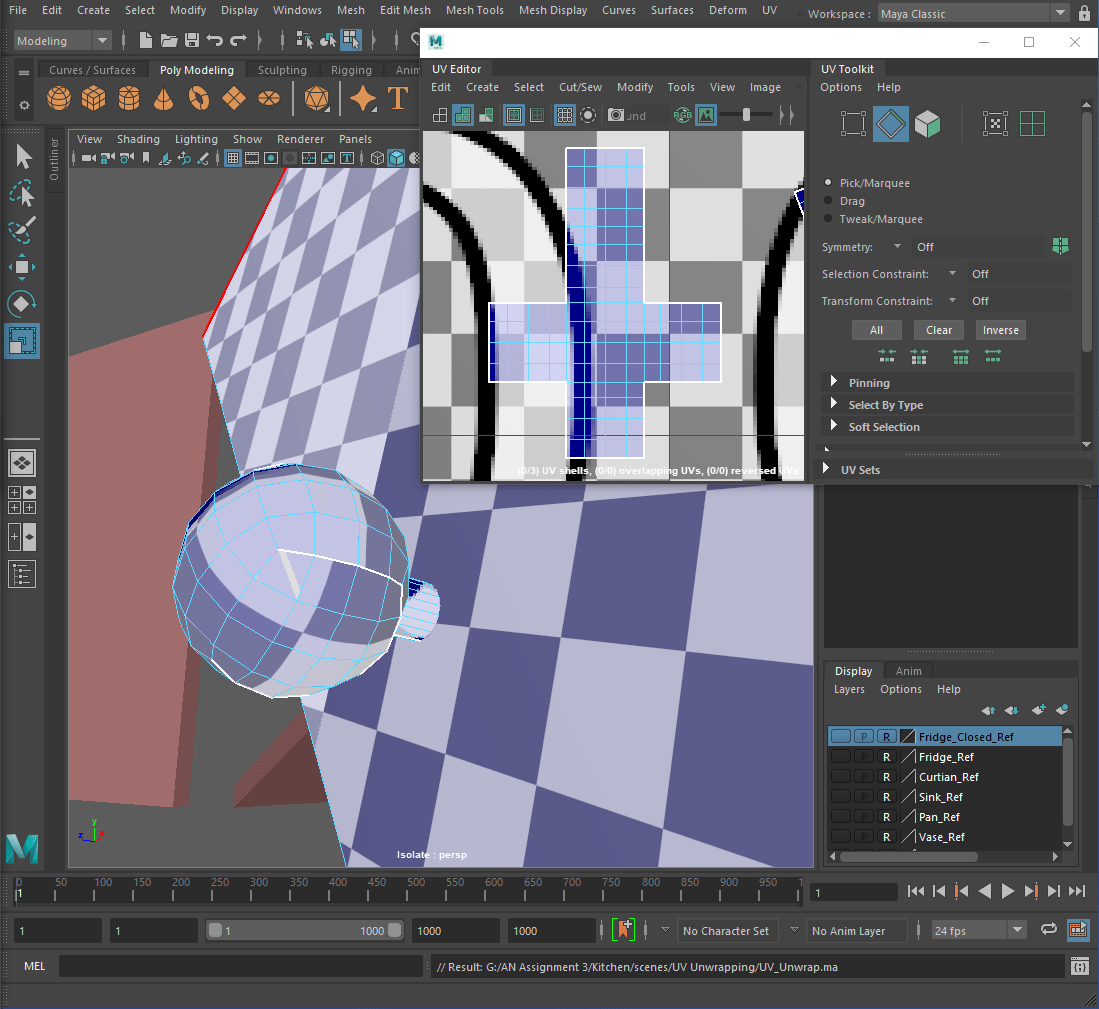

I selected the cupboard and used the ‘Layout Tool’.

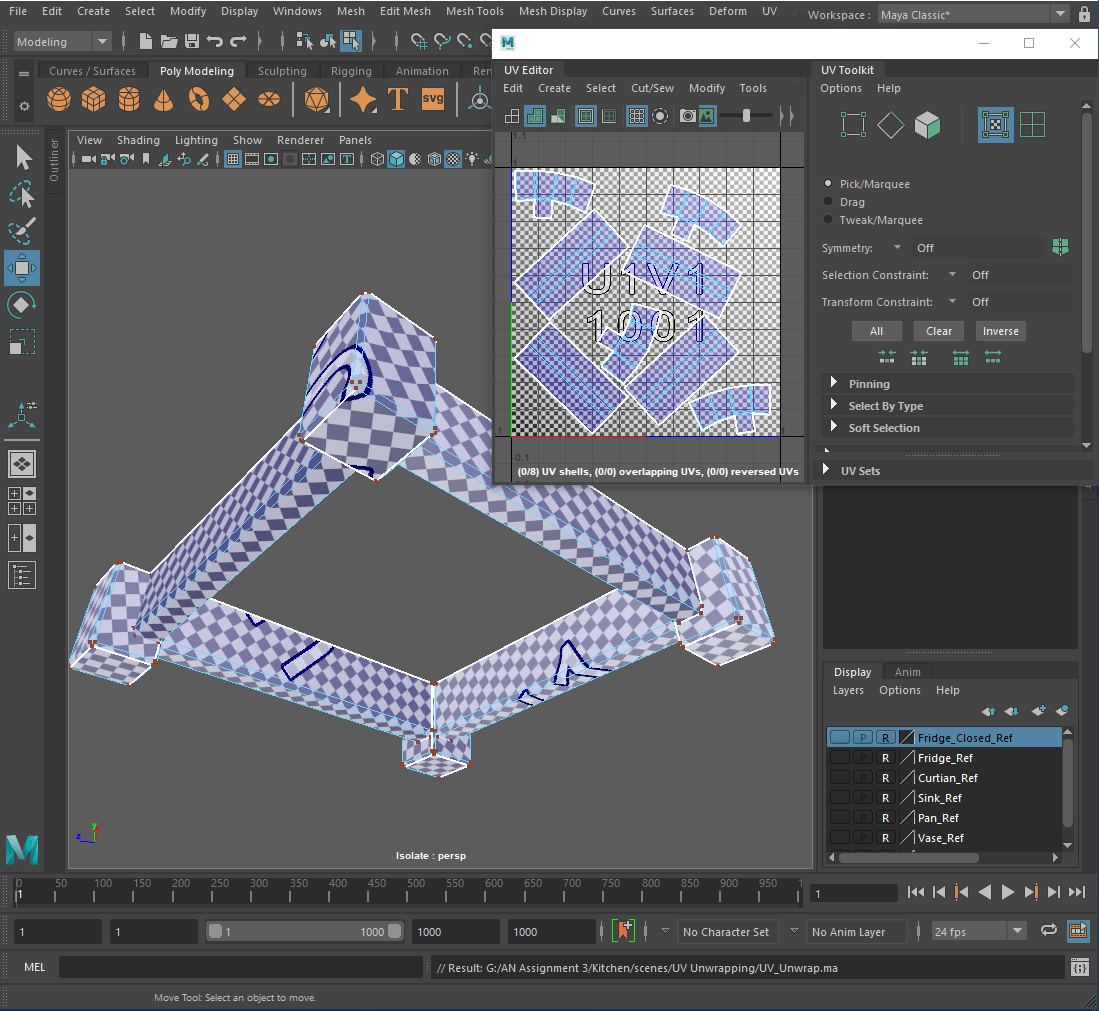
—Counter—
For the shelf and doors, I cut along the corners and the back of the door just like the cupboard.
Next I cut a seam on the underside of the handle stem and the sides of the knob and repeated for the rest of the doors and handles.
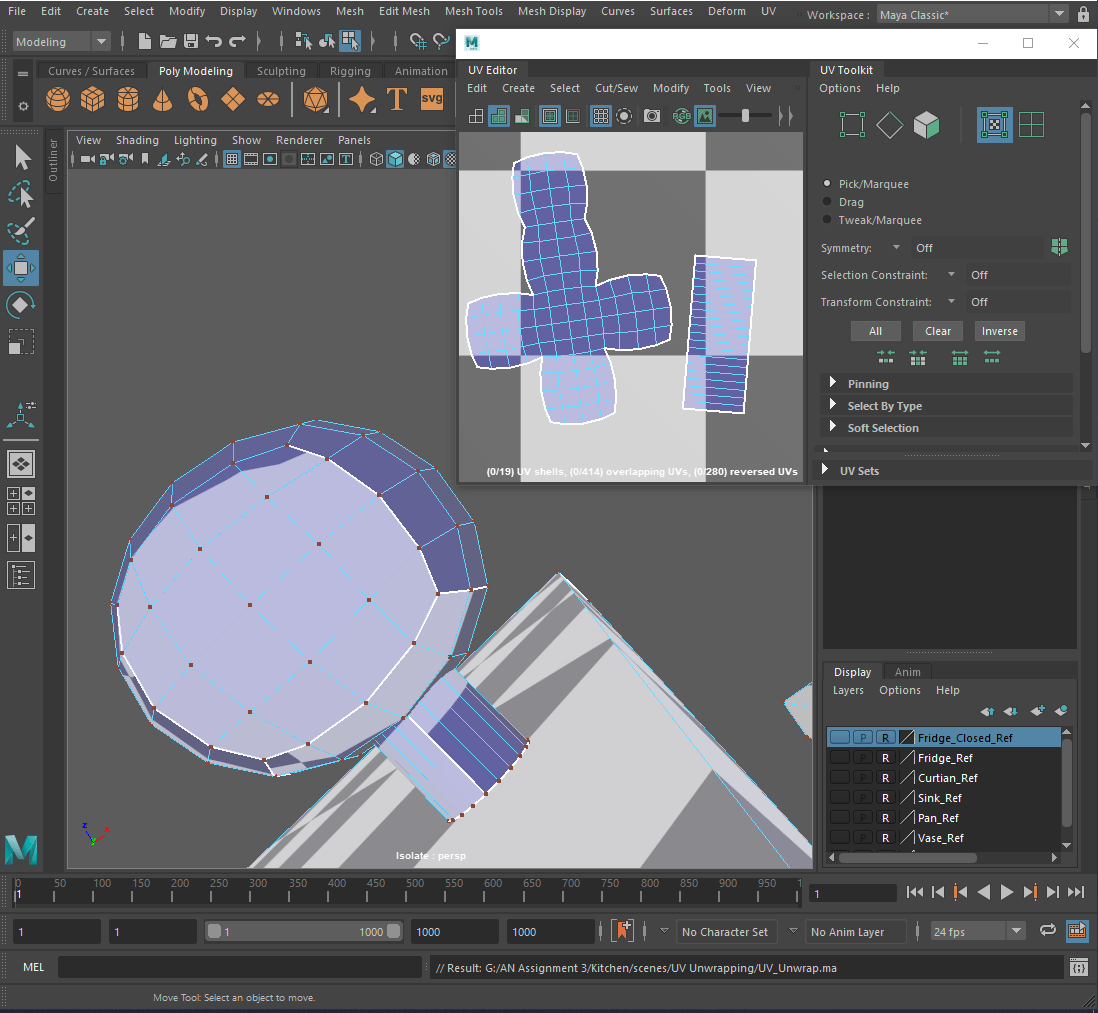

I then cut along the corners and the underside of the shelf and repeat for the other shelves.

For the shell, I cut along the inside corners of the cupboard and cut off the face. I then cut seams along the corners and backside of the cupboard and repeated for the rest of the cupboards.

For the counter, I cut the lining of the sink hole from the faces of the counter and along one of the corners.

I then cut along the edges and back of the counter.

For the sink and drain, I cut along the inner corners of the sink and cut off the face.
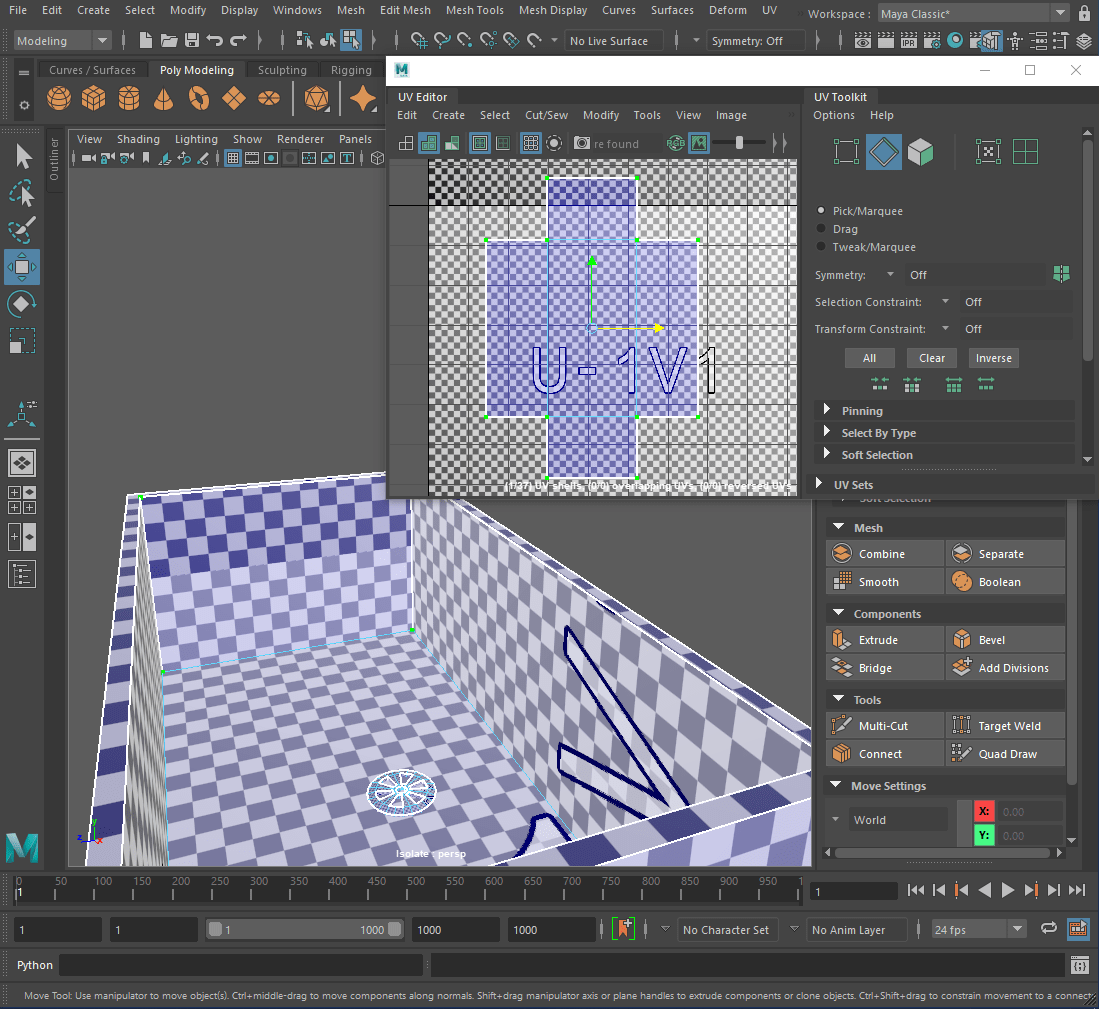
Next I created seams along the outer corners of the sink, cut the faces off the drain and cut one seam in each inner piece.

Finally I selected the counter and used the ‘Layout Tool’.
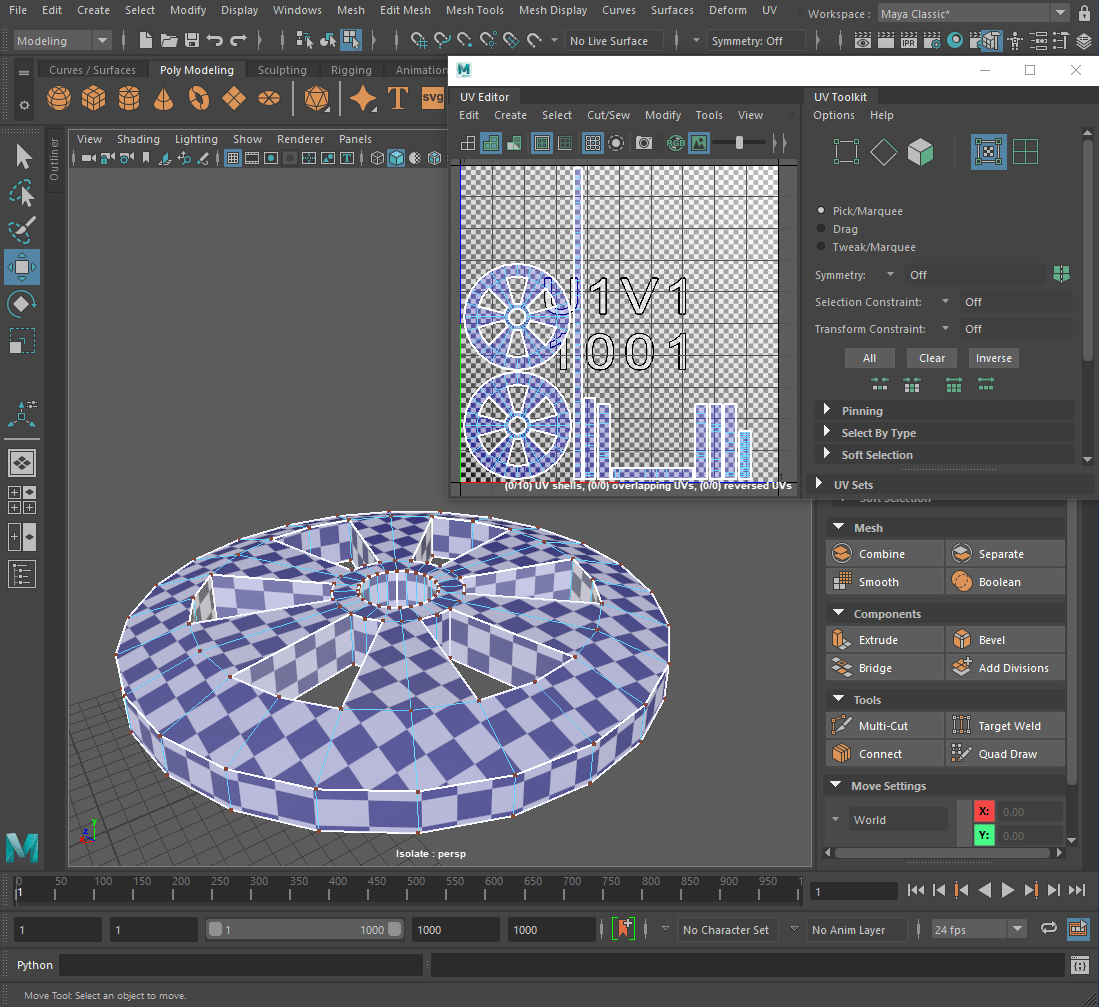
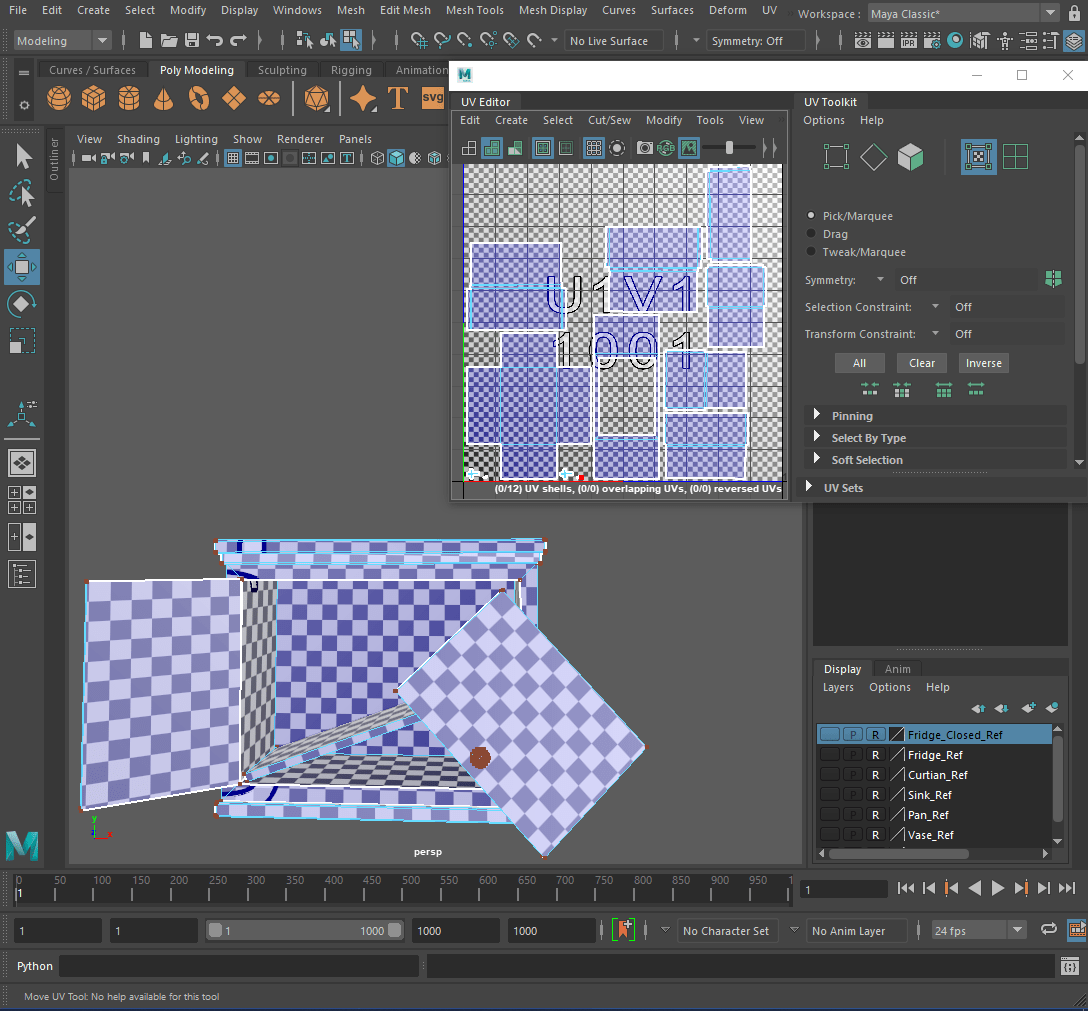
—Finishing Touches—
I selected all the pieces of furniture and clicked the ‘Layout Tool’.

—Fixing some Errors—
When receiving feedback in class, Alec found a few errors in my model so I went back to fix them.
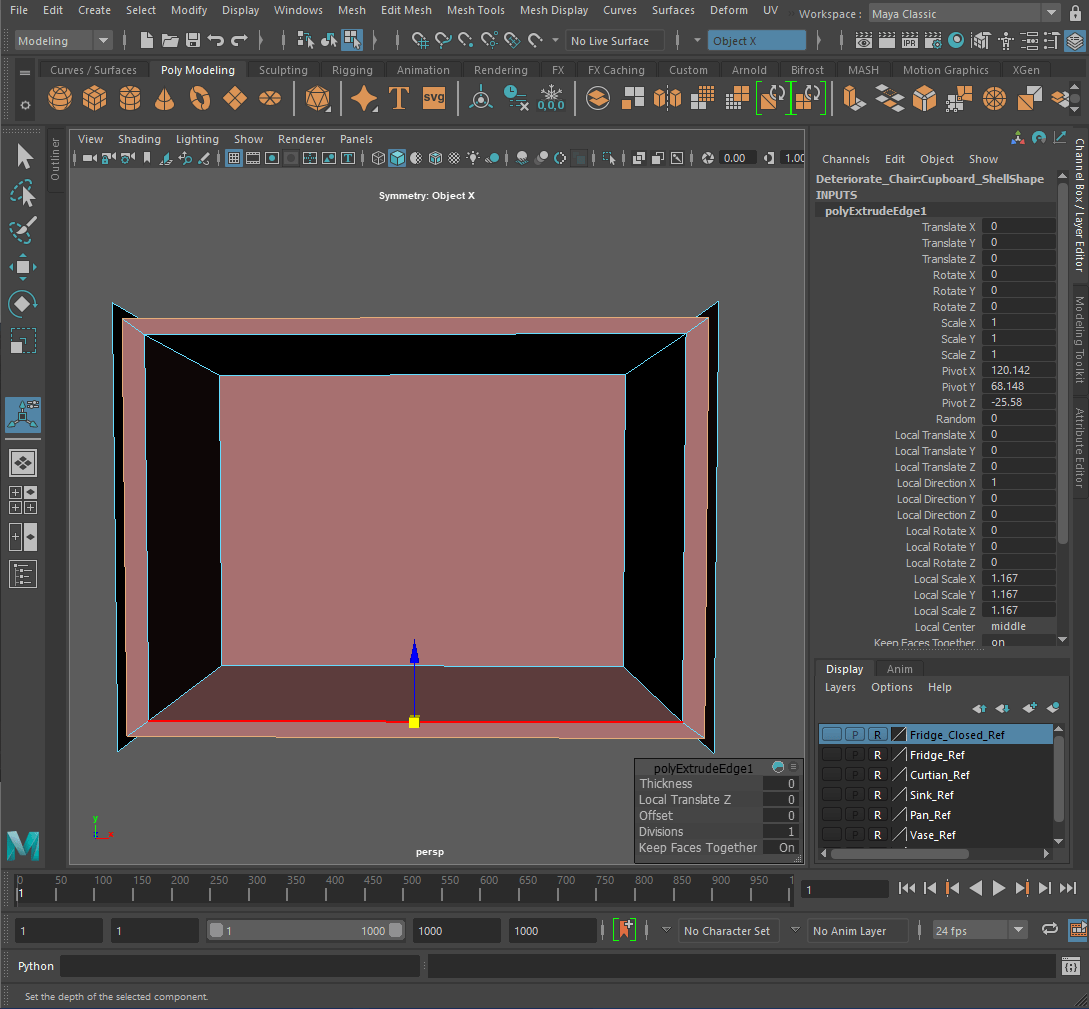
-Cupboard-
I figured out which piece of the cupboard was causing the problem and separated it.

I then deleted the face of the cupboard and extruded the edges. Using the ‘Target Weld’ tool, I connected the vertices to the edges of the cupboard.
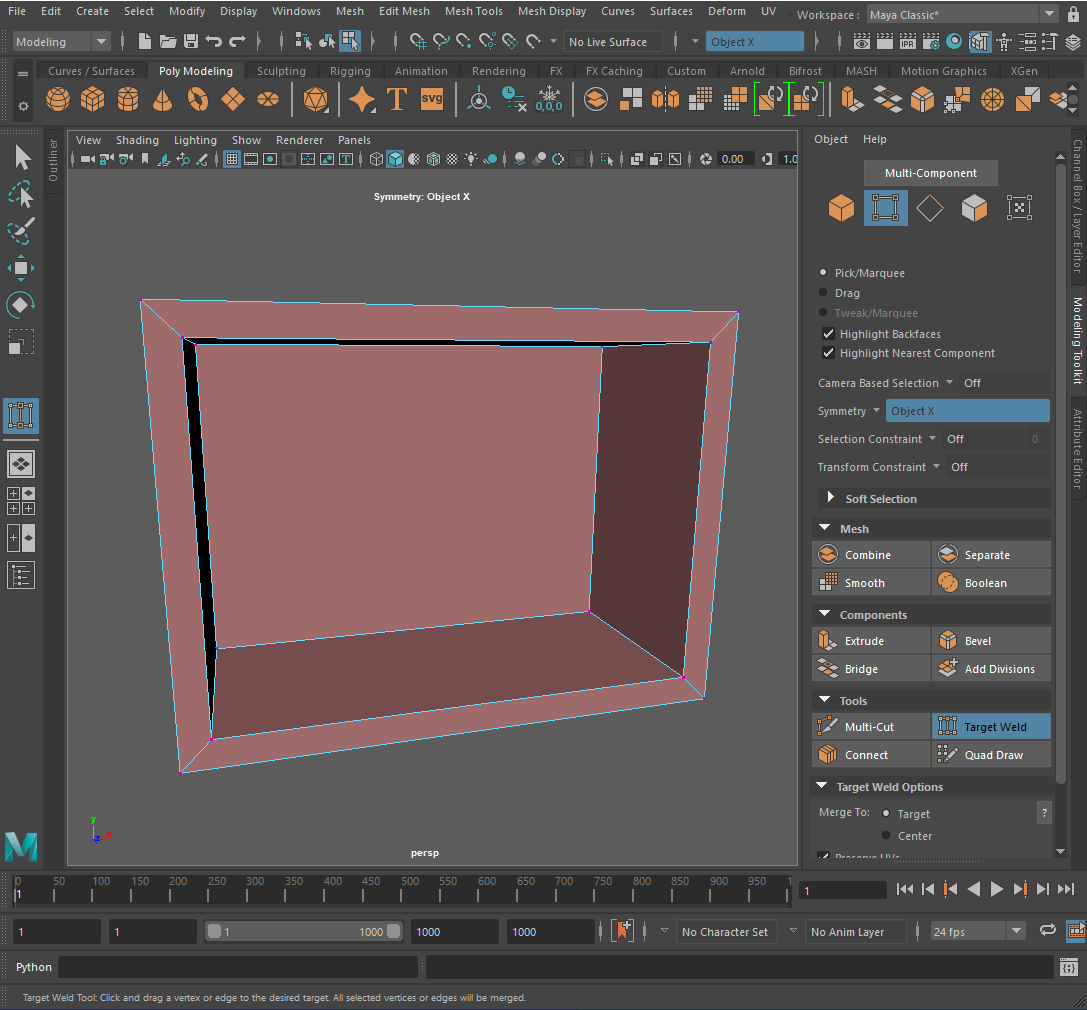
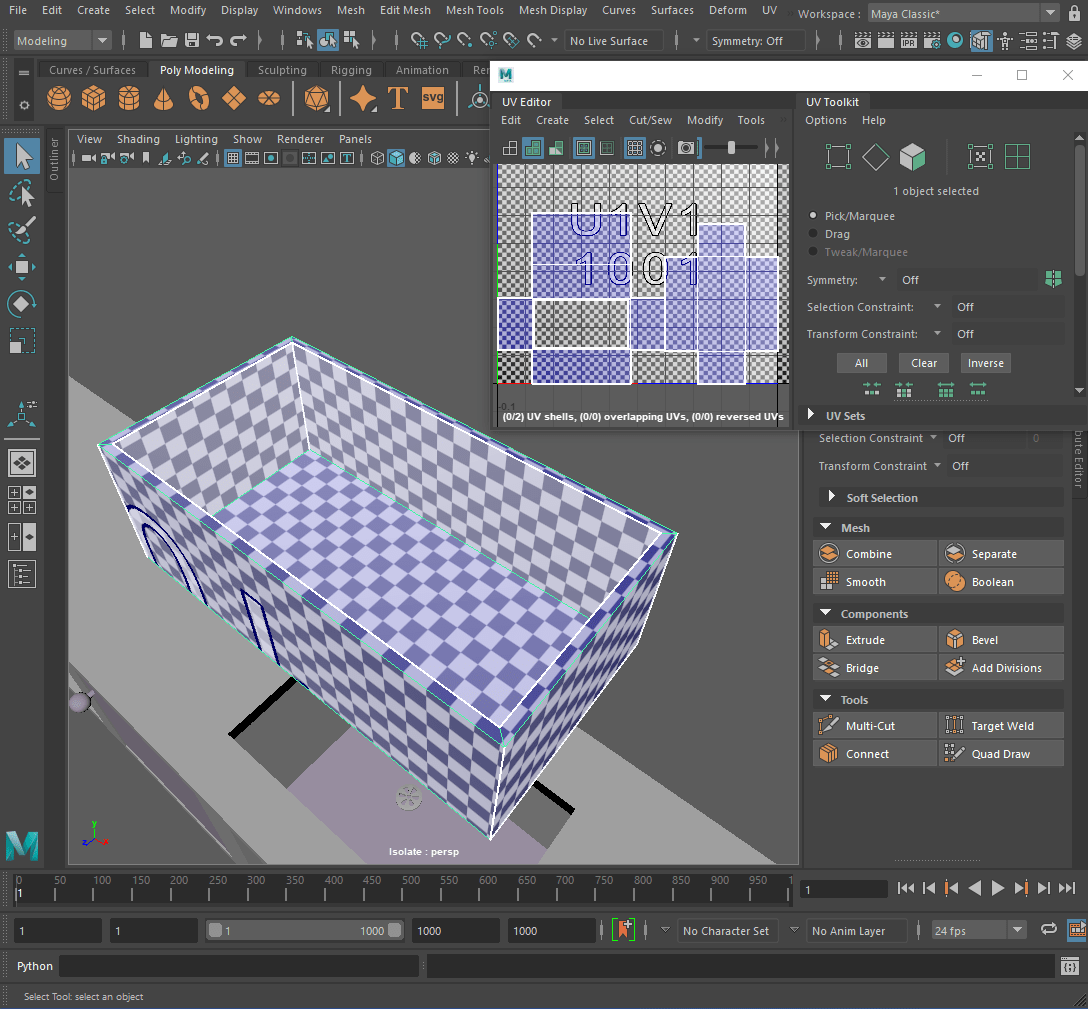
I opened the UV editor, stitched the pieces together again and placed it back in its original position.

-Counter-
Like the cupboard, the counter had parts that also needed fixed. I just repeated the same process for the Counter as I did for the cupboard.
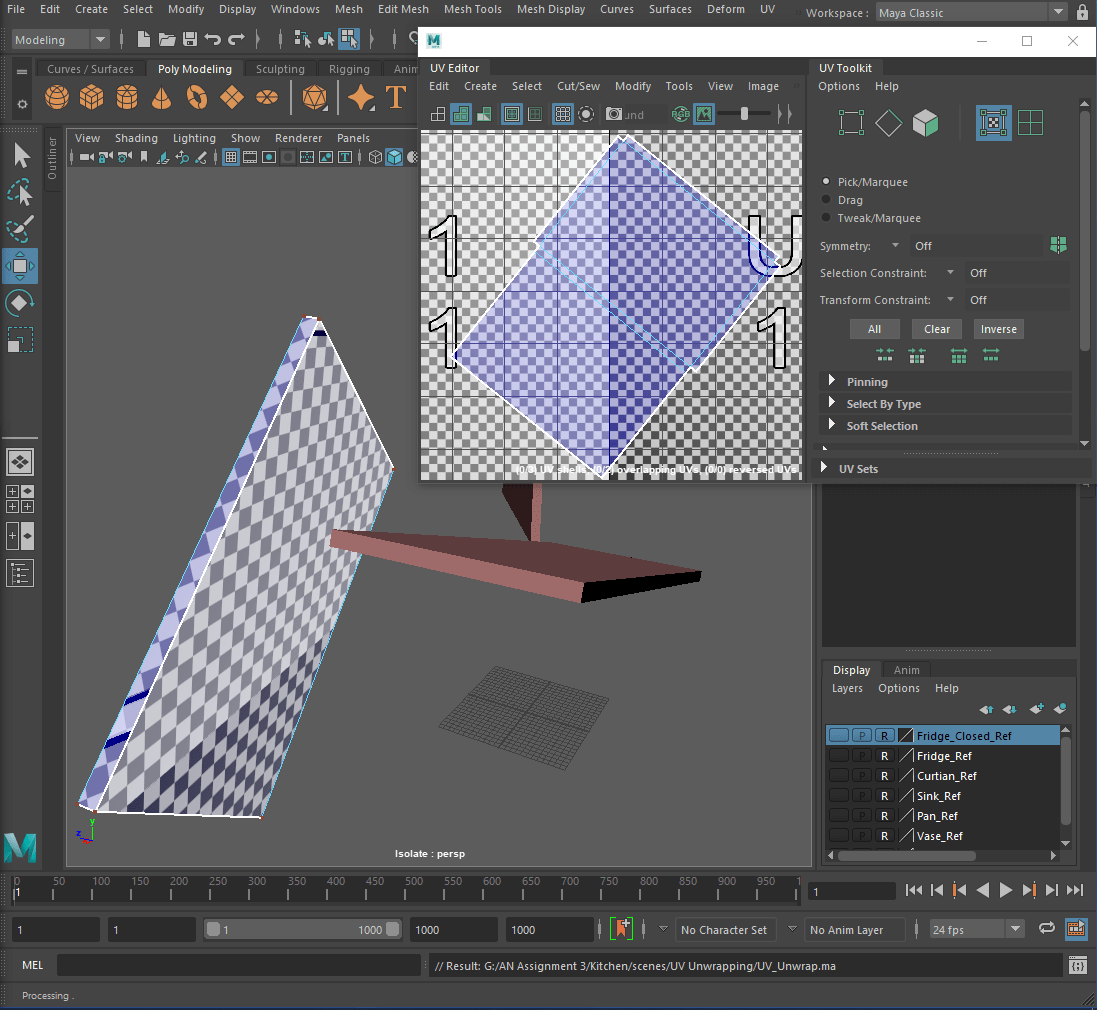
—Final Adjustments—
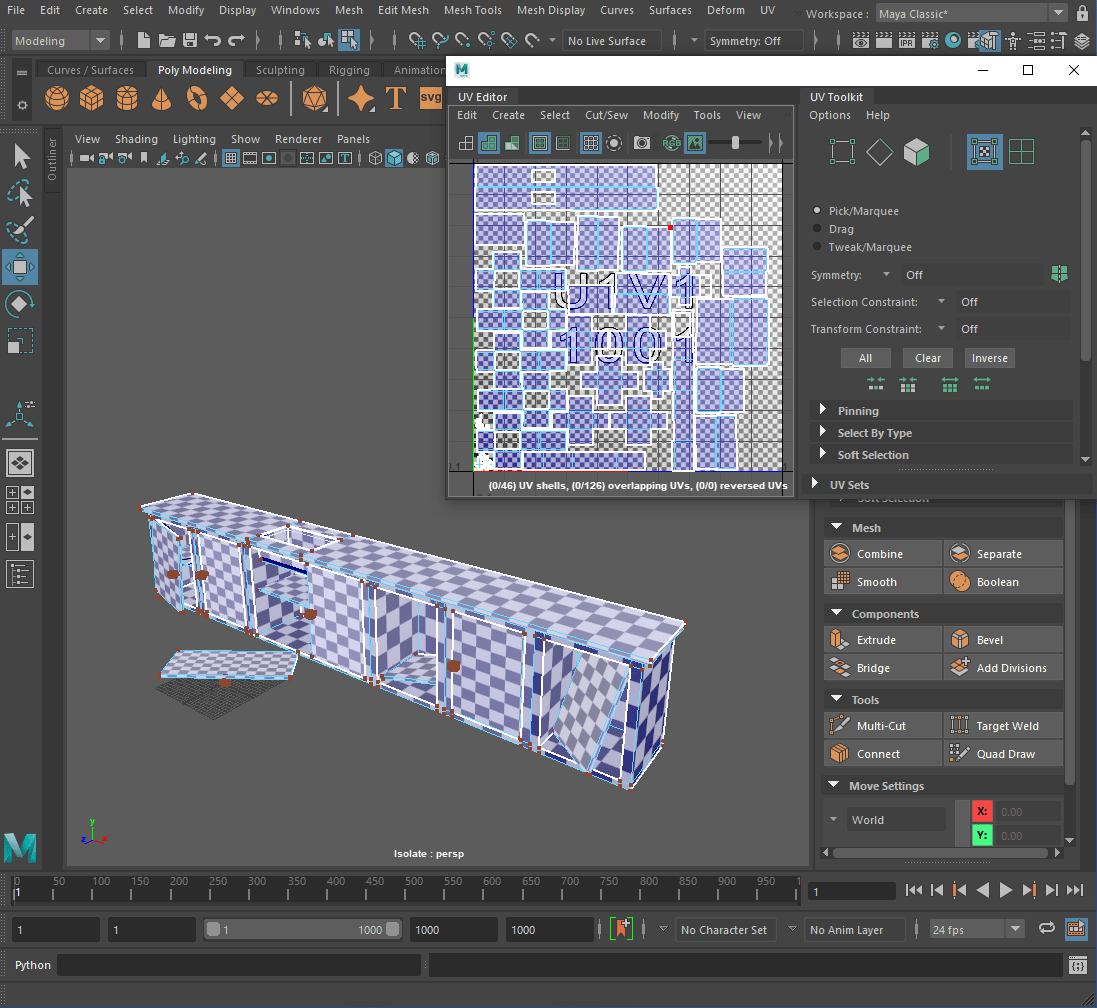
Each separate set of furniture is moved onto separate UV maps to make it easier to texture and give the pieces a higher resolution.
—Clean Up—
I assigned a new materials to each set of the furniture, opened the ‘Hypershade’ window and removed any materials that weren’t used.

After the UV unwrapping was done Danielle rearranged the furniture based on feedback.
-Tori and Amber-
While Danielle and I worked on the environment, Tori focused on modelling and UV unwrapping the sandwich and Amber focused on modelling and rigging the ghost.
Tori

Amber


____________________________________________________________________________________________________________________________
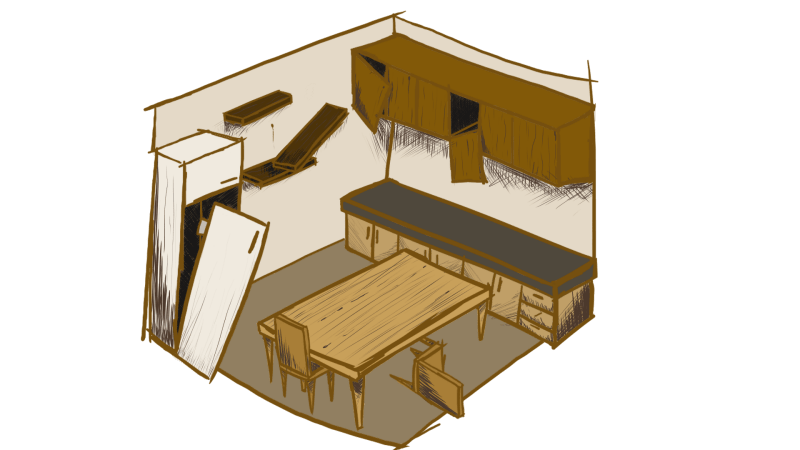
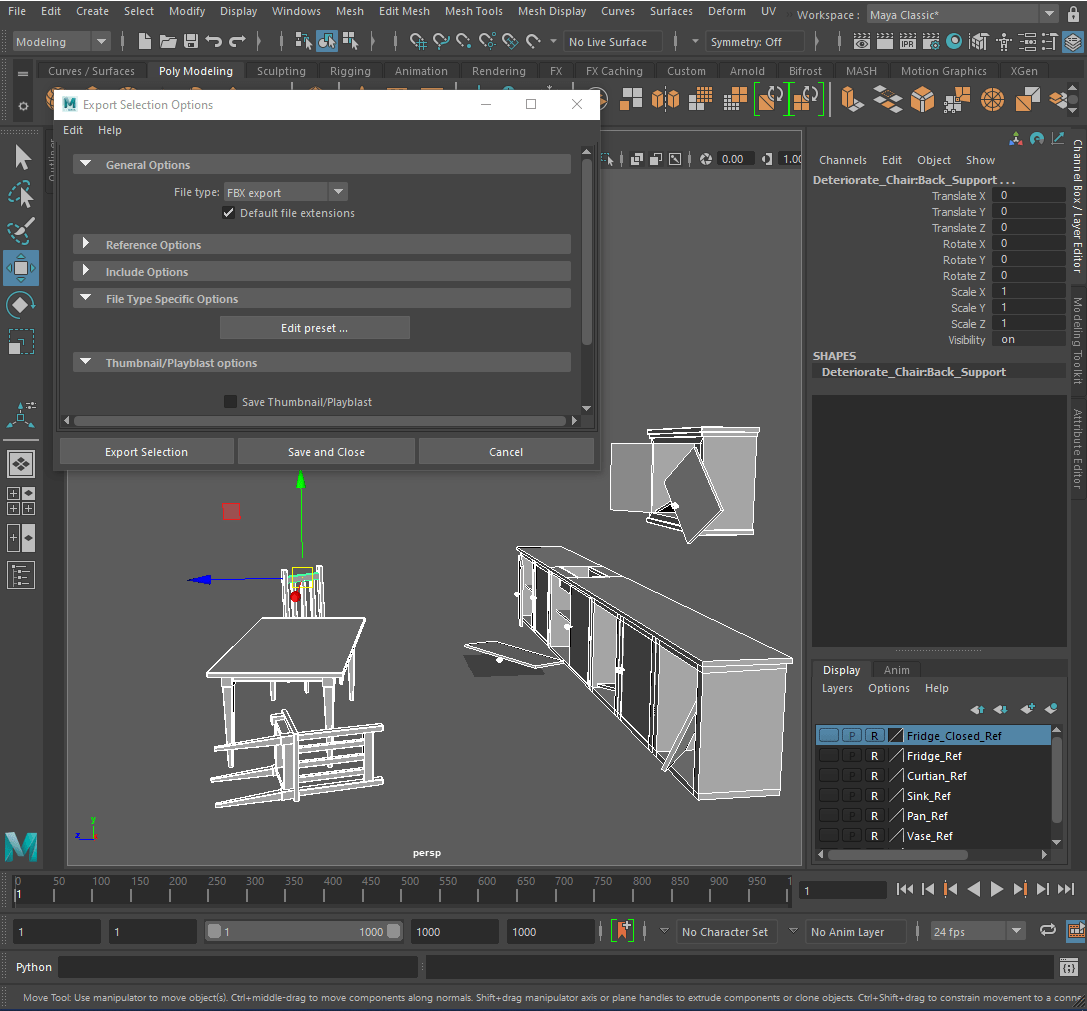
—Texturing—
—Exporting from Maya—
I ensured that all the sets of furniture had the correct material assigned to them and exported the model by selecting all the parts and clicking ‘export selection’.
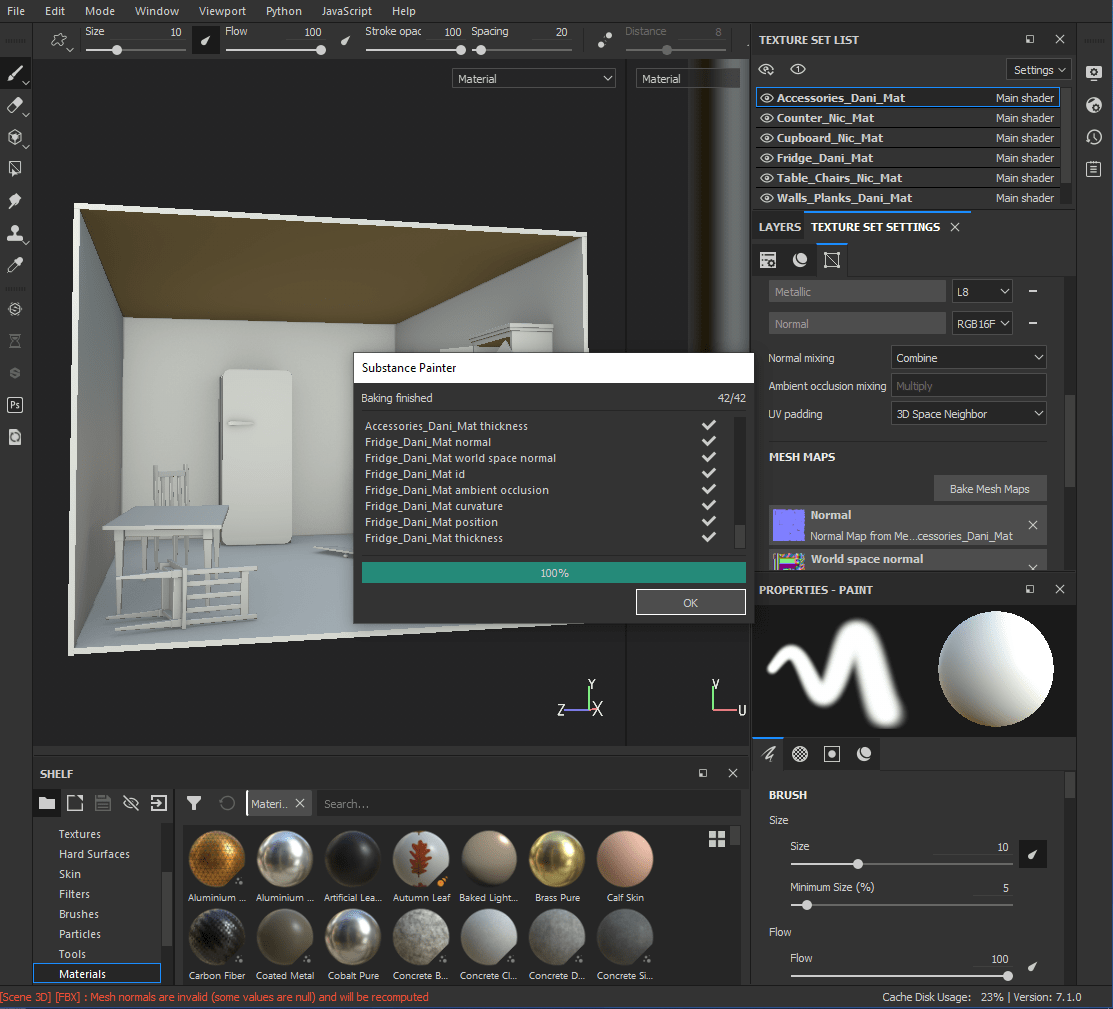
—Importing into Substance Painter—
I clicked ‘file -> new’, adjusted the settings and clicked ‘ok’.


I then baked the model.
—Blocking Out Colours—
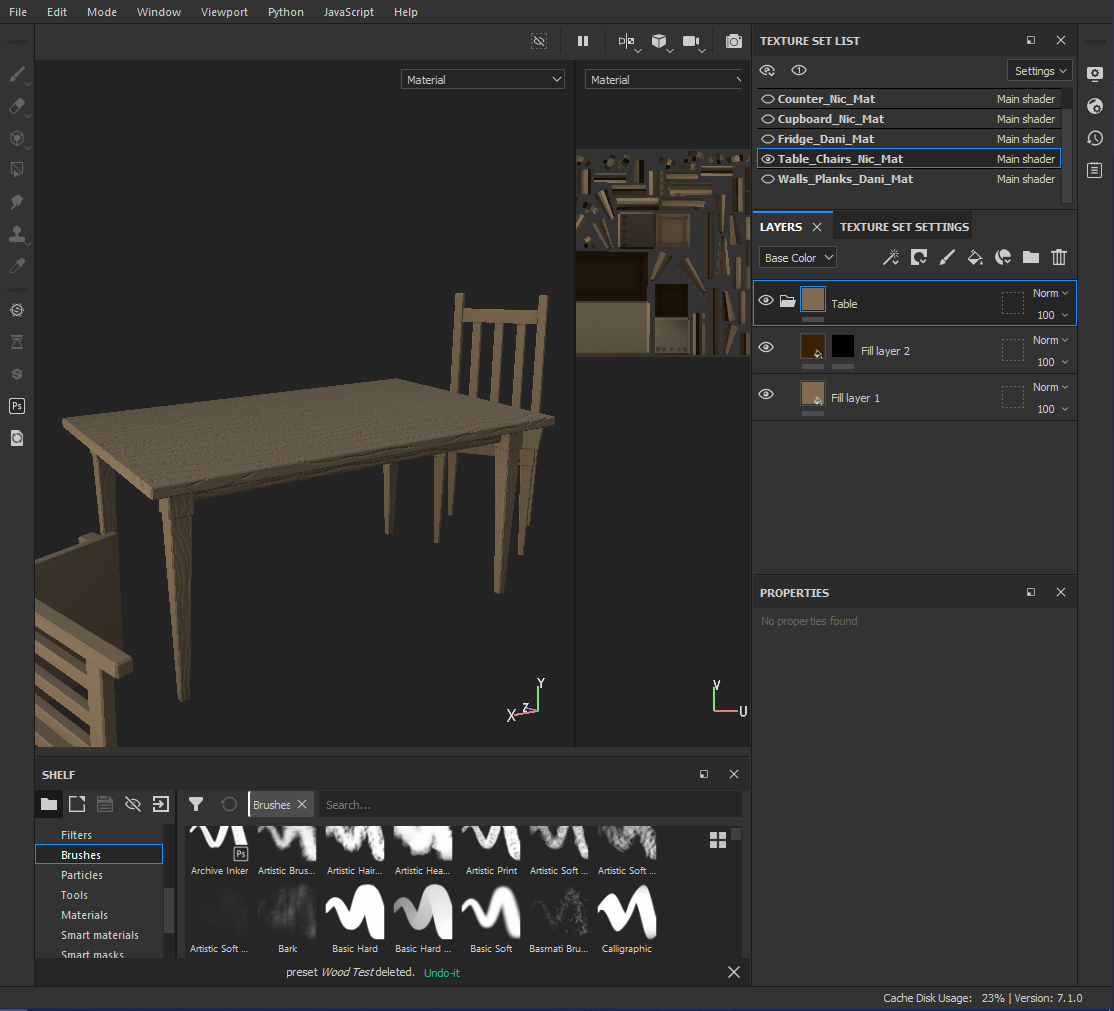
-Table and Chairs-
For the table and chairs, I initially had used some premade smart materials that I adjusted the colours of a bit but I wanted a more cartoony look so I tried again.
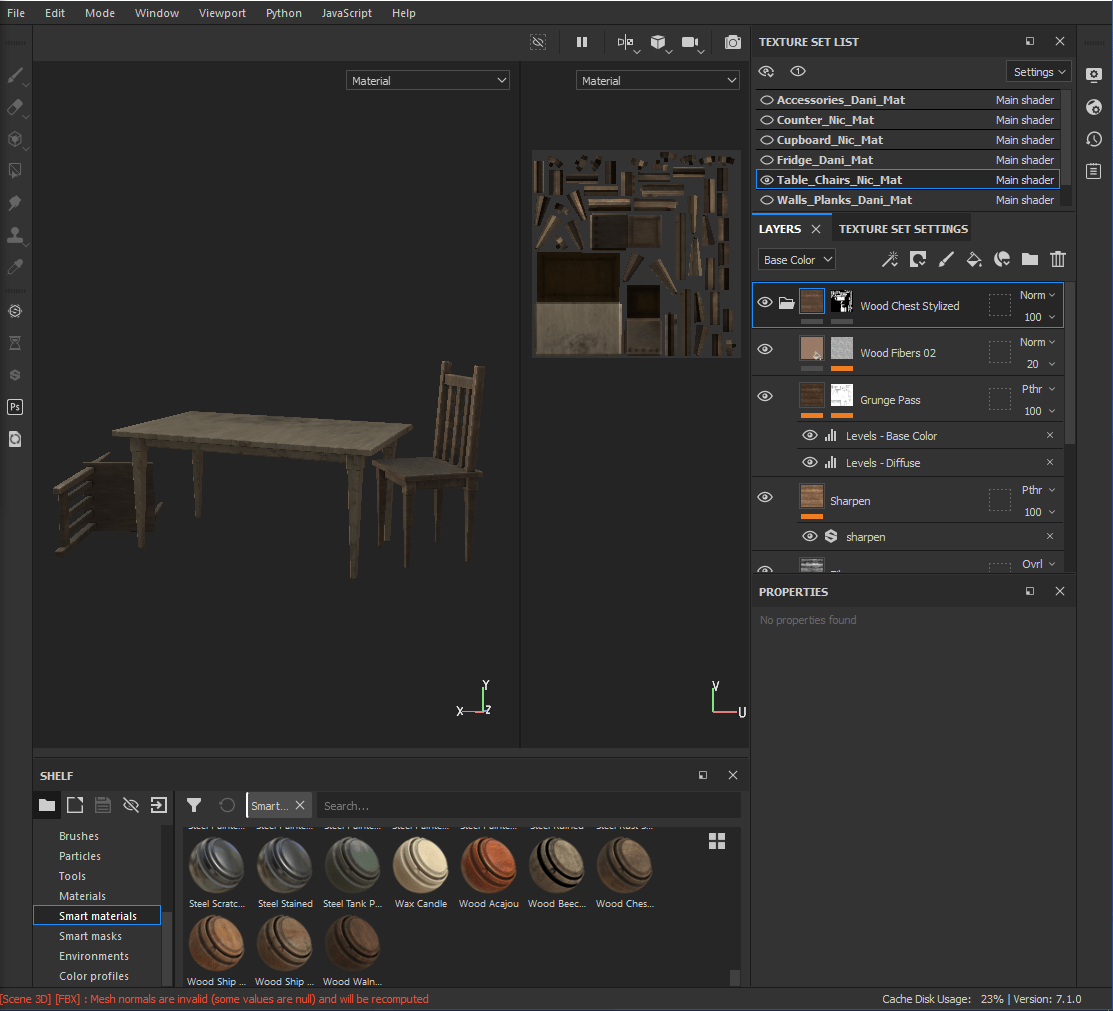
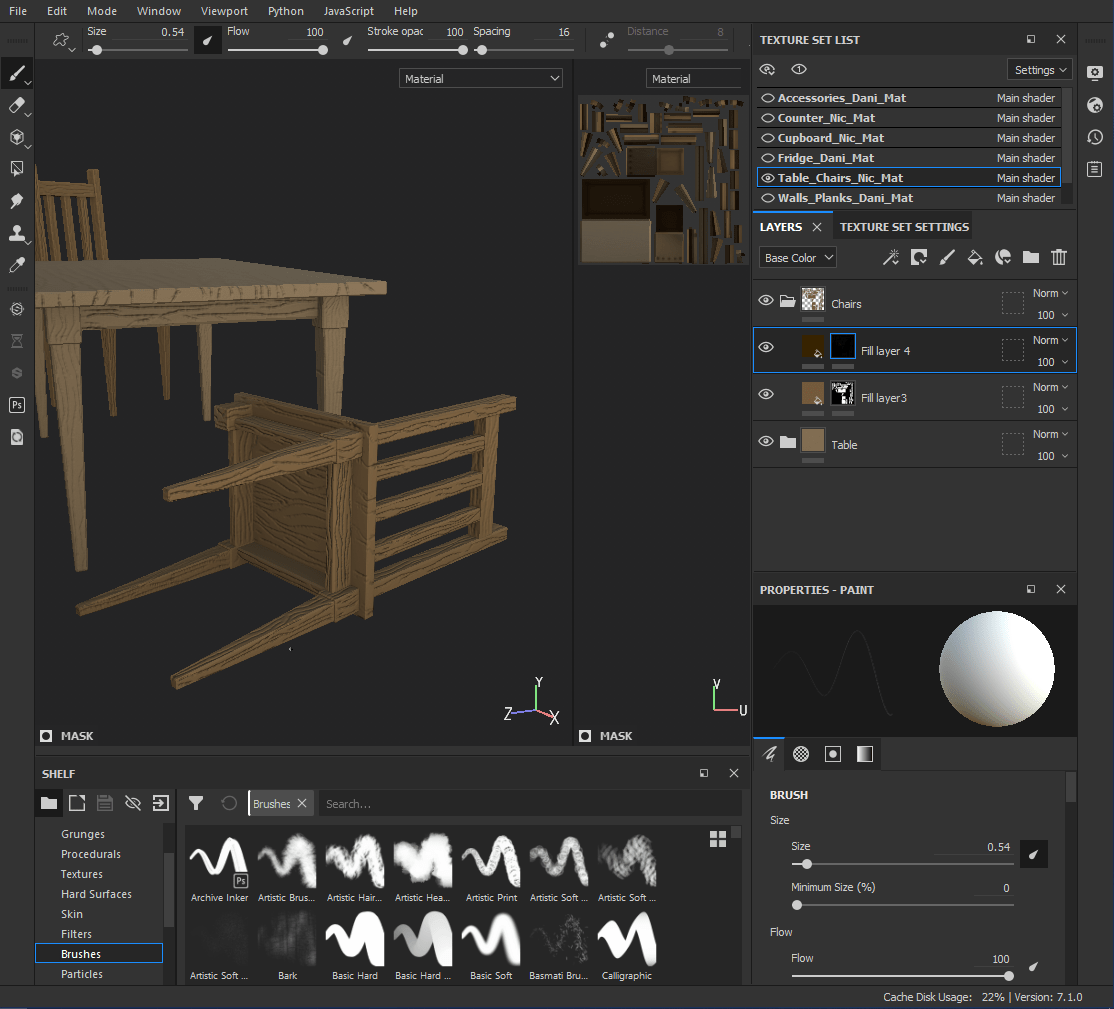
I used a light brown for the base of the table and added a darker brown on top with wood texture that was drawn on using the ‘Charcoal Fine’ brush.
I repeated the same process for the chairs only with slightly different shades of brown.

-Counter-
Like the table and chairs, I used a brown colour for the base and a darker brown for the veins that I drew onto the surface using the ‘Charcoal Fine’ brush.
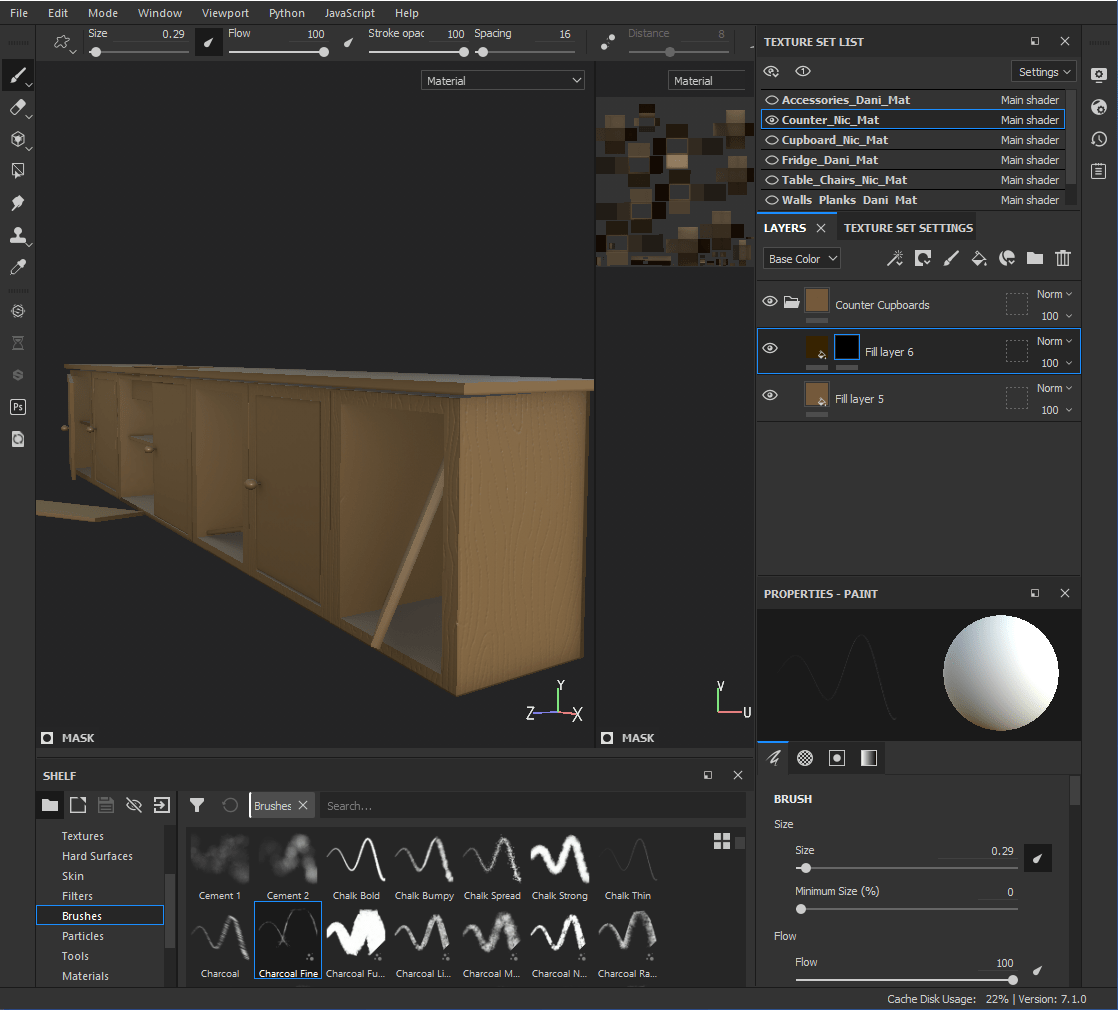
For the counter top I used a dark grey colour with ‘Metal’ turned up and the brush ‘Basic Hard’.

For the veins in marble, I used a light grey and a dark grey colour with the brush ‘Chalk Thin’ and I added a bit of height to the veins.

I made the doors of the cupboards the same colour as the counter top, made the inside of the sink metallic using the smart material, ‘Steel Rust Surface’ and added ‘Rust’ to the inside of the sink and the plug hole.
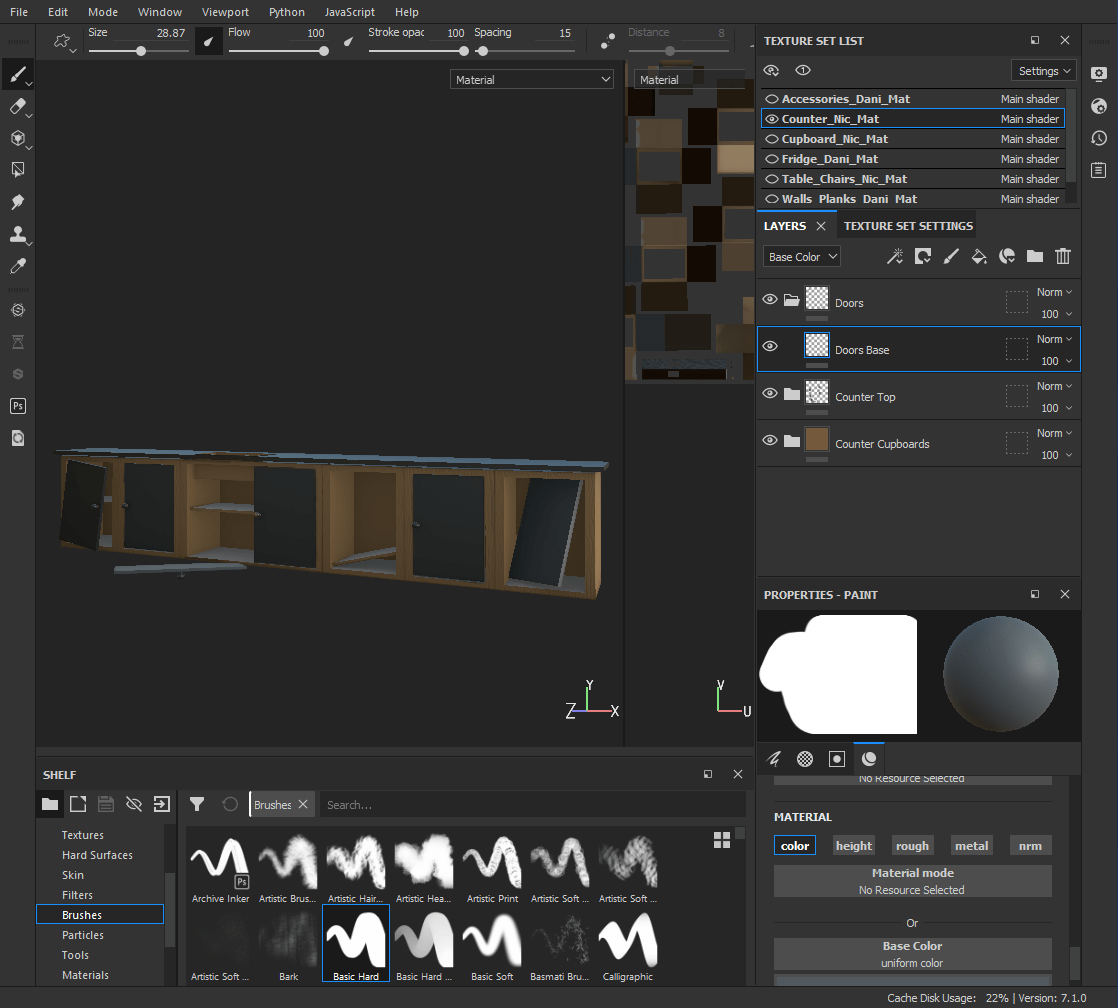

I then added the smart material ‘Steel Rust Surface’ to the handles of the doors.

-Cupboard-
For the cupboard, I made the same wood texture on the shell in the same colour as the table and I made the cupboard doors and handles the same as the doors on the counter.

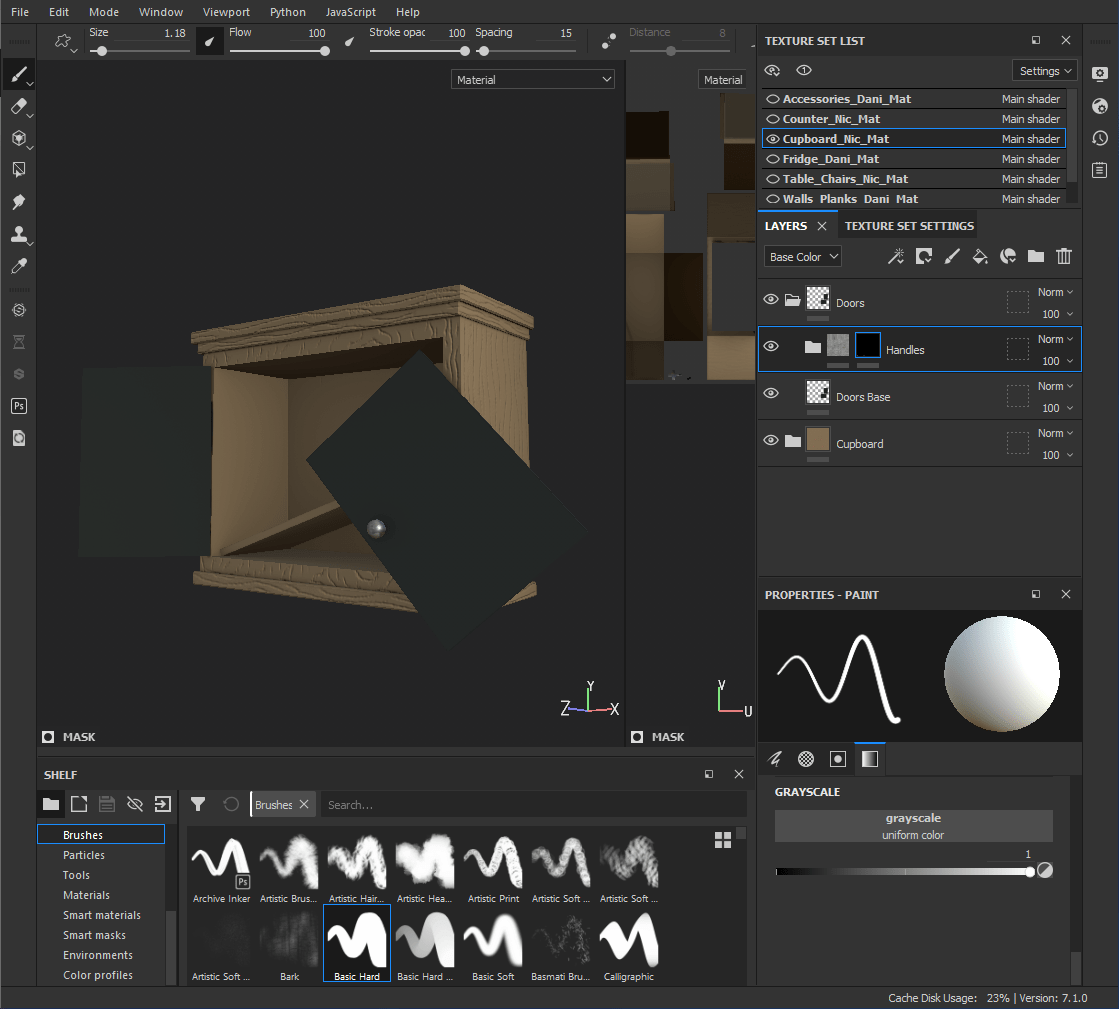
-Finishing Touches-
I added some splashes and stains to the table and cupboards using a dull greyish-brown with roughness. Used a variety of brushes and particles.

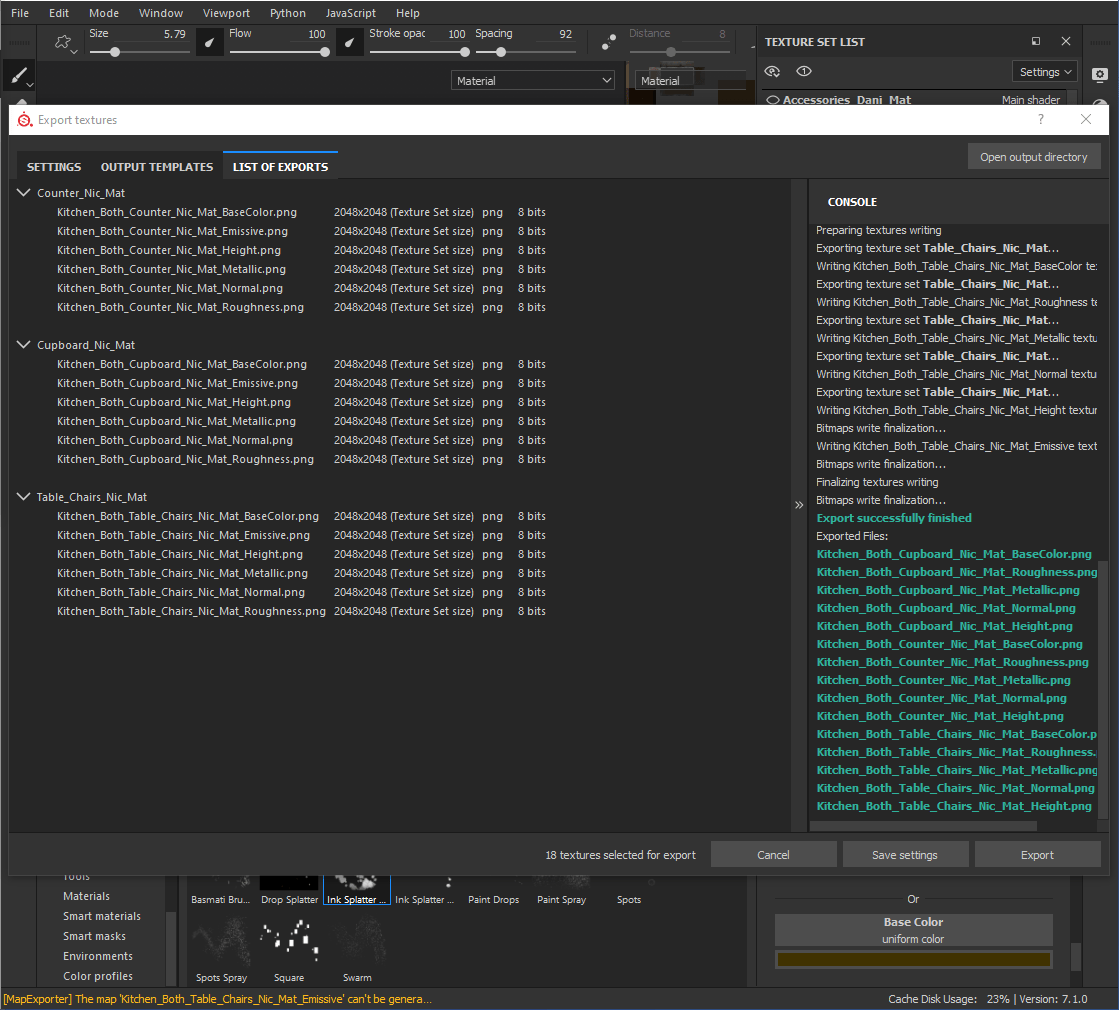
—Exporting from Substance Painter—
To export from Substance Painter, go to ‘file -> Export Textures’ and adjust the settings.
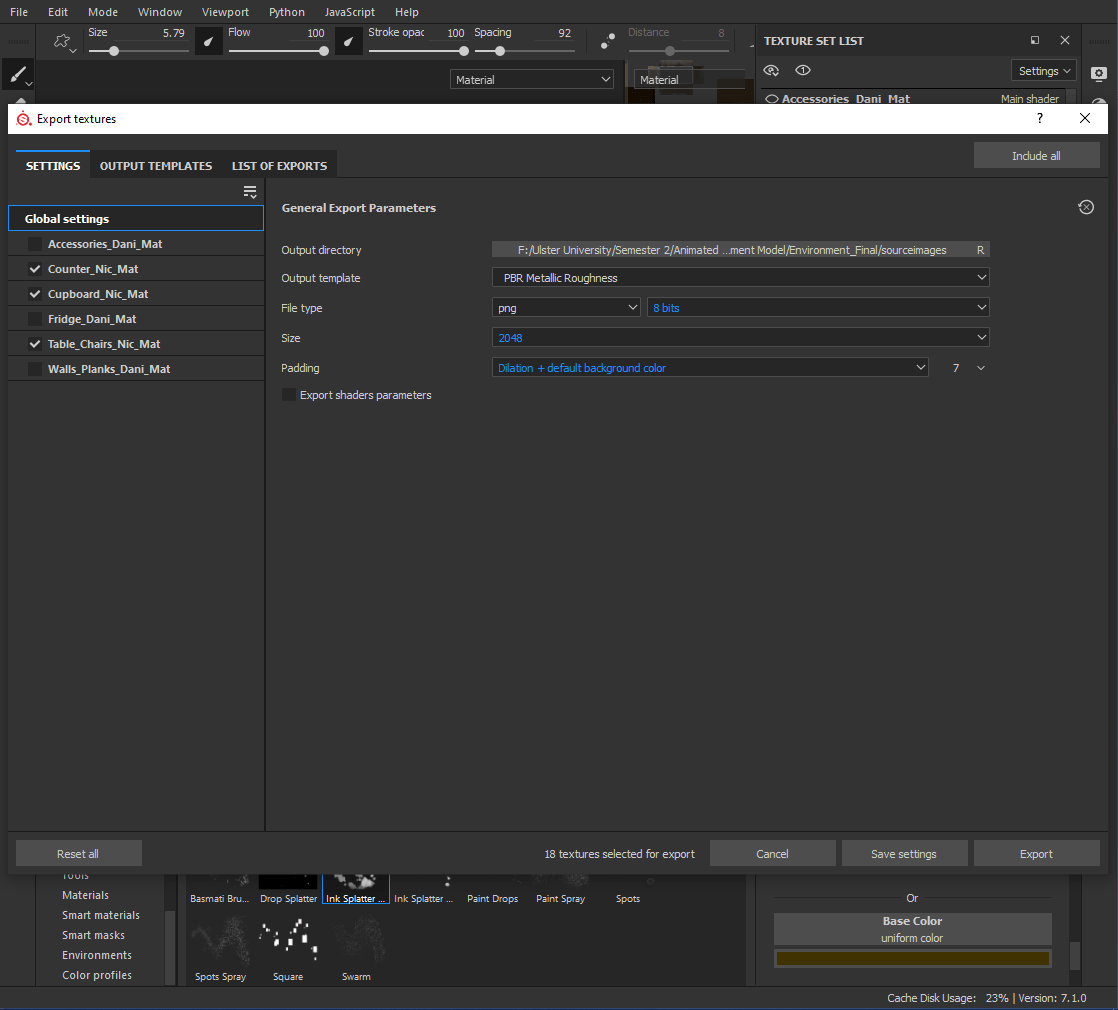
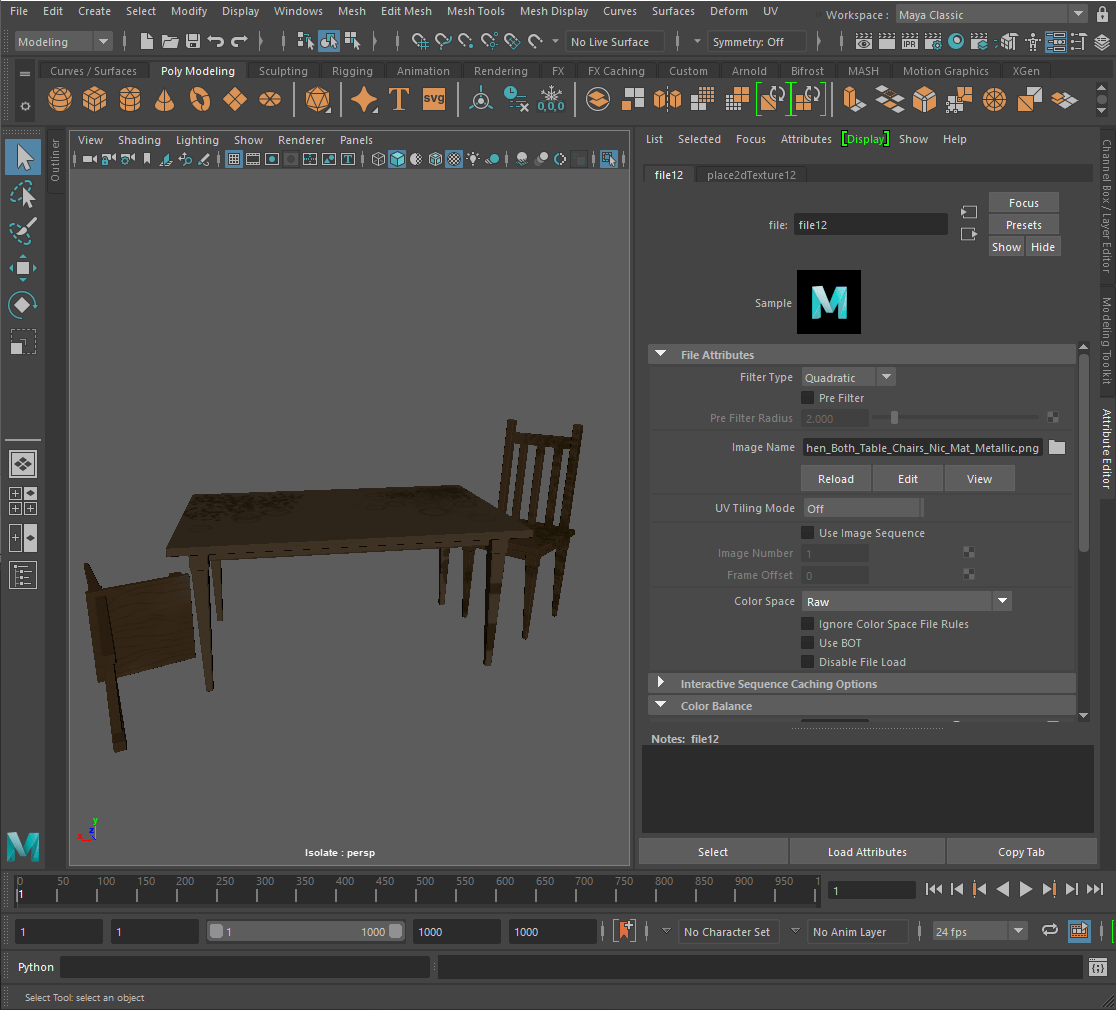
—Adding Textures to Maya—
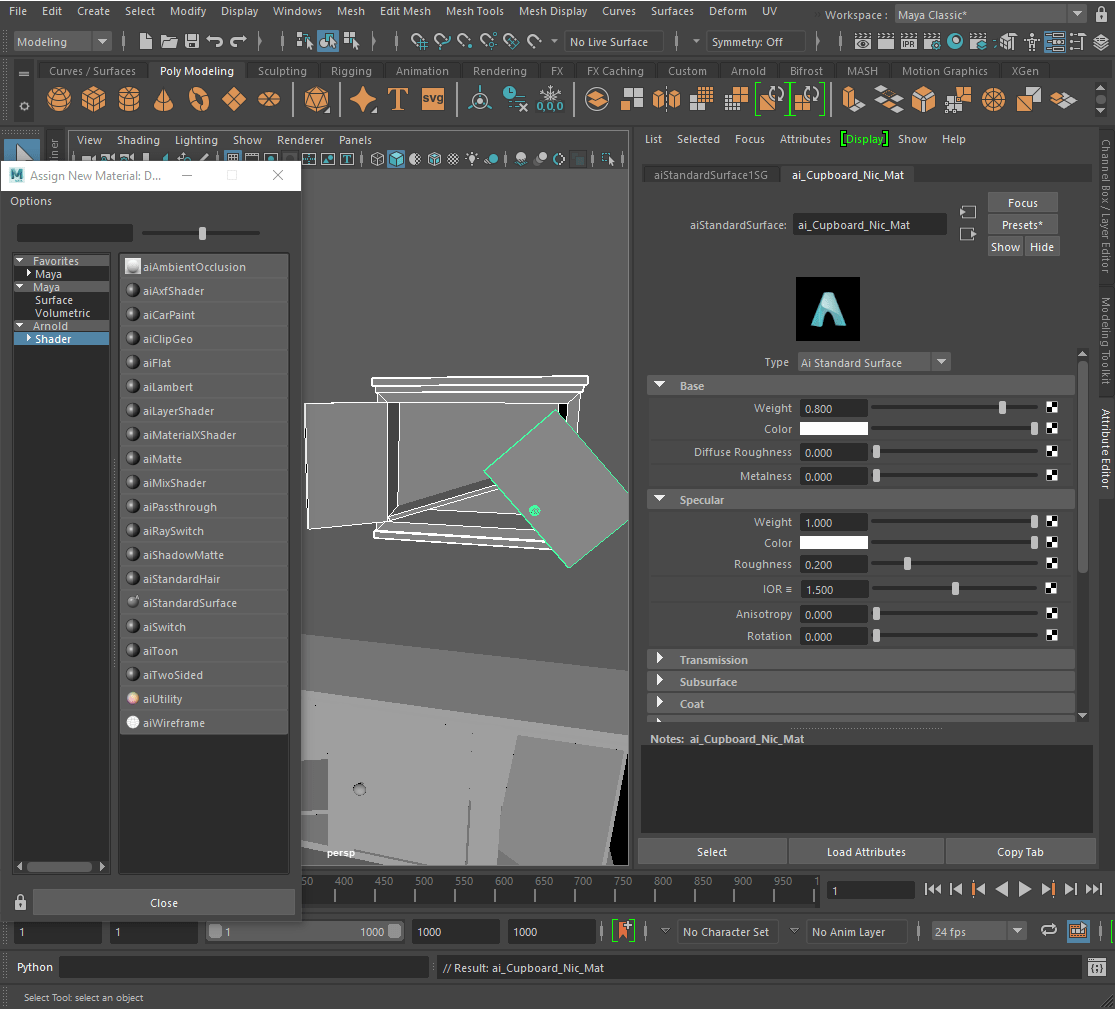
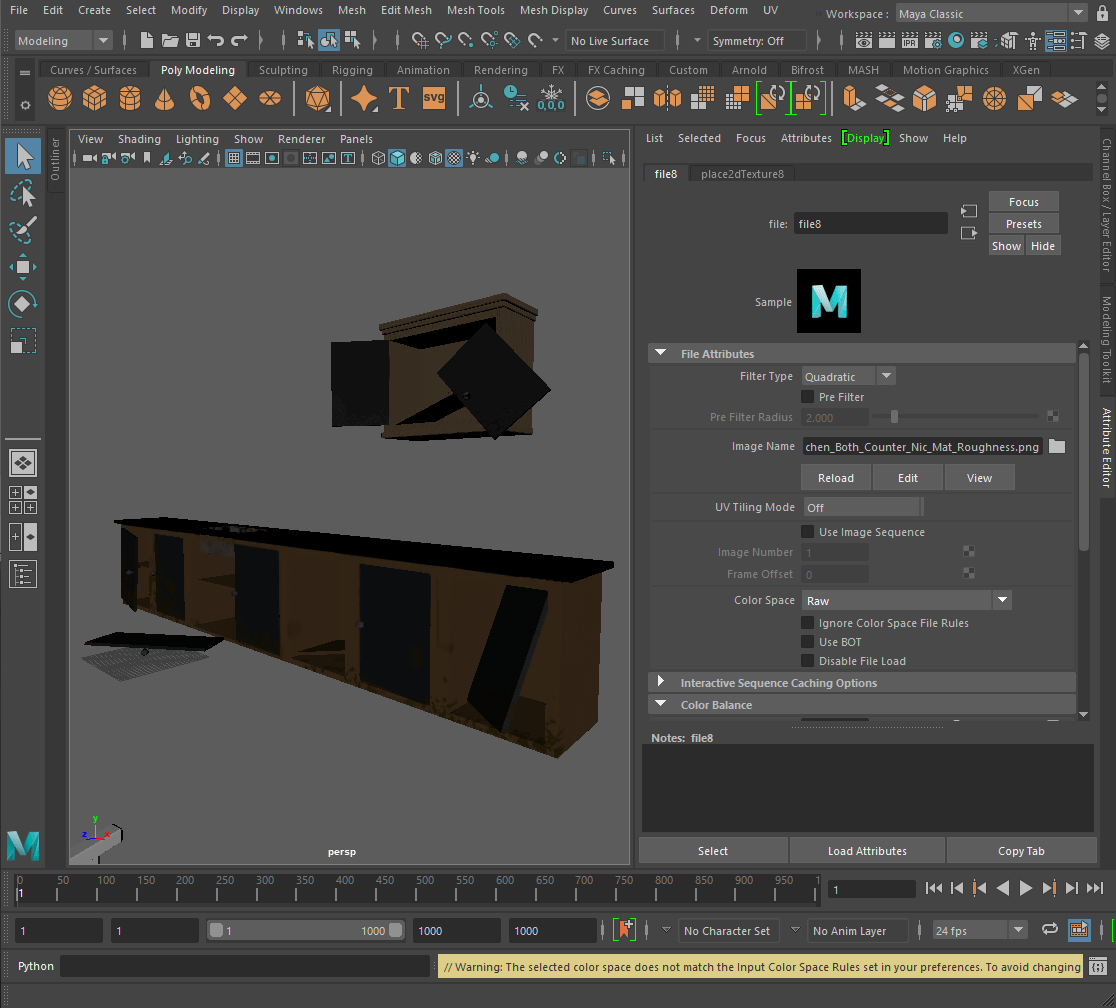
-Cupboard-
I opened my model of the environment in Maya and selected the cupboard model first and assigned it a new ‘aiStandardSurface’ material and renamed it.
Added the base colour and the metalness to the model and changed the ‘Colour Space’ to ‘Raw’.
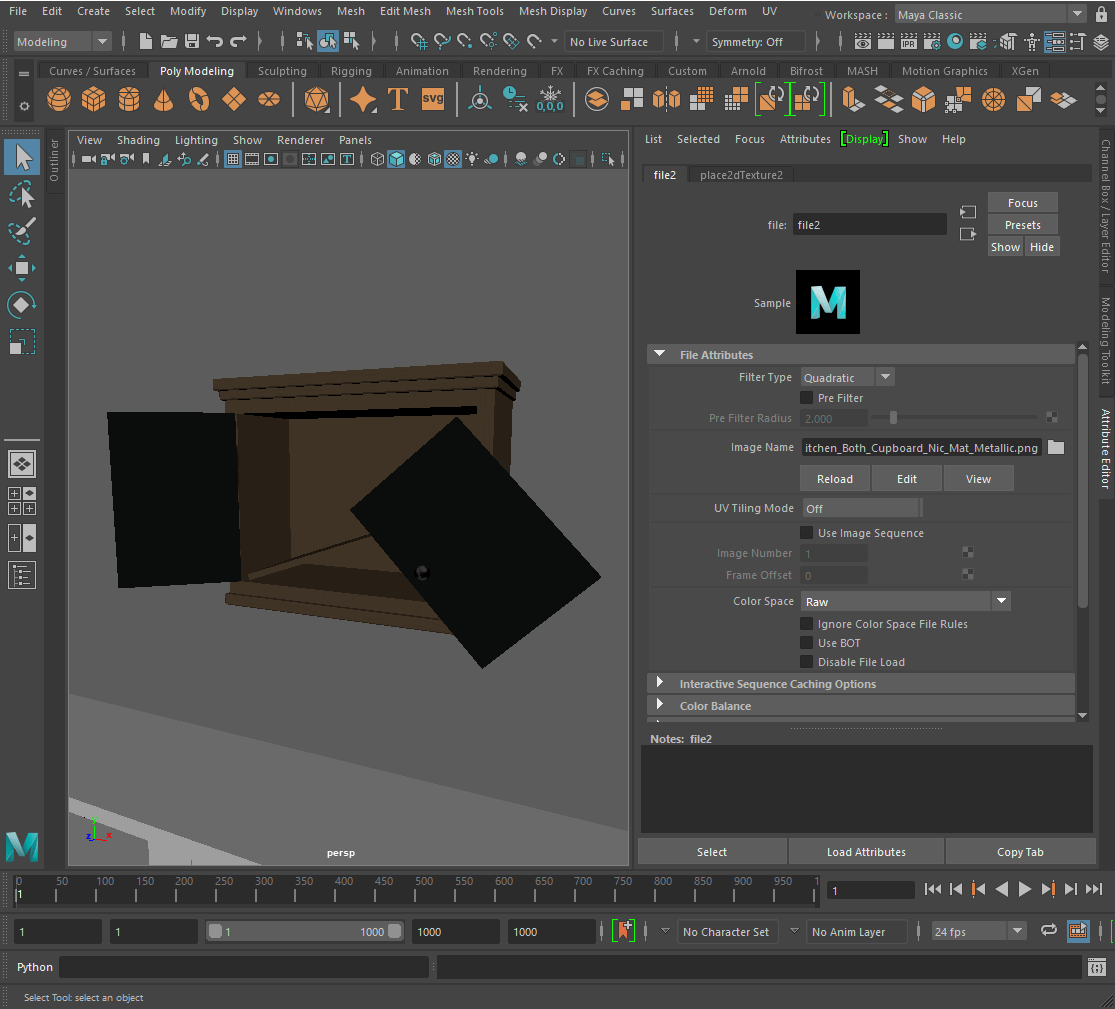
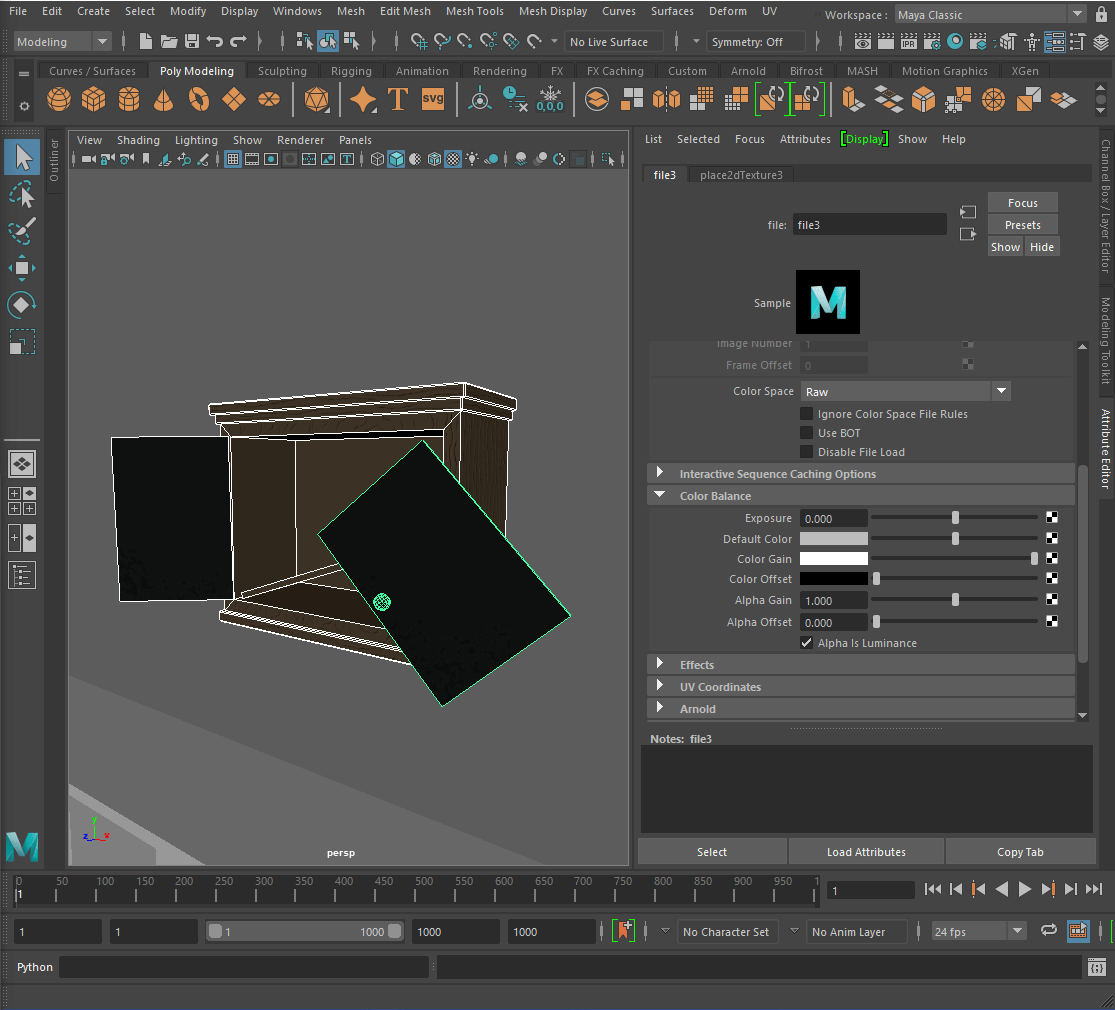
Next I added the roughness map and changed it to ‘Raw’ and added the normal map into the bump map tab and changed the settings.

Finally I turned on ‘Alpha is Luminance’ for the metalness and roughness maps.
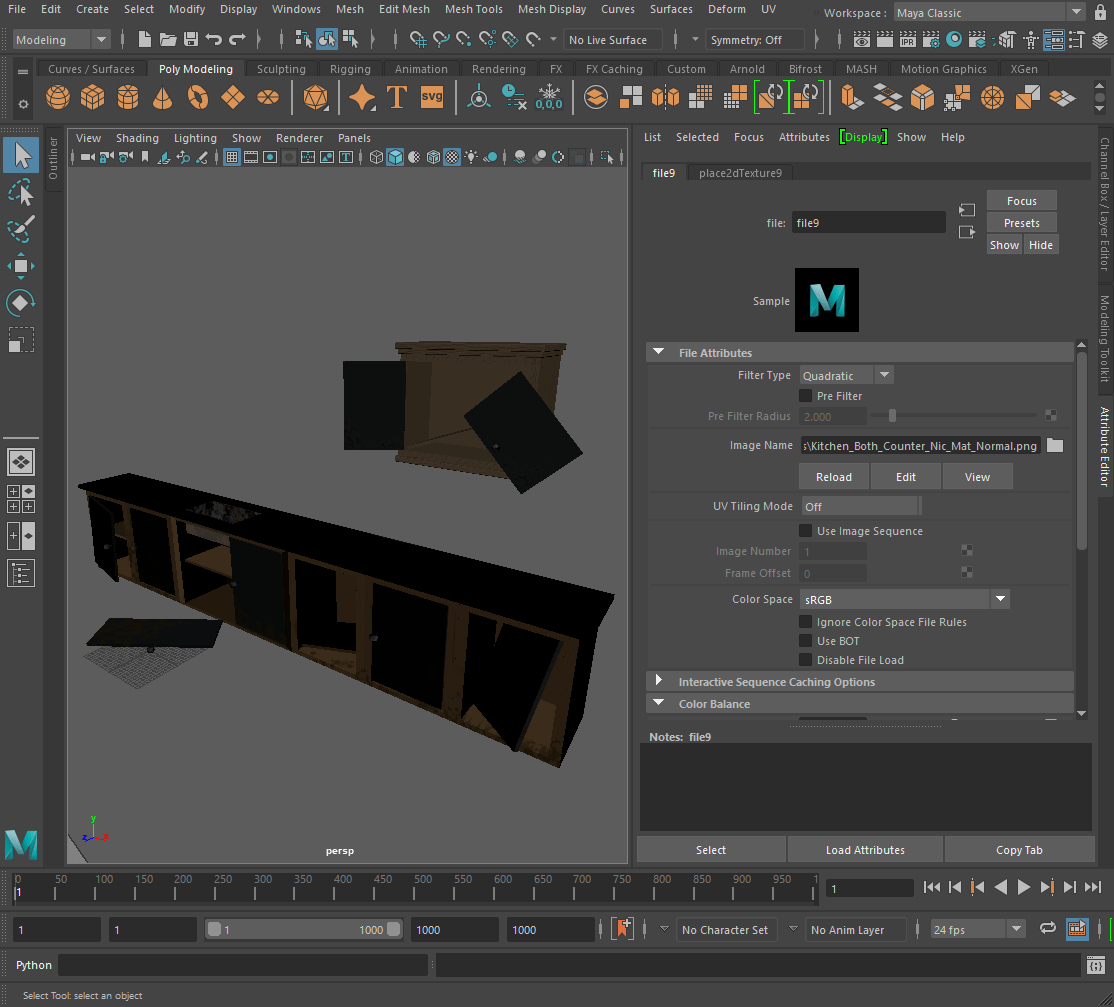
– Counter-
I repeated the same process as I did for the cupboard for the counter.
I added the base colour map.

Then the Metalness map.

Next was the Roughness map.
And finally the Normal Map.
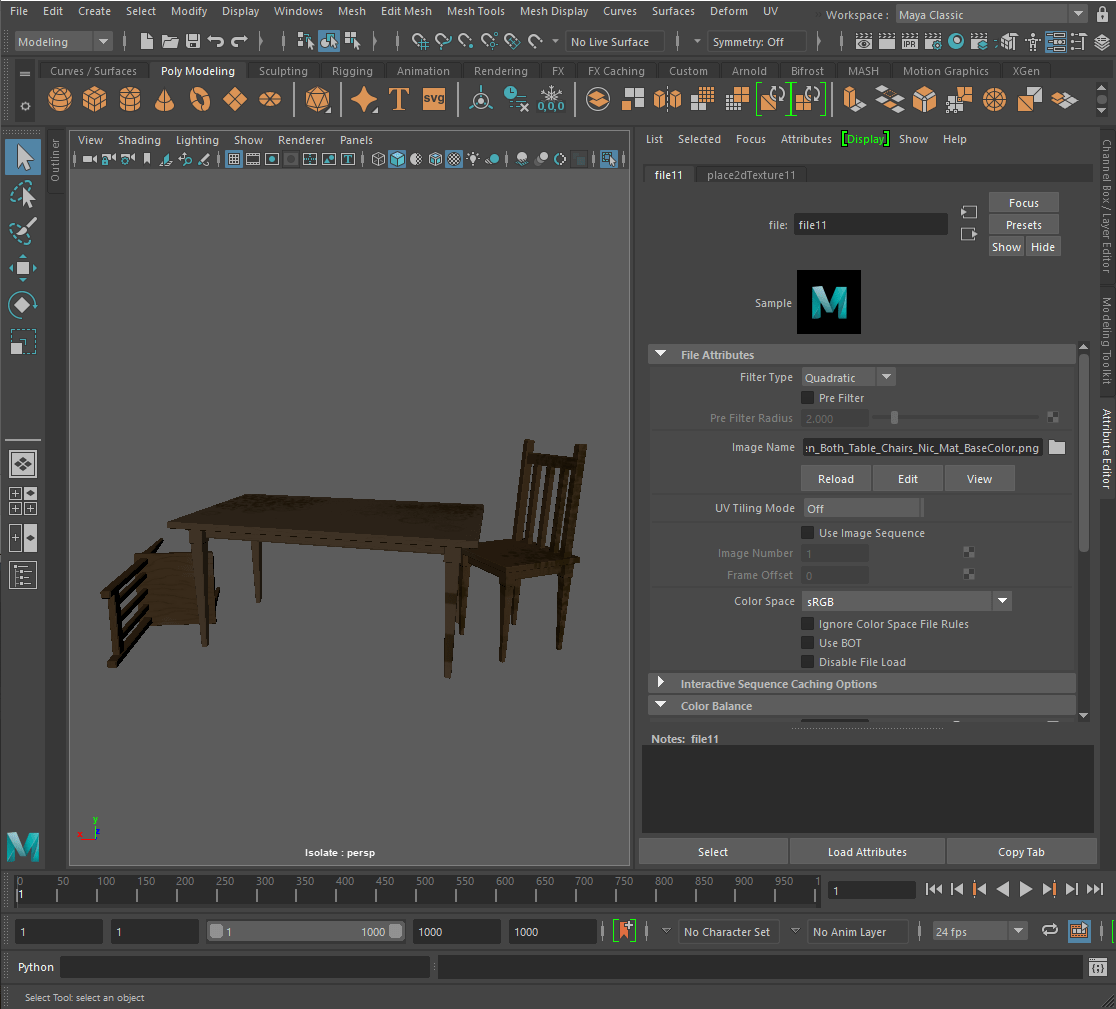
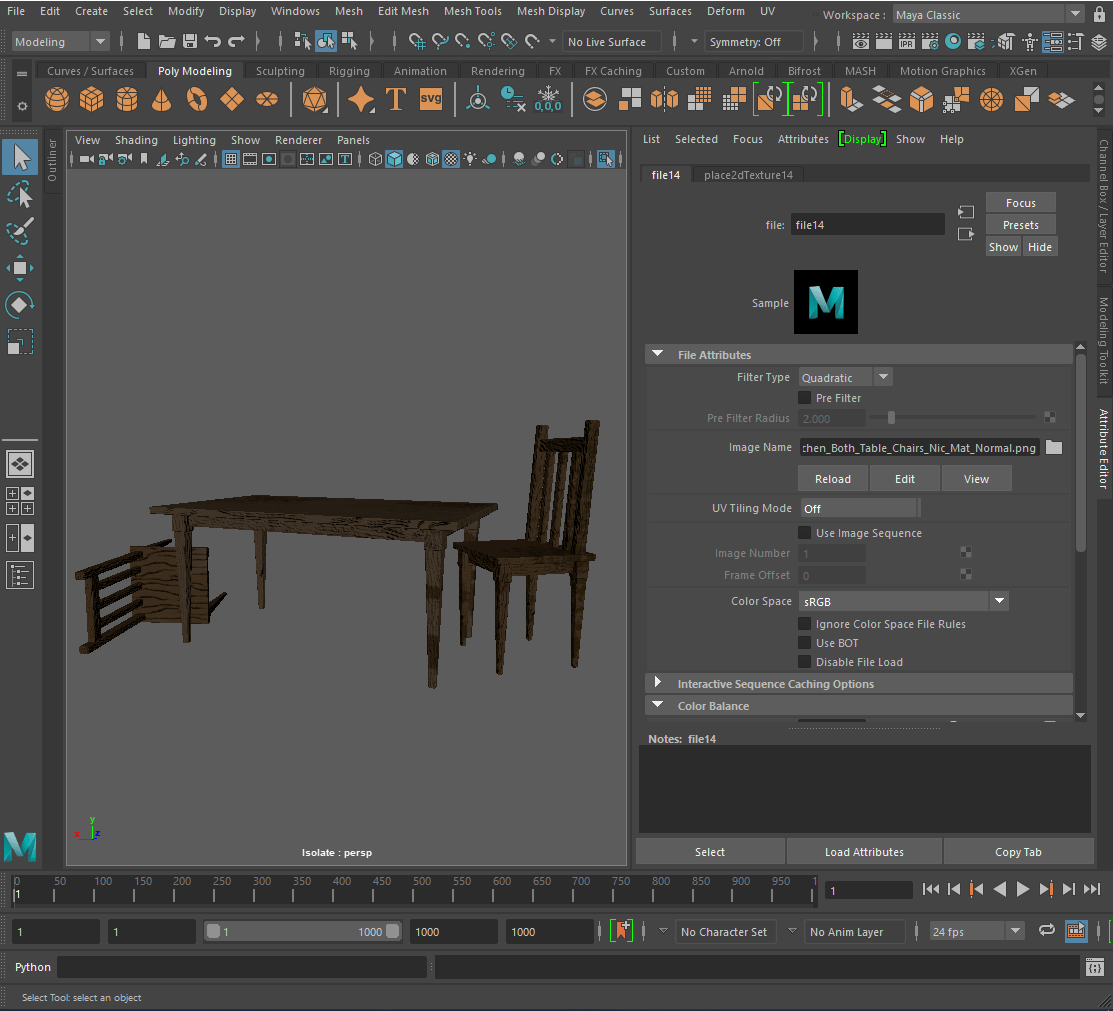
– Table and Chairs-
I then repeated the same process as before.
Added the base colour, Metalness, Roughness and Normal Map.

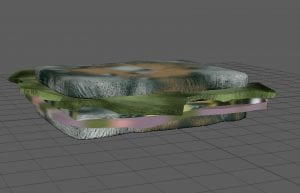
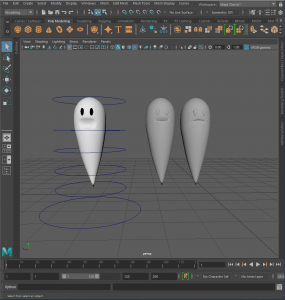
-Tori, Amber & Curtis-
Tori heavily referenced real life mold when texturing her sandwich and Amber kept the texturing of the ghost simple to give him a more cartoony look and focused on creating blend shapes for the expressions that the ghost will have.
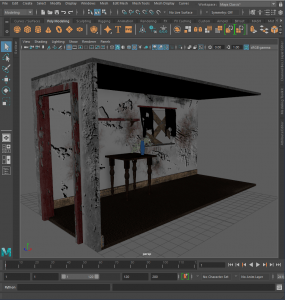
Curtis completed his model and textures for the hallway.
Tori

Amber
Curtis
____________________________________________________________________________________________________________________________
—Blend Shapes—
—Awe Expression—
I duplicated one of the ghost models and renamed it ‘Awe’. I then switched to the Rigging Tab, clicked ‘Deform -> Blend Shape -> Create’.
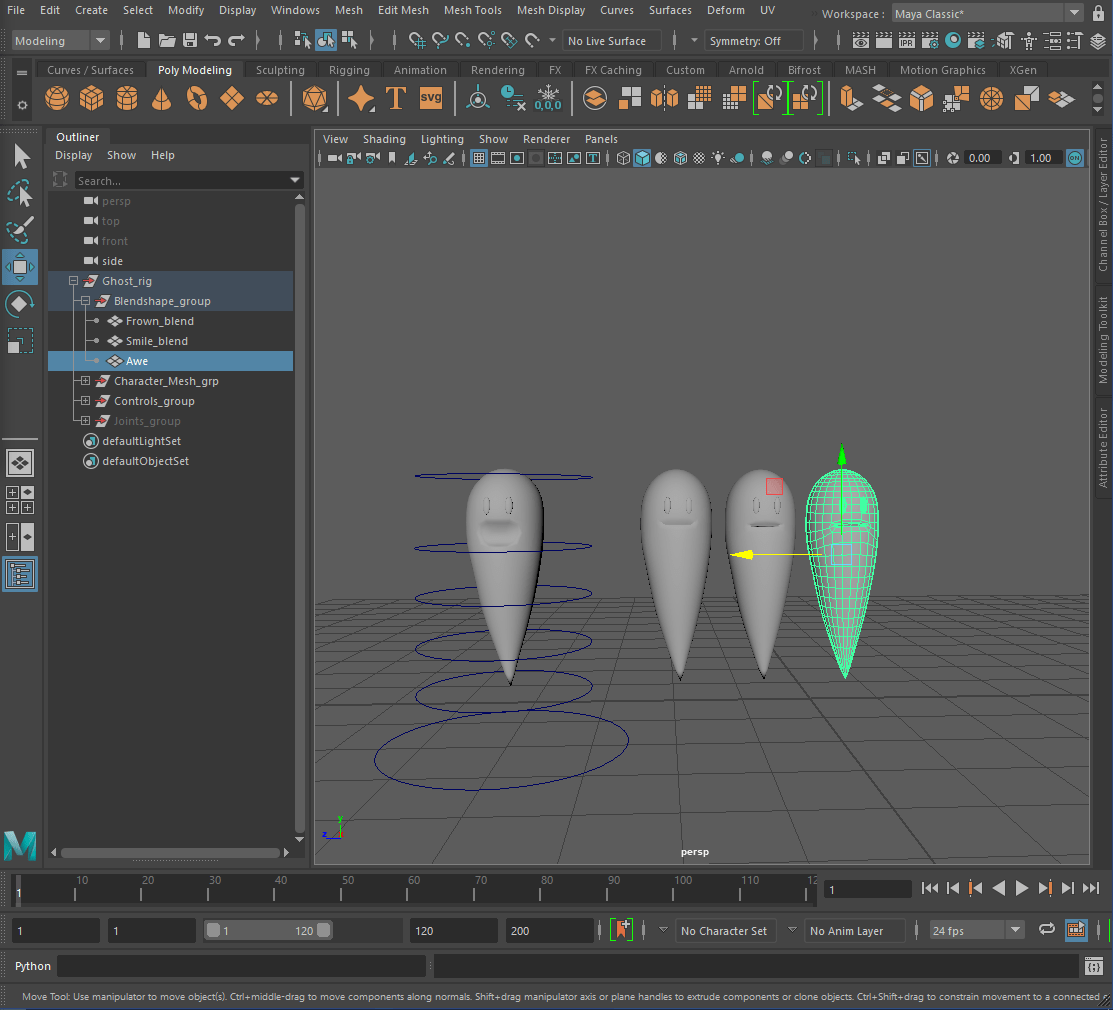

Next I opened the ‘Shape Editor’ and altered the blend shape for the awe expression.
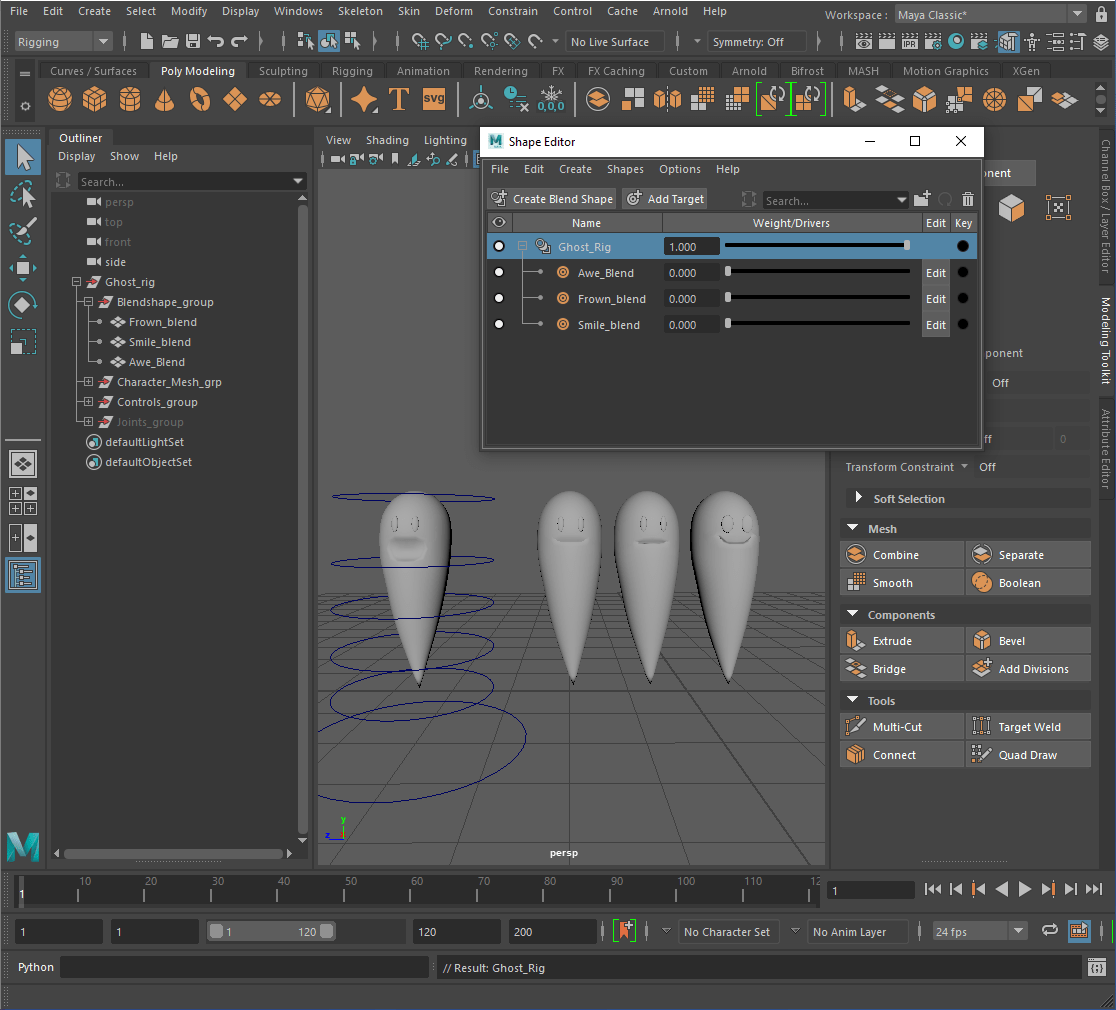
I checked that it worked, which it did and clicked on the ‘Blendshape_CTRL’ and added an attribute for the awe expression.

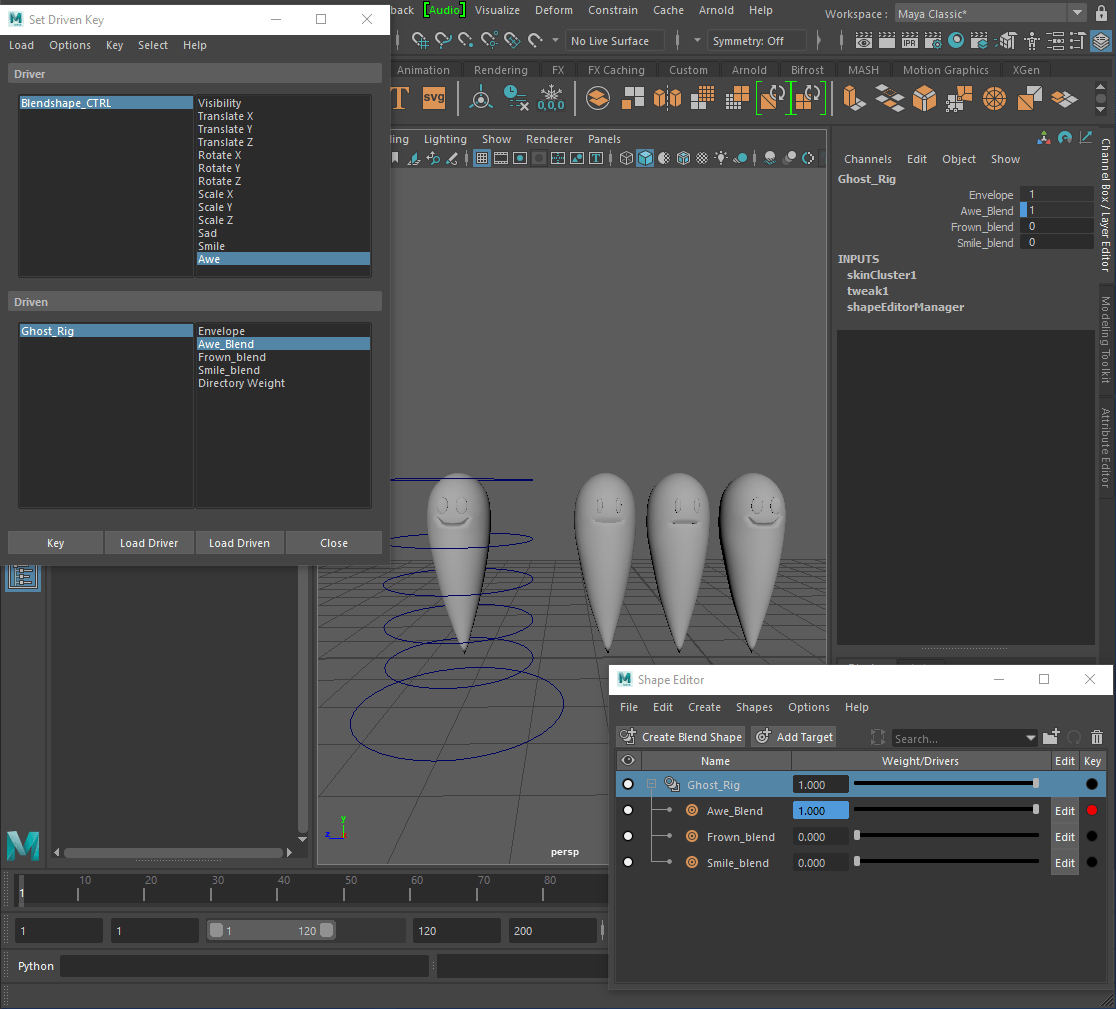
I switched to the ‘Animation’ tab and clicked ‘Key-> Set Driven Key-> Set’. I inserted the control and the blend shape into the driver.

I then selected the ‘Awe’ options from the driver and clicked ‘Key’. Next I changed the ‘Awe’ value to 10 and the ‘Awe_Blend’ to 1 and clicked ‘Key’.
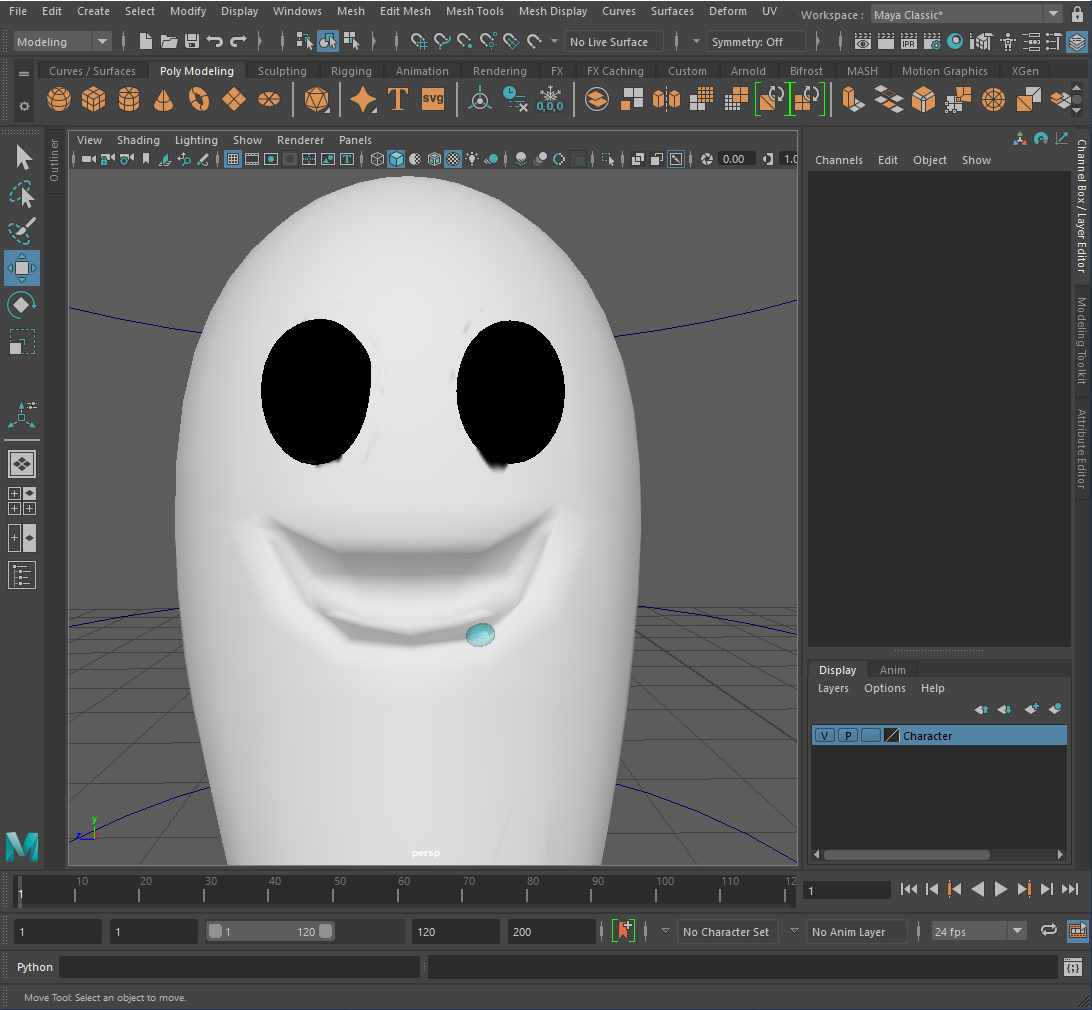
—Drool—
For my part in the animation, I had to make some drool for the ghost’s mouth as he stares at the fridge so I started by creating a cube.

Using the ‘Smooth’ tool on the cube, I turned the Divisions to 3 so that I would have plenty of faces to work with.

I started by scaling the sphere to a more reasonable size, duplicated the drool drop and named it. Next I selected all the pieces and created a blend shape.
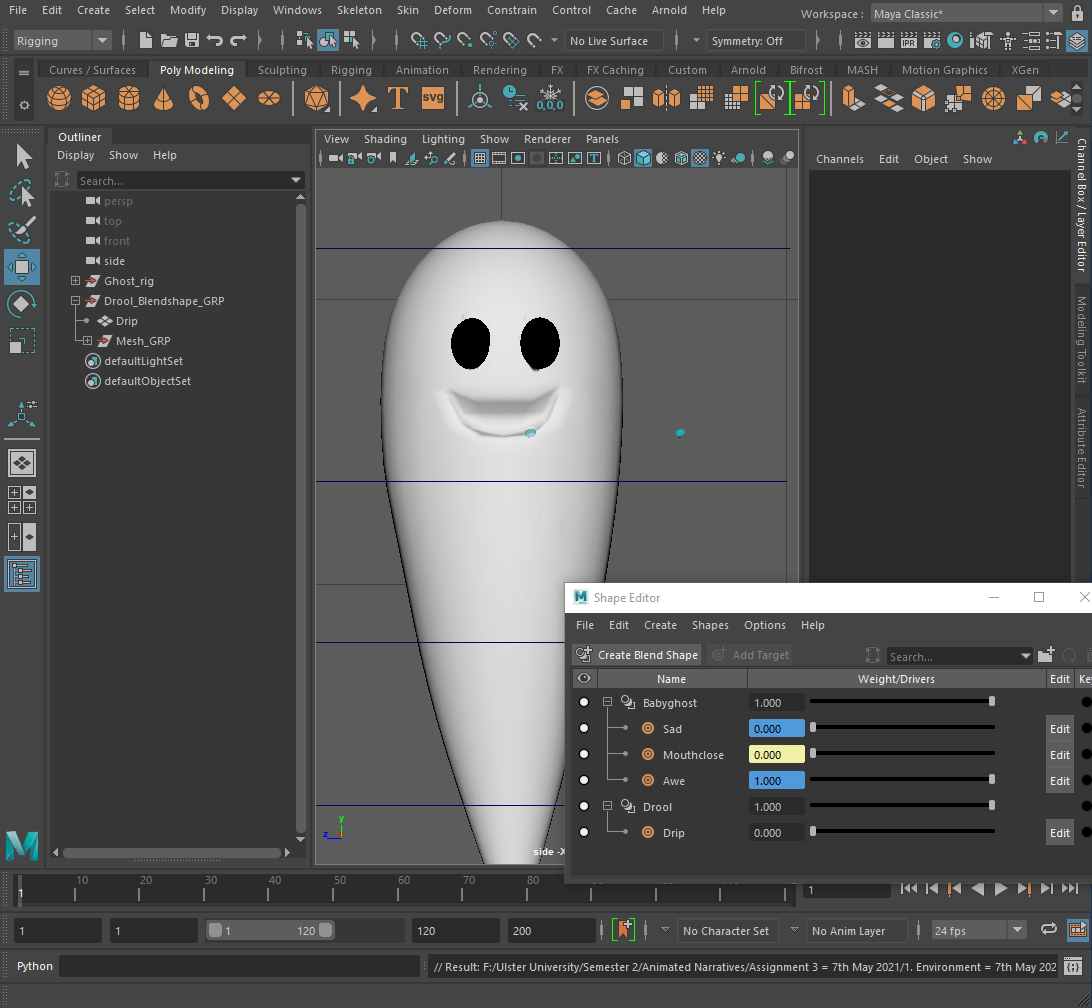
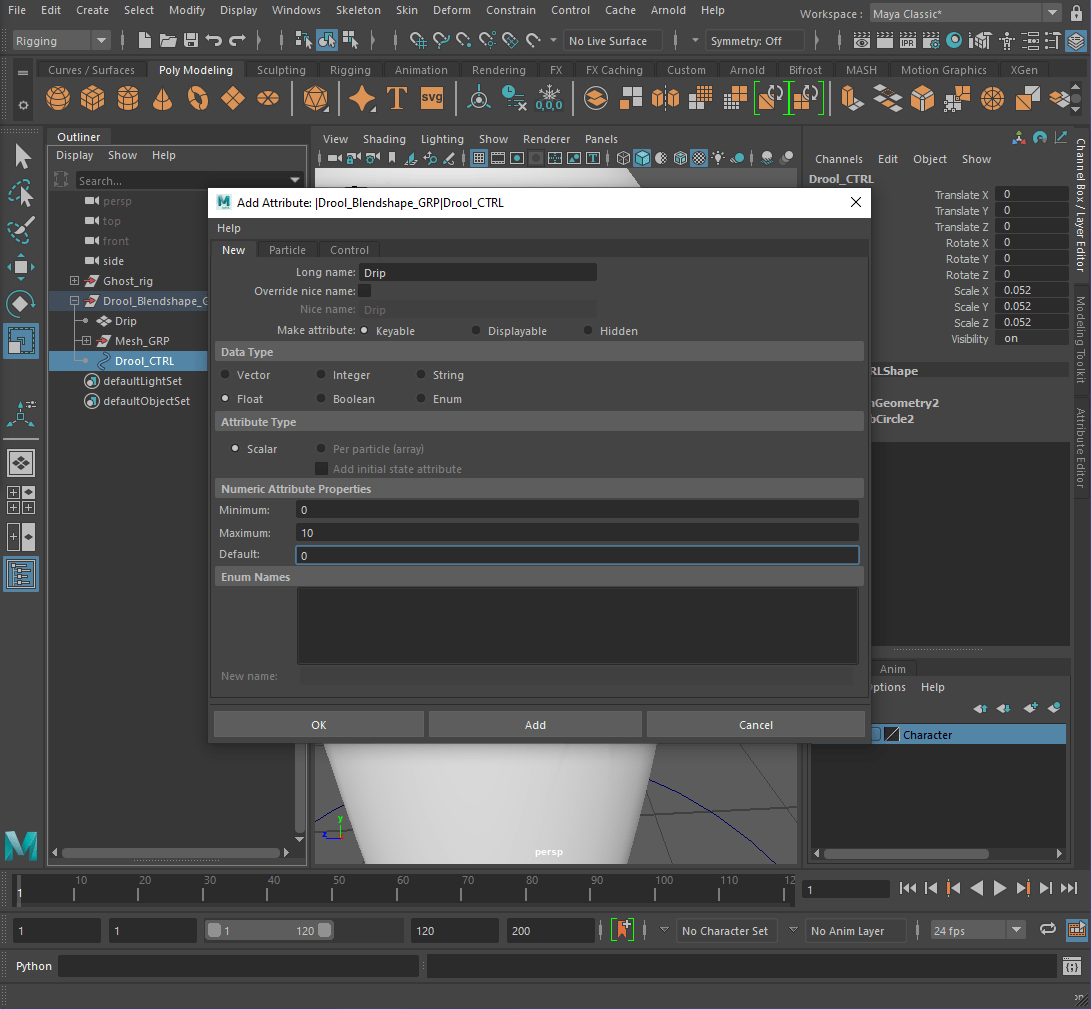
I edited the shapes of the drool drip, added a Control curve for the drip and added an attribute.

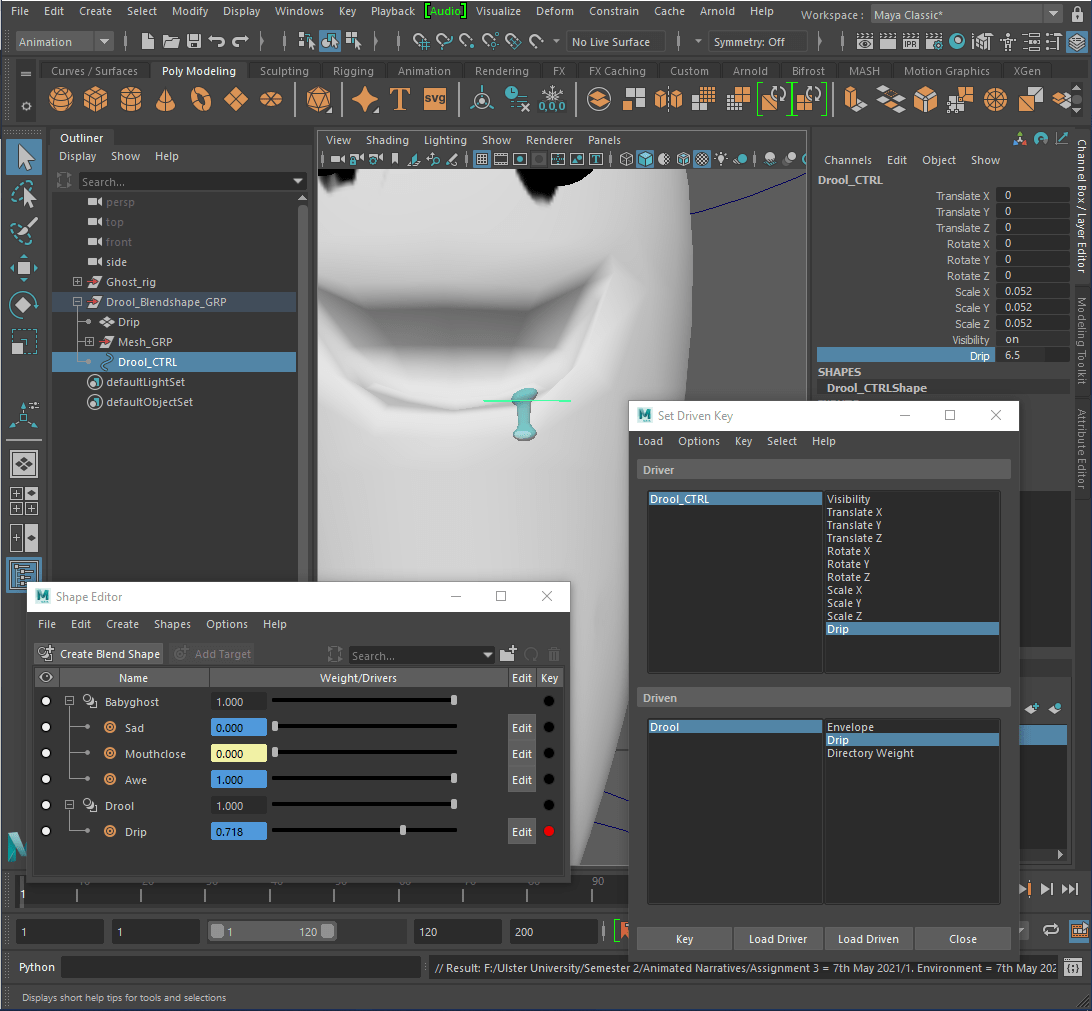
Finally I used the ‘Set Driven Key’ to make the attribute added to the Control Curve work.
____________________________________________________________________________________________________________________________
—Animating—
—Setting up the Scene—
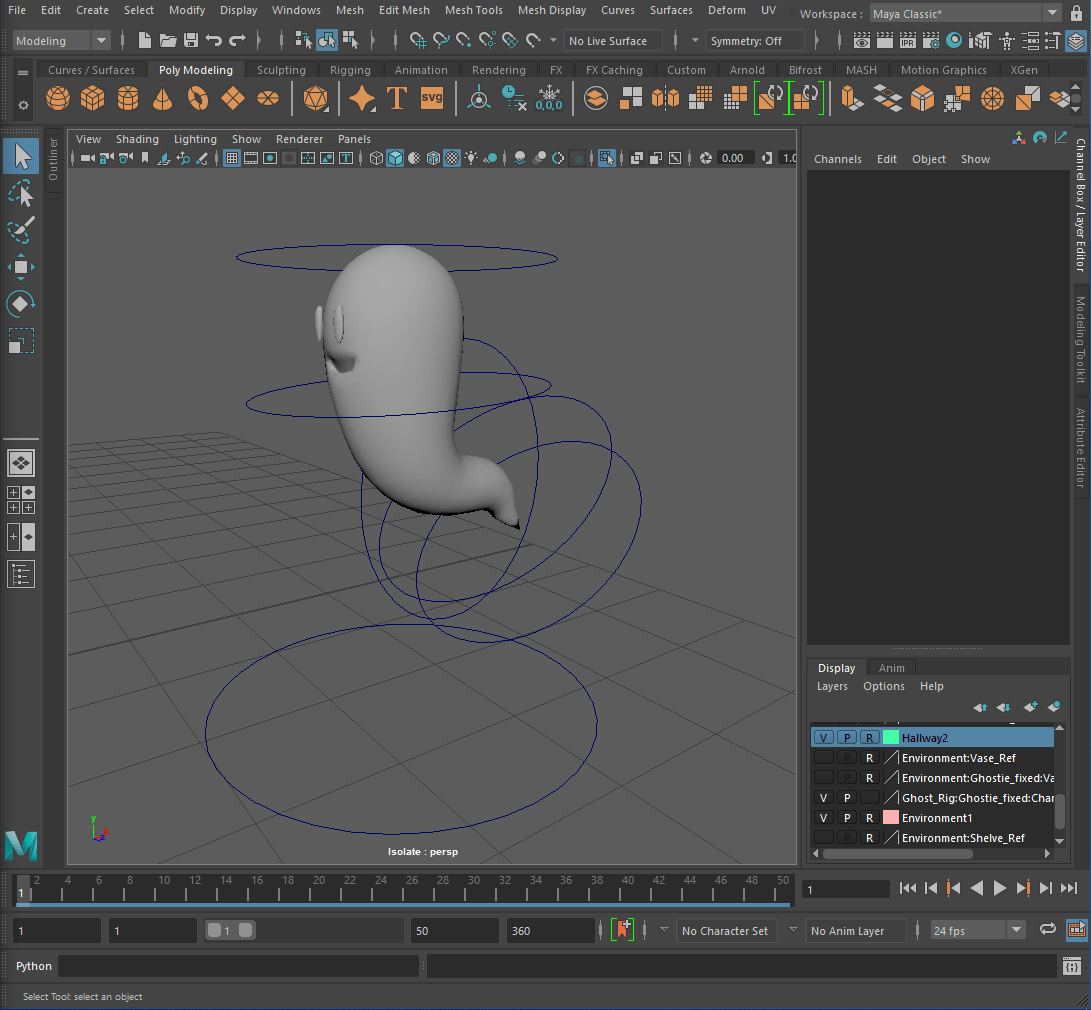
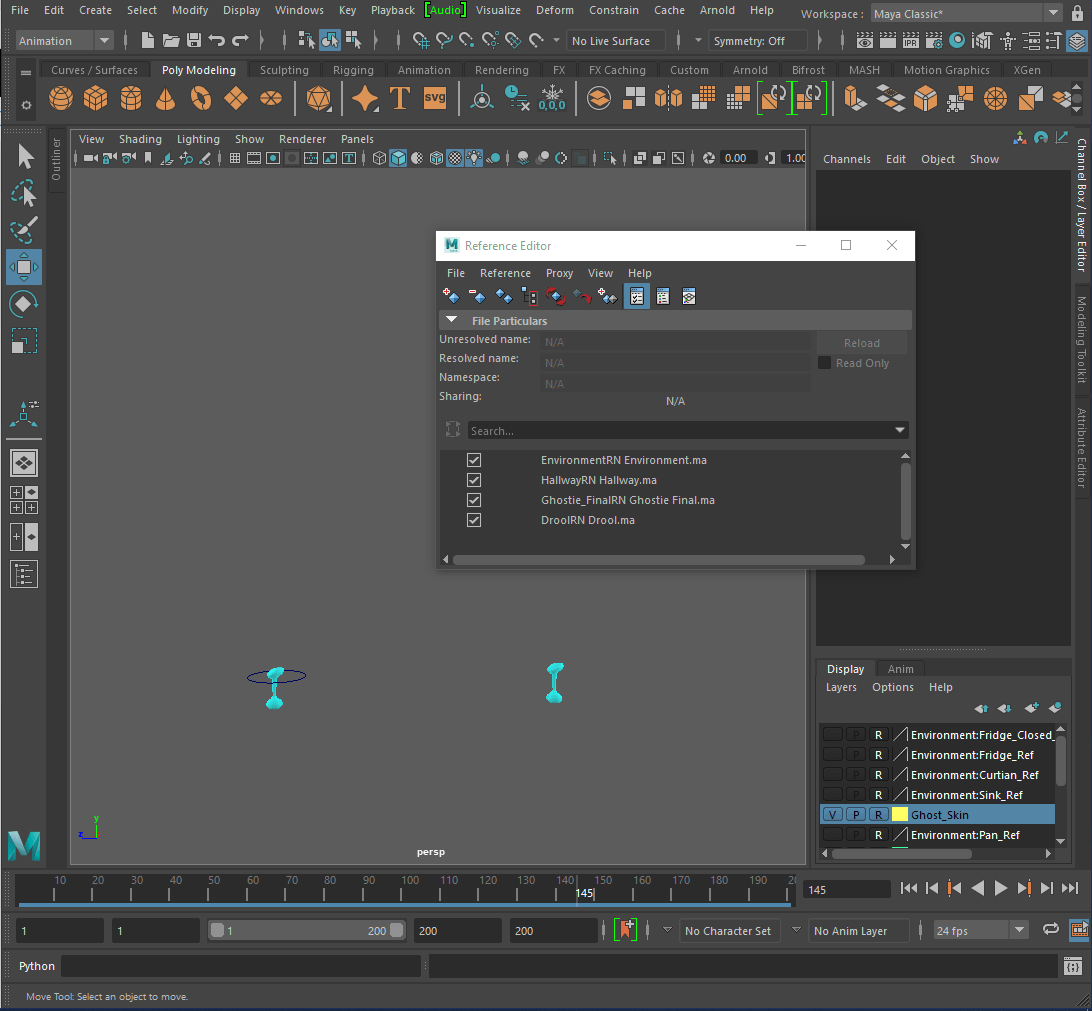
I opened Maya and added the environment and Ghost Rig as a reference.

Next I hid the blend shapes for the ghost rig and positioned the ghost where I needed it in the scene and finally I created a reference layer for the environment and hallway so that I wouldn’t accidently click them.

—Block Out—
Firstly I positioned the rig in a more relaxed position.
I key framed the stages of the ghost’s expression and the gentle bobbing motion he will have.
Next I stopped to make a star for the eyes using a cylinder and animated the stars on the eyes.


—Inbetweens—
Using the ‘Dope Sheet’ and the ‘Graph Editor’, I adjusted the timing of my animation.

—Camera—
I added a camera to the scene and positioned it. I then exported what I had as a Playblast for the final presentation for class on Thursday.
—Inbetweens – Take 2—
After I received the textured files from Amber and added them to the ghost model, I turned on the ‘Transparency’ option in the ‘Attributes Editor’.

I had to readjust the position of the stars in the eyes as the ghost is now transparent and you can see the stars behind him.

—Polish—
I made a blend shape for the drool that comes out of the ghosts mouth and opened it as a reference.
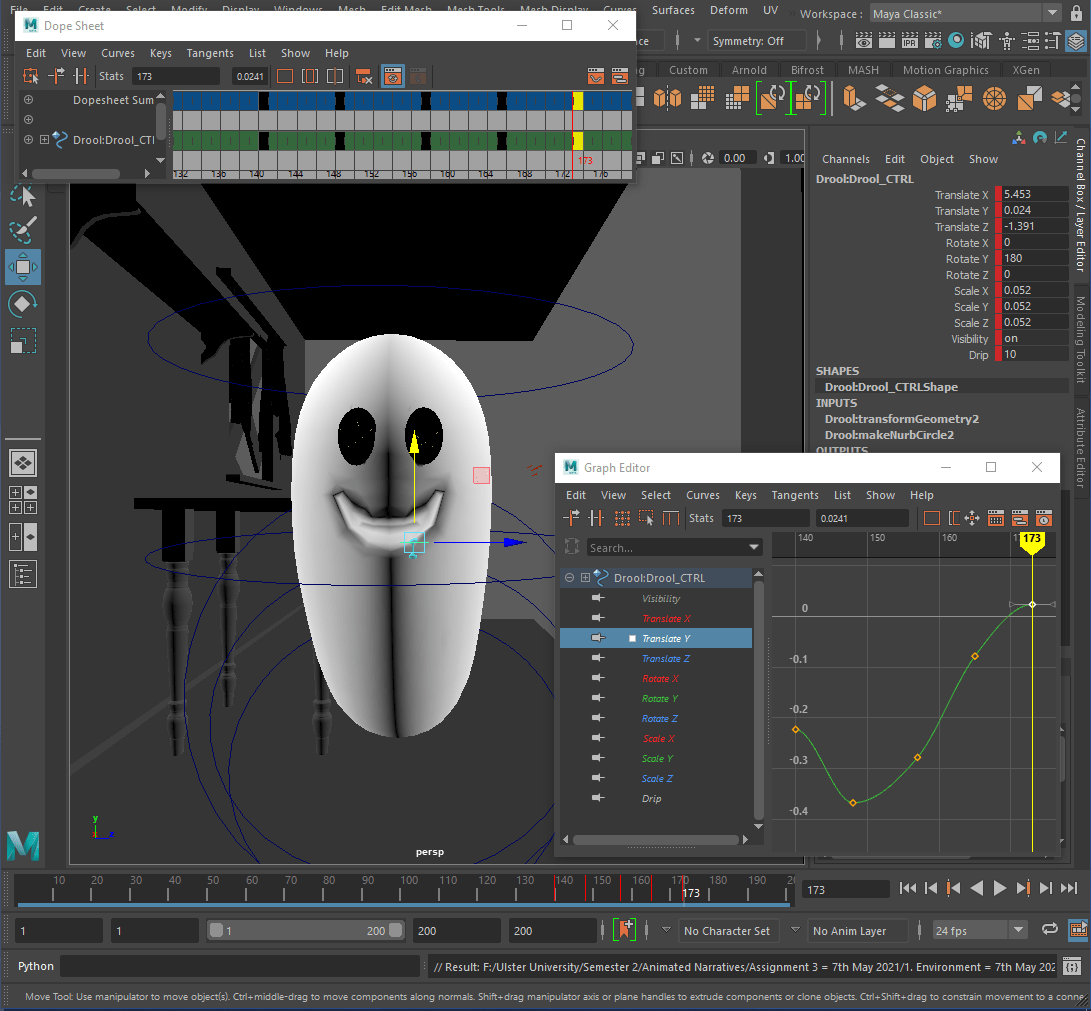
I then hid the blend shape, centred the pivot and turned the mesh into a reference. I positioned the drool where I needed it and key framed the motion of the drool dripping from the ghost’s mouth.

I then used the ‘Dope Sheet’ and ‘Graph Editor’ to refine the motion.
—Feedback from Group—
Danielle suggested making the bobbing of the ghost less extreme so I did that.
— Finishing Touches—
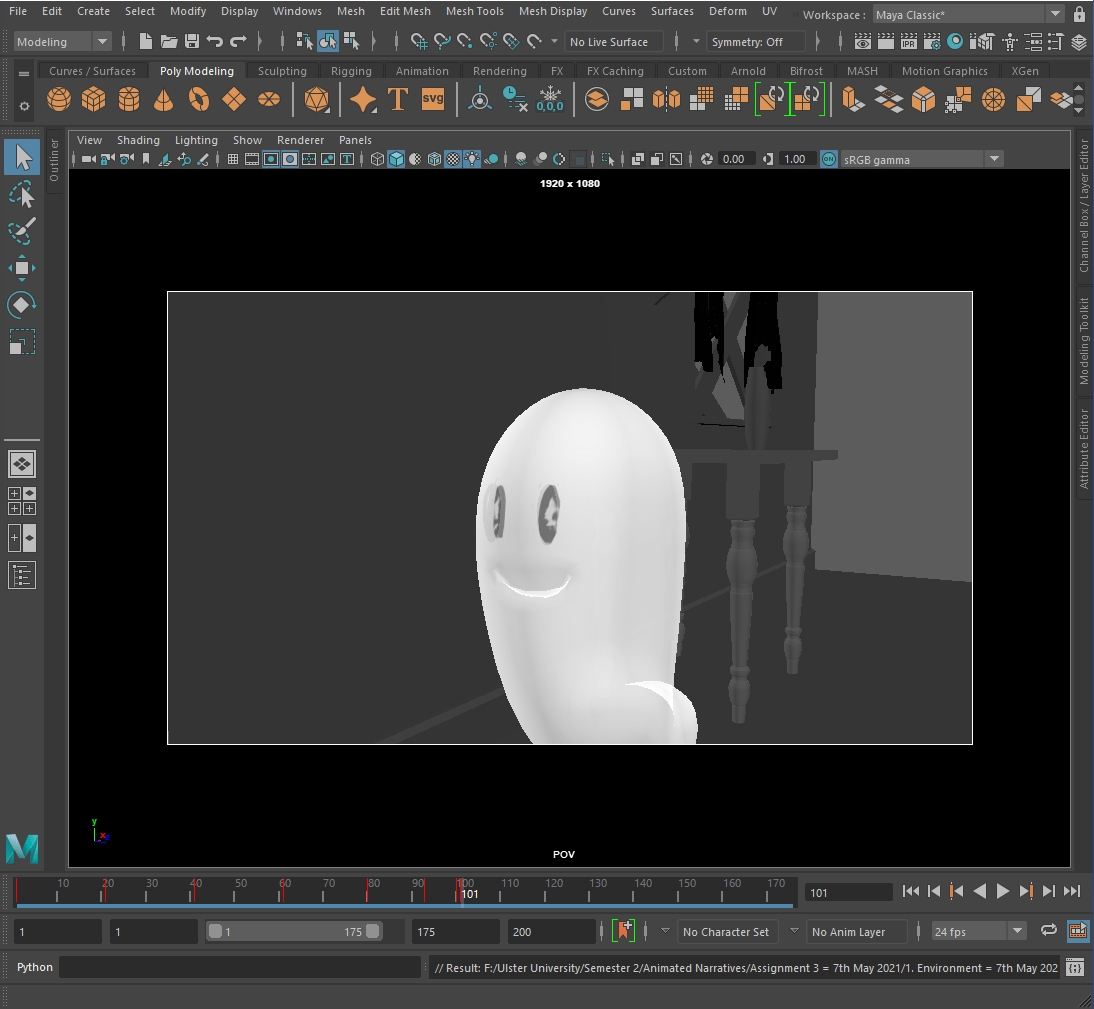
Finally I adjusted the camera angle for the shot of the ghost drooling over the sandwich to better match the 3D previs.
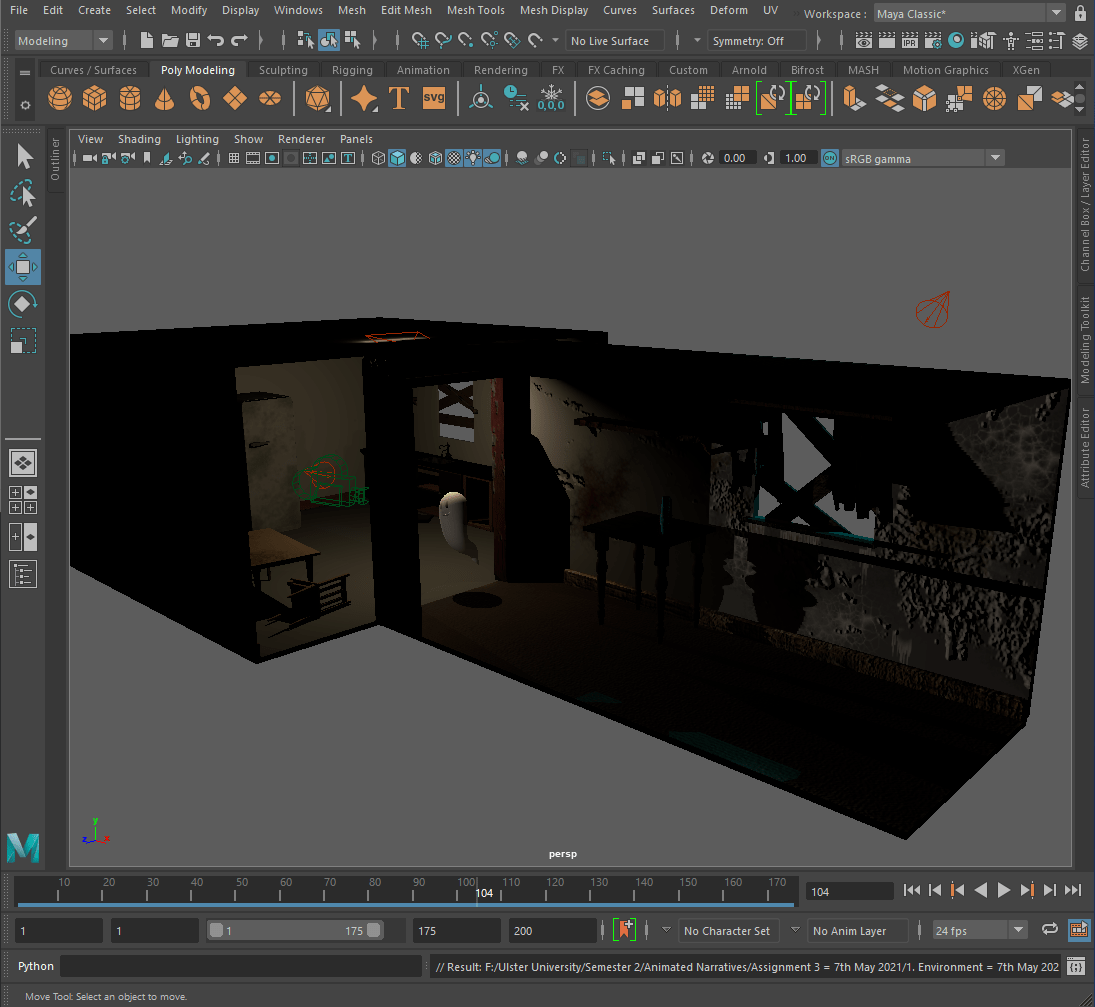
-Lighting-
For the lighting I added a spot light with a blue tint shining through the windows of the environment, an area light with an orange tint to the ceiling of the kitchen that changes to pink when the ghost notices the fridge and aminated a spot light to move in front of the fridge to illuminate the face of the ghost when the camera angle moves.
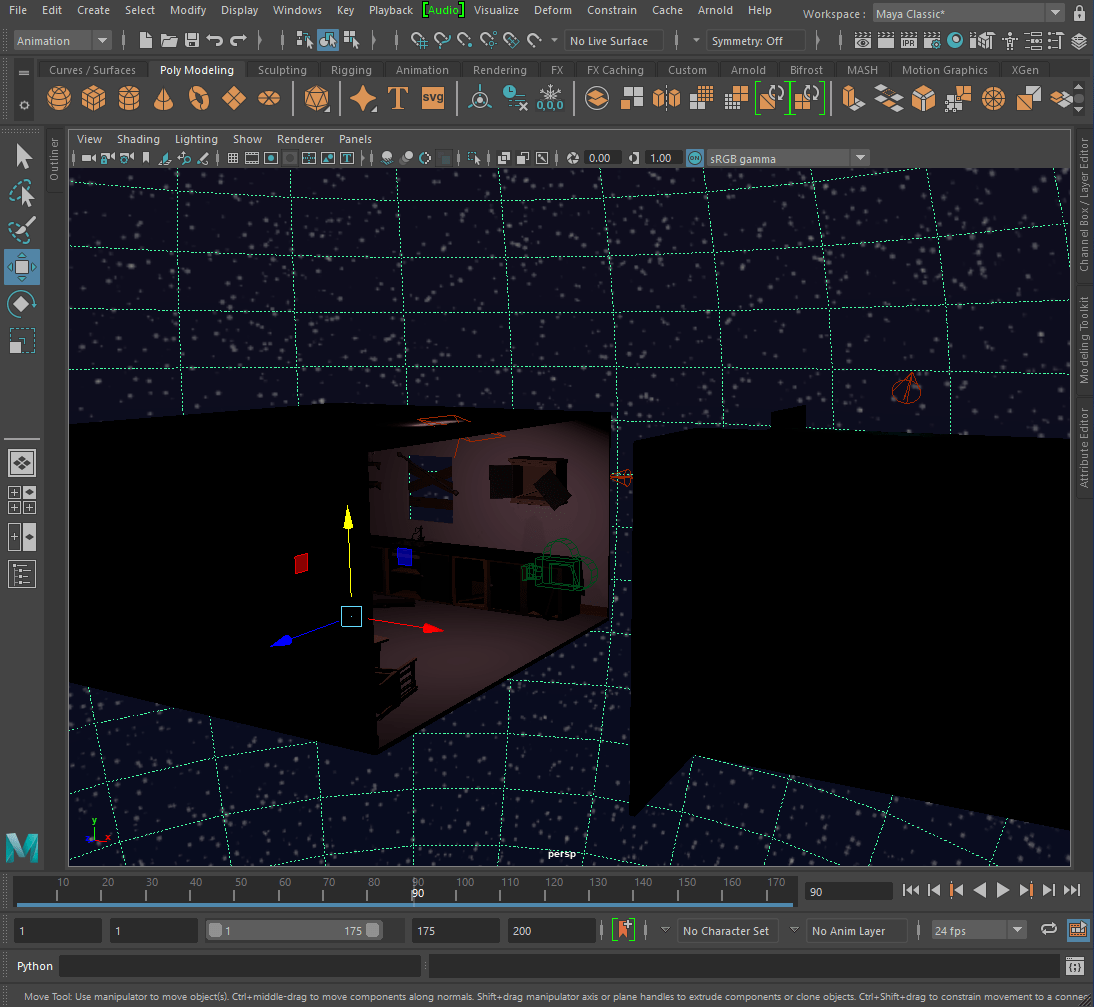
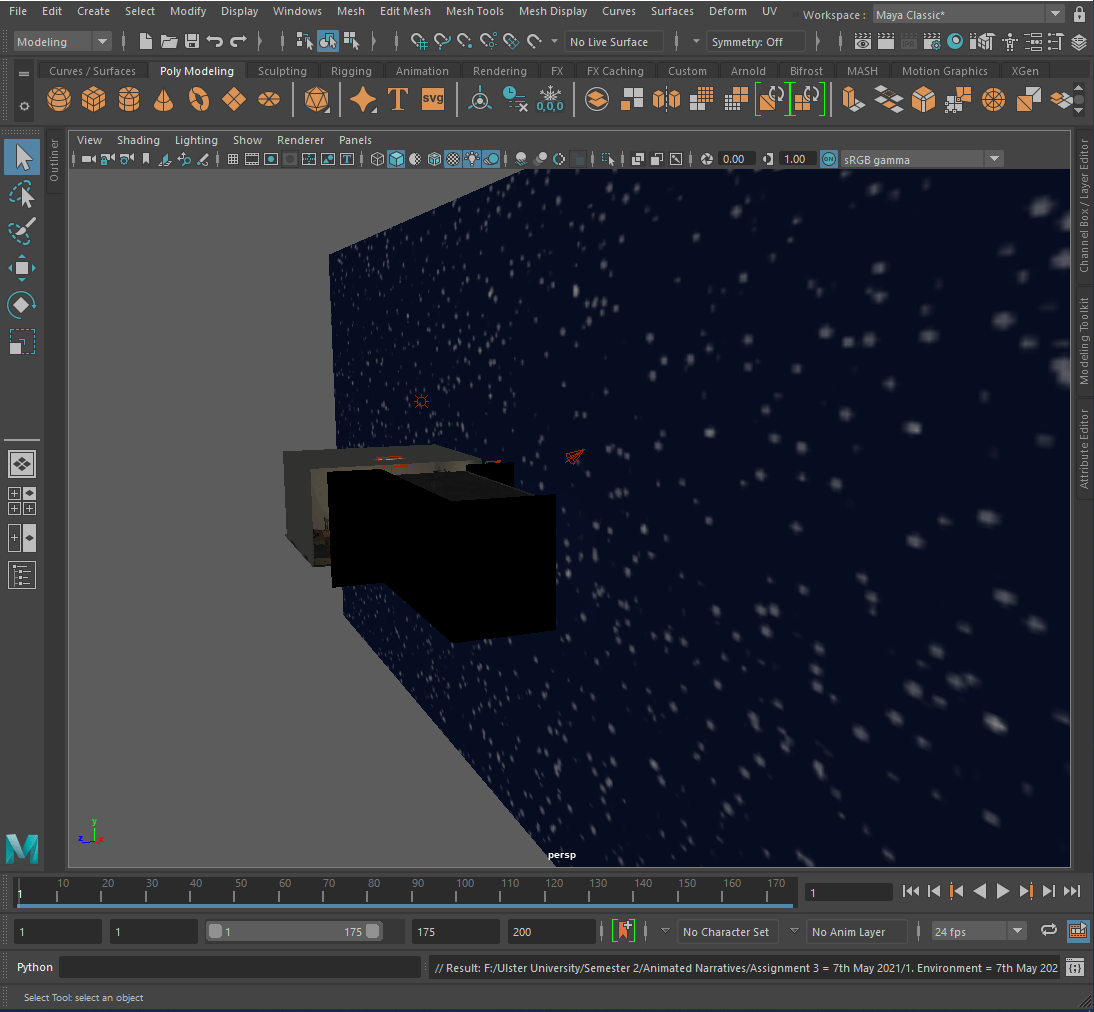
I then used the custom night sky Danielle made in the skydome.
—Rendering—
Did a test render and adjusted the intensity of the lighting.

I soon realised that a skydome is only for Arnold so I created a cube, scaled it and added the same texture as the skydome which worked the same as the skydome.
Next I adjusted the settings for the render, turned on ‘Ambient Occlusion’ and ‘Multisampling Anti-aliasing’.
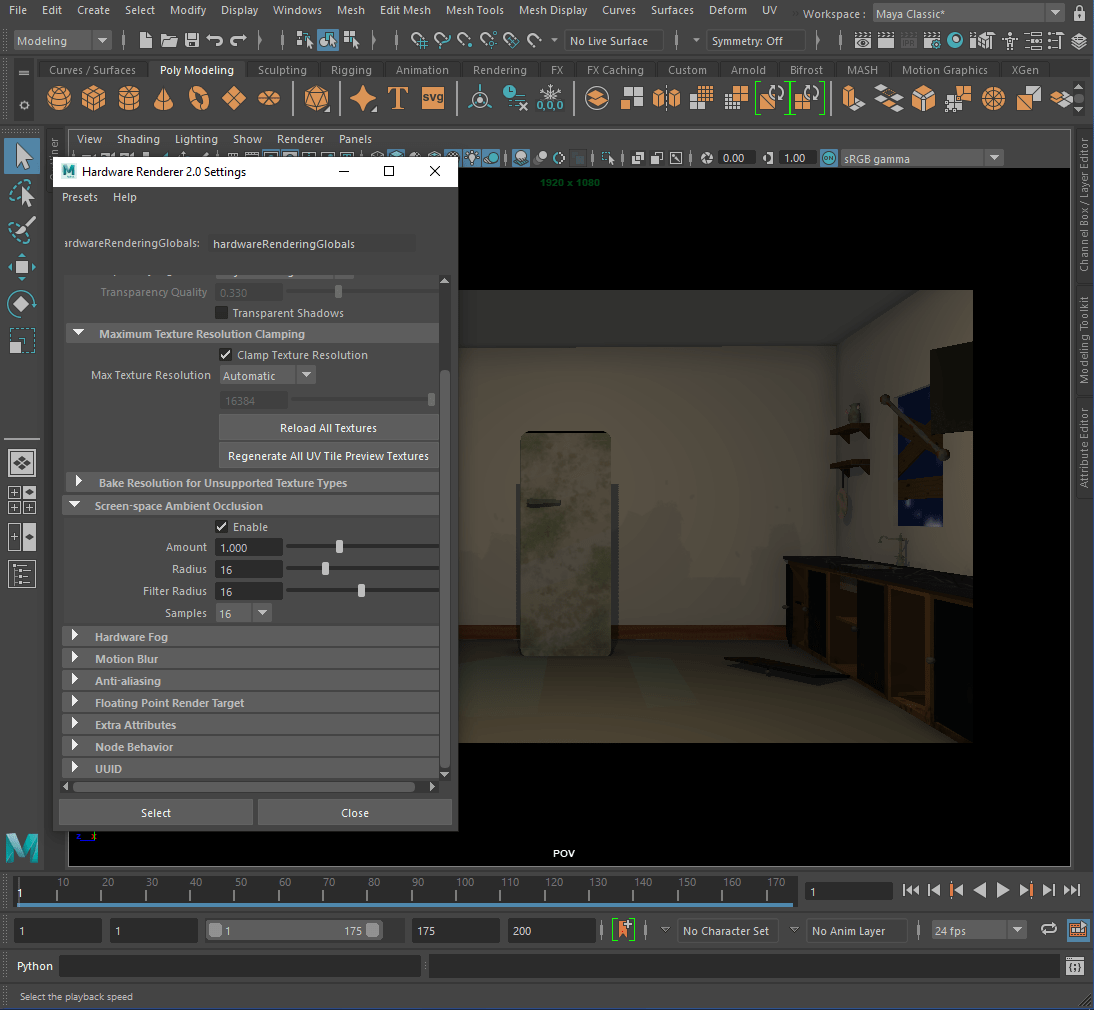

I opened the render settings and selected the ‘Maya Hardware 2.0’ and adjusted the settings in the common tab.

____________________________________________________________________________________________________________________________
—Final Animation—
-My Part-
-Full Animation-
____________________________________________________________________________________________________________________________
—Reflection—
It was a great experience to work within a group for this assignment. I really enjoyed working in this group but time management became a bit of a problem close to the end, next time I think it would be better if we create a spreadsheet or group calendar to help better manage our time and the tasks that need to be done. I feel that the majority of our group communicated and worked well together, giving feedback and help where we could as a lot of use had never really used Maya before to model in never mind to animate in.
I feel really proud of what our group has achieved in such unique circumstances and I am really happy with how the final animation came out.
—Overall Experience—
I really enjoyed the experience of this year. I feel the students and lectures adapted really well to the new rules and circumstances that this year has brought. I really like that there is a giant group discord that everyone can ask for help through and there are so many ways to contact the lectures if you are really stuck; for example: Slack, email, Discord and you are given plenty of opportunity on Blackboard during class.
I really like that the lectures are recorded and are easily accessible on blackboard even after class has ended so that everyone can take it at their own pace and don’t feel as if they have missed anything if they have a busy household or a bad Wi-Fi connection.