Task
For this assessment we were tasked with choosing an aspect from Luigi Serafini’s Codex Seraphinianus, such as a character, environment, etc. Using our chosen aspect, we had to develop two different skills from a list the tutors gave us.
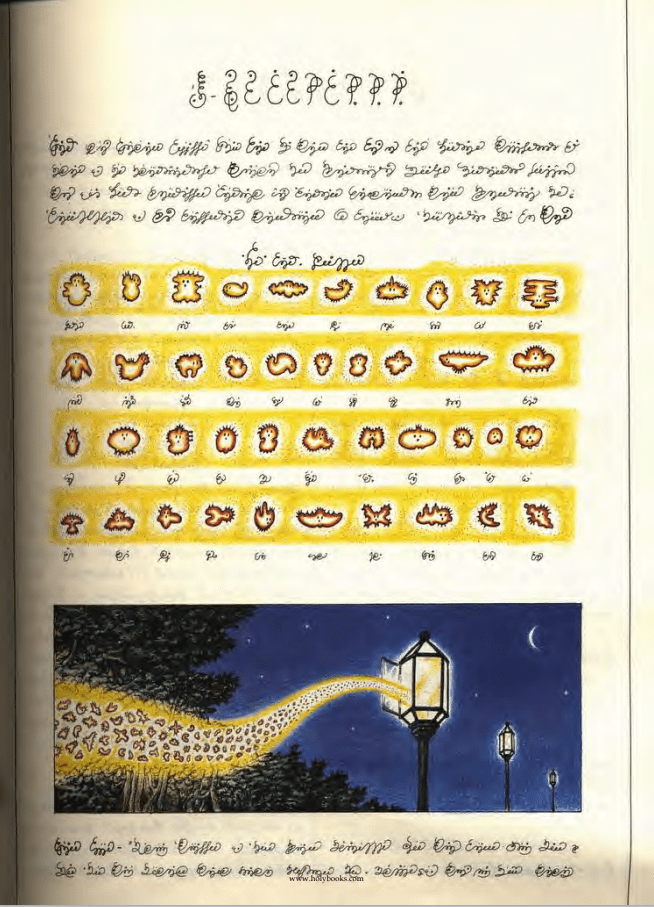
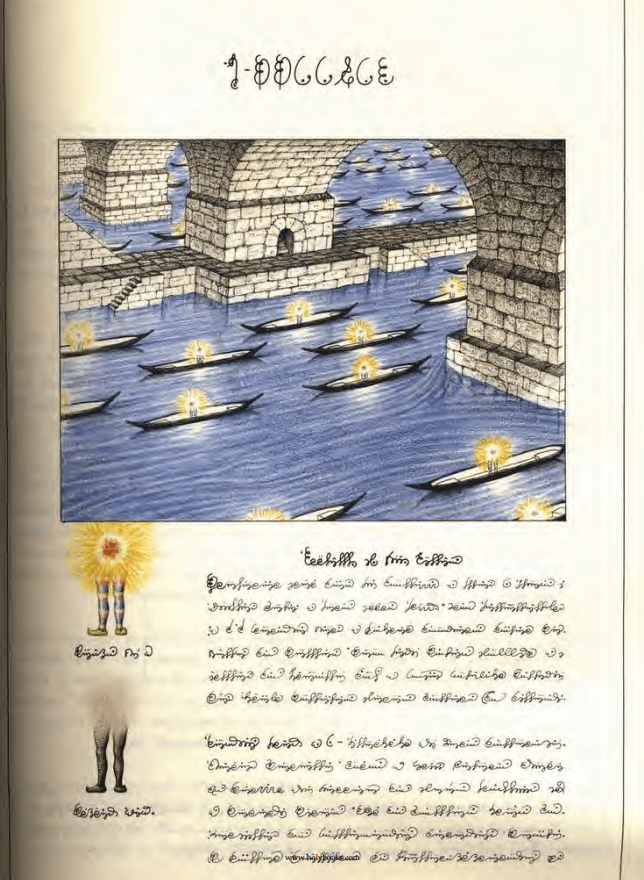
After looking through the Codex I found two pages that interested me. For the lantern page I thought about making a 3D scene with particles swirling out from the lanterns, reminiscent of Vincent van Gogh’s painting The Starry Night. For the light people page I thought about making a 3D scene with the boats floating across the water. In the dark the light people would ignite; in the light they would extinguish. For both pages I knew I wanted the models to look painterly so I found some references images of other peoples work that have a painterly quality that are 3D.

Initial Research
After talking with the tutors, I decided to go with the lantern page. I envisioned particles that constantly moved using boiling line animation, the particles would swirl around and glow. The background would be 3D models of lanterns and trees with a flat plane as the sky. The techniques I used were 3D modeling, texturing and particle effects. I have never done any particle effects before, so this was a new skill I had to learn for this assessment. I started by researching the different softwares I could use; Maya, Blender and Unreal Engine 4 are all systems I am familiar with, so I mainly looked into their particle systems.
Maya
- Maya NParticles Basics Tutorial – YouTube
- Intro to Particles in Maya 2019: Blobbies – YouTube
- How To : Make Particles to Follow a Path in Autodesk Maya – YouTube
- Maya 2023 FX Series – Nparticles Basics – 001 – YouTube
- Basics of particle sprite in Maya (youtube.com)
- [ENG] Maya Nparticles Sprites with Arnold – YouTube
Blender
- Blender Particles Tutorial – Blender 2.8 Beginners Tutorial – YouTube
- Making Blender’s Particle system EASY using Particles-X – YouTube
- How to Animate Particles Along a Curve in Blender (Without Curve Guide) – Bonus Tutorial – YouTube
- Blender Beginner Particles Tutorial – YouTube
- 3DCoat Christmas sale 2023 deals lite promo (youtube.com)
Unreal Engine
- Intro to Niagara Particles [UE4/UE5] – YouTube
- How I build intricate particle behaviours using Niagara in UE – YouTube
- Make Custom Particle Effects | Ue4 tutorial – YouTube
- [UE5 – Blueprints] How to Make Sprite Particle Footstep Effects in Unreal Engine 5 (youtube.com)
I decided to use Blender for the particles as it seemed the most intuitive to use as a beginner and I have the some prior experience with the software. I will also be modeling and rendering in Blender and texturing in Substance Painter. My sprites will be drawn in Photoshop.
Process
Particle Tests
I started by watching this tutorial on the basics of the Blender particle system.
I made a sample render using force fields to direct the particles to make that swirl effect, however, I wanted more control over the path the particles would take.
I tried using this method with a test sprite, but realised it was limiting as I had less control over the way the sprites were emitted.
So, I watched this tutorial about guided particles using a curve so they could still be affected by force fields.
The guide works great, and I can adjust the strength of the curve so the particles will follow more closely or loosely.
To achieve particles that charge as they moved, I followed this tutorial series on how to create sprite particles.
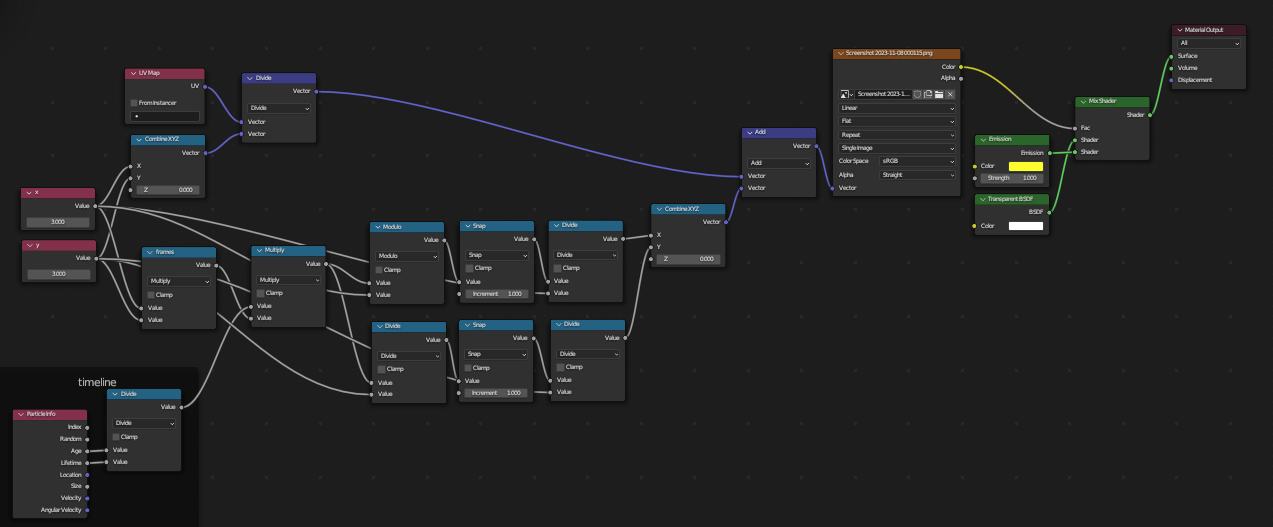
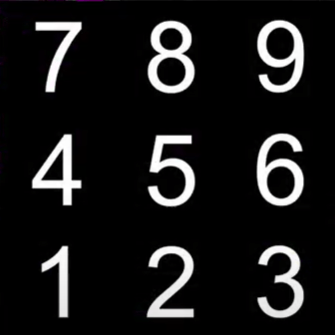
I ended up with this node tree, the particle system works by using an image on a grid that plays as the particle moves further away from the emitter. Originally the tutorials said this particle emitter only worked using cycles, so I was going to render in cycles, however I was able to render it using eevee, this made adding bloom easier and did not interfere with some of my later models and textures.
![]()
Initially, I thought about using boiling line animation so the sprites would jitter as they floated. However, after a talk with Henry he suggested using After Effects to make the sprites morph shapes. I followed this tutorial and created a test sprite.
I exported the first sprite with 9 frames and the second with 25 frames. The 25 frame one morphed cleaner and looked smoother so future sprites will be exported this way. Since there were more frames, I had to adjust the particle emitter and the sprite grid which was easy as I just had to change this number to match the new grid size.
![]()
![]()
The final thing I needed to test was if the sprites from the particle emitter would follow a curve and they did. I also tested to see how the emissive node looked on the sprites. Since this was my final test, I was able to start working on the final sprites.
Particle Set Up
To make the sprites I started by drawing them in After Effects and animating the morphing using the previous tutorial. Henry suggested adding a distortion mask to the edges so they would have a wriggling texture as they morphed and a radial gradient to the center so they would appear to have a glow. After I was happy with the effect, I exported the 25 frames and imported them into Photoshop to format them into the grid.
![]()
![]()
![]()
I imported the new sprites into my scene, but I ran into an issue with the emissive covering all the texturing. Henry helped me to adjust the node tree to allow the texturing to be seen and taught me how to adjust the intensity of the color to make the sprites appear glowing without adding an emissive node or bloom. I also added a track to constraint so no matter which way the camera is angled the sprites will always face it.
Old node tree
![]()
New node tree
![]()
Lantern
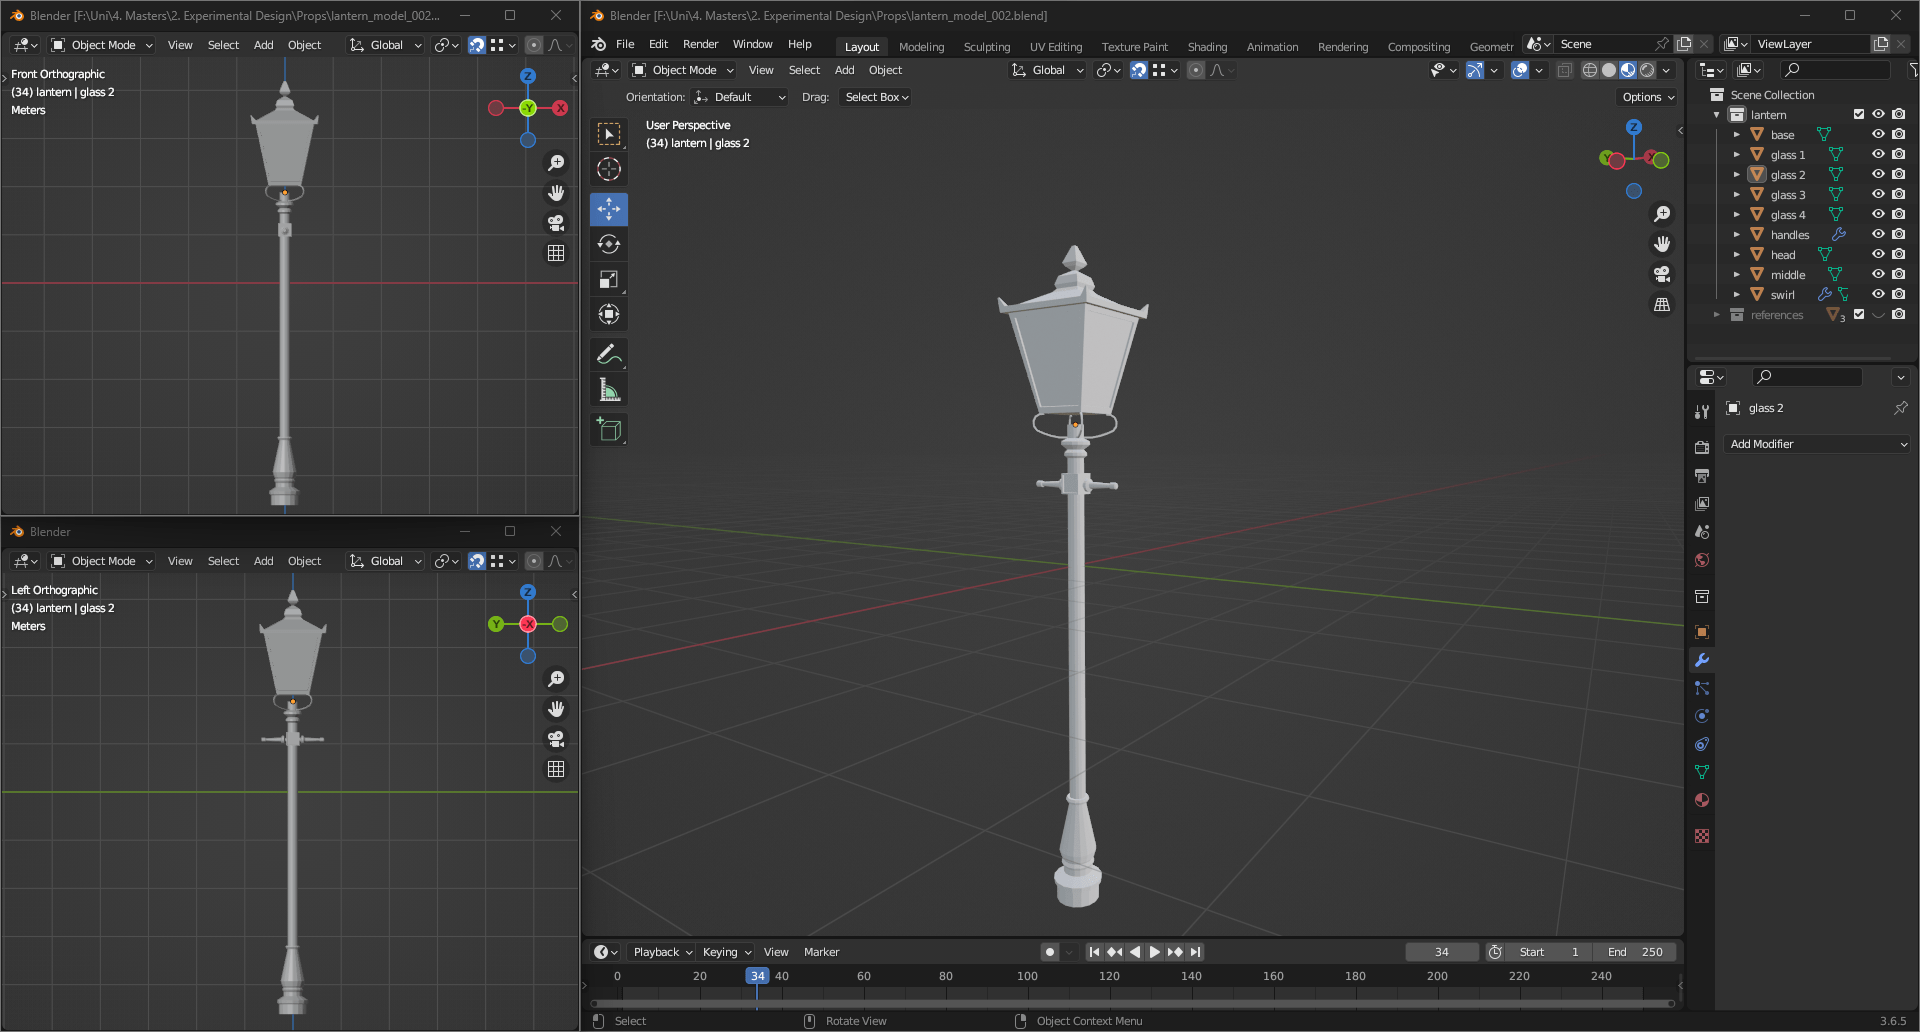
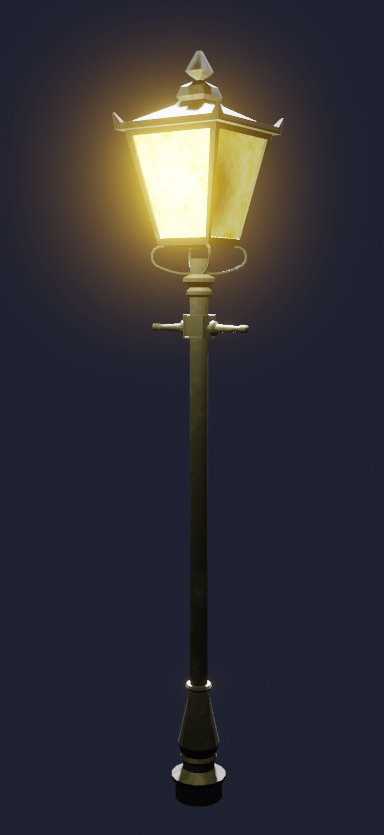
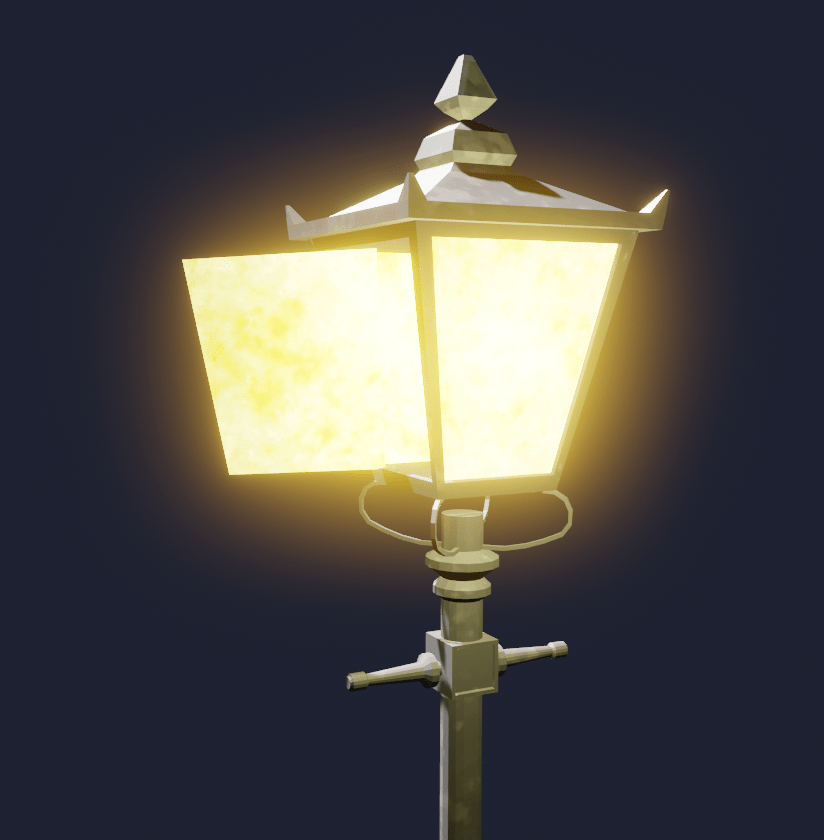
I then started to work on the lantern model. I used these references as a guide to create the model. I kept the glass separated from the main model so I could make it translucent and add an emissive texture later.

For the texturing I used Substance Painter, I used a dirt mask on the main body of the lantern to make it look like lighter blobs of colour over a darker base colour. I also added an edge highlight to make it look as if the lantern had an outline. Looking back, I wish I had made the colours more contrasting as the lantern is seen from a distance and the texturing almost disappears, I think a deep blue would have worked better for the paint splatter look. For the glass, I used the ‘artistic heavy sponge’ brush and three different shades of yellow to make the glass appear foggy.
Trees
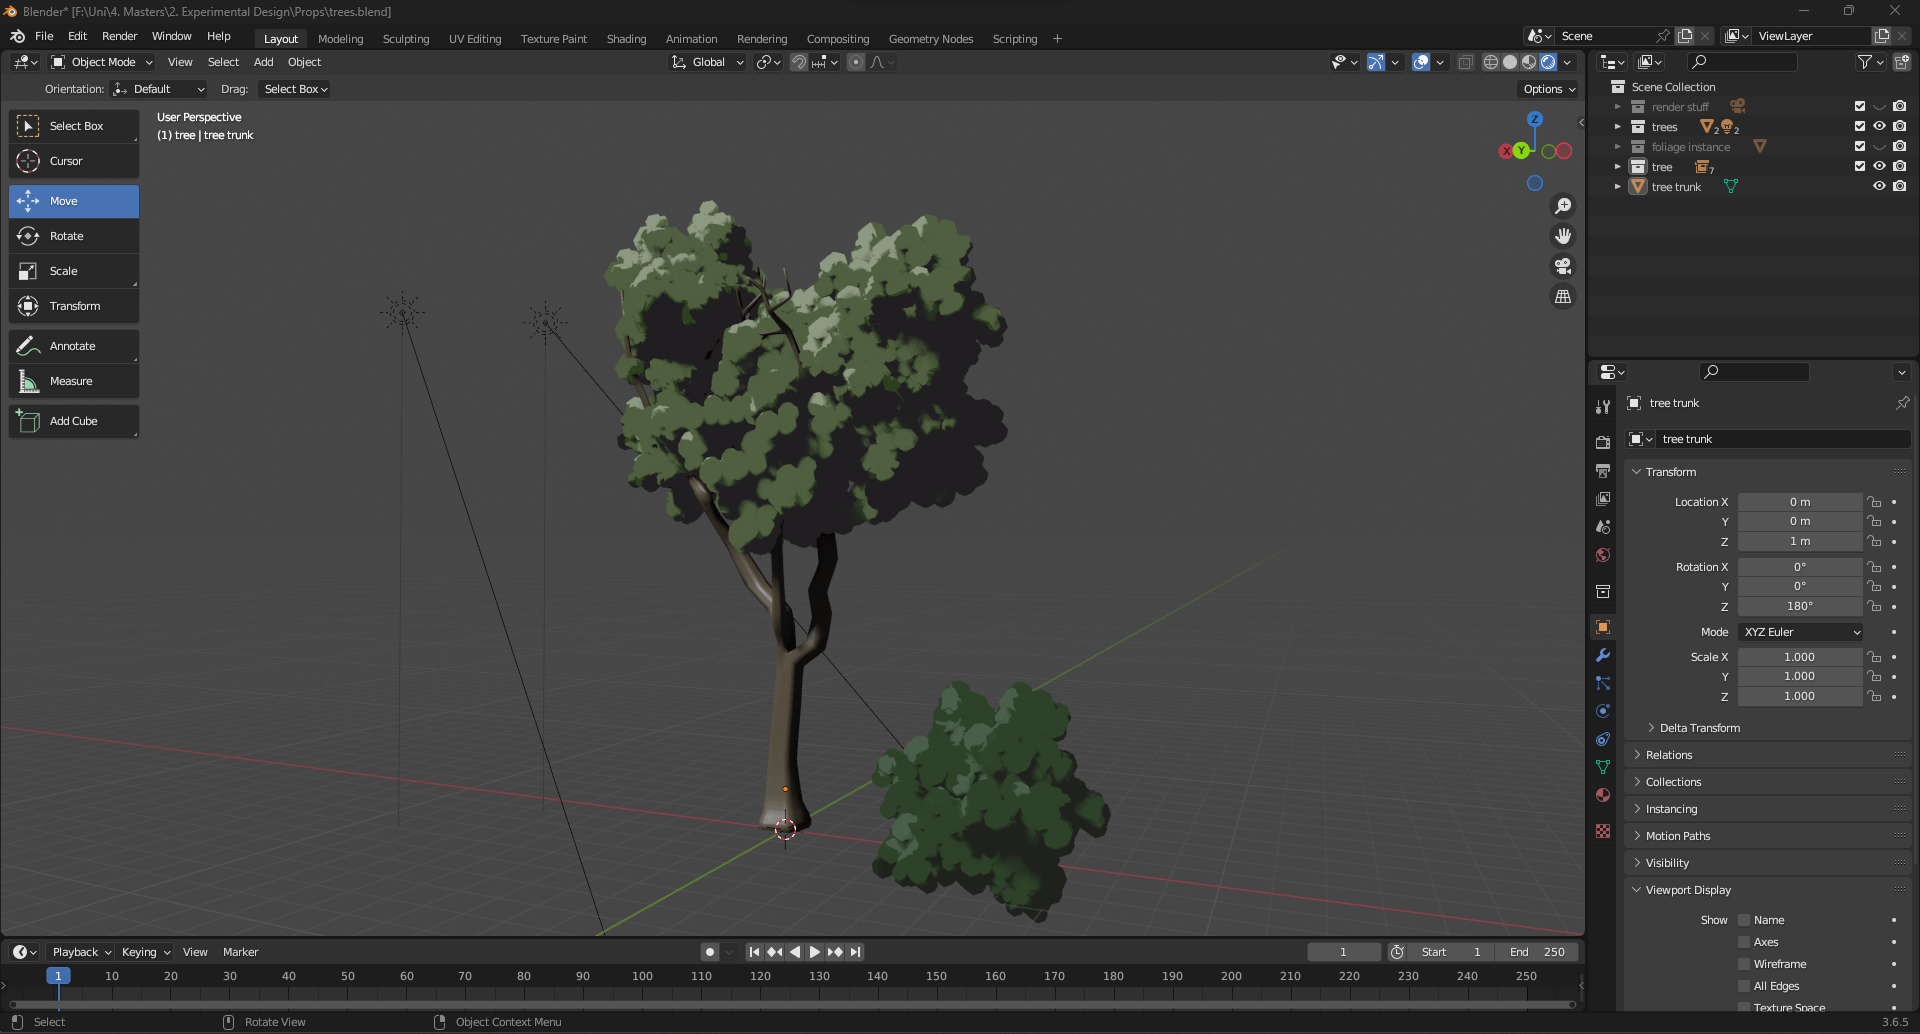
To model the trees, I followed this tutorial on how to make Studio Ghibli styled trees. I chose this tutorial as the stylised leaves and shading was similar to the ones in the Codex and matched the style I was going for.
The leaves are created in a similar way to the particle emitter I created at the beginning of this project, only the leaves use the hair emitter. The leaves are made by referencing a sphere that I sculpted onto to look more irregular, the shape is then multiplied over the emitter to make the leaf cluster. The colour is created by using a colour ramp node. I then instance the leaf cluster to duplicate it and add it to my trunk model. To make more colour varieties without making a new particle emitter the tutorial showed how to make a switch that uses the view port display colour to change the colour.

Particle Adjustments
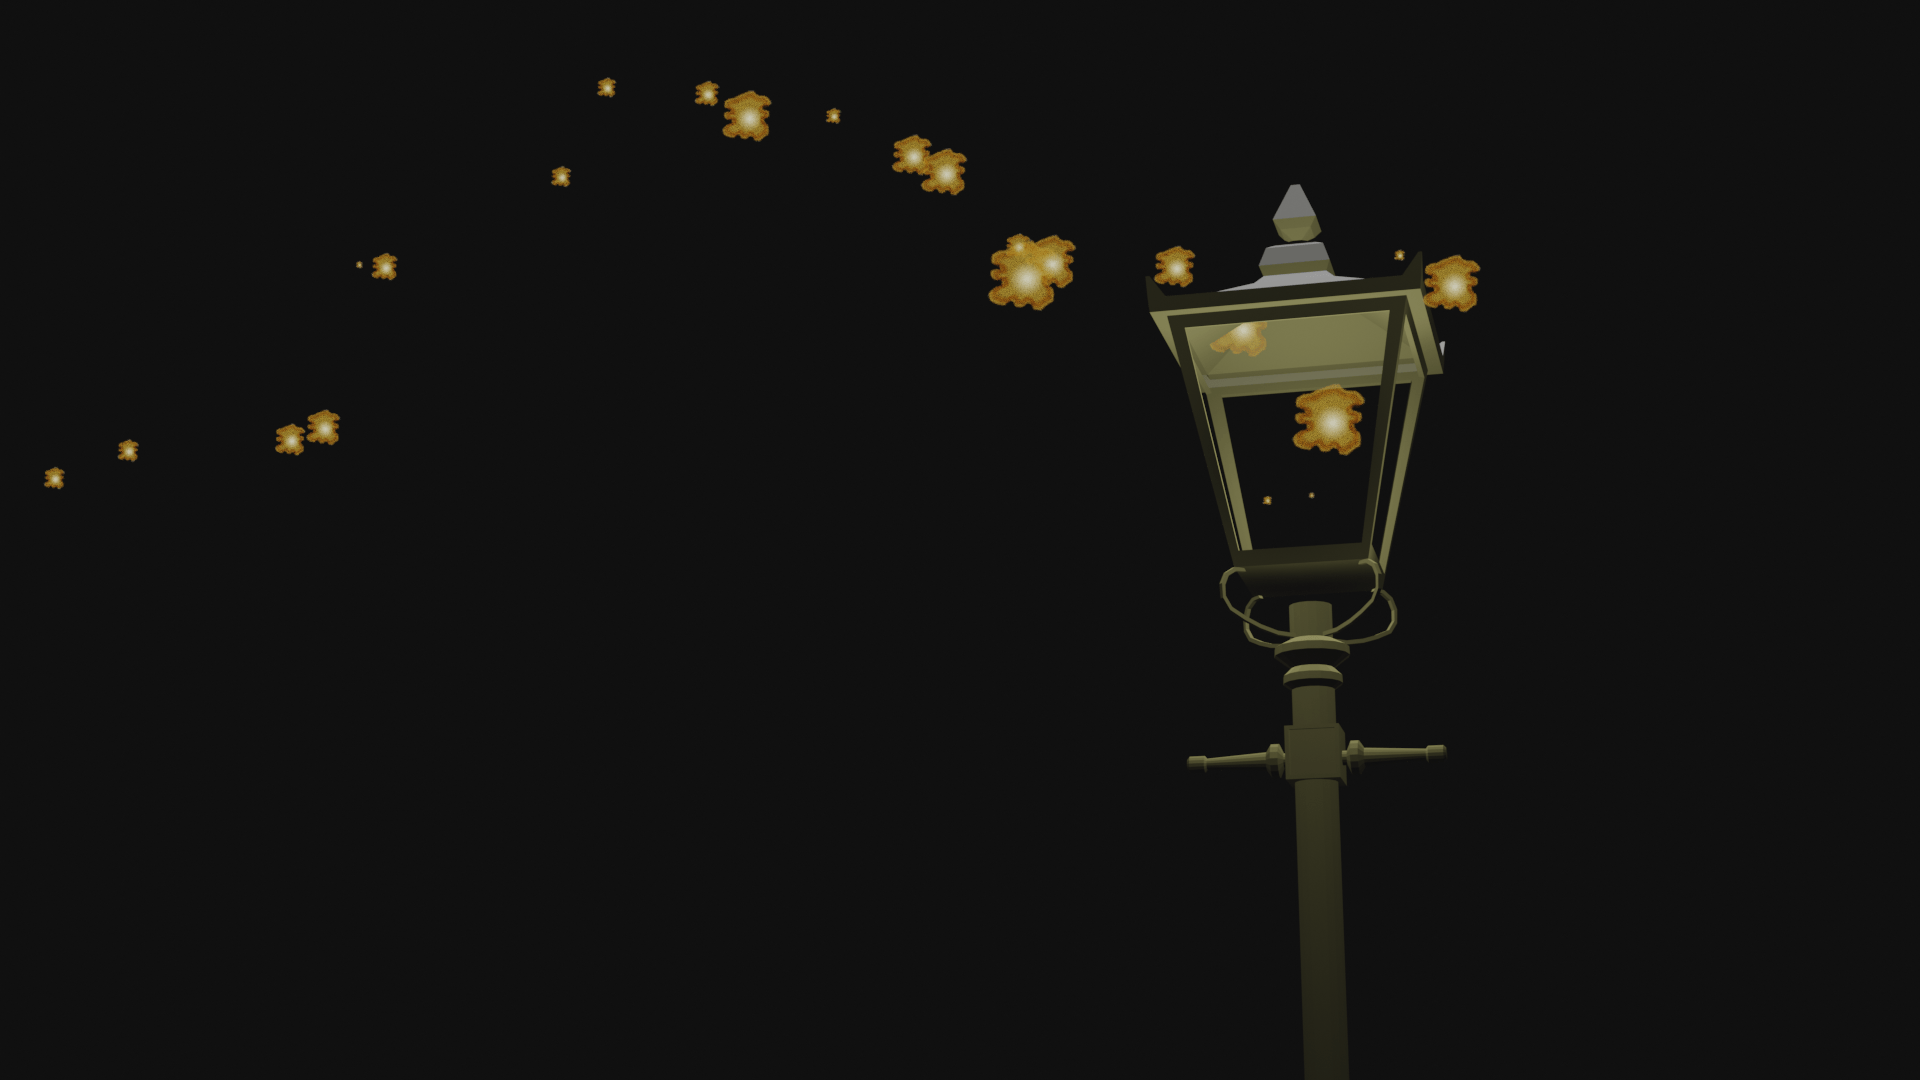
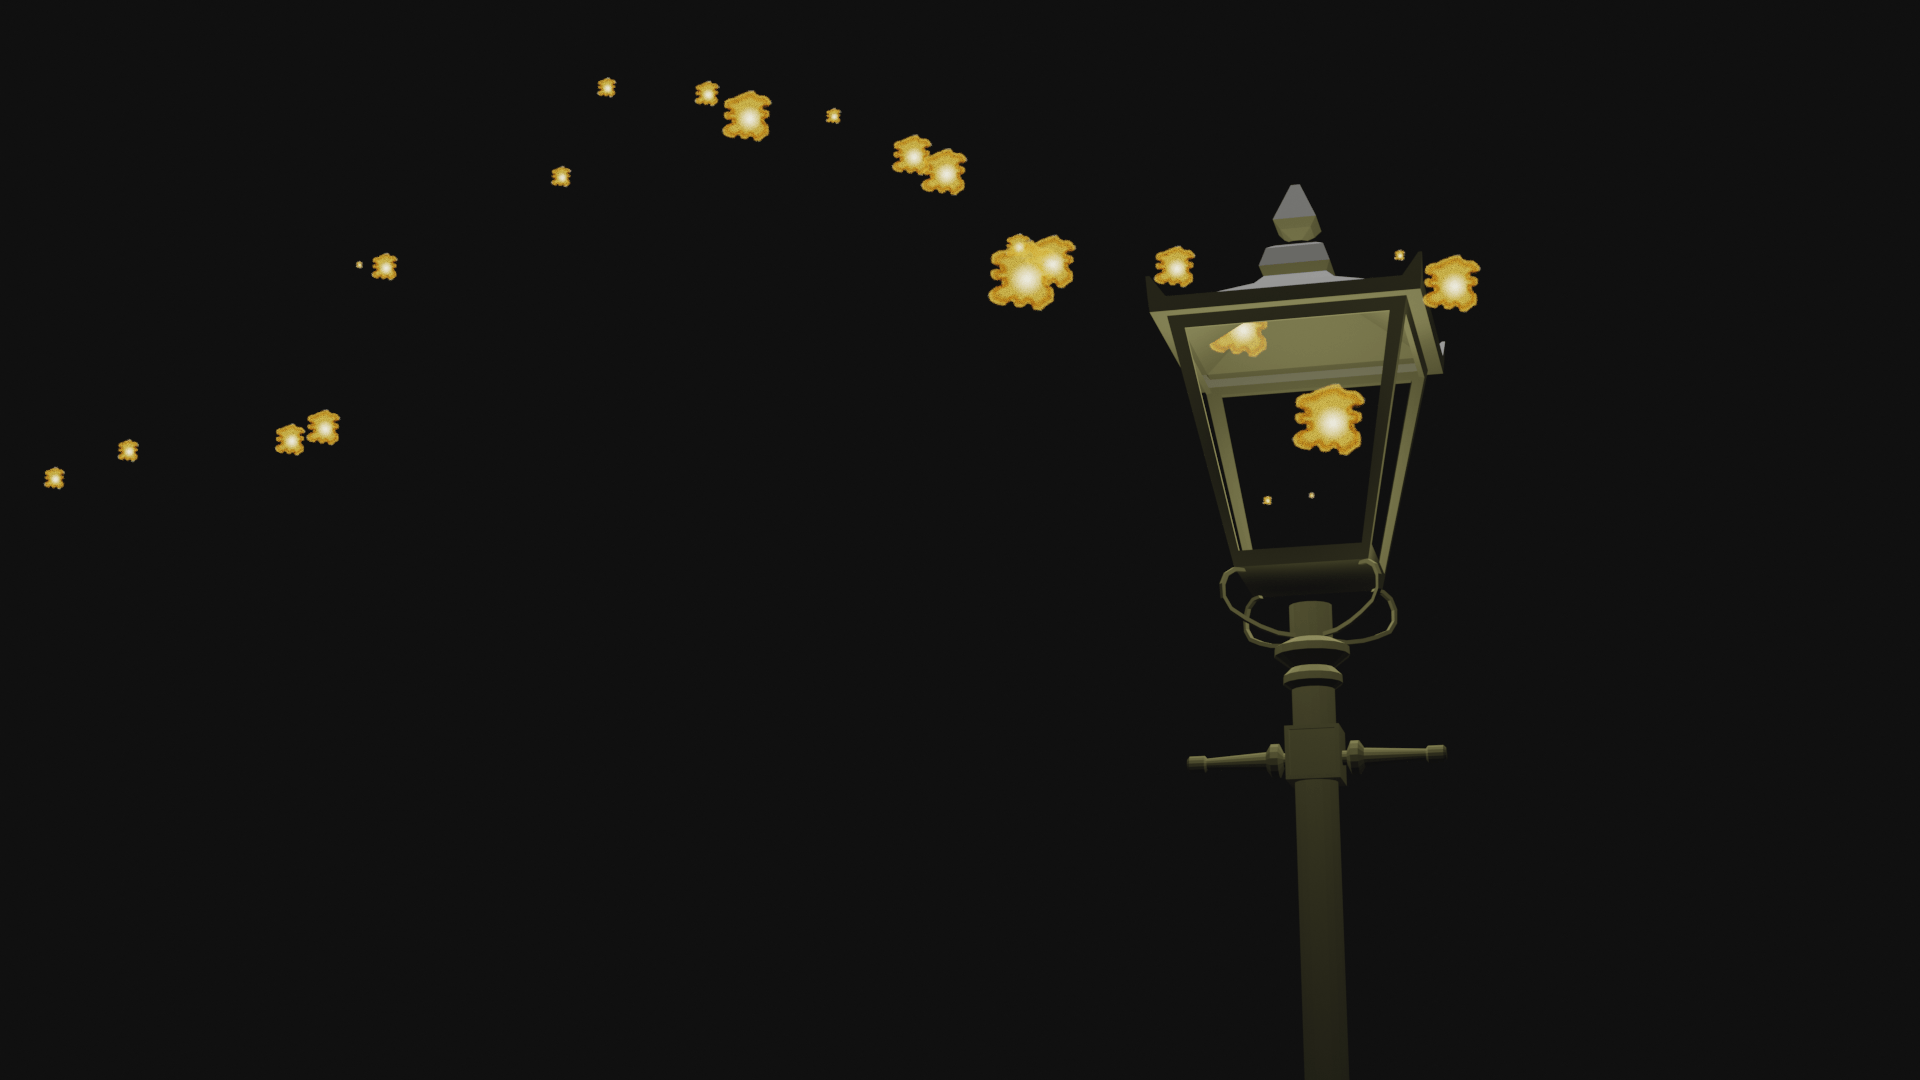
Now that I had my trees and lantern in the scene, I adjusted the scale of the particles to make them smaller and increased the amount of them. To add the different sprite types coming out of the same lantern I had to duplicate the emitter and change the sprite in the shader. After another talk with Henry, he suggested I make the particles start small and increase in size as they travel along the curve, so I followed this tutorial to do that. I then added a particle emitter to the other lanterns in the scene.

I did try to add a trail to the particles using compositing by following this tutorial however the effect was to as strong as I wished it to be.
I then tried to use this tutorial to make a plane follow the particles, but it looked weird. I think if I had more time I could have experimented more with this idea and figured out a way to make it work.
Sky
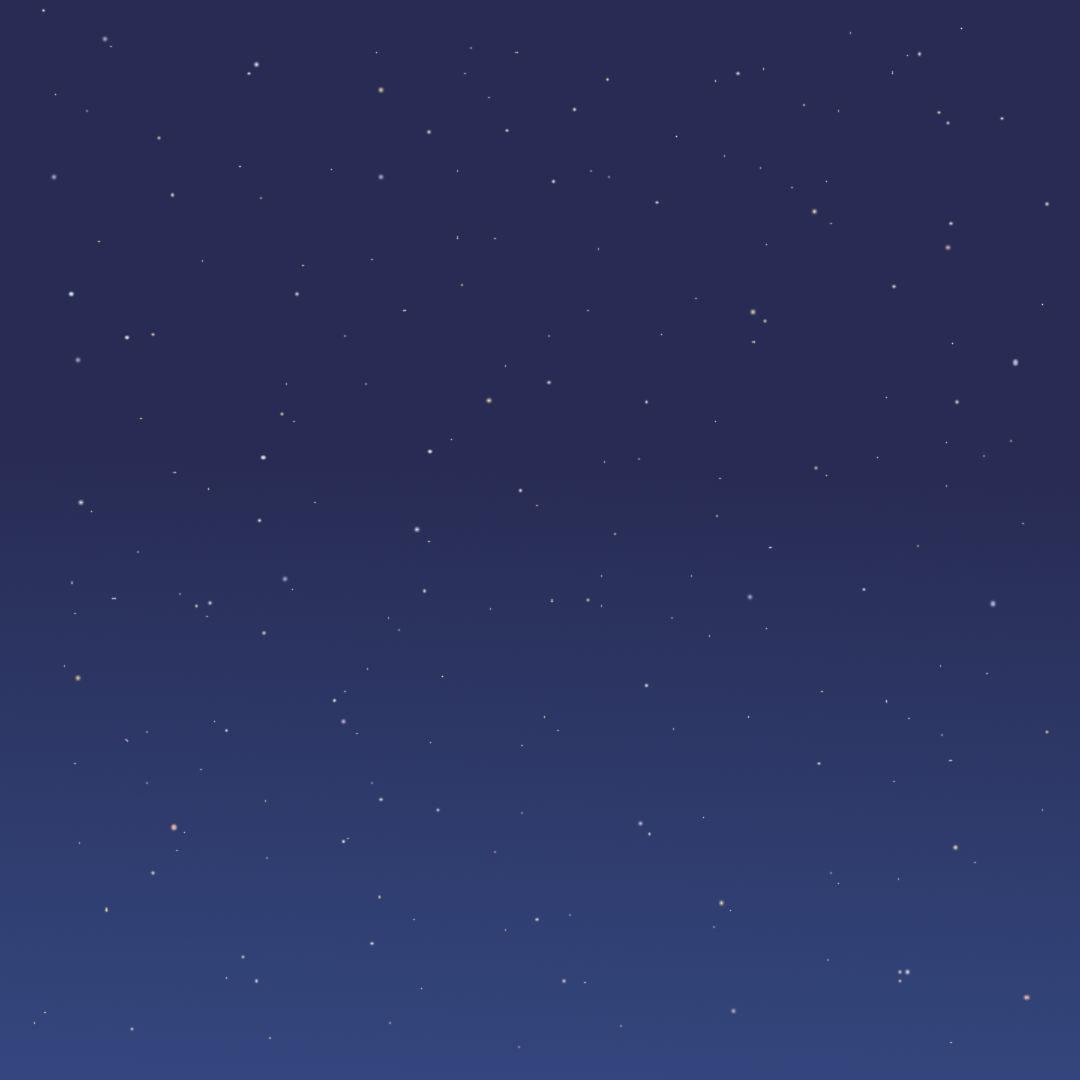
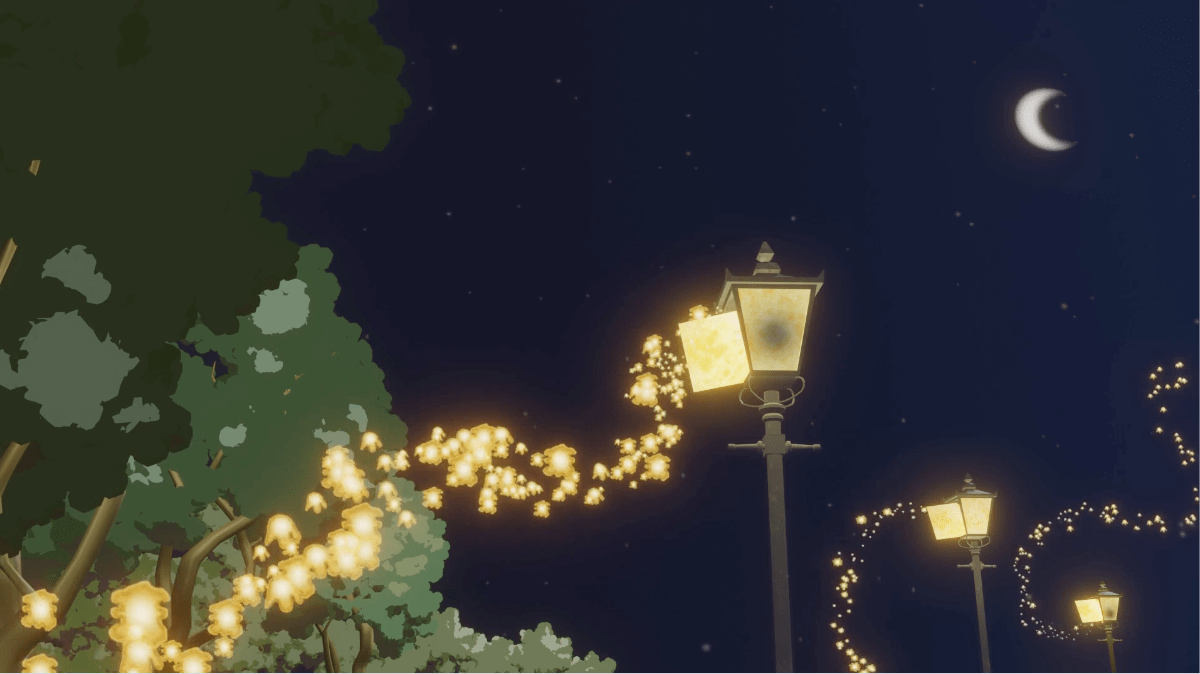
I drew the sky in Photoshop using the exact colours from the Codex page. I added a dark to light blue gradient to the sky and added small stars over the sky. I exported the moon on a separate transparent layer so it could be moved wherever it needed to be in the scene and added an emissive texture.

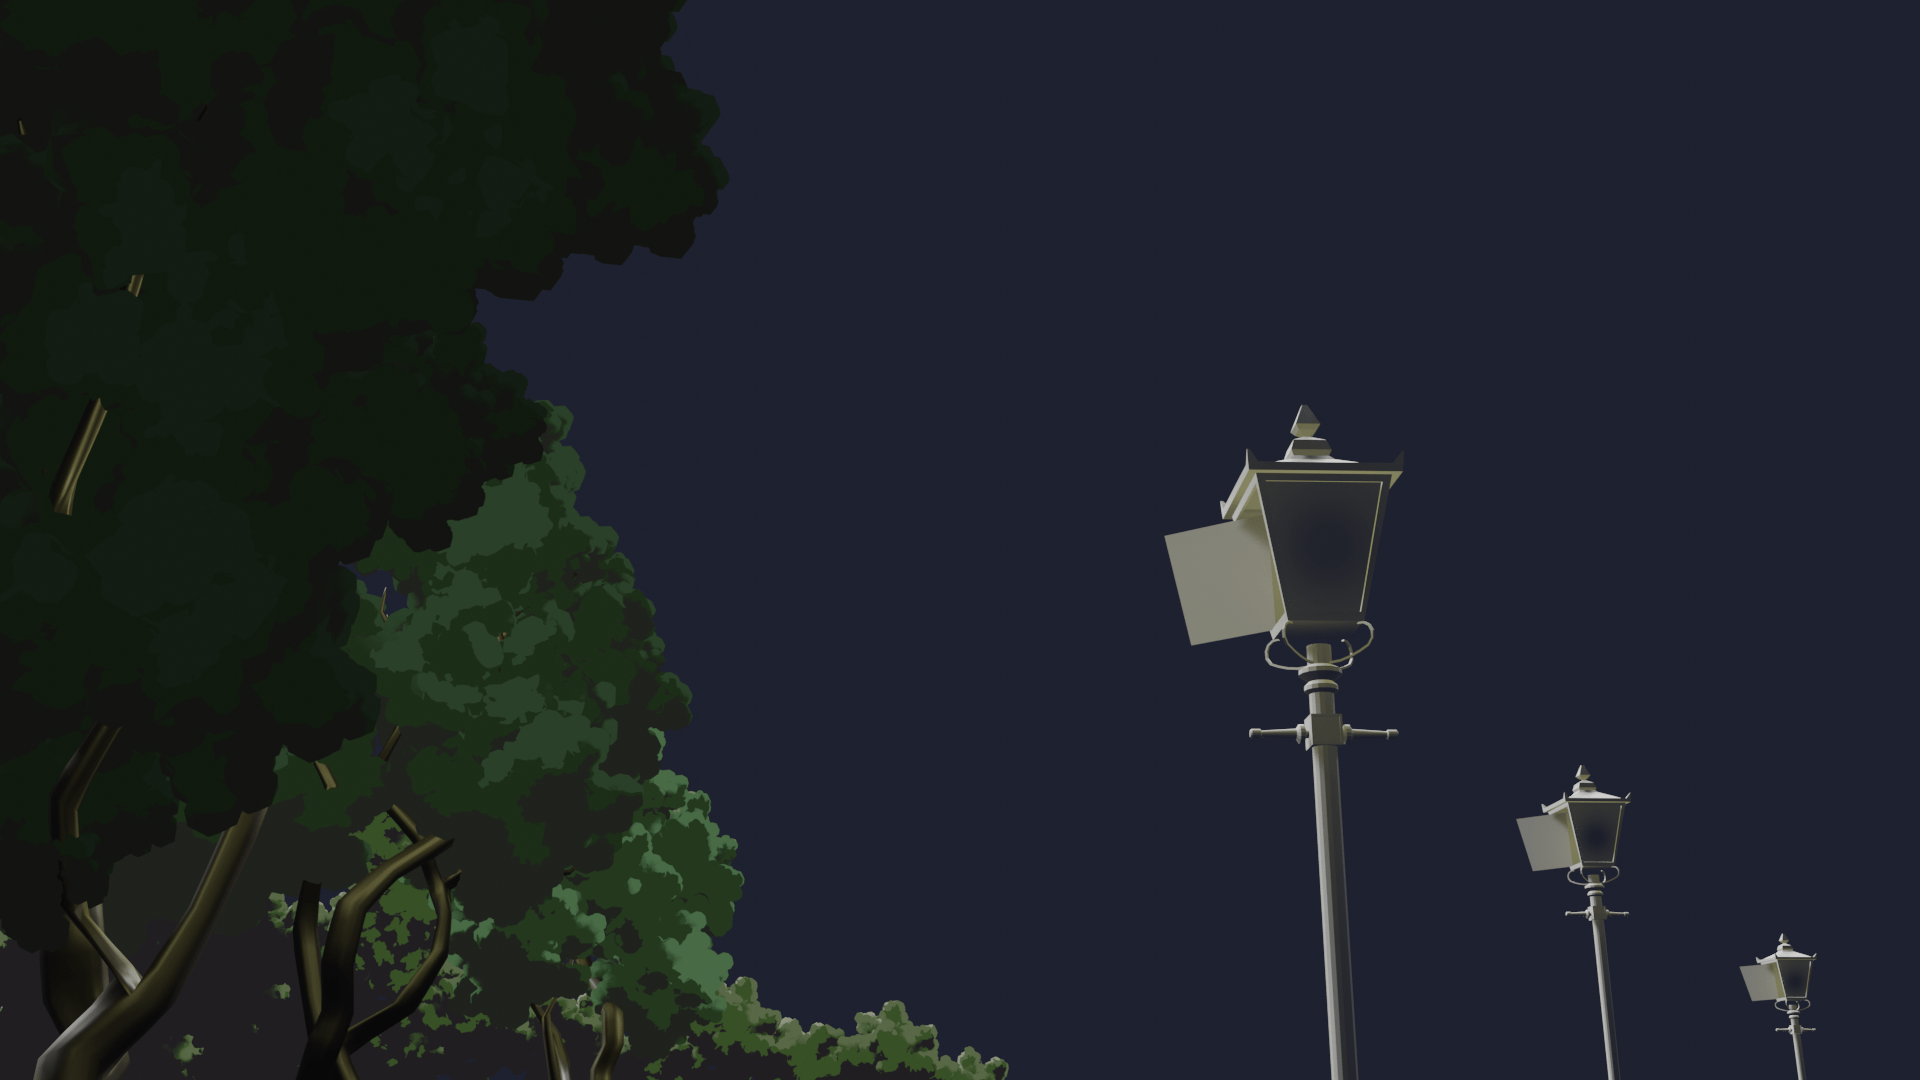
Scene Set Up
I added lights to the trees, so they had some nice edge lighting to the tops of them as well as adding a sun to the sky so the scene would be properly lit. As a final touch I animated the light in the lanterns turning on at different times so the viewers eye would be drawn to each of them in the scene. I also changed the camera to a 35mm focal length to better capture the whole scene.
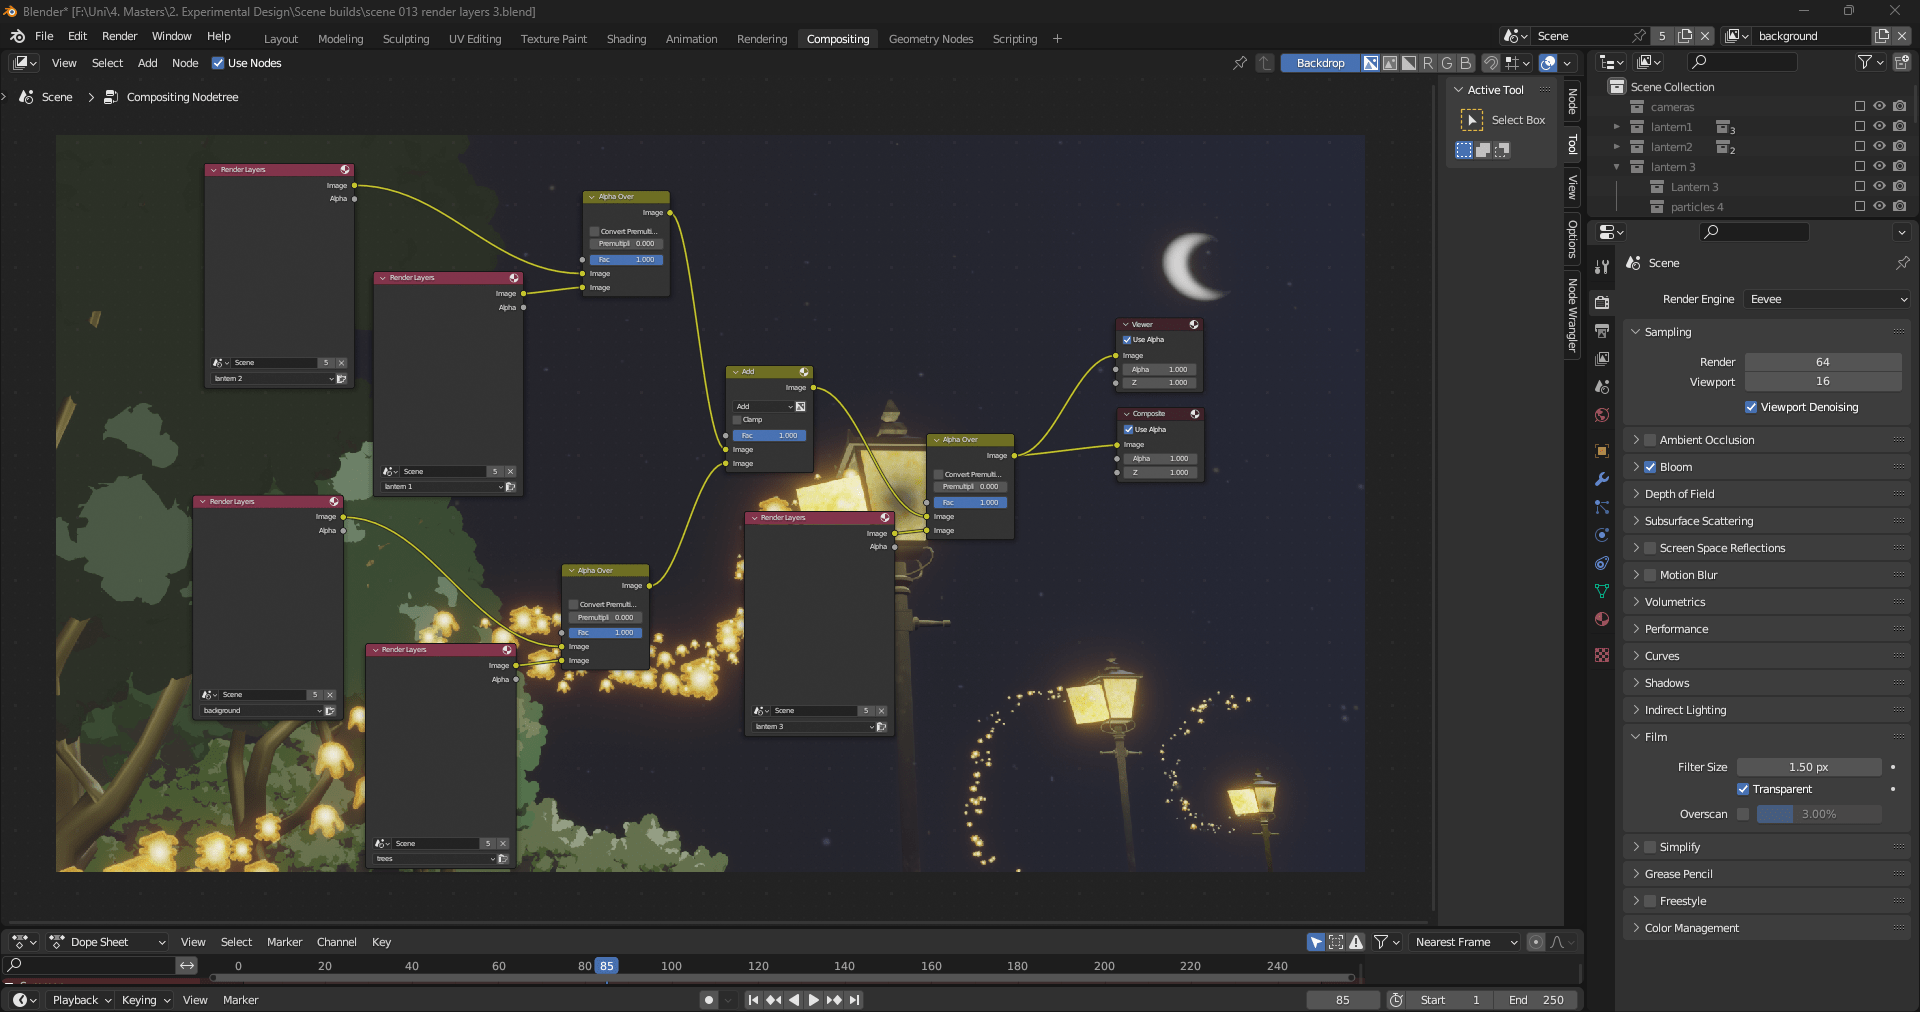
Render Layers
Finally, following this tutorial I rendered my animation in layers to make it more efficient as I was having render troubles in the past as the scene is quite large.
I created 5 different layers, individual ones for the lanterns, tree and sky.
Result
Overall, I am very happy with the outcome of this project, the particles look exactly how I wanted them. I am so happy I was able to learn an entirely new skill and execute it this well. If I was to do this project again with this new knowledge, I would have made the painterly ascetics I was going for more obvious in the texturing and if I had more time, I would have liked to add a particle trail behind the sprites so they would stand out more.