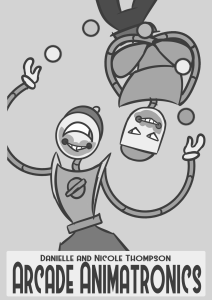
Business Card Designs
I started by researching business cards that were designed by animators and character designers as this is the field I would like to peruse in the future. When researching I looked for cards that I found eye catching and colourful. I love the look of both a small character logo and a fully illustrated business card as it shows off the artist’s work and helps them to stand out. I think both could work for my business card designs.

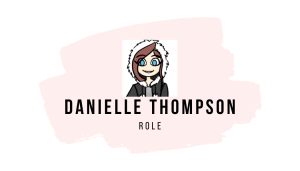
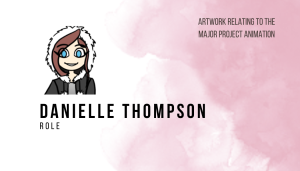
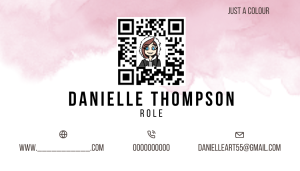
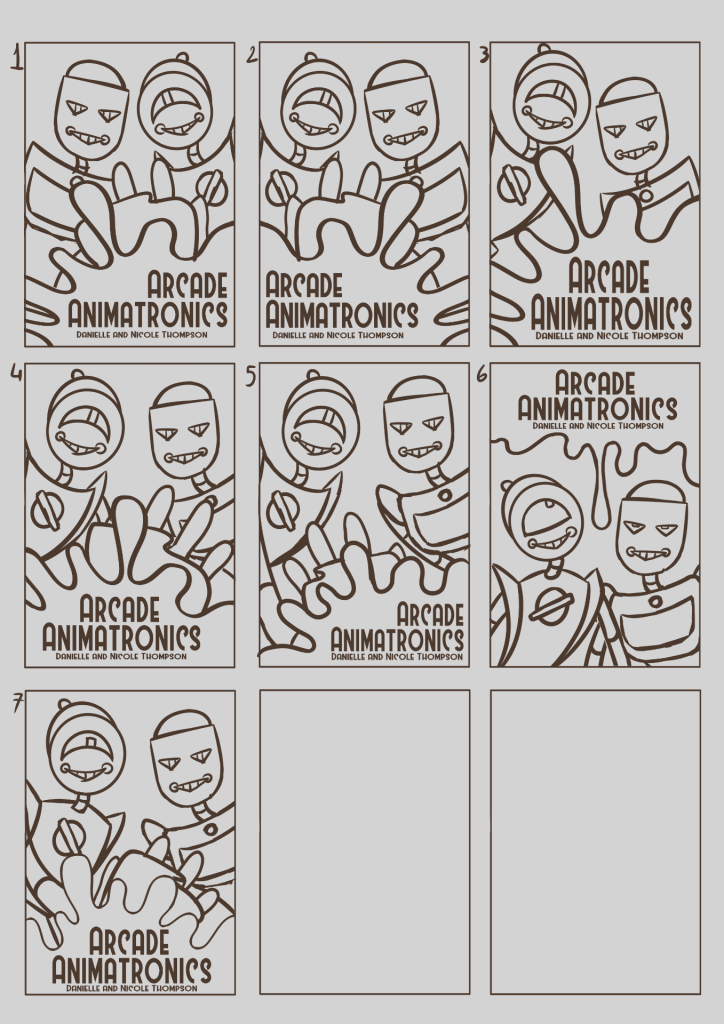
When designing my own business cards, I used Canva to block out my ideas, all of the images are place holders as I wanted to get the layout of my card right before worrying about colour or illustrations. I tried both vertical and horizontal designs to see which would look better but I am still undecided about which direction to go with, overall, I like the concept of design 2 and 4 the best however I am still not completely happy with them I will continue to tweak them till I am happier with the design. I like the idea of sketchy artwork fading into the top of my business card as it will show off some of the initial concepts of the characters. My business card will be themed around my major project so I plan to draw myself in the style of the animation, as a robot to use as my logo, I will also use pastel colours to match to the project. While designing my card I though about what information to add to the card as well as in what order. I wanted a qr code that would lead to a linktree which would have my social media, portfolio, website and contact details, qr codes make the most sense to me as it is easy to scan and quick for anyone to look through my work, adding all social media, website, portfolio and contact information to the card directly would crowd the design, overwhelm the viewer. The information I am putting on my card is; who I am, what I do, and how to contact me, this information is vital to have as a industry contact can pick up the card and immediately know who I am and if my role fits what they need.
Front Back


CV Designs
Like I did for my business cards I looked at CV’s designed by 2D animators and character designers. Aspects I like are the use of soft colours, they are bright and appealing to the eye. I also like the look of boxes framing the text, this helps the read ability of the text. Most of these CV’s have a column on the right containing their icon or logo, name, role and contact information. I like this feature as at a quick glance you know who they are and how to contact them, I will be adding this feature to my CV.

For my CV I plan on matching it to my business card as this will make a clear visual link between my work. This is my old CV, I dislike the amount of information on it as it looks cluttered and boring, the right column is too full and the choice of colours is not great. To improve the design I blocked out a new layout in Canva, I wanted to focus on the layout and amount of information on the page, I will also target the information more towards the role I wish to pursue.
Old CV Design
![]()
New CV Layouts


I like the new layouts better, I still need to experiment more but the changes do make the CV look less cluttered and although the colours are place holders I like the look of the more the softer pastels rather than the bold, bright colours of the old CV.
Career Direction
To advertise myself to potential employers I plan on creating a Facebook, Twitter and Instagram page, I will be making all three and trying to keep them up to date with current projects as it make me more accessible and easier to contact, there are also a lot of professionals that use social media to advertise themselves, so I will do the same. I will also setting up an ArtStation as it looks professional and is another way people can find and view my work. On Instagram I plan on making a Linktree which will which will connect all my platforms, this will then be turned into a qr code and added to my business card. Another great place for animators to be seen in on YouTube and YouTube shorts as you can add process videos of work as well as finished videos. Finally I will make a website with all my work and contact information. All of these platforms will allow me to be accessible to all future employers.
Posters
When gathering references for my poster I looked at films that had enemy to friends as this is the main theme of my project, most posters about enemy’s have two characters back to back or interacting in some way. The typeface on most of these references use bold, blocky and one colour, this helps the text to stand out from the characters and background.

I started blocking out the rough layouts by using rectangles to represent character and the title, this helped me to see the readability of the poster. Next, I added stick figures to represent the characters, this helped me better visualise how the poster would look with more details, overall I liked the designs of the last three, they look the most dynamic and fun.

Using my favourite block outs I drew the characters to look more like their final designs, the more bulked out designs helped be to see what I like about the designs and some issues. I added the colours that were used in the animation and then put a greyscale filter over them, the colours work in the animation however in the poster there is a lack of contrast, I plan on making tonal studies of the poster to help fix this issue. For the typeface I chose a thick font with some curves as it matches the rubberhose style of the animation while still being readable and clear.

I like the idea of this design as it is dynamic and shows what the main characters do in the animation but the design is too busy with the characters crossing is a weird way at the bottom and the title is too close to the top of the page. The layout overall looks weird, Lollipop is too close to the left and gumball takes up too much room.

The second design is more visually appealing as the characters are space out more and the poses look fun, they are also better centered taking up around the same amount of space however, the placement of the title is too low and the balls crossing in front of Lollipop blend in too much, also having one character be cut off by the border and the other being whole looks weird.


The third design is the best but still needs some work, I like the two characters being closer and interacting more, I also like the splatter as this illudes to what what happens in the animation without telling too much. I will make more thumbnail studies of this design to help finalise the layout.
Finally I made some more developed layout thumbnails for my favourite poster design, I experimented with the direction of the characters, the placement of the splatter and the alignment of the text. Overall I like the look of the sixth and seventh design, the drip being at the top looks fun however I do prefer the characters interacting with the splatter as it looks more dynamic and add more visual interest.
Design Deck
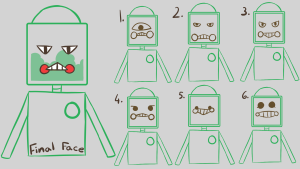
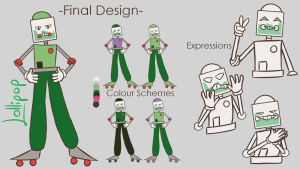
For my design deck I want to add in the character design process for Lollipop, from the rough sketches to the final design, I find it interesting to see how a character started and how they evolved to their finished design. This will also help to show my character designing skills as I would like to pursue a career in this field. I will also add some rendered frames from the final animation as this will show how the characters turned out in the animation.
Concept Art


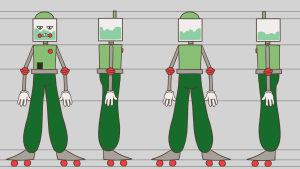


Animation Renders


The animation renders are just a place holder as I will get better renders closer to the end of the project.
Eoys Layout Ideas
At the end of year show I am thinking of having the table decorated like a birthday party as the whole animation happens at a kids party in an arcade. I would like to put bunting banners across the top of the board, a colourful table cloth, a small plastic gumball machine and a fake cake based on the bigger cake at the end of the animation. I would also like to print out the polaroid seen in the animation and have them pinned to the board. Layout wise I would like to have business cards near the front of the table for easy grabbing as well as some buttons and stickers for guests to grab, the cake over to one side and the two computer monitors will be in the middle back of the table. The board will have printed polaroid’s as well as rendered frames from the animation. I want the table to look bright and fun to draw people over.

Rough Table and Board Layout

This drawing is not based on any measurements, I estimated the sizes of the table compared to the board and all the props. Even without the real measurements I wanted to see the layout on paper. There will also be more clutter on the table such as confetti or more polaroid’s.
Conclusion
My next steps for this module is to finalise my poster designs, I still need to make some tonal study and ask for feedback on my new layouts, I also have to work more on my business card designs as well as my CV, I like where my business cards are going but I still need to tweak some of the layouts and start to draw some assets. I will be printing out my business cards on some paper to see how they look in real life, this will help fix any proportions that look weird. Finally I will start to set up all the social media accounts mentioned above and start to add my work to them.