Self-Assessment
- Author By mcveigh_beckett-m
- Publication date 22/02/2023
- Categories: AAD012, Workshop 02
- No Comments on Self-Assessment
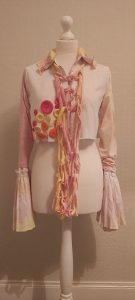


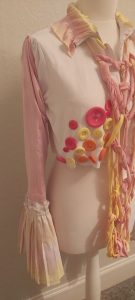
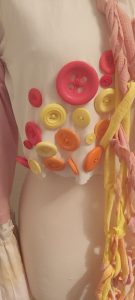


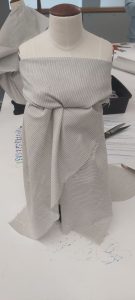
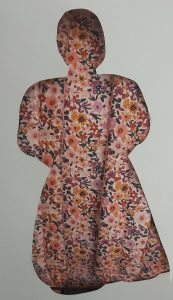
For my ten day embellishment, collar and cuffs challenge I wanted to deconstruct the shirt including two other t-shirts to create a reconstruction on the shirt that I wanted to embellish. to do this I tie-dye elements a t-shirt and used it for my collar using the coloured dyes I created for the big knit challenge pink, orange and yellow, I also dyed the pleated element from the shirt that I reconstructed on and Dyed it the same way as the collar. I embellished the bottom of the shirt with buttons to match the colours I chose for 1950’s, citrus as I wanted them to symbolise lemons, oranges and grapefruits. I wanted to add a few extra textile techniques to my shirt by sewing a running, blanket and tack stich using embroidery threads to balance out the shirt. I then used the arm knit technique I learned from the big knit workshop to create a laddered necklace effect to add extra texture to the shirt. Finally I tack stitched the sleaves from the big knit t-shirt that I dyed to the sleaves to bring it all together as one final embellishment, collar and cuffs challenge shirt. Overall I really enjoyed deconstructing, constructing and embellishing my shirt to tie in with 1950’s citrus theme. I feel that I was able to show techniques that I learnt from the ten days of the fashion/textiles course and I’m happy with the overall outcome of the embellishment, collar and cuffs challenge.
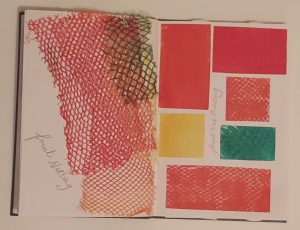
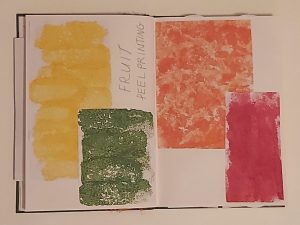
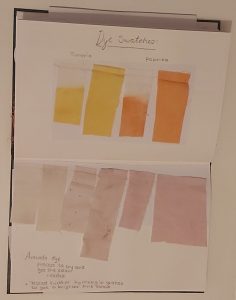
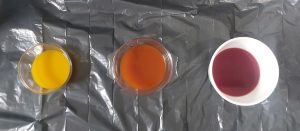
Creating coloured dyes out of spieces, juice, fruit and veg:

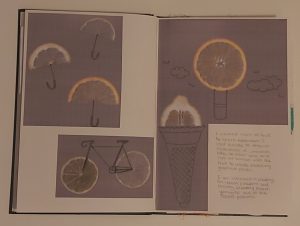
Final t-shit Dyed for big knit workshop:
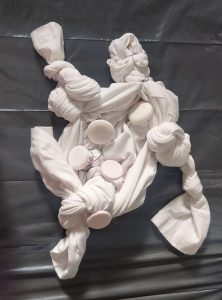
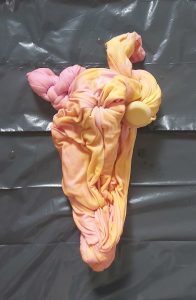
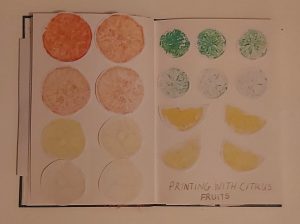
Shibory and tie-dye techniques:


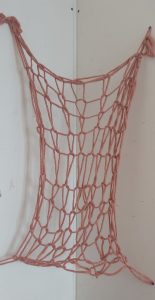
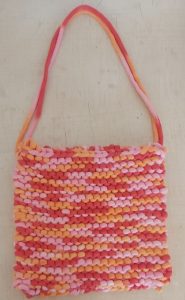
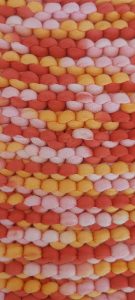
Knit workshop final examples:


I had to create and experiment with fruit, veg and spice or anything around the house that would create a dye for my t-shirt. For the dyes I wanted a reddish/pink, orange, yellow, and green so for the orange and yellow I used Turmeric and Paprika spices 3tps each to get a good colour. For the reddish/pink I mixed avocado, raspberries, grapes and blackcurrant juice together as the avocado on its own wasn’t adding colour so I mixed it to get the colour I wanted. I then decided to do spinach to create green dye however it was the same as the avocado and decided to remove it altogether and just focused on the three colours I had. I then experimented with different fabrics to try out shibory and tie dye with the dyes I created to test before dying my t-shirt. After experimenting I twisted and knotted parts of my t-shirt to tie dye experiment to see what patterns would cone out and then add shibory techniques adding the three dyes created however when drying the t-shirt the colours slightly lightened I had so much fun creating mess and experimenting with a mixture of samples using techniques learned in semester 1.
For the big knit we had to cut our t-shirt up to turn it into a ball of fabric like a wool ball ready to knit with. After we had cut our t-shirt we learned how to knit with our arms however, after I found it easy to cast on and knit I ended up dropping a few stitches near the end trying to cast off, which After trying to fix it left a few bigger gaps with in the knitted piece but it was enjoyable to knit with my arms.
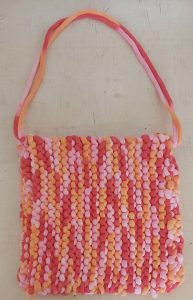
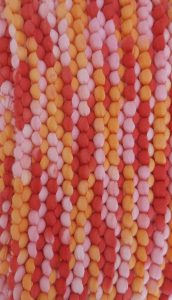
For the rest of the day I experimented further with knitting another piece with my arms with chunkier pink wool and then decided ro start knitting with knitting needles using a red, pink orange and yellow mixed wool making 2 separate knitted pieces from the same wool to create a bag by tack stitching around to fix both sides together. I then enjoyed stitching so much I wanted to do the same knit stitch again but experiment with different types of wool to show that the same knitting technique can change when using different types of wool. Overall I found the big knit workshop as it was nice to try different techniques on how to knit and found that knitting is very therapeutic and relaxing to do.
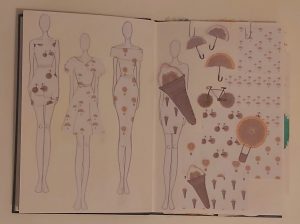
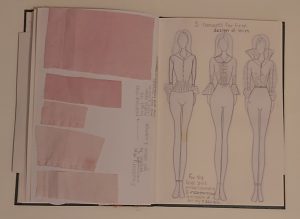
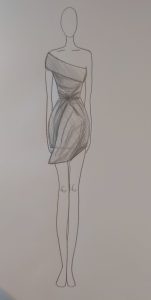
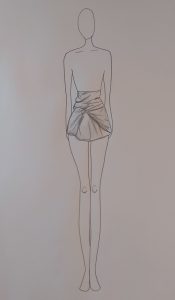
Fabric Draping sketches:


Overlock and seam:
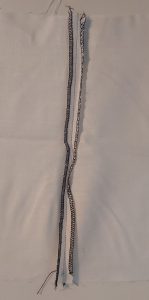

After we created our fabric draping designs we had to select a few of our favourites, I chose to sketch and shade a top, a skirt and two dresses from the fabric draping workshop. We then had another workshop where we got to use sewing machines to create an overlock and seam, we had to cut fabric in half to then overlock onto. To do the overlock we used the overlocking sewing machine, we had to over lock both pieces and then pin together creating a seam down the centre to be ready to be sewen on an original sewing machine taking each pin out at a time so that the needle didn’t catch them. After we had sewn the seam we had to steam iron onto the overlock and seam to press it down straight. I sewed a bit tighter than supposed to whilst trying to keep the over locks together meaning the overall seam at the end looked a bit off however I feel that for my first go at doing an overlock and seam it isn’t to bad.


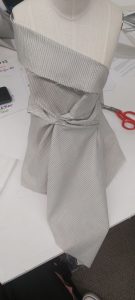
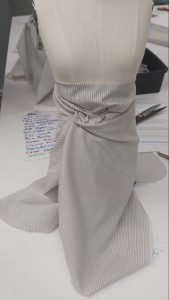
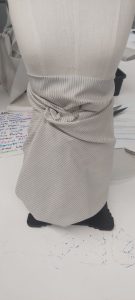
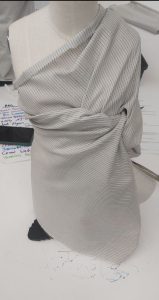

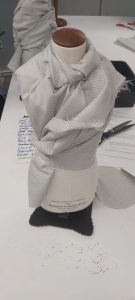

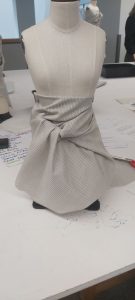
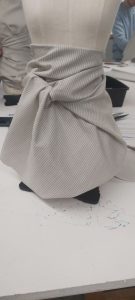

On day 5 of fashion textiles workshop we got to do fabric draping, constructing different garments out of one piece of fabric to do this we had to fold the fabric in half and cut a semi circle, creating one big circle. We then folded the fabric inwards to create a triangular cone shape, that we them pinned together. We then opened up the fabric that then allowed us to Easily create our garments. I’m really happy with how all my garments came out and have always enjoyed fabric manipulation and fabric draping since A-level as you get to see how one piece of fabric can manipulate into many interesting results.
Silhouette sketch and cut-out:


Using silhouette to capture patterns and textures around uni:


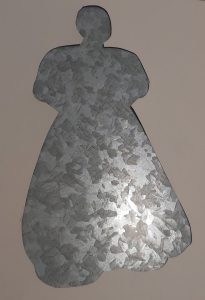

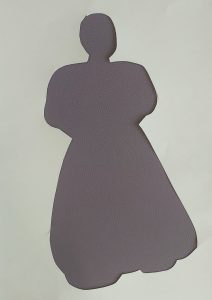

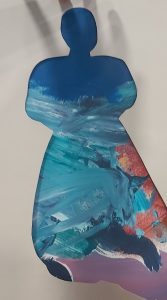
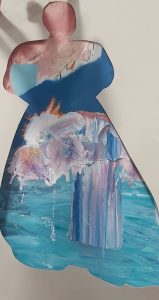

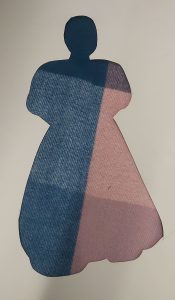
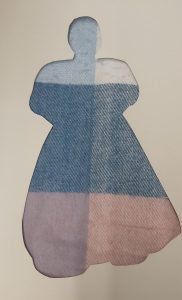
For Day 5 of fashion textiles we got to have a tour of the Fashion Textiles and got to do a few workshops. The first workshop we got to do was finding patterns and textures around uni to depict the outline of the silhouette. To do this we had to choose from a 2nd hand image and then draw a simple version of the picture, then cut out the sketch. We then as a group went round trying to find different patterns and textures around uni. I found the first workshop fun trying to find patterns and textures around uni that stood out to me the most creating interesting compositions.

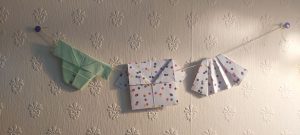
On Day 4 of fashion textiles we got to learn how to make small origami dresses. For the first two dresses I used origami paper that was the colours I chose for citrus and then made the other three dresses from my own repeat patterns, from the previous post and a tie-dye, shibory effect that I made and then scanned. I then went further to create two shirts and a skirt. Overall I found origami fun but slightly tedious as it was hard to manipulate the paper to get some folds that were needed and some of the origami patterns were hard to follow.
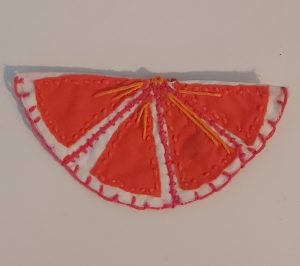


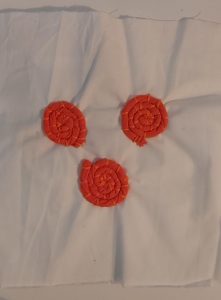


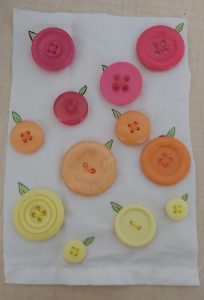
On day 4 of Fashion Textiles we learned how to couch, blanket stitch and Applique/Reverse Applique etc. I tried to create a mixture of stitching techniques including embroidery, felting and running stitch. I then wanted to experiment with stitching buttons to a piece of fabric to try and create button illustrations by drawing on leaves to make it look like lemons, oranges and grapefruits. I feel that I done well on experimenting and creating pieces trying to stitch with both couch and blanket stitch and Applique/Reverse Applique, adding extra examples to show more techniques that I learned at home.