Development of Final Piece

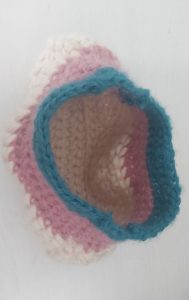
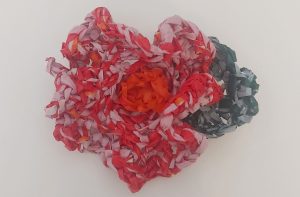
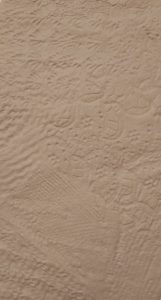
Base of Final Piece:


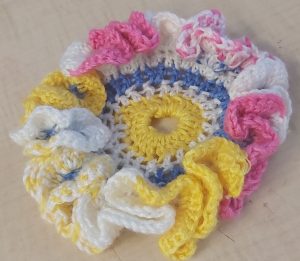
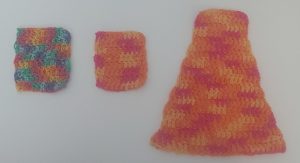
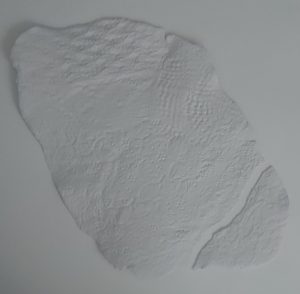
Start of Crocheted Water:


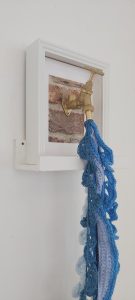
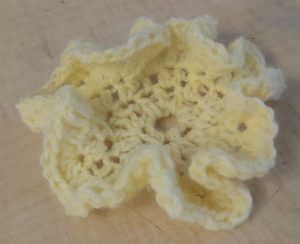
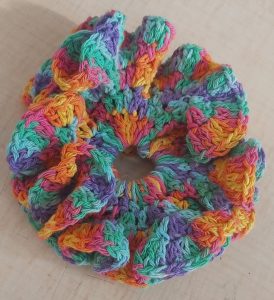
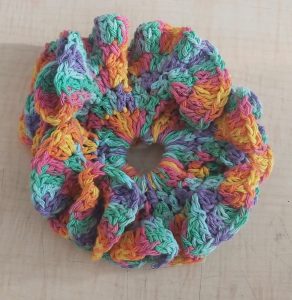
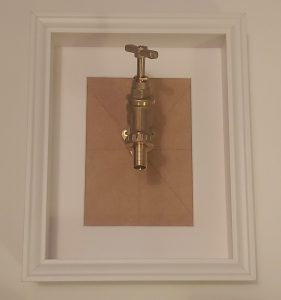
Final Personal Project Complete with Daisy’s:

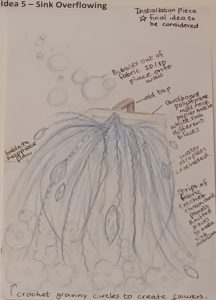
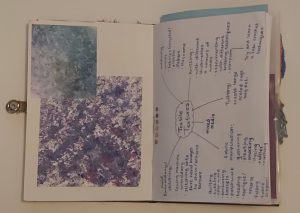
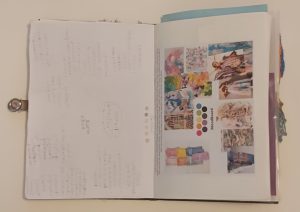
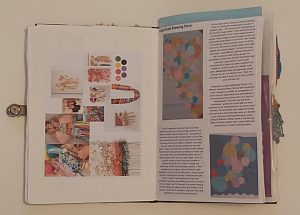
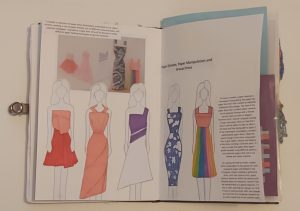
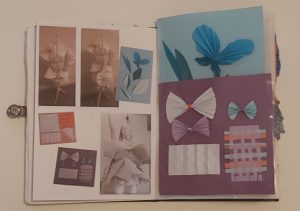
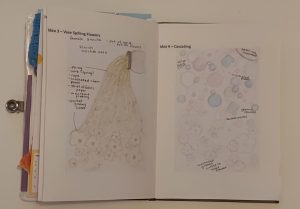
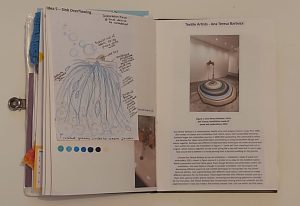
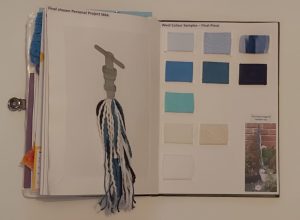
For my final personal project, I considered various ideas. I wanted to create something that was tactile, tangible and textured. I had considered creating a tapestry, with sensory elements by incorporating all the techniques I have learned through my time in fashion and textiles however, I felt this would be hard to achieve in a short period of time. For the large-scale drawing experiment, I enjoyed freely drawing circles of different sizes and colours, from this I thought about incorporating circular and spherical shapes into my final project by allowing circular elements to cascade from a metal ring suspended from the ceiling, I began to focus on crocheted circles, accidentally discovering a way to create flowers by increasing my stitches each time. The word cascade brought to mind the idea of water cascading down a waterfall, which led to the idea for my final personal project piece. In considering my final personal project, I thought of the elements of the module that I have enjoyed most. I have particularly enjoyed crochet and teaching myself new techniques and stitches. I like how the pieces suddenly build to produce delicate pieces. I have learned how to use various materials to crochet, using various types of wool, strips of plastic shopping bags and using my arms to crochet, creating a large chunky wool granny circle. I have enjoyed building my knowledge through research of textile designers, sustainable fashion and about the impacts of fast fashion on our environment and society. I have found it intriguing to discover artists and designers who have a genuine commitment to creating a better future for our planet, not only by choosing sustainable materials through recycling, upcycling and reducing waste but also by using their art and designs as a platform to build awareness to the impacts of fast fashion – excessive consumption and waste. I was intrigued to learn how much water is used to make one pair of jeans, one t-shirt and one pair of socks. I discovered that the water used to create a simple day-to-day outfit was 13300 litres, I compared this to giving a 500ml bottle of water to nearly every student across all four campuses of Ulster University. I feel the idea of water consumption for fashion works well with my final project piece. I considered how I could produce a piece that would allow my crochet to cascade like water, initially thinking I could create a papier mâché sink with tap, overflowing with water made from strips of recycled fabrics. I considered creating a vase which had fallen over with water and flowers spilling from it. I decided to use a tap on its own, fixing it to a frame, with the focus the water overflowing or freely flowing from a tap to represent our wasteful habits regarding water. The water crisis is a global concern, exacerbated by excessive use in agriculture and manufacturing, I want to use my final personal piece as a way to highlight the excessive water usage, to draw awareness to how we as individuals should be mindful of our own consumption, by collectively reducing our consumption and appreciating every droplet and how privileged we are in our country to have fresh, clean, flowing water we can start to improve on the impact that the global water crisis is having on our planet. Ikea have joined the fight to combat excessive use of water by suggesting some tips, their article highlights the quantities of water that could be saved by making small changes. By switching the tap off while brushing our teeth, we can save just under 50 litres of water per day per person. It is said that running a regular tap for only sixty seconds allows up to 12 litres of water to go down the drain. (IKEA) It is recommended that we brush our teeth for two minutes twice a day that would be 48 litres of water wasted. We need to be conscious of our actions and mindful of how precious water is to human and plant life, it is a finite resource that must be cherished and saved at all costs. I decided to add a few crocheted daisies and roses to my final piece to represent nature and the plant life that also relies on water for survival. I took first hand images of water flowing from an outdoor tap to study how the water cascades, pours, and flows from the tap. To create my final personal piece, I created lengths of swirling crochet in different hues of blue to give depth. I created thick and thin strands using chain stitch. I fixed a brass tap to a piece of MDF and bought a deep frame to display it. I had to be conscious of the weight of the tap within the frame so that it would be easy to secure. I got a sample piece of wallpaper from a hardware store in a realistic brick style, to place behind the tap for a more authentic look. I initially used bright turquoise coloured wool, adding an aqua coloured raffia and hand knitted strips, however I felt that these did not compliment the piece therefore choosing to remove them. I wanted to create a look that plays on the word flow and cascade, I feel that I have achieved this with this piece. I found it challenging to decide on the length that each strand should be without it being on the wall where I want to place it, I had to decide if the water should puddle onto a surface or flow in a steady stream to the ground. I felt that a steady flow cascading from the tap to reach the ground was enough. I chose to display my piece on a shelf which allows the water to flow out and over the edge. Once the piece was on the shelf against the white wall, I was able to see that the overall piece needed more blue crocheted strands for balance. I wanted to bulk out the ends and give a feeling that the water was splashing up from the ground therefore, I decided to add a few extra crocheted strands and frills using cream and white wool. I incorporated some crocheted daisies to reflect nature and growth and the need for water within our eco system to feed plant life. Overall, I am pleased with my final piece, I love how the word cascade broadened my thinking which led to acknowledging the current global water crisis and to really consider how water is excessively used. I enjoyed trying to create the sense of flow in this piece. On reflection, if I had more time, I would have liked to learn more crochet techniques and stitches to create different textures however, I feel what I have produced has been successful.

IKEA, 2019. Available on: 17 ways to reduce water consumption (ikea.com) [Accessed on: 9th May 2023]


Final Ideas For A Final Piece


For my first initial idea for my final personal project I was considering a tapestry that told a story involving different mixed media textiles pieces to create a picture however, considering how much time I had to complete my final personal project I felt it was too complex so I furthered my ideas from a hot air balloon made out of fabric mache, suspended with crochet and kitted elements to a vase overflowing and spilling over flowers, a circular ring suspended in the corner of my space with crochet and knitted elements. After drawing these ideas I thought about what creates texture in real life and thought of how water flows so I draw an idea that would have a mix of crochet and knitted pieces with a mix of second hand and dyed fabrics to create the water however, when thinking about adding flowers I realised it didn’t really go together with my sink I idea, this then brought me to my final idea of an outdoor tap, bringing the outside in but still creating a mix of crochet and knitted pieces with a mix of second hand and dyed fabrics to create the water and adding a mix of crocheted flowers such as Daisy’s, Roses and my granny circle flowers using different colours and textures of wools.

Bag Challenge

First Part of Creating the Bag:


Creating and Experimenting with Handles:


Final Bag Design:

For the Big Bag Challenge I wanted to take my skills of crochet and try and create a bag. To create the bag I created five panels a front, a back, two sides and the bottom of the bag using cream, pink and green wool. I wanted to keep the bag simple using minimalistic colours to tie it all together. To make the handles I used clear piping and threaded through green wool to each end of the piping to make it circular and taped it together, I then Crocheted around the clear piping with the green wool that I used within the top of each of the panels. Overall I really loved creating each of the panels and seeing how it all came together as a final product, I also enjoyed being able to see how my skills have grown from only learning how to crochet in week 4 and now being able to create and adapt my skills further to create this bag.

Big Crochet Challenge – Learning How to Crochet and Creating Samples

Crochet Samples (Granny Circles, Granny Squares and Own Pattern):

Crocheted Garment (Bralette):

Crocheting with Recycled Plastic Shopping Bags:


Crocheted Daisy’s and Roses:

To create the crochet pieces, I learnt how to make a granny circle however, when increasing and decreasing the stitches I stumbled into a happy accident as when I was continuing to make the granny circles the ends ended up rushing and layer making it look like flowers. I feel the granny circles reflect my large scale, circular bubble piece but with more elegant and refined approach creating more three dimensional, sculptural pieces. I would like to consider making a few more of my granny circle flowers and combine them within my personal project. To experiment further I wanted to do a large scaled crochet piece (large granny circle crochet) as it was a similar process to the arm knitting that we got to try in within the first 2 weeks of Fashion Textiles. I found creating the large granny circle crochet quite tricky as it was a lot harder to find what chain you had to go in and definitely made a few mistakes along the way but when looking at the final piece I was pleased about how it turned out as it was my first time doing a crochet arm knit instead of the original arm knit that I knew how to do .

Next, I wanted to try and experiment with a mix of crochet stitches by creating granny squares, which also give me the idea to create a mix of different types of Daisy’s within my final personal project as the centre of the granny squares that I was making had a Daisy in the middle of them. To create the granny squares I watched a tutorial on YouTube however, I realised that I made a few mistakes in the first one so I attempted to again continuing the same process but had a a few mistakes in it to but I feel that I am able to show that testing a new crochet pattern can be difficult for a first time crocheter and that I can also show that you don’t always get if right the first time and that it takes practice however, even though my granny squares aren’t perfect they still look unique. For my next crochet samples, I started experimenting with double crochet stitches and then realised that I was creating my own crochet pattern within my small square samples so I decided to continue with my own pattern for a bigger crochet piece and started experimenting with increasing and decreasing stitches. I really enjoyed being able to adapt a double crochet stitch that then developed into my own pattern and the wool colours that I chose for these experimental crochet pieces.

I wanted to take my crochet skills that I had learnt within Fashion Textiles and try and create a garment. To create the garment (Bralette) I watched a YouTube tutorial on how to create it step by step. I chose a jade green wool that was sturdy and breathable whilst being fashionable. I found it difficult to work out what length I needed to make the straps as I wanted to make sure it was secure and wouldn’t break off as the Bralette is quite delicate. I feel that overall, that the crochet stitch pattern looks like flowers liked together if you look closer and that I have done well at being able to construct a garment together for the first time using my crochet skills that I have learnt throughout the 10 weeks of Fashion Textiles.

From creating wool out of an old t-shirt in the first 2 weeks of Fashion Textiles I wanted to try and continue the reuse and recycling of an item that we use daily so I wanted to use a mix of plastic shopping bags such as a SuperValu and TK Max bag and crochet a flower to show another way on how you can recycle plastic in a unique and fun way. I really like how this piece came out and shows that anything can be used to crochet if you put your mind to it.

I wanted to take the flower idea from creating the granny circles (happy accident) and the reuse of a plastic bag to create a crochet flower and teach myself how to make Daisy’s and roses by watching YouTube tutorials, experimenting with different wools and sizes. I really liked being able to learn another crochet technique that I can maybe replicate within my final personal project.

Overall, I feel that crochet has been a big part of my work within the 10 weeks and would like to consider using crochet elements within my final personal project using the skills and crochet stitches that I have experimented with.


More Experiments in Main Sketch book, Fabric and stitching Experimentations

Final Sketch book:


Within my main sketch book, I wanted to be able to show my ability and understanding of development and experimentation of my work, to then get me to my final piece, showing forms of mark making, knitted and crocheted samples to photographs explaining my thought process and how they could potentially work hand in hand with my final ideas, to then produce a final outcome from looking and experimenting with different textures through using, paint and wool.

Fabric Dying:

I wanted to experiment with dying my own fabrics with a mix of coloured inks that link to my colour palette such as Pink, Orange, Yellow, Green, Blue and Purple. I used elastic bands for a few and knotted some of the fabrics together to try and create a water ripple effect out using tie-dye techniques. I found the tie dying fun as when I was placing the coloured inks it was interesting to see what it looked like after as the inks seeped in deeper with a damp fabric. I feel that the experimental samples I have dyed with the blue ink, might be nice to consider incorporating into my final personal project.

Different Stitches on Tote Bag:

I wanted to experiment with different stitches such as blanket, running, slip, catch, back and whip stitches, French knots, embroidery and and applique some of which I learnt within the first 2 weeks of Fashion Textiles. With the embroidery, the French Knot and applique fabric swatch’s continuing the patterns and elements that I liked within the fabric pieces on the tote bag. I really liked experimenting with different stitching techniques replicating the fabric patterns and picking elements for each that I liked.

Mixed Fabric Collage Piece:

I wanted to experiment with cutting different patterned and mixed blue fabrics together, cutting them in wavey shapes, sticking them with iron on adhesive onto an old bit of sheet and running stich around the rims of each piece of fabric to add more texture. I also wanted to add netting to make it look as if the water is splashing. Overall I feel that this piece is another experimental sample that shows my thoughts on flowing water and follows my theme textured textiles and I like how the piece has a collaged feel to it. I would also like to consider adding this element or process of experimentation to my final piece.


Creating Texture in Clay by Pressing in Different Textured Fabrics and Objects


Following from mark making, I wanted to create texture I wanted to experiment with clay by placing and pushing in different textured fabrics garments such as wool and lace and other objects around the house that then created a textured surface on the clay. For the first piece I used woollen cardigans and jumpers, mixed with lace and few extra scrap fabrics to get an array of different textures on one piece. For the second piece I used a broken ceramic flowered textured pot to make the texture on the pot leaving an impression of the pot on the clay. I feel if I was to consider creating something similar within my final piece that I should consider the thickness of clay as even though I rolled the clay thin, once if air dried it became very fragile which when I picked it up it broke a part of the piece off. To mend this I used a method similar to Kintsugi – the Japanese art of repair however, instead of using gold to mend the break, I thought it would be interesting to use crochet. I created a simple chain stitch and glued it to each side of the crack to imitate Kintsugi. I enjoy the juxtapose of using the soft texture of wool against the chalky texture of the clay. If I’d had more time I would have liked to try dipping the chain stitch into clay slip to repair the piece. I also loved being able to experiment with a different medium that might not be particularly used within fashion textiles but using clay to show another way I can mark make, showing diverse mediums that I can use throughout the AAD012 module without mark making with usual mediums such as paint, pencils, chalk or paper.