Self-Reflection
- Author By mcveigh_beckett-m
- Publication date 13/12/2022
- Categories: AAD010, MAKE [3D Creative Practice]
- No Comments on Self-Reflection


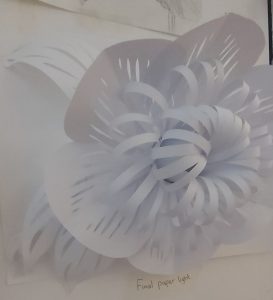
For my final I took inspiration from my lantern paper sculpture and rose sculpture to create my final paper light sculpture above. Overall, I felt that it came out well however, I found it frustrating when the paper wouldn’t fold or cut the way I wanted to and found that the bigger I took the paper sculpture the more it needed structure however, I still wanted to make it intricate and easier for myself to construct when it was as large a piece. I feel that the overall result of the light sculpture is small but delicate in its own way.
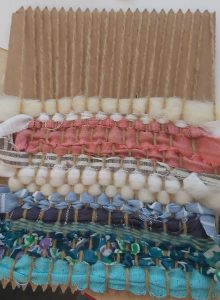

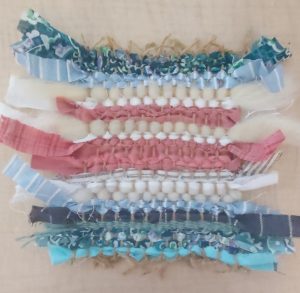
For the second part of Textiles, we got the opportunity to create our own loom from wool and cardboard that was already cut for us. we then just had to wrap the wool around the cardboard and tape in place. We then got to hoke through two big bags to find scraps of fabrics that we liked which we then had to cut into long strips ready to weave through our loom. I really loved this part of textiles as it was simple experiment, and you don’t have to think too hard about the overall outcome. I also found it therapeutic and calming to create.


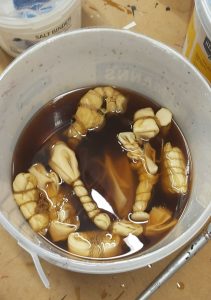
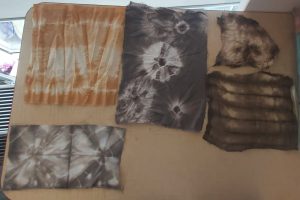
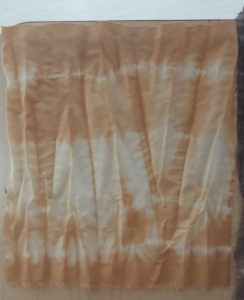


For FADT final workshop we got to experiment with tie dye and Shibori folding techniques. We then had to sting are folded 100% cotton fabric to hold it together when place in the dye. We had to then soak are 5 folded fabrics in water and then add them to the dye, I chose steel grey and beige coloured dyes and left them to sit for about 2hrs. After we had left them for 2hrs we had to rinse them out to get the excess dye off the fabric and then remove the string holding the folds together to then see the final pieces. I really enjoyed the apprehensiveness of this part of the workshop as you didn’t know what the fabric will look like and being able to experiment folding and learning new techniques.
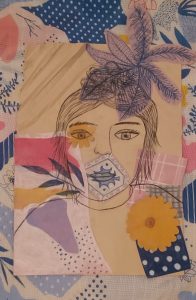
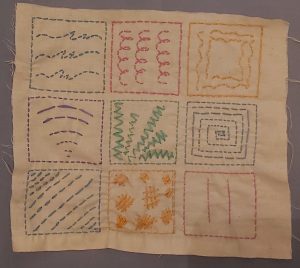
For the second part of the embroidery workshop, we had to abstract parts of different patterned fabrics and draw them with any medium of our choice, I chose to draw them with pastel pencils. We then cut them out to create a mixed media abstract collage drawing, I choose to draw my mum.
Not looking at the page –
Drawing using both dominant and non- dominant hand –

Drawing using dominant hand and then non-dominant –
Looking at the page less and more at the subject –

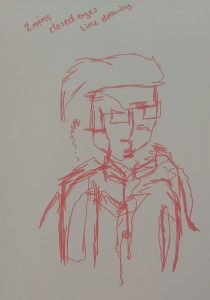
Drawing with my eyes closed –
Not looking at the page –
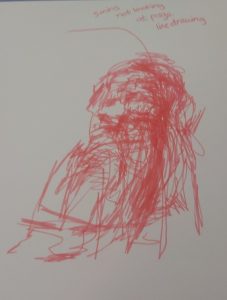
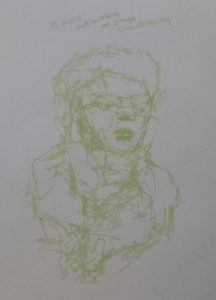
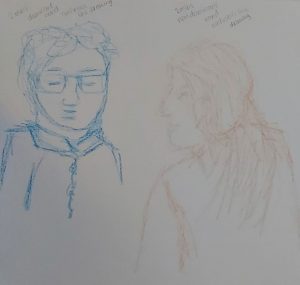
For the second part of the workshop, we had to draw quick sketches in groups of two or three. We had to sketch 2–5 minute sketches two with not looking at the page, one with looking at the page less, one using our dominant hand and one using are non-dominant hand, drawing with both hands at the same time and drawing with our eyes closed. I really liked being able to try not look qt the page but it’s hard as when drawing you have always been told in school to draw perfect and with detail, but I really love my first and second photos of my drawings above as they give the most detail and my own style come to life.


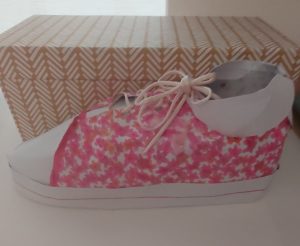
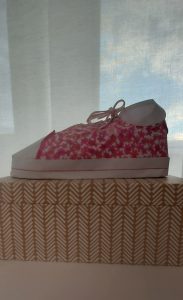

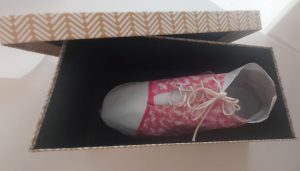
For the next part of fashion design we had to create a paper shoe. We had to focus on an era, I choose to focus mostly on the 1950s fabrics and colours for my paper shoe. I then had to choose one of my favourite patterns that I created and then draw it onto my paper shoe after I constructed the paper shoe from a shoe pattern that we cut out. I then added my flower pattern to my paper shoe. To complete the shoe I added a collar to the neck of the shoe to tie into the fashion collars on womans dresses in the 1950s, I them added laces to my shoe and made flower impressions onto the side and back of the shoe. I found constructing the paper shoe fiddly but I really enjoyed designing the pattern and seeing what it would look like on a shoe as a final product.

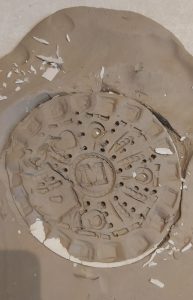

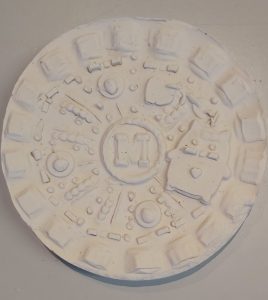


For Metal/Jewellery we got to create a plaster mould out of clay by using different tools to make impressions in the clay. We then made a circular cutter out of card to add the plaster to the clay mould to harden to then get our final art piece.
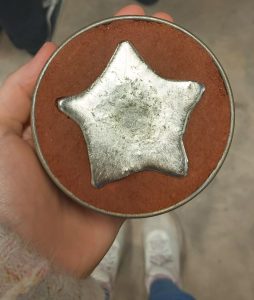
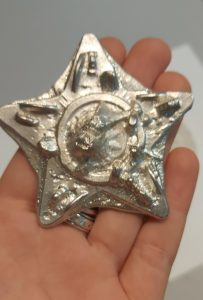
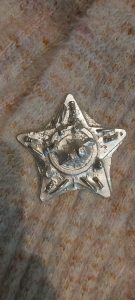
For the second half of Metal/Jewellery we got to do sand casting. For this we used a sweet tin to pack the sand into. To start adding are impressions we had to add a back shape that we imprinted into the sand so that the Pewter metal wouldn’t be singular pieces but a full piece creating a medal. I choose to use a star shape as my back and then used different utensils to make my impressions into the sand. Once I was ready I had to pore the Pewter, melted metal into the sand casting and allow it to cool and finally present as a final Metal medal piece. I enjoyed to process of both plaster mold making and sand casting and being able to put my own stamp into the design.