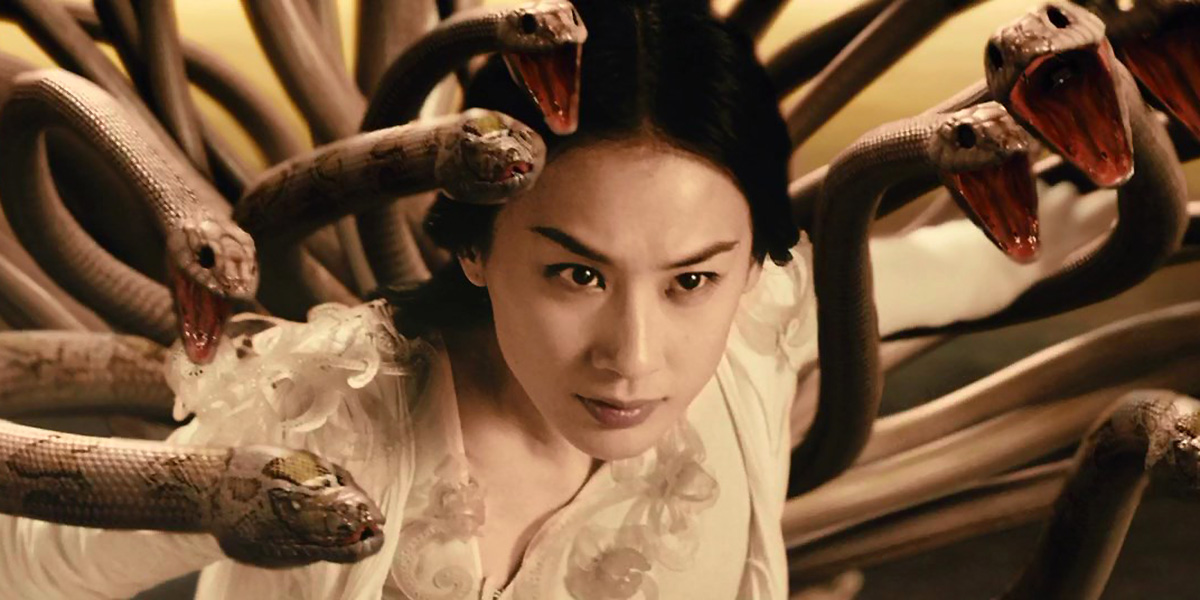
After choosing one of the four Chinese mythology stories, which was the tale of ‘The White Snake’ I took this time to further research the story starting phase 1 of pipeline of researching many variations of the tale and other adaptions with films and tv shows that tells the same story but adapted from many creators and artists with their unique art styles and visual storytelling. In short summery it tells the talewhite snake spirit, longing for human life, finally managed to transform itself into a charming lady after centuries of practice and cultivation. Bearing the name of Bai Suzhen, the beautiful snake maiden fell in love with a respected doctor, Xu Xian at first sight and both get married but face consequences of their own actions and enemies who try to separate them.
In some other versions, the pair’s first encounter took place far earlier. It holds that when Bai Suzhen was merely a young snake, she was once saved by Xu Xian in his past life. It was driven by gratitude and the eagerness to repay such a life-saving kindness that Bai Suzhen, through her constant efforts, accomplished her transformation to take on human form. After which, she set out without hesitation to look for Xu Xian and repay him back for his generous deed. The young couple set up a medicine shop, enjoying a harmonious and happy life together. But there was a looming time bomb threatening to shatter the couple’s joy, since Xu Xian had no idea of the fact that his beloved was a snake spirit. And the appearance of Fa Hai, a Buddhist monk at the Jinshan Temple, was the catalyst that lit the fuse.
Believing that such a marriage was unnatural, Fa Hai told Xu Xian that his wife was not a human being but instead an evil snake. He also convinced the doubtful husband to make Bai Suzhen drink a special wine that would prove his word. Xu Xian followed Fa Hai’s advice, tricked Bai Suzhen into drinking the wine, and witnessed his wife turning into a white snake. He then broke down and died. Bai decided to save her husband. She braved the land of the immortals and stole a sacred magical herb from there violating a rule that a snake spirit was never supposed to break. Xu Xian was brought back to life, taken by Fa Hai to the Jinshan Temple, or Golden Hill Temple. To reclaim her husband, Bai Suzhen unleashed the waters and flooded the temple.
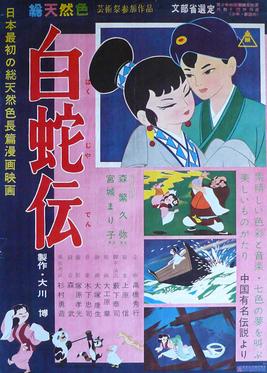
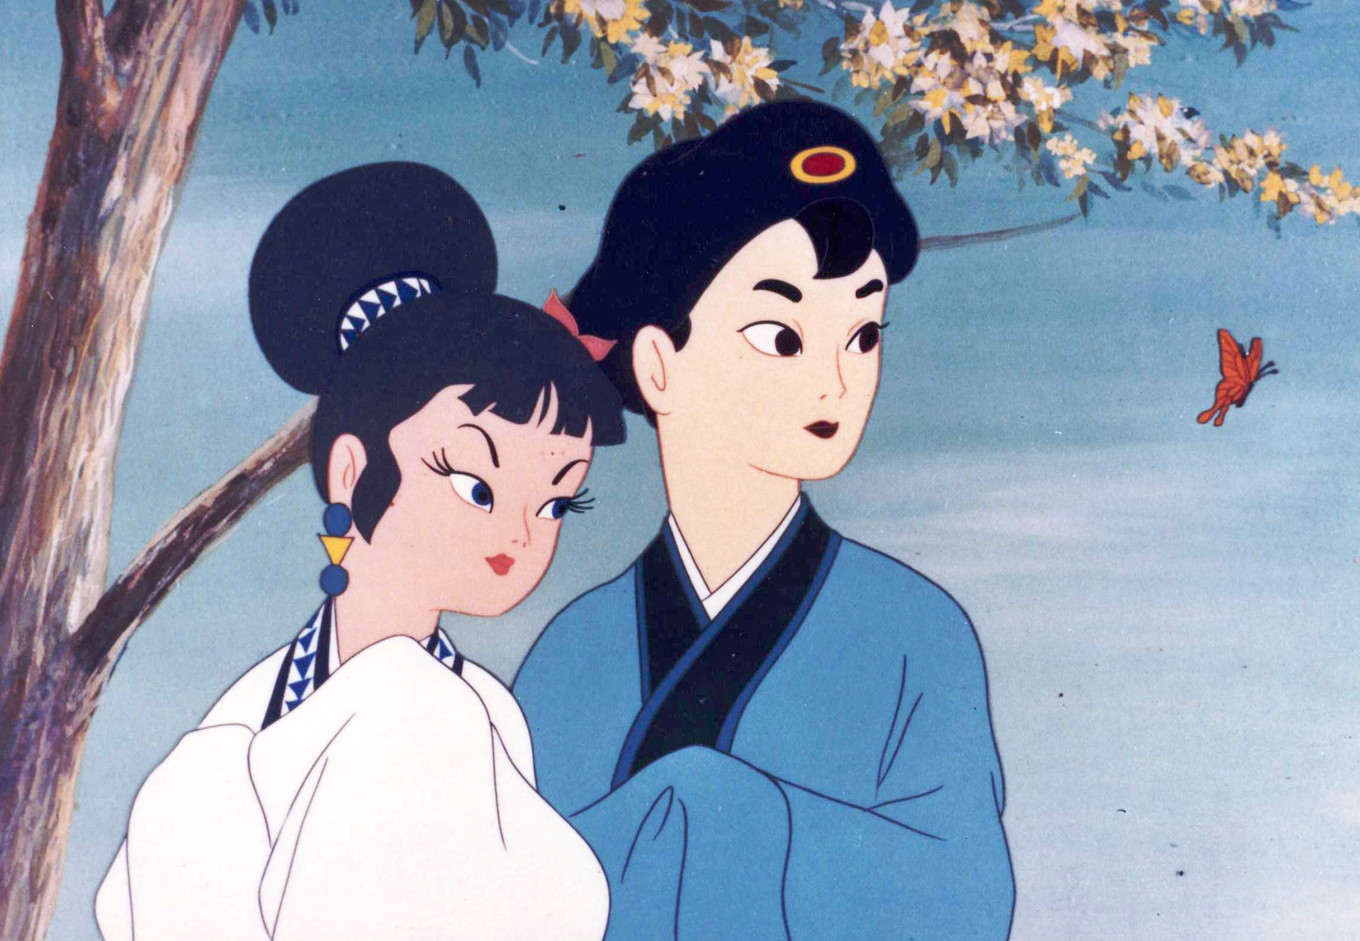
One popular adaption for the myth is a fantasy film known as ‘The Legend of the White Serpent 1958‘developed by Toei animation, the same studio behind Alakazam the Great which adapted the myth of Sun Wukong (The Monkey King). It follows the main story and adds additional background characters for character support for the main two love interests beating all the odds and the animation has a mix of western and eastern influences with realist character design and a beautiful varied colour palette which contrasts with the rough limited animation and poetic quality with charm. It shares it’s traits and style with other movies such as Monkey king Havoc in Heaven franchise and Nezha Conquers the Dragon King, both produced by Shanghai Animation Film Studio (SAFS) by the Wan brothers.
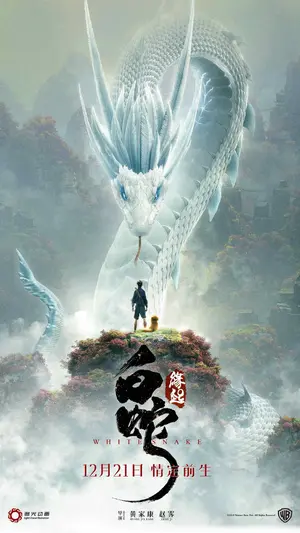
Another popular adaption of the story would involve the white snake trilogy by Light Chaser Animation Studios which took the approach of a 3D art style but keeping the traditional western/eastern style of it’s Chinese roots. The first and last film focus on the early centuries of China during the tang and southern song dynasty. The second movie focuses on steampunk modern time similar to ours with technology use involved outside it’s normal time zone. It also shows many art techniques for it’s animation such as their colour palette established for each character, mood, culture/environment and lighting for it’s sense of direction with all characters who are morally good, bad or grey. Also to mention the trilogy besides it’s visual effects and animation is the amount of 2D they put in for the characters journey and growth such as using the Chinese style of a ink painting with various colouring than white and black washing out the outlines looking like a mix of 2D and 3D (Hybrid) animation.
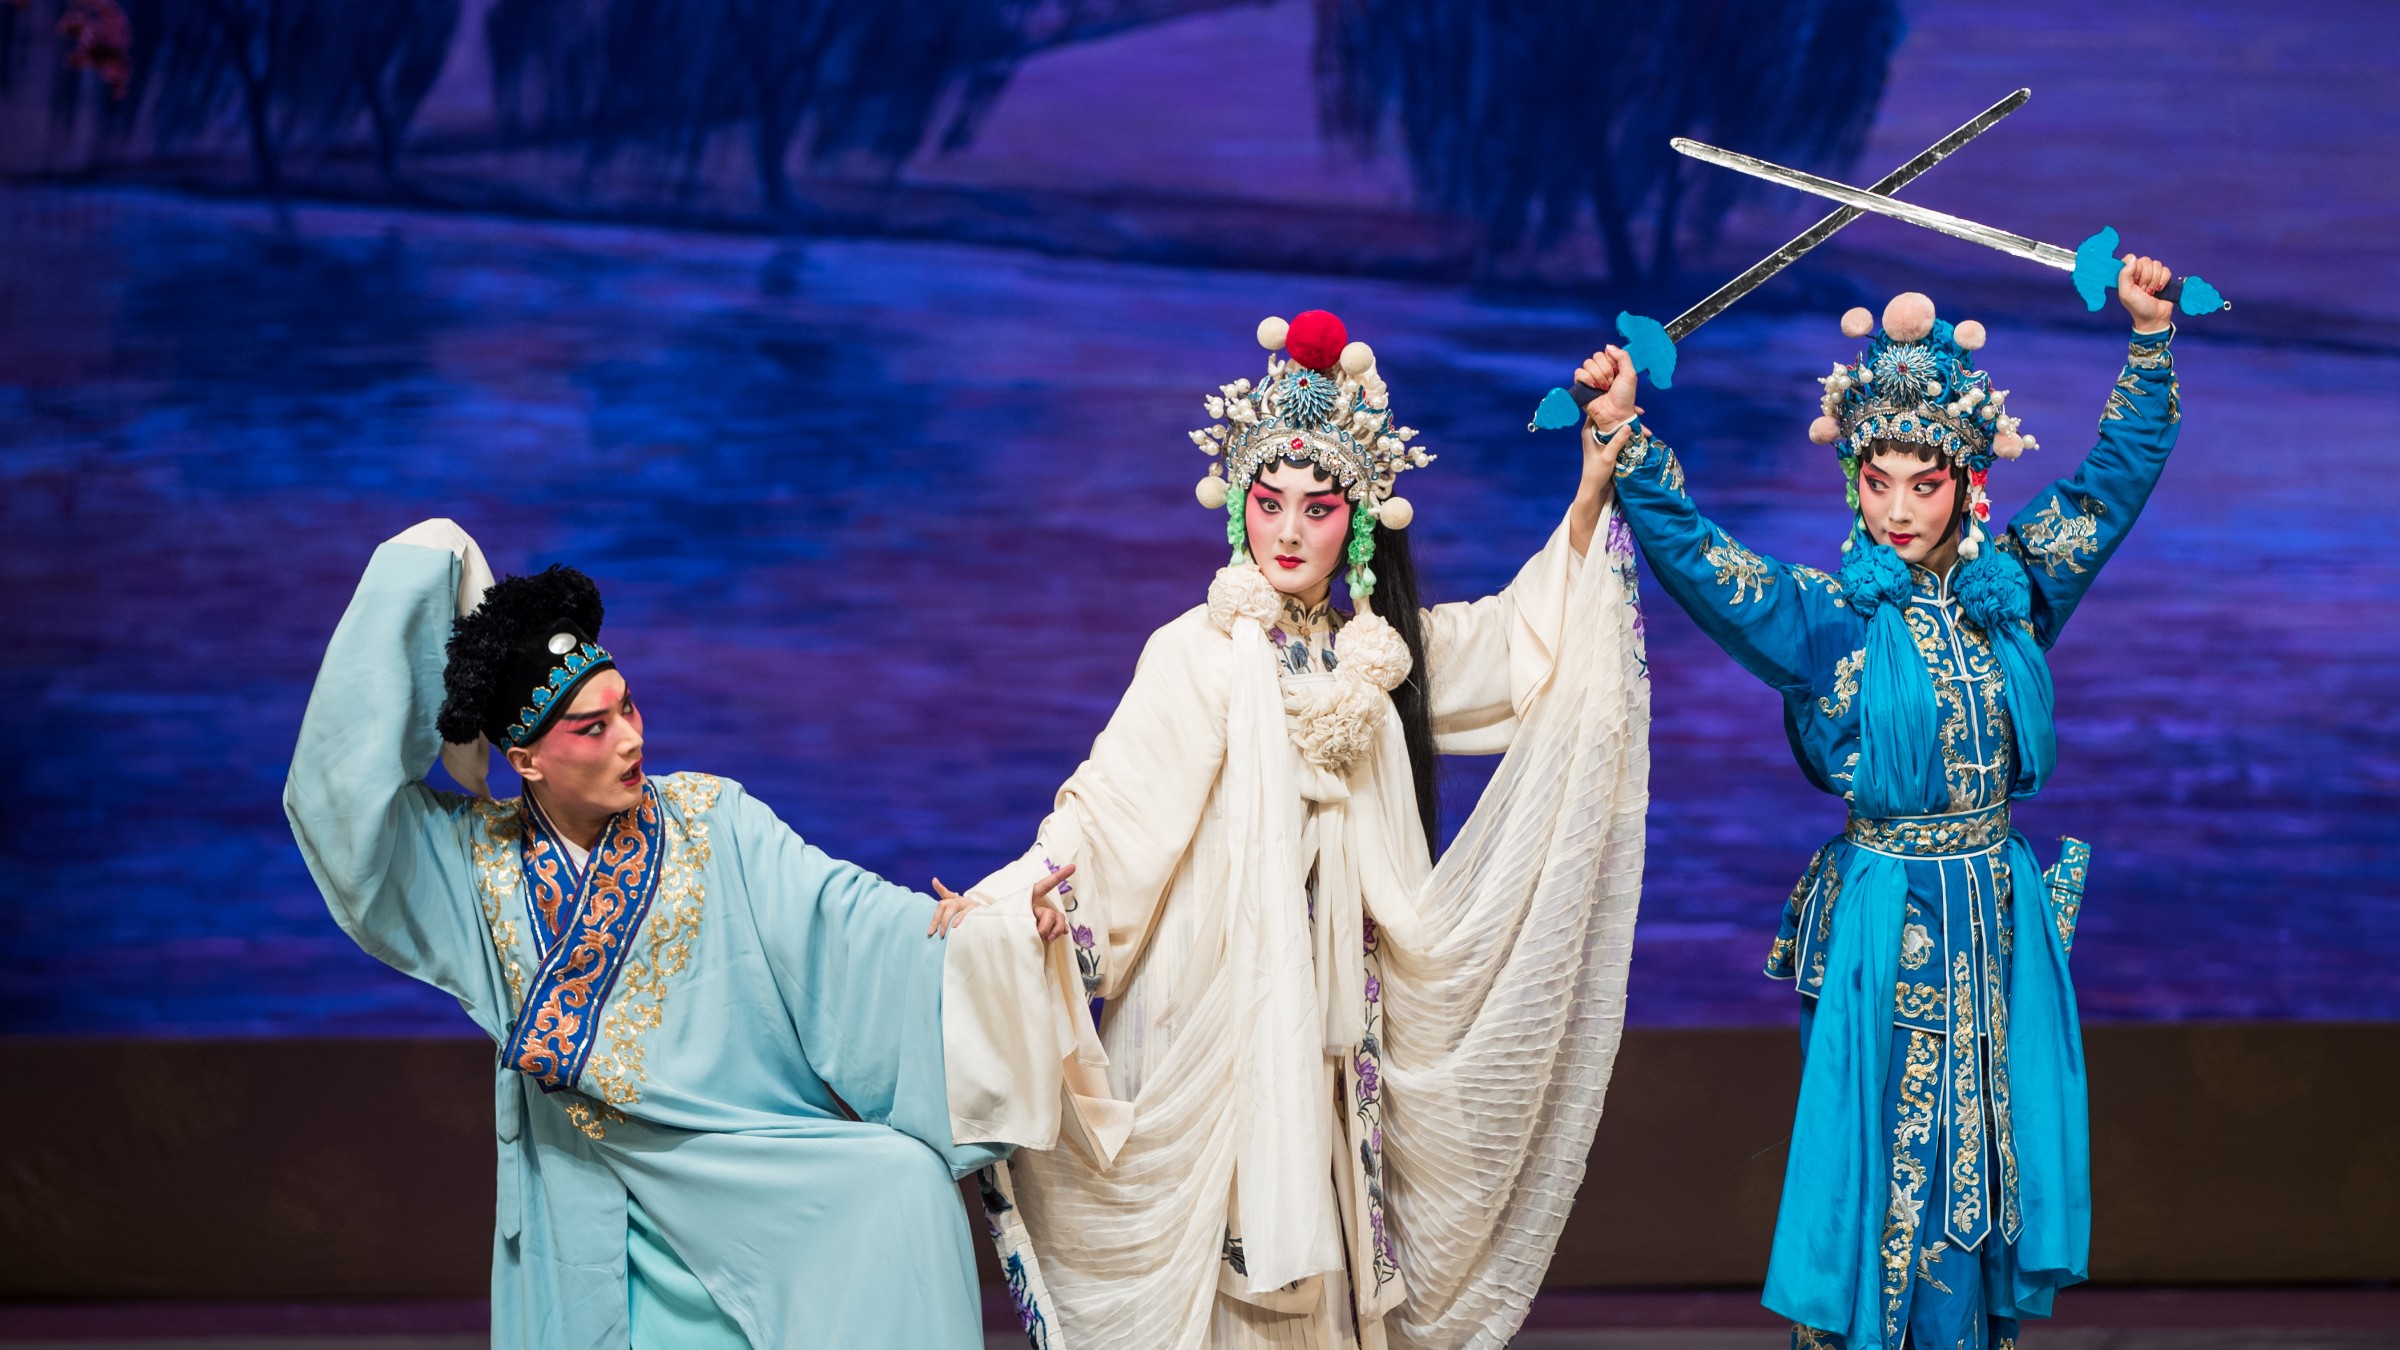
The story influenced many live action movies each their own adaption like the White Snake and the Sorcerer or The White Snake opera company over the years with original music with high melodic tones and vocals, costume’s and makeup to keep the traditional aesthetic becoming a fan favourite story to the whole country along others and telling people how love conquers all between two inseparable beings. Once I collected the research on the story, it’s characters and cultural setting I went to ahead to plan on analysing the characters and use of colour theory for my objective before next week.
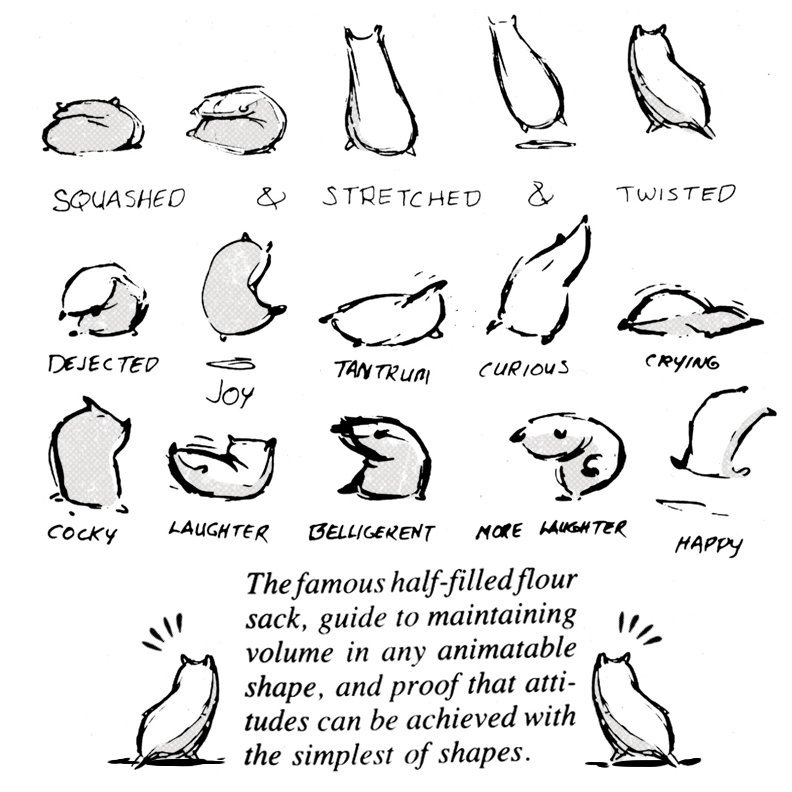
For this class we were introduced to another new lecturer called Rachel Dixon who presented the topic Body Mechanics which involved the basics of mechanics with the body with weight, line of action and blocking. We were given 3 exercises to complete which involved a robot arm, a flour sac and a origami man pushing a very heavy stone.
This first exercise involved the flour sac, which we had to animate poses with blocking to think what the sac would do while animating with a start and finish sequence with the help of Rachel to guide us each step of the way. I gathered references through images and videos especially blackboard on how the sac would look through multiple expressions and the squash and stretch for choosing poses and blocking sequences to help with mass and balance of the flour sack.
The second exercise included a robot arm which we had to animate to bring the claw arm to grab the cube object and bring in to the other side and place it down. This is where we got introduced and refreshed on the topic of rigging which included the bones and constraint. After blocking the arm, we were guided on how to connect both the arm and the cube together and how to turn off the connection. I learnt how to key frames with the claw grip and constraint the cube to the bone options which I found very easy enough to animate then turn it off with the inverse options.
This next file brought us to the very end where we had to bring the origami boy to push the stone with is strength and show his struggles which I found the hardest this exercise as rigging isn’t my biggest strength to animating. I took it as a challenge and went ahead with Rachel’s aid as I struggled at points with the IK/FK switch and connecting it the stone itself. I later went back to blackboard looking at the finished version and went online looking at 2D examples poses and line of action along with videos to help give ideas when pushing the block. Overall rigging isn’t my biggest strength in skills and I don’t see myself in the future with this kind of role but nevertheless I enjoyed this lesson and exercises to help with my assignment with mechanics.
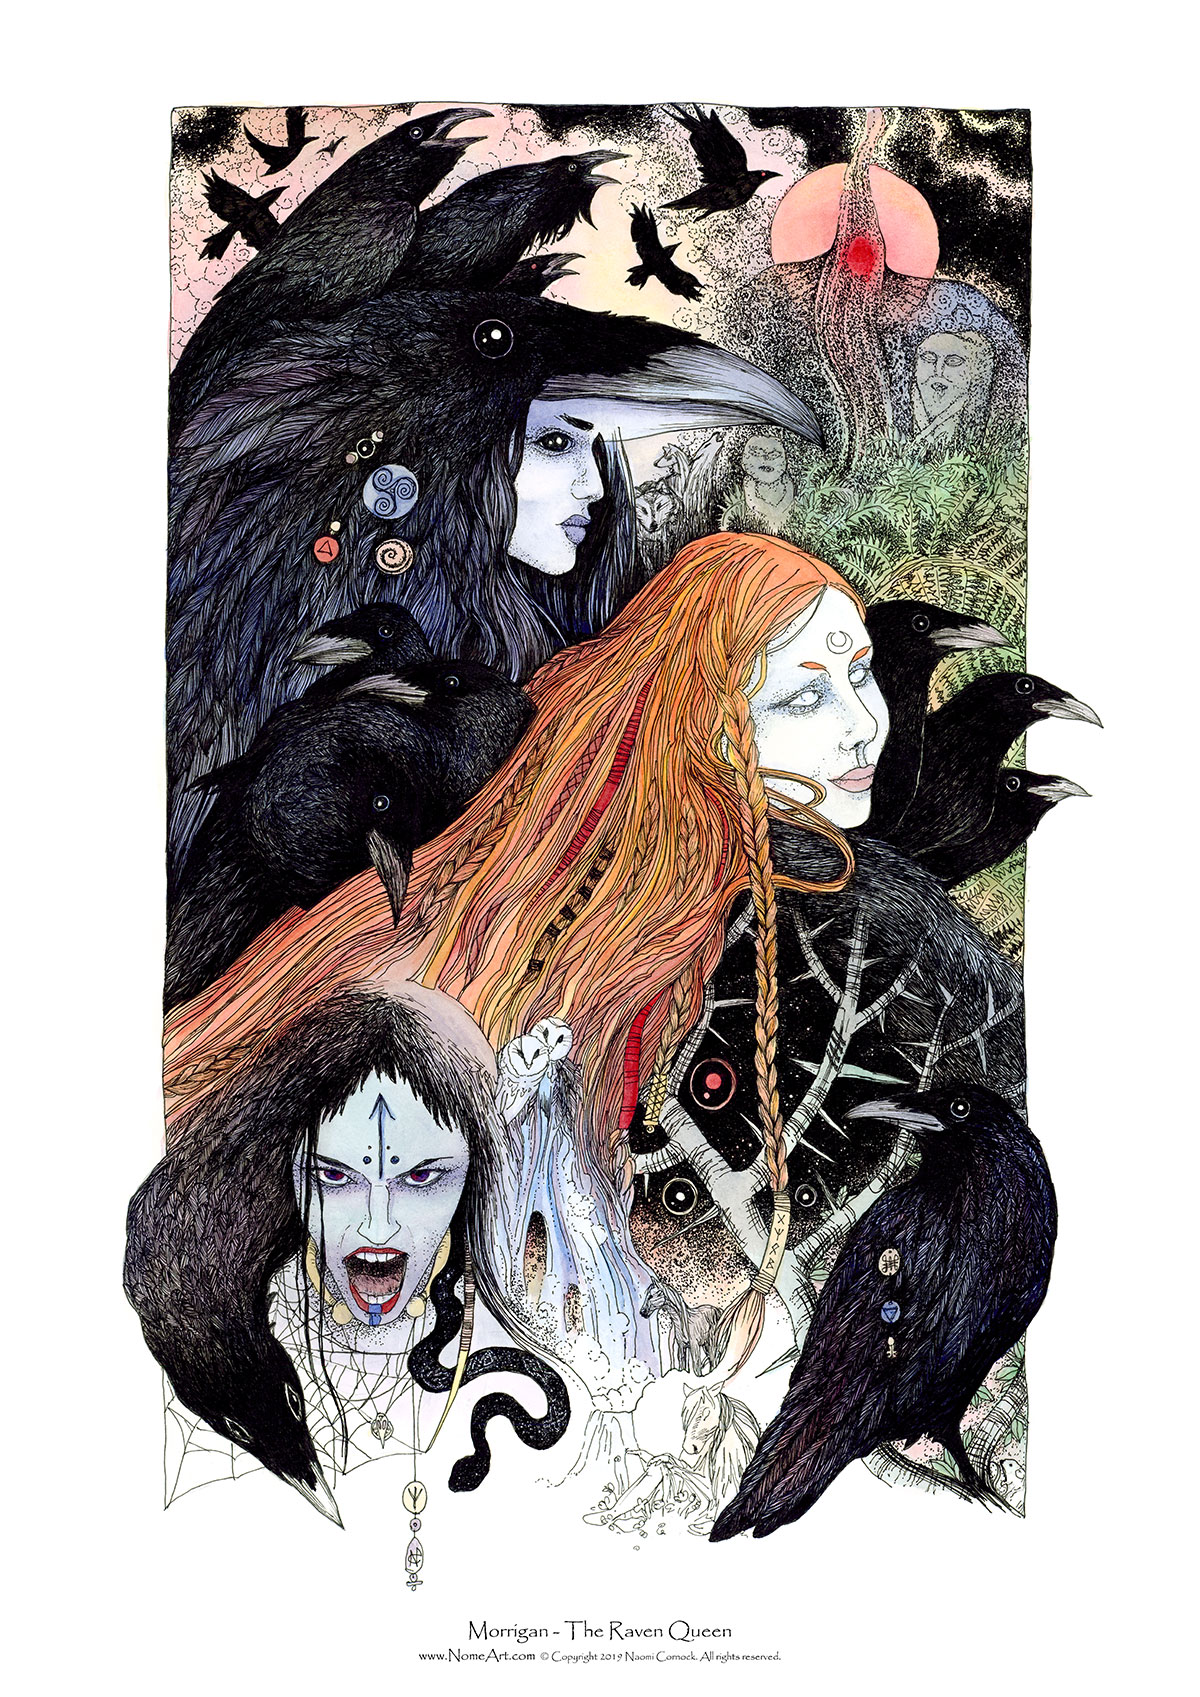
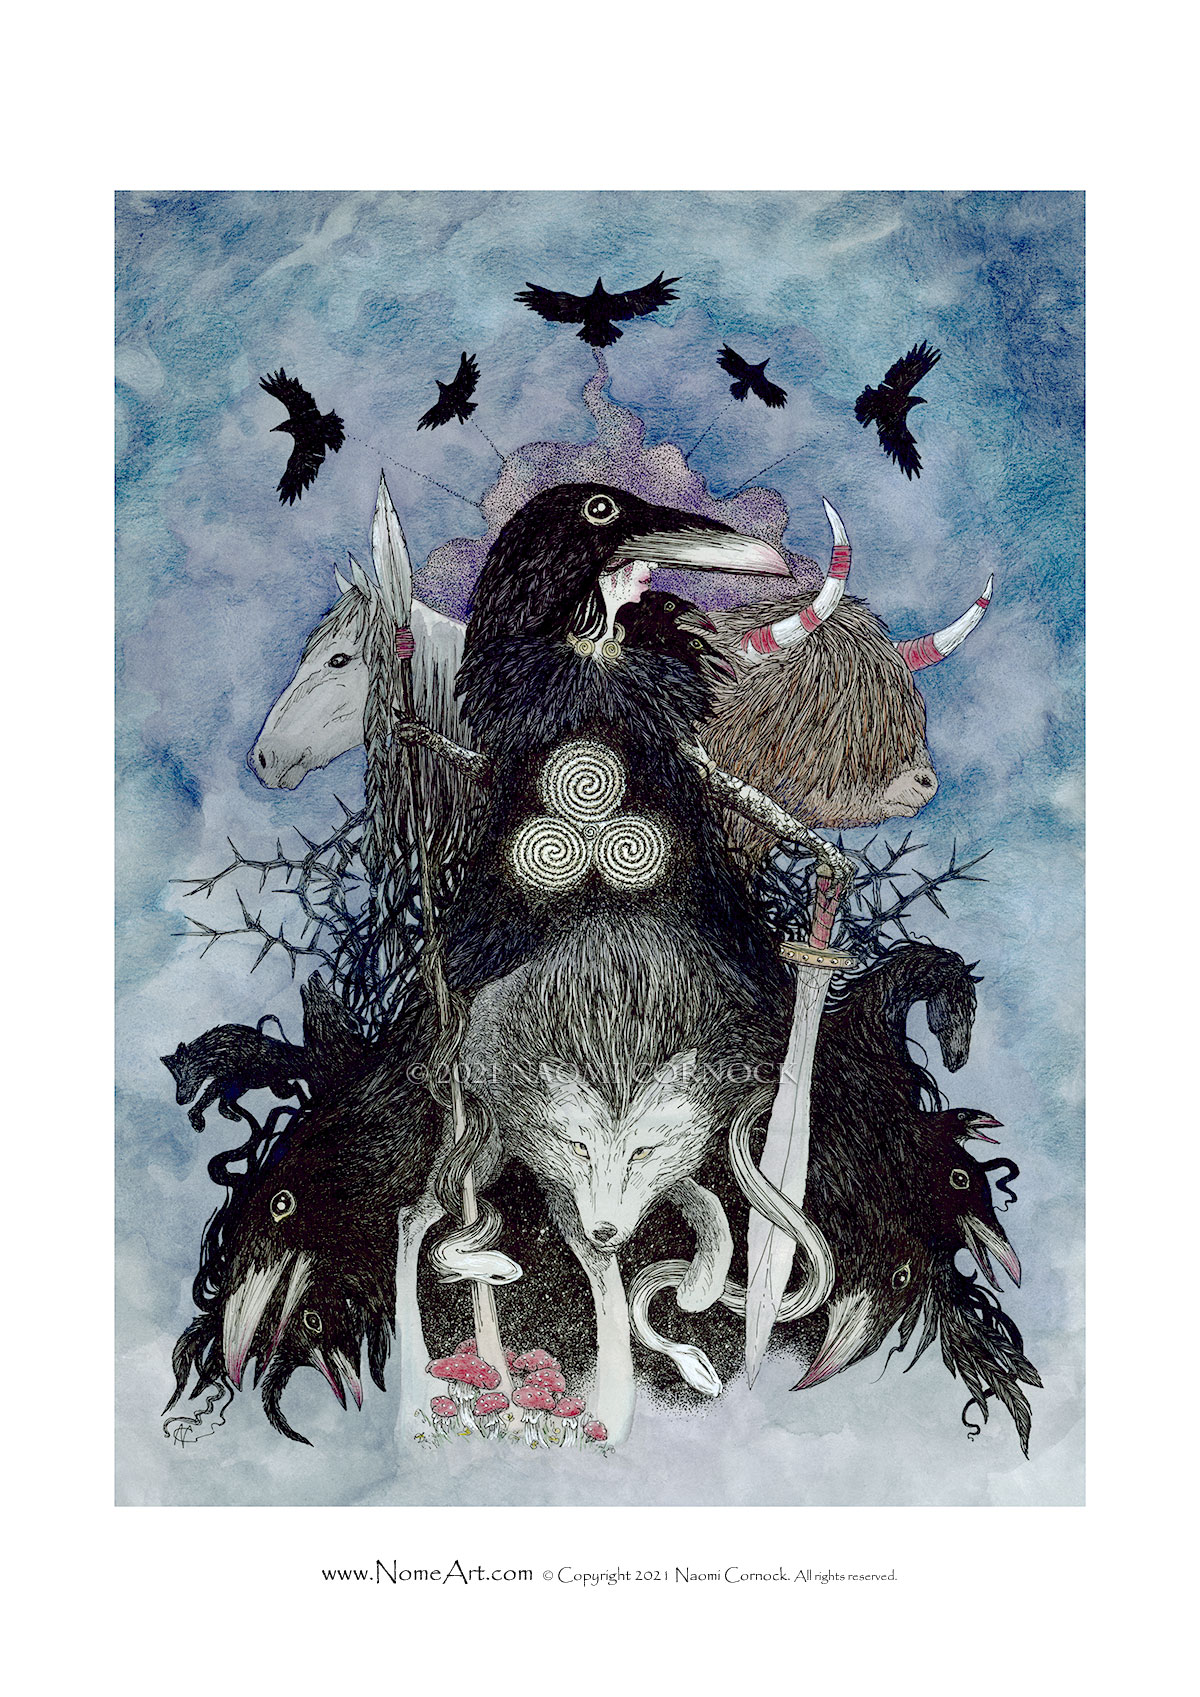
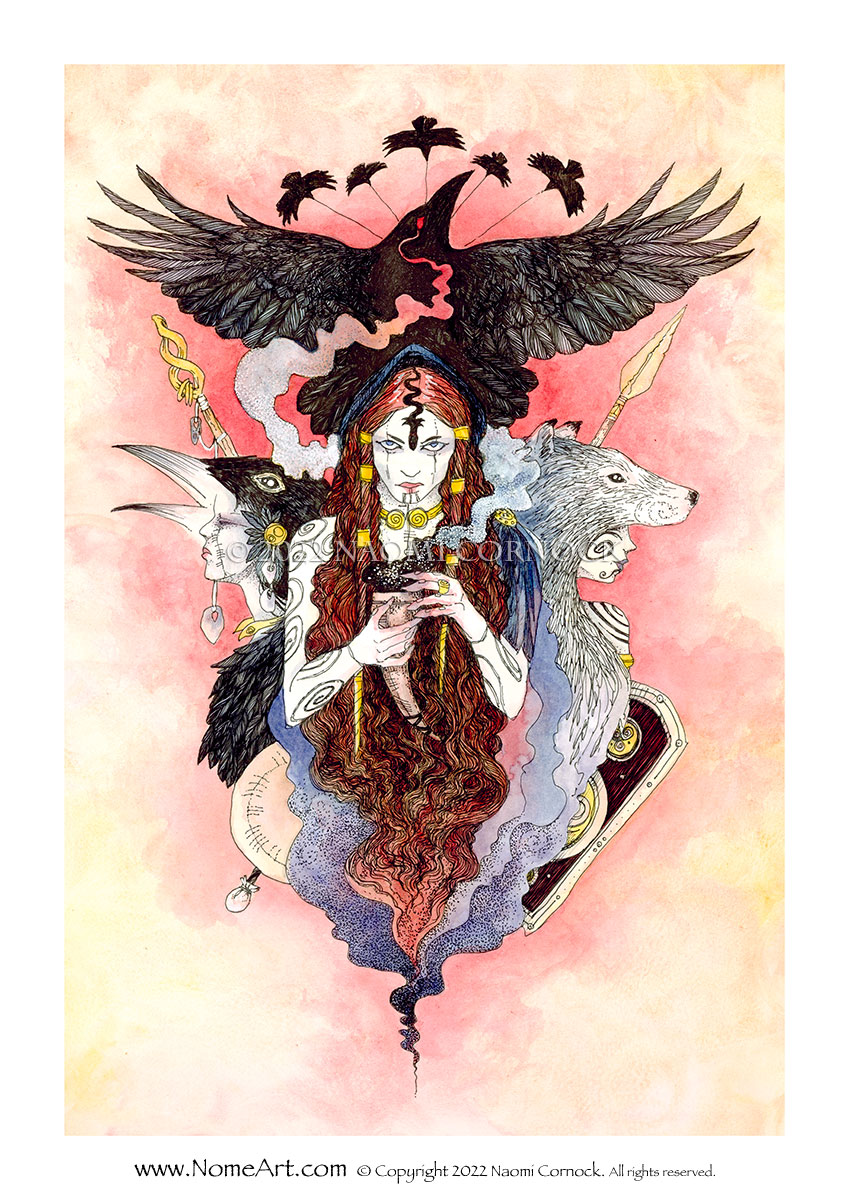
We prepared our presentations for this week where Abdul and I went ahead with the Morrigan and presented her to our classmates and the other students from China on live stream where we explained the origins and many adaptions of the Morrigan featured in. It went really well as each pair presented our Irish mythologies and put a lot research into each one with motivation and interest which I thought was a great activity. After we had shared our presentations with the other students, they went ahead and shared their 4 stories with us which included, The Nine Coloured Deer, The White Snake, The Red Mansion and Jingwei Filling the Sea. Stories both familiar and new to me when hearing about them with the plot and many adaptions included for us to use as reference. Here below is Abdul’s and mine presentation we worked on this week to preview.
After the talk and reviewing each one in our free time, we (individually) had to pick one of the stories which would become our main project and pick 2 or 3 techniques to follow through and experiment with the stories we choose. I decided in the story of the white snake, one I became familiar with growing up and had watched the Light Chaser Animation Studios adaptations with it’s exquisite character designs, special effects and storytelling that caught my and so many eyes of audiences intentional worldwide. I thought hard about going beyond the techniques that we would be choosing whether it was something I’m good at or something that needed more work done. So I took it upon myself to lower my choices between Character Design, 3D Modelling and Grease Pencil/Look Development before starting the new project and start with phase of the pipeline research.
At the beginning at my 3rd week, we refreshed our minds with the run and walk cycles on creating and animating a figure to run or walk in a simple cycle flowing smoothly. We had to do both cycles and I decided for myself to animate 2D for the walk cycle and 3D for the run cycle as both are my biggest strengths. Before animating I went on blackboard to see Mike’s 3D tutorials and Aodhans 2D videos on how to animate to help me rewind my mind. I also went back to my animation book by Richard Williams on the topics of the walk and run in different poses and the number of frames I will use for both.
I first did the walk cycle in 2D using Krita by following Aodhan and Richard Williams advice by using a simple approach of doing it in 2’s than 3’s since I didn’t want it to look choppy but fluid with the flow. I did a normal walk cycle mechanical to get the jest of the walk and think about timing, frames and arcs since the body was in one place the whole time. I found it easy once I understood the purpose of the walk.
Later on I had to make one walk with more personality since it could’ve been anything from a kid, a women or a man walking differently to their persona and to be more emotional. Looking through various videos for references, I went for the choice to do an elderly man for the walk by looking at the 100 ways to walk take on an elderly person walking. At first glance it looked a little complicated for it didn’t have enough personality for it so I researched more and found the 16 walk cycles each one transmitting a lot emotion into each character which I thought then that I should do a combination between the old man walk and the angry panda walk for the character. Animating it in 2’s and watched my arcs and timing between each frame and filling in the in-betweens.
Afterwards I focused on the run cycle in 3D with blender with the origami boy rig from blackboard and Mike’s tutorial advice and tutorial videos. So again I went back to Richard Williams note’s on the runs and remembering runs always work best in 1’s than 2’s or 3’s. I quickly looked at other cycles on YouTube and live action references with any runner or athlete with a good perspective with their runs and analysing their contact and poses each step. I started by getting my mind on doing the normal mechanical walk with the rig and started there with Blender coming out with a normal vanilla run.
Soon after that exercise and experimenting with the runs with other references and resources, I figured the run needed more roughness and determination with the rig with it’s run giving it more perspective and lifelike poses with it’s run. I gave the arms more inwards actions and kept the head straight on with the legs following the moments when one foot leaves the floor. I watched the timing as the run was only in 1’s but complex. I found it enjoyable to go back to this but I think I should give the walk more perspective than staring at the either side instead from front to back or a 90 degree angle.
This week we were given the task to choose one myth or legend from Irish mythology to showcase on our presentations about the myth/legend origins, artwork and how they are viewed in today’s world. I got paired with Abdul and went through a list of myths until we came to the conclusion of the Morrigan as we collected links and images with tones of info for the figure and what made her interesting to even talk about her.
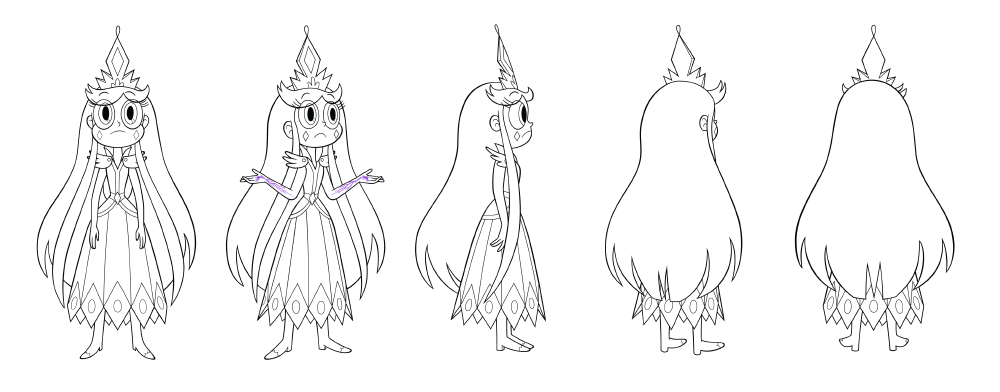
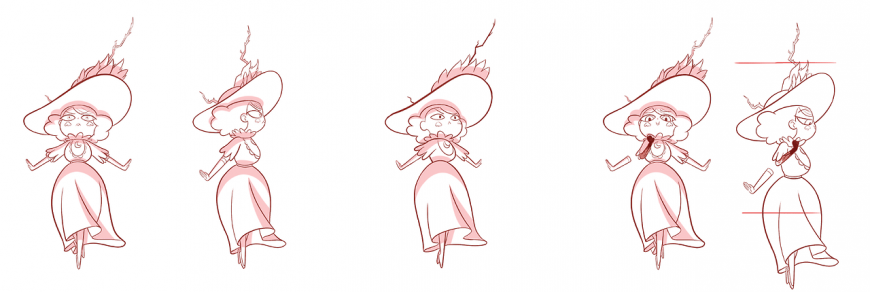
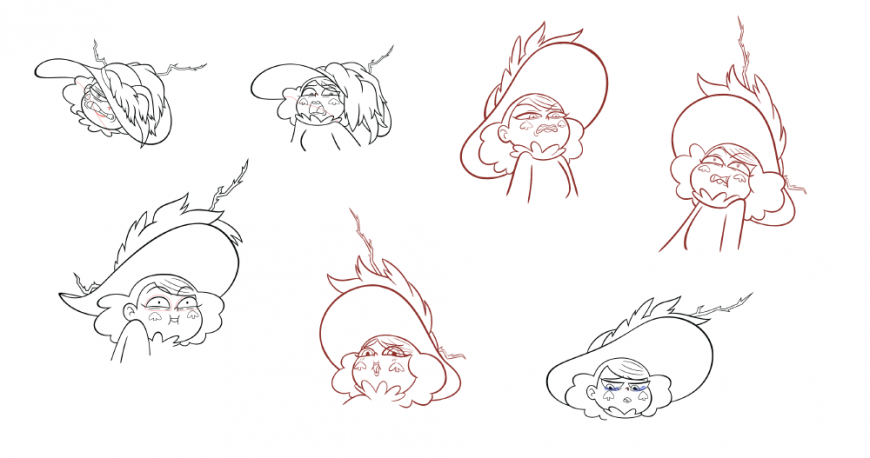
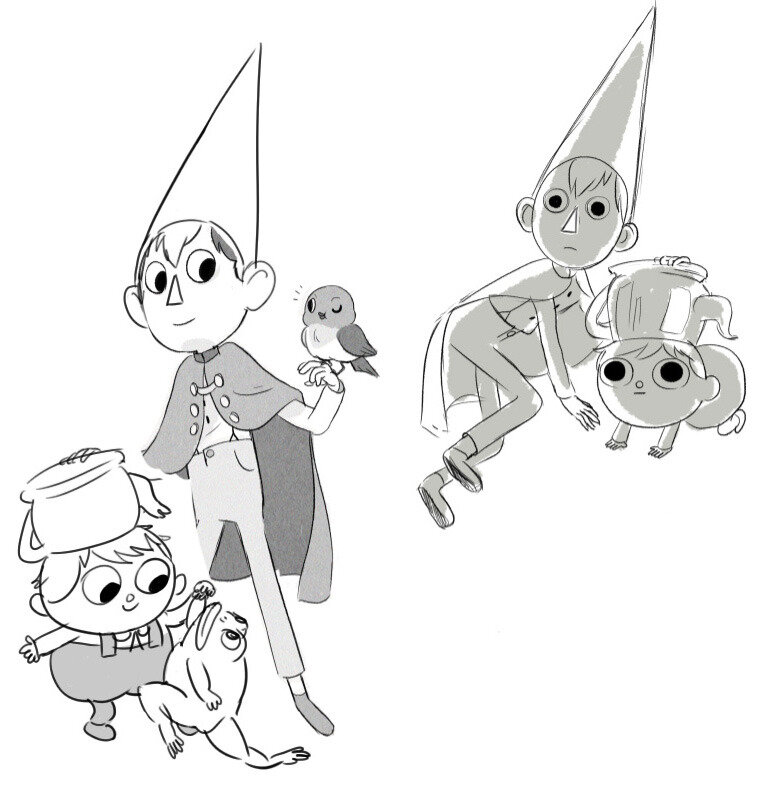
While we were planning and designing our presentation, we continued with the Art Cycles and thought more about what we wanted to do and were brought into more detail for character design and concept art. Even back to the basics of pipeline and examples from various environments and tv characters and the difference between style and story, especially how they went for one specific art style for the whole production of their show. I went to back to the shows and looked at artbooks/character sheets of various characters (main or secondary) and tried to understanded their structure and formed shapes that made it possible for their designs from many artists and animators.
Adventure time
Star vs the forces evil
Over the garden wall
Owl house
Gravity falls
Here’s the PowerPoint I’ve made which I presented for this week 2 for both classes on the art cycles which I preferred and with gathered the gathered references and motivations I collected the previous week.
Here is a few roughs I did by taking one of my original characters (OC) and put them into a number of art styles I have chosen from the vast majesty here on this blog but no line art included.
Beginning Week 2 we went straight ahead to the next major principle “Pose to Pose/Straight Ahead”. Where it involves key frames are drawn from the start to the end with picked poses at significant points whereas the in-betweens are drawn between poses to give a full breakdown of the animation and control over the 2D and 3D animation. It is another way to have a strict timeline of production planned out in a way to show storytelling of the character’s storytelling.
In our module we were given the task of animating a character with 3 – 4 poses that lasts 2.5 secs, strict timeframes between the 2D and 3D and consider anticipation, fellow through and overlap and blocking breakdowns. Using the resources from blackboard I downloaded the Rain. Rig from blender studios and saw Mike’s videos on the Origami boy rig and how he demonstrated the blocking and anticipation within the whole animation and poses. Afterwards I went back to the principles to look more closely and have understanding of the anticipation/exaggeration, pose to pose and overlapping.
After downloading the rig for Blender, I quickly looked and sketched poses for the model and went ahead by adding the poses into the model. I first had some problems with the IK FK Switch as I did them without adjusting the rigs as I ran into glitches and tried to solve the problem, luckily Mike gave me the insight I needed with the bone collection of the main controls which logically and physically made it possible for the armature to move like a person instead of moving it too freely. Whereas I continued with poses and researched ways on how to make it more anticipation with secondary action and follow through with the blocking for one part of the frame to move from A to B.
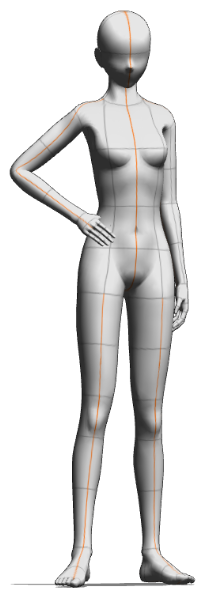
I collected random poses here above to give the rig more gesture and emotion (without facial expression) and looked at more videos on better posing and blocking with the assistance of the line of action and body shape once the main body, arms and legs to fit the rest of the poses with more emotion for the rigged character.
Later on I moved onto the overlapping action and in-betweens with other parts of the rig which involved the feet, hair, eyes, hands, fingers and clothing. I focused on the feet to make sure I knew how to get to point A to B with keeping the initial location of the rig and made movement a step or hop for exaggeration. I did the hair next which I gave it an arc for having the flow and weight side to side to make it life like than it was the hands and eyes to make sure they followed through with the moments. Whereas I went on Graph editor to clean it up with the curves and frames especially the hair movement following an arc.
I finally finished it and I reflected how how it was for rigging isn’t my biggest strength in 3D but after reviewing this week I’m glad we refreshed our memories of it here on Blender to make our animations smooth and fix problems were facing with IK/FK switch and the graph editor as I always forget near the end of the animation stage. Here is my final video of the exercise.
First week back we were introduced to the module Experimental Design and what we would be doing this semester. I met other students from another university in China where they presented themselves and showed their beautiful work and we showed them ours done in the past few years. We were given the task to find Irish Mythology here in Ireland preferably one story or legend to showcase in pairs to the new students for the live session where they will share their Chinese Mythology with us. In pairs we had to pick our Irish Mythology which my teammate Abdul and I narrowed our choices and came to the conclusion on covering the myth of the ‘Morrigan Goddess’ for the PowerPoint presentation.
While we discussing about our choices, we had to also think about the assignment on what we wanted to do or what techniques to develop and learn this semester. Each of us were also given tasks on picking an art style or animation style/technique that currently interest me whether it was a movie, show or game to talk about for next week. It was a difficult to choose from what to talk about as there was hybrid animation or 2D animation shows so I went for my strongest suite which was 2D animation.
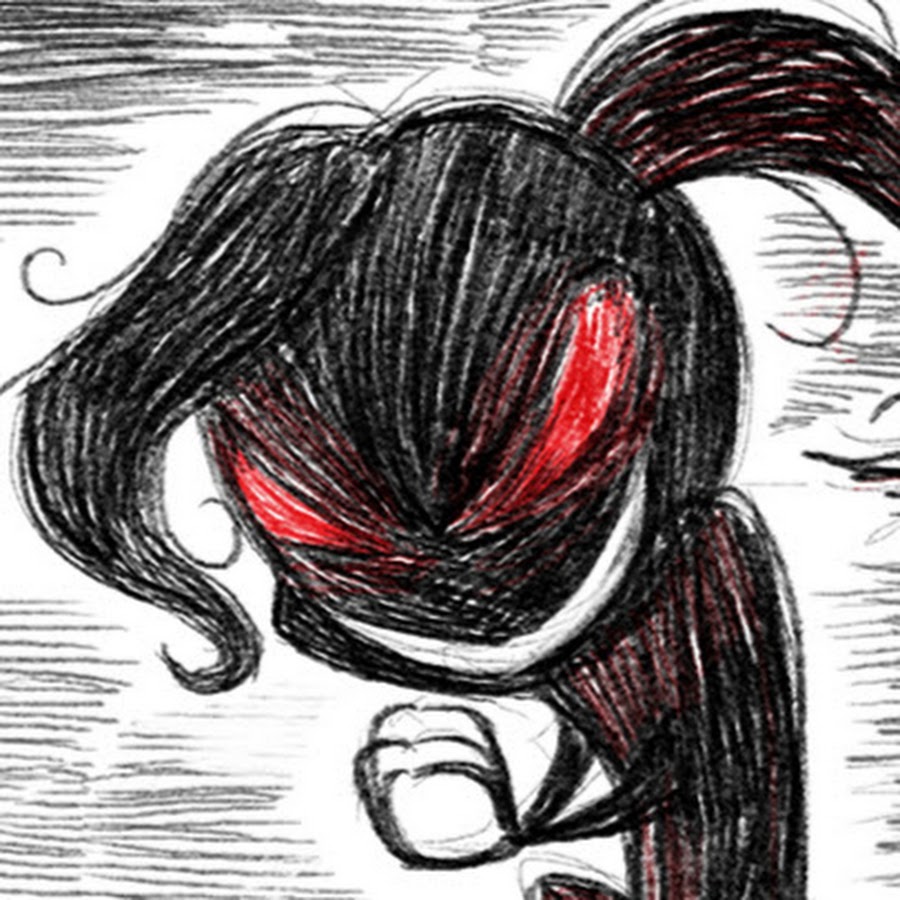
Horror and cute whimsical elements combined have always interested me over the years. Growing up with Tim Burton and Laika studios Coraline/Paranorman started this inspiration for me as the animation direction wasn’t too shy from showing weirdness and the abnormality in it’s setting and interesting art styles. I gathered inspirations from my childhood which collaborated with horror elements and the more modern in the present.
A few examples of a specific art style would come from Dana Terraces work Owl House and Knights of Guinevere. I chose these two first as characters themselves have basic shapes with character design, bright and dark colours in contrast, creative backgrounds and a captivating storytelling to enhance it’s characters. Same with the Knights of Guinevere pilot which blends beautiful detailed backgrounds, has a dynamic art style, excellent character animation conveying emotion through body language, and strategic use of colour to enhance atmosphere and tension creating a unique and immersive viewing experience.
I then remembered the shows I watched back in the early 2010’s and how became more memorable than the other shows I watched and how each one balanced colour, detailed backgrounds a range of character designs they have explored in contrast with personality and in depth with it’s unique storytelling involved with the main cast and secondary characters, builds up tensions and exaggerated expressions. This popular art style is known as the Cal-arts which some like but others don’t, especially how some designs share the same mouth ‘bean mouth when the characters smile. Which is something I won’t use for my art style but around in my very own.
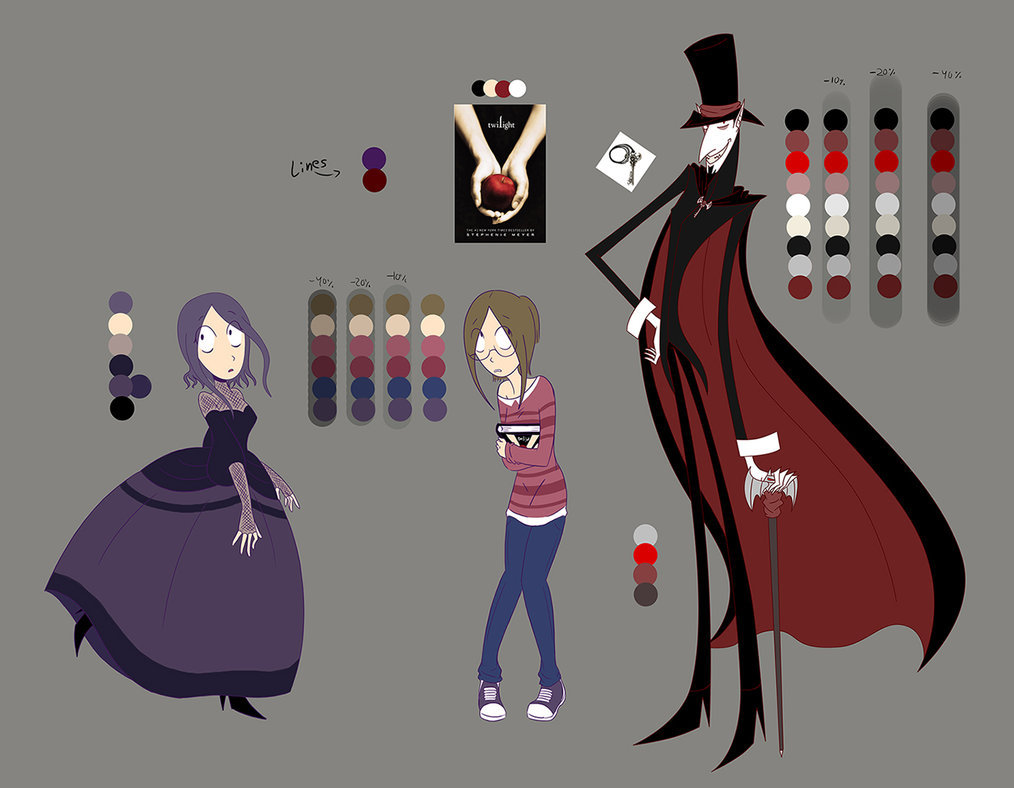
I will also include other animators online outside of studios and companies or before they joined would be a selection that had inspired me that anyone can animate with similar styles I can work with or aim to achieve. One includes animator Daria Cohen who i discovered back in 2017 has her own vampair series with animatic’s, speed paints and many animations videos with her characters and more. What’s unique about her style is she is consistent with her shapes and colour palettes included into her character design sheets to match the horror theme of her own world which blends perfectly and motivates me to work around for something like this for the future.
Then finally there’s creator and animator Vivziepop who created many projects when I discovered her short Die Young back in 2014 as she created both Hazbin Hotel and Zoophobia and has done many speed paints, fanart and short animations over the last decade. I find her character designs and concept art astounding and use of bright colours and Disney themed characters into her adult animation as her use of shapes are sharp and similar to other character’s appearances but I for one adore their different appearance even with similar designs and contrast colouring fit into it’s dark fantasy world in hell. This is similar to what I have done over the years with finding out what kind art style I wanted with other shows and movies to fit in with the main aspect of shapes and improve my character designs.
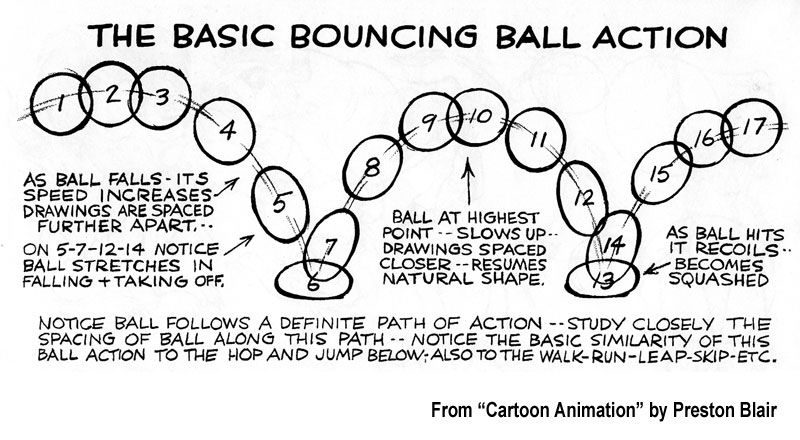
On our very first week with our lecturers’ and the courses, we were introduced to the module ‘Timing for Animation’ which has taken myself back to the first few years of being an undergraduate when I learnt how to animate the 2D and 3D animation. This week our lecturer gave us an explanation of the assignments this first semester and what we need to do to break it down. This refreshed my mind from the previous years and gave me the realisation I needed to think back and go forward on making improvements to my skills and work on my strengths, weaknesses and experimentation. This week we were given the task on animating a bouncing ball in our own style and to think more and understand each specific principle of animation, especially addressing the principle ‘squash and stretch’.
To make sure I fully grasped the concept of the principle, I went back to my resources which included the Animator’s Survival Kit by Richard Williams. Afterwards I looked for similar specialist animators such as Preston Blair and Ken Harris for the similarities and differences they had presented the basic bouncing ball action which involved the principle but as well as contact to make the ball have more life in it. I then went online for various examples of the squish and squash to get my head around this to make the ball ‘lifelike’ with each bounce.
Soon after researching and collecting resources, I decided to go with the 2D direction for this task with Krita, where I simply outlined the concept of the curves and distance for the first step then relocated the ball at it’s starting point and thinking on what frame per rate should I work with. So I had gone with the 2’s fps for the whole sequence as I could’ve picked the 1’s or 3’s but picked the 2’s as I always spaced the frames so I could do the in-betweens every 2’s fps.
Once I finished the direction, the contact’s from start to finish and each squash and stretch I animated the ball and got feedback from my lecturer once I looked it over for any mistakes and improvements needed to be made. He informed me that the last two bounces should be a bit slower and less squash and stretch since there won’t we much power in the ball’s bounce towards the end. After finishing the bounce I thought more about how I missed that detail but knew I needed someone to look over it and share there knowledge for I to understand more.
I also took my own free time to animate other balls, especially different types like a Bowling ball, Tennis ball and a Kickball animated together but at different frame rates to experiment the squash and stretch, time and spacing for each ball to understand how each one performs and logically fall or bounce off the ground due to weight.
Bonus: Shorty after, our lecturer gave us another task exercise where we had to download a blender file and animate a small ship going through a maze to reach for the exit. It was to teach everyone and myself about the follow through/overlapping and the anticipation principles to get a glimpse of making the ship animated with realism, it’s actions and secondary action with the laws of physics for other parts that move accordingly overlapping at a different frame rate. It took a while for it to render and edit frames but it was overall a fun exercise.
I had been given so much information from first year to second year about jobs and placements with the amount of knowledge I gathered for myself to make it to final year in Ulster University including animation industries for our future success after graduation. I had a lot to think about future careers and the roles and skills I had gained these last three years to hopefully meet their requirements by presenting my best work whether it is sketches, digital art or any of the work I have done for our team project from the Major Project.
Poster Process
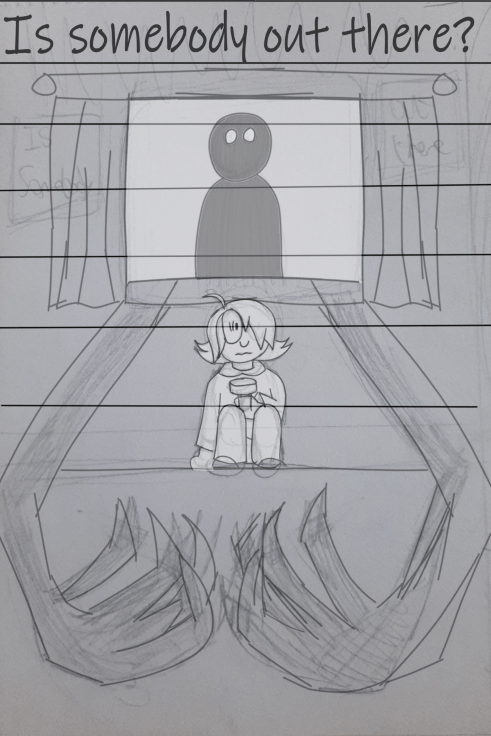
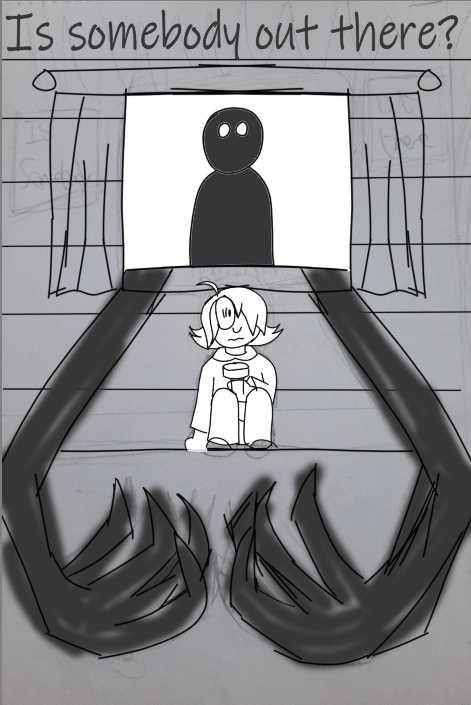
Starting our second semester with the introduction of the module creative futures, each team and individual had to make a poster to advertise our short film and to showcase for the industries themselves. In a team of 3 with Sarah Elliot, Dylan Short and I whom had our hands full with the major project, but we gave ourselves the goal of sketching concept designs for our short film ‘Is somebody out there?’. We first researched examples from films and tv shows that fit the narrative and theme of our project and used Miroboard for examples before sketching our concept design.
Taking the inspirations and references we collected for our major project with each of their official and alternative posters to help aid us in the way we see our short film in our own eyes. Especially the story been influenced by fairy tales like red riding hood and the three little pigs and warnings such as stranger danger to tell to the children of young age. We each did 3 sketches in our sketchbooks to show each other our concept designs so far in the in the early weeks.
1st concept
2nd concept
3rd concept
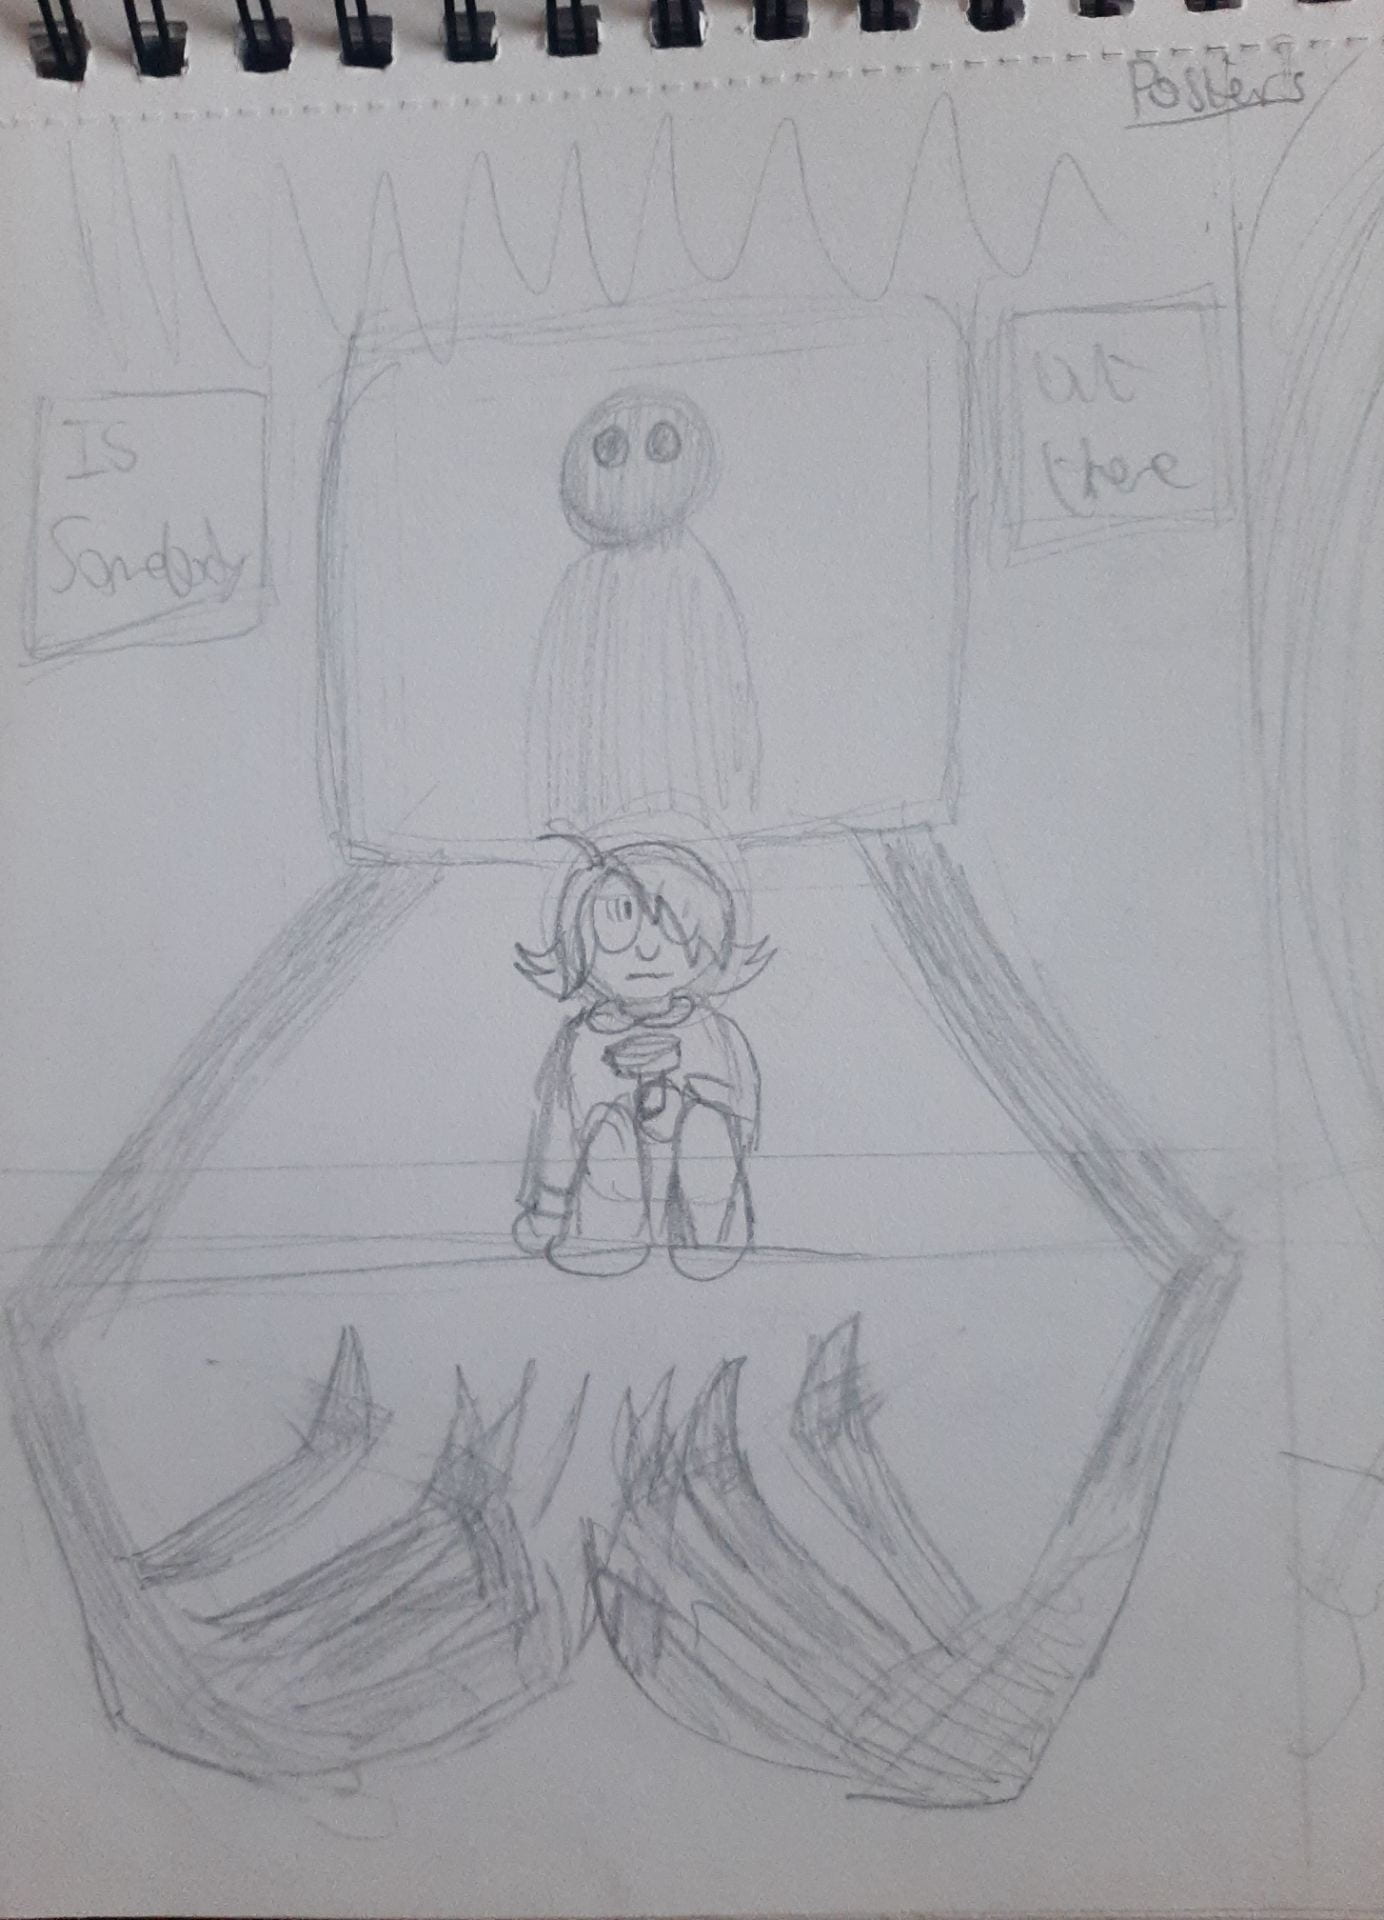
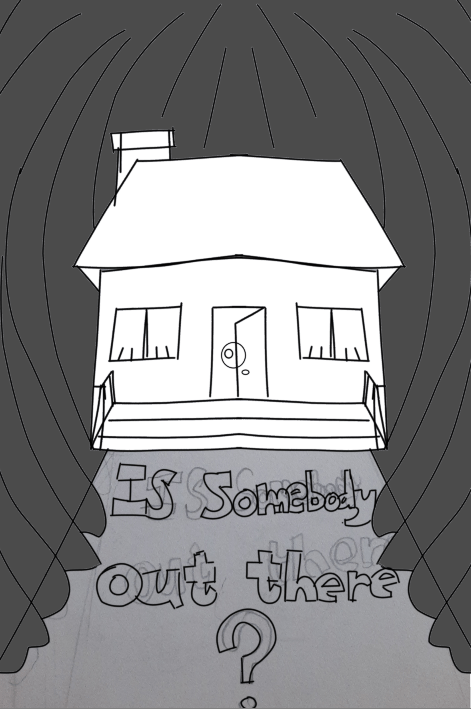
We then narrowed it down to two sketches and made a few amendments with more concept art and the merging of what we had while having similar appearances with each other. Then in later weeks we narrowed them down from two to one to then take each of our owns sketches to start onto the digital art stage. I took the movie Monster House as the main inspiration for one poster and for the other Mimic and Coraline where the danger is right behind them.
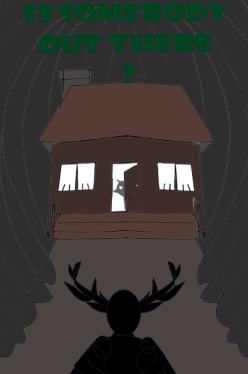
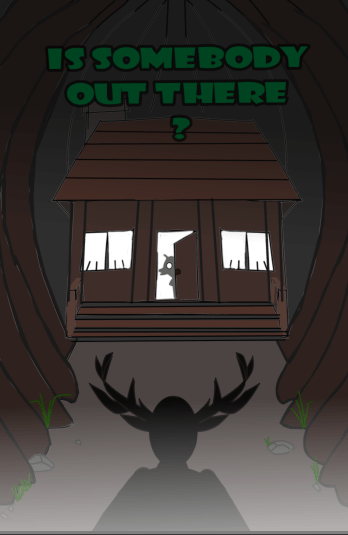
It was a long process but my group and I narrowed it down to the one where the cabin is in view inside of the boy underneath the window. We chose this design for it featured the beast and it’s antlers as a shadow, the mist in view, the trees surrounding the cabin and the boy opening the door slightly as a shadow as well. I picked out the colour scheme as well with the title being green to merge with the woods being dark brown and the curtains looking like eyes.
Final Version of Poster
Fundraiser
When our lecturers had told us about us showcasing our posters in June for everyone to see and promote our short film, but in order to do we as a class must raise funds together in order to print and deliver our poster banners in our final year room. So our class created a Discord channel to get everyone on board for the ideas and plans for the posters themselves and how to raise money for this event. We later decided to hold off two events which includes a pup quiz and a craft fair which then our team leaders hosting these events created a name chart for us to put down our names for that event and the role we would be taking that day. I put my name down for the Craft Fair with the role of being a helper which includes guiding people, minding stalls when the buyer has left for a moment and making sure nobody steals anything from the stalls.
Sarah, Dayna and I worked on creating small posters for the front and back entrance that day to show people where the Craft Fair by making arrows from highlighters. Here is the pictures I took to show the three we made and stick to the entrances. During the whole day of minding stalls, taking breaks and keeping a eye out we had bought a collection from each being stickers, keychains, pins, zines, earrings and postcards. Afterword’s when the everyone was starting to pack up, we were instructed to take them off and give them to others who ran the craft fair and left.
3 small posters for the day of the Craft Fair
CV
For my CV form, I had updated mine for any progress I had this year before the end of our final year classes using Microsoft Word and Photoshop to create it. I had gotten feedback from my lecturers about my CV as I had researched ways to make it better and only for someone in animation industry to approve it. I did not add a logo since only my name or initials are significant for the CV and had added software I have used or a professional at from my three years in Ulster University. By rearranging subtitles and textboxes, then got advice of the colour of the CV since white did not go well with the orange and blue text. So I decided to have the page in a orange and blue colour scheme to brighten it up in display and be equal to the text but still in contrast. Which then I printed out and went to deliver it to our module class.
Portfolio
I had sorted my entire portfolio from clips of my major project, sketches from my book and previous year works from other assignments I did in the 3D and 2D area with the skills I’m showing for my future roles. I did not have much time to do a showreel since I did not have enough animation to fill in the gaps or have most recent other than the 2D animation from the major project. As I would be using a social media platform to showcase my work since I signed up to Artstation as companies can view my work and art skills put into each one with finding the role for storyboard artist, concept art, character design and animator of 2D/3D. Therefore I have even more chance of getting a specific job role for a company in need of my skills and qualities. Here is the link and my profile page with my best work showcased. laurenmaxwell7.artstation.com
Portfolio on Artstation
Set-up
Before the showcase, we had set up our table in the final year room with everybody else where the banners and our work will be put on display. We arranged the tables with props, cloths and fake leaves to give it the dark forest haunted theme with monster displays and a flashlight. Here is our display before the Friday.
While this is the final version we put together with monitors, our Cv’s and artbook. However, one of our lecturers was supposed to put our banner up before 5pm what will continue with us and other teams on the Monday. It was a fun experience with the team on collecting the last of the stuff to see how it would look like for the latest display.
Promoting Work Online
Although I used Artstation for my portfolio, I had signed up to LinkedIn to promote myself with the skills and experience I had received from Ulster University, Volunteering at Cancer Focus and Work Experience from Jam Media. Here is the link to the page: https://www.linkedin.com/in/lauren-maxwell-340714309/
Artbook
For our artbook collection, Dylan had volunteered to collect all our pieces of work for what we had done for the major project which includes character creation, environment, storyboards and etc. Then he would give them to Sarah after printing where she would trim the pictures and buy the artbook by drawing the cover. She and I would then stick the images into the artbook taking turns and place onto our setup once finished with the pictures I had taken. Here is some off the pictures I taken from the artbook between images.
Storyboard
Storyboard 2
Storyboard 3
Concept art
Concept art
Character Sheet
Character Sheet
height difference
Concept art
Concept art
Concept art
Concept art area
Beast Model
Beast Model
Tree
Tree
Beast Rig
Frame Still
Frame Still
Frame Still
Frame Still
Backgrounds
Backgrounds
Backgrounds
Backgrounds
Backgrounds
Backgrounds
Backgrounds
Poster 1
Poster 2
Reflection
The Creative Futures this year, was an enlightening experience with me thinking about my future careers and promoting my work online and in physical form. I Volunteered at the Craft Fair which was a great event to attend for as I expressed good communication with other helpers and the sellers at the stalls as it was a great experience helping out. I loved making our poster design through the entire semester as I got better with the digital illustration on Krita and gathering all my research of references with my teammates. However, if I was too change anything at the start of the semester it would be balancing more time for the creative futures and the major project since the major project took up way too much of my time to get both done. Another note is doing more 3D animation with the 2D animation from our main project to create a better and improved showreel this final year and maybe create business cards. On the other hand I enjoyed the experience and can not wait for our showcase to have companies and families to see our best works with hopes of getting offers from companies who have interest in my work.