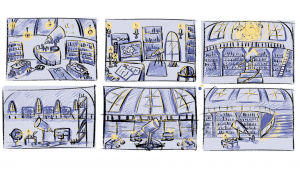
Concept phase
For this assessment I was tasked with working in a group to create an observatory scene. I started by designing my room layout, I made some thumbnails to figure out the feeling I wanted to convey. I designed both grand rooms and smaller, cramped rooms. I preferred the look of the smaller room designs so I finalised my design by combining the elements I liked from the first and second thumbnails and creating a final drawing of the room as well as a floor plan to help with positioning furniture in the future.


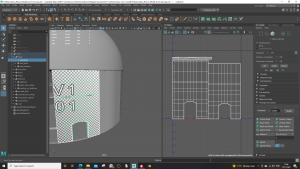
Block Out Room
The next step was to block out the room in Maya to see the positions of the furniture and size of the room. I followed my floorplan closely. After making the 3D block out, I decided to make the room bigger and grander as this would allow me to add windows to the walls and more architecture to the walls.


Prop Designs
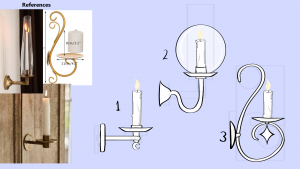
Once everyone in the group had designed their rooms, we made a list of common props used in all the rooms and divided them evenly between the group. I chose an ink pot and quill, bin, candle holders, sconces, and candles. I gathered some references form the internet and I designed different versions of the props and sent them to the group to see which was the most popular. These are the designs that were decided.


- Bin – 1
- Candle holder – all
- Ink pot – 2
- Quill – 1
- Sconce – 1, 2
- Candle – 1, 4, 6
Prop Modeling
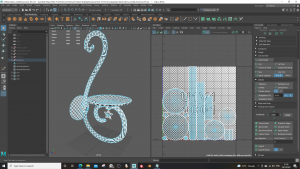
Ink Pot and Quill:
I used a cylinder to make the stalk of the feather, tapering the top and shaping the ends into points. I then add a cube and flatten it to make the main feather, I add edge loops and shape it.
For the bottle I added a cylinder, adjusting the number of segments to 12. I added edge loops to make it into a diamond shape as I wanted it to look like crystal. I extruded the top of the cylinder to make the interior of the bottle and beveled all the edges to help it keep it shape when smoothed.


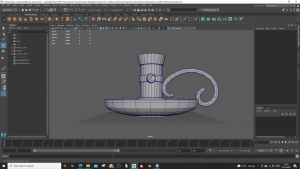
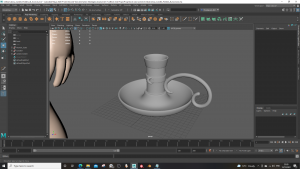
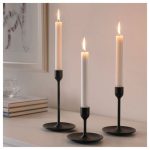
Candle Holder 1:
I started with a cylinder, added edge loops, and shaped the base to look like a dish. I added some details on the part that holds the candle and beveled the edges.
To make the handle I used the EP curve tool, added a cylinder, and deleted everything but the top face. I selected the line and the face and extruded it adding subdivisions to make the shape bend around the handle.
I made the moon using a cylinder, I added a subdivision to the top face, moved it to the side of the cylinder, I then deleted the inner face and extruded the shape.
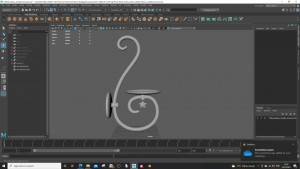
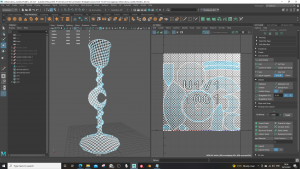
Candle Holder 2:
I made the tall candle holder using the moon from the previous holder and enlarging it. I added a cylinder and shaped it to wrap around the moon. I added a helix to the base to for decoration, adjusting the top to fit to the moon. I duplicated the base and helix to make the top of the holder. The cup at the top was made using a cylinder, the inside was extruded to make it hollow.
I used the same process to make the taller candle holder, this time adding a star instead of a moon.


Candle Holder 3:
For the third holder I used the same moon from the first holder, I then added two cubes and flattened them to act as the base of the holder.


Sconce 1:
I used my first candle holder to make the plate the candle would sit on. I made the supports and wall mount with cylinders. I then added a moon to the bottom of the support for some detail.


Sconce 2:
I modified the first sconce plate to make it flatter and thinner. I then added a cylinder and used the EP Curve tool to make the spiral. I used the same wall mount from the first sconce and made supports using flattened cylinders. I also added a star to the base.

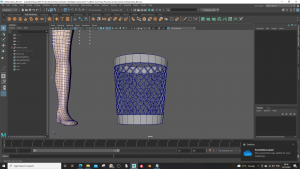
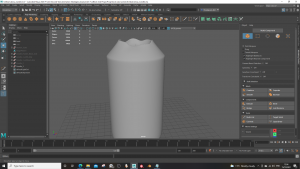
Bin:
Video help – https://www.youtube.com/watch?v=DnkvZYaepwM&t=3s
I followed the tutorial very closely as it was the same style of bin I wanted to model. I added a cylinder and used the multi-cut tool to add subdivisions. I then used the poke tool to make the grid on the bin. To thicken the grid, I extruded the faces and beveled the edges to make them stay sharp after smoothing.

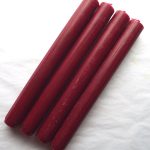
Candles:
Video help – https://www.youtube.com/watch?v=xJfxfWDP59k&t=813s
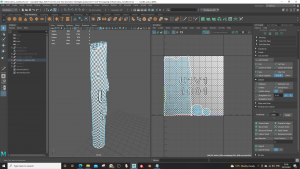
I started with a cylinder and added edge loops. I extruded some of the faces to make drips on the side of the candle. I extruded the top of the candle to make it look like it had melted. I then added cylinder to make the wick.
The second candle was made the same way as the first, I wanted this one to be thicker and more melted and warped.
The final candle is supposed to look like it has only been lit once so there are no drips down the sides and the top is only a little warped.


Prop UV Unwrapping
Ink Pot and Quill:
To unwrap the pot, I cut the bottom off and added a cut in the back, next I cut off the top and cut down the interior.
I cut the back quill and then cut around the feather to flatten it.


Candle Holder 1:
To unwrap the first candle holder, I cut down the side with the handle as it would hide the seam. I then cut the top and inside the holder. I added a cut at both ends of the handle and added a slip down the inside of it. I cut the back off the moon. I tried to straighten the UV as some are diagonal however this warped the squares, so I left it as is.

Candle Holder 2:
For the tall candle holder, I cut up the side of the holder. The steam was a little more difficult as it was twisted but I tried to keep the cuts to the inside. I cut the moon down the middle and removed the base of the holder.
I did the same process to the other tall candle holder.

Candle Holder 3:
I cut the bottoms off the cubes and add slits down the sides so it could lay flat. I then cut the moons in half.

Sconces:
I cut the top off the holder and removed the inside. I then cut down the back of the support beam on the bottom. I cut the moon in half and cut the bottom of the wall mount. The second sconce is a similar process; however, I separated the main spiral into three to improve the resolution of the UV’s.

Bin:
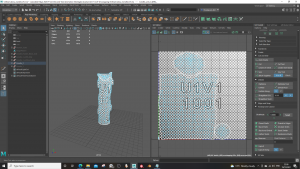
After struggling to unwrap the bin by hand I realised that it was because I beveled the edges which added too many lines to the bin making it extremely hard to unwarp, so I remade the bin. After that I cut the top and bottom off and flattened them. For the cage I just used the cuts Maya generated, they work well even though they look complicated.

Candles:
I cut up the back and removed the top of the candle. I did the same process on the other candles.


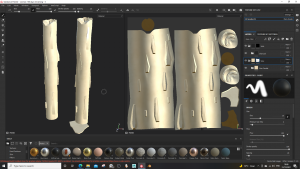
Room Modeling
I referenced both my floor plan and sketch when modeling the room. Overall, the room is basically the same, however I decided to make the room bigger and add a second level supported by pillars. After receiving some feedback, I was told to add more detail to the pillars as they look low poly. I also added some bars to the window to create some interesting shadows when the model is imported into Unreal Engine.


Room UV Unwrapping
For the roof I cut down the sides of the gap and separated the top from the underside. I cut the front and back of the support beams and unfolded them.


For the second floor I cut down the middle of the second floor to separate the top and bottom. I cut the underside of the handrail, then cut it into four parts.


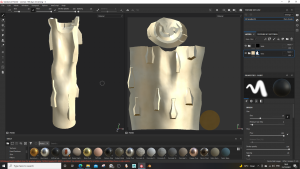
I cut down the back of the full pillar and separated the detail pieces. I did the same with the broken ones, however I also cut around the broken section to separate it.


For the plain wall I cut down the sides. I did the same process to the wall with the door and the wall with a window, however I also cut the door and window frame away from the wall.

I cut down the middle of the first floor to separate the top from the underside.

To unwrap the doors, I cut the front and back away from the side. I cut the side into two to fit onto the UV map.

For the window bars I separated the bars from the connecting crosses.

For the platform I cut the top and bottom off and cut down the back. I cut the handrail along the underside to hide the seam. The stair border and railing were difficult to unwrap, I tried to keep all seams to the underside. While unwrapping the stair boarder I found some duplicated faces and edges so I had to fix the model before I could continue unwrapping. I cut the bottom off and added slits up the sides to of the steps.


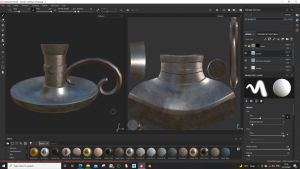
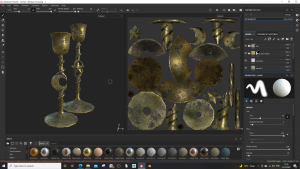
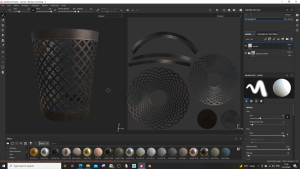
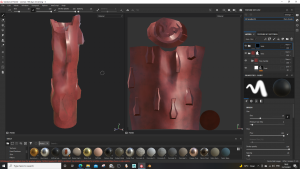
Prop Texturing
I decided to make different variants of the props to give the other members of the group as much choice as possible when it came to them picking what looked best in their models. Before Texturing I looked up some references on the internet.


Ink pot:
I made three variants for the ink pot, plain glass, greed tinted glass and blue tinted glass.


Quill:
I also made three variants for the feather. I used the fibers feather brush to create the texture. For the brown feather I use deep brown and a lighter brown to create stripes that fade to cream near the quill. For the black feather I used black, blue, purple, and green to create a colour shift effect. For the gray feather I faded from dark grey to white.


Candle Holder 1:
I made four variants for the first candle holder, these include gold, tarnish gold, silver, and tarnished silver. To create the scratches, I used the sharp line brush and added lines to the handle and around the edge of the holder as this area would get damaged the most.


Candle Holder 2:
I created six variants for the tall candle holders, gold, tarnished gold, silver, tarnished silver, black steel and tarnished black steel. I used the same brush as the first candle holder to create the scratches as well as adding the dirt smart material to the tarnished versions.


Candle Holder 3:
I made four variants for the moon candle holder. I used the same process as the first candle holder.


Sconces:
I made four variants for both sconce designs, gold, tarnished gold, silver, and tarnished silver. I used the same process for the sconces as the candle holders.


Bin:
For the bin I made four variants, silver, silver tarnish, black steel, and black steel tarnish. I also added the dirt smart material as it made the bin look grimier.


Candles:
I created three variants for the different candle designs, white, red, and black. I used the smart material candle wax and charged the colour for the different waxes.


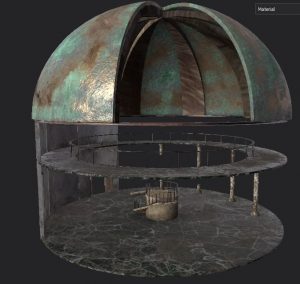
Room Texturing
When I was texturing the room, I tried white floors with dark walls and dark floors with lighter walls. After looking at the props I decided the dark floors with the lighter walls would look better.

Once I had decided what materials I wanted to use I looked up some references from the internet for those materials damaged, rusting or chipped.


For the floors I used Marble Verde Alpi, I added dirt to the floors to make them look as if they had not been cleaned for a long time.

I used Concrete Simple for the walls, I used Concrete Bare to distress the walls.

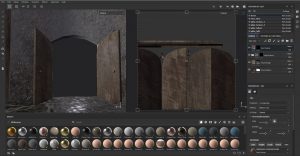
The door, roof beams and wall beam are Wood Walnut, I used the charcoal wide brush with the material Wood Rough to add ware patches.
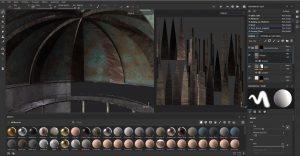

The Roof is Bronze Armor with Bronze Statue and Bronze Corroded to create corrosion.

I used Steel Dark Stained for the platform and second floor railing as well as the steel support on the roof and the window bars. The rust texture is Steel Rust Surface and Rust Coarse


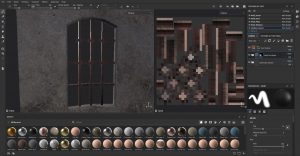
For the pillars and platform, I used Marble Fine White. I added dirt using the dirt brush and different shades of brown.


Once I had finished texturing, I exported the textures using the Unreal Engine 4 (Packed) setting.
Importing into Unreal Engine
I started by importing the fbx files and the textures for the props and room model. I created a material. I added the Base Colour, Normal, and the AORM textures to the node and changed the textures into parameters. To control the brightness, I added a multiply node to the base colour and attached a scalar node. To adjust the roughness, I added a multiply node to the AORM node, then attach a constant and changed it into a parameter.

Once the main material is complete, I create an instance of the main material and change the textures to create the different versions of the prop. I am also able to adjust the brightness and roughness without affecting the other versions. I did this for all the props created for the room.

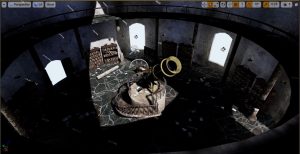
This is the room with all the props textured and placed where I want them.
Lighting
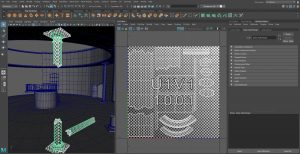
The sun is set to stationary and rotated to point up, so the sky becomes night, tick the refresh reference box, and bake the lighting. To fix the shadows, click lit, optimization viewmodes and then lighting density. I ran into a problem when I tried to bake the light map for the first time, this error message popped up.


I tried to fix it however I had not luck so I asked Henry to have a look at my scene; he was able to find the problem, the telescope piping was set to 4K which crashed the light map build, once I adjusted the resolution the light map built perfectly without crashing. To adjust the resolution click the object, scroll down the right menu to lighting section, tick the override light map, go up in powers of 2. Change everything to green. Once done, click lighting density and click lit. Bake the lighting again.

Click the light menu on the left, and select the spotlight and place it, change it too static. Change the attenuation radius to widen the light width. Change the inner cone angel to 100 to flatten the light and increase the source radius to engulf the entire scene. Also increase the soft source radius. Change the intensity to about 4 and de-tick cast shadows. I placed the spotlights at all the windows to help light the scene otherwise it would be very dark. I also added a spotlight to the gap in the roof and narrowed the attenuation radius to make a more direct beam of light.


In the left menu select lightmass importance volume. Enlarge the cube to envelop the room model, this tells Unreal Engine to focus the light bake in this cube so the bake will take less time to render.

To light the rest of my scene I decided to use candles, to make them flicker I followed this tutorial:
https://www.youtube.com/watch?v=2ZMcZqL1Eqw

I thought the subtle flickering would add a slightly creepy atmosphere to the room. I made three different speeds, so they don’t synchronise up when flickering.

For the flame I created a texture and called it emissive. I held 3 and right mouse clicked, then I made the node a parameter and called it colour. I added a multiply node and connected a scalar node to it, set the default value to 1. Connect the multiply node to the emissive colour. After all the lighting was added I baked the lighting.
Camera
The main camera type I used was the cine camera actor, 16:9 DSLR. I placed cameras where I thought would make interesting shots that would convey an abandoned look while also highlighting the props and layout of the room. I played around with the focus shifting from prop to prop. I ended up with 10 different shots. To render a clip, select the camera and the shot that will be rendered. Click the clapboard icon and select movie render queue. Click unsaved config, output, set where the render will export. Click render local. Repeat for all the clips. Once I had all the clips rendered, I edited them together and add music to the background.


Overall I am extremely proud of the outcome of this project, the lighting, props, textures and assets came together so well. If I was to do this again I would add some greenery to the scene as I think this could add some depth to the room as well as adding some interesting shadows. I would have also liked to play with the candle effect more as it does look ok but I would have preferred to make an animated flame instead of a emissive flame shape.
Reflection
I enjoyed this semester as I was able to learn a new system and I am very happy with the work I produced. The recorded videos and in person classes were very helpful when it came to learning Unreal Engine. The in-person classes allowed me to ask questions if I needed help with a problem and the recorded videos meant I could go back and review them if I got lost or forgot what the next step was.
It was nice to work in a group for this project as it meant we could all discuss our ideas of what an observatory may look like. Also working in a group meant we could push our ideas further as more people were working on the project, making it easier to spread the workload between the group. I think the group worked well together as we all communicated and kept each other informed on what stage of the project we were on. It was also a nice challenge to make assets and textures look cohesive and not mismatched as multiple people worked on them.
I defiantly struggled with Unreal Engine as I had never used the program before, and it looked very complex. However, as I watched the recorded videos and figured out what I was doing it was not as hard as I thought it would be. I did end up having a problem when baking my lighting as an error kept popping up and I did not know how to fit it, but Henry was able to help. Overall, I am happy with what I have learnt and done this semester, I think the final render of the observatory came out looking really well and I am very proud of myself and my team.