Research
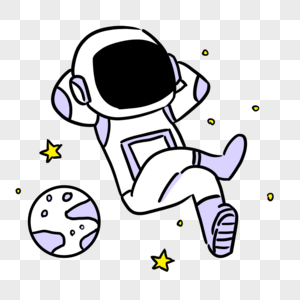
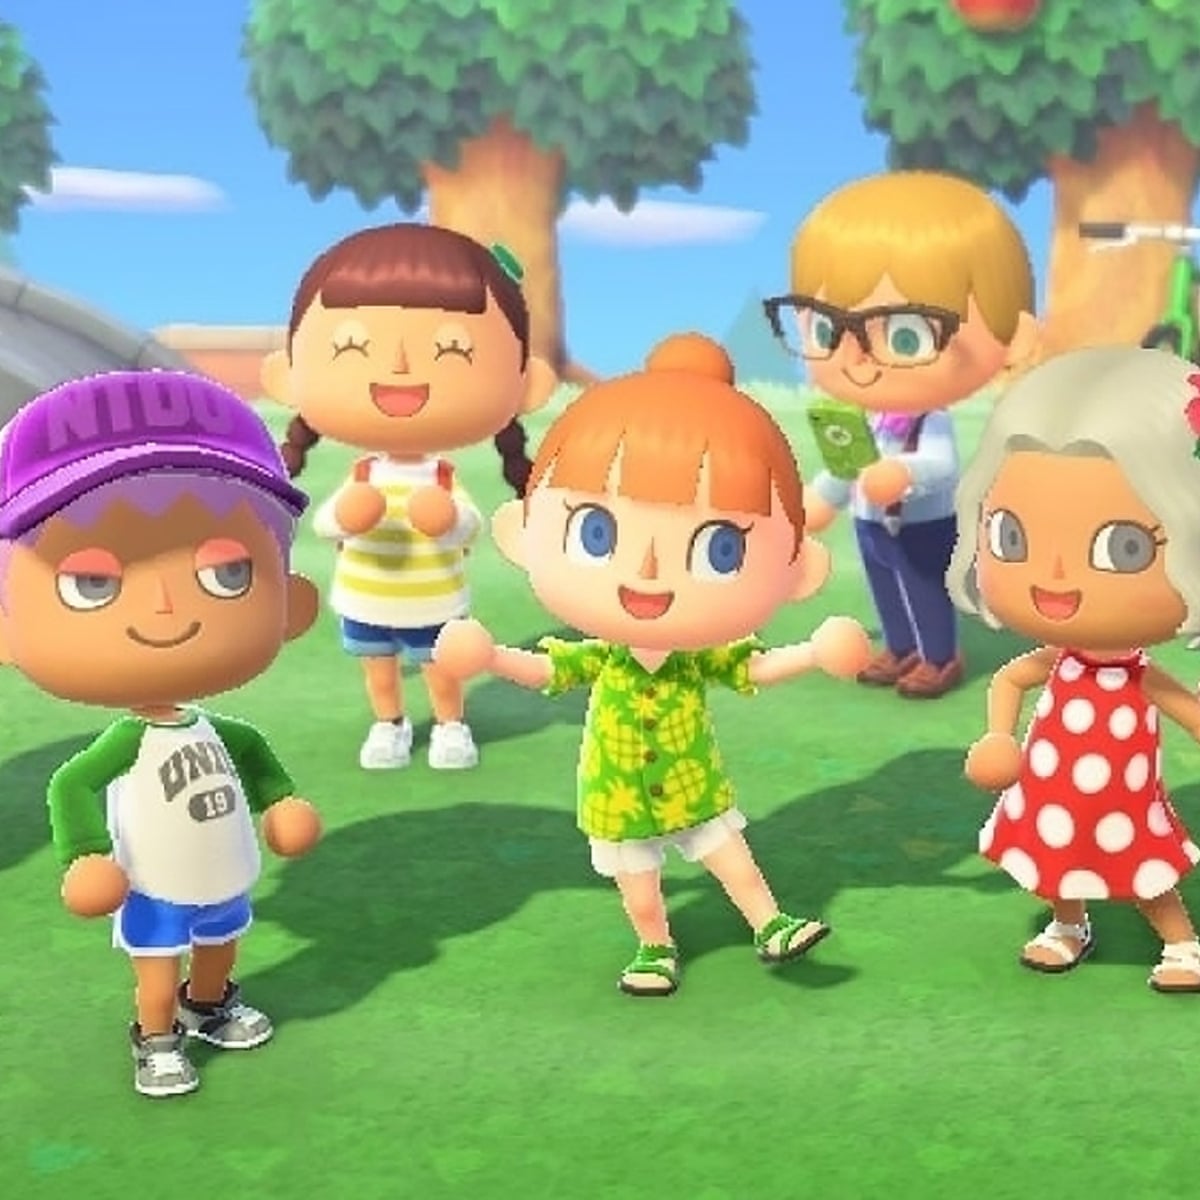
To start this assessment, I looked into different characters I found cute from TV shows, movies and games. I also looked on the internet to see what other artists had created. Here is the mood board I made. I really liked the food themed characters as well as the astronaut.

Concepting
After looking at my mood board I started to make some sketches of characters I could model. I really liked the marshmallow; the plant and the ice cream characters so I developed them further.

I drew three concepts for each to full explore the designs and see which I liked the most. I really liked the marshmallows sitting around the campfire, but I thought it would be too complicated and have too many polygons, so I went for the ice cream man with the fallen scoop.

I drew a 3D turnaround of the design to help me with modeling it in blender. I also tried some colour schemes using references of ice cream flavors. 

Sculpting in Blender
To start I cleared the scene of all the preloaded objects. I added in my references to the scene and enlarged them to 10.000, I also moved them to be -100m apart to give me room to work.

Cone Man:
I worked on the cone first as everything would attach to it. I added a cylinder and scaled it to match my drawing. I added edge loops to the cylinder to shape it to the drawing. I will add the splats that are on the cone when texturing.

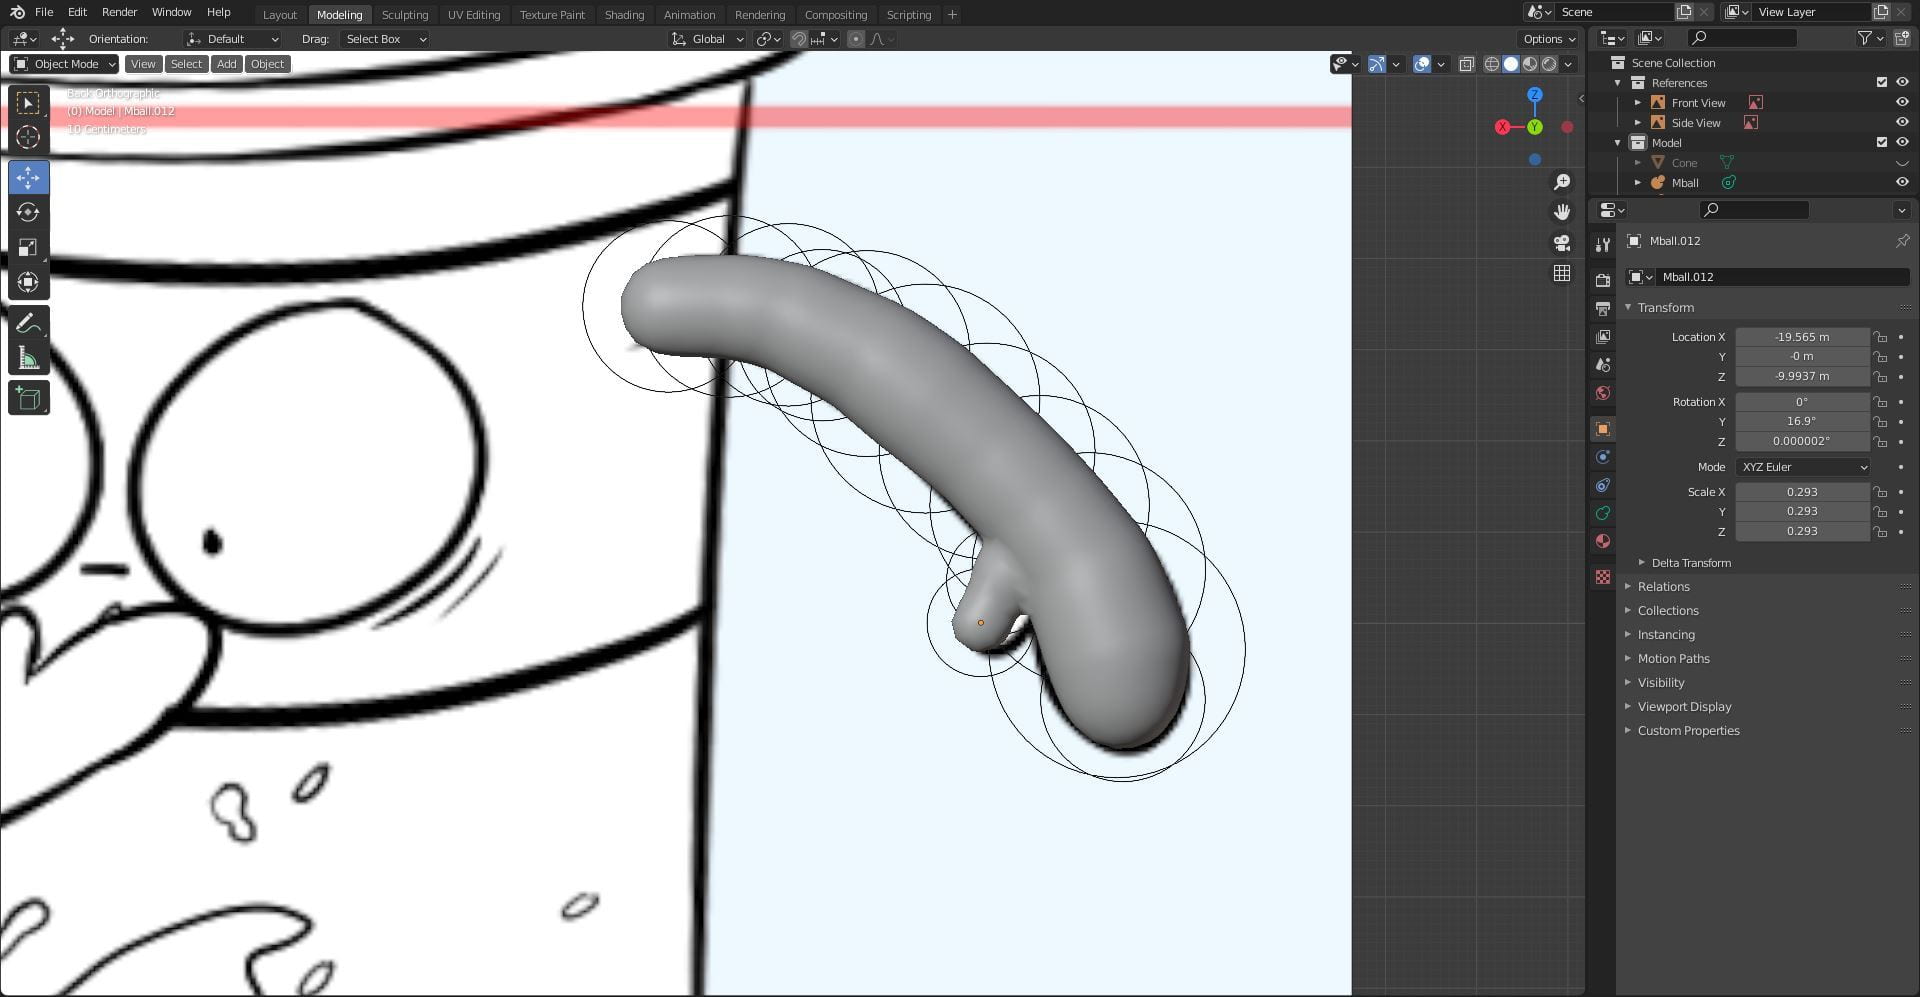
To make the limbs I used metaballs to form the shape. For the arms I started at the shoulder and worked my way down the arms, slowly enlarging them to for the hands. I also added small metaballs to make the thumbs. The right arm was a little more difficult as it had to bend around the cone. I used the same technique to make the legs. After making the shapes I converted the metaballs to a mesh by clicking the object option at the top of the screen and click convert to mesh.


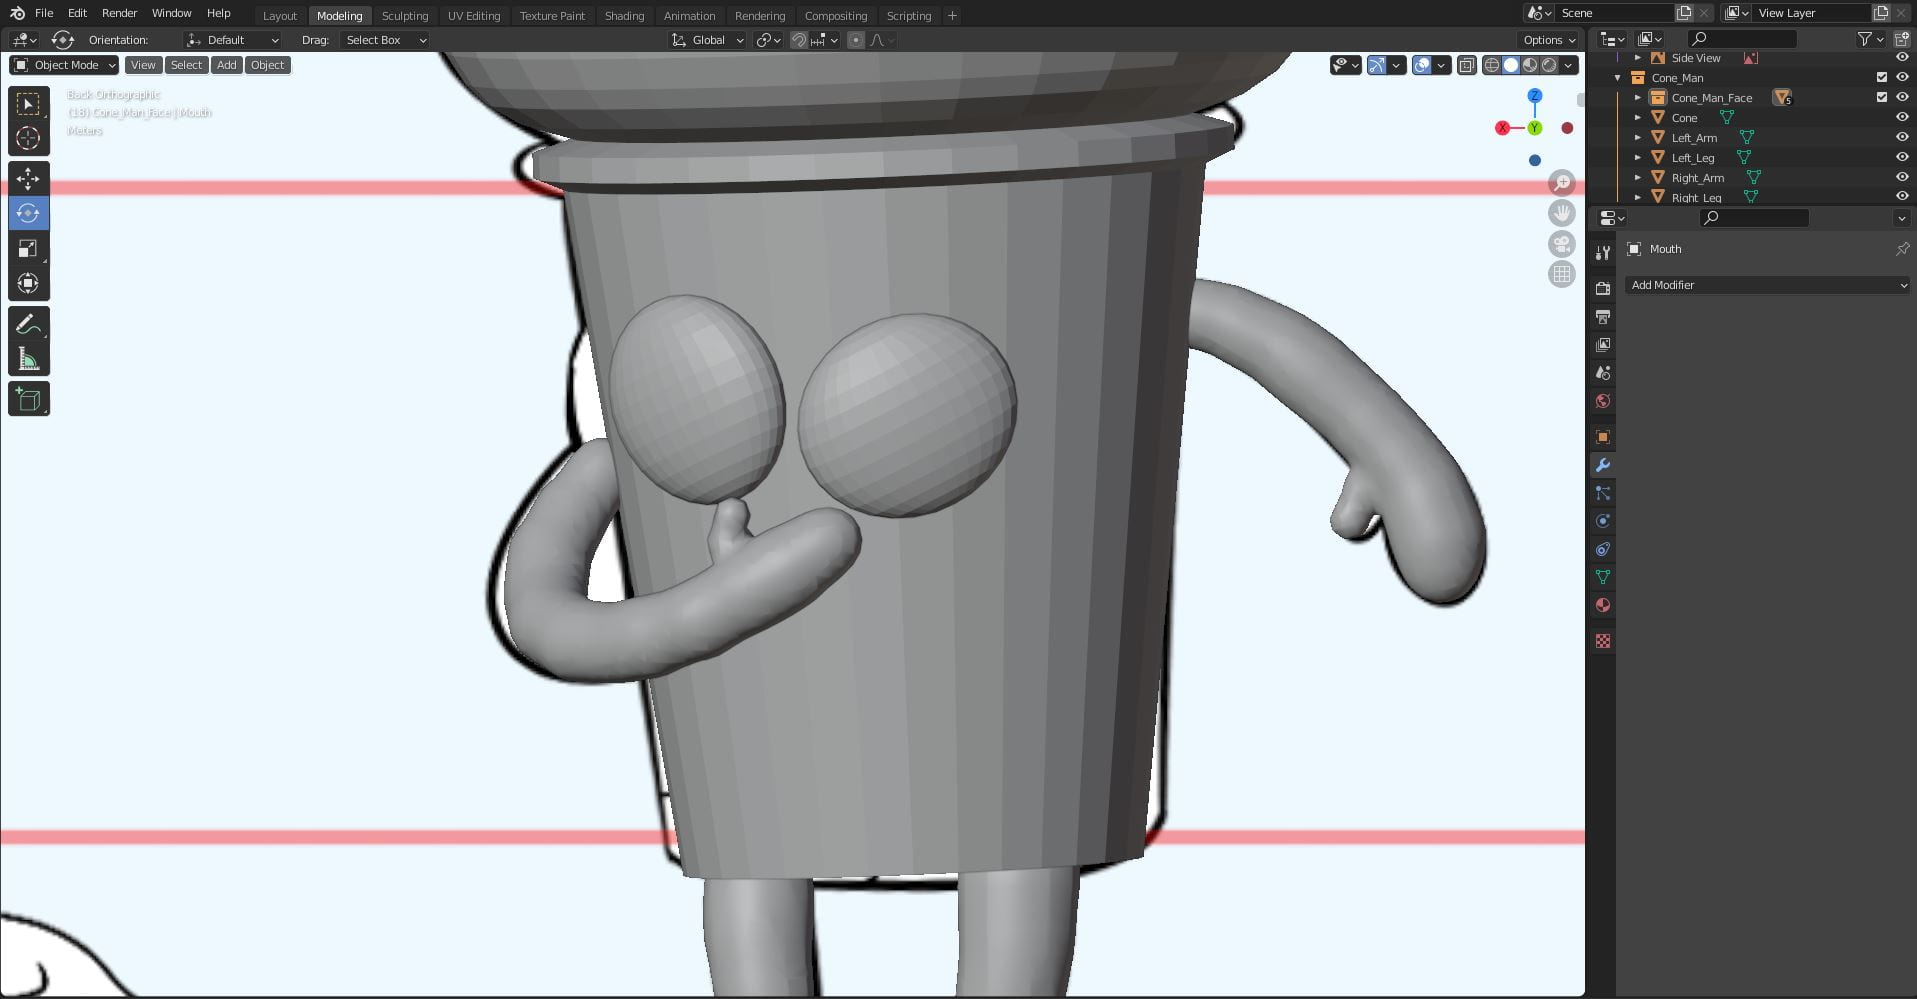
To make the face I added two spheres and flattened them to make the eyes, same process for the pupils. The mouth is a cylinder that was scaled to fit. I clicked the eyes and used smooth shading on the eyes to remove the grid texture. The eye creases will be added in the texturing phase.


Ice Cream Scoops:
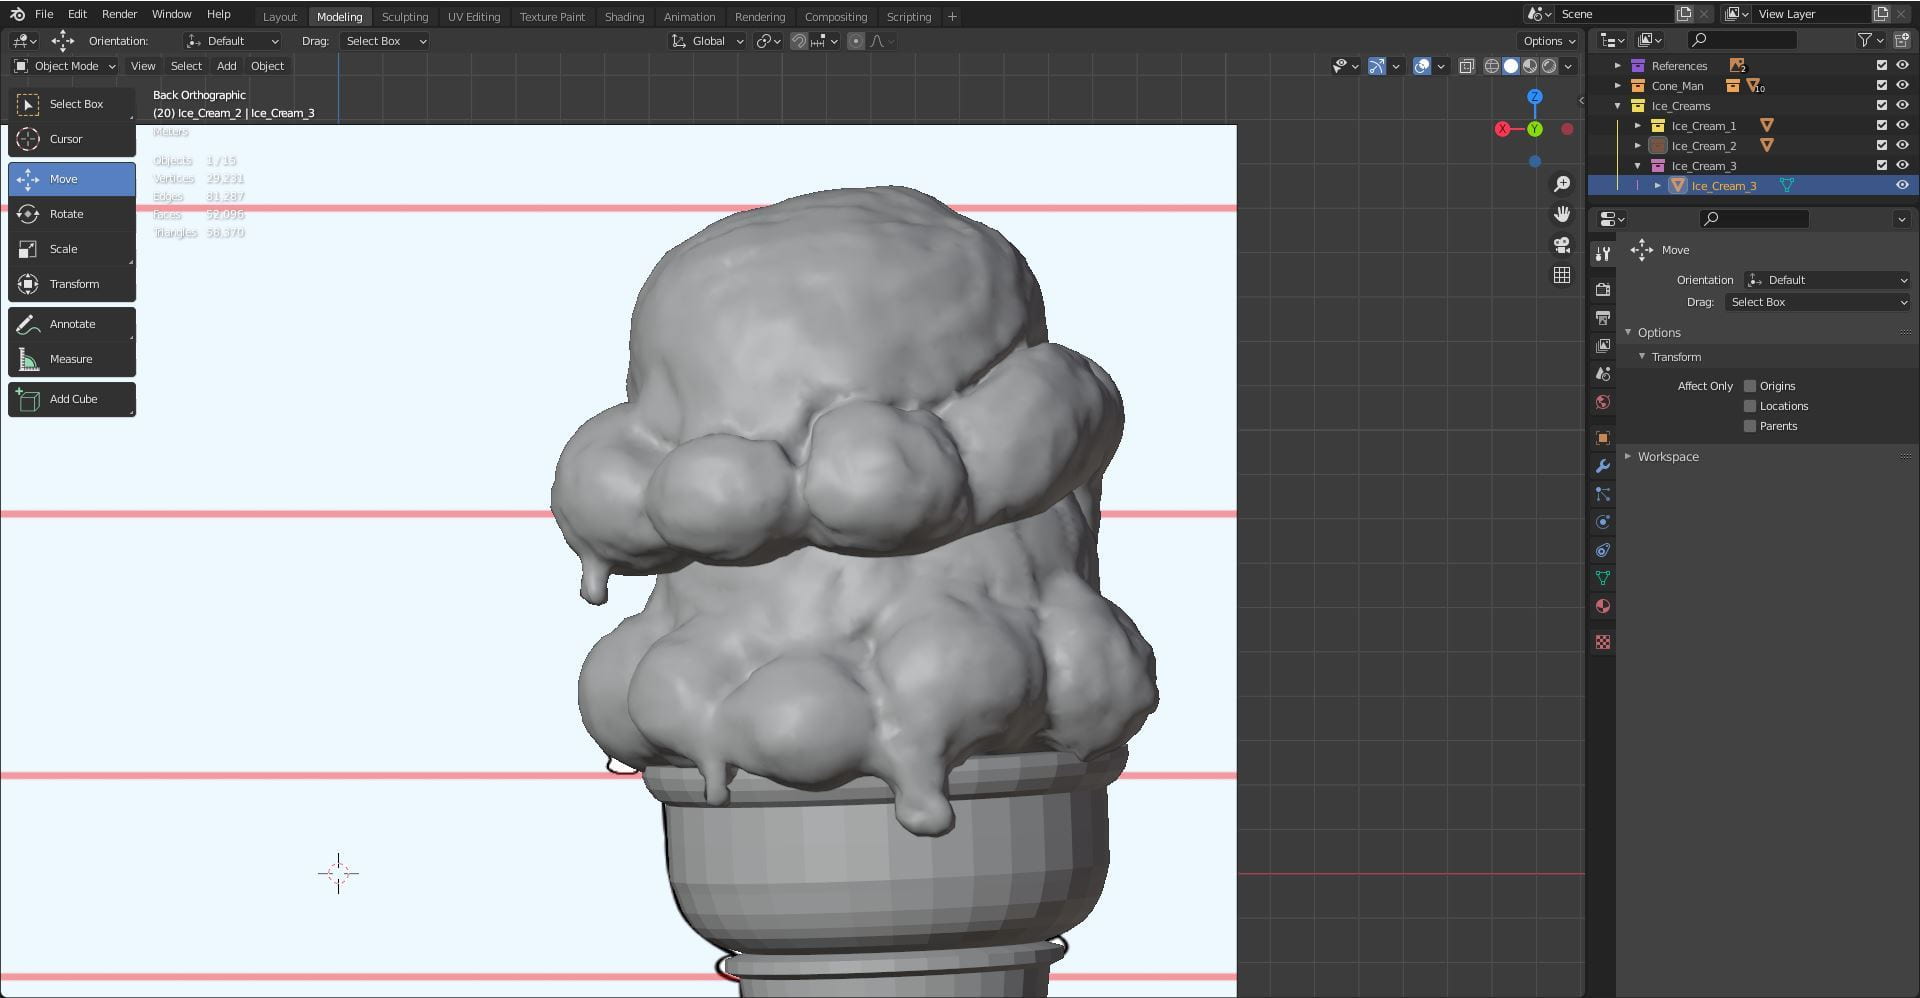
For the ice cream scoops I added a metaball to the center of the first ice cream, I continued to add to the sphere to form the shape of the ice cream. I repeated this for the other two scoops.


Once the scoops were sculpted, I change the mode to sculpt mode, turned on dyntopo to 3.00 and smooth the surface using the simplify brush. I then added some mass to the first scoop by using the clay strips tool and craved out some detail using the draw sharp brush. I also added some drips by using the grab tool and dragging some of the mass down the cone. I repeated this process for the second scoop. I made the third ice cream flatter and more spread out as it is supposed to be melting.


Talk With Michael:
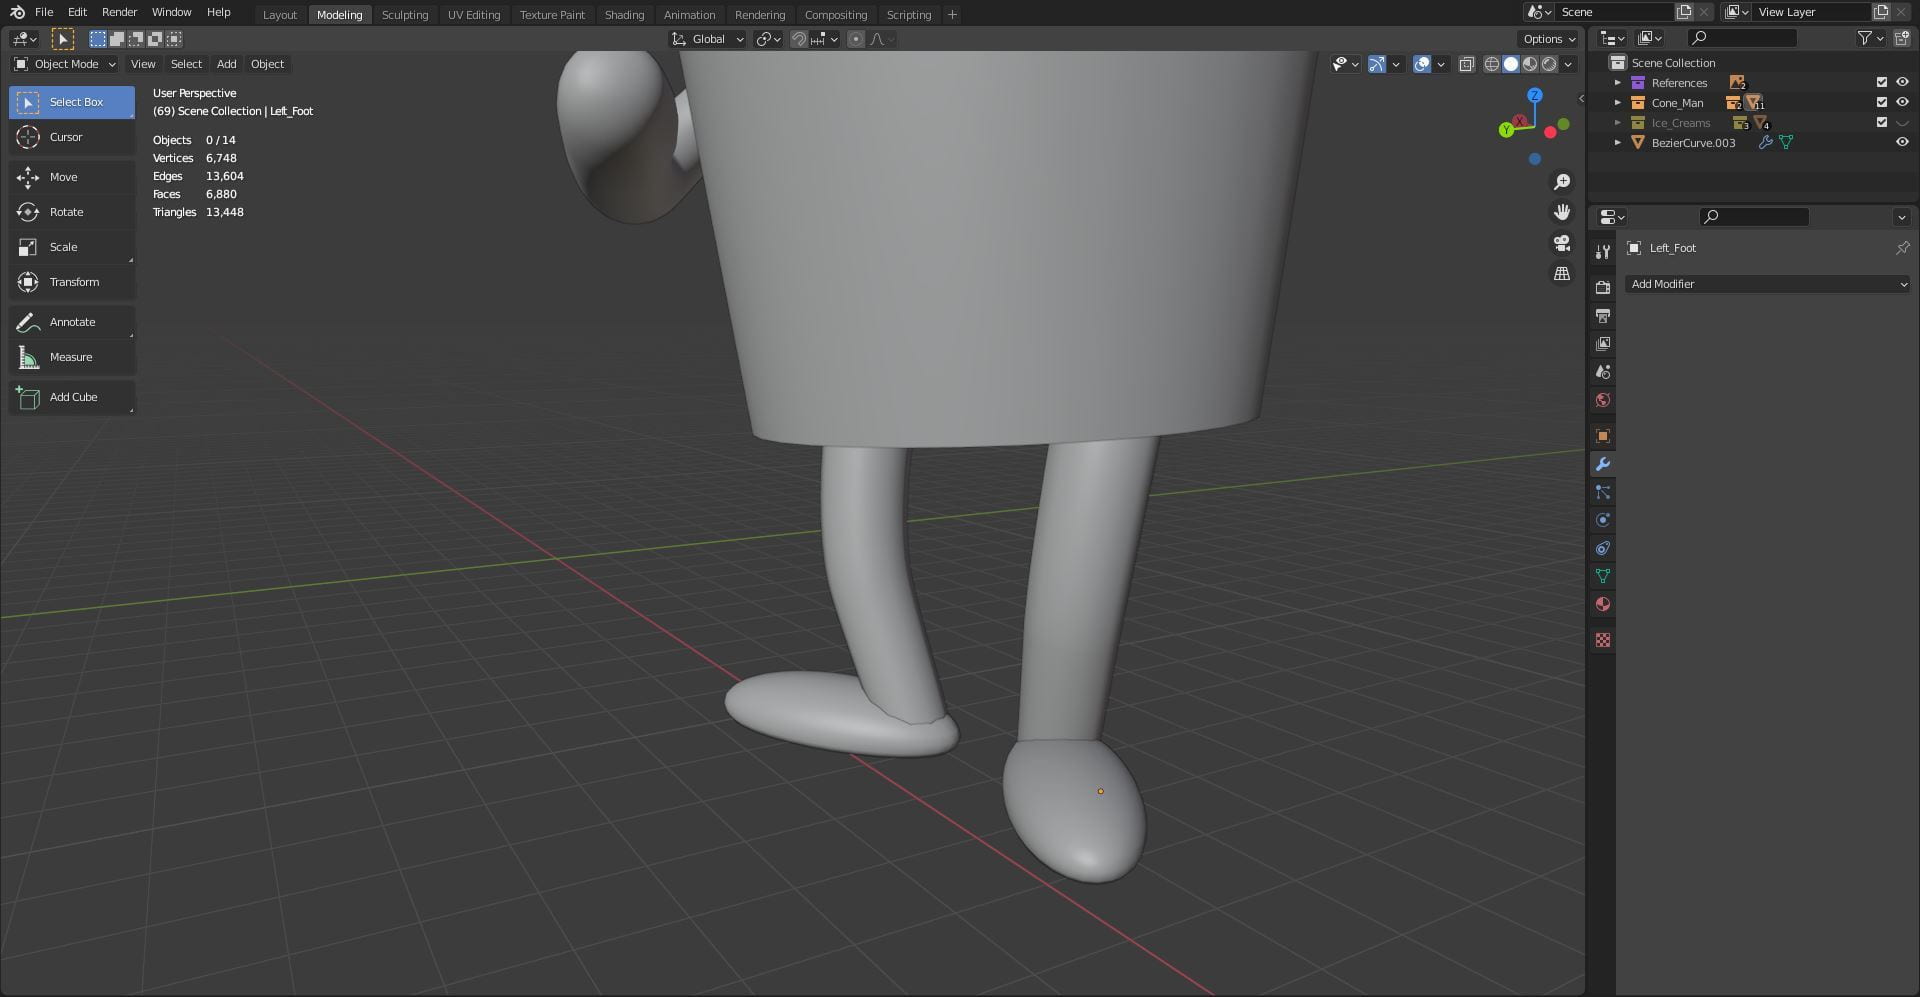
After my talk with Michael, he explained a better way of making the limbs, so I remade them. I clicked add, curve, bezier, bend it to the shape of the arm, in the geometry menu edit the depth to the desired thickness. Add another bezier and straighten it. Select the arm, using the dropper tool in the geometry menu click the curve, bend the curve to enlarge or taper an end. To make the thumb I selected the faces where the thumb would go and extruded the surface. I then add the ‘Subdivision Surface’ modifier to smooth it. I did the same process of the other arm and legs. To make the feet I added a sphere and flattened the bottom. I then clicked convert to, mesh to make them one piece.


Splat:
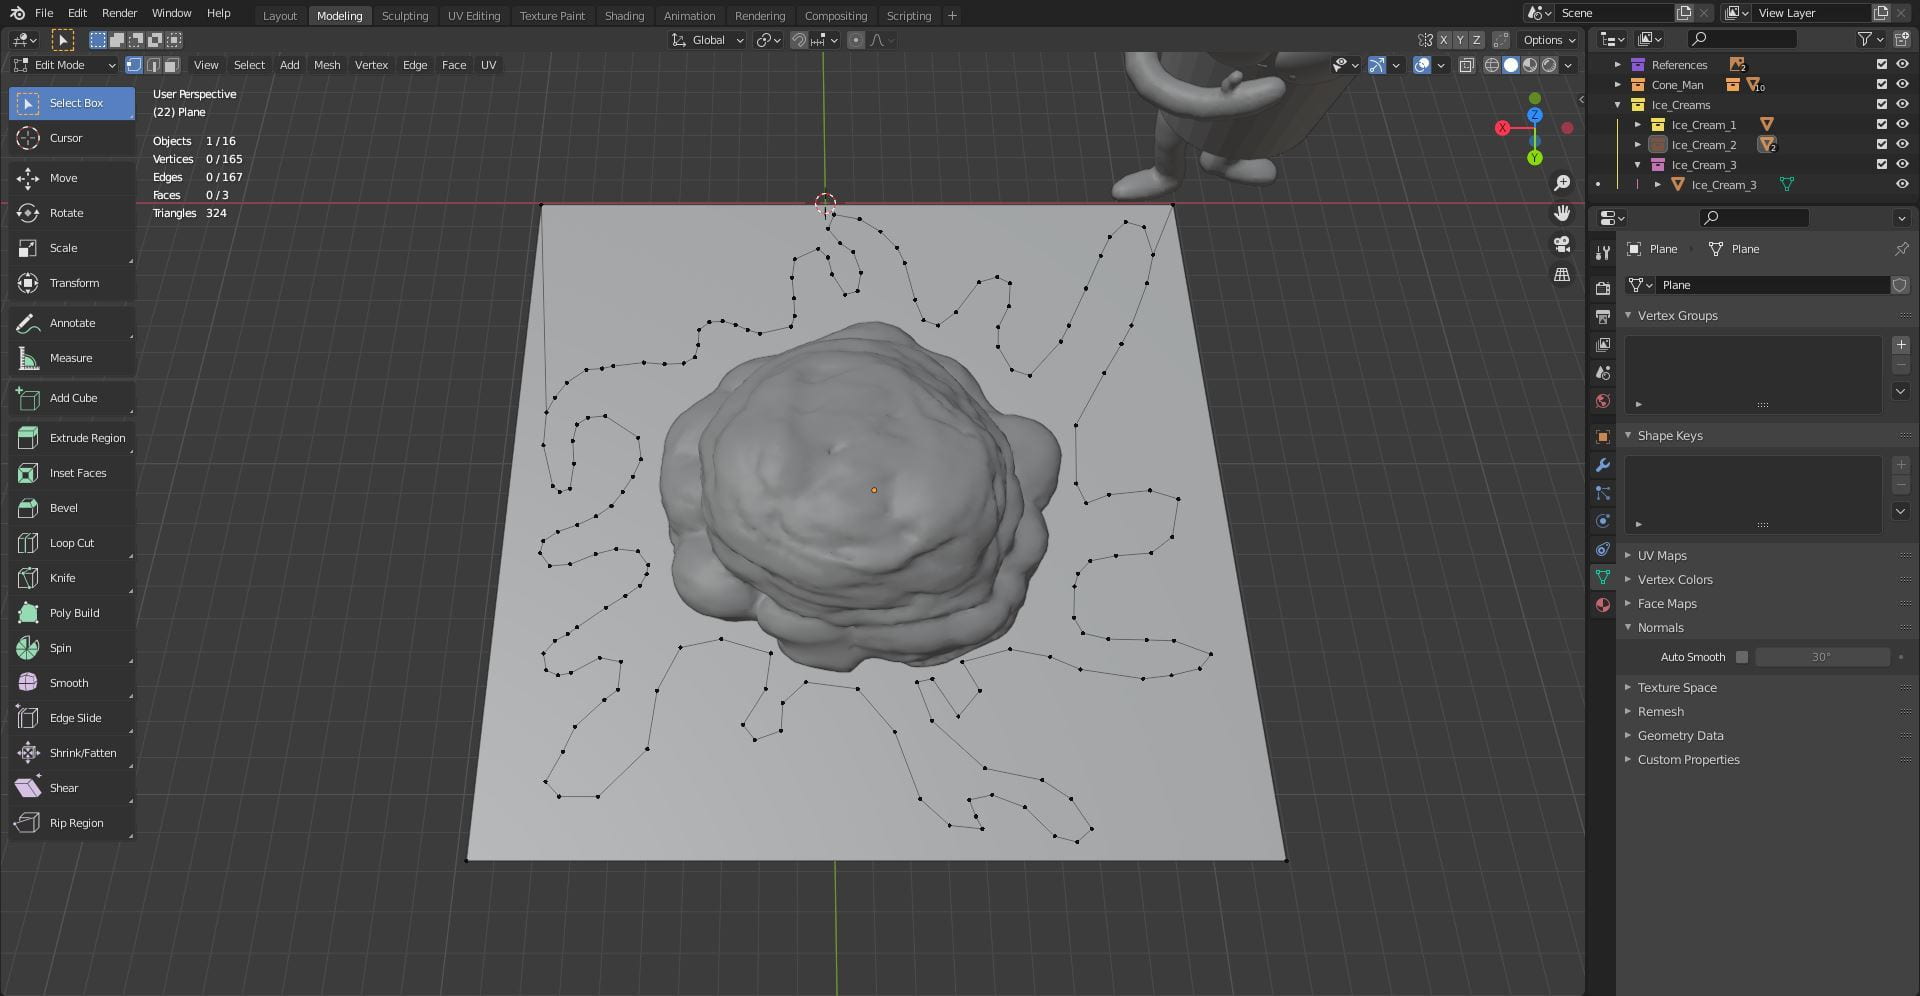
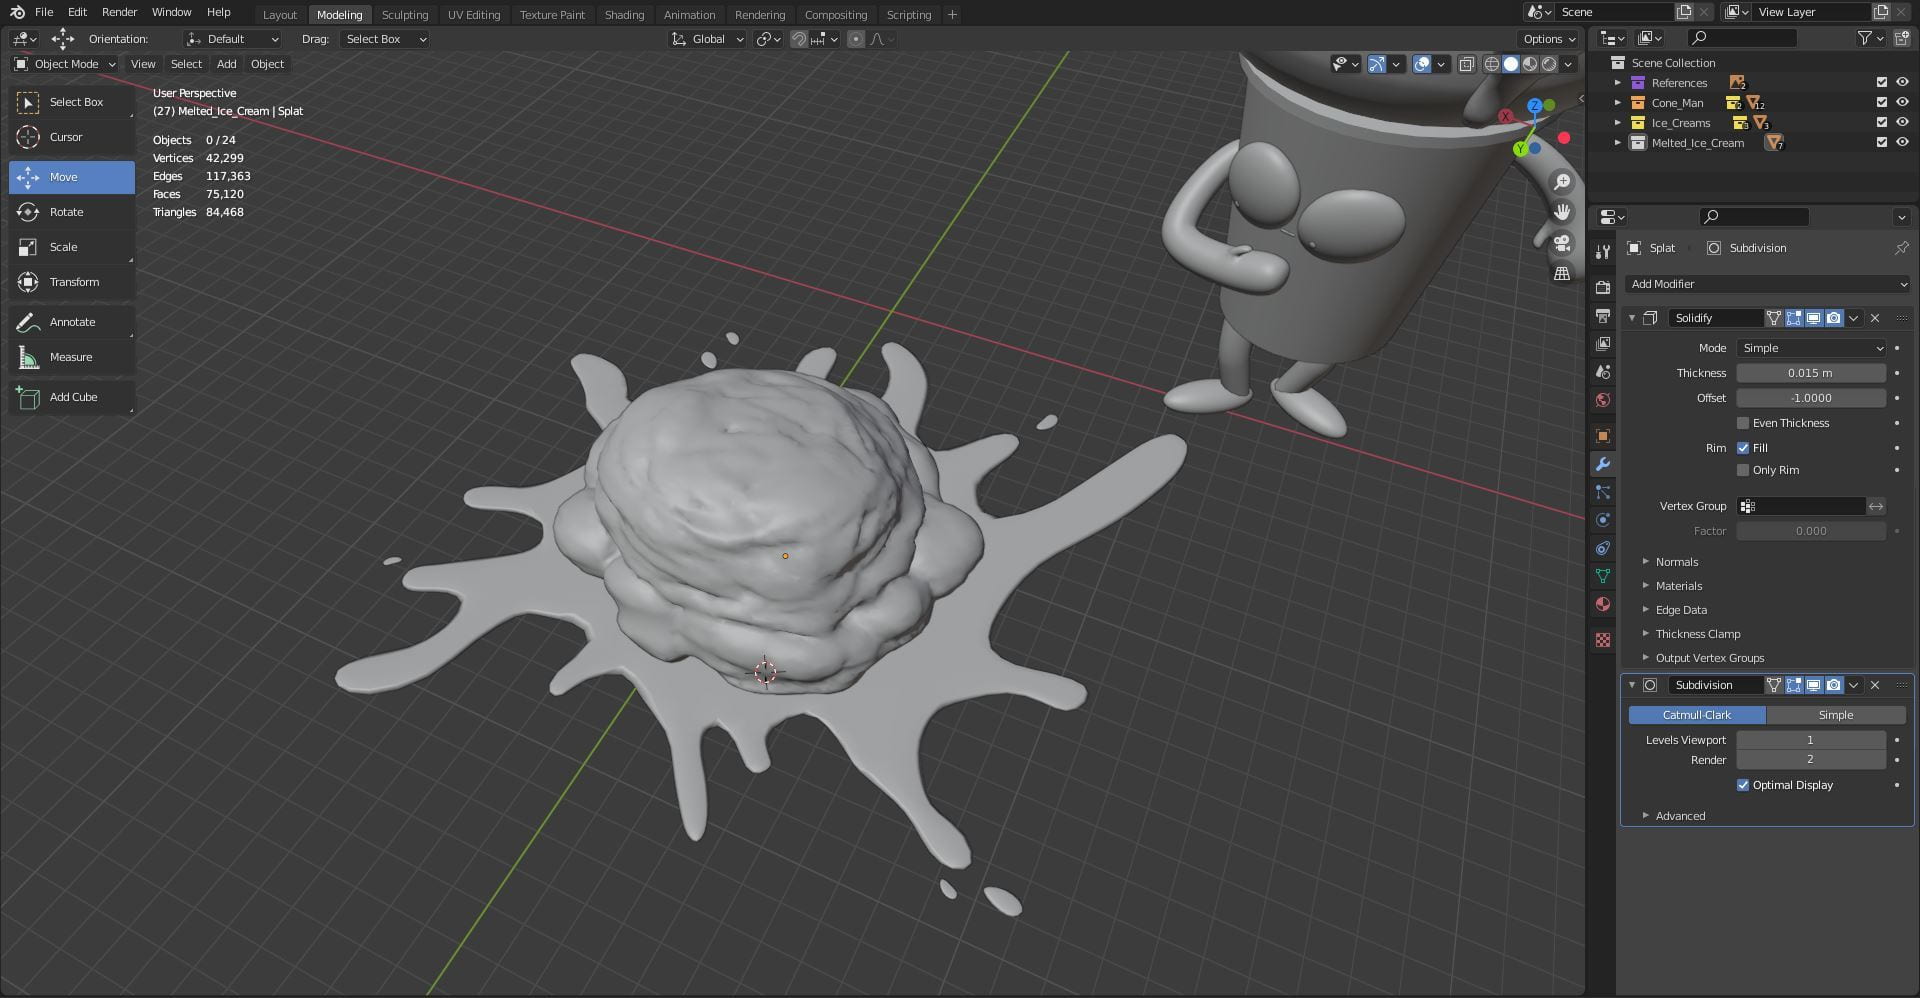
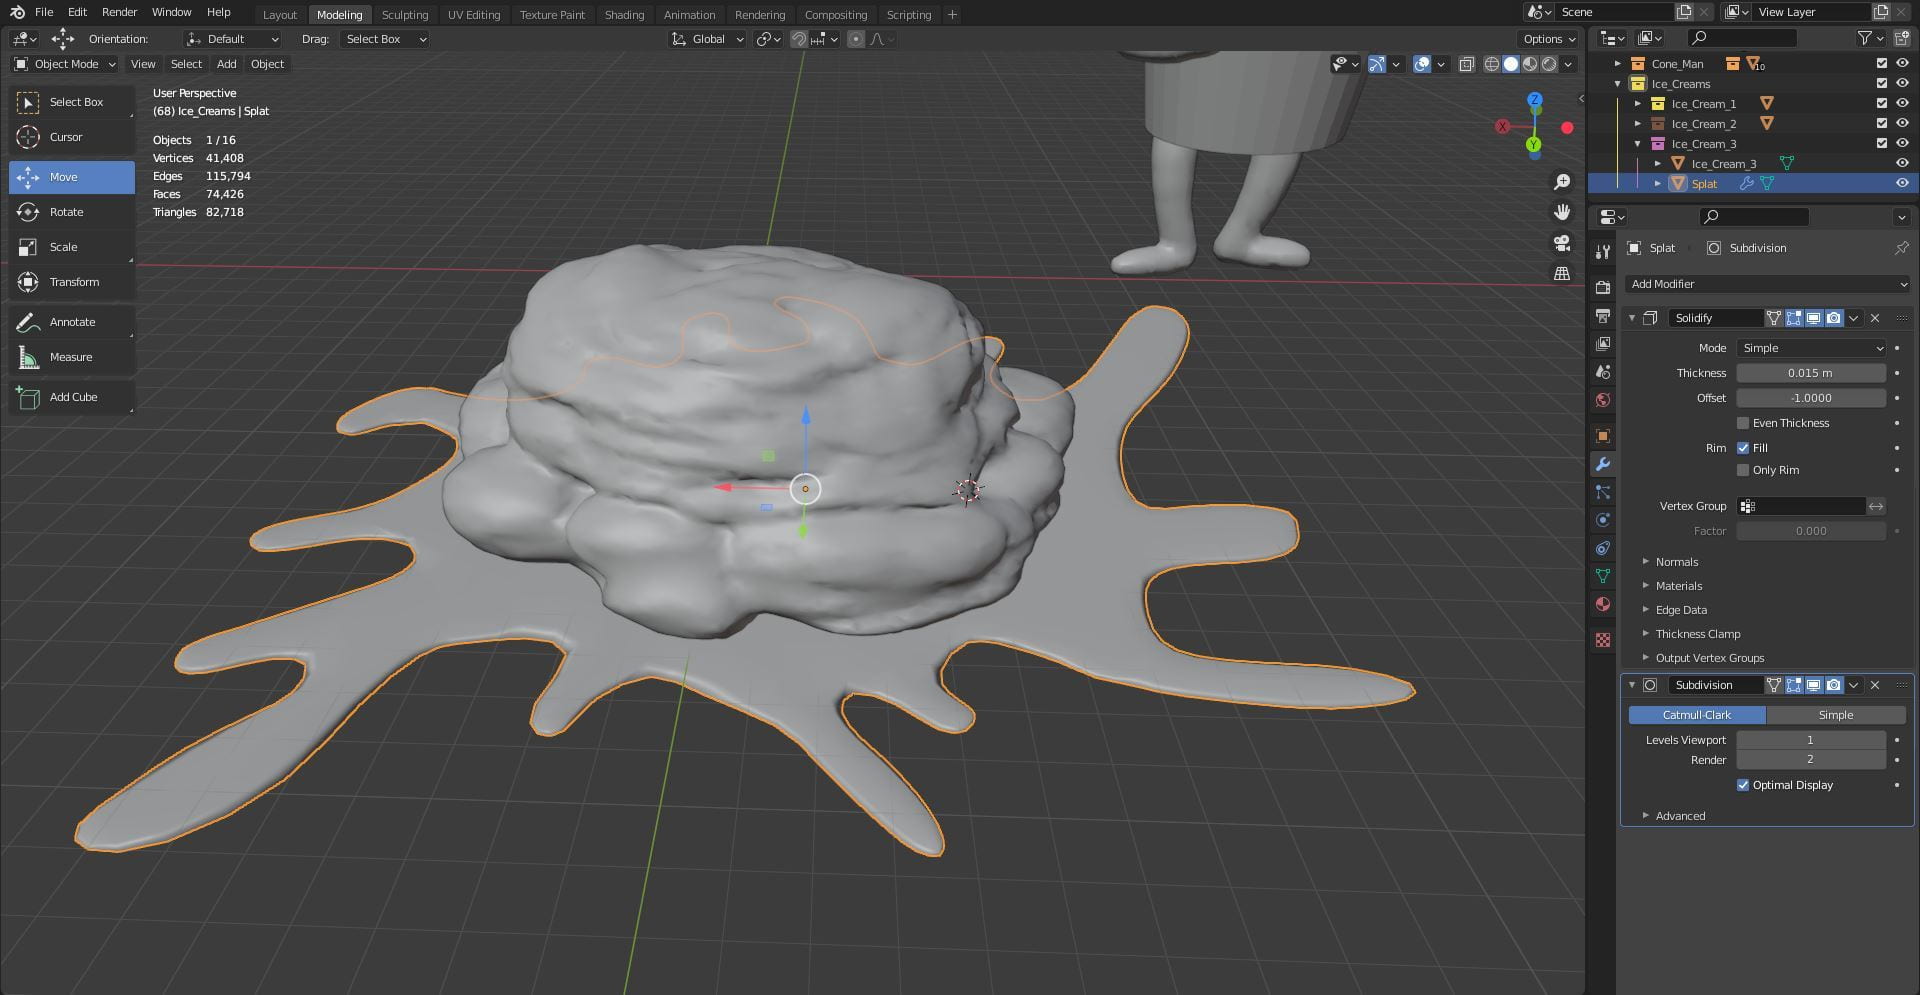
To make the splat, I added a plane and enlarged it. I then used the knife tool and cut the shape I wanted. I selected the outside faces and deleted them. I used the knife tool and split up the face to make quads so the mesh would be easier to work with. I added the modifier ‘solidify’ and set it to 0.015, this added height to the splat. I also added the modifier ‘Subdivision Surface’ to rounds the edges of the shape. I repeated this for the small droplets.
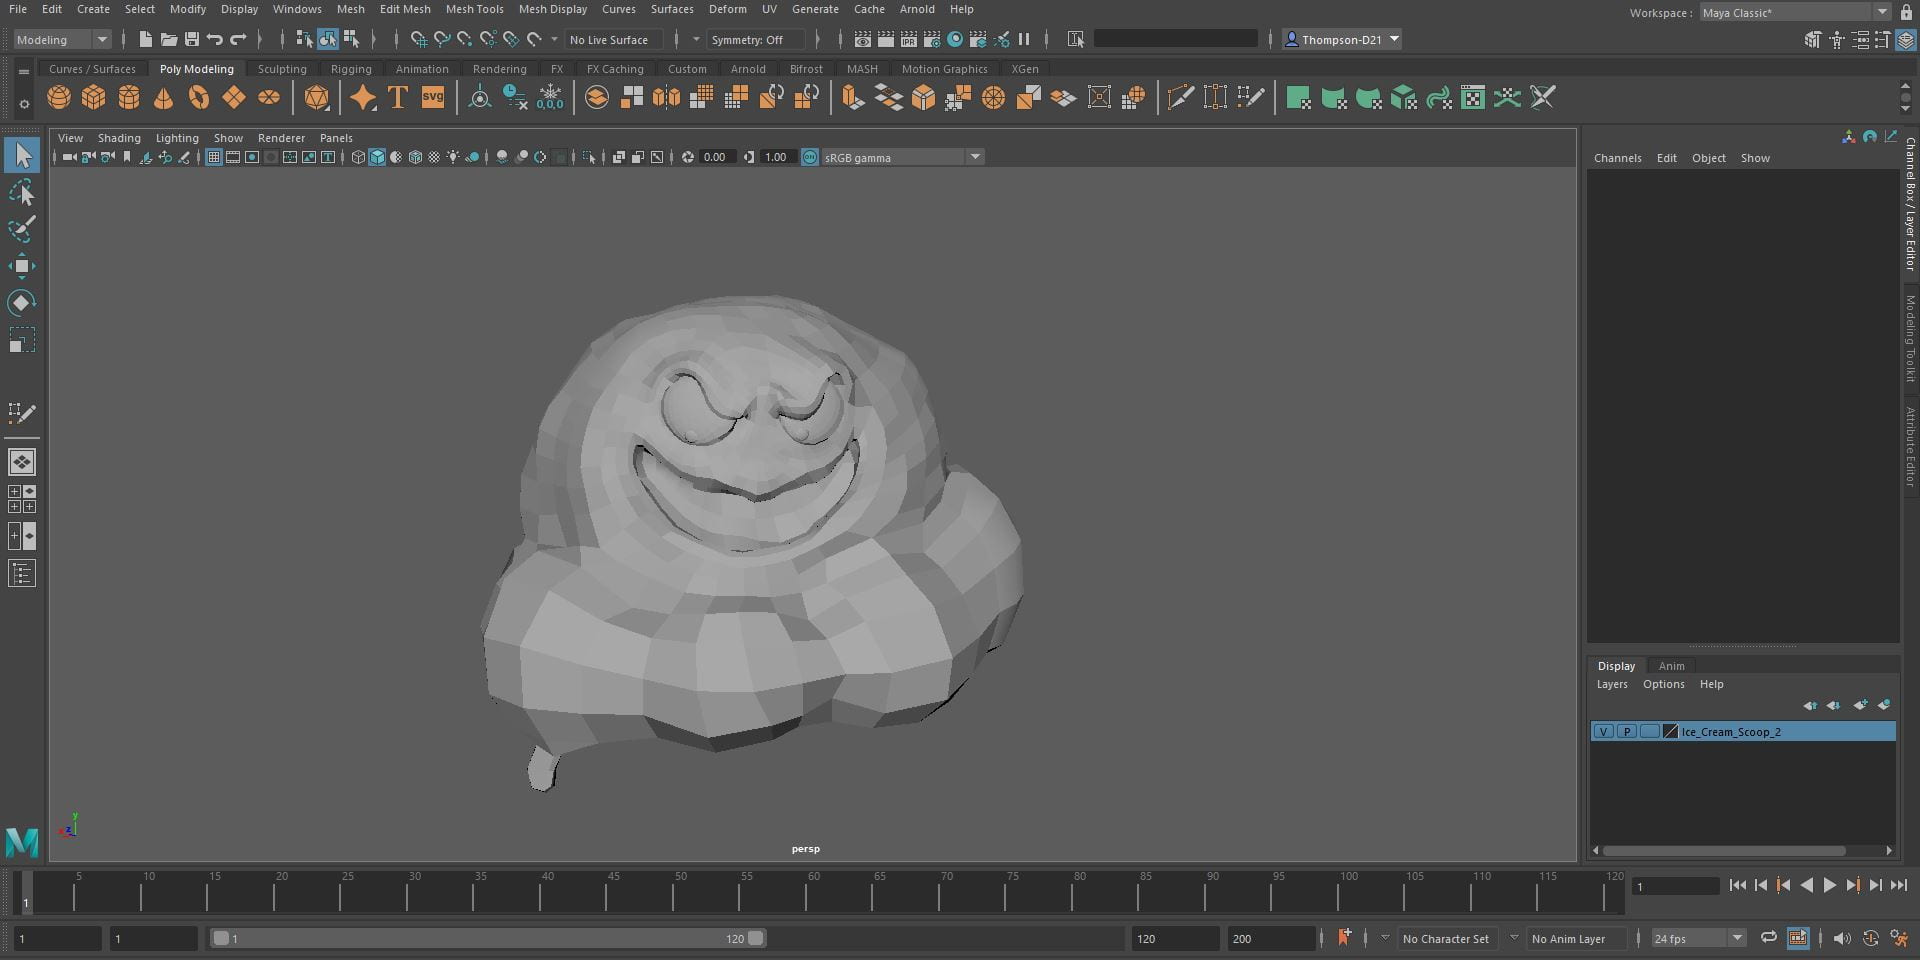
Ice Cream Faces:
To make the first scoop’s face I added a UV Sphere to the scene and flattened it, I then scaled it to fit on the face and duplicated it to make the other eye. I had to add additional mass to the scoop as it was too flat behind the eyes, and it did not sit right. For the pupils I added more UV Spheres, flattened them and added them to the eyes. To make the eyes look smooth, right click them and selected ‘shade smooth’.


I sculpted the mouth by carving an indent using the draw sharp brush, I then added mass to the form the rim of the mouth using the draw brush and the clay strips tool. I increased the Dyntopo of the brushes to allow me to achieve more detail. I sculpted the eye creases using the draw sharp brush and the crease brush to make the worry lines.


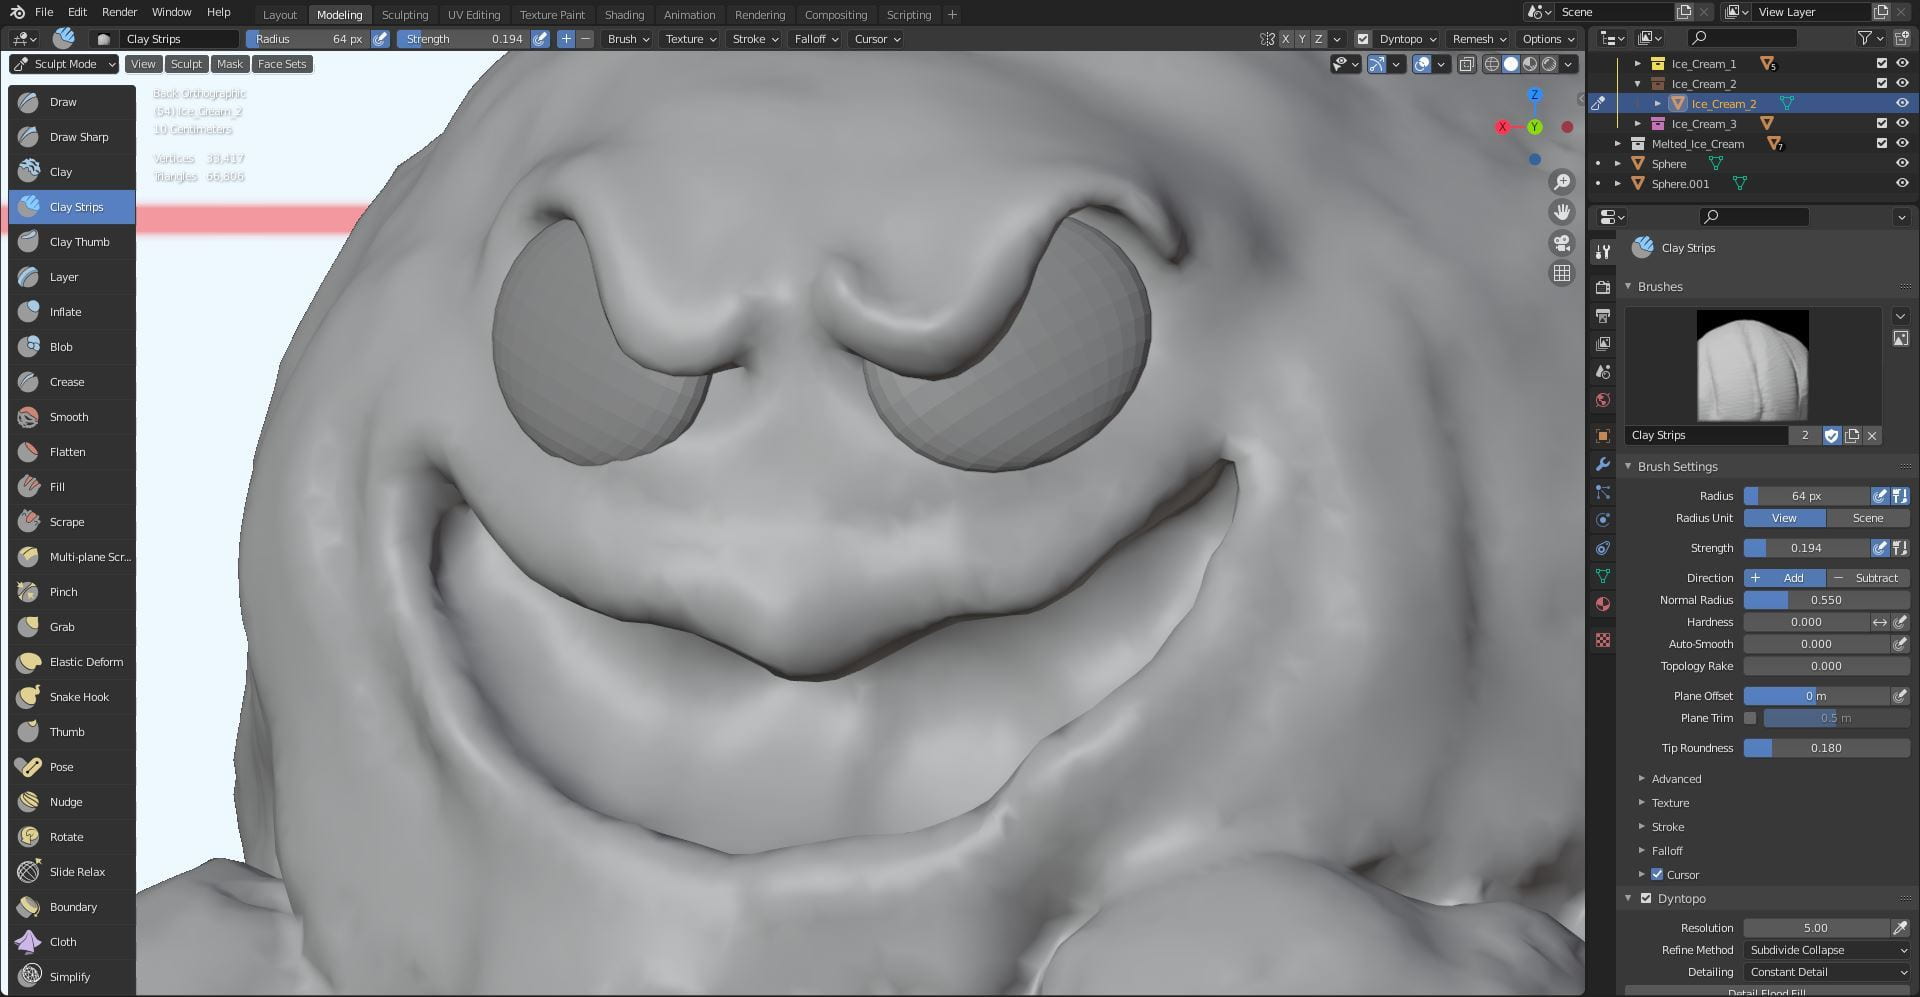
The second scoop’s face was a similar process, I carved the mouth using the draw sharp brush and shaped it using the clay strips tool and the draw brush. To add more detail and allow me to carve thinner lines into the mouth I increased the Dyntopo of the brush. To make the eyes I added a UV spheres and flattened the. I sculpted the eye lid using the clay strips tool to make the basic shape, I then used the sharp draw brush to sharpen the shape. I used the grab brush to position the lid and make him look angrier. I repeated the same process on the other side. I added the pupils to the eyes, right clicked and selected ‘shade smooth’ to smooth the eyes.


For the third scoop’s face I made the eyes using a cylinder and scaled it to size, I then tilted it and duplicate it to make an x shape. I right clicked and selected ‘shade smooth’ to smooth the surface. I duplicated the shape to make the other eye. I added the mouth using another cylinder. To make the tongue I added a bezier curve and bent it to the shape I wanted, in the geometry menu edit the depth to the desired thickness, I converted the bezier to a mesh and flattened the shape.
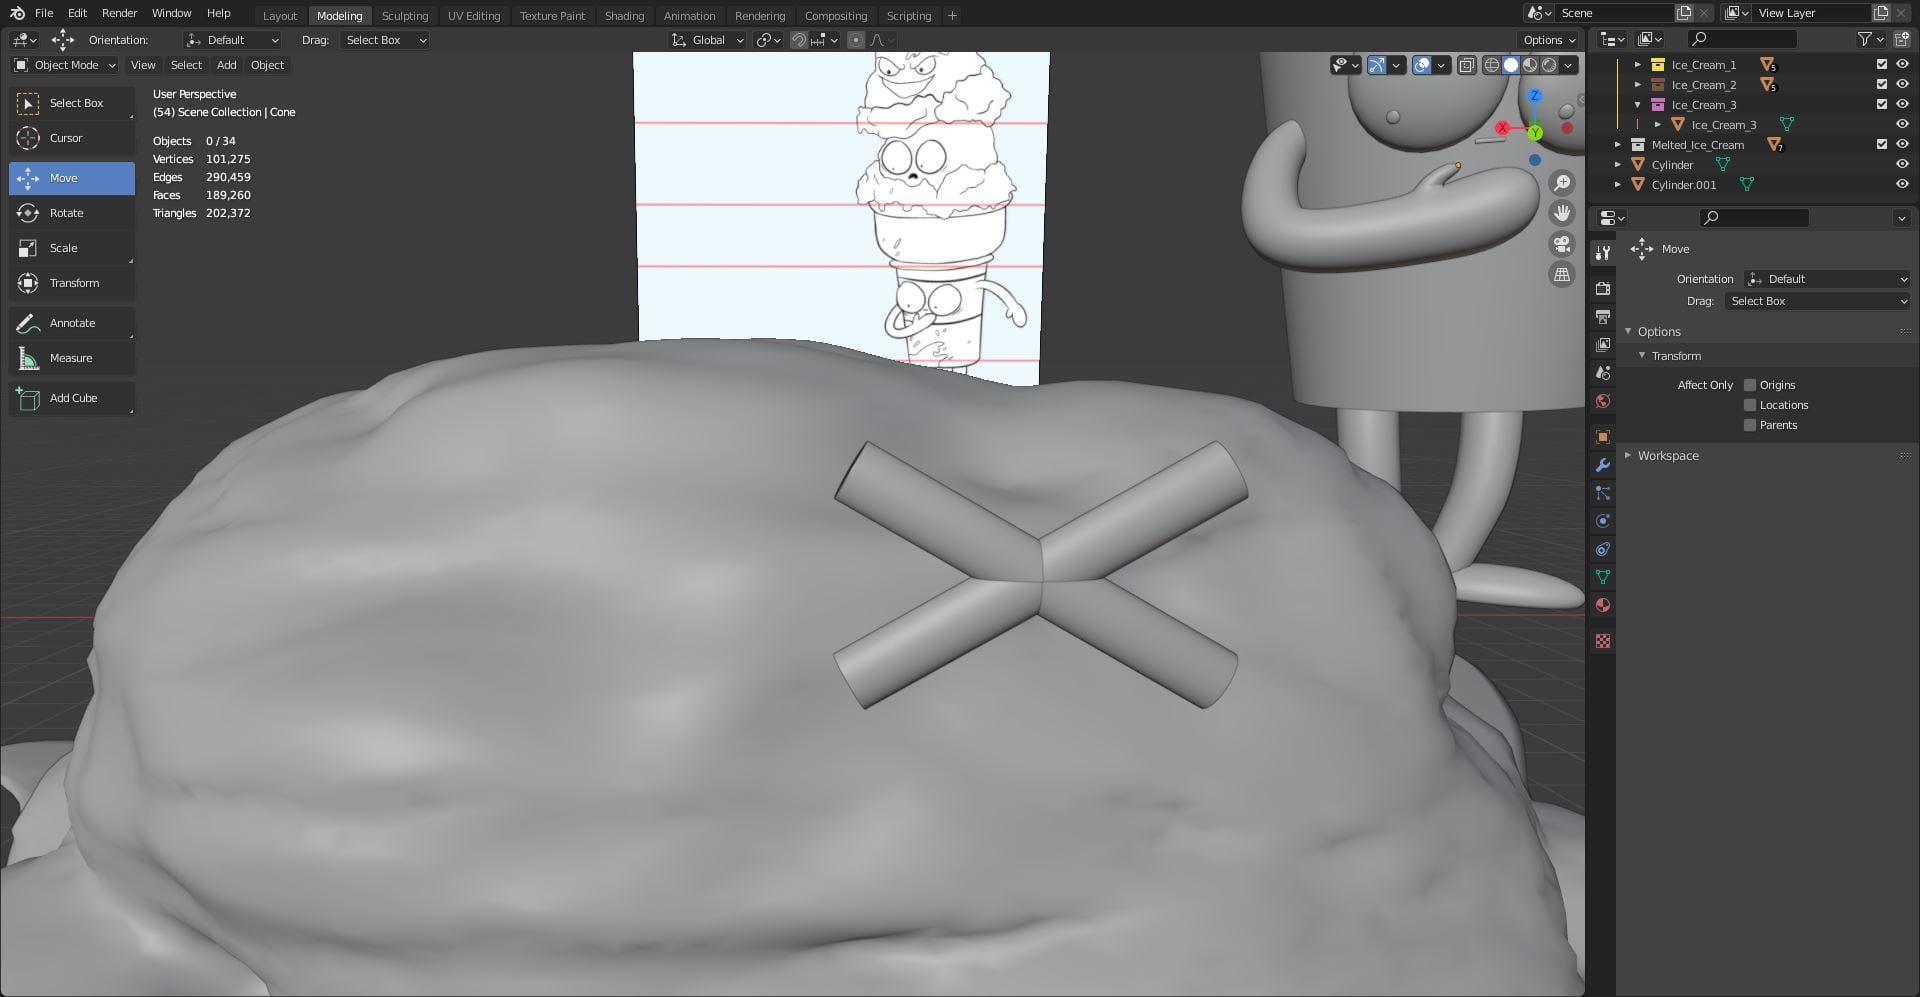


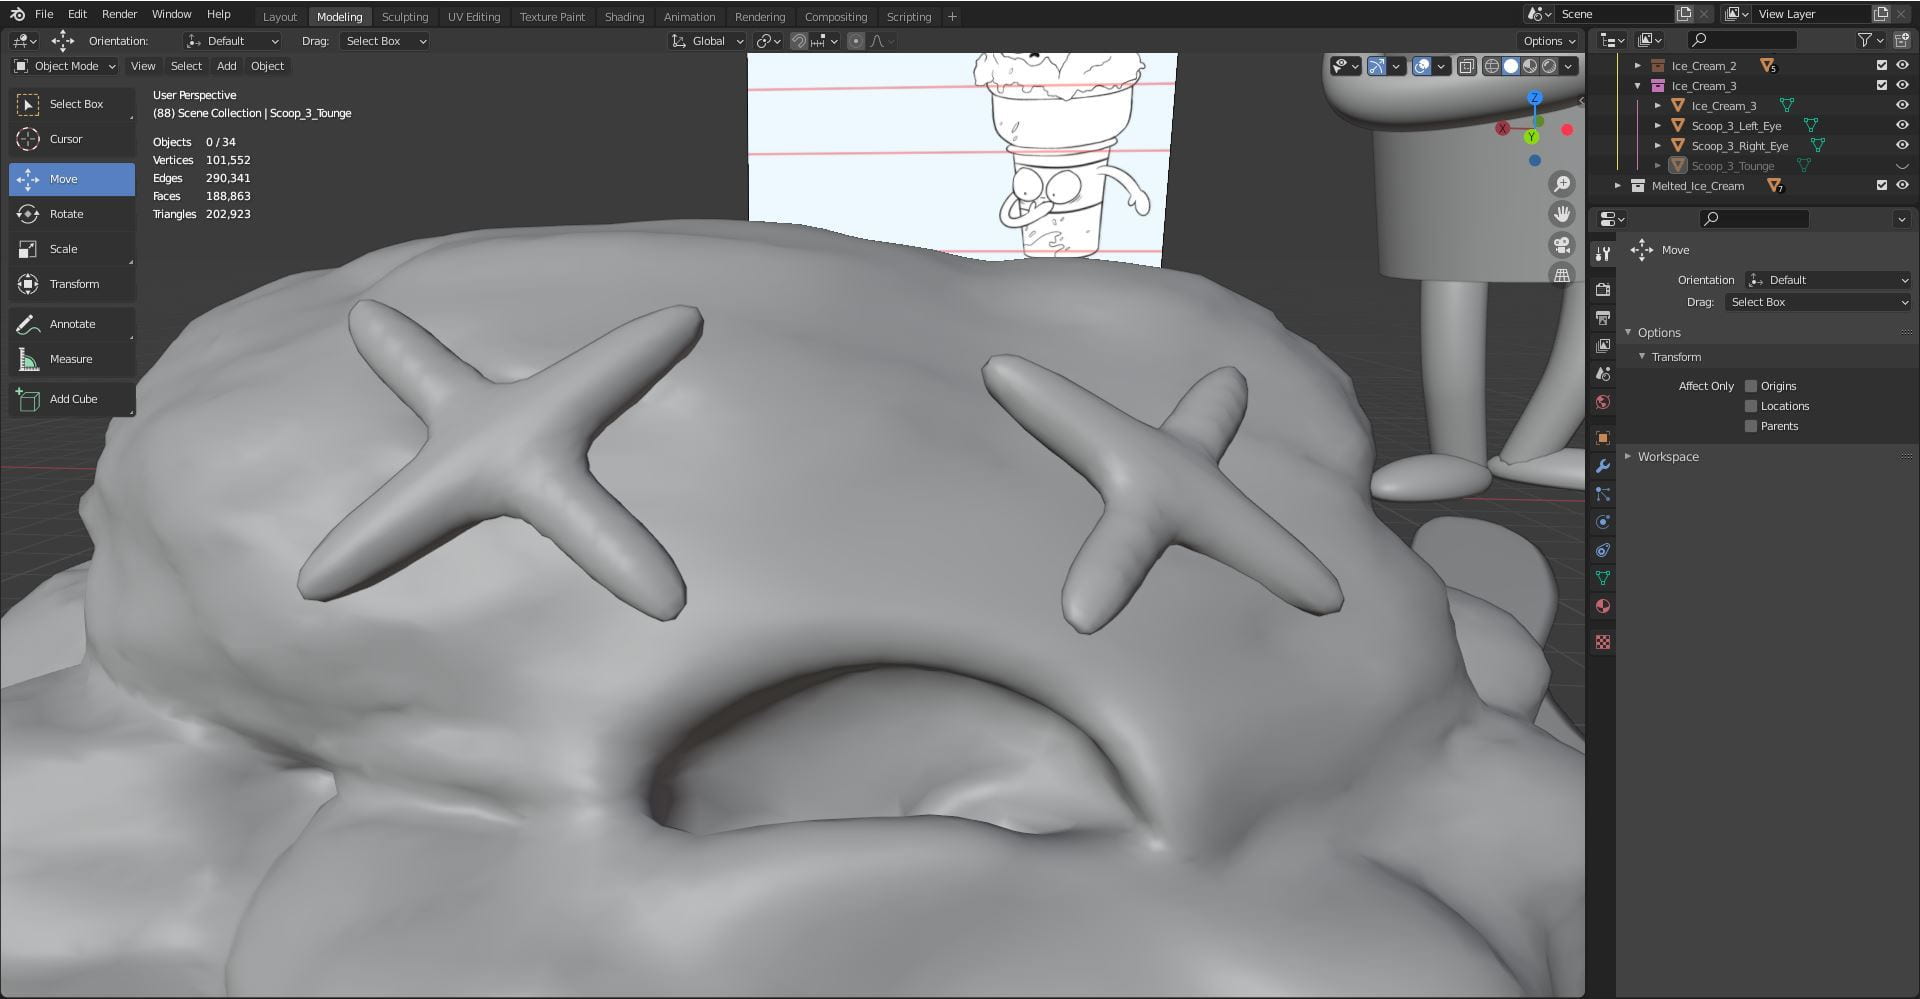
I did not like the way the face was turning out, so I did it again. I think it was mainly that the 2D concept did not translate well into 3D. This time I made the new eyes using the capsule metaball to make the x shape and duplicated it to make the other eye. I sculpted the mouth into the ice cream to make it look like it had fallen open. I used metaballs for the tongue and flattened it using the flattening tool and added the crease down the middle using the crease brush.


I was also going to add a cherry to the fallen ice cream, but I thought it would look too cluttered, so I did not.


To export the file from Blender, click file, export and select the fbx option.

Retopology
To start I had to shrink the model as it was too big and would not fully render in Maya. I selected the model and created a layer so I could turn off and on the high poly model to make working easier. After running into problems with Maya running slowly, I split the model into different files and worked on them separately.

Cone Man:
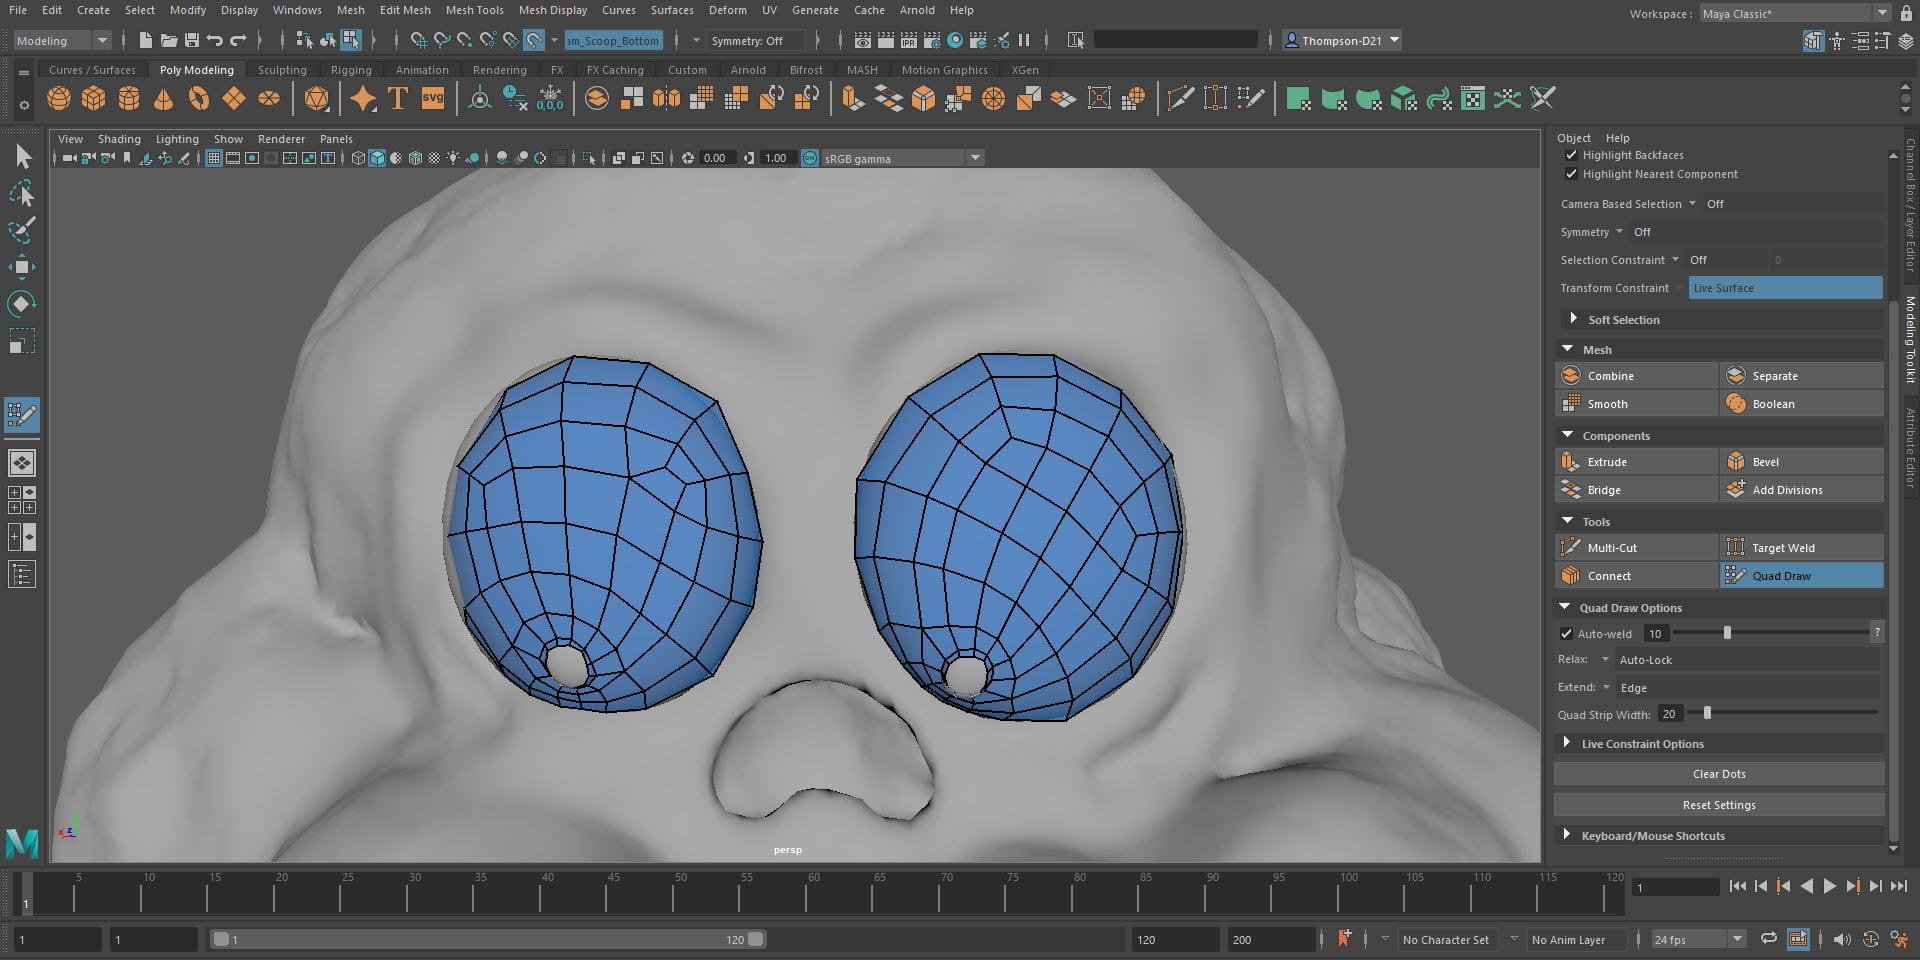
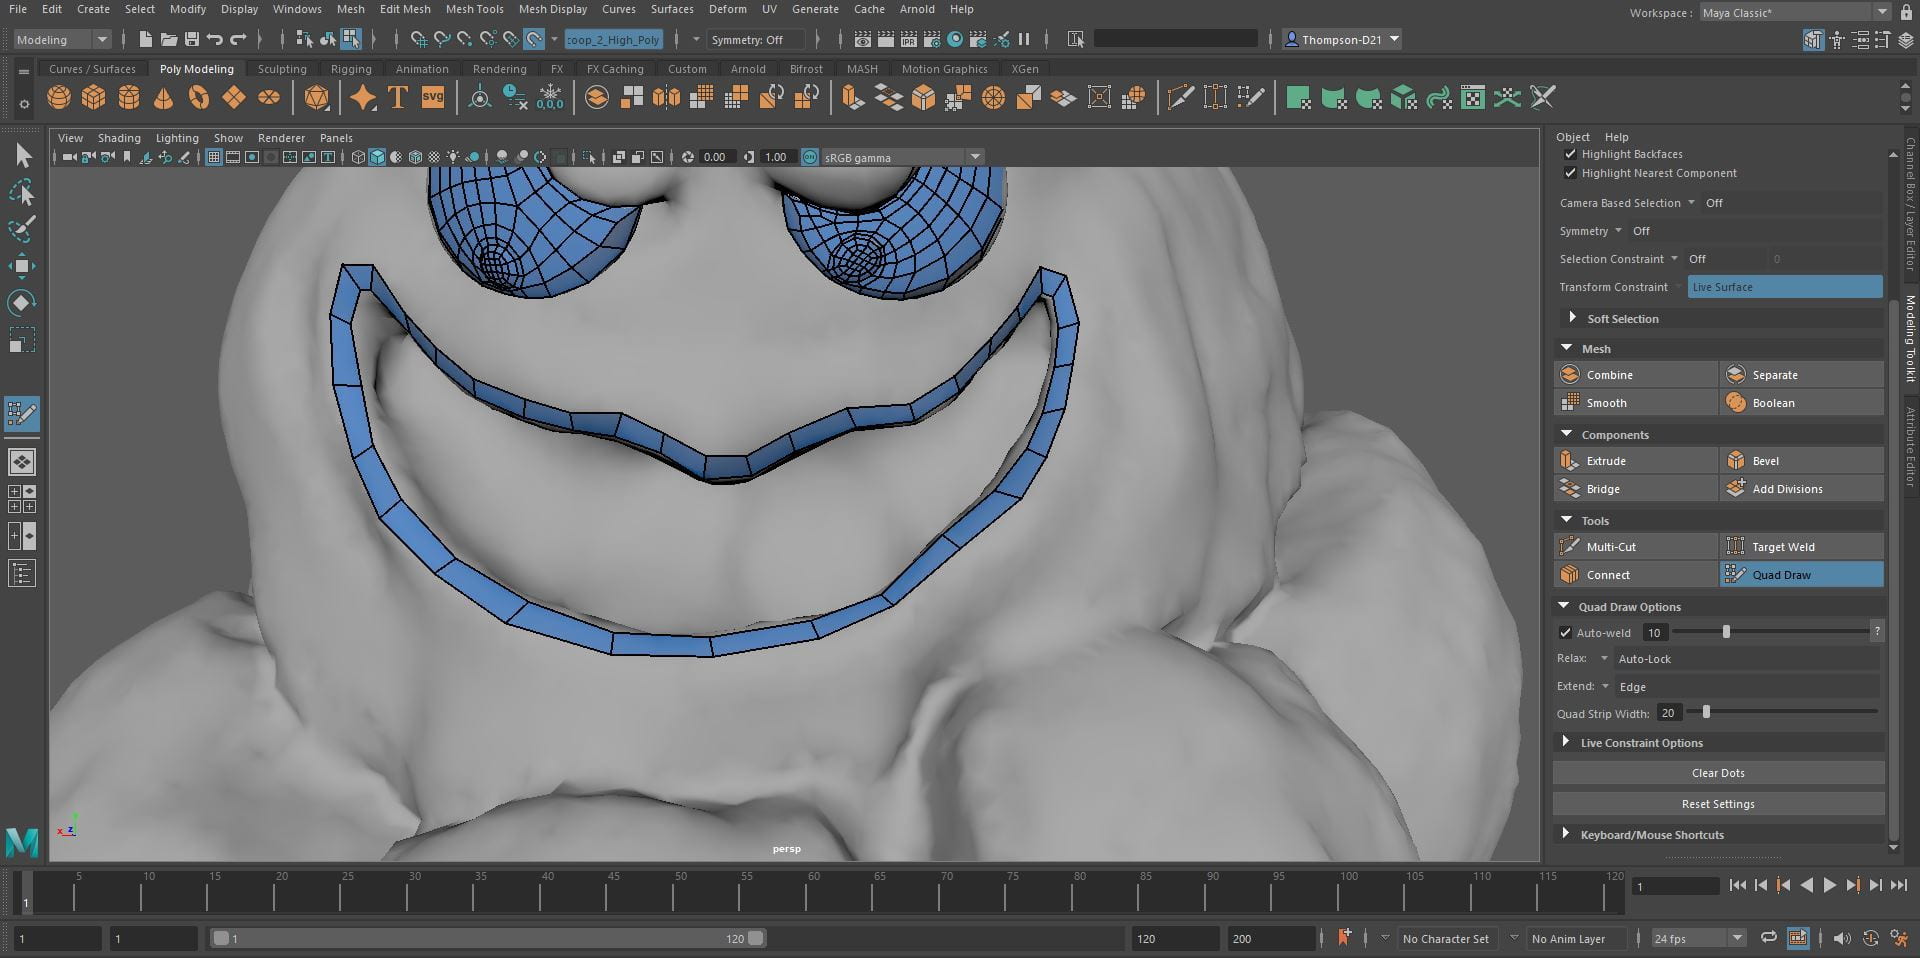
To start I made the model a live object so I would not accidently select or move it. I selected the quad draw tool in the modeling tool kit, I added a square in between the eyes and worked my way around them. I then added a ring around the mouth and filled it in. I attached the mouth to the eyes.
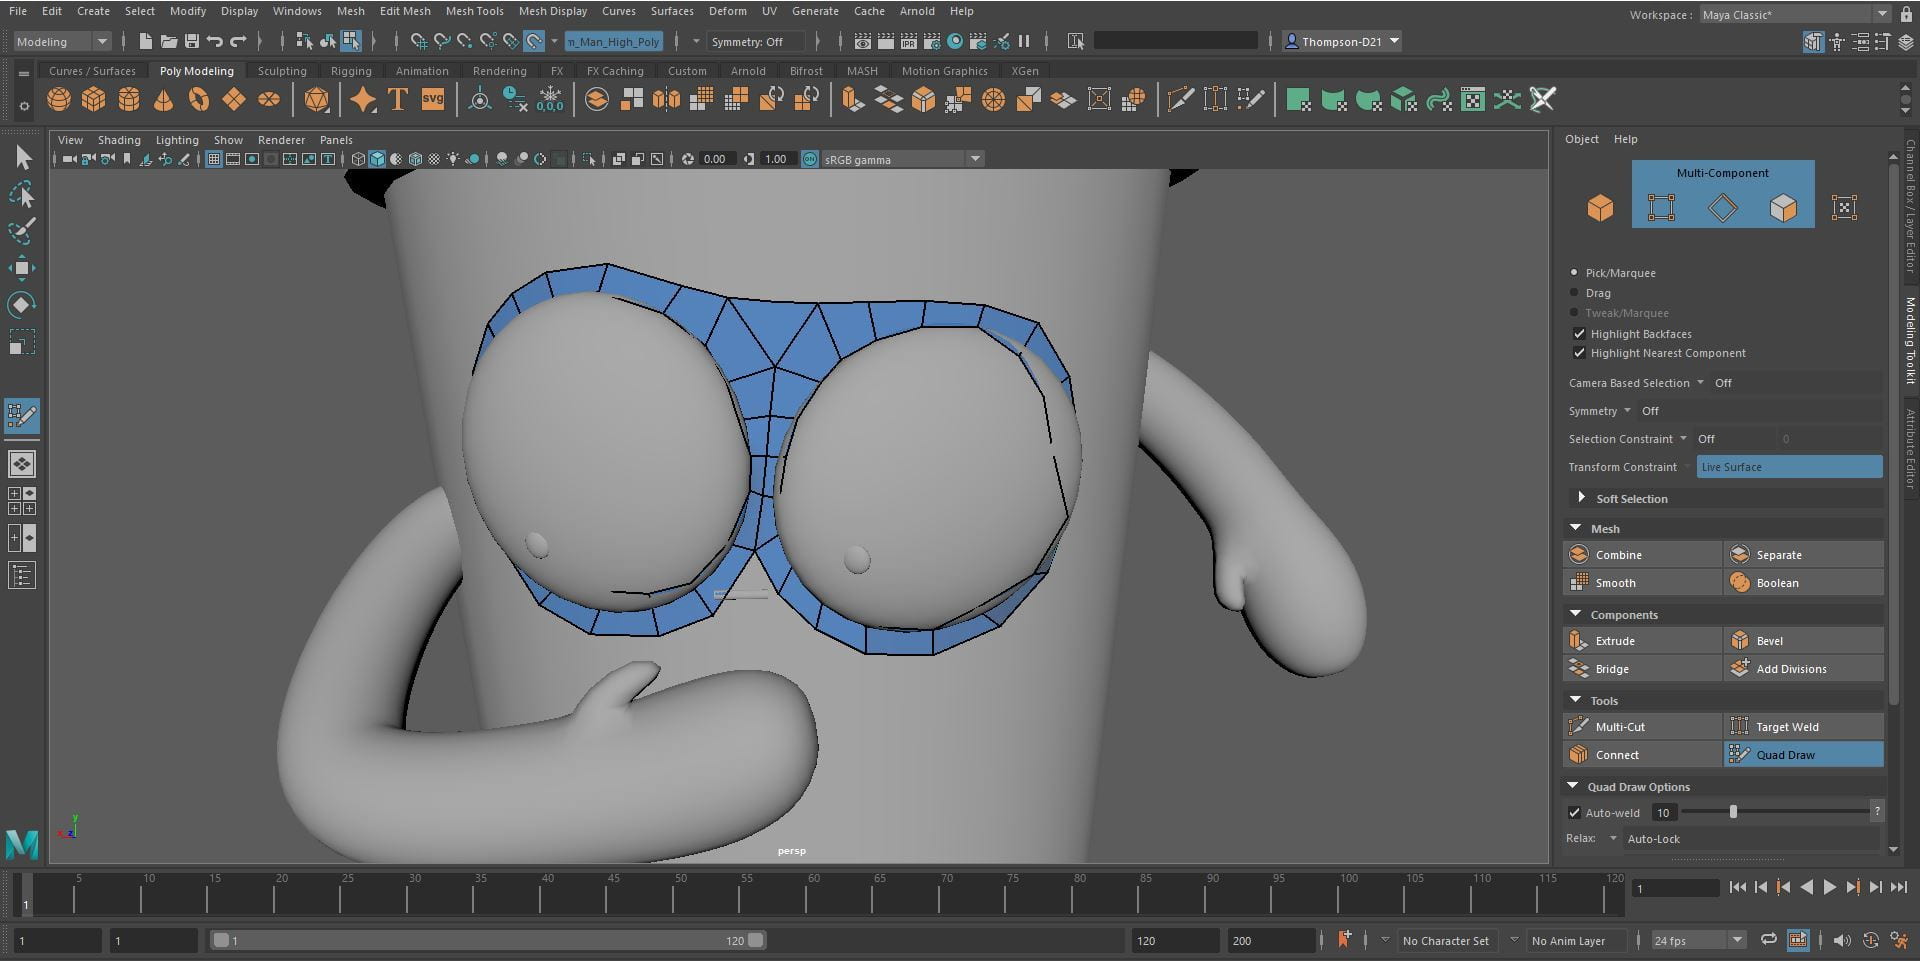


I made a ring around the pupil and then filled in the eyes meeting the mask shape at the edge. I repeated this process to fill in the other eye. The pupils were quite hard to do as there were a lot of faces and I had to try and reduce it. I continued to add faces under the mouth and created another ring around the face.


I added rings around the base of the body and continued up until I reached the face. To connect the face, I divided the rings around the body and connected them to the ring around the face as best I could. I continued to work up the body to the top of the cone.


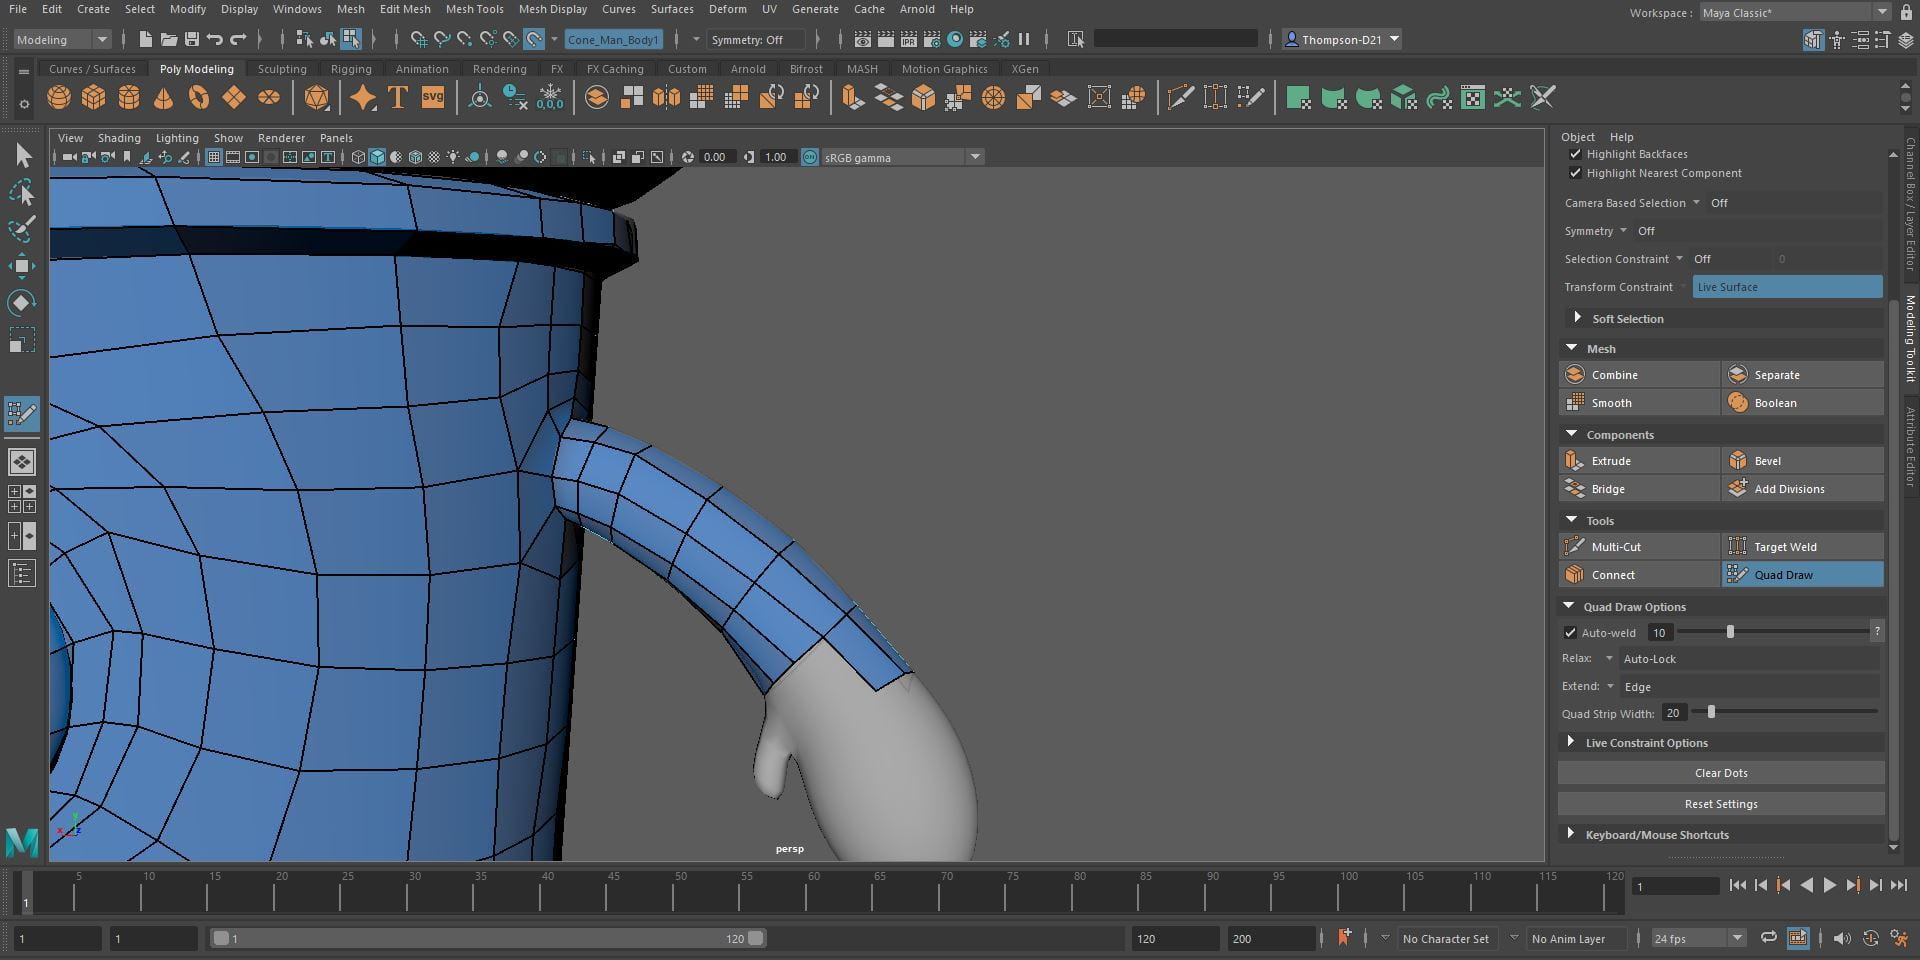
Next, I added a ring around the top of the arm and attached it to the body. I continued to work down the arm. I added a loop around the thumb and around the bottom of the hand. I then connected them to the arm. I repeated this for the other arm.


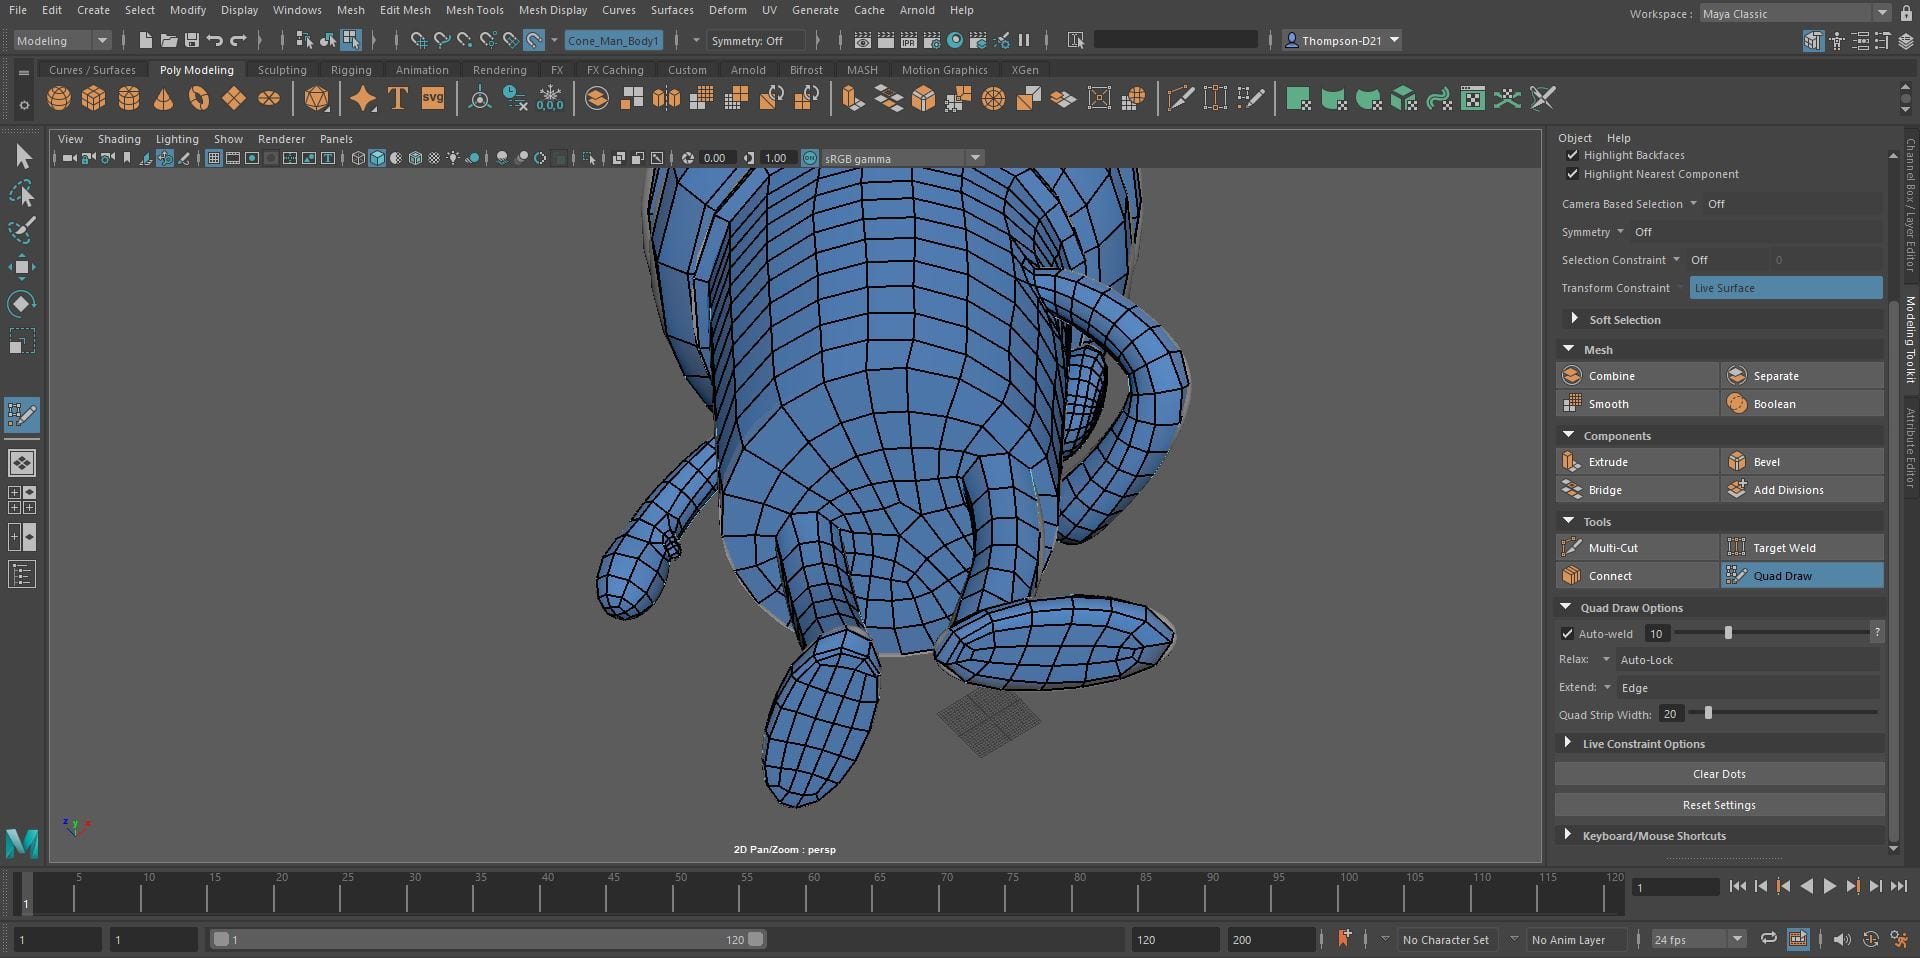
I made a ring around the base of the cone, then I made a ring around the base of the leg and connected them. I continued down the legs and made a ring around the base of the feet, I connected the base of the feet to the legs. Finally, I filled in the base of the cone.


Ice Cream Scoops:
To start, I made a ring around the eyes then around the pupils, I filled in the eyes, then the pupils.


Next, I made a ring around the mouth and filled it in. I connected the eyes to the mouth in a mask shape. I then made a ring around the back of the scoop and connected it to the face. I continued down the ice cream till I hit the bottom.


I followed the same process as the first scoop. I made a ring around the eyes and pupils, then I filled in the space. I then filled in the pupils.


I added a ring around the mouth, I then filled in the mouth. I drew around the eye lid shape and attached the mouth to the eyes in a mask shape.


I made a ring around the back of the head and worked forward till I reached the eyes. I continued to make rings around the body till the bottom.


I started by outlining the eyes. I then filled them in.


Next, I filled in the tongue and made a ring around the mouth. I filled in the mouth. I connected the eyes to the mouth in a mash shape.


I made a ring around the back of the head and filled in the top of the head and connect it to the eyes. I continue around the body till I hit the puddle.


I drew around the base of the ice cream and worked my way outwards to the edges of the puddle. To fill the droplets, I started by making a ring and working my way into the middle. I repeated this for all the droplets.


Combining the pieces:
After retopologizing all the pieces I exported them and imported them into one Maya file. I then went in and filled any fixed any gaps in the mesh that I had missed when retopologizing.


Since there is more texture on the ice creams that is not being picked up by the retopologizing I plan on baking the low poly model using the high poly model to get more detail in Substance Painter.
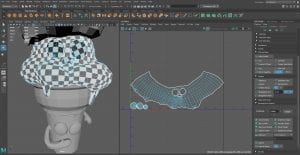
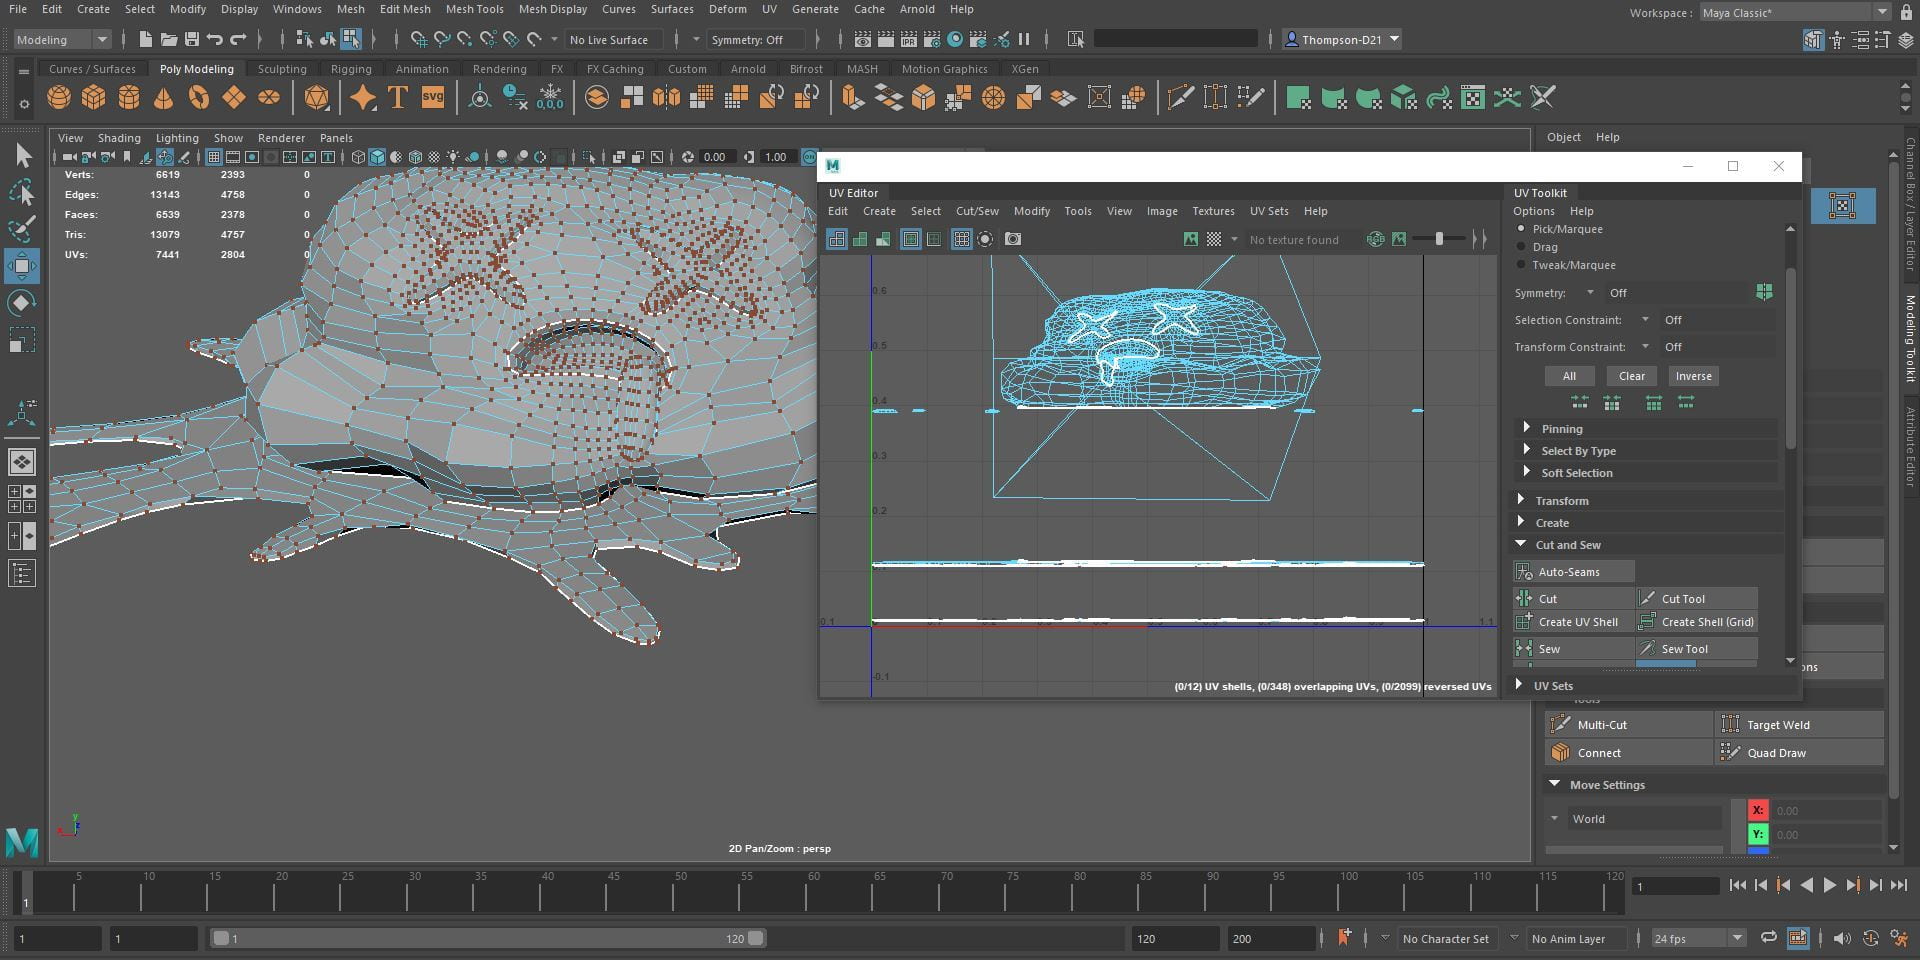
UV Unwrapping
Cone Man:
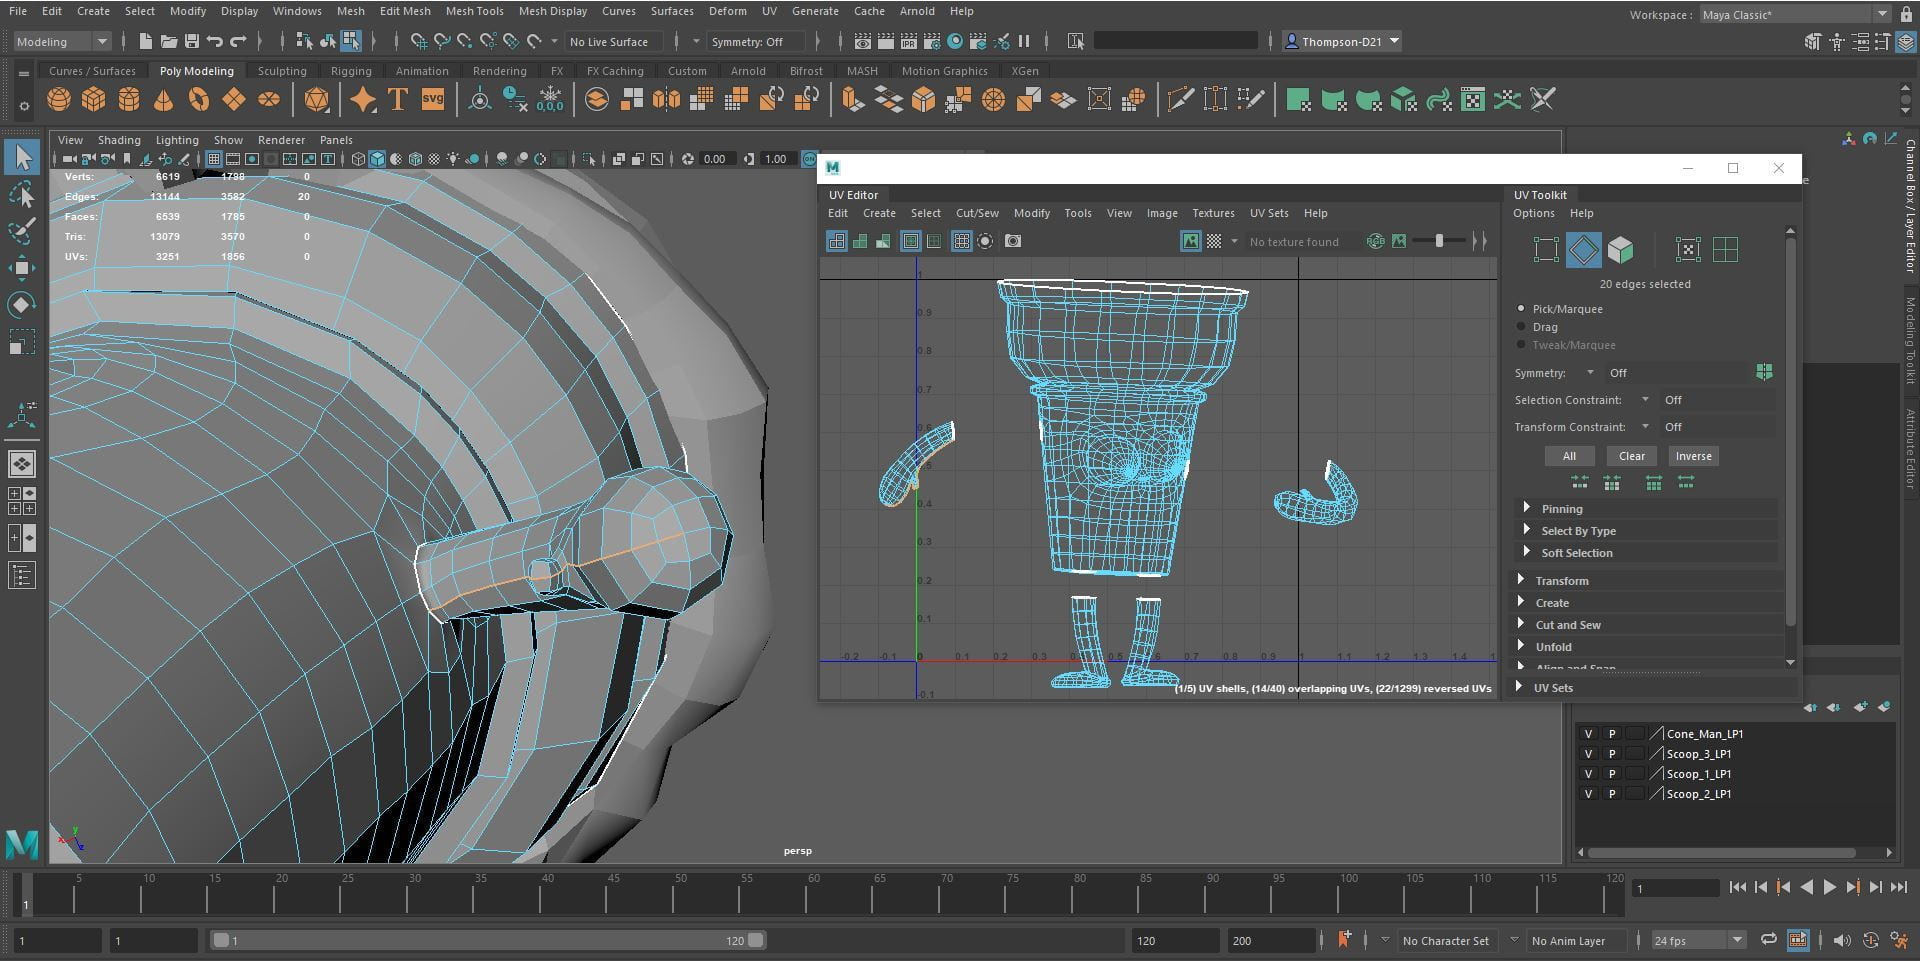
I started by cutting his arms and legs away from the body. For the left arm I cut down the inside of the arm and over the thumb. I did the same to the right arm. For the legs I cut the soles off the feet and cut down the back of the legs. I cut off the base of the body and cut up the back so the seam would not be as visible. I cut the eyes off the face.


Ice Cream Scoops:
For the first scoop I cut the mouth out and separated the eyes from the face. I cut down the back of the ice cream to flatten it. I optimized the UVs and clicked straighten shell in the UV menu.
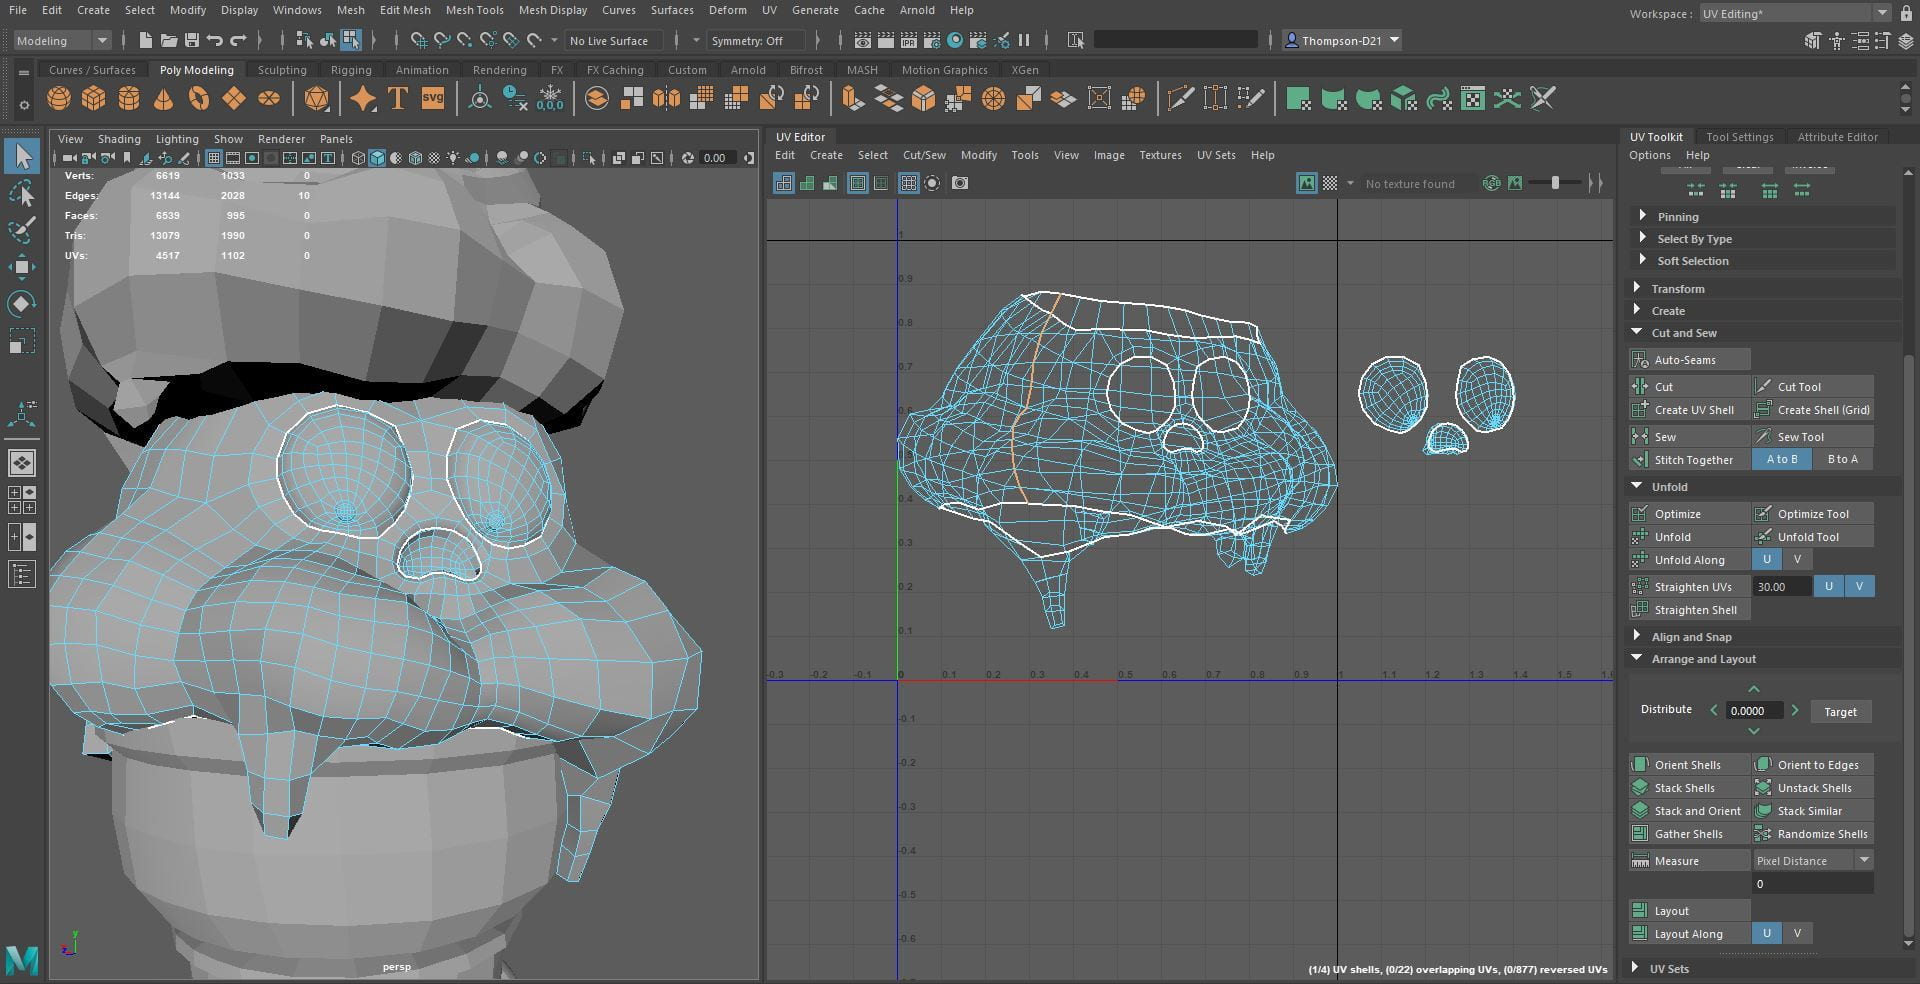
For the second scoop I cut the eyes and mouth away from the face. I cut down the back so I could flatten the mesh. I optimized the UVs and clicked straighten shell in the UV menu.


For the third scoop I separated the scoop from the splat. I cut the eyes and mouth out of the head. I separated the tongue from the mouth and cut down the back of the head. I cut the bottom off the splat and the droplet.


After UV unwrapping everything I selected everything and clicked Mesh, Smooth. This made the shapes look smoother and less rough. I also assigned different lamberts to the different parts of the model to make texturing easier. I selected the whole model and clicked File, Export Selection, I set the export to fbx.


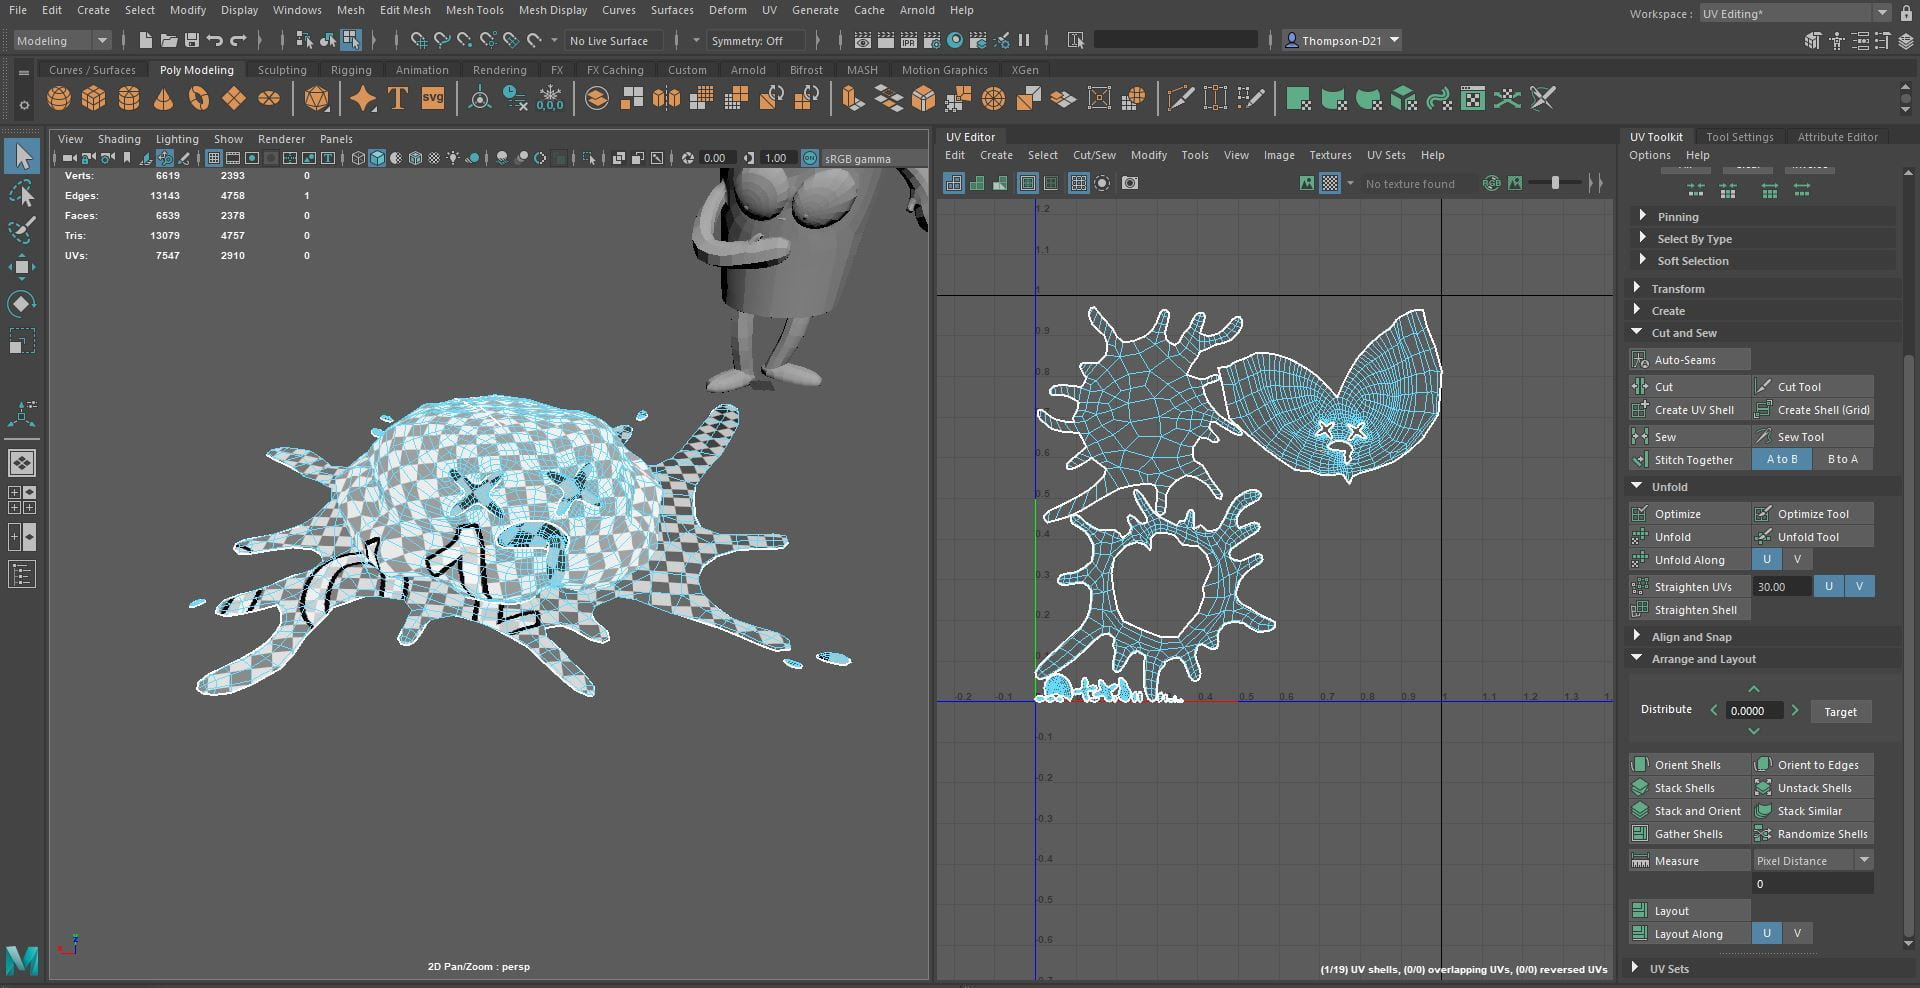
Importing the Model into Substance Painter
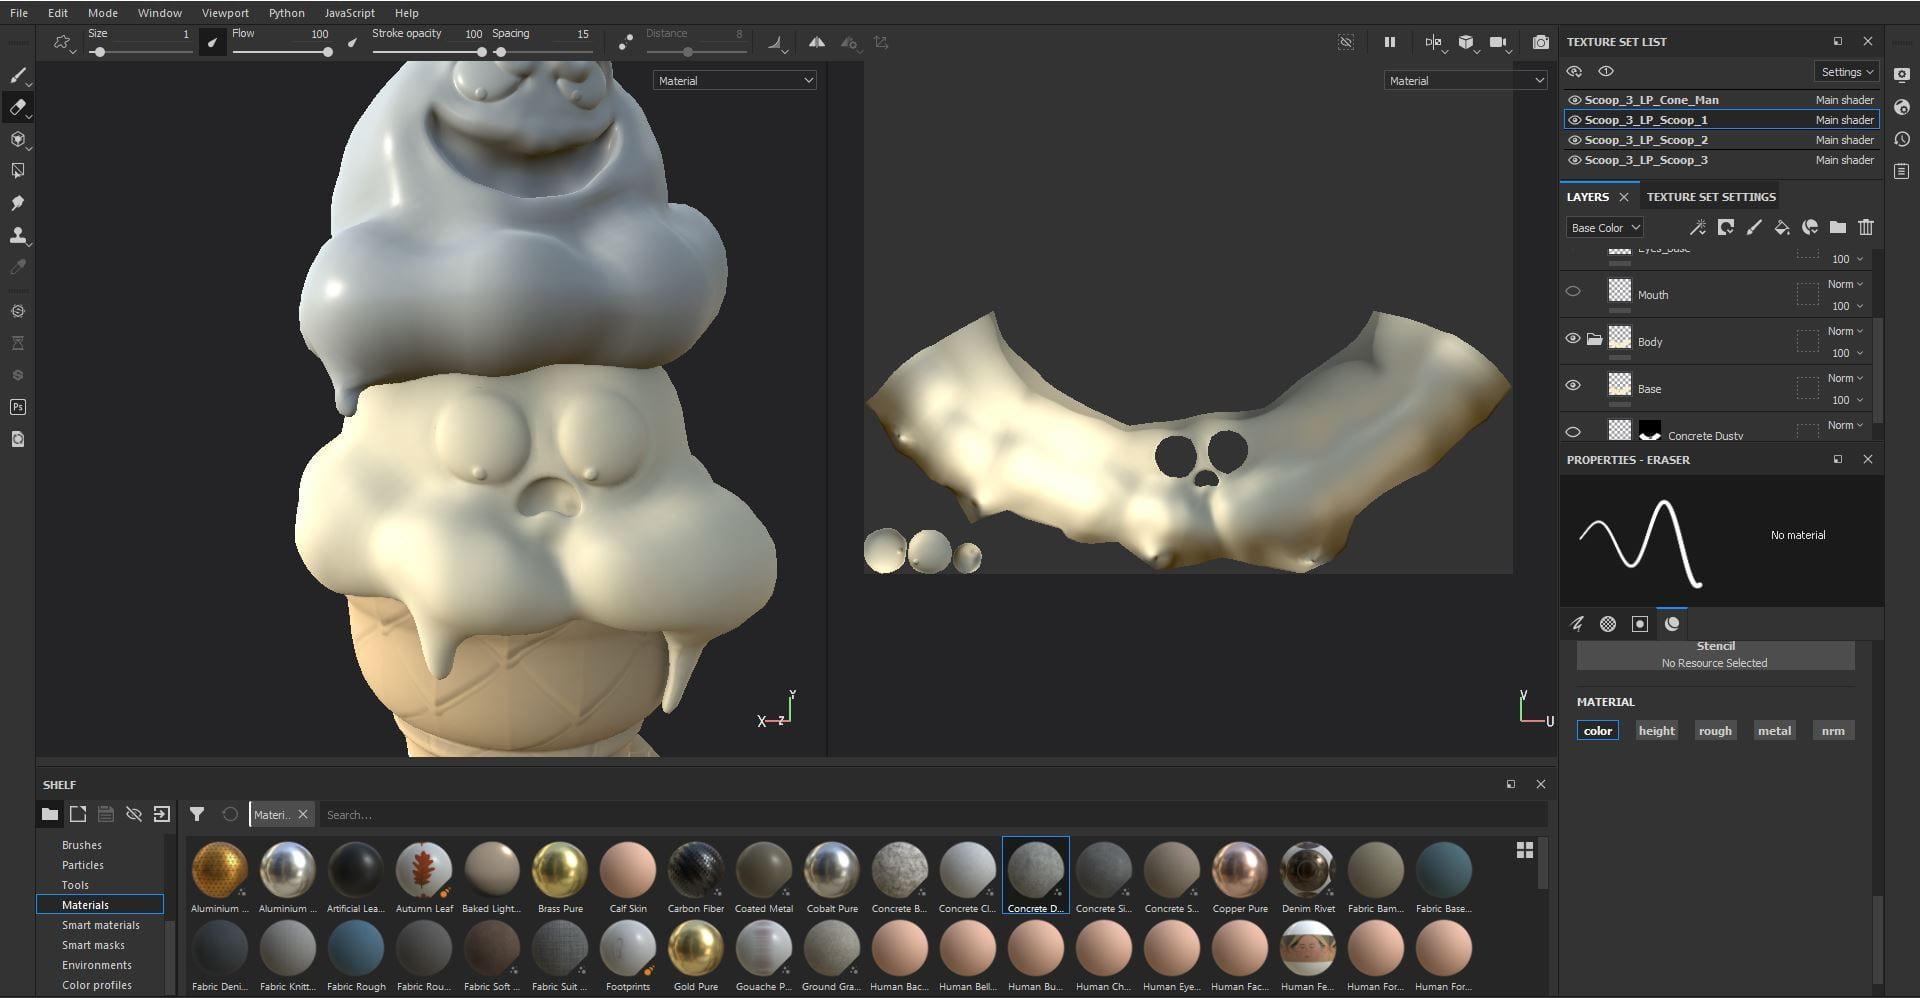
I clicked File, Import and selected the fbx, I changed the resolution to 2048 and clicked ok. Click Texture Set Setting and click the Bake Mesh Maps option. Change the resolution to 2048 and click the file icon beside the High Definition Meshes, load in the high poly version of the mesh. Tick the box and click Bake Selected Maps. The texture of the sculpt did not come through as strong as I wanted.


Cone Man:
I started with a light brown as my base colour. I added the paper label to the cone using a cream colour and the ‘Basic Hard’ brush. I tried to add a cone texture to the base by hand, but it did not look good, so I added the ‘Iron Diamond Armour’, I played around with the settings till I was happy and added it to the body and the limbs. I used white for the eyes and a bark brown for the pupils, mouth and worry lines on his face.


Ice Cream Scoops:
I started with a light cream colour for the first scoop as I wanted this one to be vanilla. I coloured the eyes in white and the pupils in dark brown. I coloured the mouth in a darker cream to add contrast. To add more texture to the ice cream I used the material ‘Concrete Dusty’.


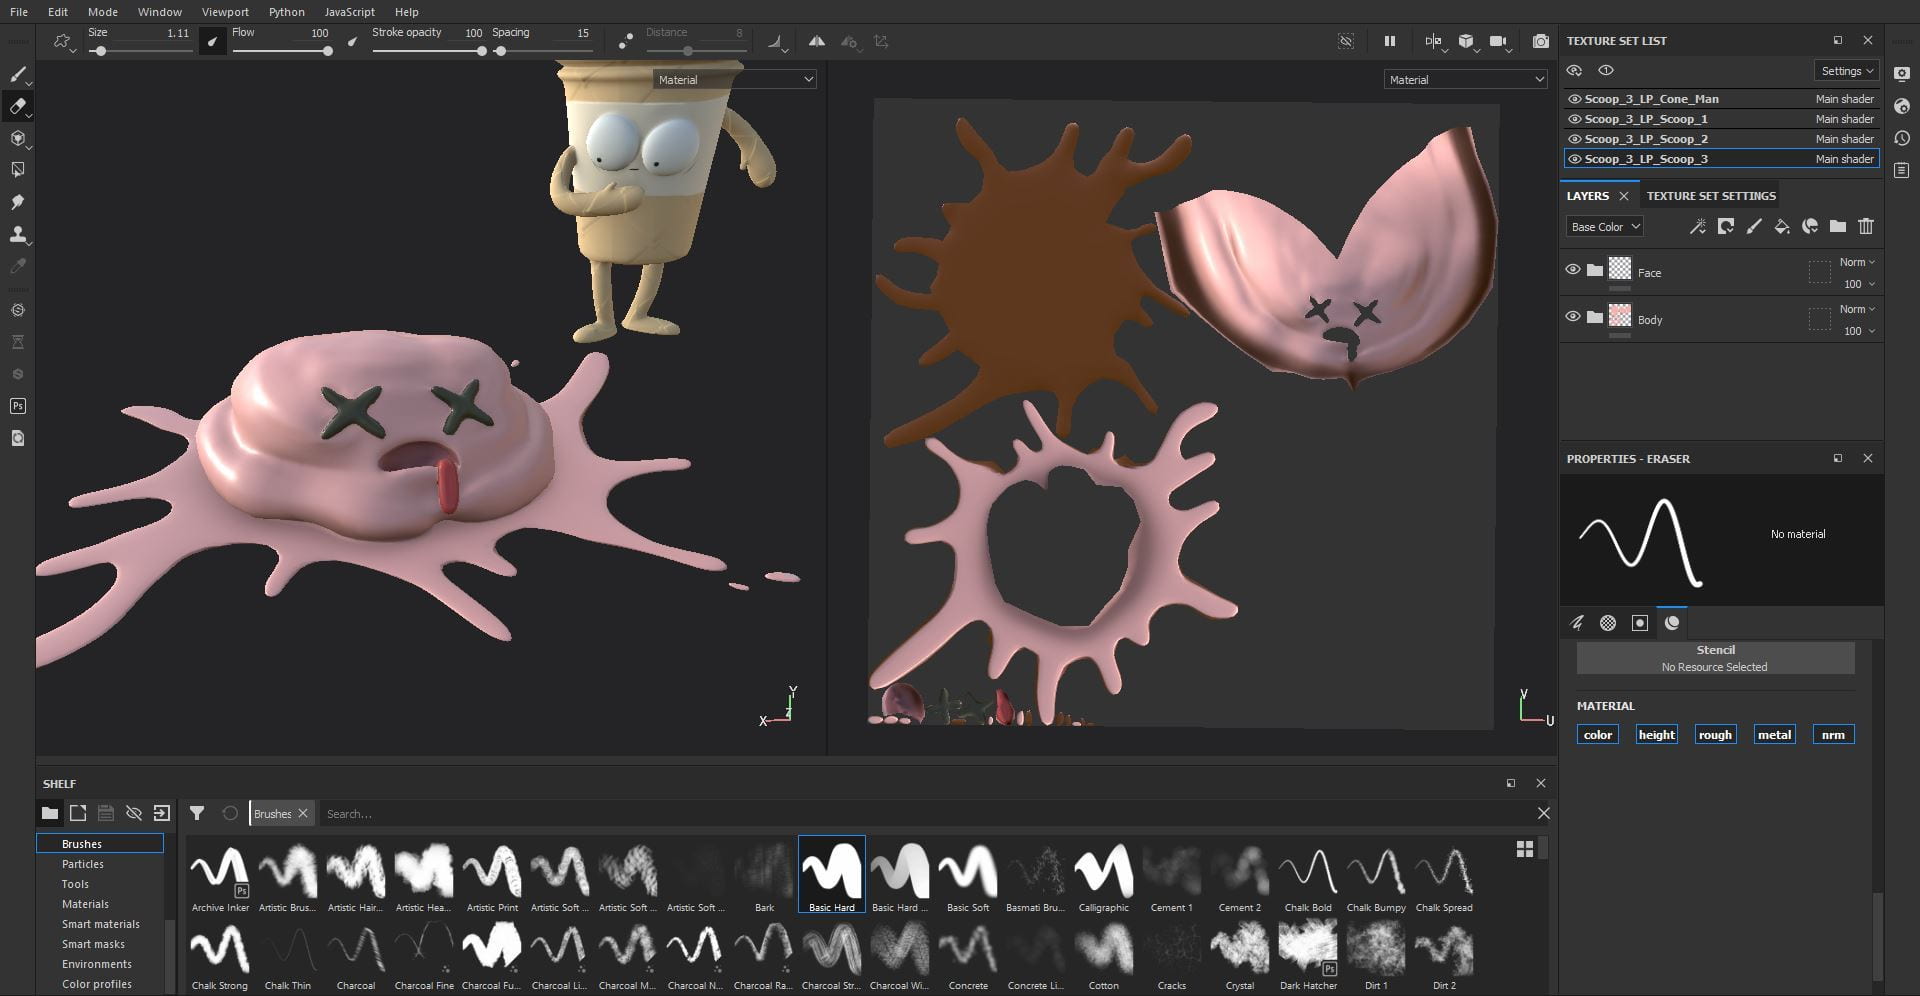
I started with brown for this scoop as I wanted it to look like chocolate. I coloured the eyes in white and the pupils in dark brown. I coloured the mouth in a darker brown. I added the same ‘Concrete Dusty’ texture to the ice cream. To make the smear I used a pink colour that will match the third scoop. I wanted it to look shinier as it is melting. I also added height to make it look like it is sitting on top of the chocolate scoop’s head. I used ‘Kyle’s Paintbox-Gouache G Dry Out’ brush.


I used pink for this scoop as I wanted it to be strawberry. I turned up the roughness as I wanted this scoop to look like it is melting. I coloured the pupils the same dark brown as the other two scoops. I coloured the mouth in a darker pink to add contrast and I coloured the tongue a red pink colour. I added the same ‘Concrete Dusty’ texture to the ice cream, but I made it more subtle, when ice cream melts it loses some of its texture. To make the splatter that is on the model I used the ‘Ink Splatter’ brush. in the same pink as the scoop on the ground.


Exporting the textures:
To export I clicked File, Export Textures. I changed the Size to 2048, the Padding to ‘Dilation + default background colour’ and changed the number to 7.


Uploading to SketchFab
Go onto SketchFab and click the upload button. Upload the low poly version of the model and set it to free so it does not used up any credits.

Adding the Textures:
I click onto the materials tab, base colour, texture and click import textures. I select the texture and apply it. I repeat this for all the textures and all the maps.


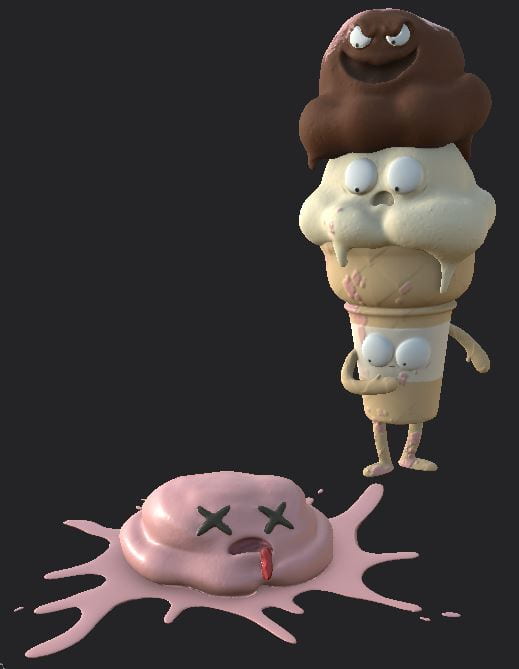
Lighting:
In the lighting tab I added some spot lighting, a ground shadow and changed the background to ‘Footprint Court’.


Post Production Filters:
I played around with the filters till I was happy with the result. Finally, I clicked Publish.

Reflection
Overall, I really enjoyed researching, designing and sculpting the model for the assessment. The process went smoothly but I did have a few problems, when I tried to bake the high poly texture onto the low poly texture, it made distortions on the model which in turn messed with the texturing, so I lost some detail I had on the ice cream scoops. I still think the model looks good, but I think it could have looked better if baking the textures worked. I’m very happy with my cute character, I think everything looks good and the expressions turned out really well. If I was to do this again, I would have tried to be more careful when retopologizing the model as I think that could have been neater, but it works. I also underestimated the amount of time it takes to sculpt a model, so I did fall behind on this task and hade to rush near the end to get everything in on time but at least I know for the future, manage my time more efficiently.
I have learnt a lot this semester about 3D sculpting and how to retopologizing and texture a model. Since I have never used Blender before I was worried, I would get lost in all the menus, but the video tutorials were very helpful. I am still a beginner and I still have a lot to learn about the system, but I think I am on the right track.
References
Image References:
- No Face – Spirited Away – https://media3.giphy.com/media/ayMW3eqvuP00o/giphy_s.gif
- Bomb – Super Mario – https://static.wikia.nocookie.net/mariosupernintendo/images/c/cd/Bomb_omb.jpg/revision/latest/scale-to-width-down/340?cb=20110212014009&path-prefix=es
- Kirby – Kirby – https://upload.wikimedia.org/wikipedia/en/thumb/2/2d/SSU_Kirby_artwork.png/220px-SSU_Kirby_artwork.png
- Gudetama – Sanrio – https://cms.qz.com/wp-content/uploads/2016/08/gu_announcement_01.png?quality=75&strip=all&w=410&h=231
- Little Twin Stars Kiki and Lala – Sanrio – https://cdn.custom-cursor.com/packs/3289/sanrio-little-twin-stars-pack.png
- Baymax – Big Hero Six – https://miro.medium.com/max/381/1*kKoR3r6_kVRgCPJD5IkLkQ.jpeg
- Mickey Mouse – Disney – https://www.netclipart.com/pp/m/53-538346_unique-mickey-mouse-turns-90-happy-birthday-just.png
- Astronaut – https://img.lovepik.com/element/40165/2507.png_300.png
- Planchette – Lavendertowne – https://d30womf5coomej.cloudfront.net/sa/4b/de2eab30-3c58-4f73-816d-e8f95f1c9934.jpg
- BMO – Adventure Time – https://www.nicepng.com/png/detail/145-1451818_drawing-adventure-bmo-adventure-time-bmo-drawing.png
- Cat – Kiki’s Delivery Service – https://www.nicepng.com/png/detail/147-1470056_jiji-cat-t-shirt-kikis-delivery-service-jiji.png
- Dipper and Mabel – Gravity Falls – https://cfcdn.zulily.com/images/cache/product/452×1000/241283/zu52255732_main_tm1508503399.jpg
- Lemon – https://line.17qq.com/articles/shuutewax.html
- Ice Cream Girl – https://www.deviantart.com/dav-19/art/Ice-Cream-350280651
- Whale – https://cdn.shopify.com/s/files/1/0267/2630/1768/products/creating-your-own-adorable-characters-for-webcomics-digital-art-class101-243027_800x.jpg?v=1593844251
- Animal Crossing Avatar – https://i.guim.co.uk/img/media/b666958f934fd9af52b9c20d9efab84217948b8e/152_0_2210_1327/master/2210.jpg?width=1200&height=1200&quality=85&auto=format&fit=crop&s=d6514775650ad0fd819deaca9c404e4c
- Pucca – https://www.licensing.biz/wp-content/uploads/pucca.png
Sculpting References
- How to make an ice cream – https://www.youtube.com/watch?v=yr63Ih9-58s
- How to make a cherry – https://www.youtube.com/watch?v=TwdakP4BfE4