Creating the Staff
The first step to modelling the magic staff was the hilt/handle part of it. Easily enough, it’s created by a long cylinder primitive with extra parts at the top and bottom. It was possible to extrude the main cylinder to create the shapes of the extra parts. However I found it more manageable using more cylinder primitives and shaping them individually to create the look of this part.

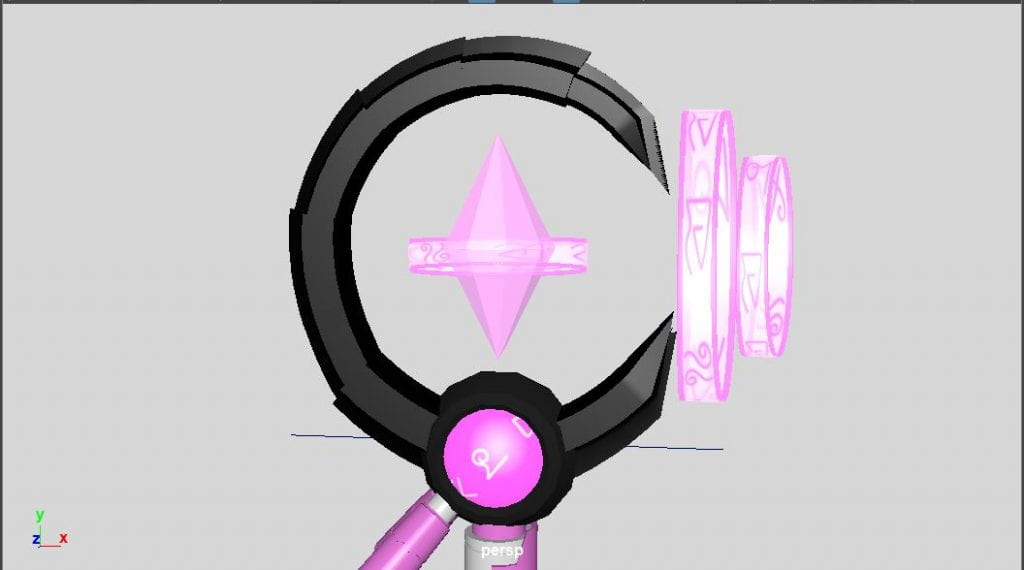
The next step was to created the top of the magic staff. This was a bit tricky to do, as I had to go and research how to perform a part of this. The inital idea was to extrude from one curved cube to form the arc. However the shape of the arc was not coming together quite as I hoped, so I decided to do duplicate the bent cube I already had and used that to form the arc, and then again to form the tiny extra at the end. The middle section with the sphere is a torus primitive which I thought was perfect for this as it suits well with a sphere in the middle. The two part coming off the torus are cylinder primitive in the form of pistons. This was to enhance the technological mechinal side of the magic staff.

After creating the top I was able to then create the magic circles and crystal as I then had an good idea of where to place them. Thankfully the model was coming along nicely similar to the sketch I had done so the rest of it went smoothly too. I used a cone primitive and lowered the amount of side faces it has to get a more edged cone. I duplicated that and flip the copy and then combine the two cones to form the crystal. I also lowered the opacity of the material to give it a translucent look. The magic circles were formed by cylinder primitives. I extruded the front and back faces to get a small edge to the cylinder, erased those faces, and then filled in the gap left behind by using the ‘fill in hole’ function. With this I was able to create large thing circles for the magic effect of the staff.
The Textures
My magic staff only required two created textures. The rest of the staff uses coloured materials of blinn, phong, and phong e. The textures that are applied to this model are on the magic circles and the sphere in the middle. The sphere UV map was simple enough to get, however the magic circle one was not. My plan was to have the magic circles see through, and so I need to make sure that both sides of the cylinder UV’s matched up. This invloved me separating the facing UV’s into three manageable sections, then I had to flip the matching section to complete the look of the UV’s. I think it worked out perfectly in all honesty.


The script I am using for my textures is the Nazcaan script from the game ‘Ni no Kuni: Wrath of the White Witch’. I decided to use this script as it has interesting shapes for it’s letters and I thought that it would be suitable for the magic circles. In the game the script is read from right to left, however for my purposes I am spelling my words to be read from left to right. So using this script the letters I have used should spell the word staff.


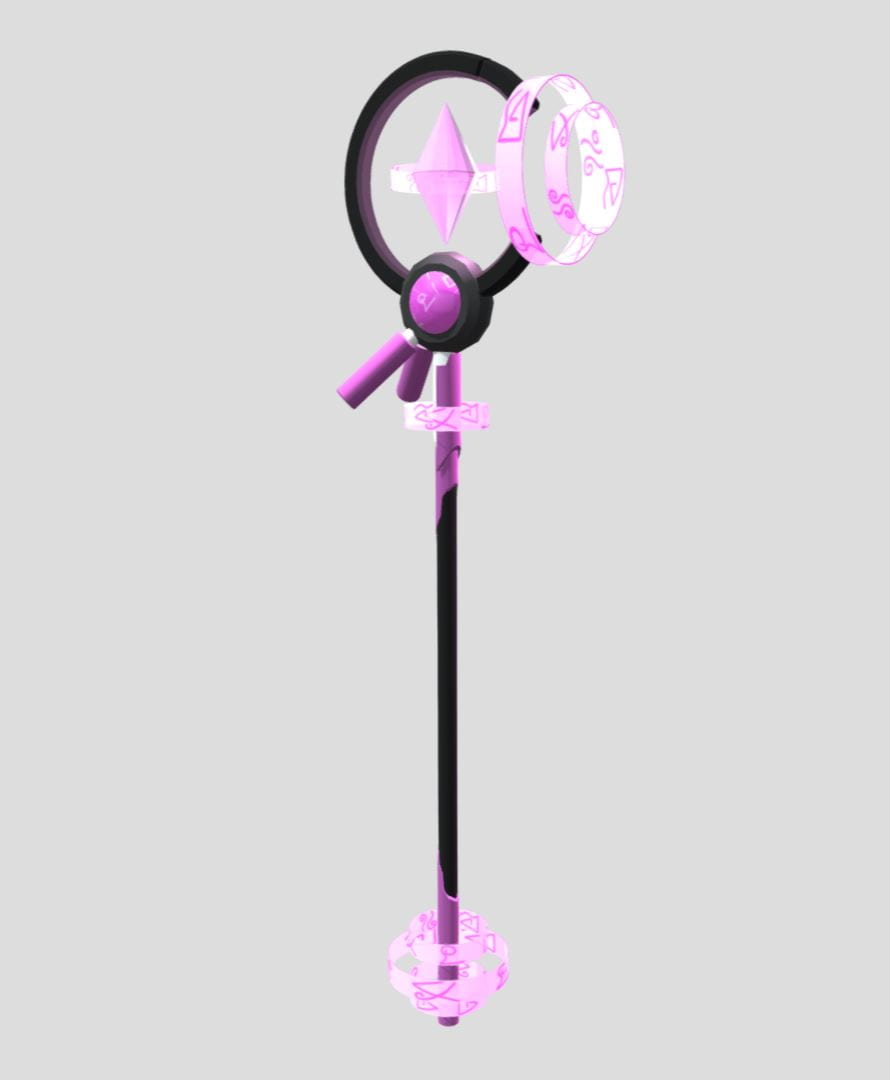
The Completed Magic Staff
Not Finished Yet!
During my 1-1 talk with Michael, we both agreed that my model was a bit too simple, the design is really good but it could use a little more. Michael’s idea was to do some scuplting to the arc of the staff. He showed me a good way of creating something easily while keeping the style of my references in mind. I really liked what he had done and decided that I’ll go back and see what I can do.

This is what I decided to do using the techniques and advice that Michael had given me. For the arc, I decided to extrude the arc to give the look that I had intially planned on doing at the beginning. I had to make the arc bigger to make sure that it would form a neat circle, as that was something that stopped me from the extruding idea in the first place. I also gave the arc some sharp features to make it stand out. I didn’t think of sharp features as I though it would disrupt the entire look of the staff due to the majority of it being made out of round objects with soft edges.
I then went add did some extruding on the barrel and pistons for that extra mechanical look and I have to say that it looks much better like this than it did before. I am happy I decided to take on Michael’s advice.
The Now Completed Magic Staff

The last thing I changed was switching the barrel’s position from the right side to the left. I think this way, it really pulls the look together.