Tools Used:
- Clip Studio Paint (Concept Art)
- Maya (Hard Surface Modeling & UVs)
- Zbrush (Model Detailing)
- Substance Painter (Model Texturing)
- Unreal Engine 5 (Asset Testing)
- Pencil & Sketchbook (Initial Concept Design Art)
- Youtube (Tutorials & References)
My Contribution:
- The Mk8 Robot (Modelling, sculping, & texturing)
- Mk8 Platform (Modelling & texturing)
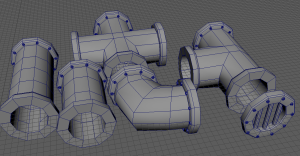
- A 6-piece set of modular steampipes (Modelling)
- Weighted Floor Button (Modelling)
Team A: Auto-Matons
Week 1:
Roles:
Primary: Art Direction & Character Modelling
Secondary: GUI Design, Character Sculpting, Prop Modelling, Animation
As a group we each suggested different games concept. I suggested a 3D puzzle game that was the combination of Pikmin and Portal, where the player controlled a horde of mini robots to solve puzzle rooms. This ended up being the idea that the team would adopt, due to the promising potential for the gameplay and narrative.
After the class had concluded the group arranged a meeting on Discord that night, where we further developed concepts using Miro. In that meeting we cemented that we wanted the art style of the game to be steampunk dystopia, and the premise of a group of robots wanting to escape a dilapidated robot factory. Due to concerns about programming complexity, the large group gameplay of Pikimin was simplified down to 4 player controlled bots that could fill specific roles. We also settled on the name Auto-Matons as the name of the game.
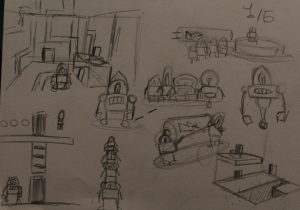
Concept Designs
These are the initial sketchbook sketches I made in order to pitch the idea to the group. It mainly illustrating the Pikmin like gameplay and the Portal-like puzzle rooms.

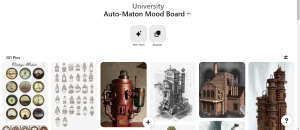
References:
I created a personal Pinterest board gather anything remotely based on steampunk or robots in general. I took particular interest in the robots featured in the works of Matt Dixon.
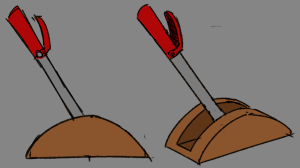
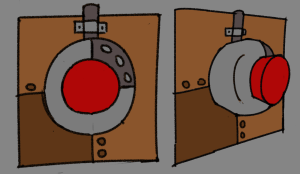
Props & Assets
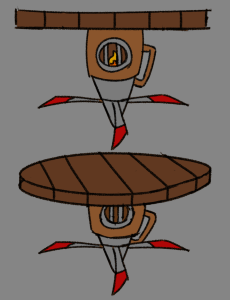
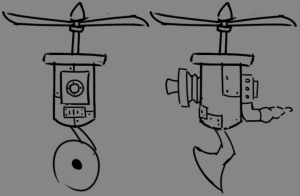
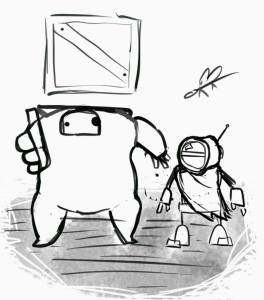
Since one of my main roles was art direction, I was tasked to create concept art for potential puzzle assets. See featured a lever, steam jet/grate platform, wall button, rising pistons, and a steam powered propellor platform. Out of the five concept only the first three made it into the game in some manner.


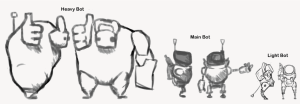
Character Designs:
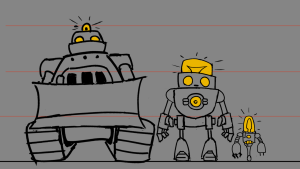
Since the whole team understanded that they’re would be several types of robots all the artist in team decided to create their own iterations of the robot designs based on the task they fulfilled in-game. The first bot was the main player character, a heavy bot, a agile bot, and a flying companion bot. Here are my iterations.
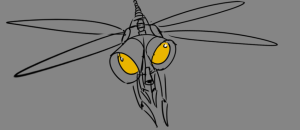
Here’s two versions of the flying companion bot:
Week 2:
We held a presentation where we pitch the concept of our game to the class to get feedback for it. Gameplay-wise the team was asked to focus more on the puzzle elements of the game and to narrow down the character roster to just two player controlled robots instead of three.
Finalisation of ideas
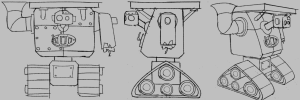
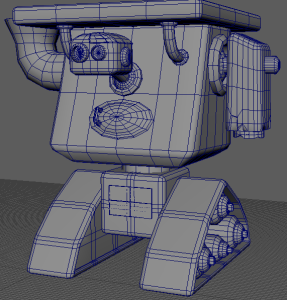
After the presentation the team had to narrow down and finalise the designs for the robot characters, I was assigned the responsibility to design and model the heavy bot character, Mk8. The designs I drew were heavily inspired by a quick sketch done by Lucas, which in turn was inspired by sketches done by Morgan. The design I drew were made with the permission of their respective artists. (Morgan’s sketch is on the left, Lucas’ is on the right)
The main mechanic behind Mk8 is that it could hold down weighted buttons and carry objects on it’s back. To reflect this purpose I designed the character to look bulker then the main character bot (Mk15), and attached an obvious platform on top so the player understands what the purpose of the character is.
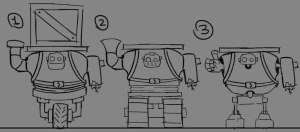
For locomotion we decided on giving the character treads instead of regular legs, not only to differ from Mk15, but to express to the player that the character was unable to jump in-game. It’s cubic design was also to telegraph to the player that the character had the ability to hold down objects with it’s weight. The chimney arm was a carry over from the thumb from the previous designs, to keep in the steampunk aesthetic I decided to give it a chimney reminiscent of a steam train.
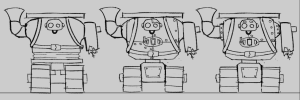
Different tread designs:

In addition to all this, one of the game design students created a Trello board, where everyone was giving a list of what assets need to be done and see what has already been done.
Week 3:
This week was mostly uneventful, the only progress I made was finalising the design for Mk8. So I was ready to move into the block-out phase.
Week 4:
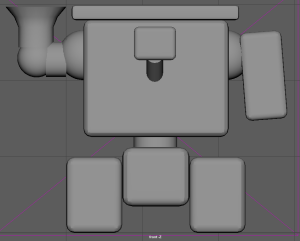
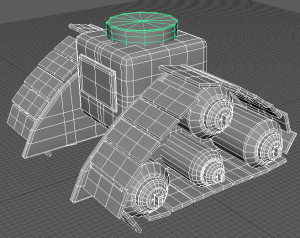
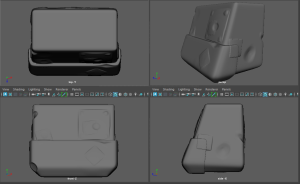
Here’s the initial MK8 Block-Out based on the proportions of the final concept design art. Handy for finalising the scale of the character and how the platform would lay on it’s back.

Week 5:
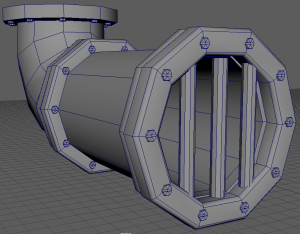
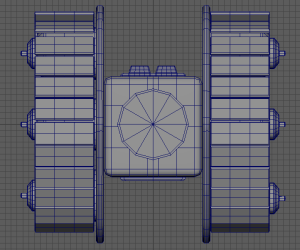
Progress on modular steam pipe set to be used to dress the environment. I needed to remake as they were too high poly for the low poly style we were going for.
Old
.

New

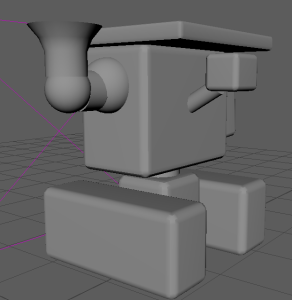
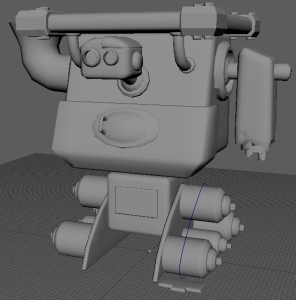
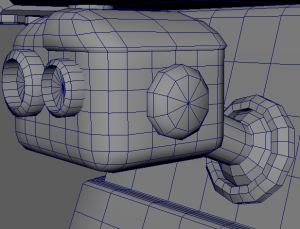
Weekly progress on MK8 model, began adding details.
Week 6:
I presented my work for the mid semester progress presentation, adding explanations about my work process and what my plans were for the coming weeks.
Here’s a personal roadmap that I wanted to follow:
Here’s the week’s progress I made on the MK8 model:
Completed the models of the 6 the six steam pipes. I handed them off to Lucas to have them textured:
Week 7:
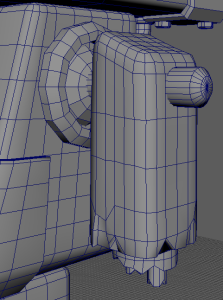
Spend most of the week adding further details to Mk8, such as adding damage to the arm and steel plating to the head.
Week 8:
The Mk8 model had reached the stage where I could hand it off to Philip to have it rigged an animated. Before I did I experimented with how to create treads for the character to move with. Though due to the fact it was made using MASH it wasn’t suited to be animated. Philip then took on the task of assembling the treads as well as rigging them. While he was doing that, I made begin to add further detail to Mk8.
Week 9 & Easter Break:
Zbrush
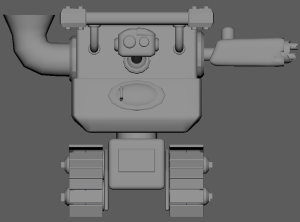
During week 9 and over the easter break I tasked my self to bring the MK8 model into Zbrush to add details to the model and export them as a normal map to apply to the full model later. I made very little in the way of progress over the last two weeks, as I found Zbrush confusing and difficult to use. I was also very unsure how normal maps worked which caused no ends of frustration. Changes made in Zbrush were never implement into the game due to time constraints. Here’s what progress I did make:

Week 10 to 13:
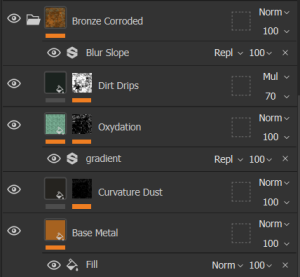
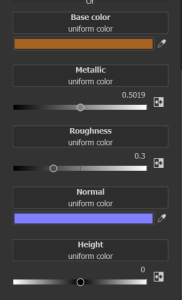
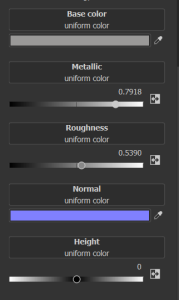
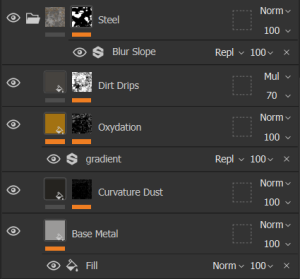
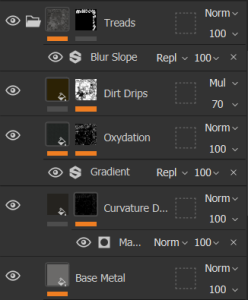
To keep the texturing styles similar to from asset to asset, a set of instructions were made in the project style guide which follows as such. The ‘bronze corroded’ smart material was the base for most textures, from there we experiment with the base colour, gradient colours and global balance settings until we get the desired result. ‘The ‘Blur Slope’ filter is then applied over very layer, to give off a splotchy painting look to the textures.
Here’s the result:
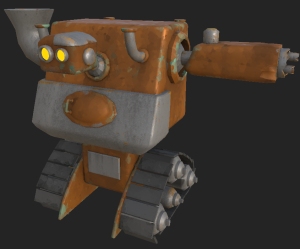
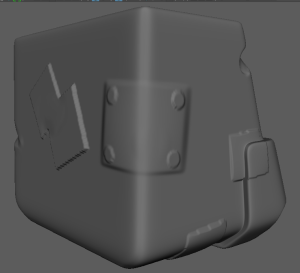
Full Model In Unreal Engine:
After texturing I brought the Mk8 model into UE5 to get an impression of how it would look in game:

Complications:
Due to a miscommunication, the version of the model I textured was had different UVs than the rigged version, since this issue was discovered at the night of submission there was not enough time to correct the mistake. The version present in the game currented is not the intended version.
Despite them begin my secondary roles, I didn’t contribute to GUI design or animation at any point during the project, as I was too busy with my other responsibilities to allocate more time to them.