When creating the assets for our scenes, we all gathered ideas on main items we needed.
- Pillar / Column (Clean / Damaged) Square Pillars?
- Egyptian Statue (Clean / Broken)
- Anubis Statue (God of Death)
- Vases / Pottery – Fire bowl decoration?
- Sarcophagus
- Wooden Torches (Wall Mounted / Standing / Handheld)
- Floor (Brick / Tile / Sand)
- Walls (Clean / Cracked)
- Low Ceiling Walls / ?
- w/ hole for entrance
- w/ trim sheet variations
- Altar
- Human remains – Skull/Bones
- Shanti
- Scarab Coin / Gold Coin- Single coin/Coin Pile
- Gold Bar
- Egyptian Cat
- Burial mask
- Amulet
- Dagger
- Sword
- Old Rope
- Old Cloth
- Paint Brush
- Trowel
- Clipboard
- Pencil
- Notebook
- Measuring Tape
- Tool Case
These were some main things we came up with, from here we all decided what items we’d prefer to do. My chosen assets were:
- Anubis Statue
- Shanti
- Scarab
- Egyptian Cat
- Burial mask
- Amulet
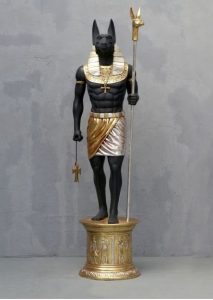
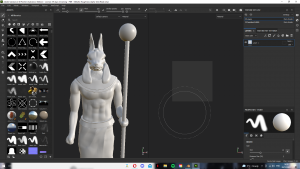
Anubis:
After choosing my assets I did some research into different references I could use. I started off with my Anubis statue.


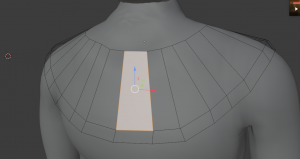
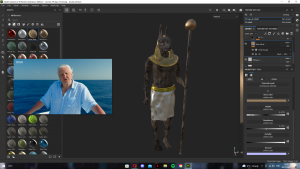
To start off my modelling I thought using a human reference would work a lot easier to get the masculine shoulders and torso. I used the image below to get me started.
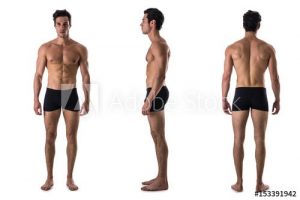
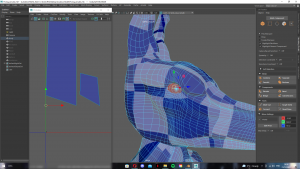
I used Maya to build a basic outline of the human figure and transferred it to Blender to use the sculpt mode to add in details in the torso, legs and arms, adding more definition to the muscles.
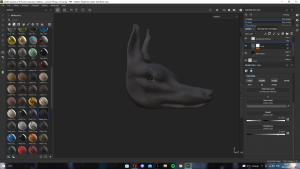
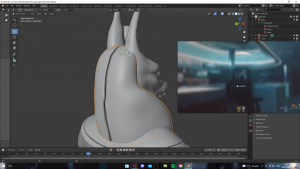
After this I added in the head, instead using Blender to build a simple shape and using the mirror tool to ensure consistency on both sides.

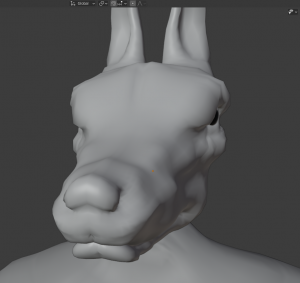
I used the reference to define the face and adding indents for the positioning of the eyes.
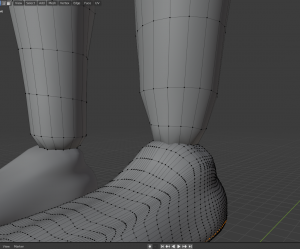
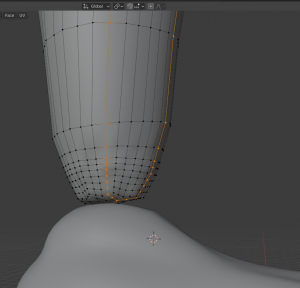
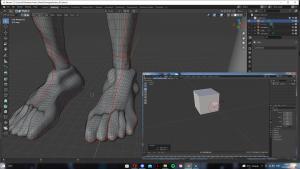
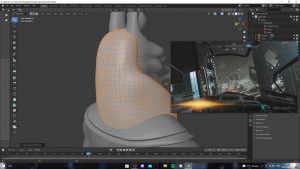
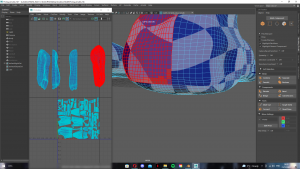
Next, I added simple cubes for the feet and used the sculpting tool to create a simple block design to the feet. I think I over did the subdivisions however I did need quite a lot to model the feet using the sculpting mode. However, if I were to improve this I would begin modelling in Maya to create the basic shape and improve the amount of subdivisions I add. From here I smoothed a slightly tweaked the model.
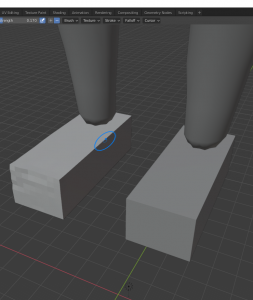


One issue I did stumble upon was the combining of the feet and the bottom of the legs was that they merged around each other and not together. It left them a little bumpy and odd looking, however I wasn’t too concerned since the top half would be more of what the viewers seen.
From here, I began working on the neck piece I followed along to a video I found on YouTube which was really helpful and saved me a lot of time trying to figure out the best way to approach it. However, it did turn out great and suited the model.


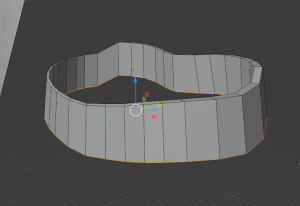
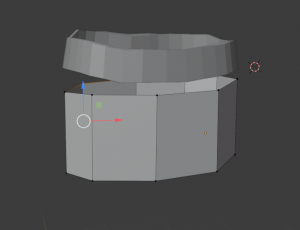
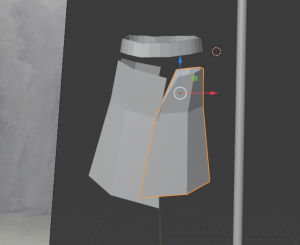
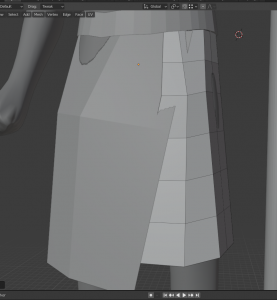
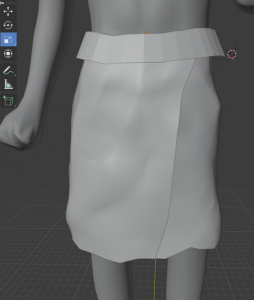
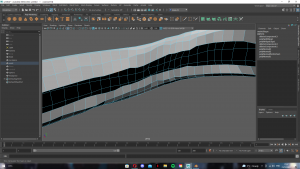
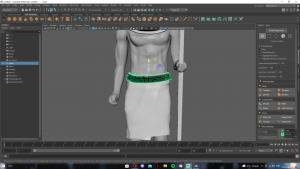
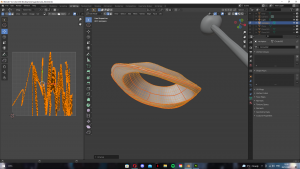
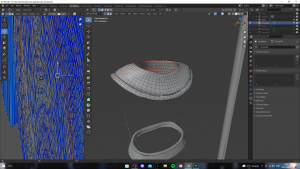
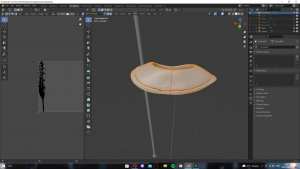
Next up was the top of the skirt. I used the same method for the neckpiece for this part of the skirt. I did 2 layers of it to create a rounder piece rather than a flat plane. Then I worked on the lower part of the skirt, firstly creating a full circle however finding that I couldn’t overlap the pieces like the reference image. Instead of this I decided to do it in 2 halves and combine them together, then combining them to the top half. From here I subdivided the whole skirt so I would be able to sculpt and add in wrinkles and smoothness.


Next, I went back into the main body of the Anubis and tweaked the definition of the muscles and fixed any odd looking vertices using the smooth tool.

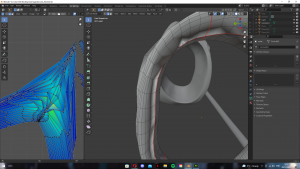
Following this I moved onto the Headpiece. This was one of my favourite parts to do. I used the same method as the neckpiece and skirt to create the basic shape, adding in extra edge loops for sculpting and smoothing.
I did come across having an issue at the back, I thought it was from the mirror tool that I used however, I did apply the tool so I looked up solutions. I found going into the mesh menu, normals and recalculate inside, this fixed the mesh and I was able to use other tools onto it.
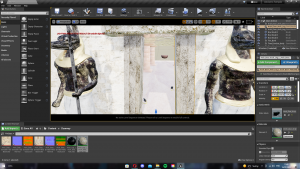
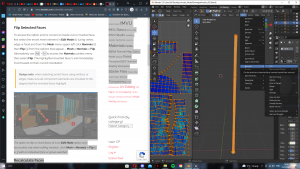
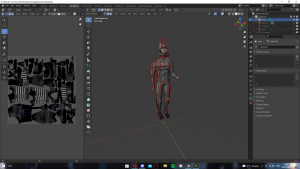
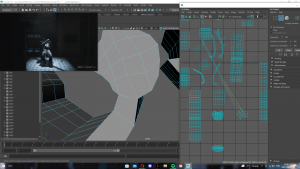
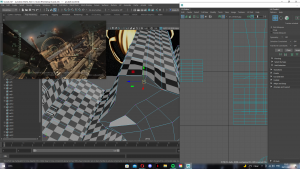
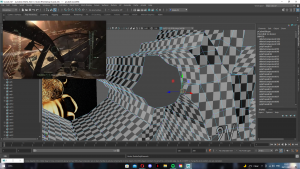
This lead me onto my UV Mapping. I am not the greatest at UV Mapping and so the first thing I tried out was Blenders automatic mapping. However, it didn’t come out the best, leaving very sea sickening looking waves and errors within Unreal, as some parts of my model weren’t showing. To fix these I was able to select along edges and cut them to straighten. I think I may have over did some UV Mapping but I done as much as I could to ensure the textures applied the best they could.
To fix the parts of the model missing I flipped faces within Maya and adjusted the subdivisions and faces of some parts.
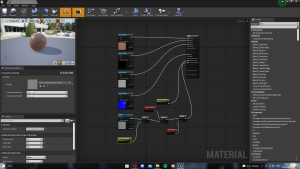
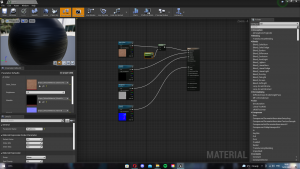
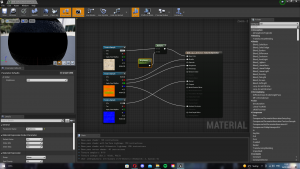
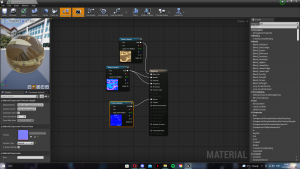
Once I tweaked my UV’s I added my model into Substance Painter where I applied a few textures I thought may work well. I also rewatched Henry’s videos on blackboard, explaining black masks etc. as this was my first time using Substance properly.
I went for a matte black body adding on top some dirt materials and editing their height so it would appear they were stuck on top. I also added in some dirt and adjusted so it looked like over the years sand and wind caused the body to degrade over time. When it came to the skirt, headpiece and neckpiece I wanted them to be quite metallic but have the appearance of years of sand sticking on top.
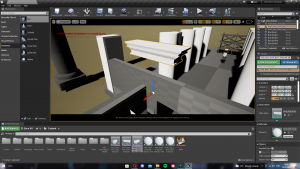
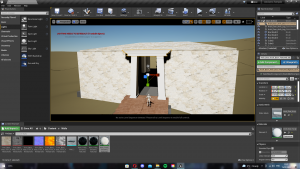
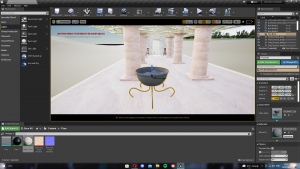
Once textured I exported them and imported them into Unreal. I found applying them was great and showed a lot of detail.


Scarab:
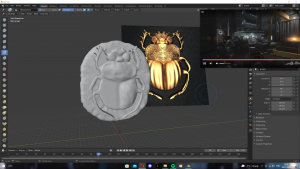
I started off my scarab with these references. I started the basic shape in Maya using a cube, then placing the reference behind. I manoeuvred the vertices to a rough shape and extruded the faces along the side for the legs. I then used the edge loop tool to divide it up for sculpting in Blender.
I used a plane for the base of the scarab and moved the vertices into a circular shape then subdivided using the edge loop tool for sculpting.
Next, I thickened out the limbs to the same width and flattened the scarab to the base.
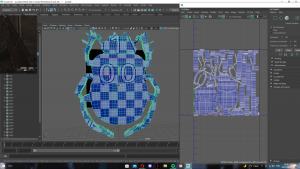
From here I began UV Mapping. First doing the front face and then the edge in sections. I had some issues when it came to cutting the sections of the UV map but I was able to cut it in a different area and it worked.
I also came across an issue with the antenna areas, some vertices weren’t connected and so the UV didn’t work. To fix this I went through and deleted the extra vertices and faces and bridged them together again. Another issue I found in UV mapping was that some faces had another set of faces on top that were hidden within the model but it was a simple fix and I just deleted them.
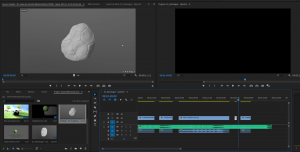
After finishing UV Mapping I imported my model into Blender and began sculpting, mainly using the smoothing tool. I also used tools to roughen up the edges of the base and add shape to the top of the model.
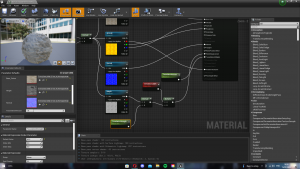
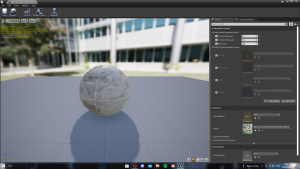
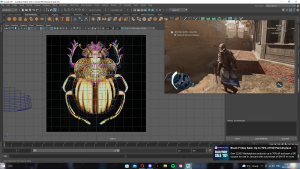
After modelling I transferred into Substance painter were I applied a golden texture and adjusted the metallic to max. I also added into the crevices a dust material, it worked really well and made the gold pop out.


Links:
Anubis Egyptian God Sculpt (Blender 2.8): https://www.youtube.com/watch?v=gWory0T-A_U&list=PLxlrQQKwwf9du4GYIe719a8Qch3roNlyz&index=2&t=1s
How to use Mirror Duplicating Special in Maya: https://www.youtube.com/watch?v=4bgXjoffKGE&list=PLxlrQQKwwf9du4GYIe719a8Qch3roNlyz&index=4
Blender (2.81) How To Model a Base Mesh: Creating Anubis 1: https://www.youtube.com/watch?v=b-tbo83G2ys&list=PLxlrQQKwwf9du4GYIe719a8Qch3roNlyz&index=3&t=2483s
Maya bodybuilder CHARACTER MODELING tutorial: https://www.youtube.com/watch?v=spi4lGxnMZg&list=PLxlrQQKwwf9du4GYIe719a8Qch3roNlyz&index=5&t=431s
maya torso modelling: https://www.youtube.com/watch?v=cZuEAj6gbf4&list=PLxlrQQKwwf9du4GYIe719a8Qch3roNlyz&index=6&t=135s
Anubis Head Sculpt: https://www.youtube.com/watch?v=_Pln7wU8WkU&list=PLxlrQQKwwf9du4GYIe719a8Qch3roNlyz&index=21
Anubis 3D Modelling – time lapse: https://www.youtube.com/watch?v=bd-zR-5X4Bs&list=PLxlrQQKwwf9du4GYIe719a8Qch3roNlyz&index=37
Blender daily tips how to straighten ups in blender: https://www.youtube.com/watch?v=WmBBQdpexdc&list=PLxlrQQKwwf9du4GYIe719a8Qch3roNlyz&index=38
How to straighten ups without add ons in blender: https://www.youtube.com/watch?v=sF-bBD0JHdk&list=PLxlrQQKwwf9du4GYIe719a8Qch3roNlyz&index=30
Substance Painter Auto UVS: https://www.youtube.com/watch?v=zMxQOVKzvFM&list=PLxlrQQKwwf9du4GYIe719a8Qch3roNlyz&index=24