Beginning my showreel I followed along with Alec’s week 3 videos. First off getting some helpful tips and tricks as I had never used Premier Pro before. First thing Alec mentioned was music, something with a good beat to it but not overdoing it. So first off I opened up Google and searched showreel music, I came across a website called Epidemic. All I had to do was sign up and access to these songs were limitless.
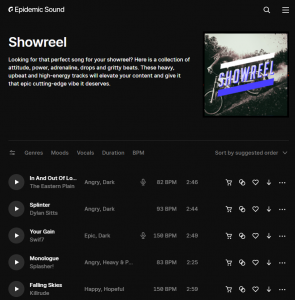
After looking through some, the one that stood out to me most was Monologue by Splasher. I found it had a nice, powerful beat that felt like it was impacting my work, and seem attracting.
Next up I moved onto learning how exactly Premier Pro worked. Alec’s videos were great in showing how to place markers, which helped to find where the main beats dropped, using CTRL and K to cut clips into sections and how to unlink the music from a video clip.
From here I used YouTube to find a beginners video demonstrating how to add in clips. First off I had to gather some of my first year and second year work and drag them into the lower left side of the screen, from here I simply clicked on the video, moved to the screen above and drag that image onto my timeline. After that I downloaded my music clip and dragged it into the same area, then imported it into my timeline below my videos. It ended up looking like this below:
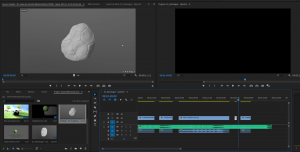
Next, I selected each of the video clips, right clicked and unlinked them. This allowed the video to be silent so the music was nice and clear.

The image above shows me starting to gather my clips together and trying to line them up with the beat, the markers were a great help and when adjusting the bar it automatically snapped to the marker. I used CTRL and K to cut some of my longer clips and added shorter animations between them. Once I had the main structure of my videos done, I used the YouTube video from earlier to show how to add in graphics to include my name and email. It was very easy to follow and in a few steps through the graphics tab I had placed text that would last a few seconds then disappear.
The final step in my showreel was to export my scene out and into a MP4 setting. I was able to find quickly the format settings that should be used such as H.264, which would produce a media file with an .mp4 extension, and using the preset menu to find the vimeo profile with a resolution of 1080HD.

From here I was pretty much finished, I felt like I could’ve swapped a few of my clips round in order of my best to least favourite but I felt some clips would be too short and not show the sections that I wanted. For my first time as well using Premier Pro it was a very simple way of creating video clips and I will definitely use it again.
Below is my final showreel, to improve I would figure out how to record models in Sketchfab without showing the mouse on screen and icons. I would also go back into my first year walk and jump cycle and render them out correctly so that the axis and camera name were in view, it would make the scene cleaner, and also add in a loop so that I could use these clips for longer sections. I’d also add in more concept work which has been cleaned up and some more of my own personal work just to add variety and keep the individuals watching my reel interested.
https://vimeo.com/656279516
Websites & Videos:
How To Export to MP4 Format in Premiere Pro: https://support.shutterstock.com/s/article/how-to-export-to-mp4-format-in-premiere-pro?language=en_US&c3apidt=71700000083936683&gclid=CjwKCAiA-9uNBhBTEiwAN3IlNPgfdPhC_MGWVyrVgj_rUuvt_dneADfVzE3eHctl6eY6nToyVBu6ohoC888QAvD_BwE&pl=PPC_GOO_UK_DSA-523720044174&kw=&gclsrc=aw.ds&cr=c
Learn Premier Pro in 20 Mins: https://youtu.be/Hls3Tp7JS8E
Edit to the Beat Adobe Premier Pro: https://youtu.be/TFvRuvcYsTY
2D Animation Showreel: https://vimeo.com/385455279
25 Tips to Create an Animation Demo Reel: https://vimeo.com/385455279

