– Feedback on Staff –

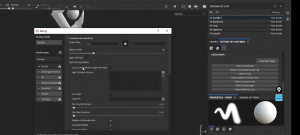
The video feedback back from Henry settled a lot of issues I had throughout my assignment. He seemed happy with the design of my handle and the smaller details around the rings, however he explained to me to bake my orbs before uploading. Firstly to select my orbs, go to mesh display and soften edge.


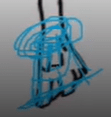
Another improvement I can make is to follow the flow of the texture. Due to my UV’s being in the wrong directions, the grain of the wood then flowed in the wrong ways. To improve this I would need to use the checkerboard behind my UV’s or an imported image to align each section and to also use more reference images to understand how the grain of wood twists around corners and sharp edges.

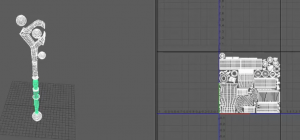
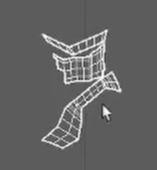
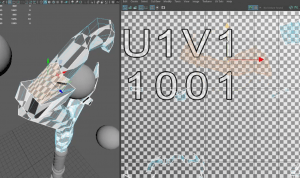
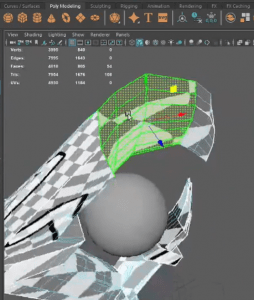
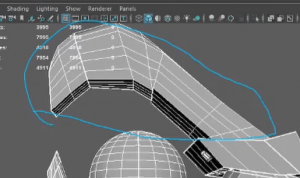
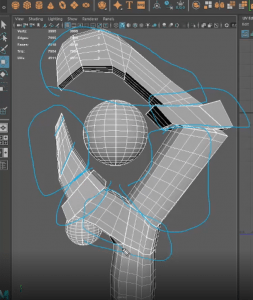
The next main area of improvement is my UV mapping. The positive thing is that when my whole model is selected the UV maps work okay, however I’m now aware to use less UV’s and instead do as little UV’s but do them in larger chunks. One specific map that consisted of smaller faces needed to be stitched together by selecting the edges and stitching them and then selecting an edge that’s slightly hidden to unfold. I’ll remember for next time to keep it simple and bigger pieces.


The pictures below show Henry’s comment on bigger portions of my model for mapping and aligning up correctly for texturing.

The next suggestion for my model is the orb I placed at the bottom of the staff. I struggled to create the layered wood I wanted but it didn’t work out so I had to change last minute. However, Henry made the suggestion of creating a box and small planes throughout, as well as possibly adding a rope to hide any imperfections.

I only had two small changes to my blog which is to add in more research about modelling and sculpting, especially to assist in my assignment 2. The other change is to not focus all my research on staffs but to possibly research on canes and the textures within them which would’ve helped in the wood texturing.

The last main area of improvement is the texturing on my model. Before beginning I’ve noted that for my model I only used 1 texture which applied to the whole model, whereas I should’ve separated them.

I struggled with opening and working Substance Painter before but I’m going to try a older version so I can carry out what Henry suggested. Firstly I needed to separate my materials then selecting my orbs, right clicking and assign a new material as a lambert and renaming it. For the whole model I need to repeat this to be transferable to Substance Painter.

Finally, the last section was about my upload to Sketchfab. I had a lot of issues with this before but Henry was able to show me how to export and what settings to have it under.

The feedback I was given was a great confidence booster in what I have created so far and will definitely be a huge help in my cute character assignment.

Substance Painter/ZBrush

My next step was to then export my Maya model to substance painter. When first exporting I came into the issue of not having a FBX file to export as, I followed a lot of videos and articles on how to fix the issue but I ended up having to clean uninstall Maya and reinstall it again. However, I realized that I didn’t need to uninstall anything I just had to scroll down the list and FBX was at the bottom (facepalm).

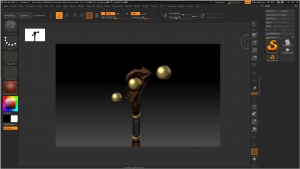
When trying to upload my piece to Substance Painter my computer wasn’t able to load it up so I had to switch to ZBrush which I found was quite similar to Substance Painter. However, trying to learn the keys and how the software was difficult and when trying to finish up and upload to Sketchfab, it went downhill. My computer wasn’t able to load the plug ins and so I couldn’t upload to Sketchfab.

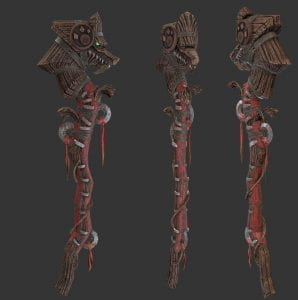
Using ZBrush was difficult to learn, I found it to be complicated and awkward how to apply textures and to maneuver around the model but I managed to create the colours and effects I wanted. I was happy with my UV mapping and it working well within ZBrush, I just wish I UV mapped the metal rings around the claw part of my model so I could apply a shiny, metal like material.

I am gutted I couldn’t fully upload my model, but to work on from now on is getting practice on ZBrush or other programs similar just incase anything happens and have to rely on plan B.

Articles & Videos: 

Exporting 3D Models from Maya into Substance Painter: https://www.youtube.com/watch?v=reuCXOiuiFs&list=PLxlrQQKwwf9fZs140wIDjrN3xaP_1EADB&index=69

ZBrush 2020 for beginners – The UI and getting started: https://www.youtube.com/watch?v=uuq8pzHToMQ

DART 153 Intro To ZBrush: Texturing Part 1 Colors And Materials: https://www.youtube.com/watch?v=tZwEKqqFuTU

How to retopologize in ZBrush using Zremesher: https://www.youtube.com/watch?v=z6iUTpZASFc

Autodesk 3ds Max, Zbrush, Substance Painter – Stylized Staff: https://www.youtube.com/watch?v=1KDCBDKzgnI&list=PLxlrQQKwwf9fZs140wIDjrN3xaP_1EADB&index=43&t=549s

Stylized Purple Amber Dagger – Autodesk Maya, Zbrush, Substance Painter and Marmoset Toolbag: https://www.youtube.com/watch?v=x_5sO_fTl4I&list=PLxlrQQKwwf9fZs140wIDjrN3xaP_1EADB&index=44&t=371s

Final Design

Beginning this module I had very little experience with 3D modelling, but over the past few weeks I feel I’ve created a successful model. The class material provided was great to look back on and it provided a lot of info on how each section should look. With the use of both class videos and online videos I feel it’s a great variety of topics covered and allowed me to find the best way to do different tasks. However, the only area that I really struggled with is UV mapping, the videos provided were great it was just hard to get my head around but I hope with time and practice I can use the software and understand it much better. It’s great to look back now at UV mapping and produce something I can be proud of. Moving on from this I feel I’ve a better knowledge and understanding of the software’s we used. A lesson I’ve learned as well from this module is to learn to walk before I run and go back to basics if I’m struggling to understand certain software’s and build up from there. I hope with future modules I complete I become more experienced and can move onto more difficult techniques.


Modelling

From my initial designs, I then moved on to modelling my final one with Maya.

So after about a day of watching tutorials and messing around with commands I came up with a basic model of my staff. I really struggled with making the wooden layers at the bottom and so I dragged faces to get the layered effect. I then tried to extrude the top section and somehow it turned into spikes. I was however able to create the leather wrapped around the center by following a online tutorial, it was difficult and awkward but it came through in the end.

However on Friday the 26th, I had a talk with Michael about my model. He told me about keeping my objects and polycount low, to extrude surfaces for the claw instead of creating a new object, the knife tool, to texture the leather straps instead of modelling them and how control edges work. He did also tell me how to create the edges of the wood piece but I didn’t get all the notes down on time and so I had nothing to build from.

With Michaels help I was able to navigate Maya easier and restart my model. I think this one came out a lot better. Below are some images of the basic look I was going for, I just need to smooth edges more and focus on the wood section at the bottom. One part of my model I am really proud of is the twist which is the handle, I was able to get Henry’s help on our 1 to 1 session where he showed me a few ways I could achieve this. The easiest way was to go onto Deform – Nonlinear – Twist. The menu that appears on the right was easy to use to get the twist I wanted. Another feature I’m happy with is the metal rings around the claw, instead of creating a new model and trying to adjust it, I simply extruded a ring of faces and adjusted it to stand out from the wood.


However, after trying to achieve the wooden edges I wanted I couldn’t get the hang of it and so had to alter my design to make it simpler and achievable. I changed the bottom section to another orb and defined the wooden section as the straight piece won’t look nice with the other features. To improve on this I would design a more symmetrical object to make things easier for myself and do more research into creating a cleaner looking claw and to also figure out how to create the wooden effect I was looking for.


Moving on from the modelling, I began my UV mapping. When watching Alec’s tutorials in week three I thought UV mapping wasn’t that difficult, but was I wrong when I came to my model. Some parts were simple, such as the spheres, flat surfaces and cylinders. However, the claw was the most difficult, I had to separate it and UV map parts of it at a time. I don’t think I created them the correct way but I feel I done the best I could on my claw and will definitely invest more time into UV mapping.

I was able to stay consistent with UV mapping once I knew what to do, I got used to using the cut and sew tools as well as learning to unfold shapes. I watched a lot of videos as some spoke of one way to do it and then another saying to do it a completely different way and so it took some time to figure out the easiest and most effective way for me to learn.


One thing I did learn from UV mapping is that smaller portions of a section of model works much better than trying to model the whole section. I also learned about the layout option when using UV that organises it for you which saved me a lot of time trying to organise each UV map individually.

Articles & videos:

Maya Tutorial for Beginners 2020 | Introduction: https://www.youtube.com/watch?v=PjpF3phtpHg&list=PLsPHRLf6UN4k0_AfrTzLmK4iDV9J97-qR

How to UV a Complex Object In Maya | UV Map Tutorial: https://www.youtube.com/watch?v=EpTezpLOXQw&list=PLxlrQQKwwf9fZs140wIDjrN3xaP_1EADB&index=77&t=917s

Maya Beginner Modeling Tutorial – UV Unwrap: https://www.youtube.com/watch?v=VHUJ-kte1n8&list=PLxlrQQKwwf9fZs140wIDjrN3xaP_1EADB&index=76&t=274s

unfolding a ball: https://www.youtube.com/watch?v=vlIKWFi5VmU&list=PLxlrQQKwwf9fZs140wIDjrN3xaP_1EADB&index=73&t=3s

How to unwrap the UV’s of a cylinder in Maya 2018: https://www.youtube.com/watch?v=qkMEk591sIg&list=PLxlrQQKwwf9fZs140wIDjrN3xaP_1EADB&index=72&t=114s

Unwrapping UV’s on Complex Cylinder Shapes in Maya 2019: https://www.youtube.com/watch?v=7GkcTzabxiM&list=PLxlrQQKwwf9fZs140wIDjrN3xaP_1EADB&index=71

Maya 2014 tutorial : Wood texturing tips ( Subscriber request ): https://www.youtube.com/watch?v=98E-L163fC4&list=PLxlrQQKwwf9fZs140wIDjrN3xaP_1EADB&index=67&t=245s

Speed Modeling | Priestess Staff from Goblin Slayer | Maya 2019: https://www.youtube.com/watch?v=Qh_0pES7CNU&list=PLxlrQQKwwf9fZs140wIDjrN3xaP_1EADB&index=66

Maya Quicktip: Modeling a claw /nail: https://www.youtube.com/watch?v=GTuxkPATLzA&list=PLxlrQQKwwf9fZs140wIDjrN3xaP_1EADB&index=64

How to model a Twisted Candle Stick in Maya 2018: https://www.youtube.com/watch?v=UEa1DWcn62s&list=PLxlrQQKwwf9fZs140wIDjrN3xaP_1EADB&index=62

Maya Non-Linear-Deformers – for modelling or animation: https://www.youtube.com/watch?v=CdCwE_m1WhE&list=PLxlrQQKwwf9fZs140wIDjrN3xaP_1EADB&index=61

UV Map Anything in 5 Minutes with Maya: https://www.youtube.com/watch?v=t5Co6SuzoQw&list=PLxlrQQKwwf9fZs140wIDjrN3xaP_1EADB&index=59

Design

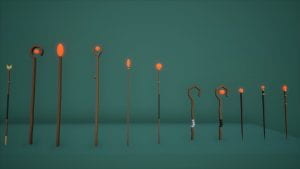
Moving on from my research I began designing some staffs, on Adobe Illustrator, with different features I liked on them. I played around with size, width and style.

I began with some traditional tribal features onto a staff, keeping the theme of glowing orbs/skulls. I thought these came out great and allowed me to see what I was capable of doing and what I’m not.

With the first three drawings complete, I assessed what I had done and decided any of these would be too much for what I could do, with the feathers and the hanging assessories, and so I crossed these options out.


Moving on to the second set of designs, I really loved the dragon piece I thought with the right texturing and layering it would come out amazing but for the timeframe and experience I had I thought it would be too much to achieve. However, the other two pieces I liked as well but there was nothing that stood out and the final piece wouldn’t look appealing or interesting but I did like the use of the orb and the shaping of the staffs.


For my final designs I loved them both, I used a previous staff from my first designs and added detailing along the bottom with the use of metal discs stuck onto the staff. However, I didn’t like how much they stuck out and the model didn’t look eye catching enough, as well as the placing of the handle which didn’t look right to me. The last design on the right is what I liked the most, it kept with the tribal theme and made sense to me with the placing of the handle and the proportions of the staff. The glowing orb in the center is what interested me the most with the claw shaped wood curved around it, it made it feel mysterious and powerful. However, I don’t know if I will stick to one orb, the possibility of a couple more floating orbs around the staff might work well.

Articles & videos:

Autodesk Maya 2020 _ Stylized 3D Magic Staff Modeling in Maya 2020: https://www.youtube.com/watch?v=aQO6-KHbaM8

3D Modeling Voldimus’ Staff- Speed Modeling: https://www.youtube.com/watch?v=nC4_PiJKKjw

Research

So, after a long break we’re back and to start things off we got the handbook of what this semester is all about. Our first assignment is to model, UV unwrap, texture and render one of the following:

  • Windmill
  • Mantel Clock
  • Treasure Chest & Treasure
  • Sword & shield
  • Sci-Fi Door
  • Old Well
  • Magic Witch / Wizard Staff

I then began to research all of the objects to see which one appealed to me the most. 


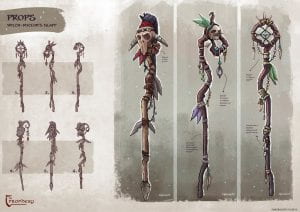
I done some of my research on Art Station, it gave me some of the best designs and encouraged me to like the staff idea. I like the tribal feel to them with the skulls and the feathers and their magical/mysterious atmosphere about them.

I researched some images of tribal staffs:

For my staff I’d love to add different elements seen in the images above. Using a leather and wood handle and the accessories with bright colours and lights.

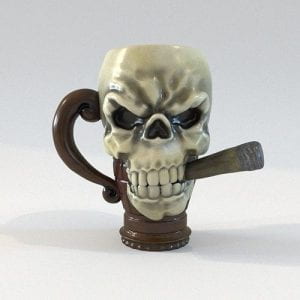
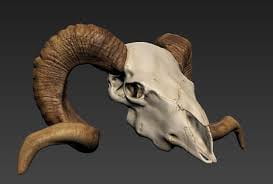
I did find some skulls that would look really cool as the main piece on top with added lights or a smoke effect coming out of the eyes and mouth. Another idea with the skulls is a ram skull, I think the horns would be cool with feathers etc. hanging from them.

When researching skulls I came across Sea of Thieves skulls, the lighting and design caught my eye. Since these skulls usually have no bottom jaw it would be much simpler to model, giving me more time on my other accessories.

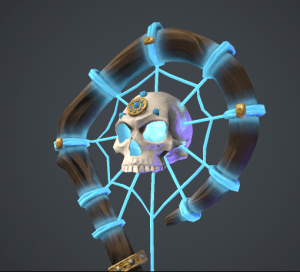
I found an image on ArtStation which is something similar to what I was imagining for my staff, I think the use of colours and lighting would work really well.

From these ideas I decided to focus on a simpler staff, having basic knowledge of Maya and Substance Painter it made me realize a simpler design would be more realistic for my deadline. I’m going to stick to a tribal themed staff, with a simple orb in the center, I think my staff will come out well once the textures have been applied.

Articles & videos: 

3D Literacy – DES132 – Intro to Maya:   https://www.linkedin.com/learning/collections/enterprise/1~AAAAAAIe0ZQ=968203?trk=share_ent_collection_url&shareId=a652b0e9-e277-4ea0-bc25-a015f215536a&accountId=35574164&u=35574164&success=true&authUUID=yskrsFW3T3WzPRSxDTLHcQ%3D%3D

Maya Tutorial for Beginners – 2020: https://www.youtube.com/watch?v=PjpF3phtpHg&list=PLsPHRLf6UN4k0_AfrTzLmK4iDV9J97-qR&ab_channel=GameDevAcademy

Pixabay: https://pixabay.com

3D Literacy – DES132 – Intro to Maya: https://www.linkedin.com/learning/collections/enterprise/1~AAAAAAIe0ZQ=968203?trk=share_ent_collection_url&shareId=a652b0e9-e277-4ea0-bc25-a015f215536a&accountId=35574164&u=35574164&success=true&authUUID=yskrsFW3T3WzPRSxDTLHcQ%3D%3D

Glowing Skull Staff: https://www.artstation.com/artwork/99RDO