Beginning this module I had very little experience with 3D modelling, but over the past few weeks I feel I’ve created a successful model. The class material provided was great to look back on and it provided a lot of info on how each section should look. With the use of both class videos and online videos I feel it’s a great variety of topics covered and allowed me to find the best way to do different tasks. However, the only area that I really struggled with is UV mapping, the videos provided were great it was just hard to get my head around but I hope with time and practice I can use the software and understand it much better. It’s great to look back now at UV mapping and produce something I can be proud of. Moving on from this I feel I’ve a better knowledge and understanding of the software’s we used. A lesson I’ve learned as well from this module is to learn to walk before I run and go back to basics if I’m struggling to understand certain software’s and build up from there. I hope with future modules I complete I become more experienced and can move onto more difficult techniques.
From my initial designs, I then moved on to modelling my final one with Maya.
So after about a day of watching tutorials and messing around with commands I came up with a basic model of my staff. I really struggled with making the wooden layers at the bottom and so I dragged faces to get the layered effect. I then tried to extrude the top section and somehow it turned into spikes. I was however able to create the leather wrapped around the center by following a online tutorial, it was difficult and awkward but it came through in the end.
However on Friday the 26th, I had a talk with Michael about my model. He told me about keeping my objects and polycount low, to extrude surfaces for the claw instead of creating a new object, the knife tool, to texture the leather straps instead of modelling them and how control edges work. He did also tell me how to create the edges of the wood piece but I didn’t get all the notes down on time and so I had nothing to build from.
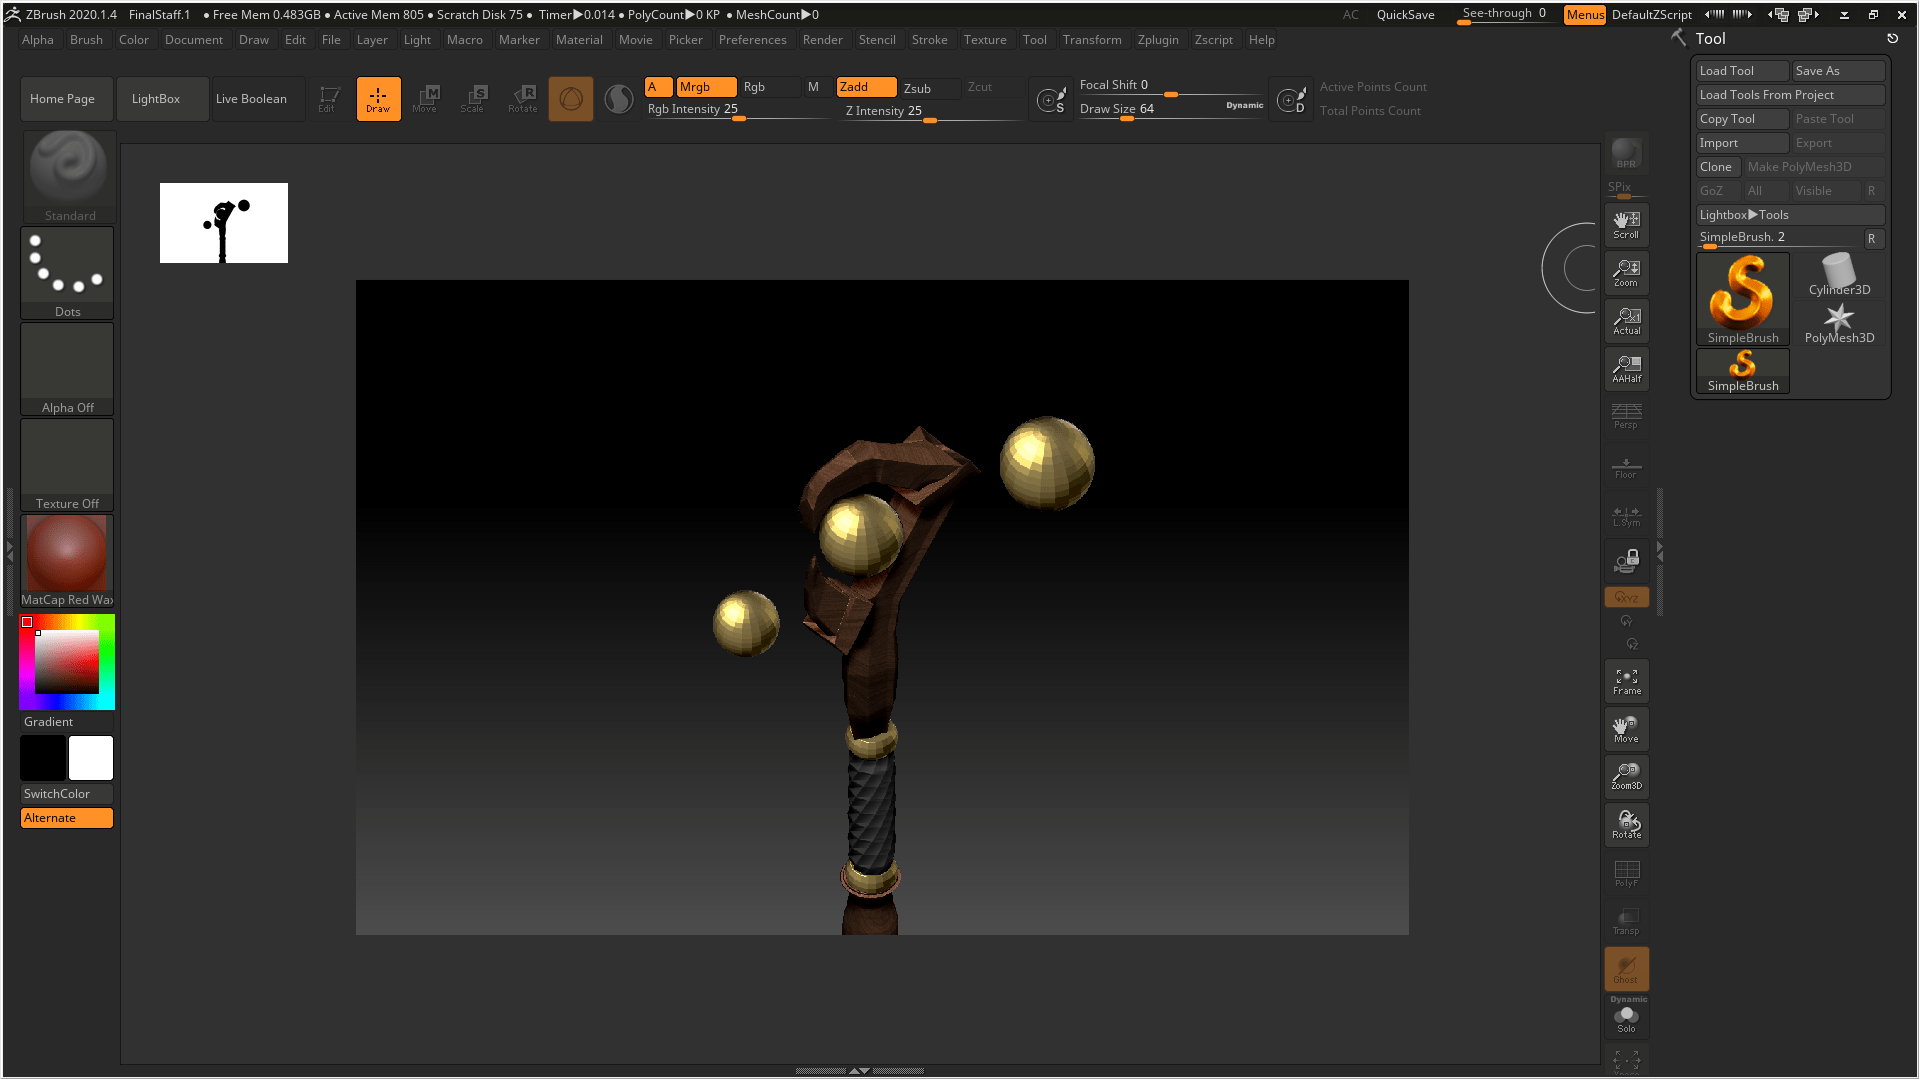
With Michaels help I was able to navigate Maya easier and restart my model. I think this one came out a lot better. Below are some images of the basic look I was going for, I just need to smooth edges more and focus on the wood section at the bottom. One part of my model I am really proud of is the twist which is the handle, I was able to get Henry’s help on our 1 to 1 session where he showed me a few ways I could achieve this. The easiest way was to go onto Deform – Nonlinear – Twist. The menu that appears on the right was easy to use to get the twist I wanted. Another feature I’m happy with is the metal rings around the claw, instead of creating a new model and trying to adjust it, I simply extruded a ring of faces and adjusted it to stand out from the wood.
However, after trying to achieve the wooden edges I wanted I couldn’t get the hang of it and so had to alter my design to make it simpler and achievable. I changed the bottom section to another orb and defined the wooden section as the straight piece won’t look nice with the other features. To improve on this I would design a more symmetrical object to make things easier for myself and do more research into creating a cleaner looking claw and to also figure out how to create the wooden effect I was looking for.
Moving on from the modelling, I began my UV mapping. When watching Alec’s tutorials in week three I thought UV mapping wasn’t that difficult, but was I wrong when I came to my model. Some parts were simple, such as the spheres, flat surfaces and cylinders. However, the claw was the most difficult, I had to separate it and UV map parts of it at a time. I don’t think I created them the correct way but I feel I done the best I could on my claw and will definitely invest more time into UV mapping.
I was able to stay consistent with UV mapping once I knew what to do, I got used to using the cut and sew tools as well as learning to unfold shapes. I watched a lot of videos as some spoke of one way to do it and then another saying to do it a completely different way and so it took some time to figure out the easiest and most effective way for me to learn.
One thing I did learn from UV mapping is that smaller portions of a section of model works much better than trying to model the whole section. I also learned about the layout option when using UV that organises it for you which saved me a lot of time trying to organise each UV map individually.
Articles & videos:
Maya Tutorial for Beginners 2020 | Introduction: https://www.youtube.com/watch?v=PjpF3phtpHg&list=PLsPHRLf6UN4k0_AfrTzLmK4iDV9J97-qR
How to UV a Complex Object In Maya | UV Map Tutorial: https://www.youtube.com/watch?v=EpTezpLOXQw&list=PLxlrQQKwwf9fZs140wIDjrN3xaP_1EADB&index=77&t=917s
Moving on from my research I began designing some staffs, on Adobe Illustrator, with different features I liked on them. I played around with size, width and style.
I began with some traditional tribal features onto a staff, keeping the theme of glowing orbs/skulls. I thought these came out great and allowed me to see what I was capable of doing and what I’m not.
With the first three drawings complete, I assessed what I had done and decided any of these would be too much for what I could do, with the feathers and the hanging assessories, and so I crossed these options out.
Moving on to the second set of designs, I really loved the dragon piece I thought with the right texturing and layering it would come out amazing but for the timeframe and experience I had I thought it would be too much to achieve. However, the other two pieces I liked as well but there was nothing that stood out and the final piece wouldn’t look appealing or interesting but I did like the use of the orb and the shaping of the staffs.
For my final designs I loved them both, I used a previous staff from my first designs and added detailing along the bottom with the use of metal discs stuck onto the staff. However, I didn’t like how much they stuck out and the model didn’t look eye catching enough, as well as the placing of the handle which didn’t look right to me. The last design on the right is what I liked the most, it kept with the tribal theme and made sense to me with the placing of the handle and the proportions of the staff. The glowing orb in the center is what interested me the most with the claw shaped wood curved around it, it made it feel mysterious and powerful. However, I don’t know if I will stick to one orb, the possibility of a couple more floating orbs around the staff might work well.
Articles & videos:
Autodesk Maya 2020 _ Stylized 3D Magic Staff Modeling in Maya 2020: https://www.youtube.com/watch?v=aQO6-KHbaM8
3D Modeling Voldimus’ Staff- Speed Modeling: https://www.youtube.com/watch?v=nC4_PiJKKjw
My first weekly challenge was to create a vase in Maya, below is my reference image.
I used Maya before during my Foundation Degree year, I created a small city in Maya and added in a camera. However, I did watch a tutorial on Linked In that covered a lot of features in Maya by George Maestri. I found the tutorial very long but I think I’m more comfortable now with understanding the software and it’s endless features.
I managed to finished just the basic shape of vase, for not using this software in over a year the shape is pretty smooth and I found the controls pretty easy. However, I did manage to create ngons on my vase which messed up the next stages. But I learned that pressing 1 turns off smooth preview and will help for future reference.
I found creating the vase was simple, using the multi-tool button, but I did struggle when creating the inside of the vase. Using the bevel tool was a bit confusing at first but after a few tries I managed to create an even width of an inside. Using the wire frame view made seeing the inside much easier and allowed me to make sure the circle stayed consistently round and not uneven.
The final vase came out really good, I managed to add more smoothness to the rim of the vase since it looked very sharp. I’m really happy with the outcome and I have boosted my confidence working with Maya.
Videos & Webpages:
3D Literacy – DES132 – Intro to Maya: https://www.linkedin.com/learning/collections/enterprise/1~AAAAAAIe0ZQ=968203?trk=share_ent_collection_url&shareId=a652b0e9-e277-4ea0-bc25-a015f215536a&accountId=35574164&u=35574164&success=true&authUUID=yskrsFW3T3WzPRSxDTLHcQ%3D%3D
Maya Tutorial for Beginners – 2020: https://www.youtube.com/watch?v=PjpF3phtpHg&list=PLsPHRLf6UN4k0_AfrTzLmK4iDV9J97-qR&ab_channel=GameDevAcademy
Pixabay: https://pixabay.com
3D Literacy – DES132 – Intro to Maya: https://www.linkedin.com/learning/collections/enterprise/1~AAAAAAIe0ZQ=968203?trk=share_ent_collection_url&shareId=a652b0e9-e277-4ea0-bc25-a015f215536a&accountId=35574164&u=35574164&success=true&authUUID=yskrsFW3T3WzPRSxDTLHcQ%3D%3D
To start off our Animated Narratives class, I was given the first assignment, to produce a presentation based upon analysis of a Pixar short – Kitbull. My group consists of Megan McColm, James Greer, Samantha Savage and Curtis Girvin. In the assignment overview, we had to cover the elements of Narrative structure and its relation to the Hero’s Journey, Mise-en-scène, Cinematography, Sound, Editing and Discovering intent – How it evokes a reaction from the audience.
During the first class, we were split into our groups on Blackboard. We all then watched through the short (almost in tears) and set up a word doc to put down any ideas. We all didn’t agree on a part to give each other but we all just started analyzing anything that stood out.
I decided I was going to focus on Cinematography. I began with some research on cinematography on what it is and how it can be used effectively through lighting, framing, composition, camera motion, camera angles, film selection, lens choices, depth of field, zoom, focus, color, exposure, and filtration.
From the research I came up with a script for my section of the presentation;
Cinematography in any film is fundamental, without it the visual mood, atmosphere, and sense of meaning lacks for the audience. Cinematography is important for every element of the narrative and needs to be cohesive and support the story. In Kitbull the cinematography varies widely, from high angled shots to close up shots, sunny days to thundery nights.
Most of the shots in Kitbull are at the same level to our main characters. This gives us the atmosphere that the producers want us to see their world and struggles through their eyes and cut out the importance of humans. In the beginning these close-up shots emphasis loneliness and selfishness of the kitten, supporting itself and keeping away from humans. This could tell us that the kitten was possibly abandoned and feels no trust with humans, however it does show of this pink elephant. The close up shots of the toy is seen as a comfort to the kitten, whenever it becomes scared its first reaction is to the elephant.
However, as the story progresses, the elephant becomes less important and is replaced by the pitbull and by the end when they both escape, no thought is given to the elephant and is left behind but instead the dog becomes the comfort to the kitten. The lighting shown when the car pulls up seems mysterious and unusual. Its bright orange light isn’t normal to this kitten and shows a somewhat evil arriving. It links well with the orange lid the kitten and dog end up playing with as it shows contrast from evil and good, through the building of trust this lid gives them both and the lack of trust the orange lighting the humans are given.
We then see in the next scene that the lighting has changed to a dull grey, showing us a storm could be on the way and what does it mean for the kitten and the dog, could something bad happen? The next scene shows us that evil orange light again but this time inside the mysterious building. Along with the sounds of barking and yelling, we notice the dog being kicked outside in the rain with the contrast of the orange light and the dark blue and black lightning sky. It shows us the pain and sadness through both the kittens and dogs eyes and that this night brings change.
The next scene shows a gloomy blue sky, showing us the calm after the storm, and the dark kennel the dog is placed in shows us pain, sadness and hurt, maybe just wanting to be left alone. Nearing the end, the orange light appears yet again showing that more hurt and sadness can come. It acts like a warning to them both to get out while they can, through the trust they’ve built together. In the final few scenes, it is seen as a bright day, showing the kitten and dog are happy together and free. The close ness of the camera shows us the close bond they have for one another and are changed towards humans. Them both appearing from the shadows shows that they are ready to step into the light and trust this human that has tried to comfort them before.
From my script I then created my slides, I thought that leaving out text would make my slides look less cluttered and more simplistic to avoid the viewers being distracted by what’s on screen rather than what I’m speaking about.
I feel that these slides came out well and were able to relate to my script, the way the images were laid out I feel that the viewers could follow my voice with them.
After Samantha’s final edit our presentation came out really well and flowed great. To improve, I would suggest that we planned out our sections more and gave each other more feedback whenever we finished our slides or our recordings etc. but overall I enjoyed working with my group and I’m happy with the final piece.
Film 101: What Is Cinematography and What Does a Cinematographer Do?: https://www.masterclass.com/articles/film-101-what-is-cinematography-and-what-does-a-cinematographer-do#what-is-cinematography
Planning Animation Cinematography and Shot Structure to Communicate Theme and Mood: https://web.stanford.edu/dept/HPS/154/Workshop/KennedyKevin%20Planning%20Animation%20Cinematography%20and%20Shot.pdf
Cinematography for 3D animators: https://www.creativebloq.com/3d/cinematography-3d-animators-8069687
Vogler, C. (2007). The writer’s journey. 3rd ed. LA: Michael Wiese Production.
Wallis, T. and Pramaggiore, M. (2011). Film – a critical introduction. 3rd ed. London: Laurence King Publishing.
Campbell, J. (2008). The hero with a thousand faces. 3rd ed. Novato: New World Library
Katz, S., (1991) Film Directing Shot by Shot, Michael Wiese Productions