—The Room Task—
At the start of this project we were all split into groups. I was placed in group A as an animator and rigger. In week 1, we were tasked with establishing a game concept and creating a ‘room’ that could fit within that concept. This also allowed all members of the team to interact with each other, work as a group on a smaller version of the game and see how each different role worked.
____________________________________________________________________________________________________________________________
____________________________________________________________________________________________________________________________
—References and Concept Art—


To begin I looked up different wardrobes and drew up some concept art based on the aspects of the wardrobe references I liked. I had the group vote on which concept they liked the best and did a few colour schemes for the designs.

—Modelling and Texturing—
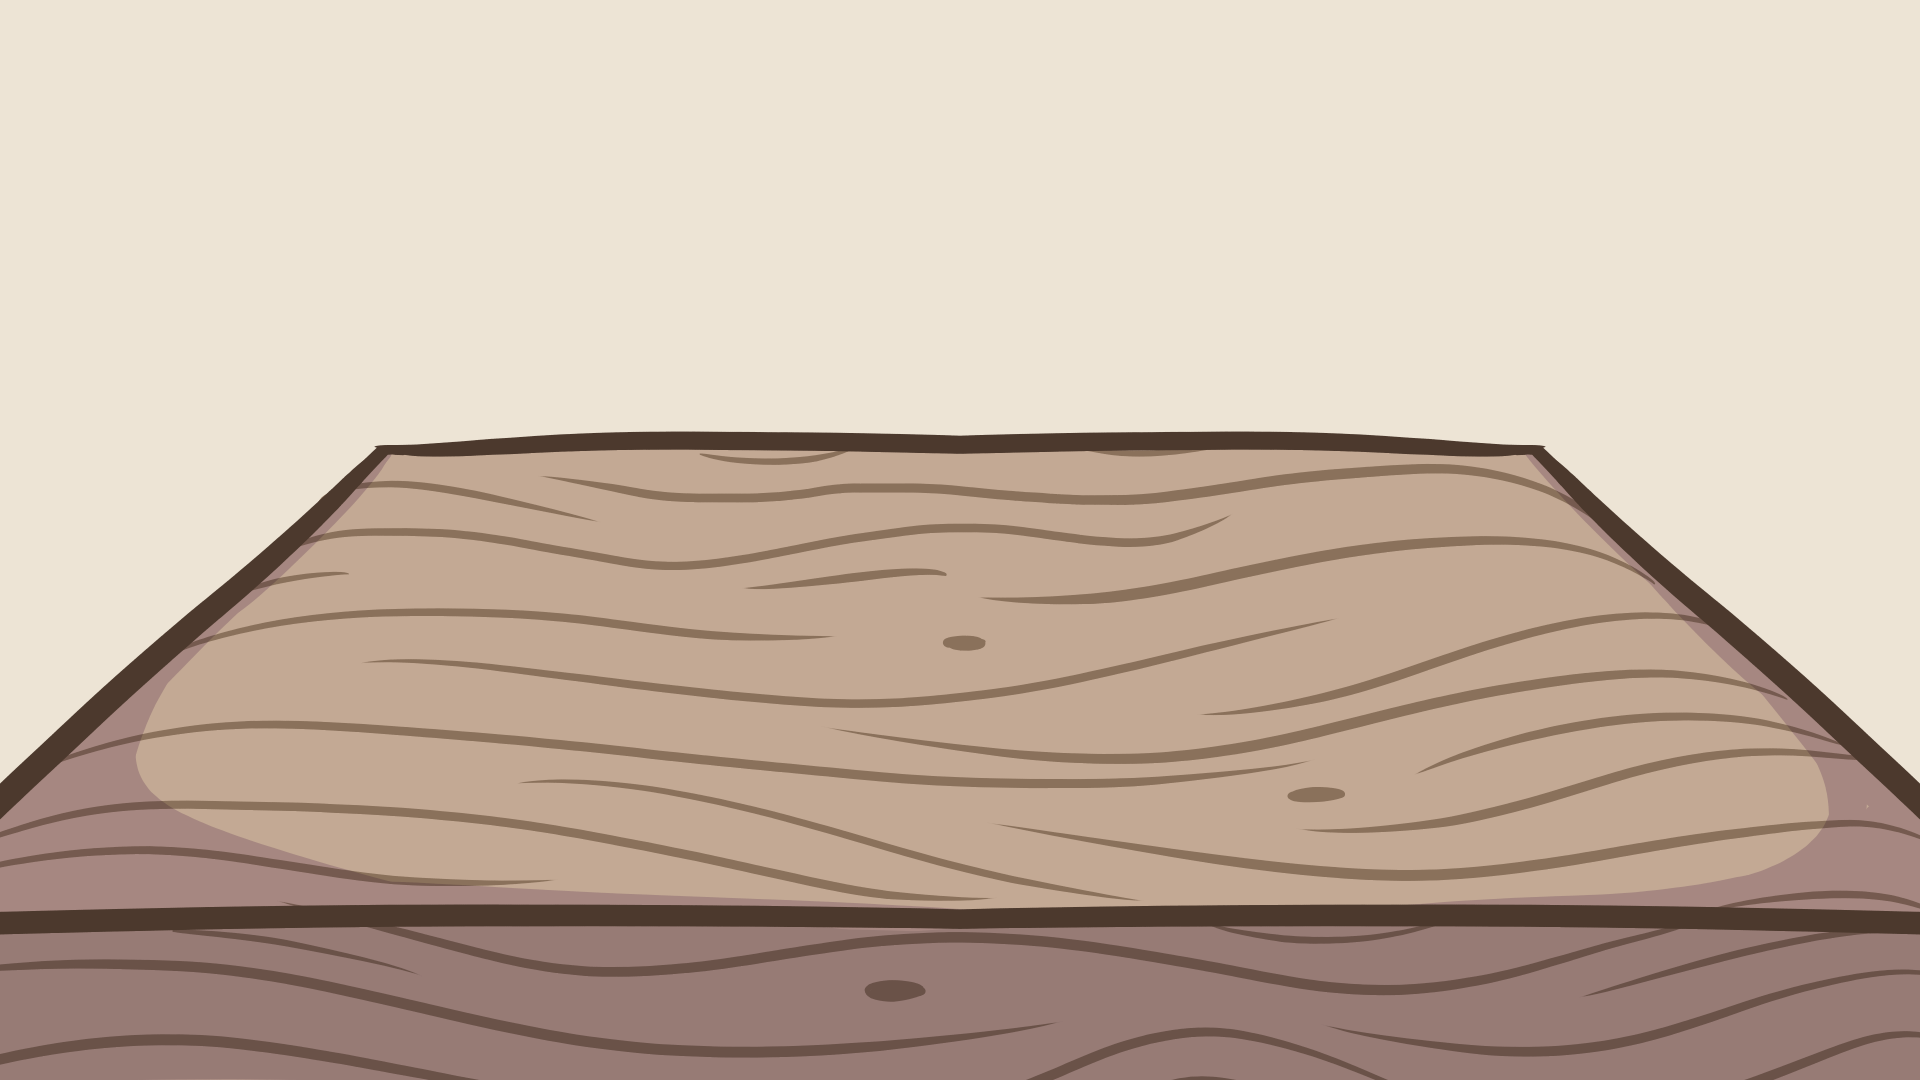
To begin, I added a polycube to the scene and scaled it to the size I needed the wardrobe to be, extruded the sides and created the doors. I created the drawer in the same way as the wardrobe used polycubes for feet and made custom spheres for the handles.
For the pattern on the front I used a polycube and edge loops to adjust and create one side of the shape and then I just copied and mirrored the piece.
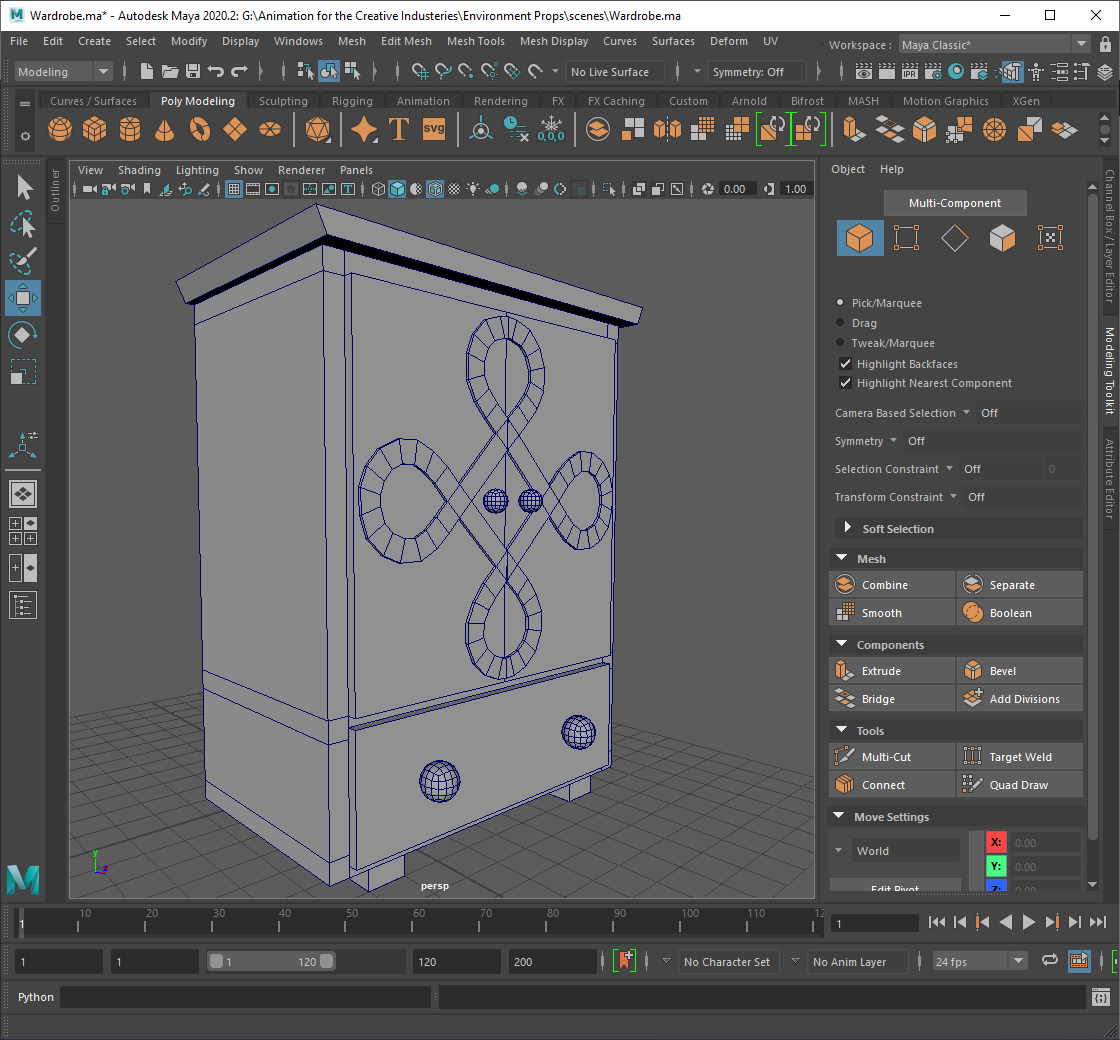
When UV unwrapping the model I tried my best to keep the seams to the back or spots where they wouldn’t be visible. I ensured that the UV maps for each part were all facing the right direction to make the texturing process easier.

When texturing the wardrobe I only used base colours in Substance as the group wanted to see what it would look and to see if it was something we wanted to use in the overall game.
I asked the group what wood colours they wanted and created the wood grain using a lighter brown and the brush ‘wiggly stroke with break up’.
In the end this model wasn’t used in the final game.
____________________________________________________________________________________________________________________________
____________________________________________________________________________________________________________________________
—The Vertical Slice Project—
For the main project we all decided on creating an open world game with a Celtic theme and low poly look.
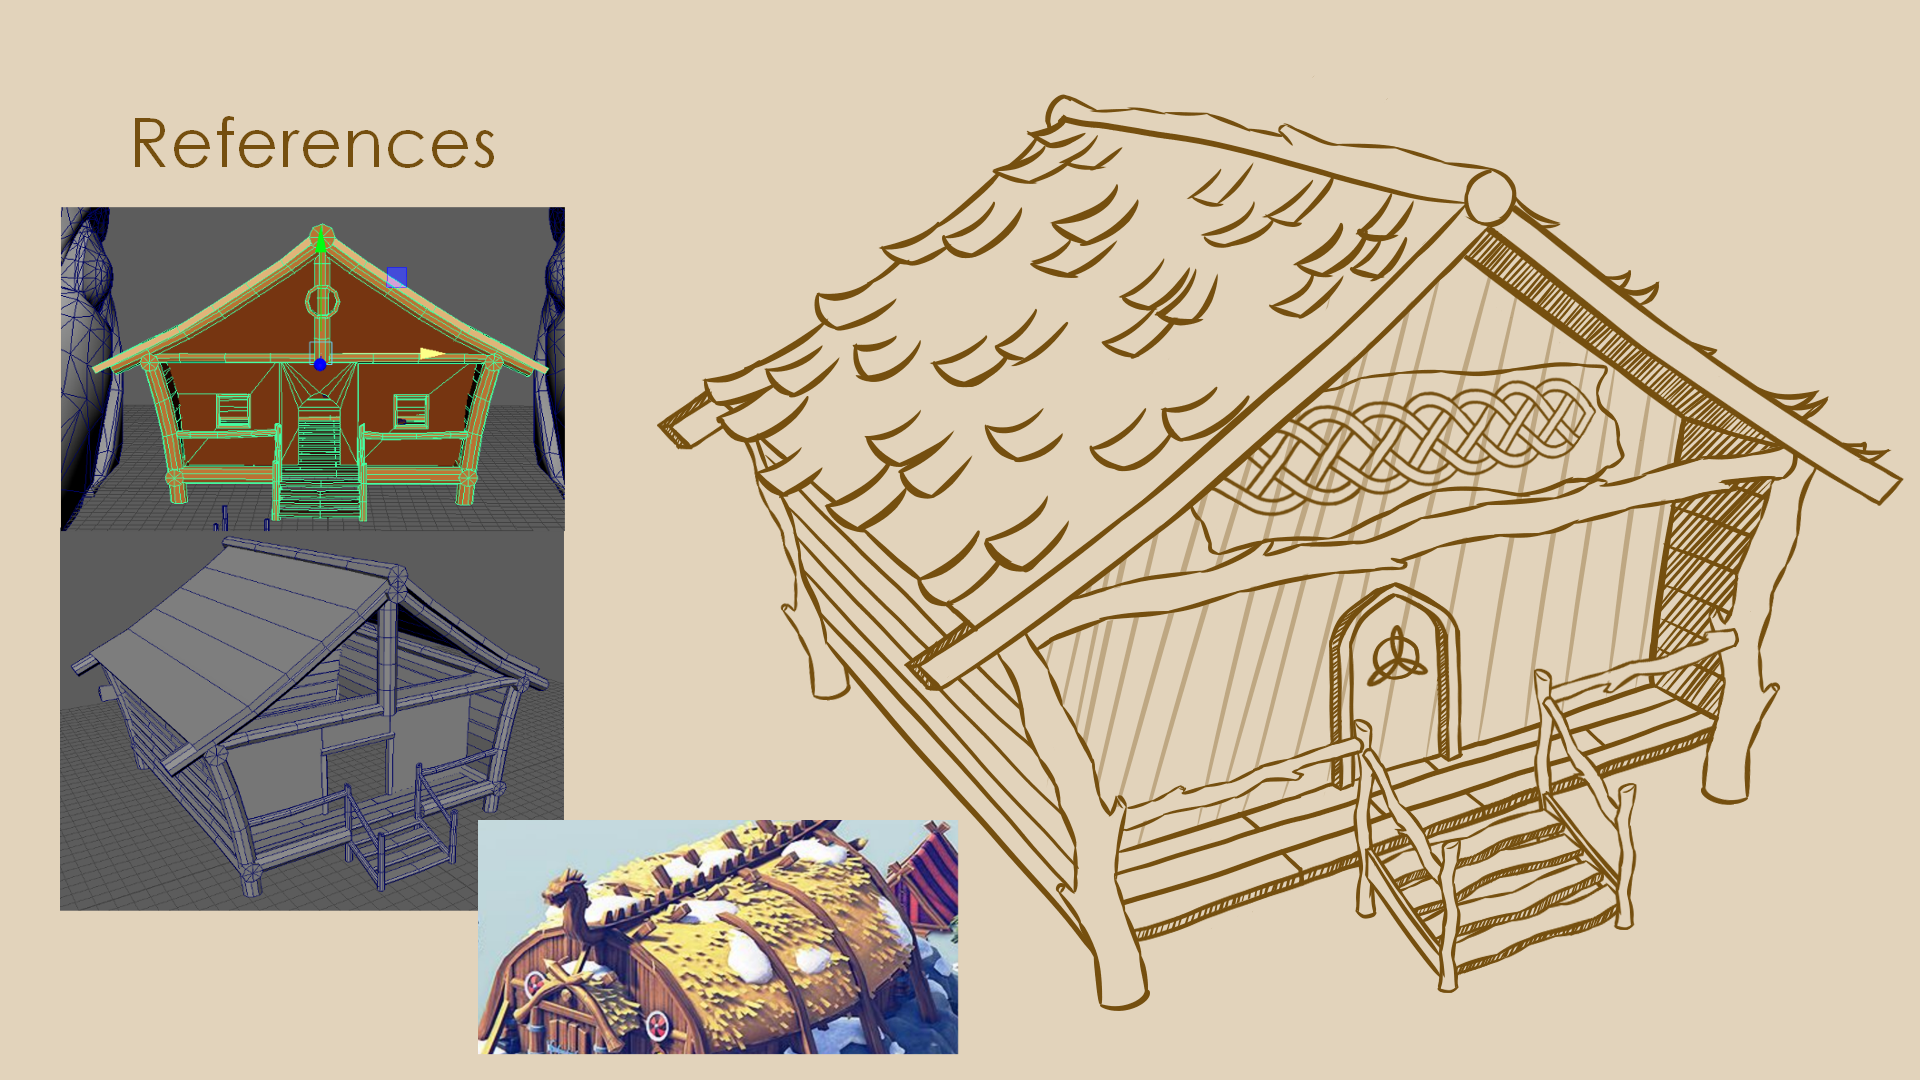
—References – 3D Assets—
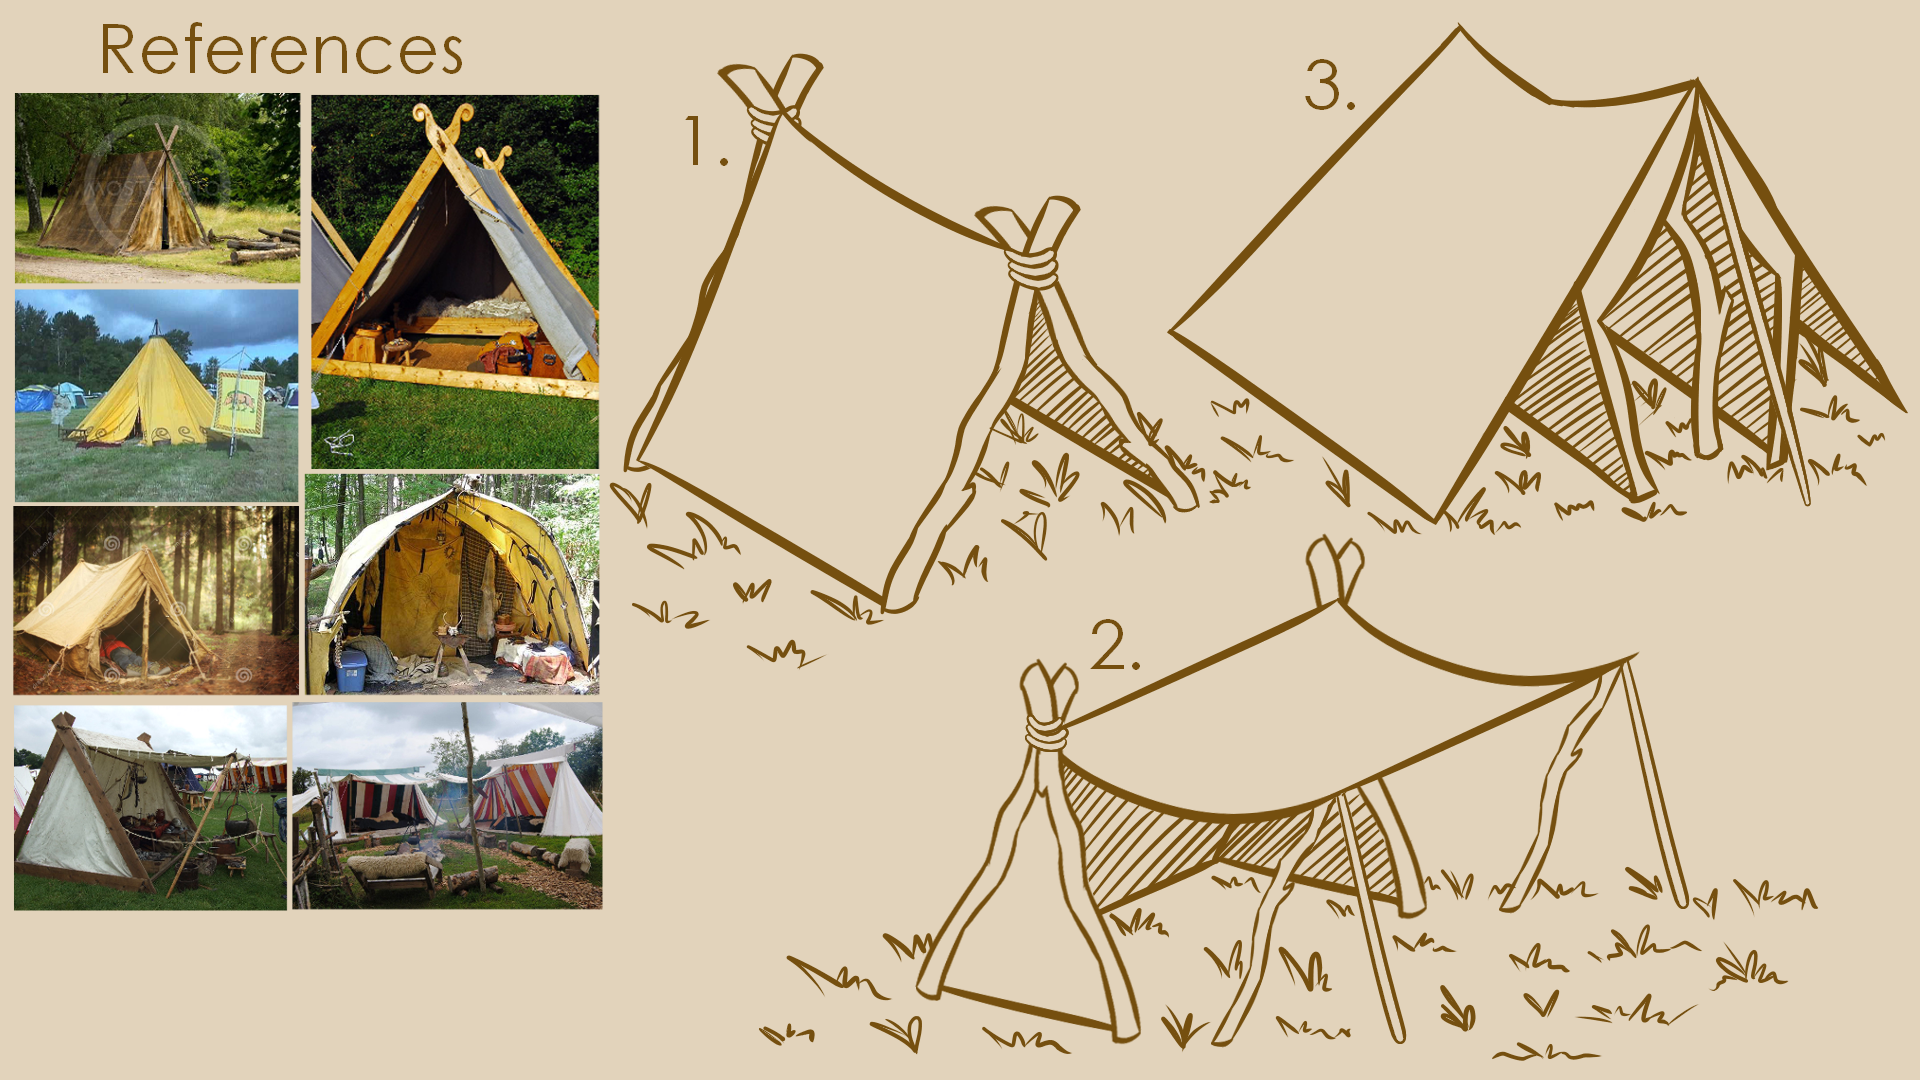
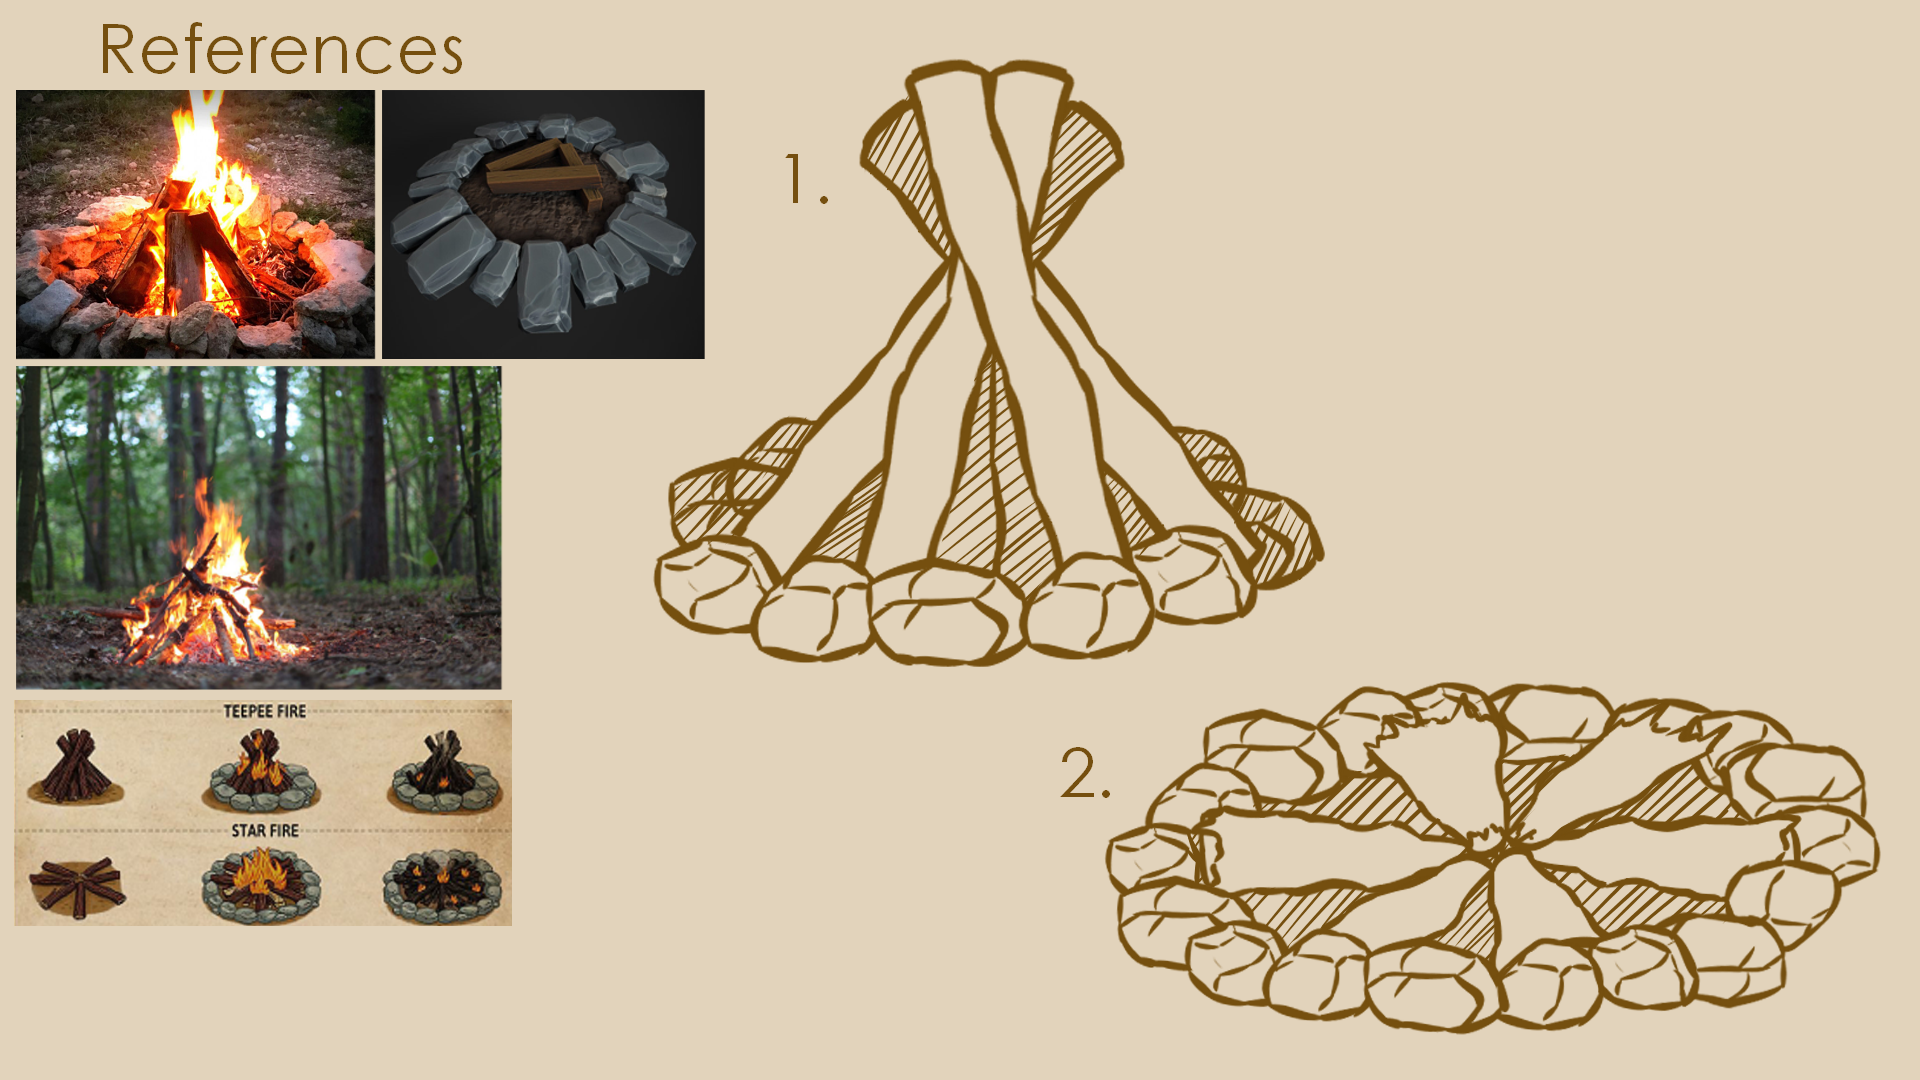
-Tents-


-Campfire/Bonfire-


-Wood Cutters Axe-


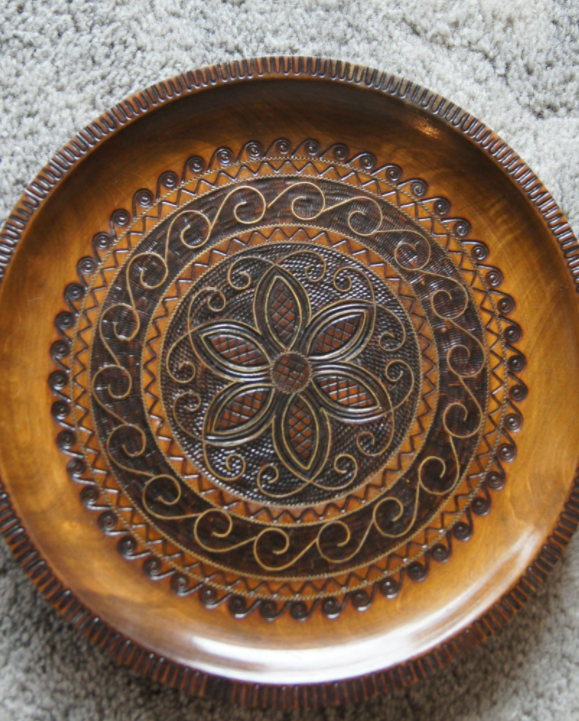
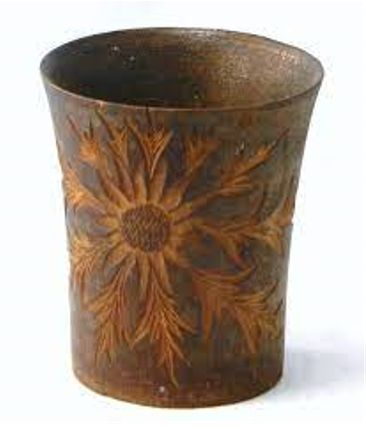
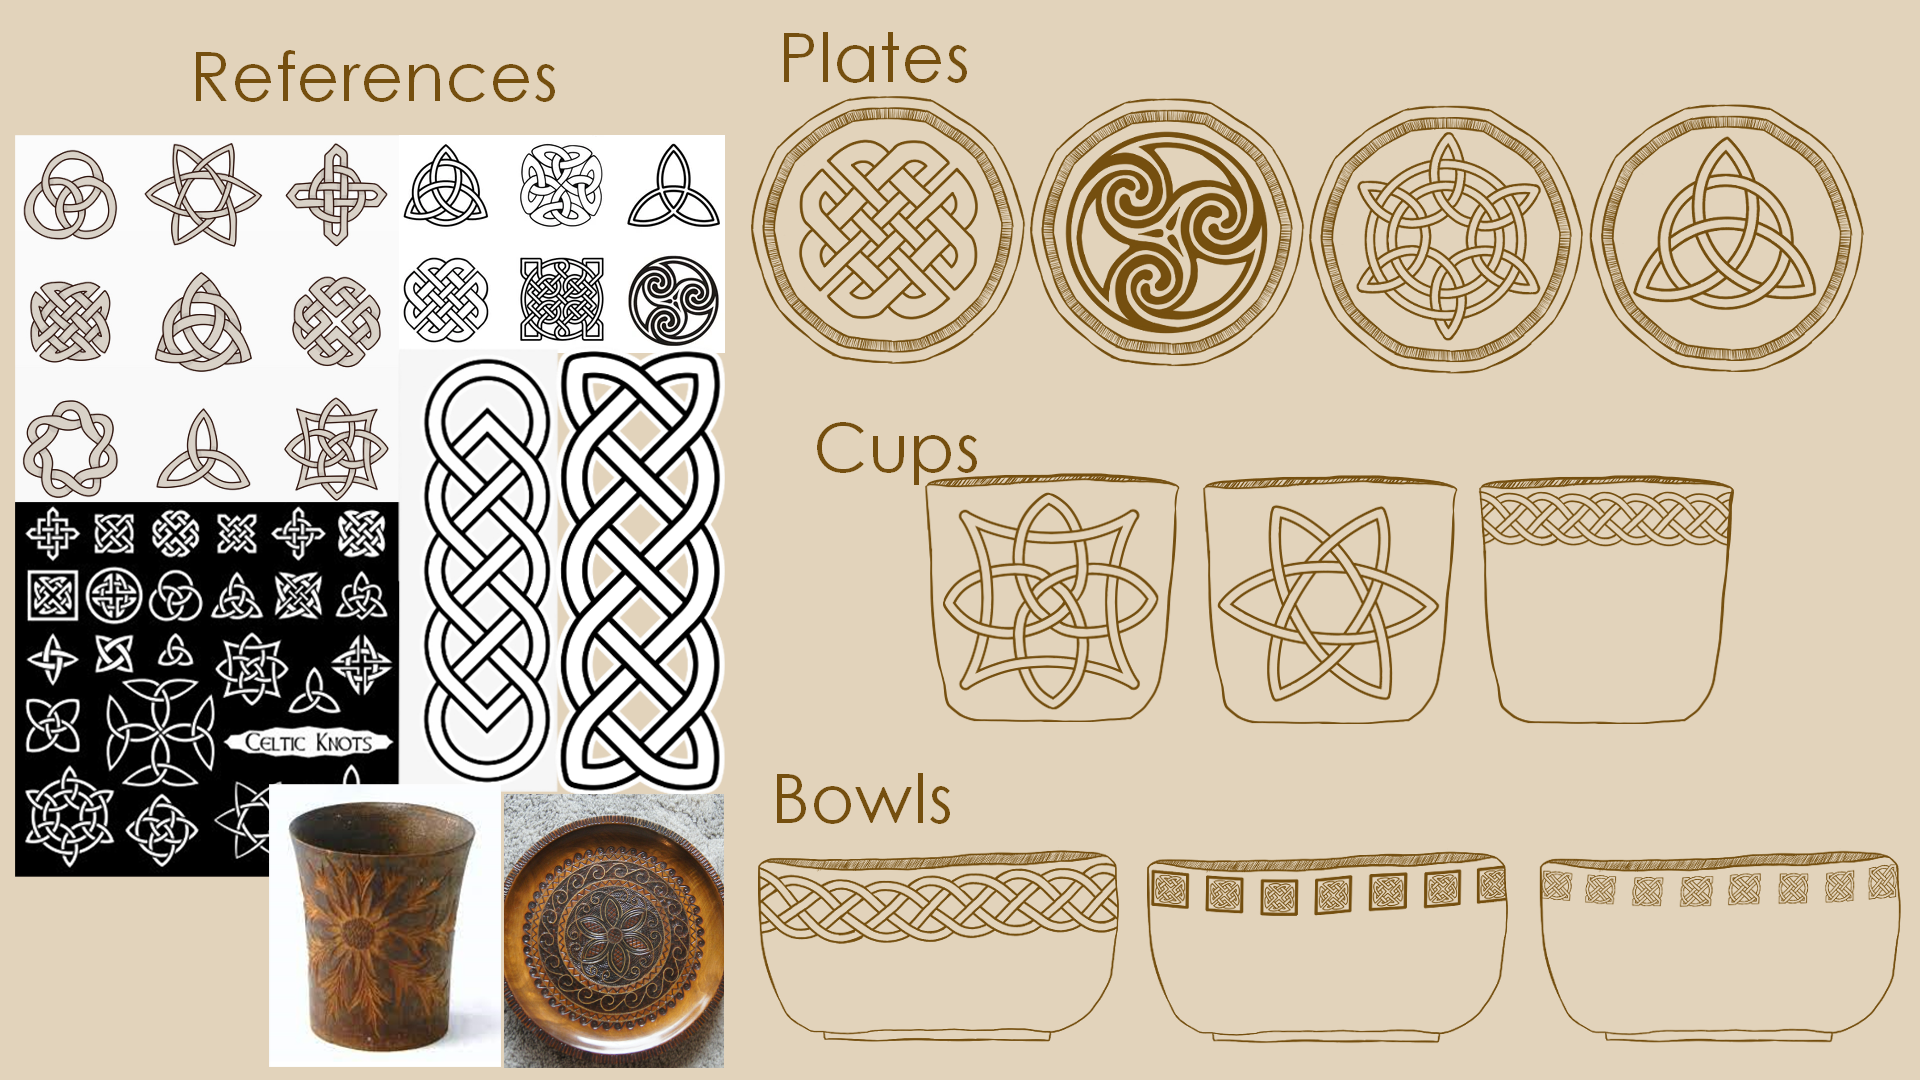
-Dishware-


-Wooden Palisade-


—Concept Art – 3D Assets—
When creating the concept art for all of the 3D assets I kept in mind how they would translate into 3D and I heavily referenced the style guide to ensure that the models would match with the rest of the assets created by the rest of the team.

____________________________________________________________________________________________________________________________
—Modelling Process—
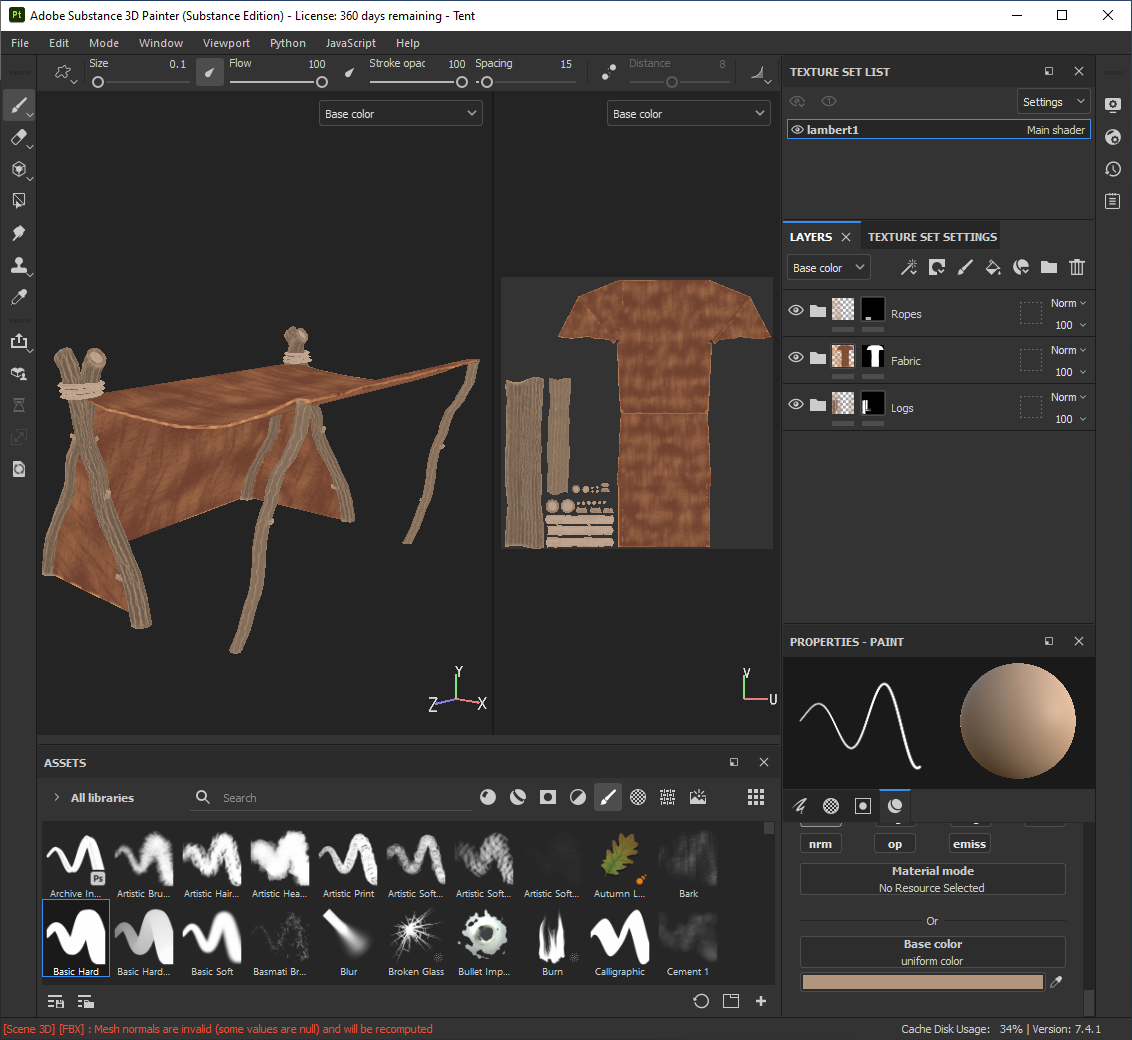
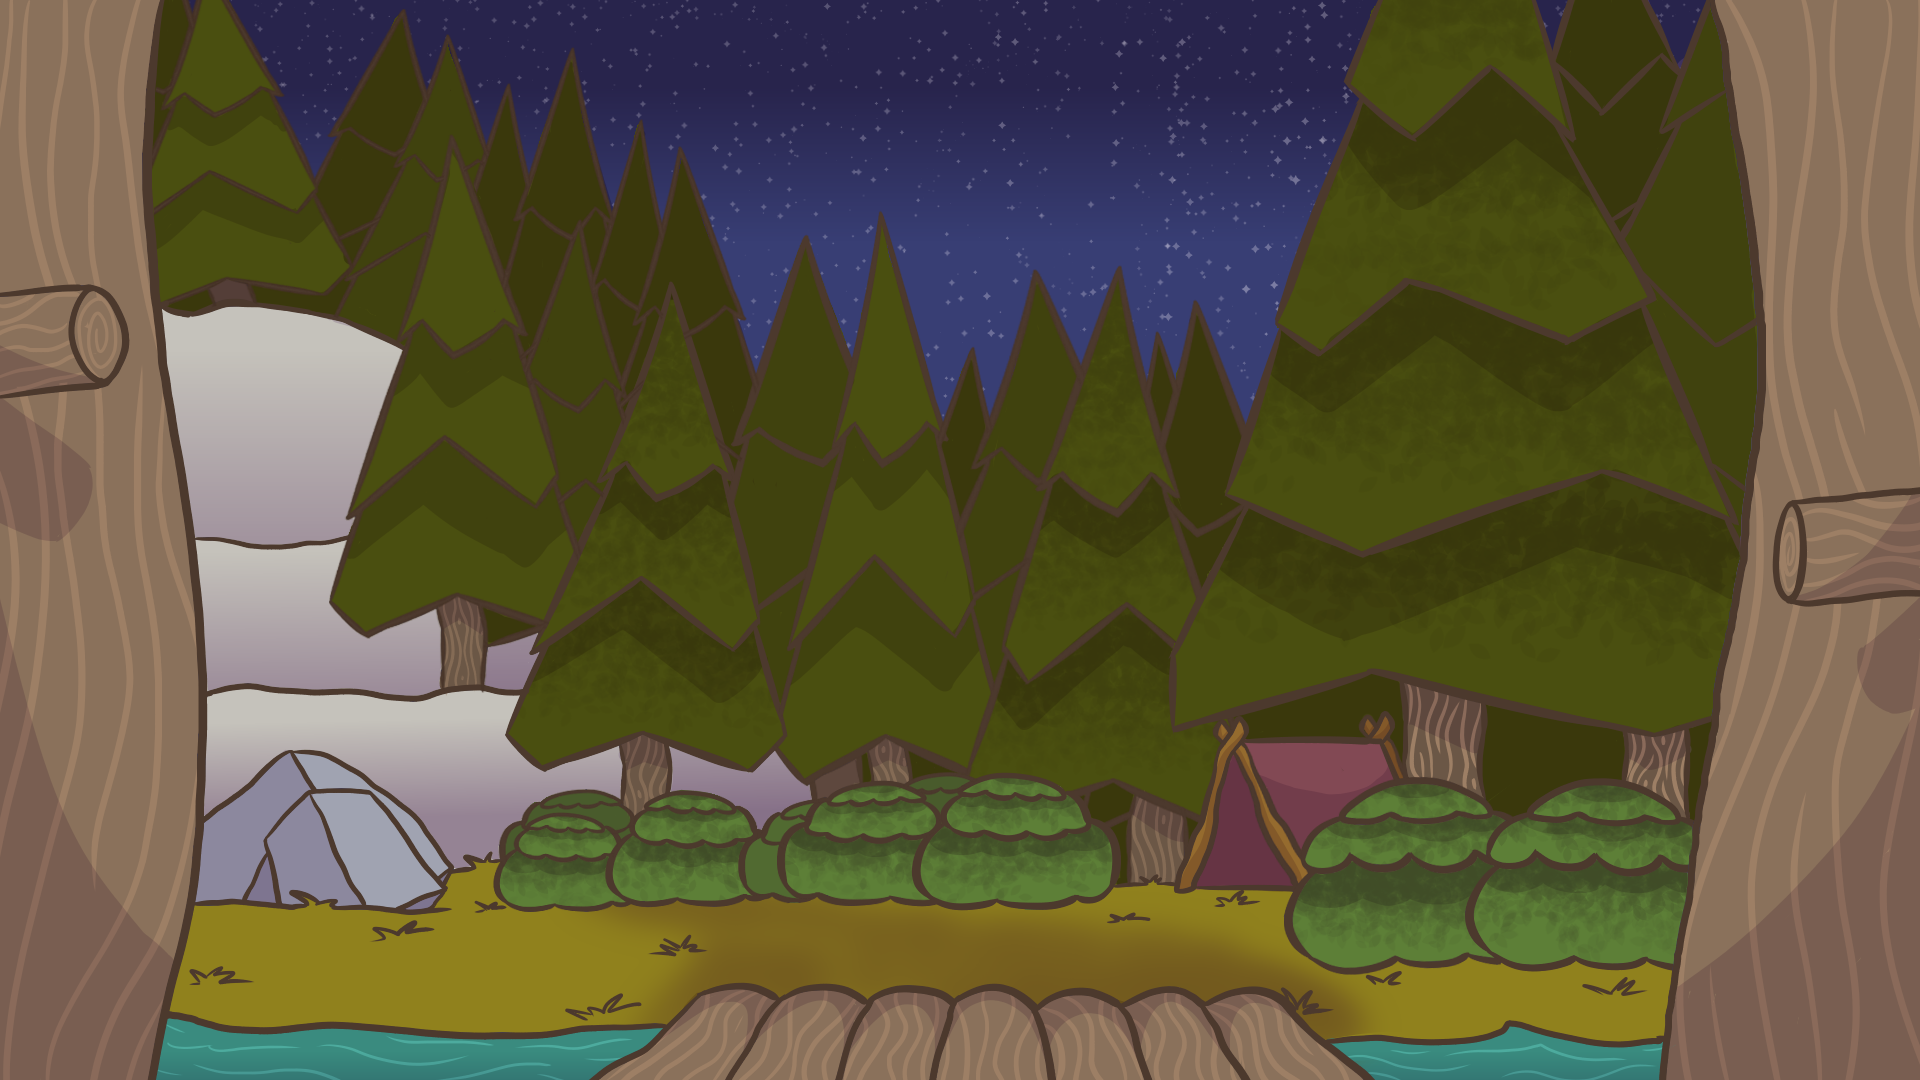
-Tents-
To make the tent I started with the supports beams which are made from poly cylinders with a subdivision of 10 and created smaller pieces using the same method. Afterwards, I positioned and duplicated them to create the frame of the tent.
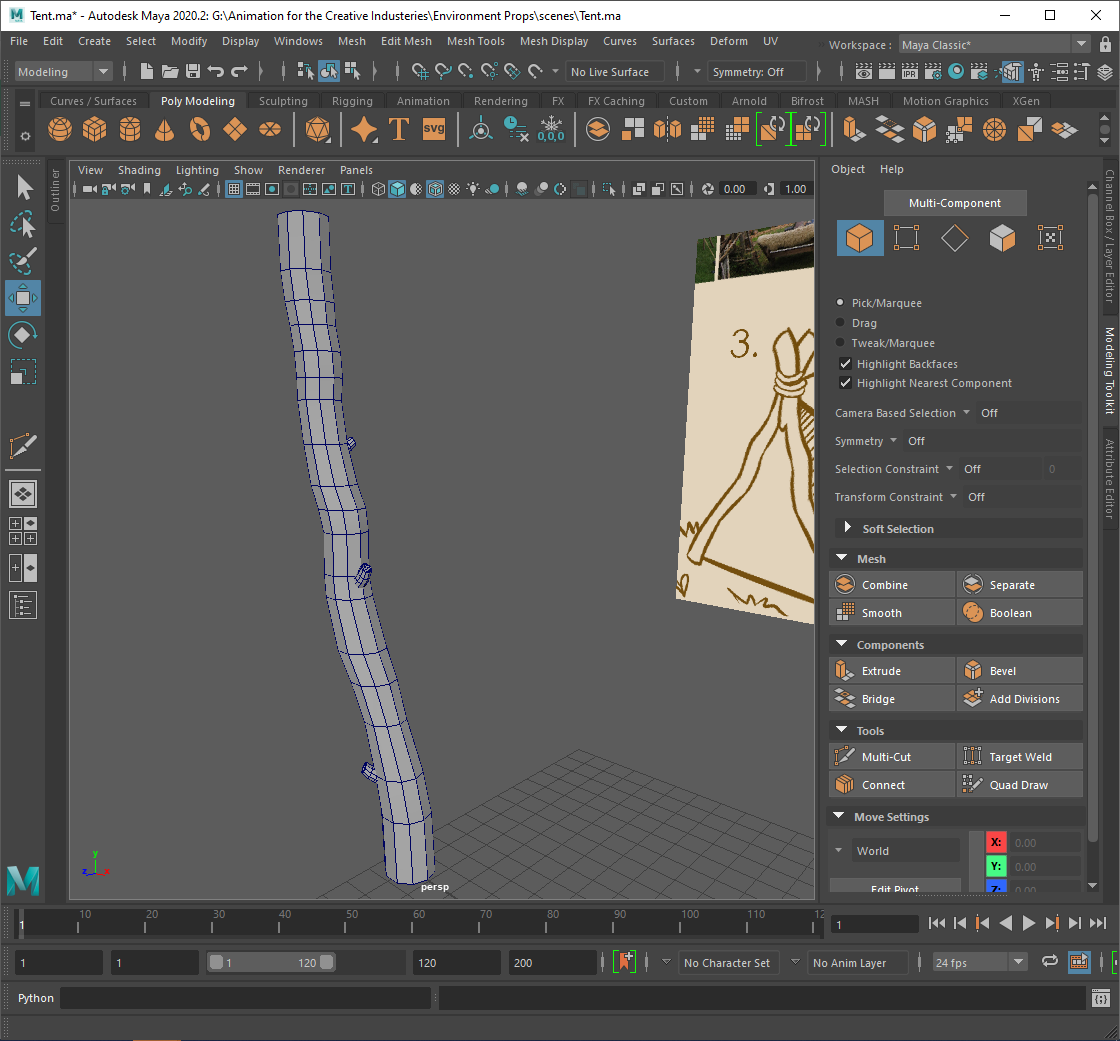
Next I created the rope that ties the support beams together using polytorus’ with a subdivision height of 4. After I created the fabric using planes which I adjusted the vertices of to get the shapes I needed and target welded them together. Then I extruded it so it wasn’t one plane thick.


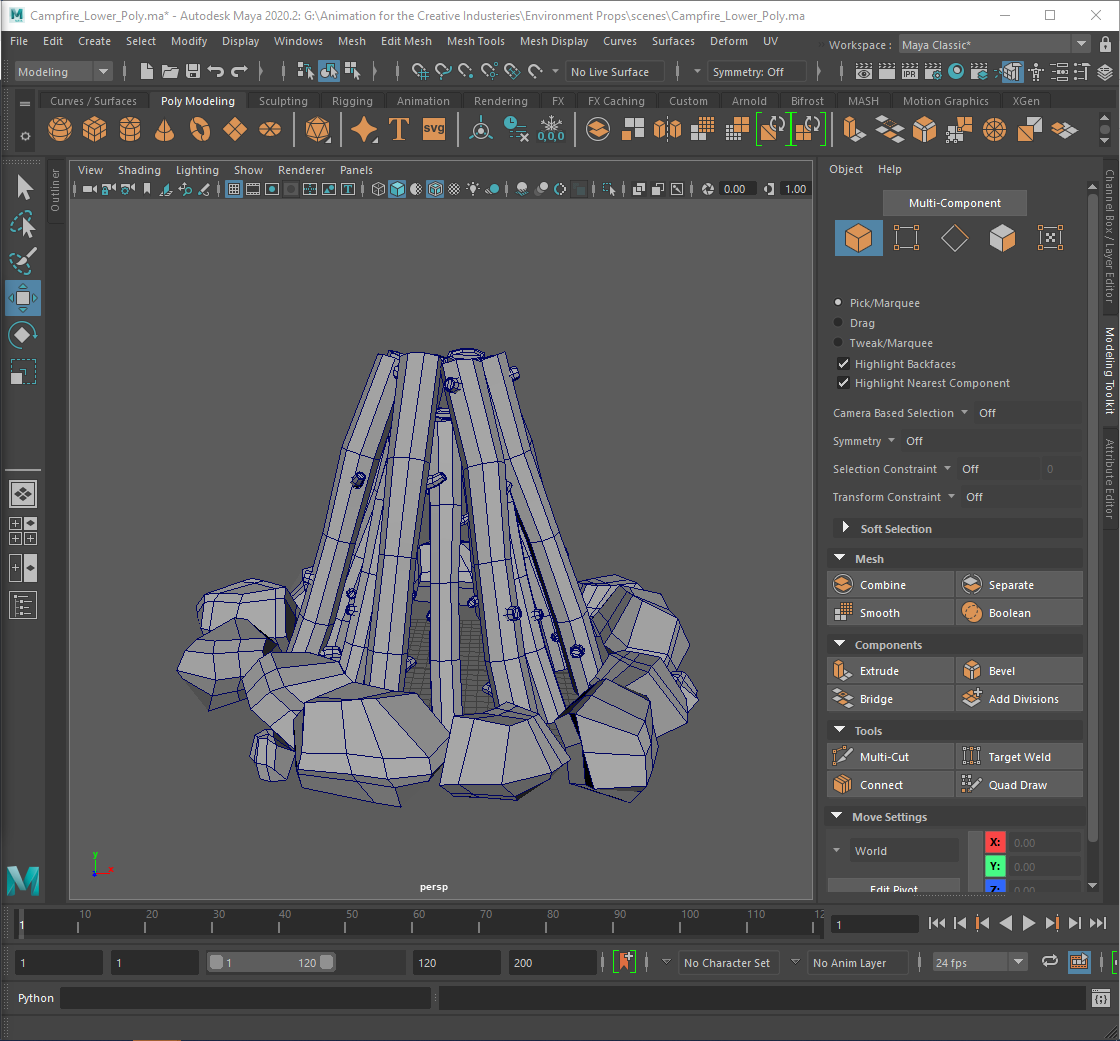
-Campfire/Bonfire-
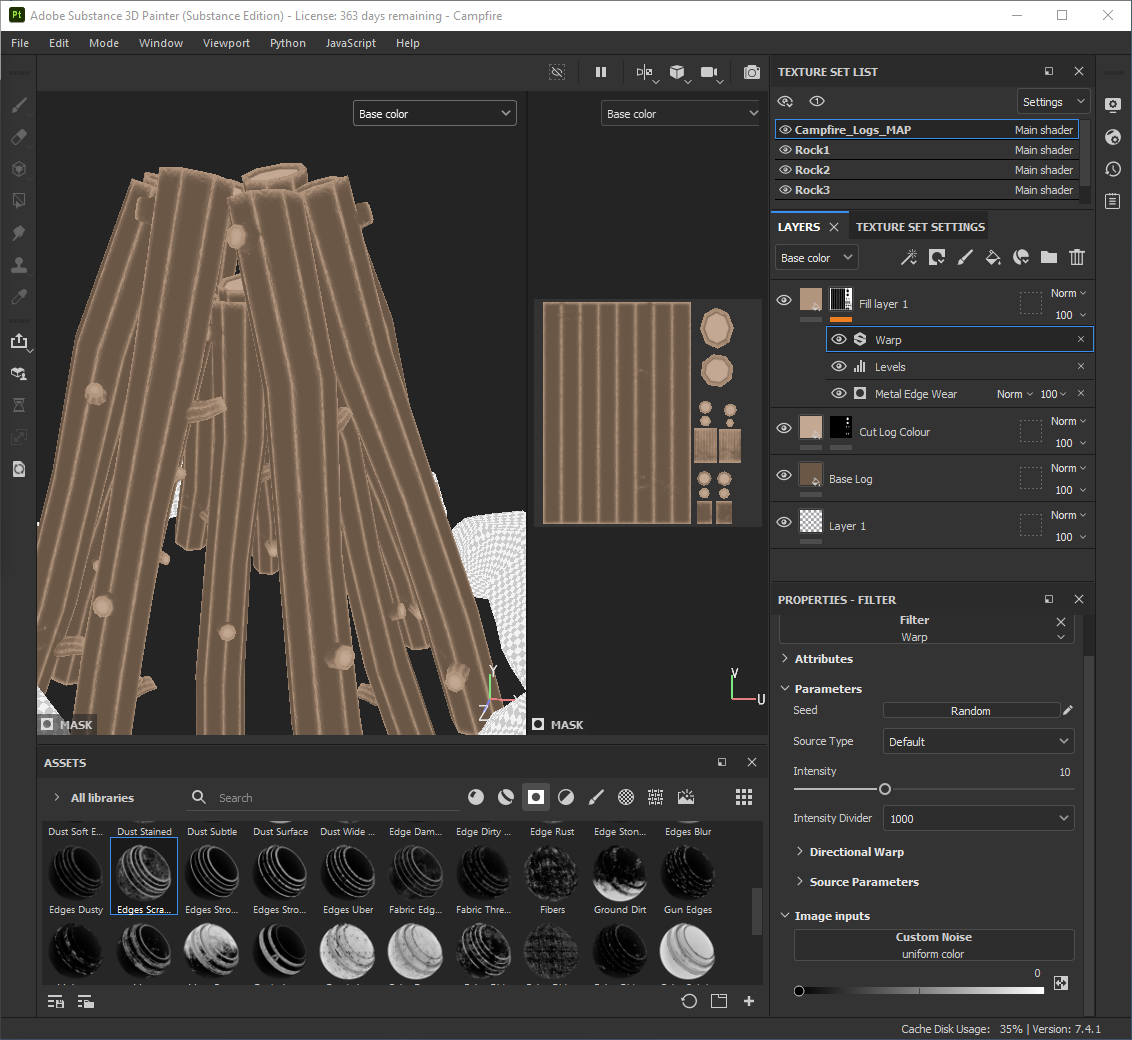
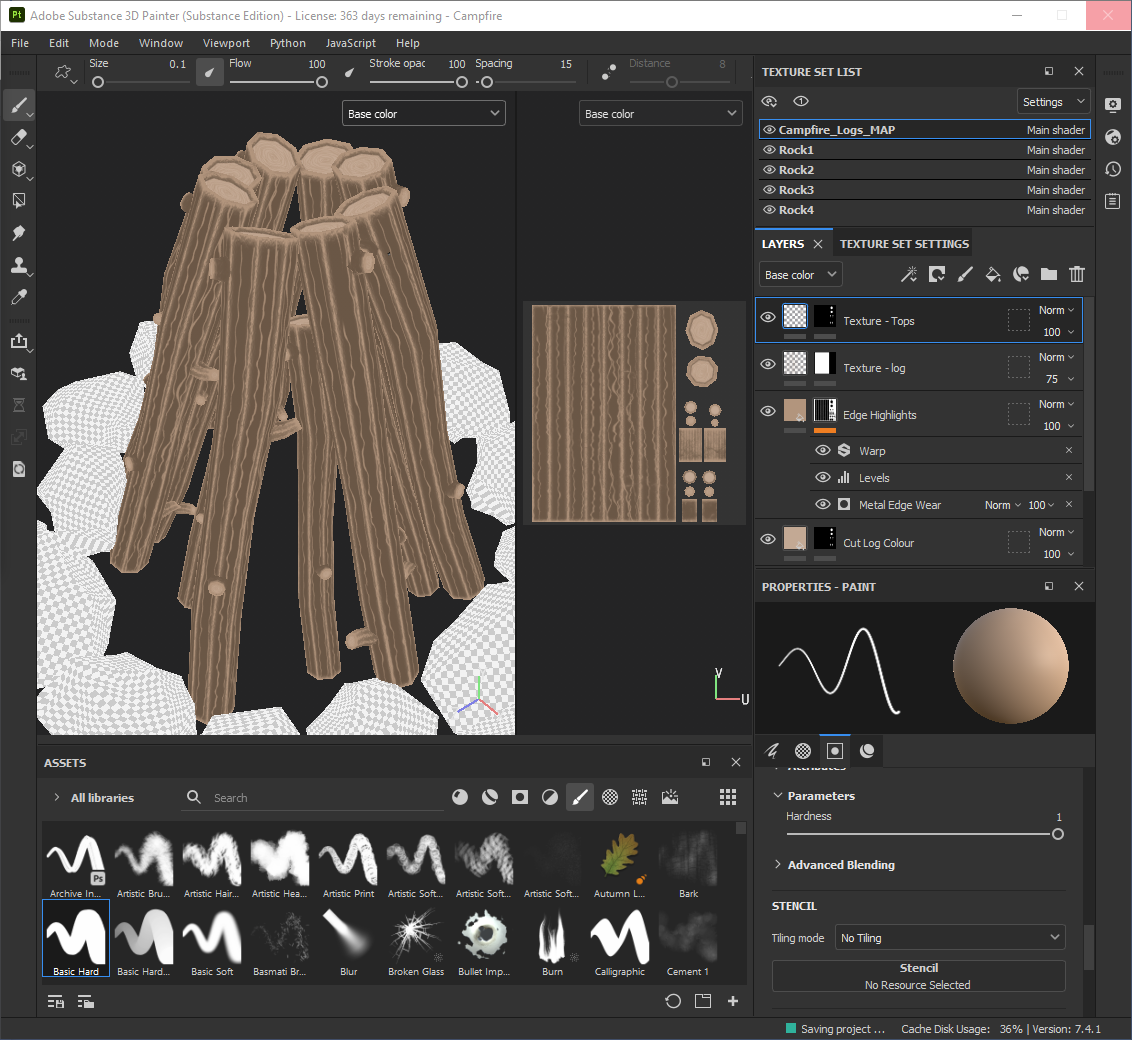
To begin I created the logs using poly cylinders that I changed the subdivisions to 8. I added edge loops to adjust the shape of the logs, used the same process to create smaller pieces to add to the logs and then arranged them in a teepee formation. Next I added some rocks in a ring around the logs. The rocks were modelled and textured by Curtis.
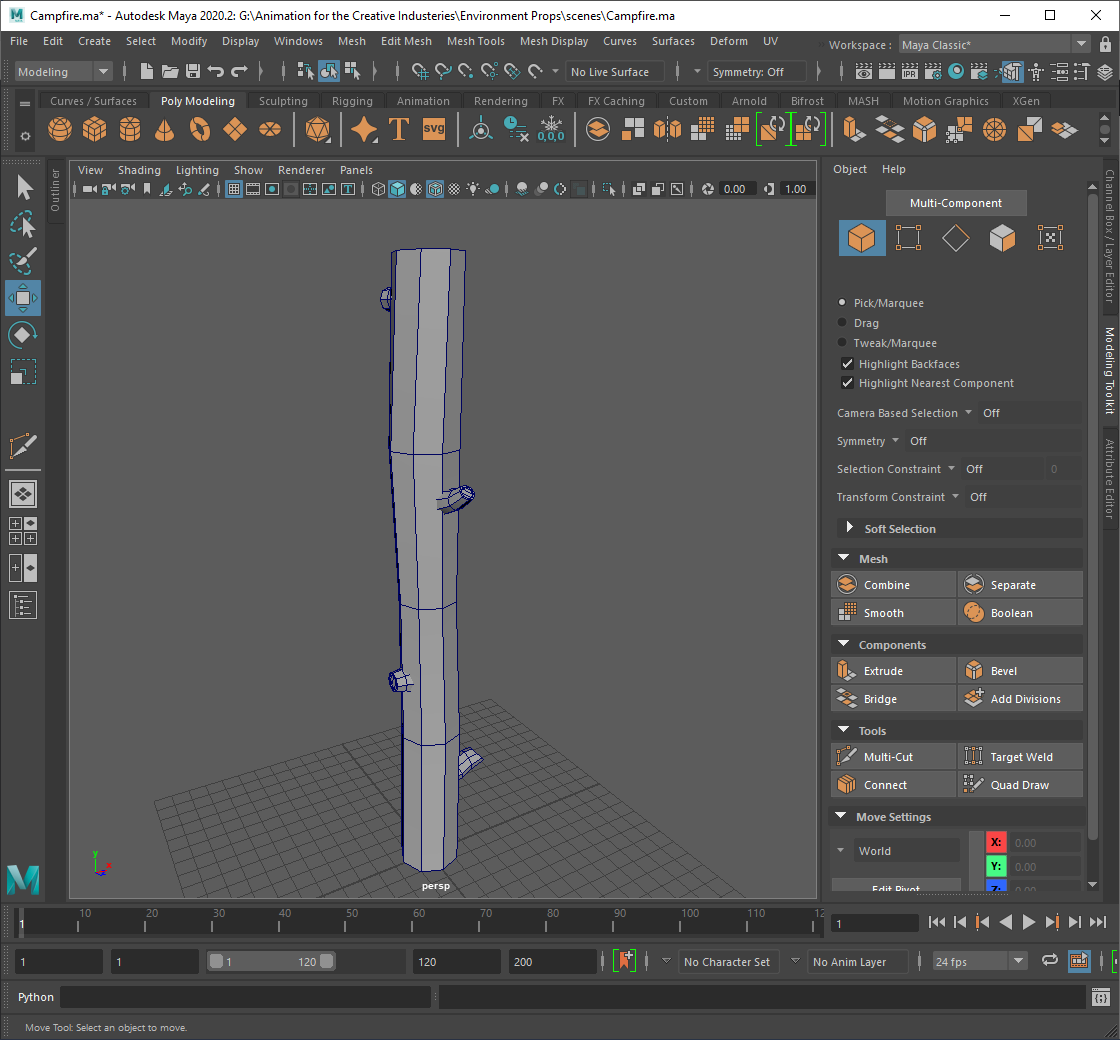
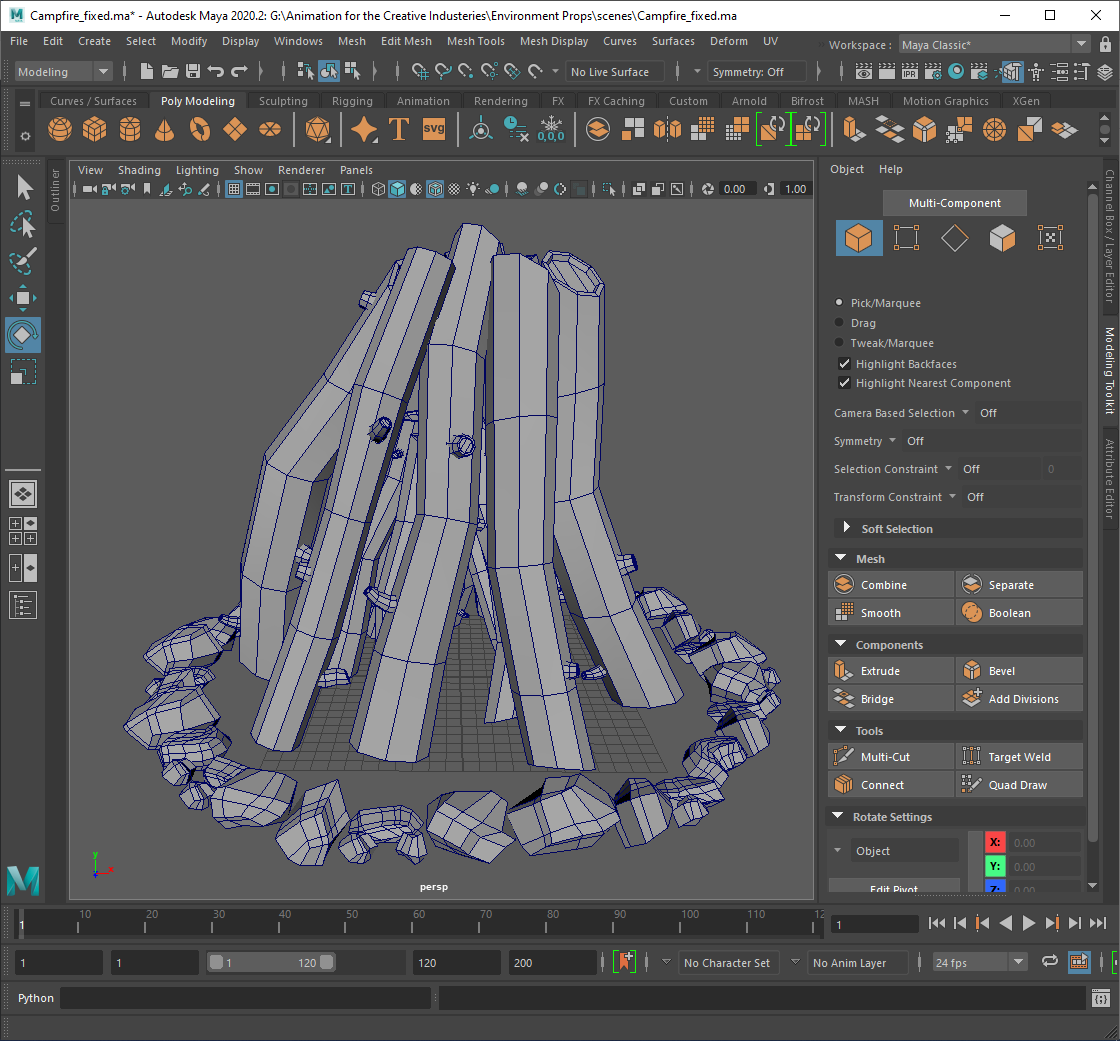
After feedback from the tutors, I realised that the campfire was going to be a small prop that the character wouldn’t be interacting with so I reduced the poly count of the logs and reduced the number of rocks used by enlarging them.
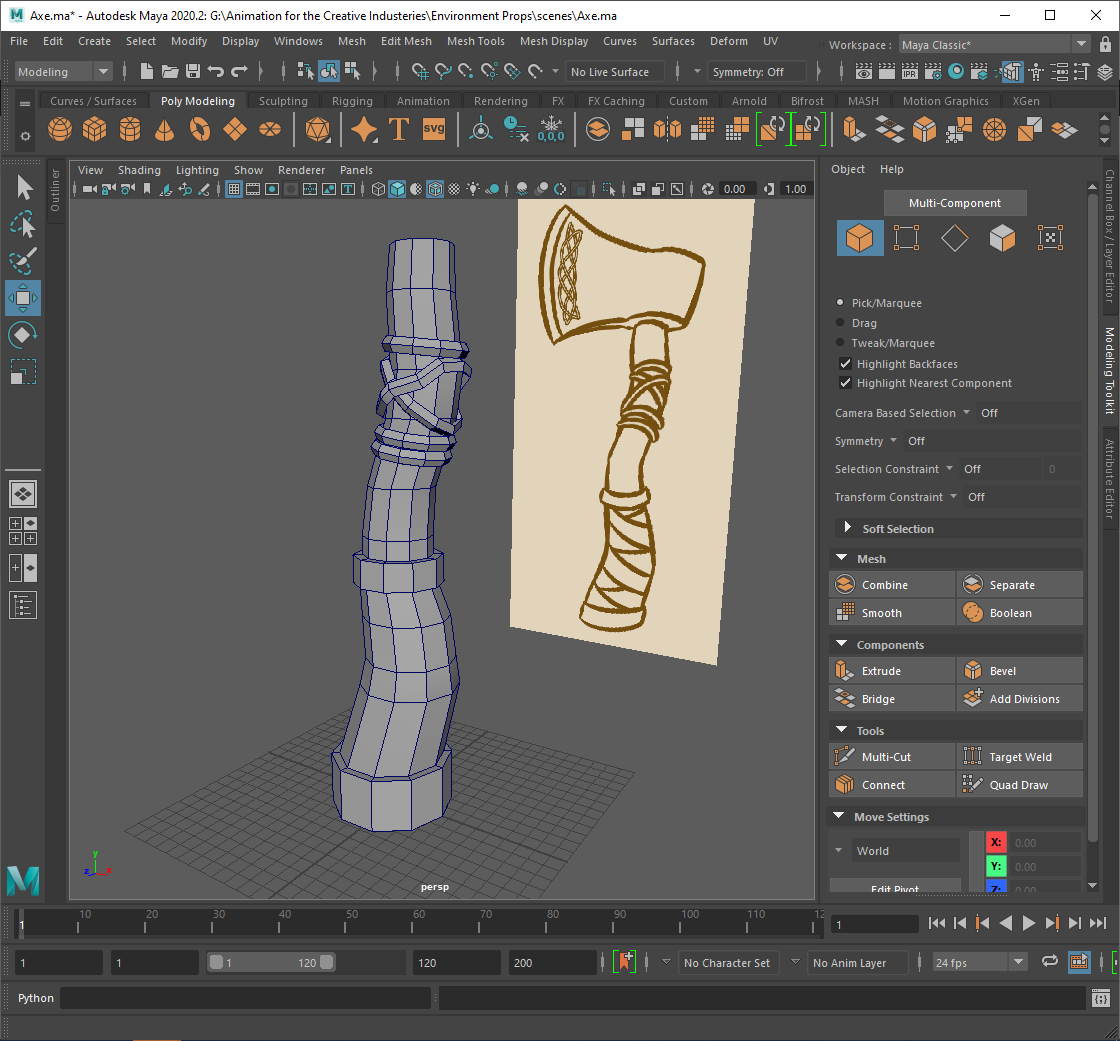
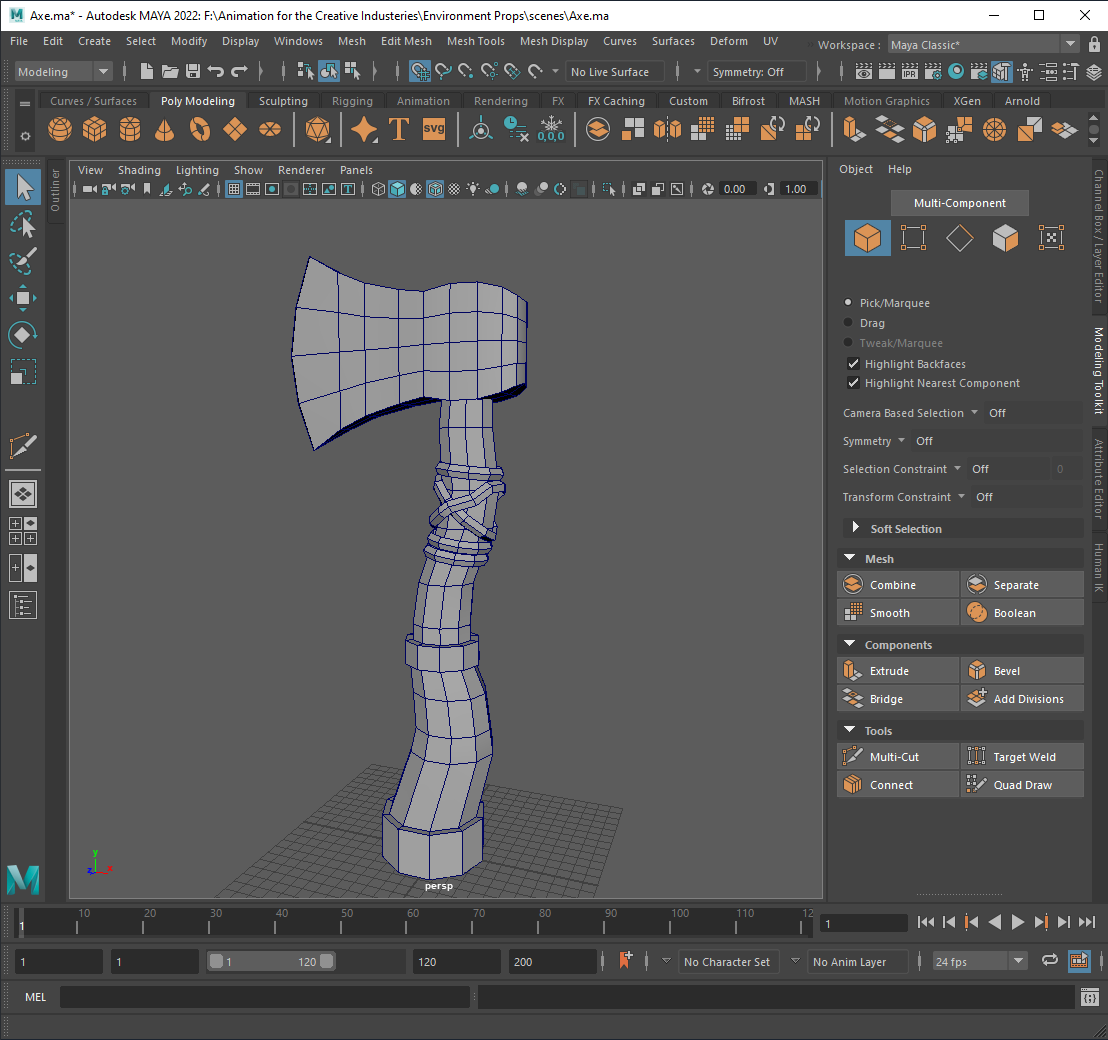
-Wood Cutters Axe-
I added the final concept for the axe as an image plane and created the handle using edge loops and a polycylinder that I changed to have 10 subdivisions. Next I created the handle grip by adding edge loops and extruding. After I created the ropes around the handle using polytorus’ with a subdivision height of 4. To create the axe head I used a polycube and some edge loops to adjust the shape to better match the concept.
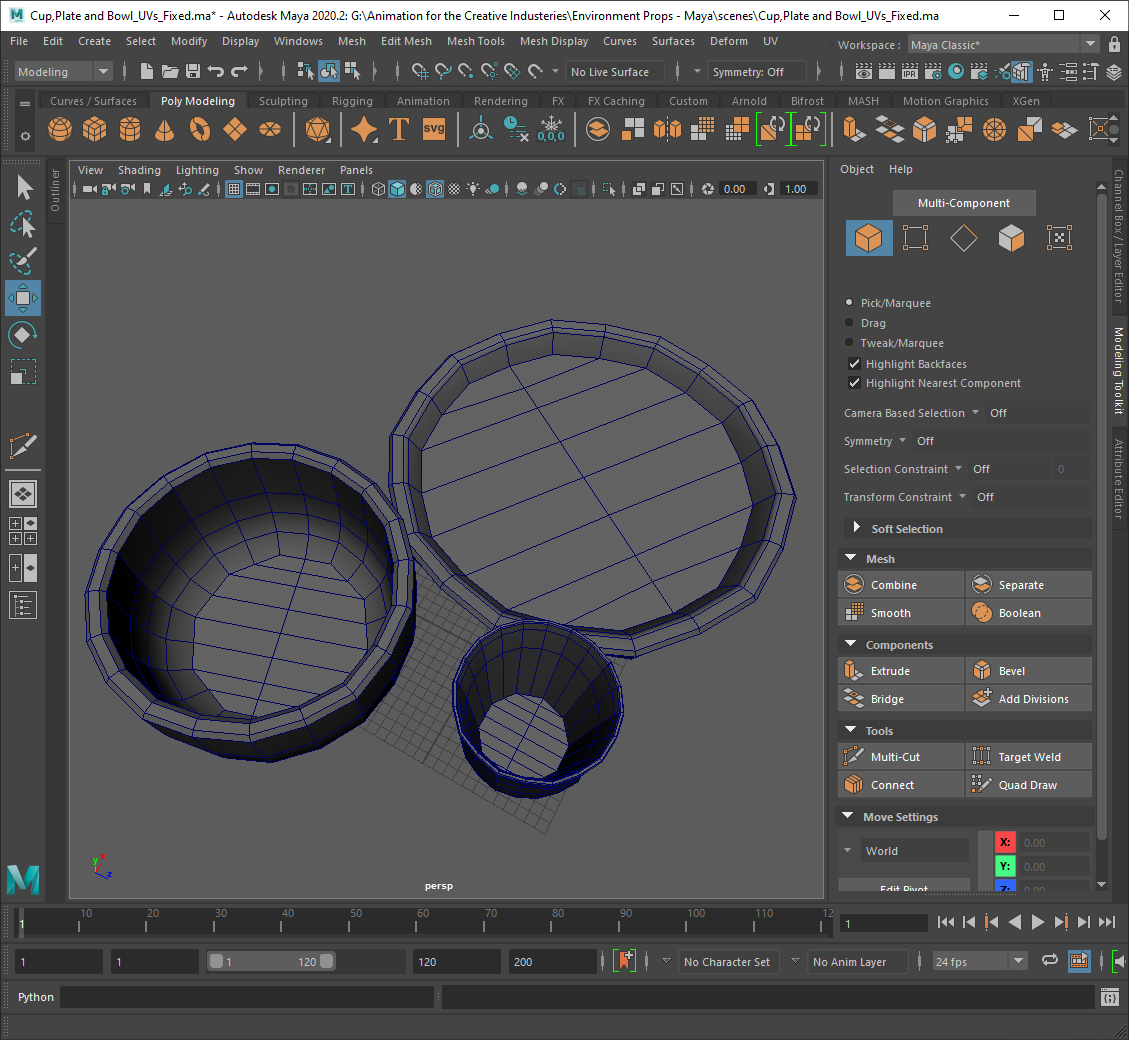
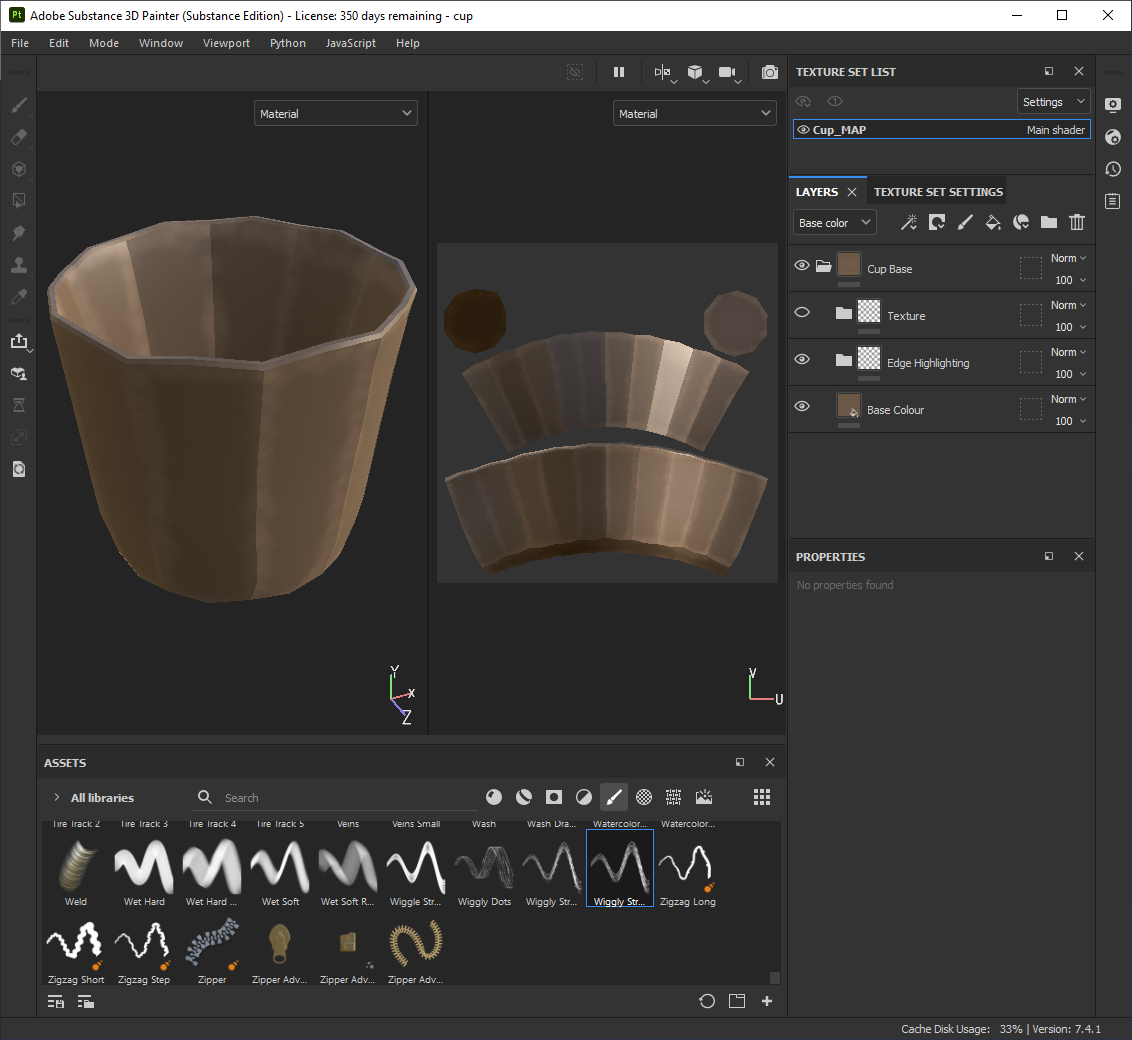
-Dishware-
To create the base of the cup, bowl and plate I used a polycylinder with a subdivision of 10. After, I altered the height, added a few edge loops and adjusted the vertices. Finally I added imperfections to the cup, bowl and plate like dents and wonky sides.
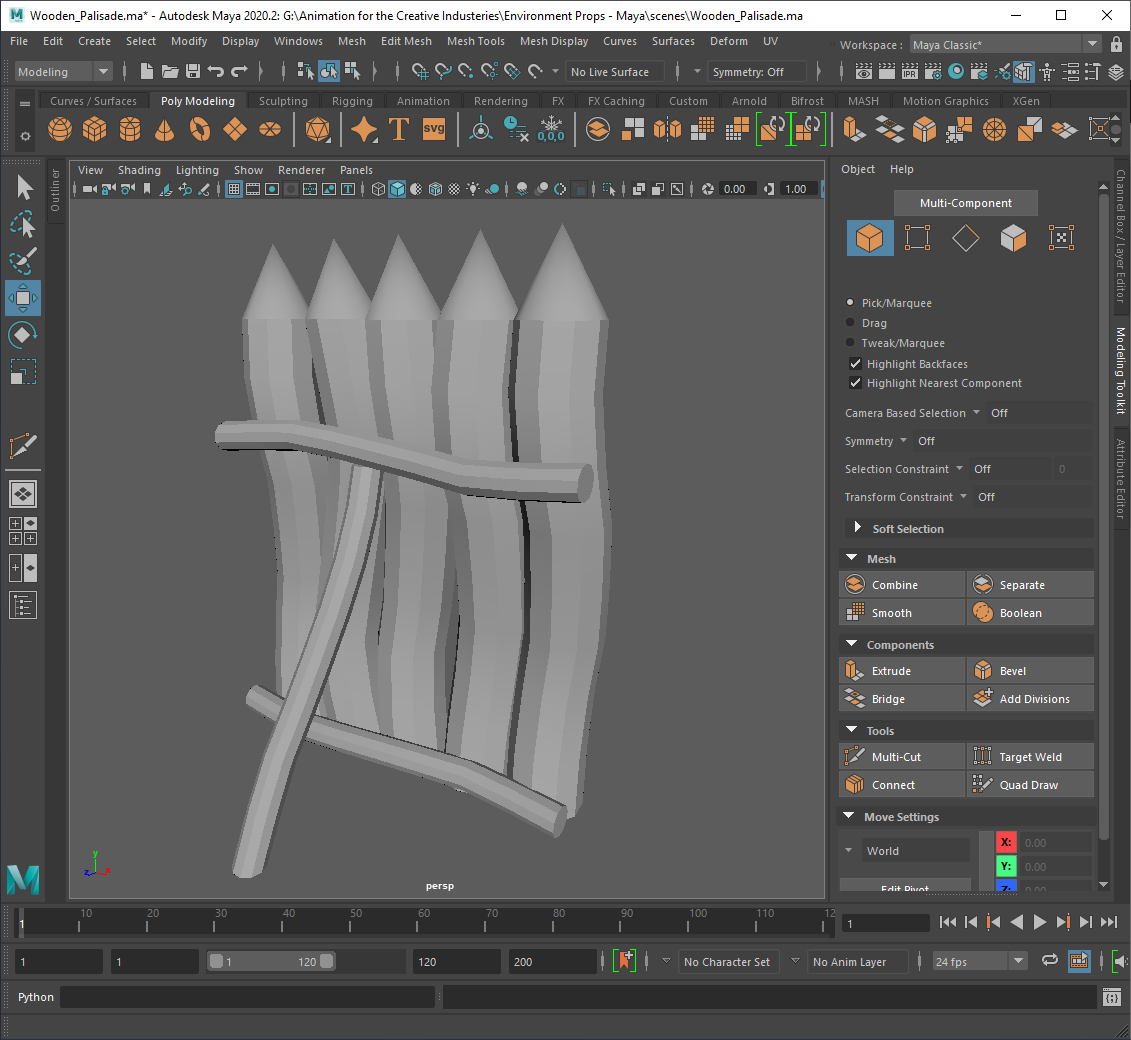
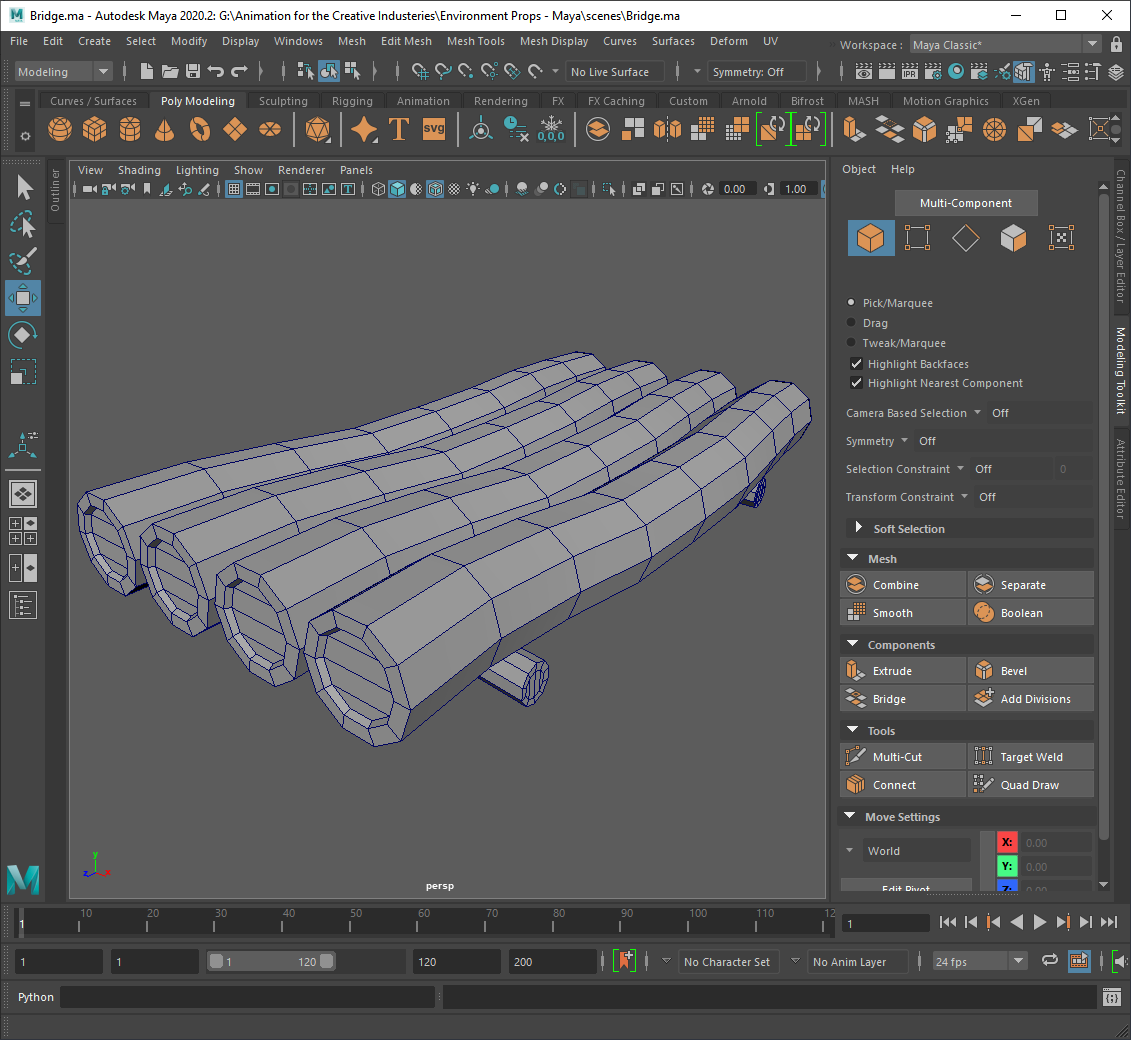
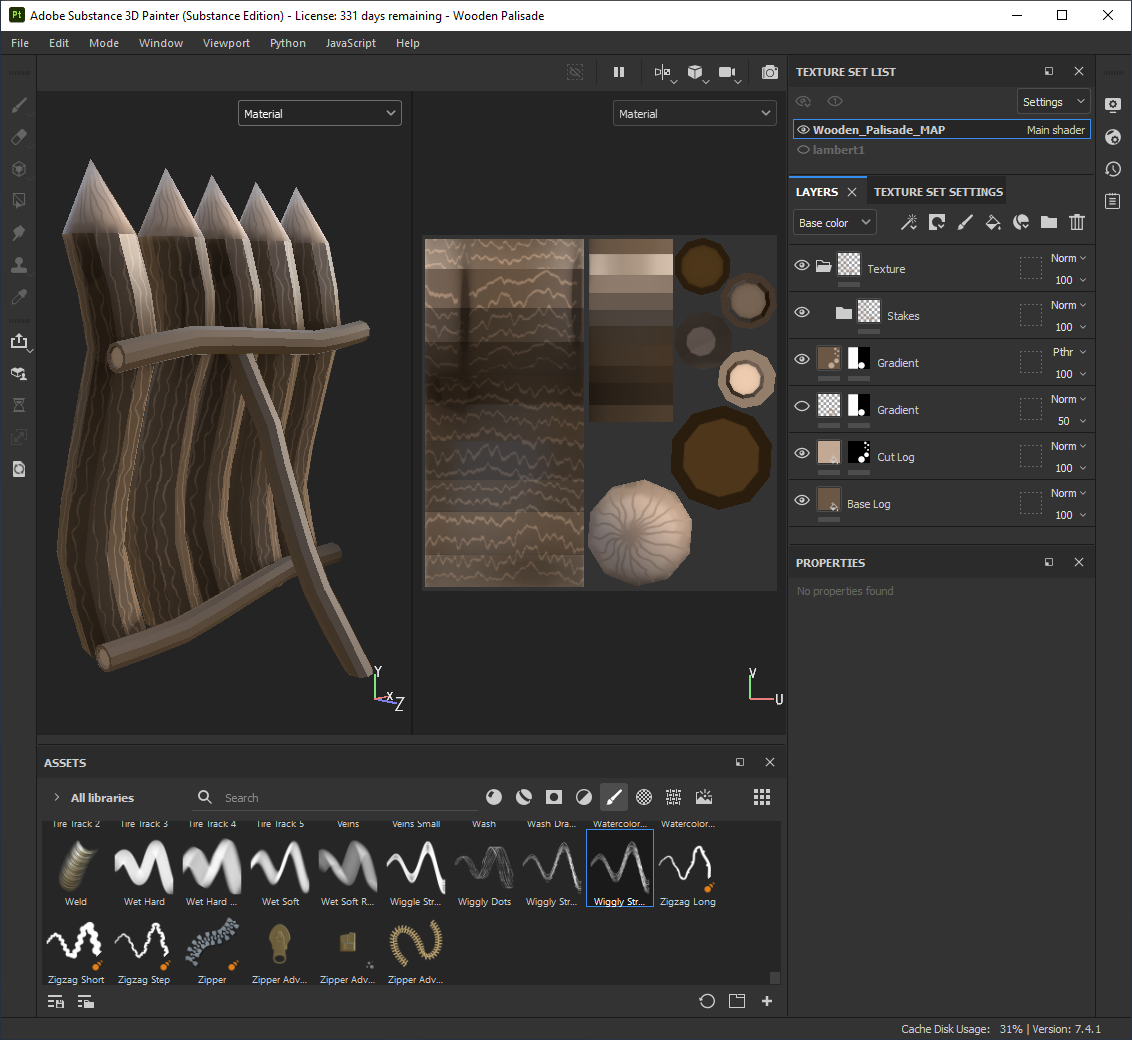
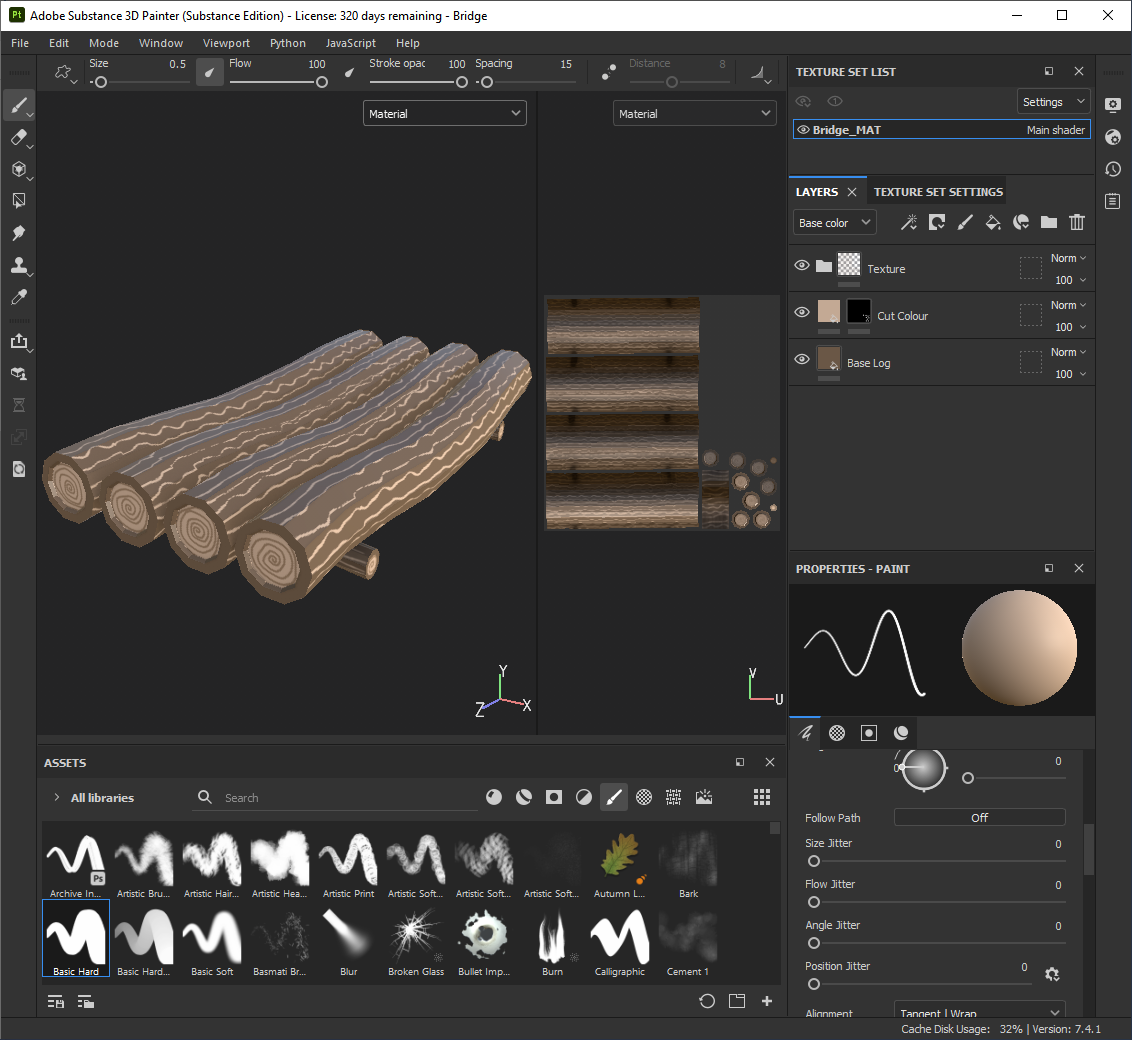
-Wooden Palisade and Bridge-
I created the wooden stakes using a polycylinder with a subdivision of 10. Using edge loops I adjusted the shape of the logs and extended the tip to make a point. I then added more logs to the palisade to create the appearance of structure.
The bridge was made using the same parts as the wooden palisade with a few small adjustments.
____________________________________________________________________________________________________________________________
—UV Unwrapping—
When UV unwrapping I kept the seams to the back and tried to make them as subtle as possible. To finish, I assigned each model a lambert and labelled them clearly to make it easier for me and the rest of the team to apply the textures to models in Unreal.
____________________________________________________________________________________________________________________________
—Texturing—
Before texturing, I made sure to bake all the models before applying any of the textures. When texturing all the models, I referenced the style guide and the colour schemes selected for the game so that everything would remain consistent.
-Tents-
Firstly, I applied the base colours and added the edge highlights then I finally added the texture to the logs and fabric of the tent. I made a few different colour variants of the tents to add a bit of variety.
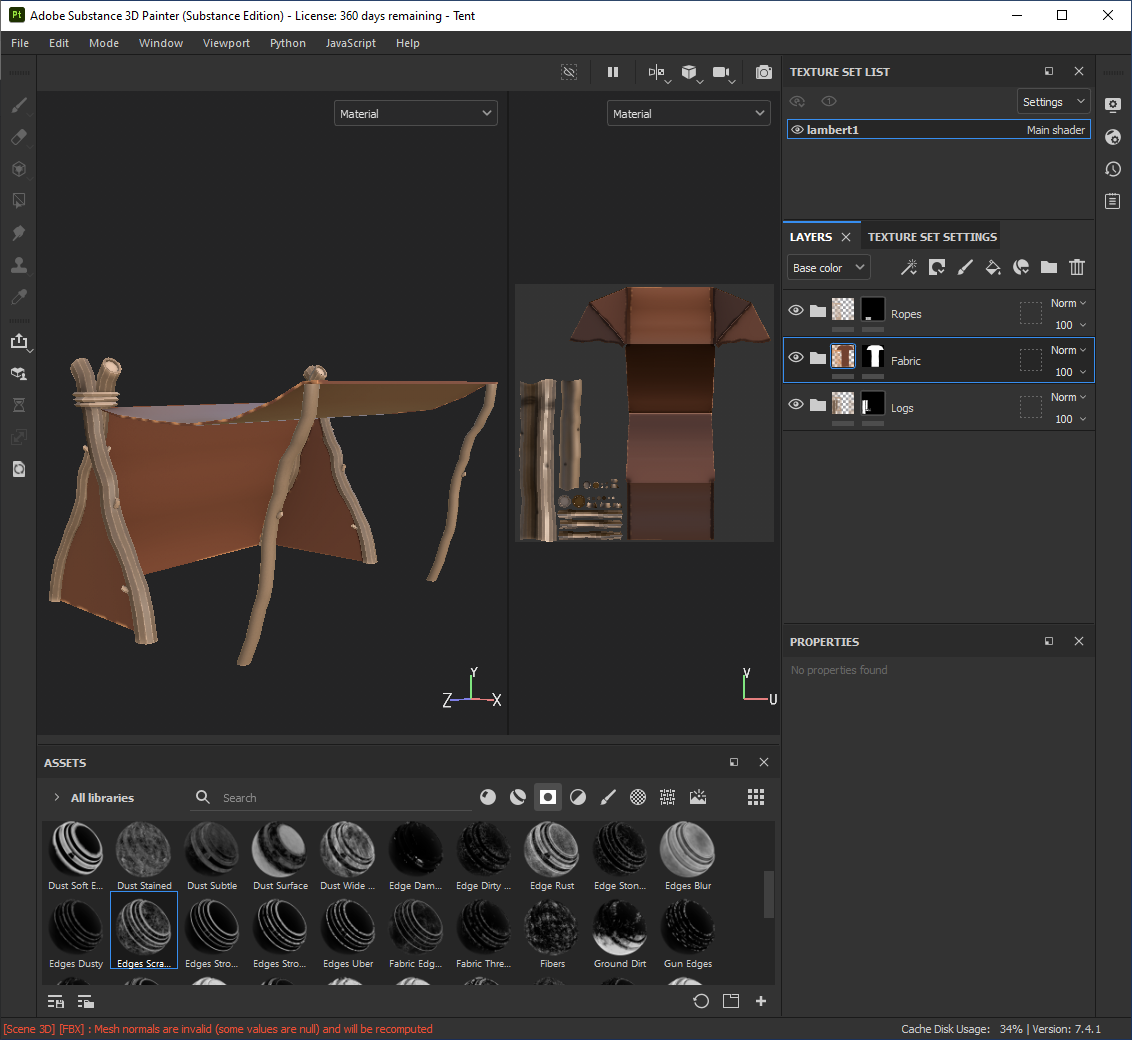
Based on tutor feedback, I made a small adjustment to the front of the tent fabric so that it curved.
-Campfire/Bonfire-
I started with a base colour for the logs and added a lighter brown to the inside. After I added the smart mask ‘Edges Scratched’ to add edge highlights with a lighter brown. Finally I added the wood texture using the ‘Wiggle Strokes’ brush.
I also created a burnt variation using the base campfire textures and adding some dark purple for the burned areas.

-Wood Cutters Axe-
I added the base colours and edge highlighting, then the texture for the wooden handle and the details. Exported the textures and added the Celtic symbol to the axe head in procreate.


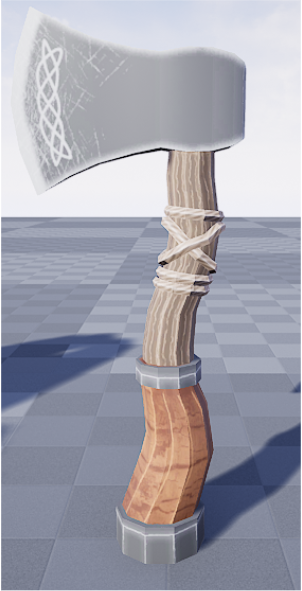
When applying the textures in Unreal I noticed that the axe textures weren’t aligning properly after adding the Celtic symbol so I created a custom stamp in Substance Painter using a tutorial which fixed the issue.
Substance Painter, Adobe Photoshop – How To Stamp On Logos – YouTube
-Dishware-
I applied the base colours, added the edge highlights to match the rest of the assets of the game and painted on the symbols to the dishware.


I created a few different designs to add a bit of variety to the designs.
-Wooden Palisade and Bridge-
Added the base colours, added a small gradient to the top of the stakes to ease the transition between the colours and drew on the wood texture.
I repeated the same process as the wooden palisade by making small adjustments to the textures.
____________________________________________________________________________________________________________________________
—References and Concept Art – 2D Assets—
-House-
When we received feedback from the tutors on Dylan’s house I created some concept art to make amendments while keeping the same model style so that the changes would be easier and quicker to make.

This model was created by Dylan
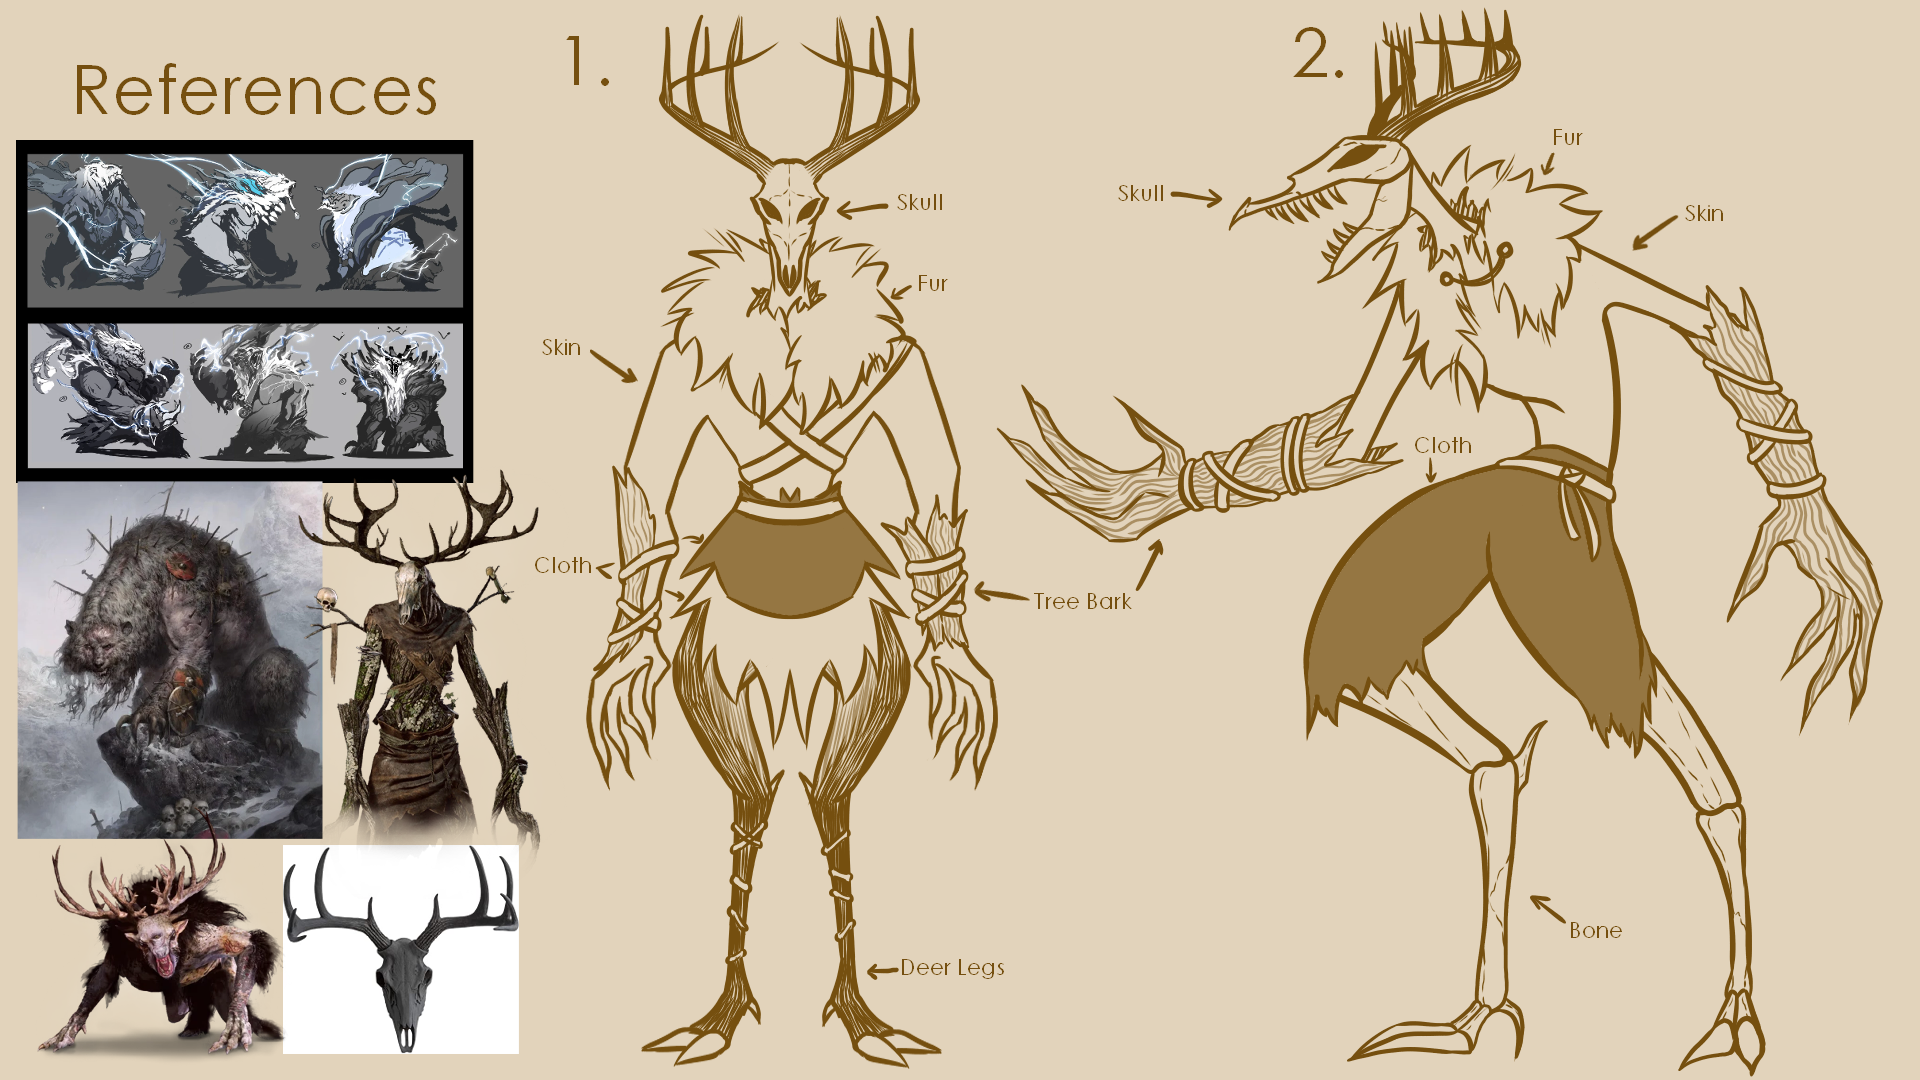
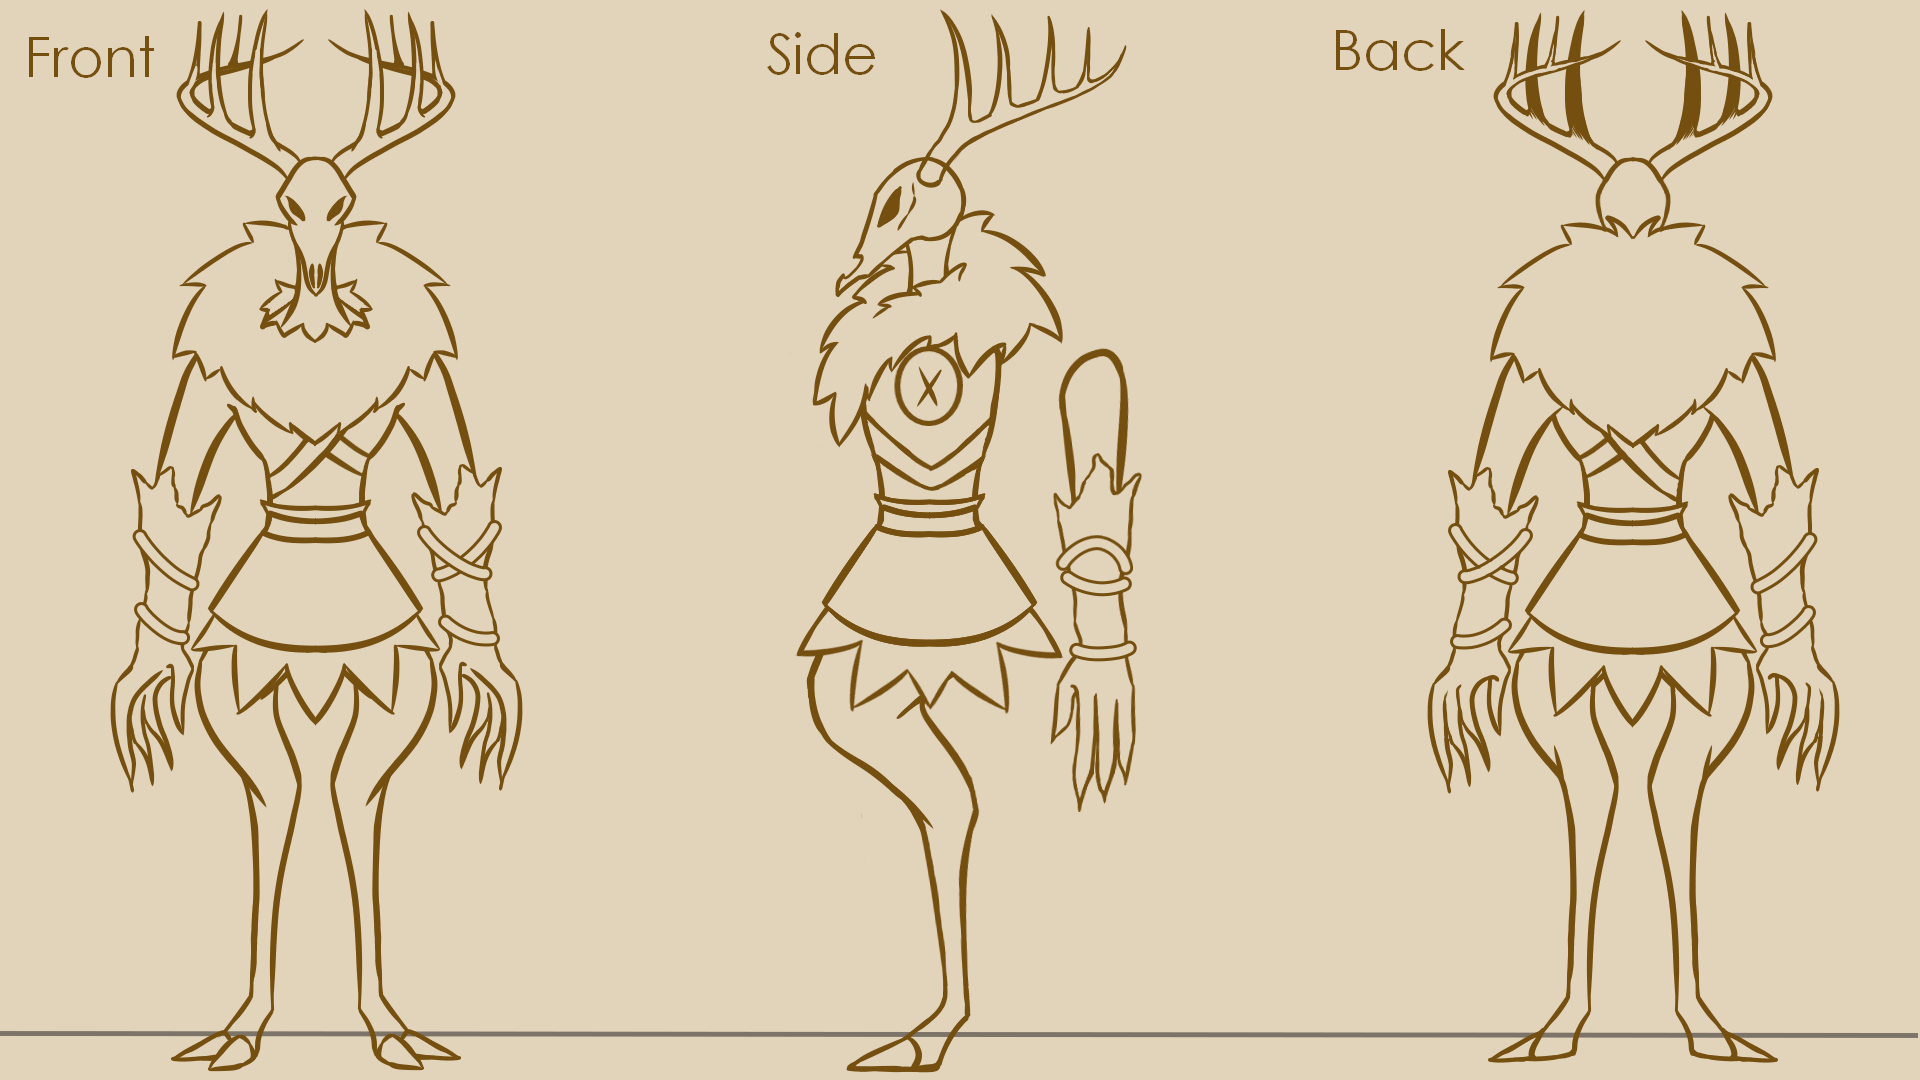
-Enemy-


When a member of the group was unable to create the concept art for the main enemy design I volunteered to. Due to how late in the project we were, I created two variants for the creature and sent it off to the rest of the group for feedback. They wanted fur instead of a cloak so I made those amendments and created a turnaround for Curtis so that he could model the boss.

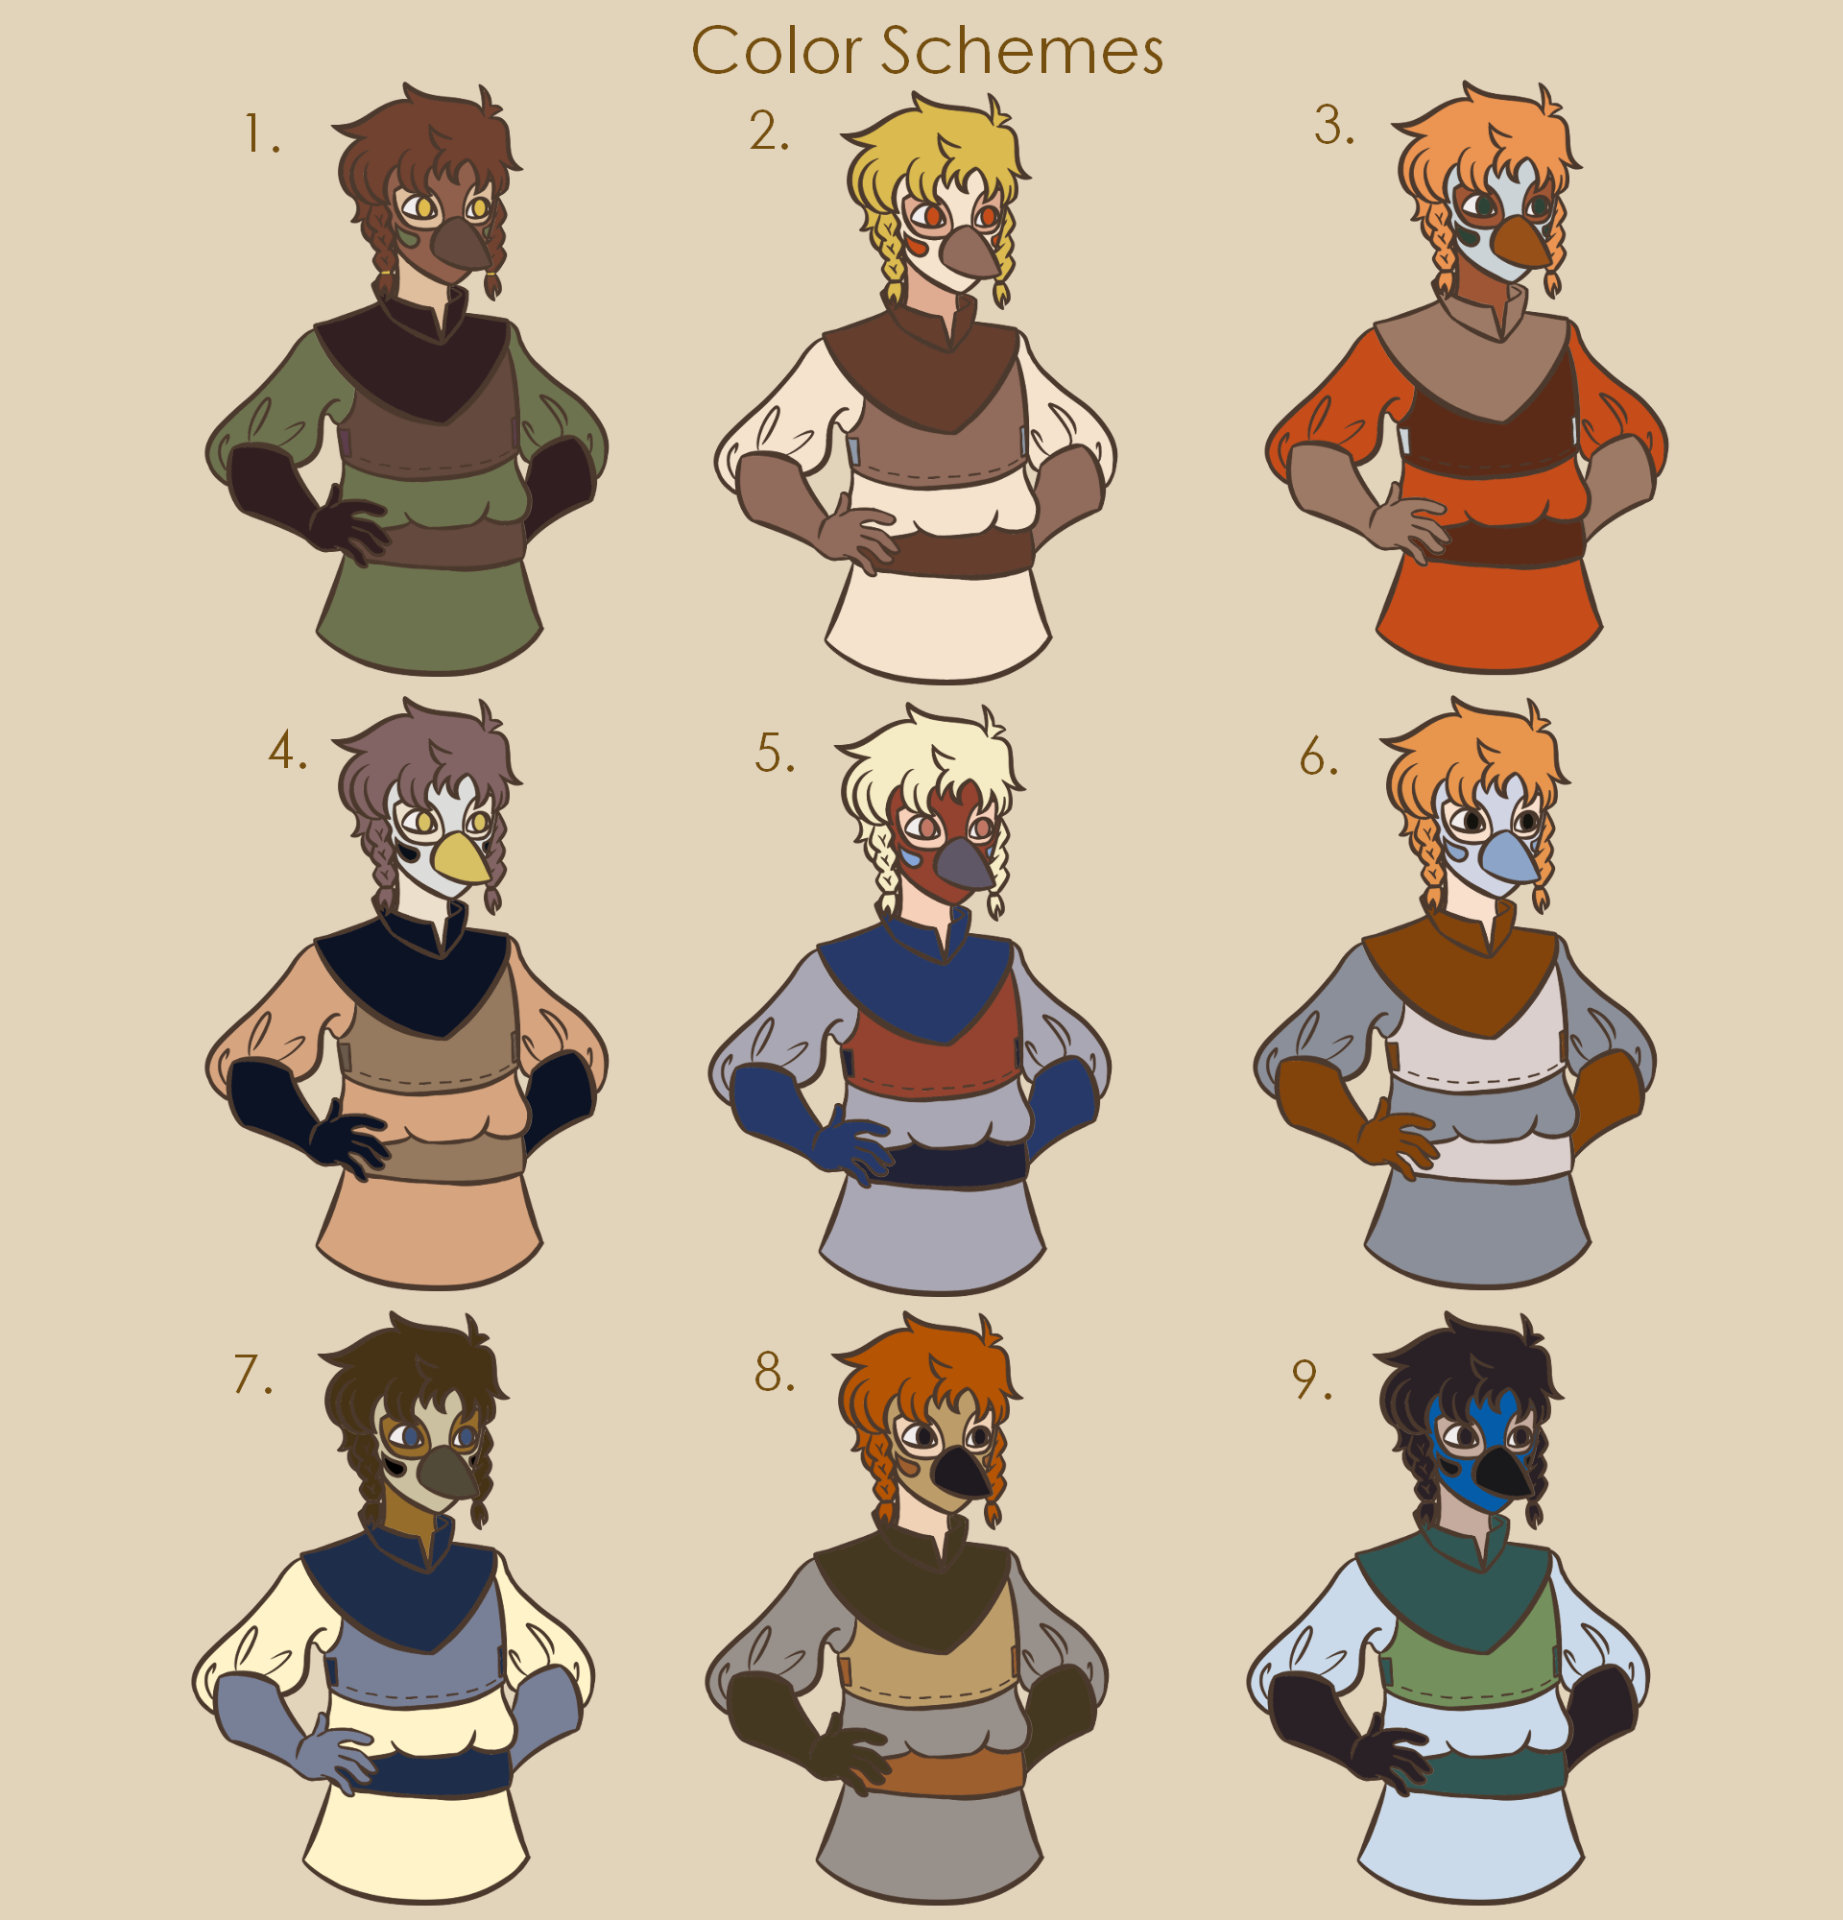
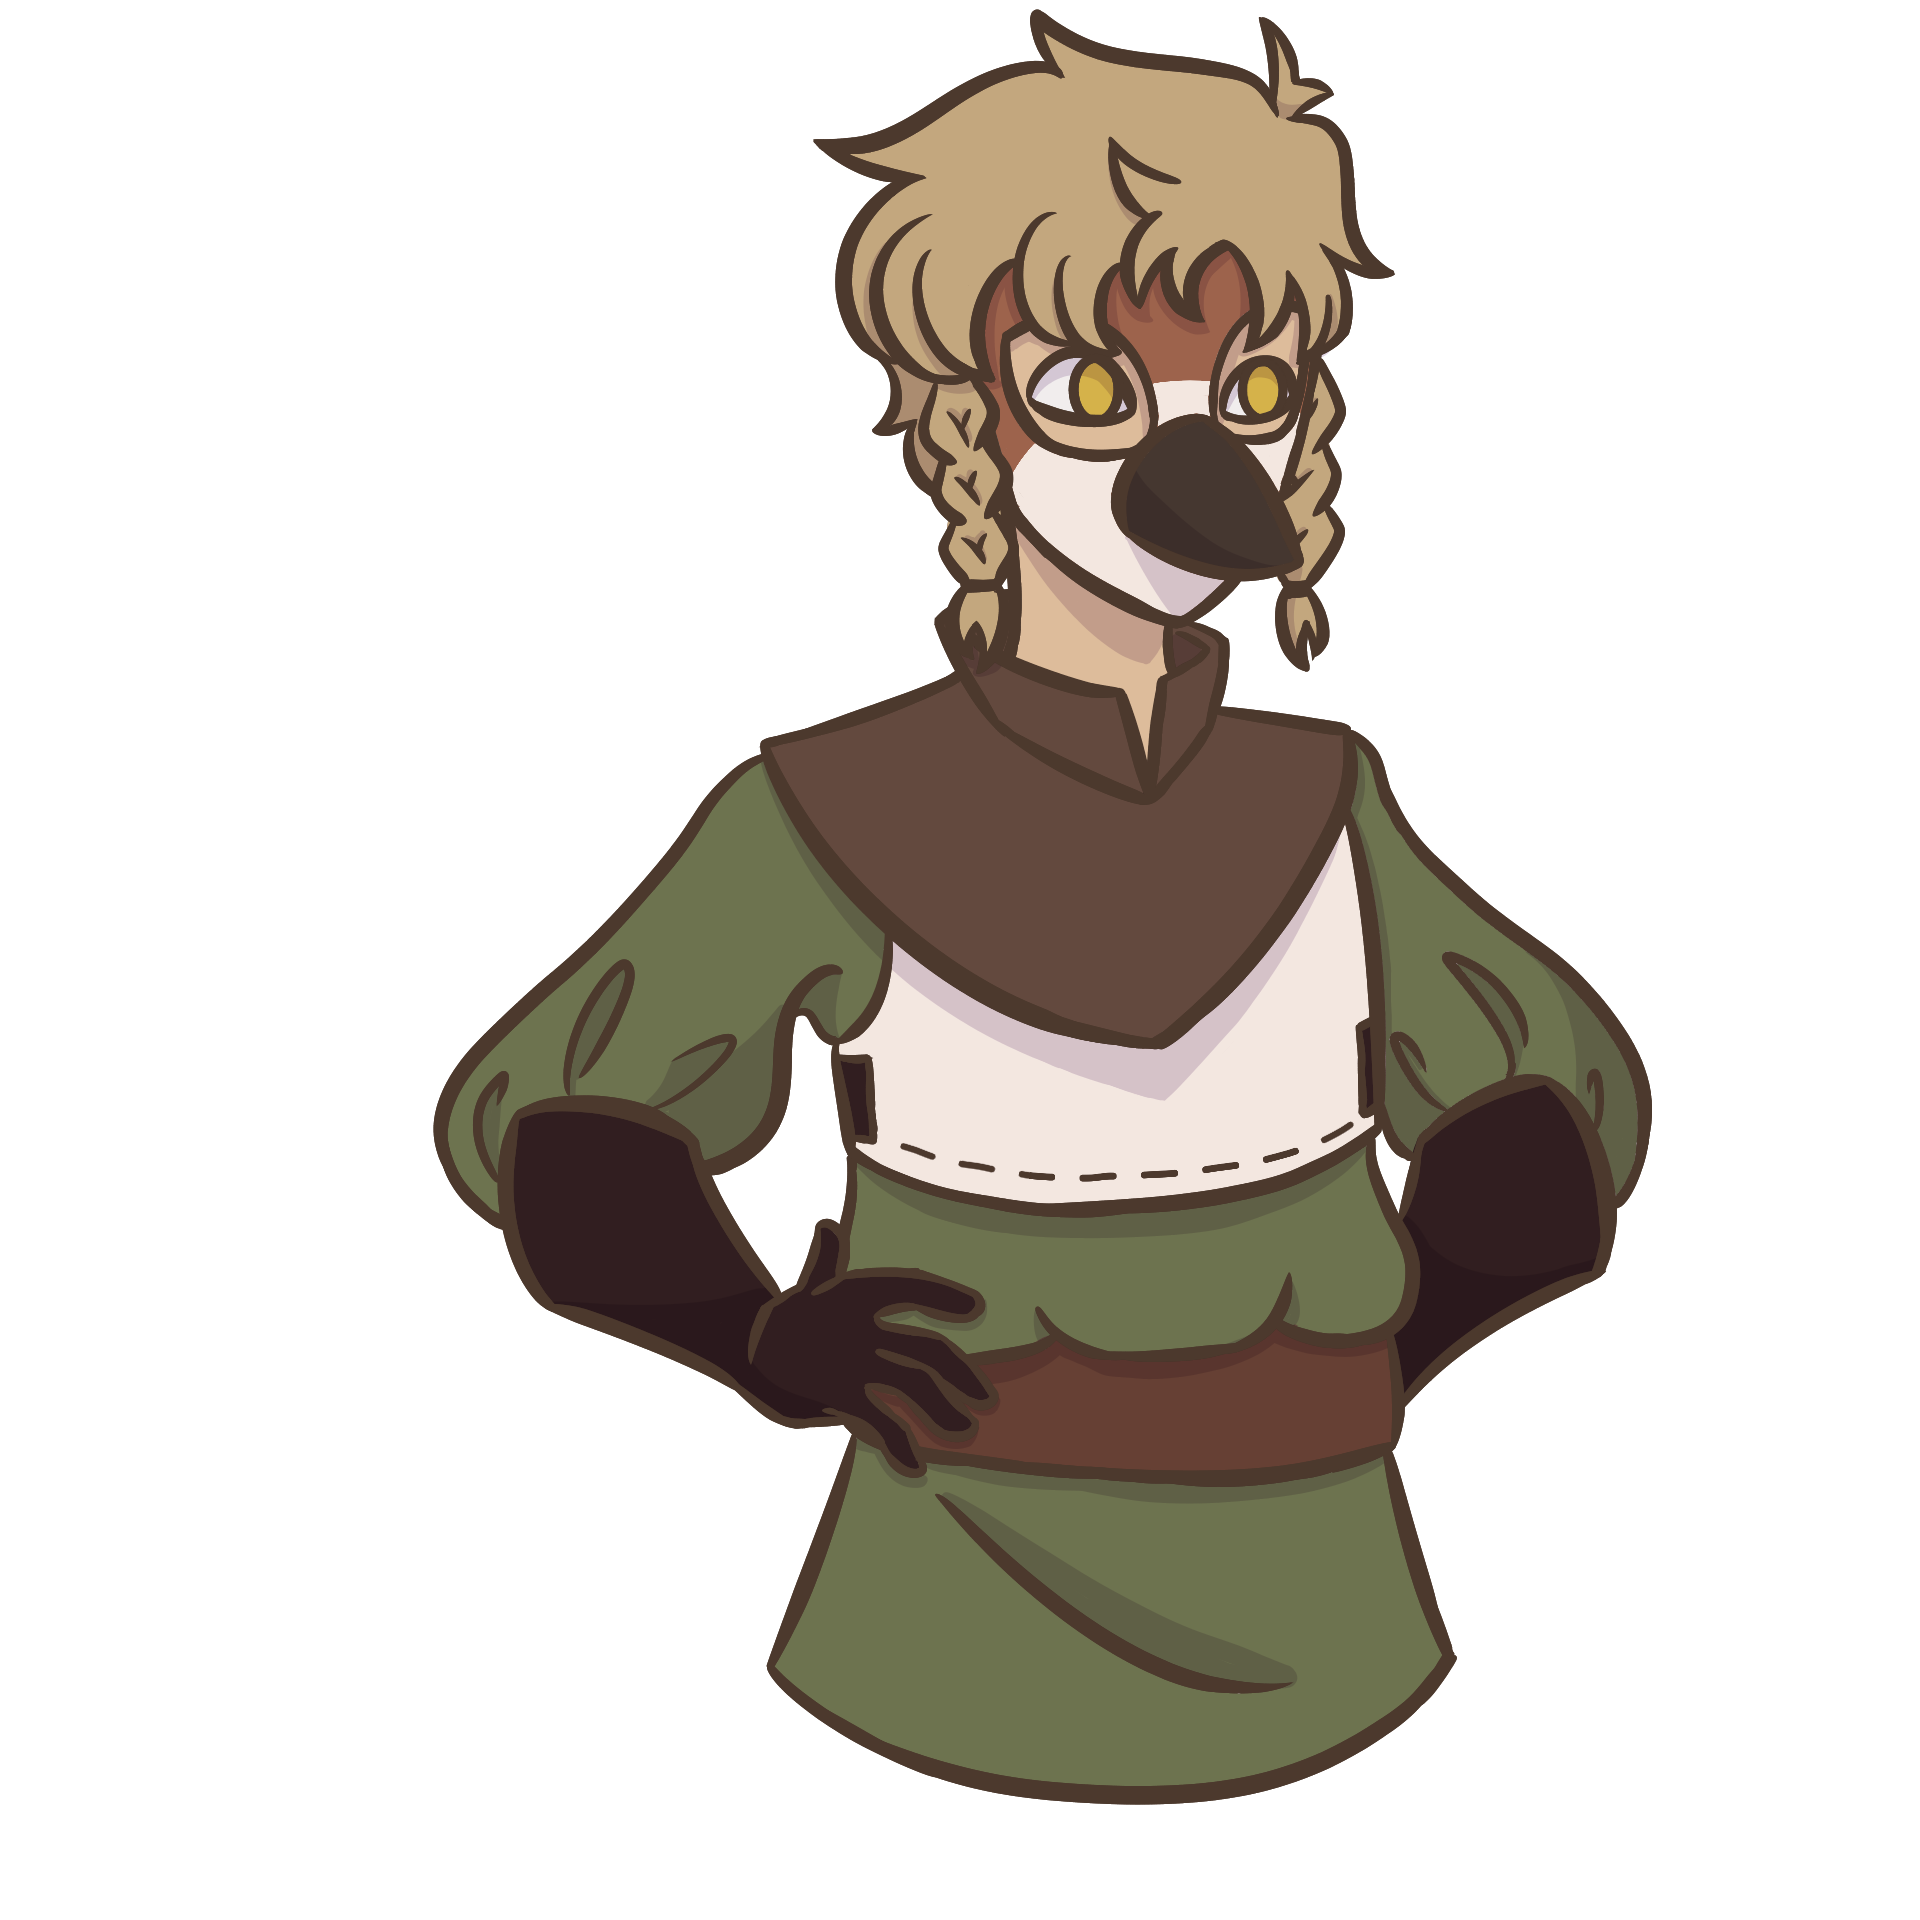
-Sprites-
![]()
![]()
When creating the sprites, I made a fundamentals sheet for the rest of the group to vote on which style they wanted. Afterwards, I created a variety of colour schemes alongside Benny who created three additional colour schemes using my lineart. The group decided on a combination of colour schemes and Jessica decided to use the extra ones when texturing the NPCs.
![]()
Once the sprites were finalised, I roughed out some expressions that could be used during the dialogue sequences as Eamonn didn’t have it finished at this point so I just made a wide range of emotions in hopes to cover all the dialogue.
![]()
 ____________________________________________________________________________________________________________________________
____________________________________________________________________________________________________________________________
—2D Animation—
I started by creating all the storyboards for the animated sequences and showed them to my group for feedback. I made the amendments and put them up to a vote for the final decision on the cutscenes. I made sure to make them as simple as possible as there wasn’t long left until the final deadline of the project.
-Cutscene 2-
Another teammate was supposed to be creating the second cutscene and I ran out of time to create it so it got cut from the final game and I focused on the other two cutscenes.
-Storyboards-
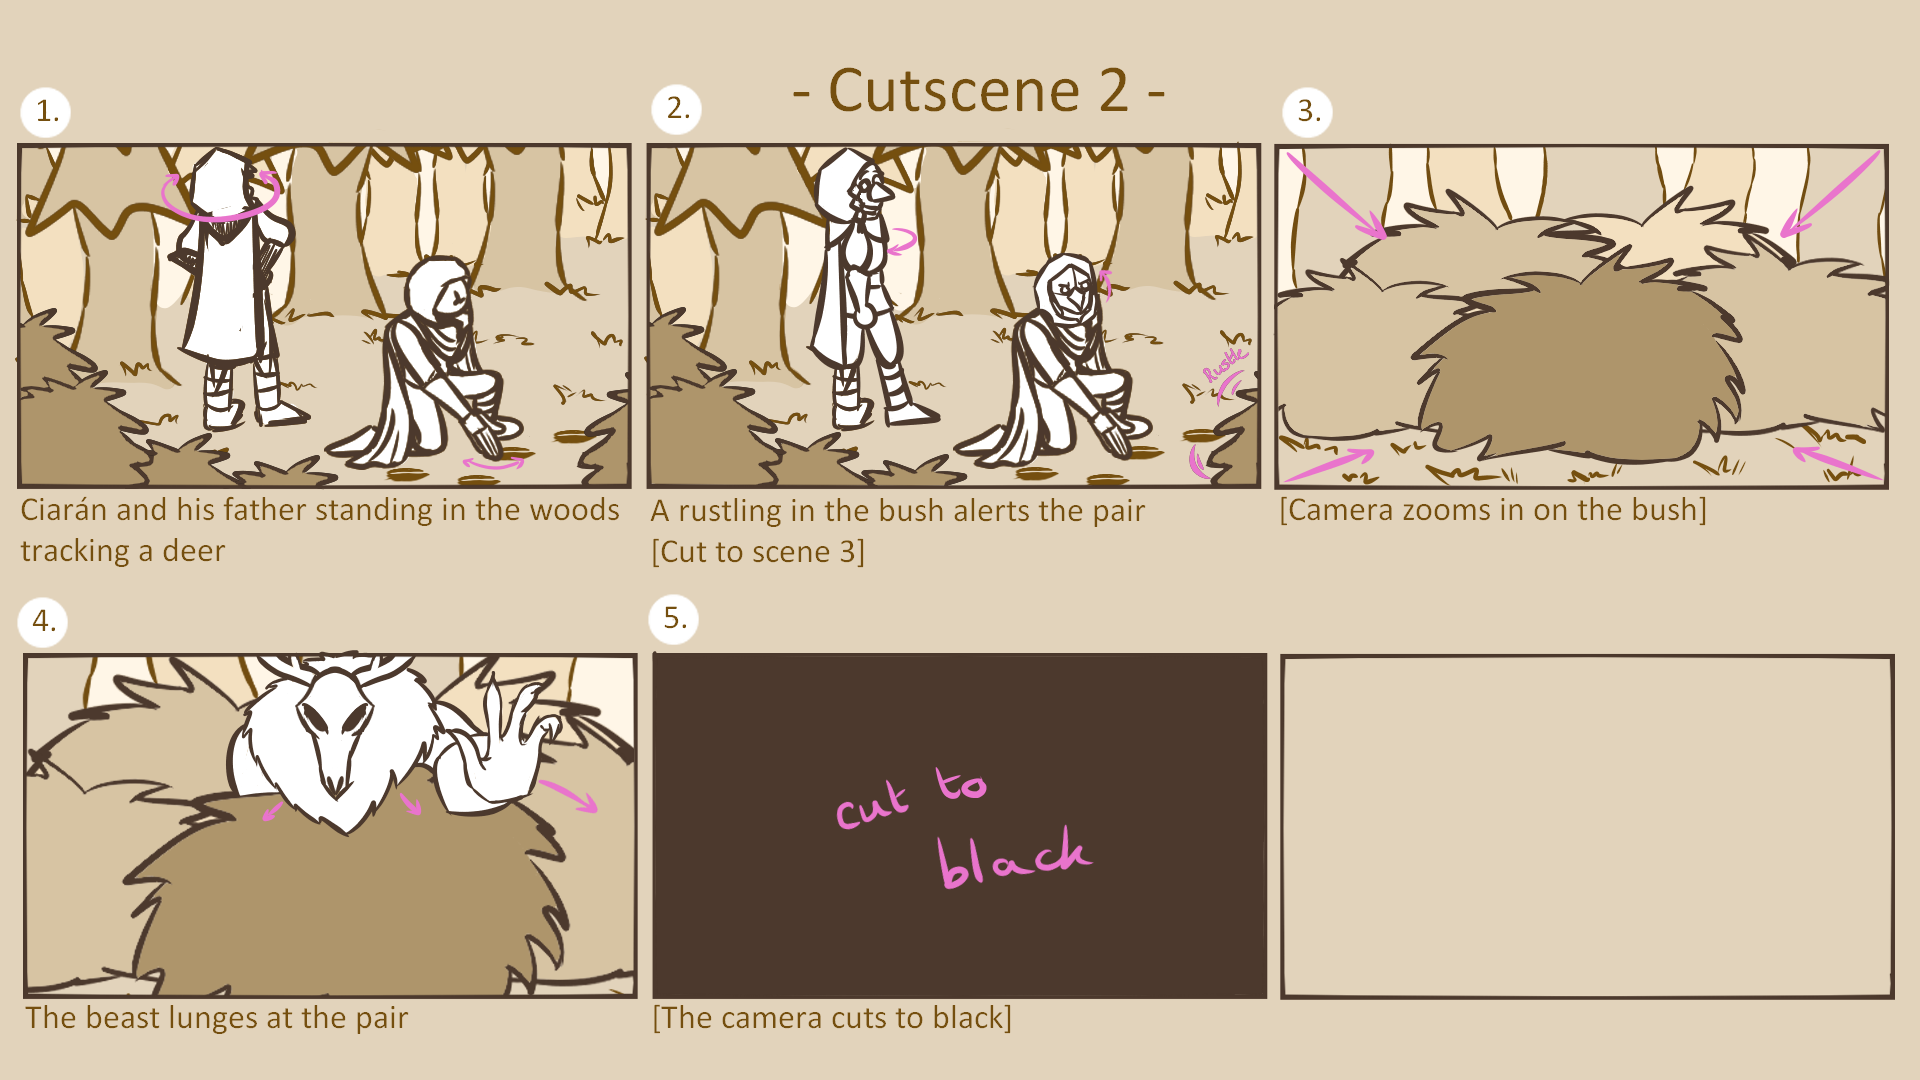
-Animatic-
-Cutscene 1-
Cutscene 1 was made to be an introduction to the game and set the scene for the player. It’s supposed to show that this is a normal day in Ciarán’s life, he is awoken by his mother and prepares to go hunting with his father.
-Storyboards-
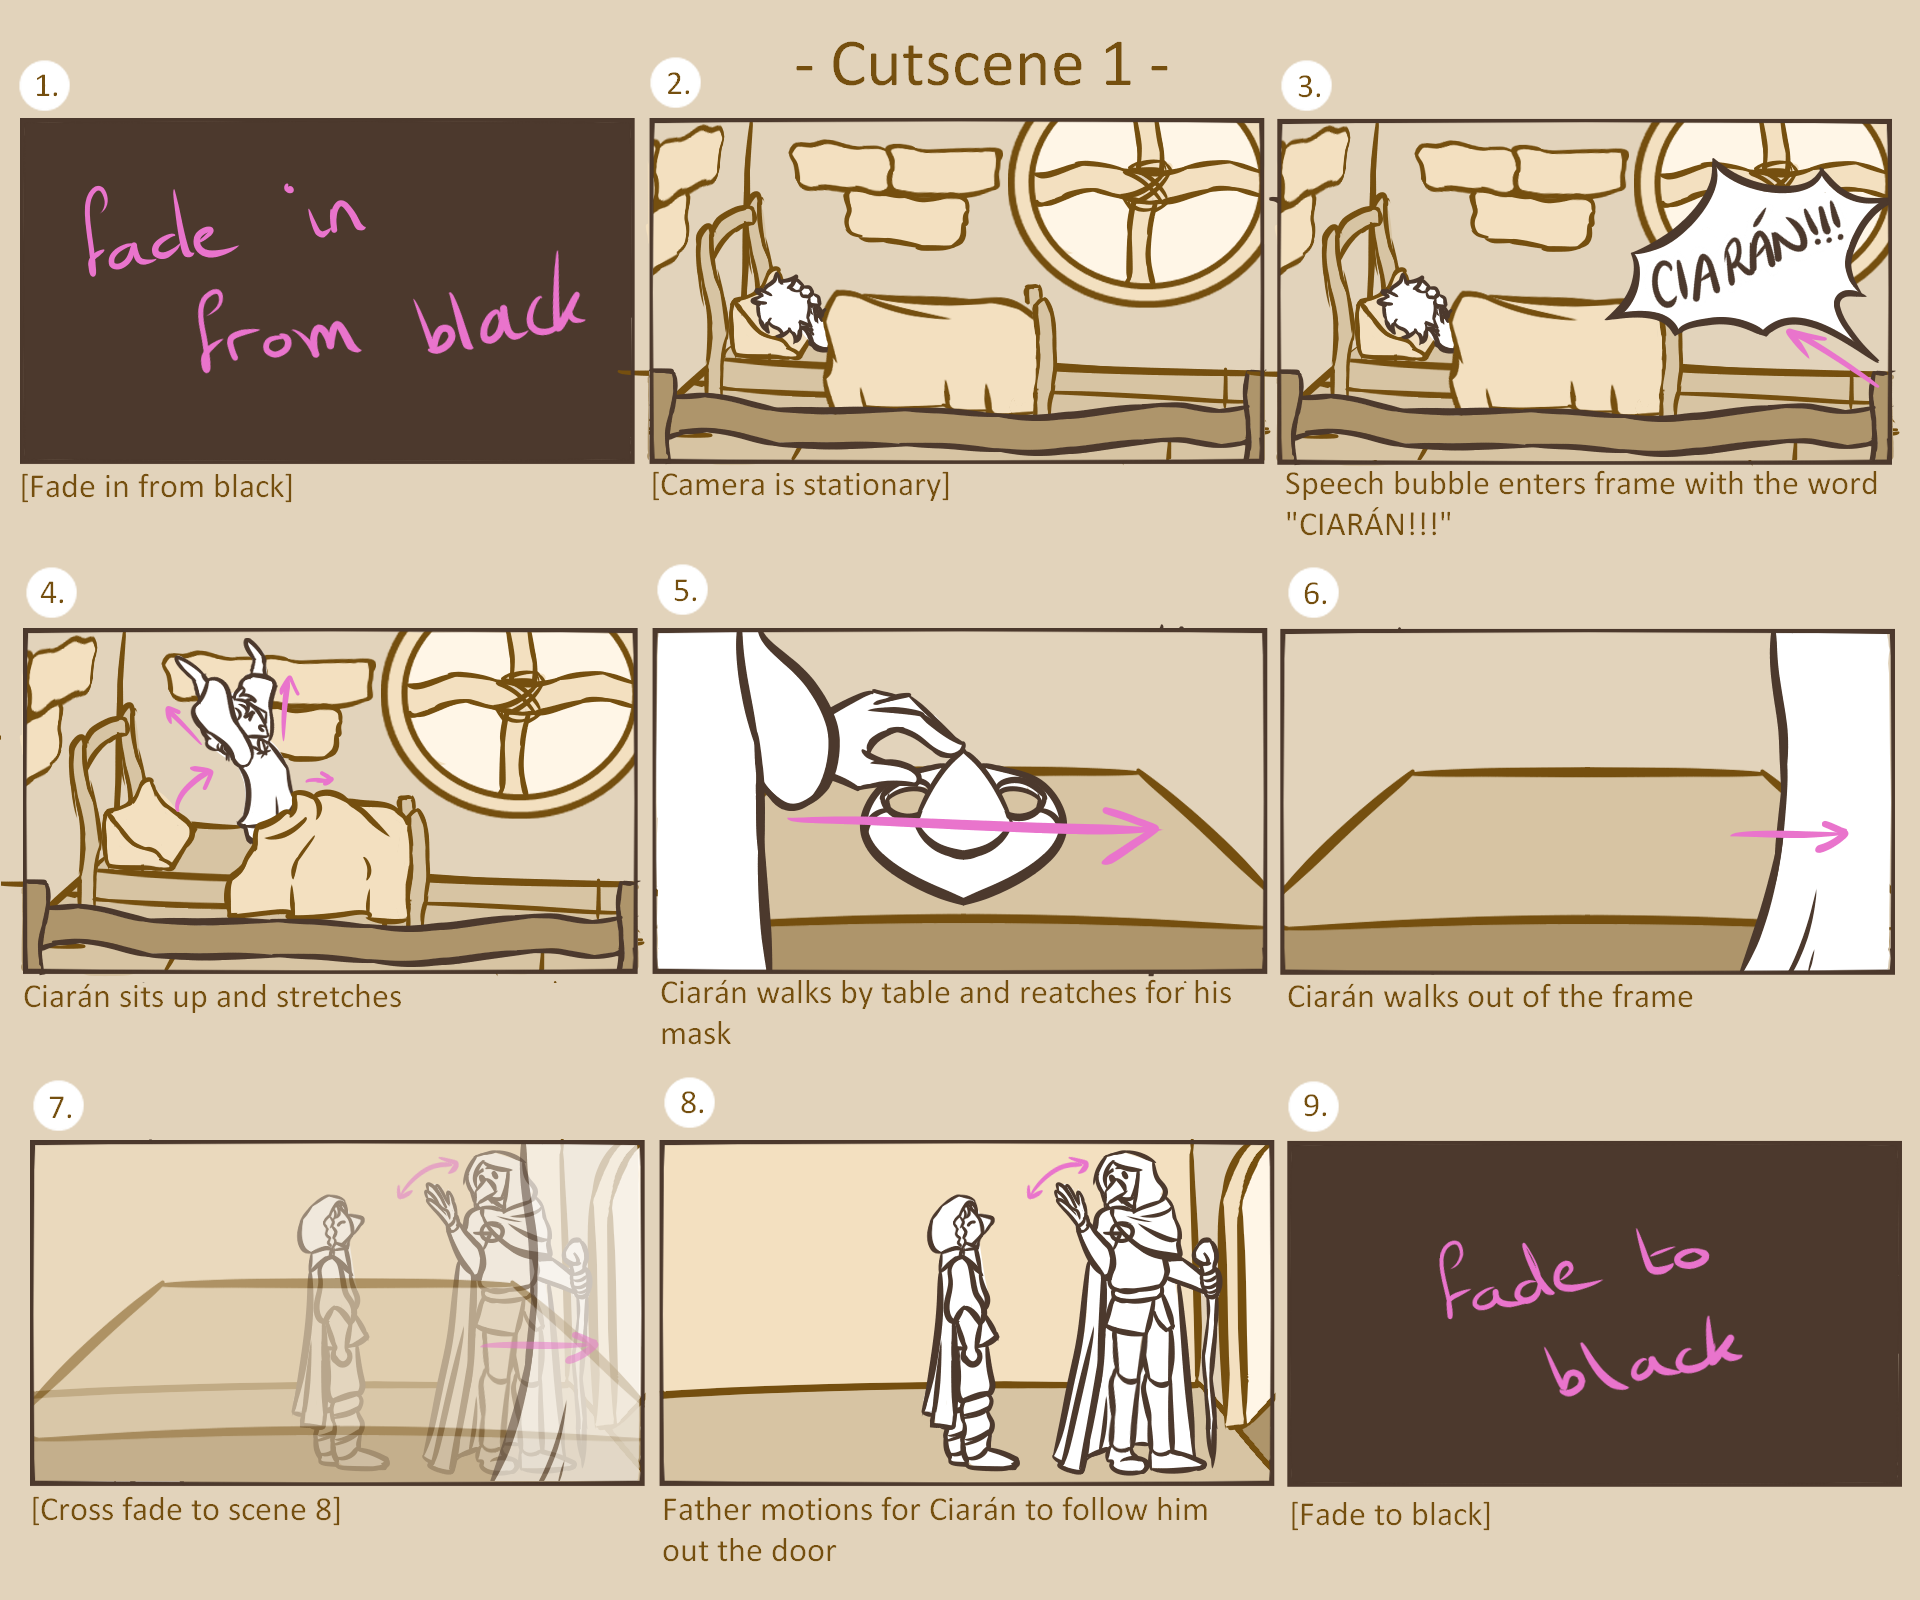
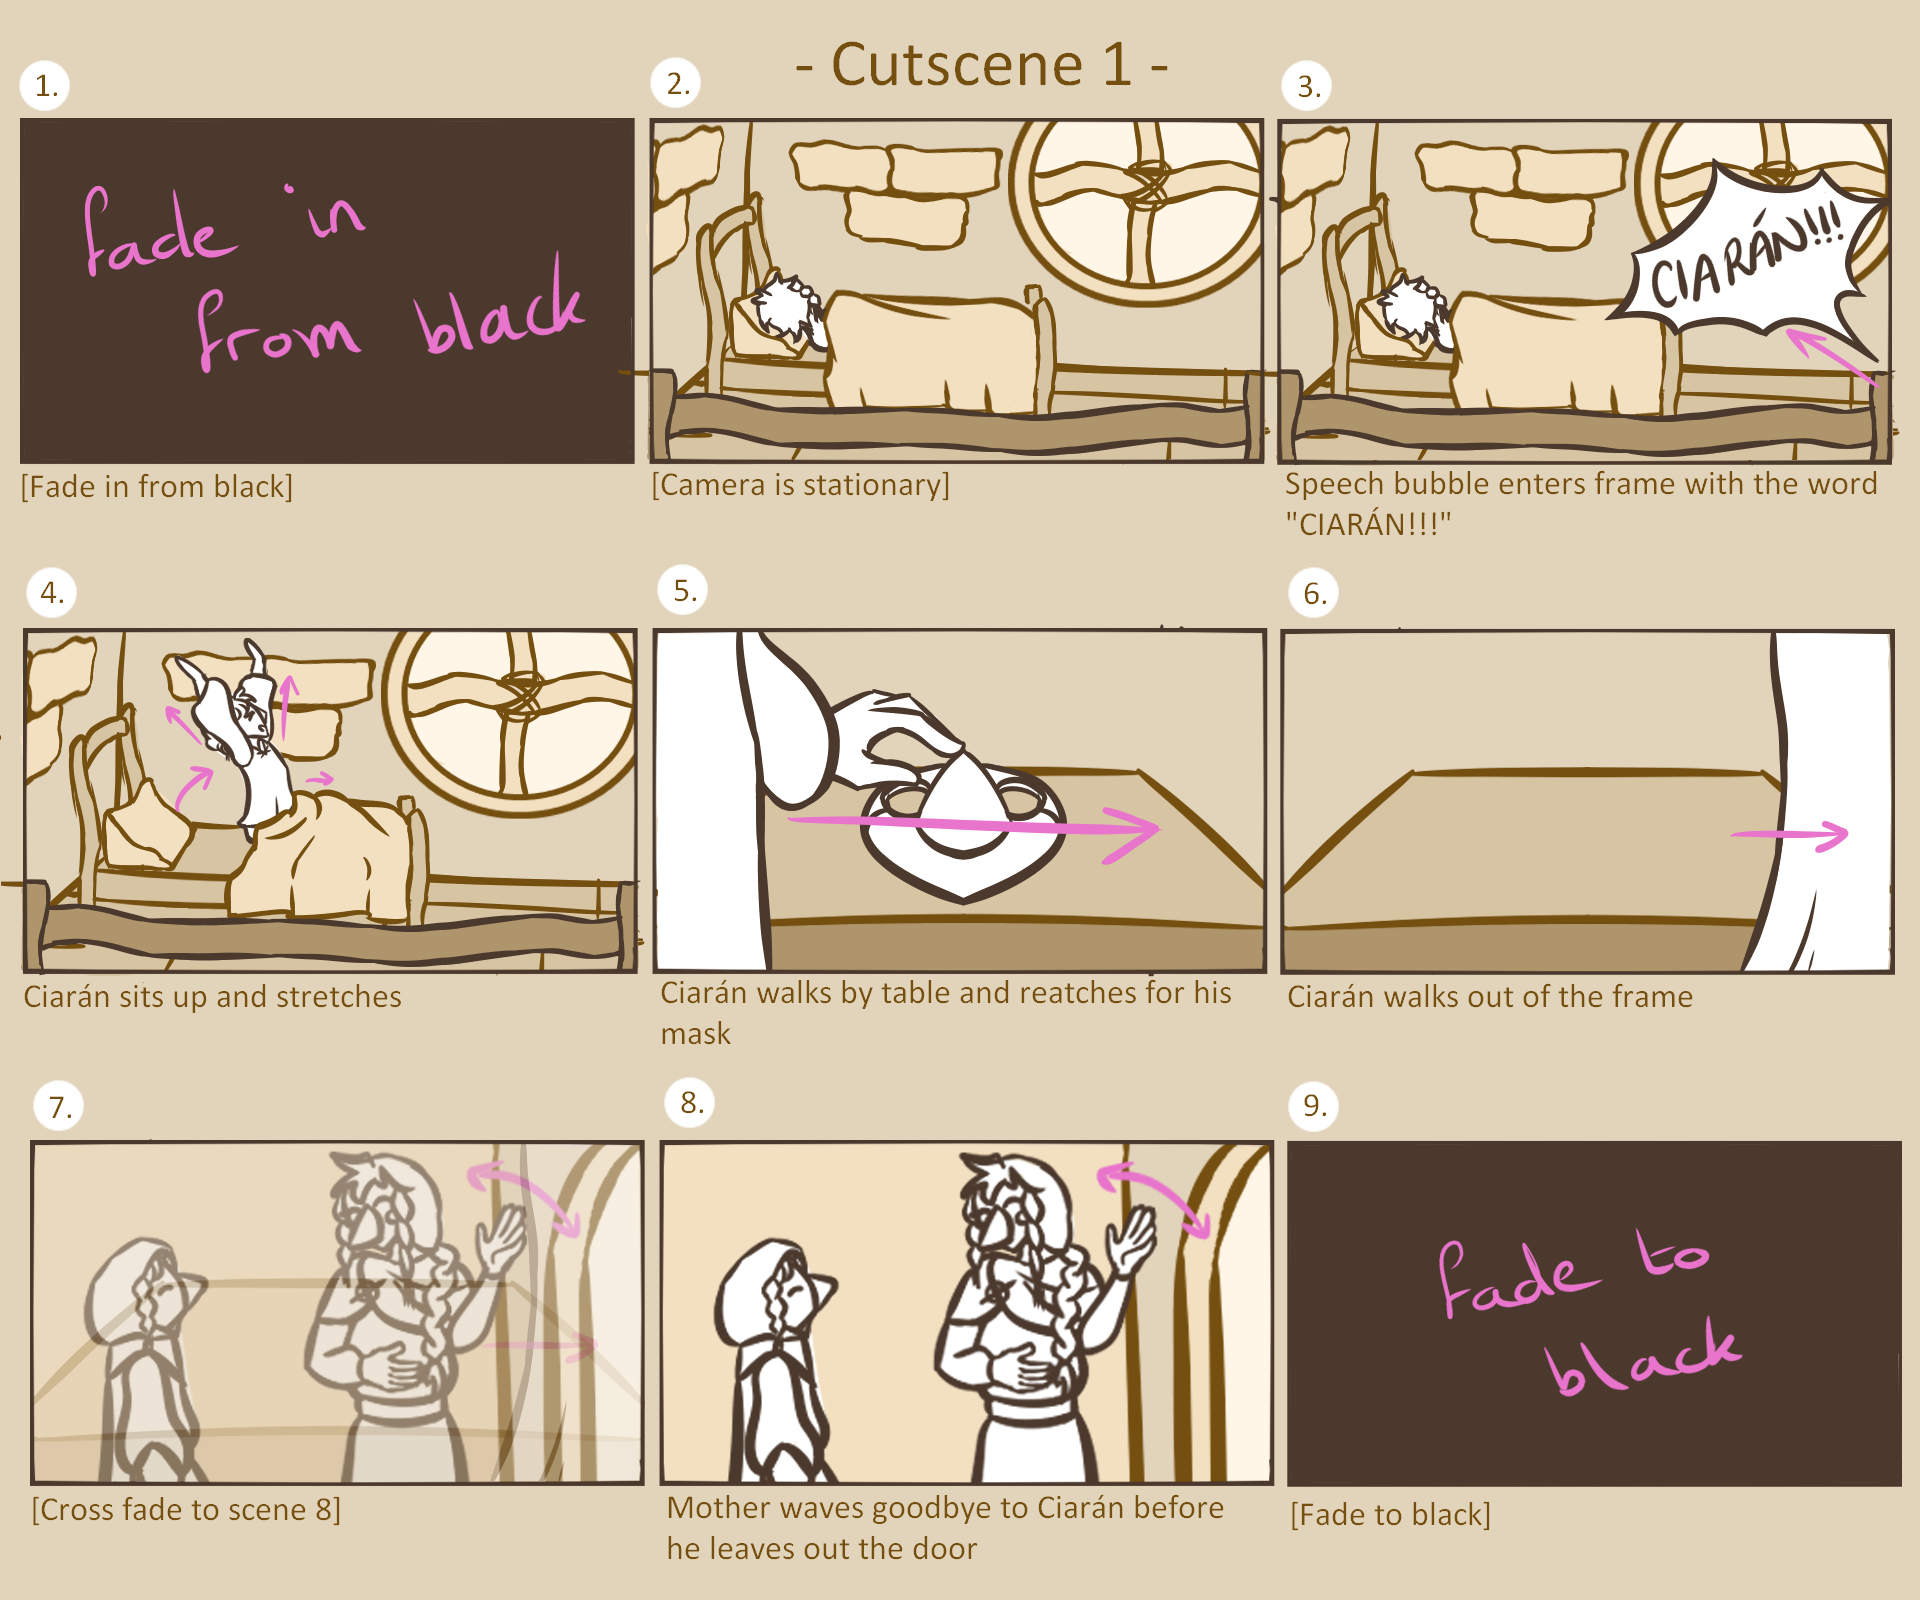
-Animatic-
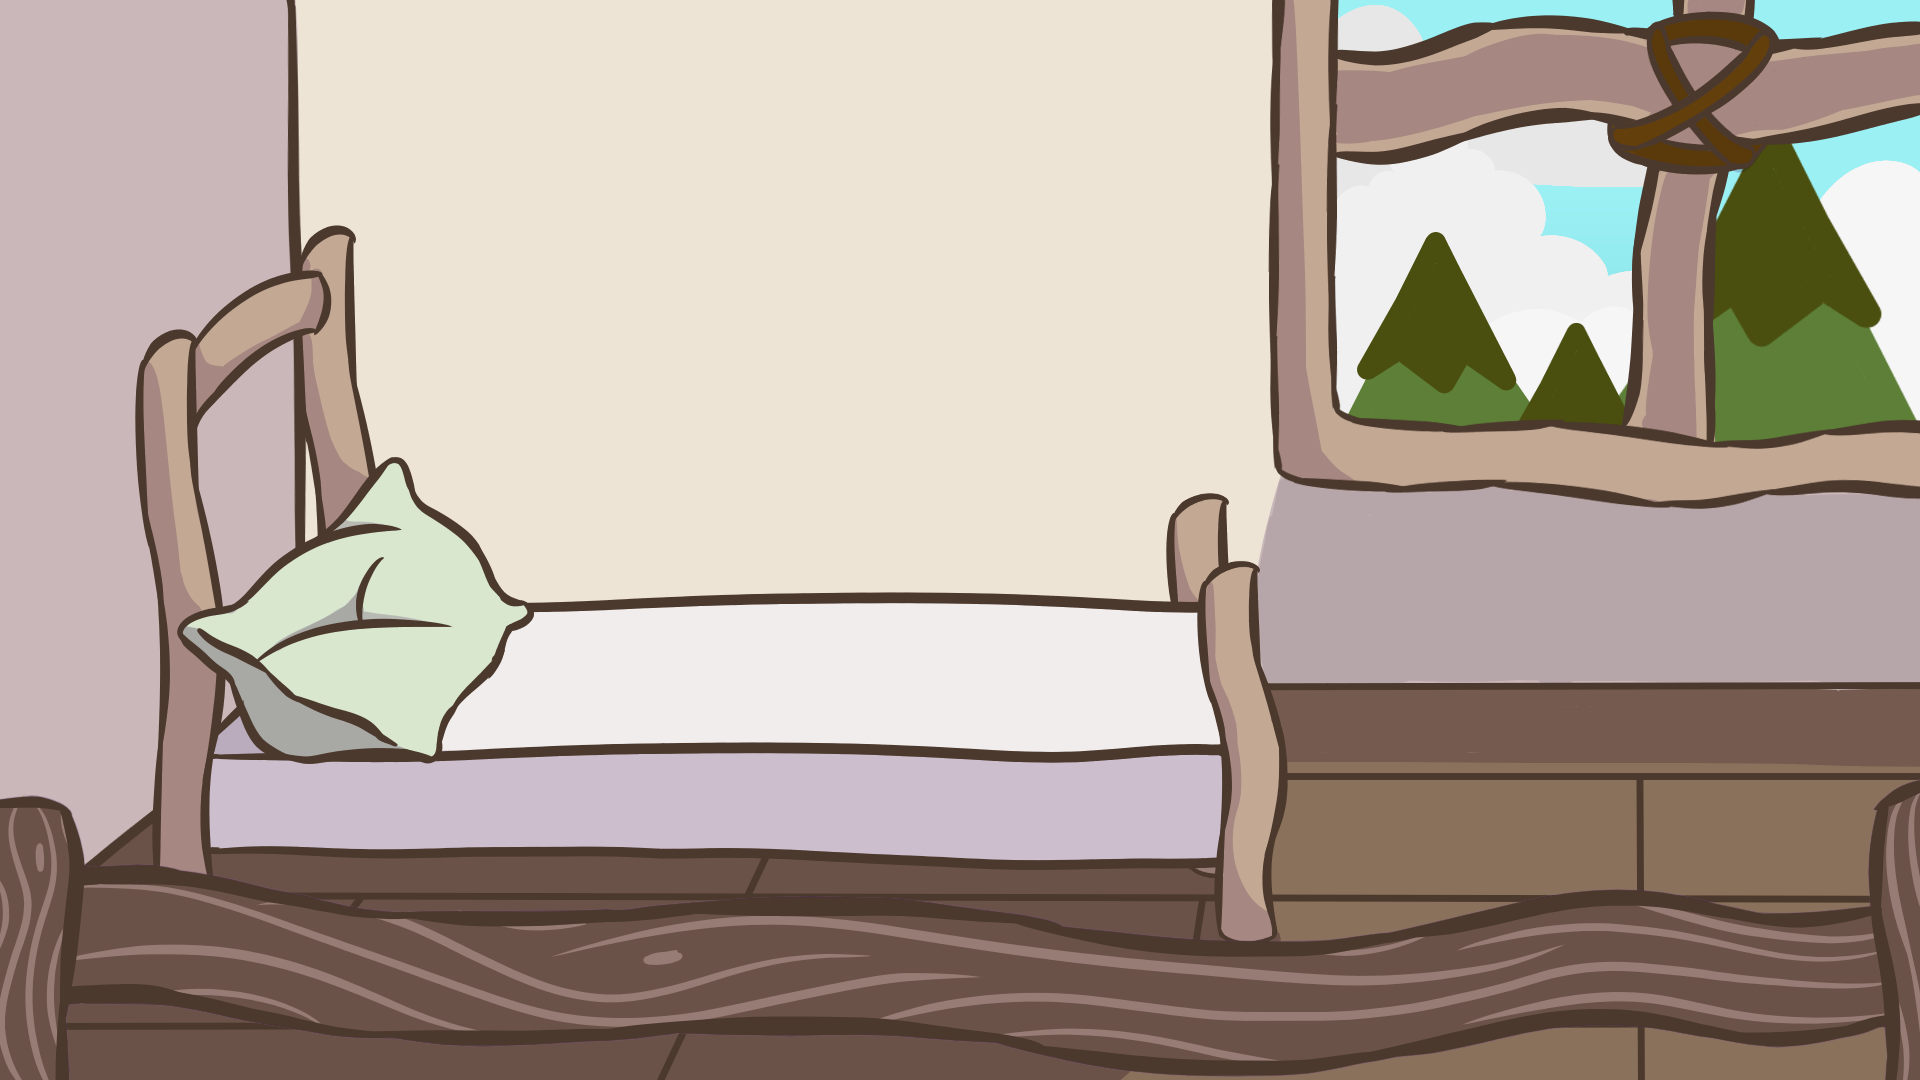
-Backgrounds-

-Rough Animation-
-Final Animation-
Music used was created by Oisin McShane from the Sound design class.
-Cutscene 3-
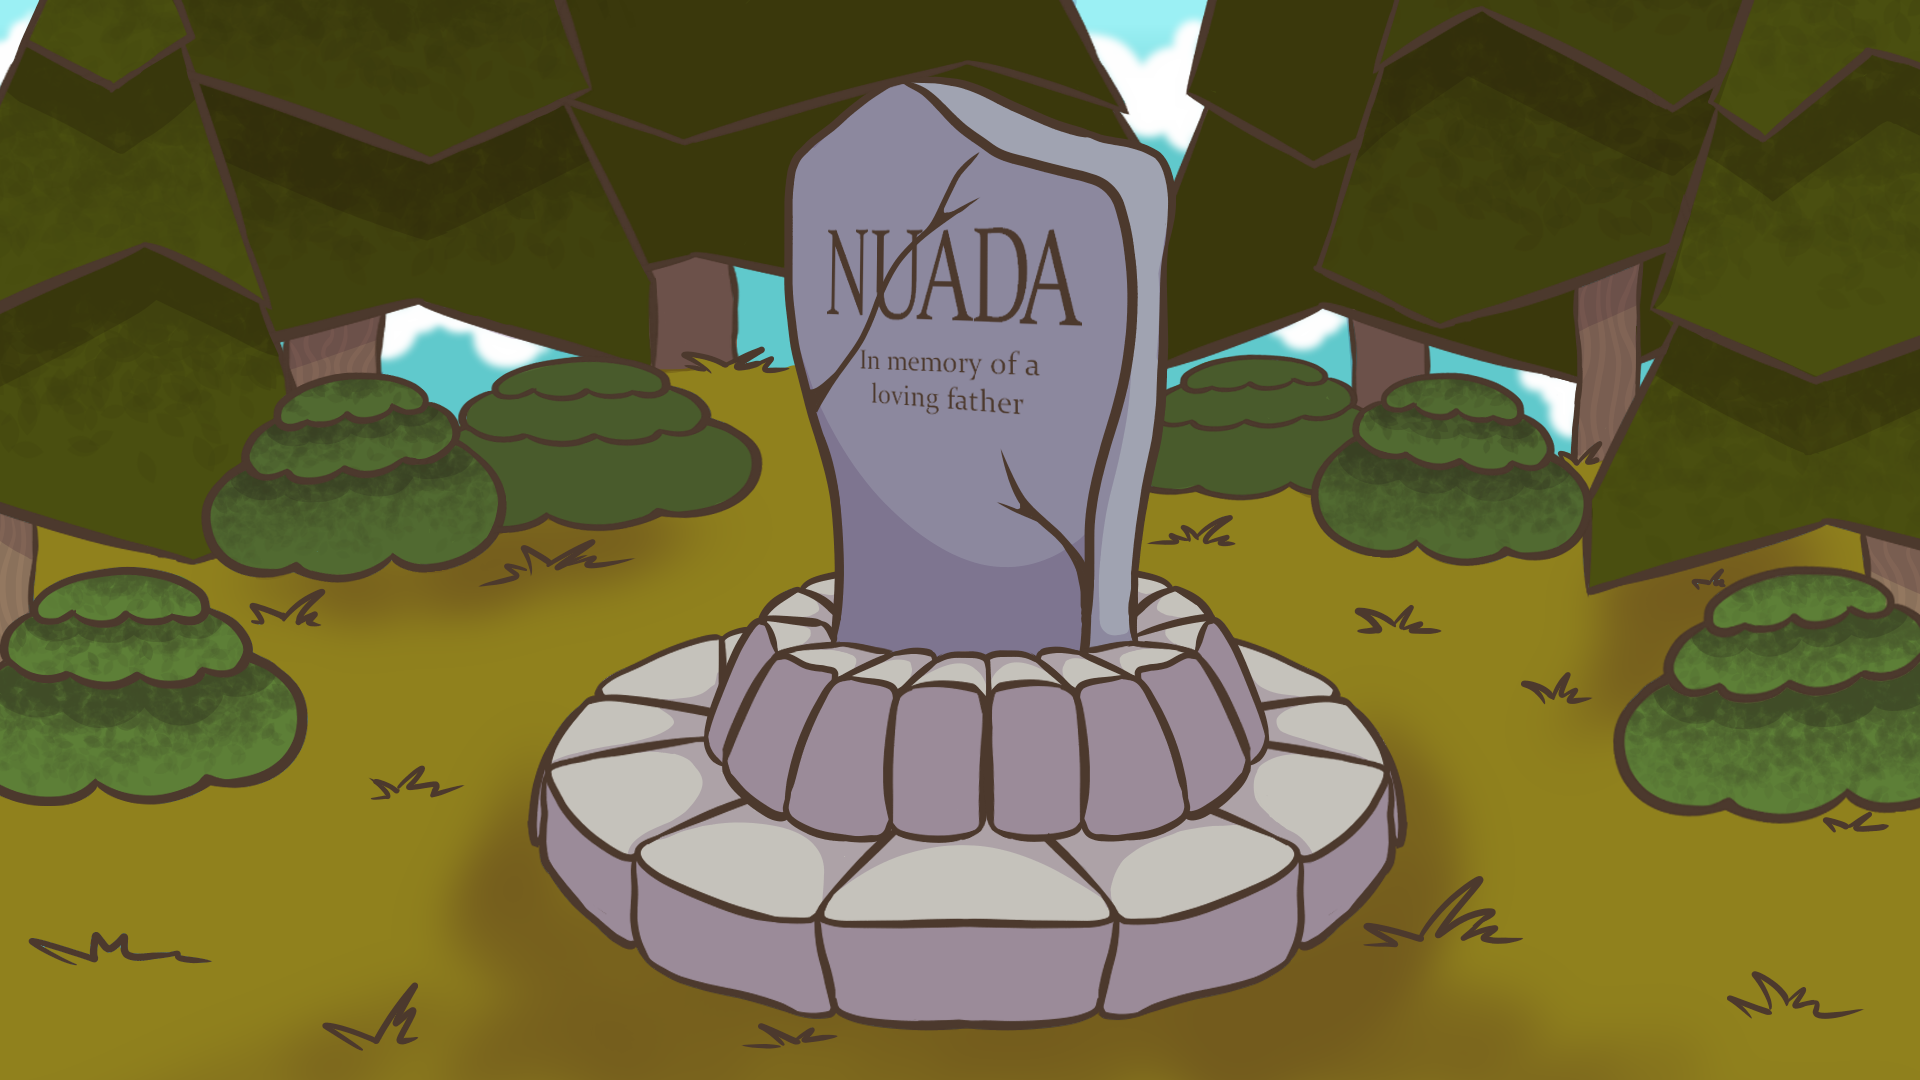
The third cutscene is used to close the game and show the player that the battle was won and the threat was chased back into the woods but Ciarán’s father died in the process.
-Storyboards-
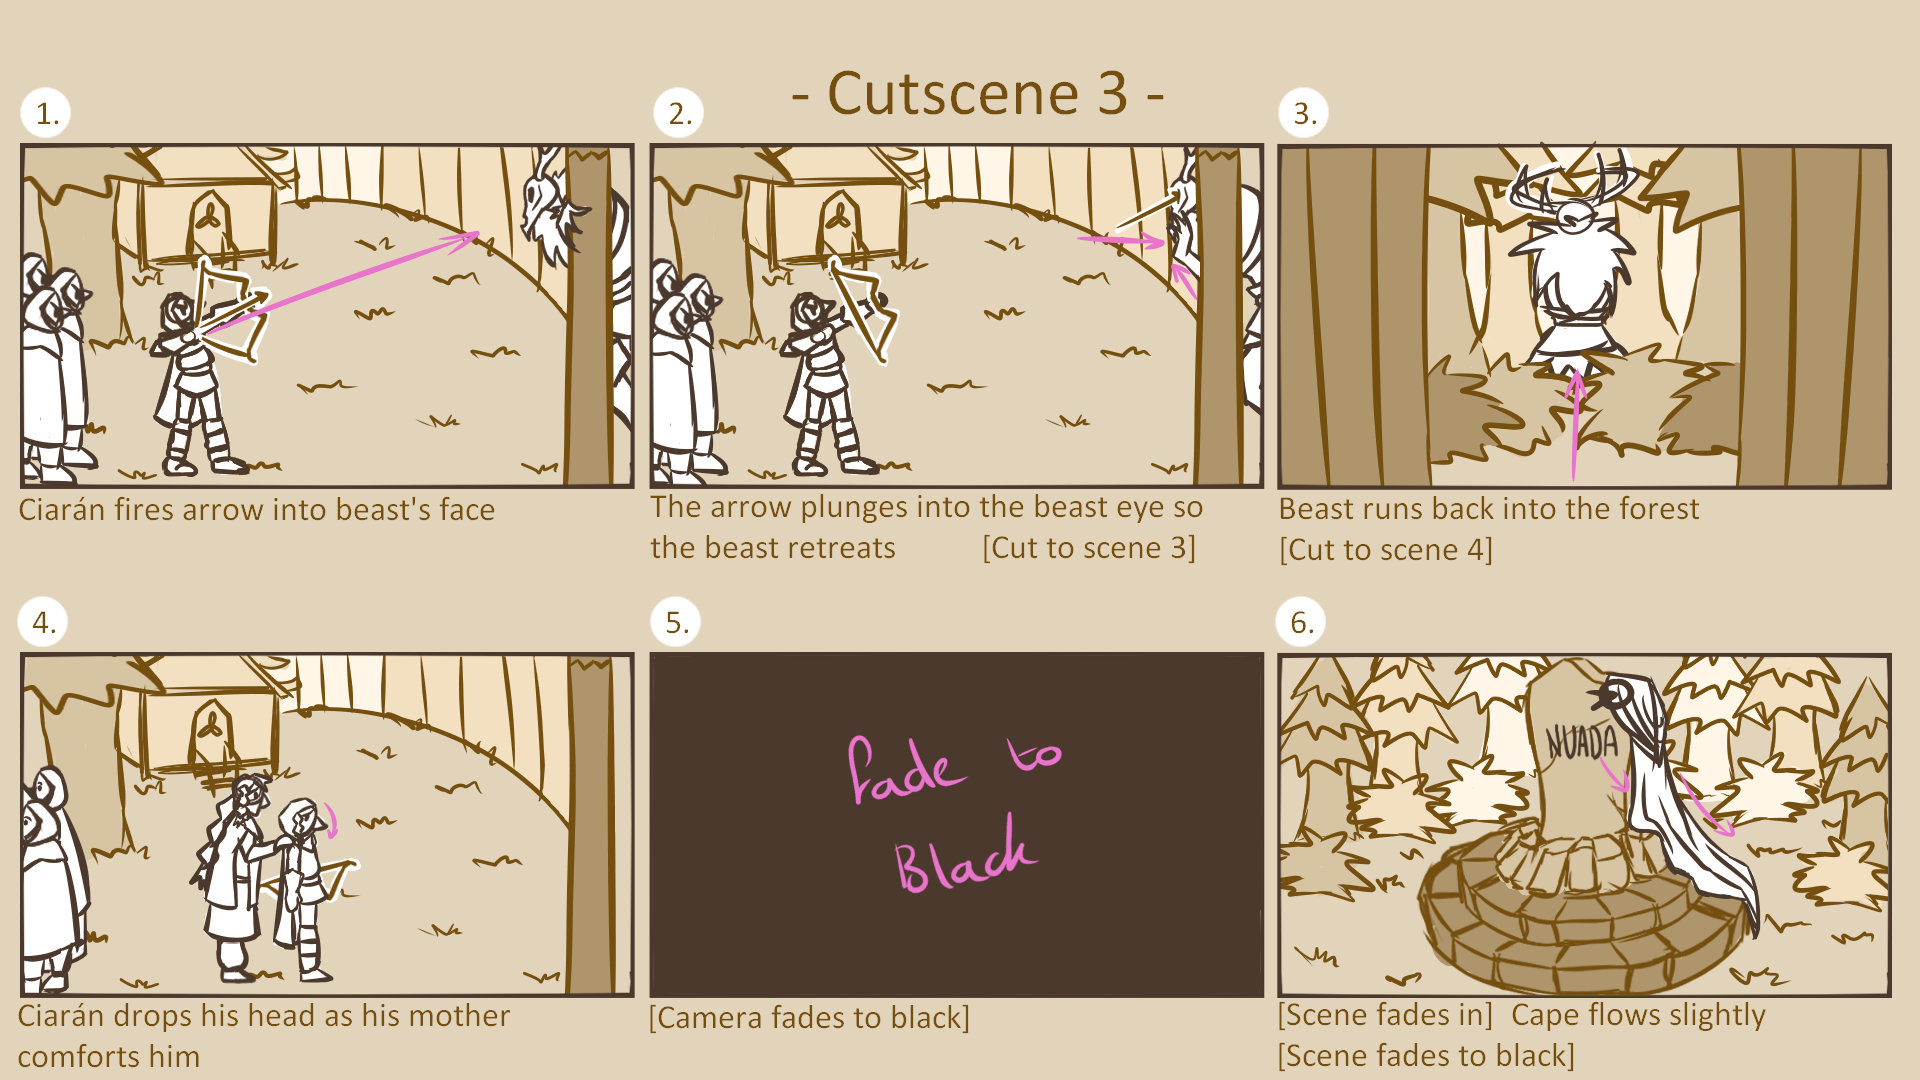

-Animatic-
-Backgrounds-

-Rough Animation-
-Final Animation-
Music used was created by Oisin McShane from the Sound design class.
____________________________________________________________________________________________________________________________
____________________________________________________________________________________________________________________________
—Reflection—
Overall, I am happy with how well the group worked together throughout this project. We made a playable game with all the features that we wanted and I like the outcome of the final game. I feel all the assets mesh well together and look cohesive in the game, the level design shows a clear path of where the player needs to go without being too blunt about it and all the game mechanics work the way we intend them too.
If we had more time I would have liked to see the game more polished, for instance the characters models legs are extended through the ground, the main enemy model wasn’t added to the final game making my third cutscene make less sense and the sprites are displayed wrong during the dialogue sequences.
To conclude, this was a great experience that I thoroughly enjoyed as it felt like working in the industry and I liked getting to know and work alongside the game design class. This experience demonstrated the effect that each team member has on each stage of the game and I am proud of what the team were able to achieve within the 12 or so weeks of this project.