—Character Concepts—
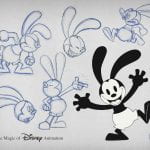
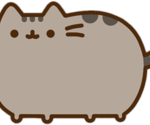
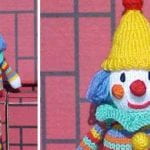
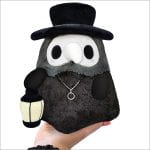
Whenever I think of cute characters I think of cats, rabbits, simple designs, etc. I looked up a variety of different themes that I would consider cute and worked from there.
Based on the references, I sketched some potential designs for my character.
I really like the clown design so I explored it further by changing the proportions of the character.
Once I decided on a set of proportions I liked I drew the character in full and made a few colour schemes. I really liked the pastel pinks, blues and yellows as they reminded me of a Flump marshmallow sweet so that is what I decided to call him.
During one of the weekly classes, Henry suggested adding a background and changing the pose to give the character context so I sketched out some ideas. I really liked the silhouette of pose 3 so I went with that one.
To make modelling easier I created a 3D turn around of my character that I could reference. This proved to be extremely helpful when modelling and it gave me a better understanding of how each part was curved and positioned from different angles.
____________________________________________________________________________________________________________________________
—Modelling Process—
—Block Out—
To begin I cleaned up my workspace, added in my 3D turn around of Flump as a reference image and positioned it.
I added a UV Sphere and positioned it for the head. Scaled it to better match the size and added another UV Sphere for the nose.
Next I added a ‘Metaball’ and scaled it. Using ‘Shift + D’ on the ‘Metaball’, I created the rough shape of the Flump’s body. I switch to ‘Object mode’ and click ‘Object -> Convert to -> Mesh’.
Finally I added another ‘Metaball’ to form the pants and converted it to a mesh.
—Sculpting: First Pass—
-Body & Pants-
I used a variety of brushes to sculpt the body to better match the reference of Flump and I repeated the same process for the pants.
Next I turned on ‘Dyntopo’ and changed to ‘constant detailing’. Adjusted the resolution to 5, turned on smooth shading and clicked on flood fill, then used the ‘simplify brush’.
Then I used the ‘grab’, ‘inflate’ and ‘smooth’ brushes to better match the shape I wanted.
-Head-
I turned on ‘Dyntopo’, symmetry for the y-axis and used the ‘Pinch’ and ‘Crease’ brush to make the mouth.
-Face-
I then added a UV Sphere that I scaled for the eye. Duplicated it and positioned it on the face.
—After Meeting with Michael—
I decided to remake the body using a cylinder and some edge loops as this gave a smoother look than the metaballs. I adjusted the edge loops to better match the shape of Flump and used the ‘Grab’ brush to adjust the bottom.
I also remade the pants using UV Spheres, the ‘Grab’ brush and the ‘Remesh’ tool. I then used the ‘Clay Strips’ brush to add mass to the pants.
After, I altered the bottom edge of the body to better match the shape of the pants using the ‘Grab’ brush and the ‘Clay Strips’ brush.
-Limbs-
For the limbs, I used a ‘Bezier’ curve that I increased the depth to make it thicker. I placed the leg and added a sub division so that I could further bend the leg and added a second ‘Bezier’ curve which I used to taper the leg. Finally, I converted the right leg into a mesh and deleted the extra ‘Bezier’ curve.
I then repeated the same process for the other leg and arms, adding half spheres to the ends of the legs to make them rounded.
-Hands & Cloth-
I added UV Spheres for the hands and used a ‘Cylinder’ for the cuffs, deleting the end faces. I scaled it to the size I wanted and used some sculpting brushes to better shape the cuffs. After I added a ‘Solidify’ modifier to the cuff so that it wasn’t one plane thick.
I then repeated the same process for the other cuff and the neck piece.
—After Meeting with Daryl—
Daryl suggested that I add a taper to the arms so I did. I also decided to add the mouth and cheeks as a texture instead of trying to model them.
—Pom-Poms—
I started by creating a UV Sphere, scaled and positioned it. I turned up the ‘Dyntopo’ on the sphere and used the ‘Snake Hook’ brush. After I duplicated the pom-pom and positioned it. [39 – 41]
—Hard Surface—
-Hat-
I created a cylinder and positioned it atop Flump’s head and added another cylinder to make the brim of the hat.
Next I scaled the hat, added some edge loops and adjusted the top of it to flair out a bit.
I then had to flip the position of the hat so it would not block the cuff of his sleeve.
-Ball-
Finally I added a UV sphere and scaled it to the size of the ball that Flump stands on.
—Finishing Touches—
To add wrinkles to the pants I used the ‘Clay Stripes’ and ‘Crease’ brush.
____________________________________________________________________________________________________________________________
—Retopology-—
—Exporting from Blender—
Clicked ‘File-> Export’ and selected the FBX format.
—Importing into Maya—
Clicked ‘File-> Import’ and selected the FBX file.
—Setting Up—
I split the model into groups that I will retop separately and combined the meshes within the groups so that I could turn them live.
—Head—
-Nose-
To begin I turned the head ‘LIVE’ and hid the rest of the parts of the model. I then turned on the ‘Quad Draw’ tool and began to add points around the nose.
I continued the same pattern all around the nose, adding another ring around the nose that leads onto the face.
-Eyes-
Next I added a ring around the eyes then filled them in.
-Connecting the pieces-
After I connected the eyes together in the middle and connected the nose.
I continued adding rings around the face until the whole head was covered.
—Limbs—
-Arms-
I turned the limbs ‘LIVE’ and hid the rest of the model. I then turned on ‘Quad Draw’ and added points to the hand just like the nose.
Next I added rings of quads up the arm until I reached the end.
I repeated the same process for the other arm.
-Legs-
Finally I repeated the same process that I did for the arms to the legs.
—Torso—
For the torso, I created a ring around the top and continued down the torso until I met the pants. I then added a ring onto the pants.
I then moved to the bottom of the pants, added some quads and repeated for the other side of the pants.
Next I added more rings and connected the pants in the middle then the torso.
—Clothing—
-Pom-Poms-
I added some points to the front of the pom-poms and continued this until I covered all the visible faces of the pom-pom.
-Neck Piece-
To begin, I created a ring around the neck piece then continued until the top of the neck piece was covered.
I repeated the same process for the underside of the neck piece.
-Cuffs-
I made a ring around the top of the cuff, covered the rest in quads and repeated for the inside of the cuff.
—Hard Surface—
-Ball-
I placed points on the face of the ball then covered the whole ball.
—Finishing Touches—
I put all the low poly pieces into the same file, cloned the duplicate pieces and placed them.
____________________________________________________________________________________________________________________________
—UV Unwrapping—
—Head—
To begin, I selected the head and opened the ‘UV Editor’. I cut the eyes and the nose from the face and created seams along the nose.
Next I cut seams along the head, unfolded it and used the ‘Optimize’ tool then the ‘Layout’ tool.
—Limbs—
I cut the hand from the arm and cut seams around the hand. I then cut a seam along the inside of the arm and repeated the same process for the other arm.
For the legs, I cut a seam along the underside of the foot and up the back of the leg, repeating the same process for the other leg.
I then used the ‘Optimize’ tool and then the ‘Layout’ tool.
—Torso—
I separated the pants from the torso and cut a seam up the back of the torso.
I then cut a seam down and under the pants and a seam along the back of the pants. After I used the ‘Optimize’ tool and then the ‘Layout’ tool.
—Clothing—
For the pom-poms I cut some seams along the edges, straightened the UVs and repeated for the other pom-pom.
For the neck piece, I cut around the inside and the outside, flipped one of the faces and used the ‘Optimize’ tool on the pieces.
For the cuffs, I cut a seam along the wrist and the base of the piece, made a seam along the top of the cuff and used the ‘Optimize’ tool. I repeated the same process for the other cuff.
After I used the ‘Optimize’ tool and then the ‘Layout’ tool on all of the clothing pieces.
—Hard Surface—
For the ball, I created seams along the edges and along the back.
For the hat, I cut off the top of the hat from the brim and put a seam along the back. I then cut the faces off the brim and created a seam along the back. After I straightened the UVs.
Finally I used the ‘Optimize’ tool and then the ‘Layout’ tool.
—Finishing Touches—
I assigned each group of pieces a new material and used the ‘Layout’ tool to arrange the UV maps.
—Clean Up—
Finally, I opened the ‘Hypershade’ window and removed any materials that weren’t used, selected the model and clicked ‘Mesh Display-> Soften Edge’.
____________________________________________________________________________________________________________________________
—Texturing—
—Exporting from Maya—
I exported the model by selecting all the parts and clicking ‘export selection’.
—Importing into Substance Painter—
Clicked ‘file -> new’. Adjusted the settings and clicked ‘ok’.
Next I baked the low poly mesh using the high poly mesh but discovered that it seemed to create strange raised areas so I decided to just bake the low poly mesh instead.
—Body—
To begin I added the ‘Fabric Soft Denim’ material and removed the colour then a roughness layer to remove the shininess from the model.
On a fill layer I added a peach colour for the face and on another layer I added a blue colour for the top and yellow for the pants.
Added blue for the nose and pink for the cheeks with the Alpha brush ‘Shape Circle Squeeze’. I then used brown for the eyes, re-did the cheeks so that they would have a bit of height and indented the mouth.
—Limbs—
I added the ‘Fabric Soft Denim’ material and the roughness layer and a skin colour as a base for the limbs.
Next I added the pink stripes, then the blue stripes and finally the yellow stripes.
—Clothing—
Added the ‘Fabric Soft Denim’ material and the roughness layer then added a fill layer with a white colour for the cuffs and neck piece.
Finally, I added a pink colour to the pom-poms.
—Hard Surface—
I added the ‘Fabric Soft Denim’ material and the roughness layer then a fill layer with a pale yellow.
On another layer I painted a blue segment on the ball then a dark pink segment.
And finally I paint the hat yellow.
—Finishing Touches—
I removed the ‘Fabric Soft Denim’ material from some of the pieces by using Black Masks.
—Exporting from Sketchfab—
Go to ‘file -> Export Textures’ and adjust the settings.
____________________________________________________________________________________________________________________________
—Rendering—
—Uploading onto Sketchfab—
I uploaded the FBX file of my model.
—Adding Textures—
-Materials Tab-
Firstly I click onto the ‘materials’ tab then on the ‘base colour’ box, ‘texture’ and click ‘import textures’.
I repeated the same process for the other texture maps.
Then I repeated the same process for the other maps.
Body
Clothing
Limbs
—Adjustments—
-Lighting Tab-
I added some directional lighting and ground shadows then added a background called ‘Pine Tree Arch’.
-Post Processing Filters Tab-
Next I added some ‘Grain’ and ‘Depth of Field’.
Adjusted the ‘Sharpness’ and ‘Vignette’.
Then turned on ‘Bloom’ and adjusted the ‘Tone Mapping’.
—Publishing—
—Final—
Share Code: https://skfb.ly/o6rHA
____________________________________________________________________________________________________________________________
—Reflection—
Overall I think this assignment went well for me, I really enjoyed designing and modelling my character. I am really happy with the outcome considering this is my first proper model made in Blender. I really enjoyed using the system and the tutorial videos on Blackboard really helped me but I know I still have a lot to learn when it comes to sculpting. To improve, next time I will use more quads/faces when retopologising to retain more of the details from the sculpt.
With texturing, the only problem I faced was when I tried to bake the high poly texture onto the low poly one and it left strange raised marks on the model that affected the textures that were applied, overall, this meant that I had to use the low poly sculpt as the final model which wasn’t that big of a problem. The rest of the texturing went smoothly and I like how the denim material makes Flump look like a soft toy.
After this I feel less intimidated by Blender as I have had tutorials, practice exercises and an assignment that needed to be completed in the system. Next time I need to better my time management as I feel I spent too long sculpting which, in turn, made me stress about getting the other stages done on time for the deadline but apart from that I really enjoyed using Blender.


