On our very first week with our lecturers’ and the courses, we were introduced to the module ‘Timing for Animation’ which has taken myself back to the first few years of being an undergraduate when I learnt how to animate the 2D and 3D animation. This week our lecturer gave us an explanation of the assignments this first semester and what we need to do to break it down. This refreshed my mind from the previous years and gave me the realisation I needed to think back and go forward on making improvements to my skills and work on my strengths, weaknesses and experimentation. This week we were given the task on animating a bouncing ball in our own style and to think more and understand each specific principle of animation, especially addressing the principle ‘squash and stretch’.
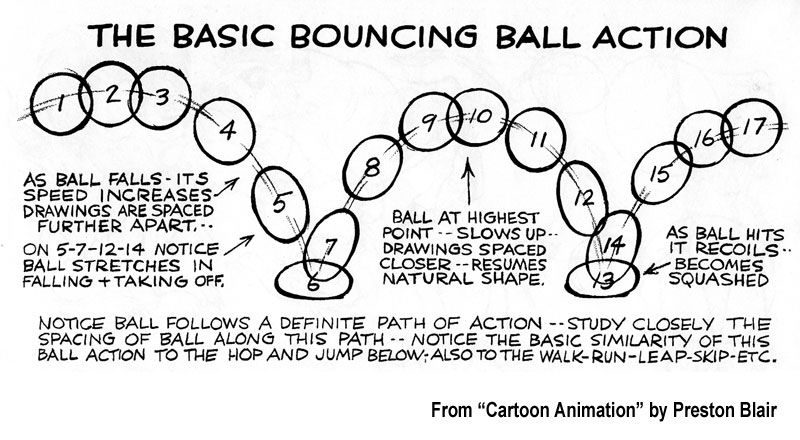
To make sure I fully grasped the concept of the principle, I went back to my resources which included the Animator’s Survival Kit by Richard Williams. Afterwards I looked for similar specialist animators such as Preston Blair and Ken Harris for the similarities and differences they had presented the basic bouncing ball action which involved the principle but as well as contact to make the ball have more life in it. I then went online for various examples of the squish and squash to get my head around this to make the ball ‘lifelike’ with each bounce.

Soon after researching and collecting resources, I decided to go with the 2D direction for this task with Krita, where I simply outlined the concept of the curves and distance for the first step then relocated the ball at it’s starting point and thinking on what frame per rate should I work with. So I had gone with the 2’s fps for the whole sequence as I could’ve picked the 1’s or 3’s but picked the 2’s as I always spaced the frames so I could do the in-betweens every 2’s fps.