

(This is my finalised pure ref but I added stuff to this as I went) I first made Pinterest boards to try and get some of my ideas together (my Pinterest board) then I started to make the pure ref board. I added screenshots of my Pinterest to the Pure ref board just so all my references where in one place. Then I began My character design process.
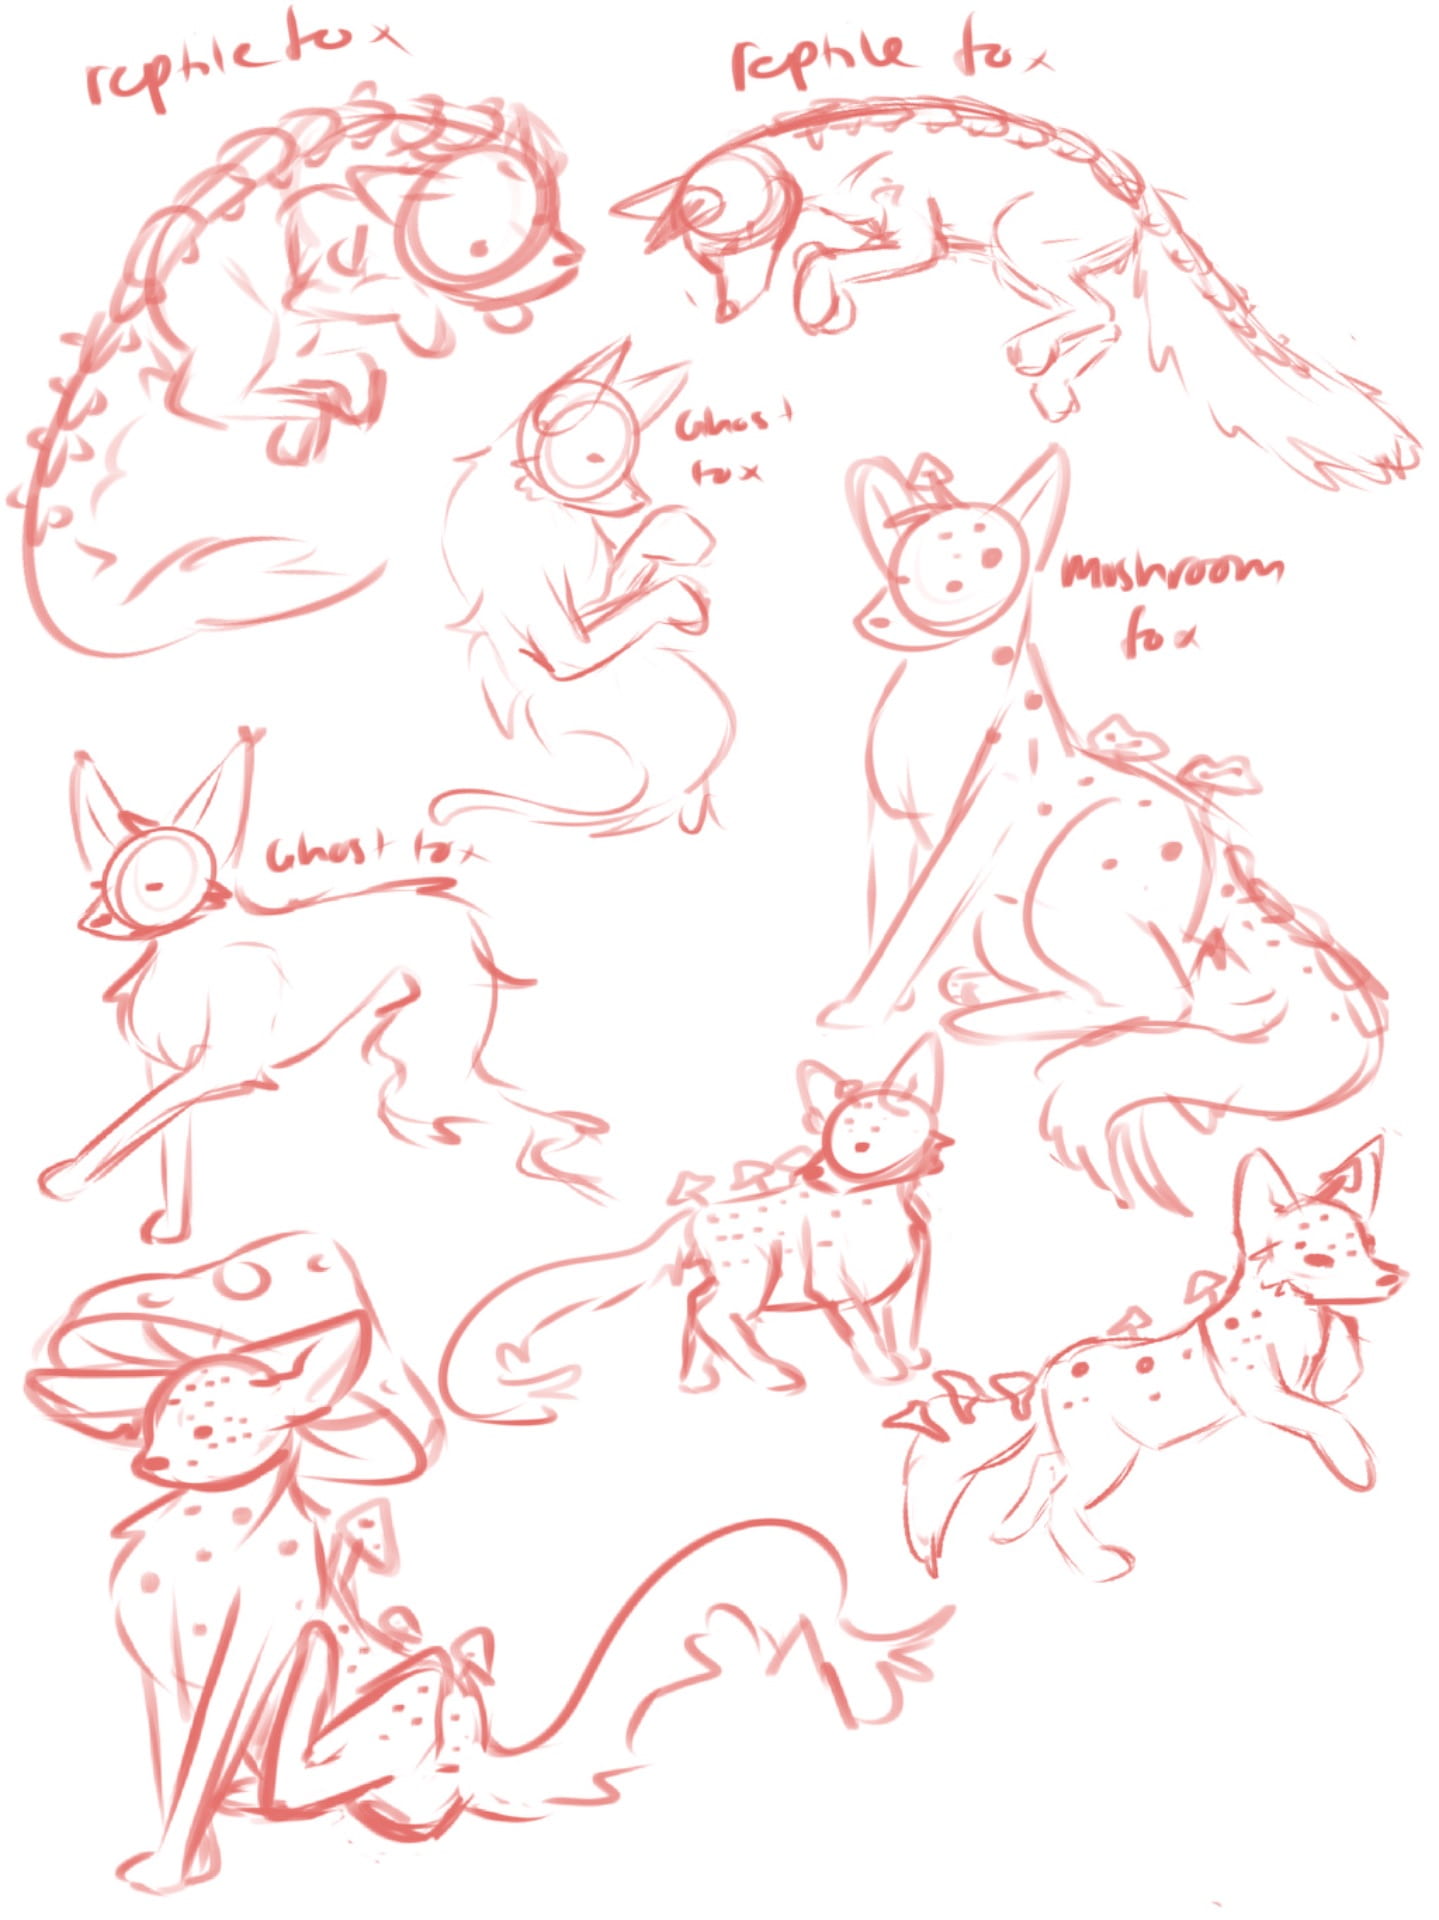
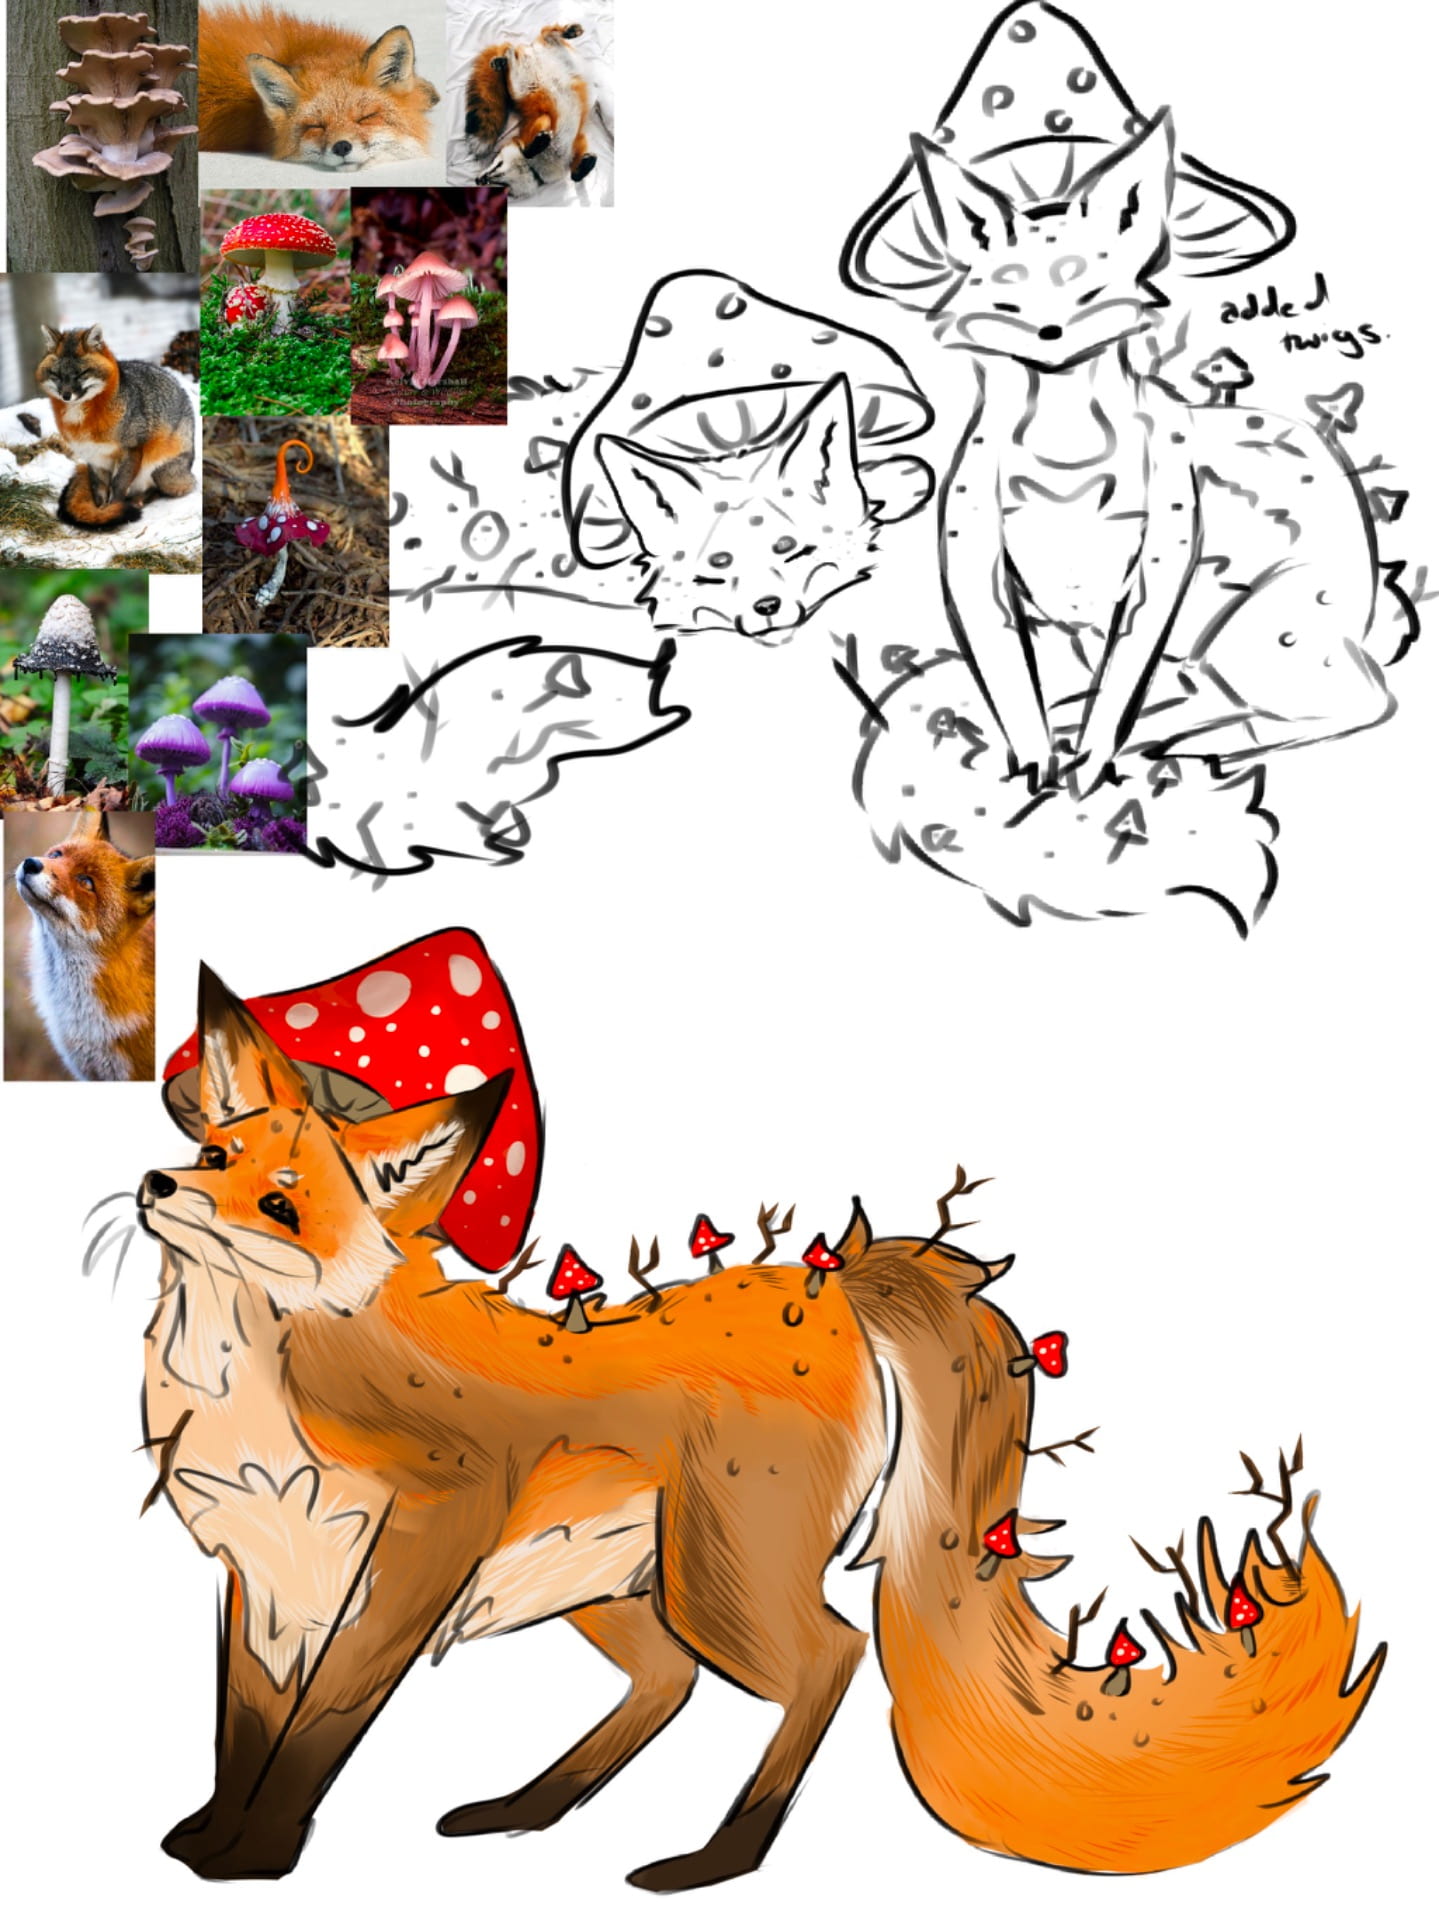
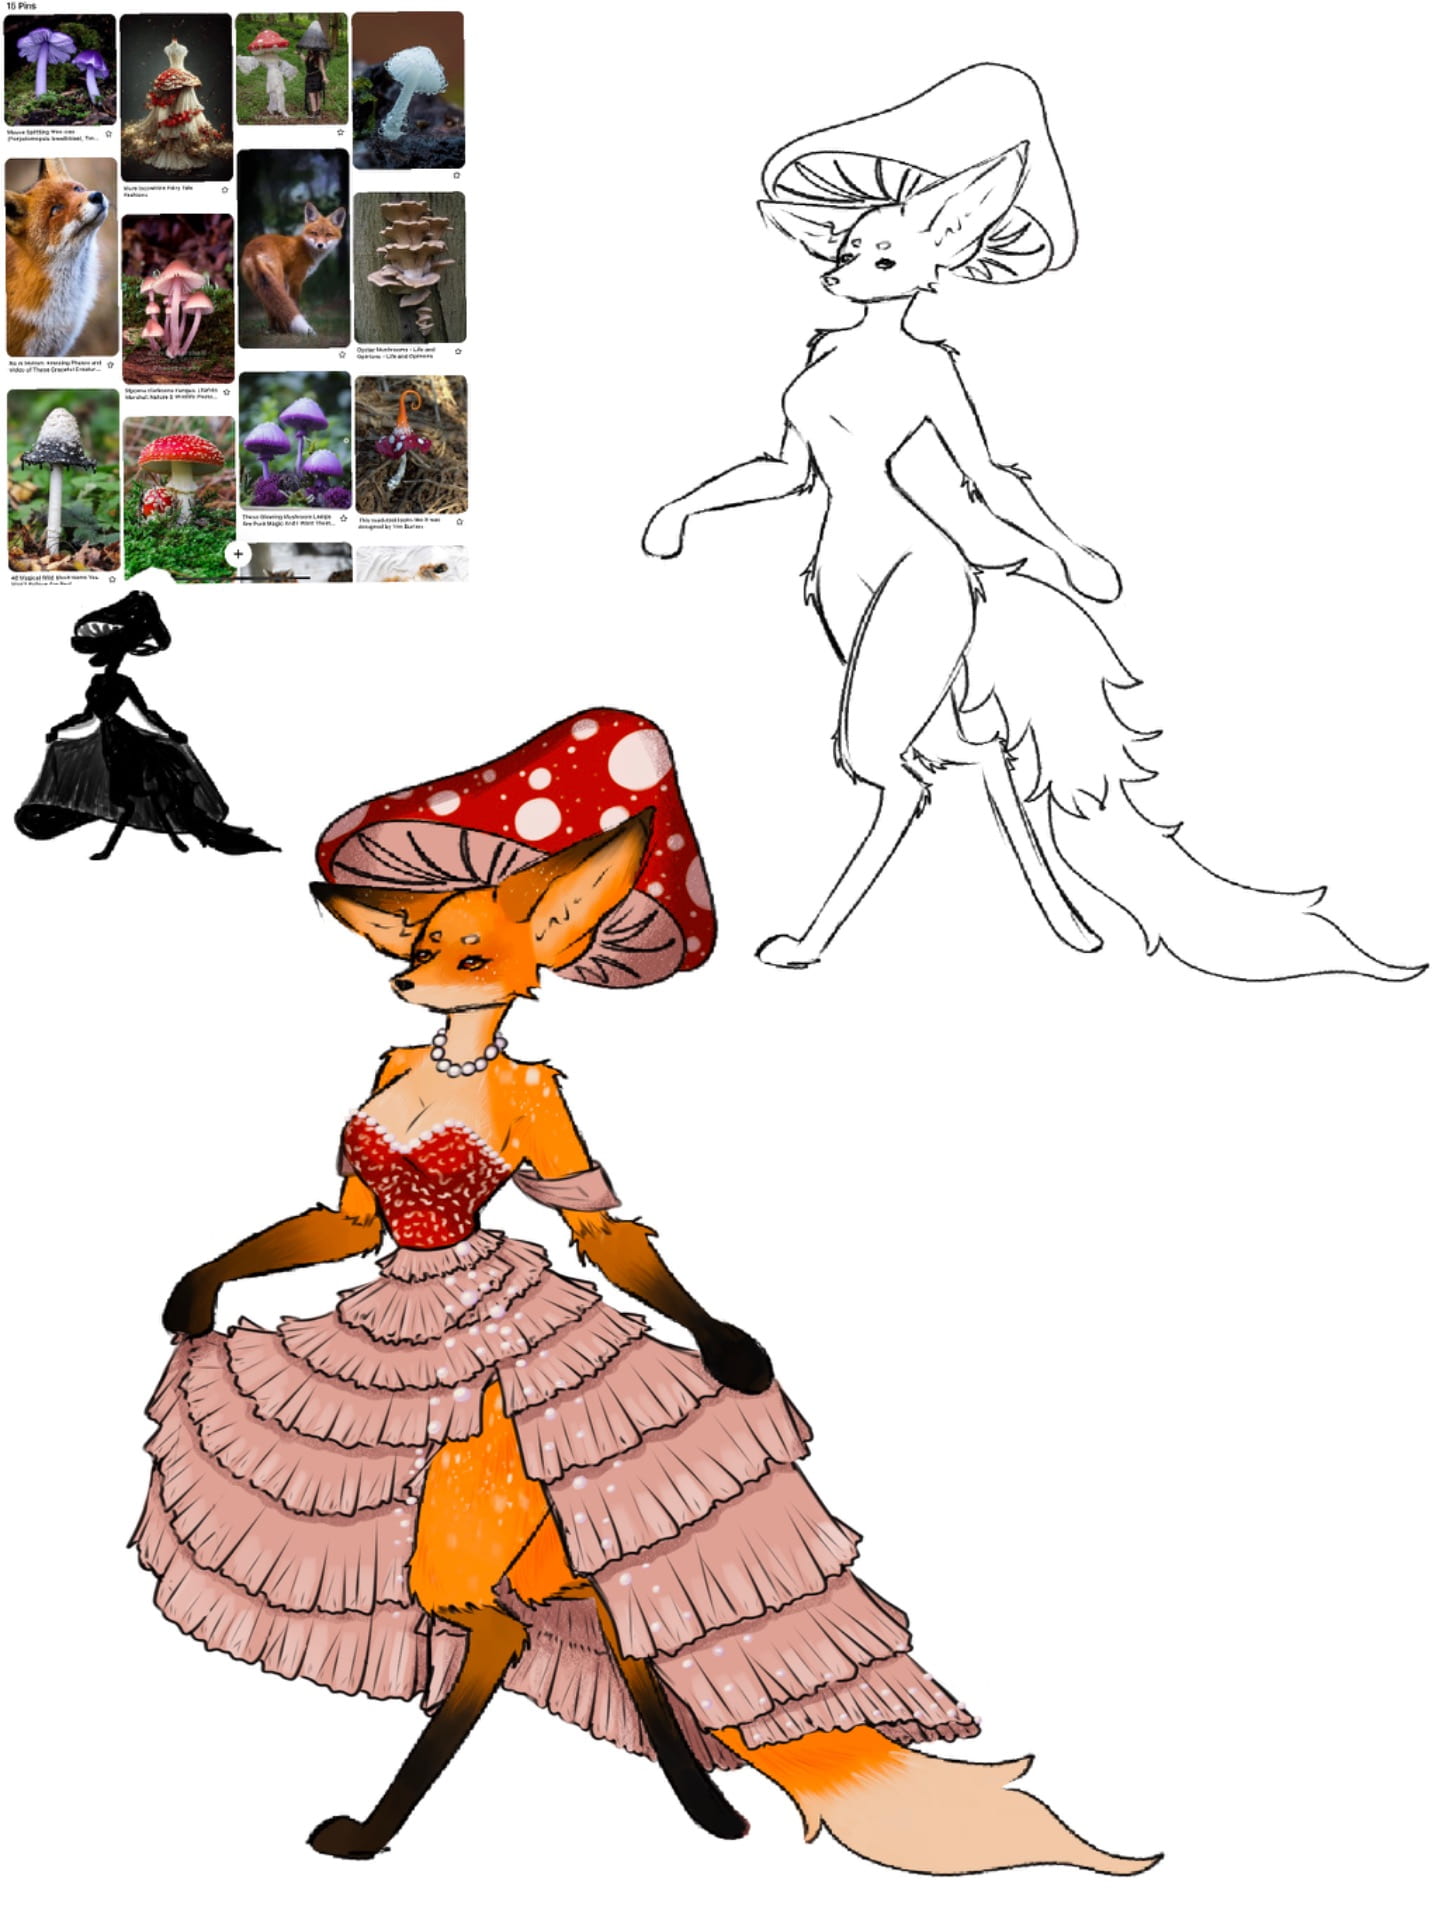
I knew very quickly I wanted to make a fox inspired creature, however, I was stuck between what kind of fox to make. My initial ideas included A reptile fox, A ghost fox, and a Mushroom fox, I really liked all of them, but the one to the bottom left, was the sketch that made me pick the mushroom fox. I looked up types of foxes, and types of mushrooms. I wanted to make the fox a mix of a Red fox, and a Darwin fox, and I wanted the mushroom to be the Fly Agaric Mushrooms, (or Amanita muscaria) . Then I had to decide if I wanted to make them more like an actual fox, or more humanoid. I really liked the humanoid one but I also wanted to make a more creature like model as opposed to a character model. So I decided to move forward with the 4 legged version.
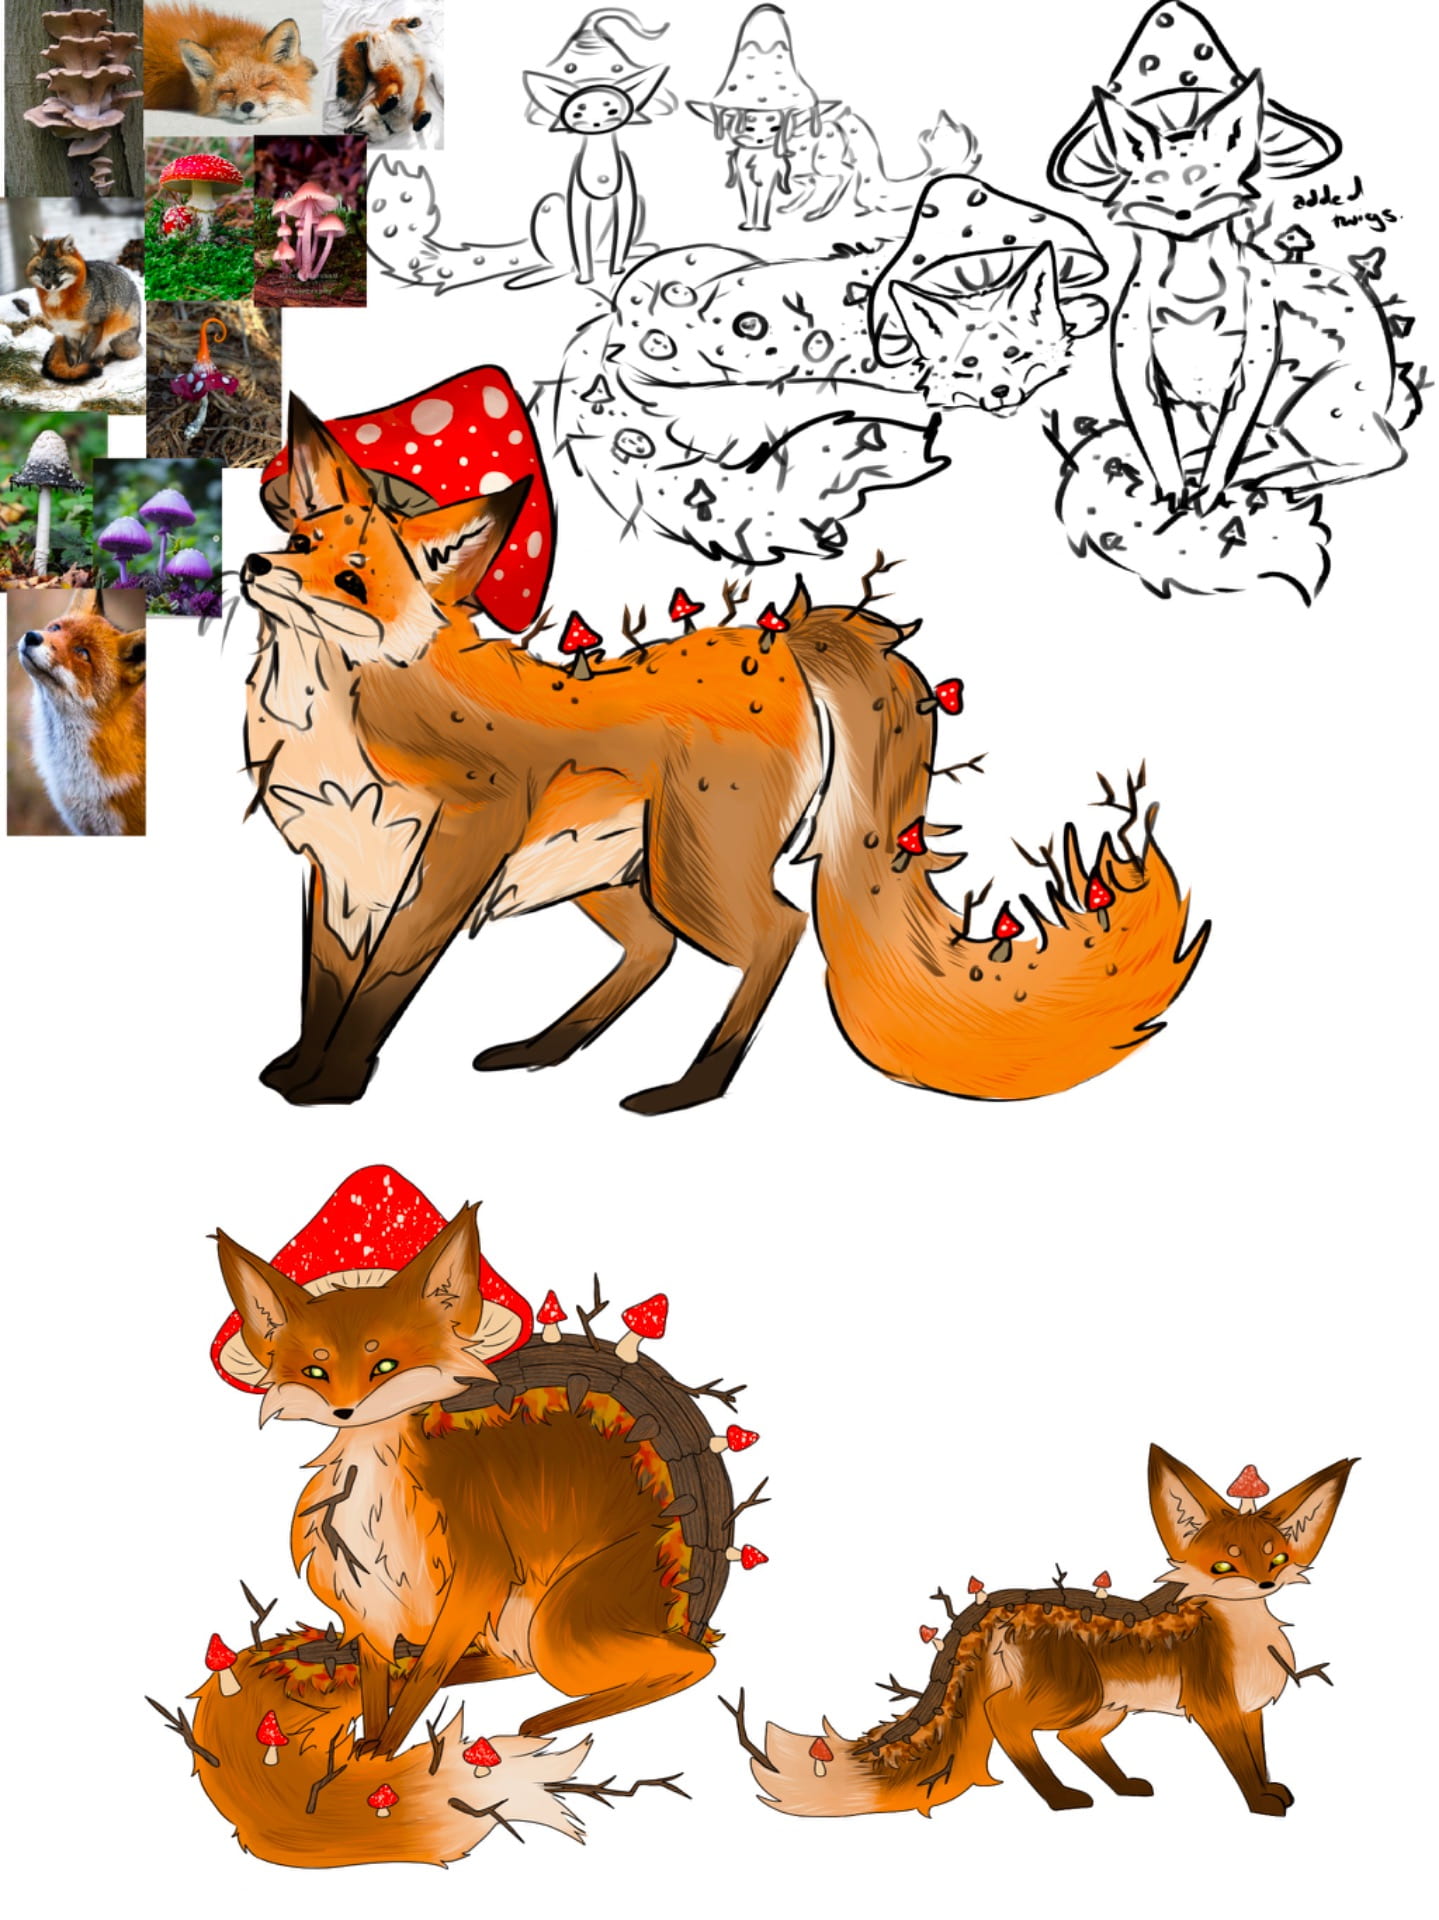
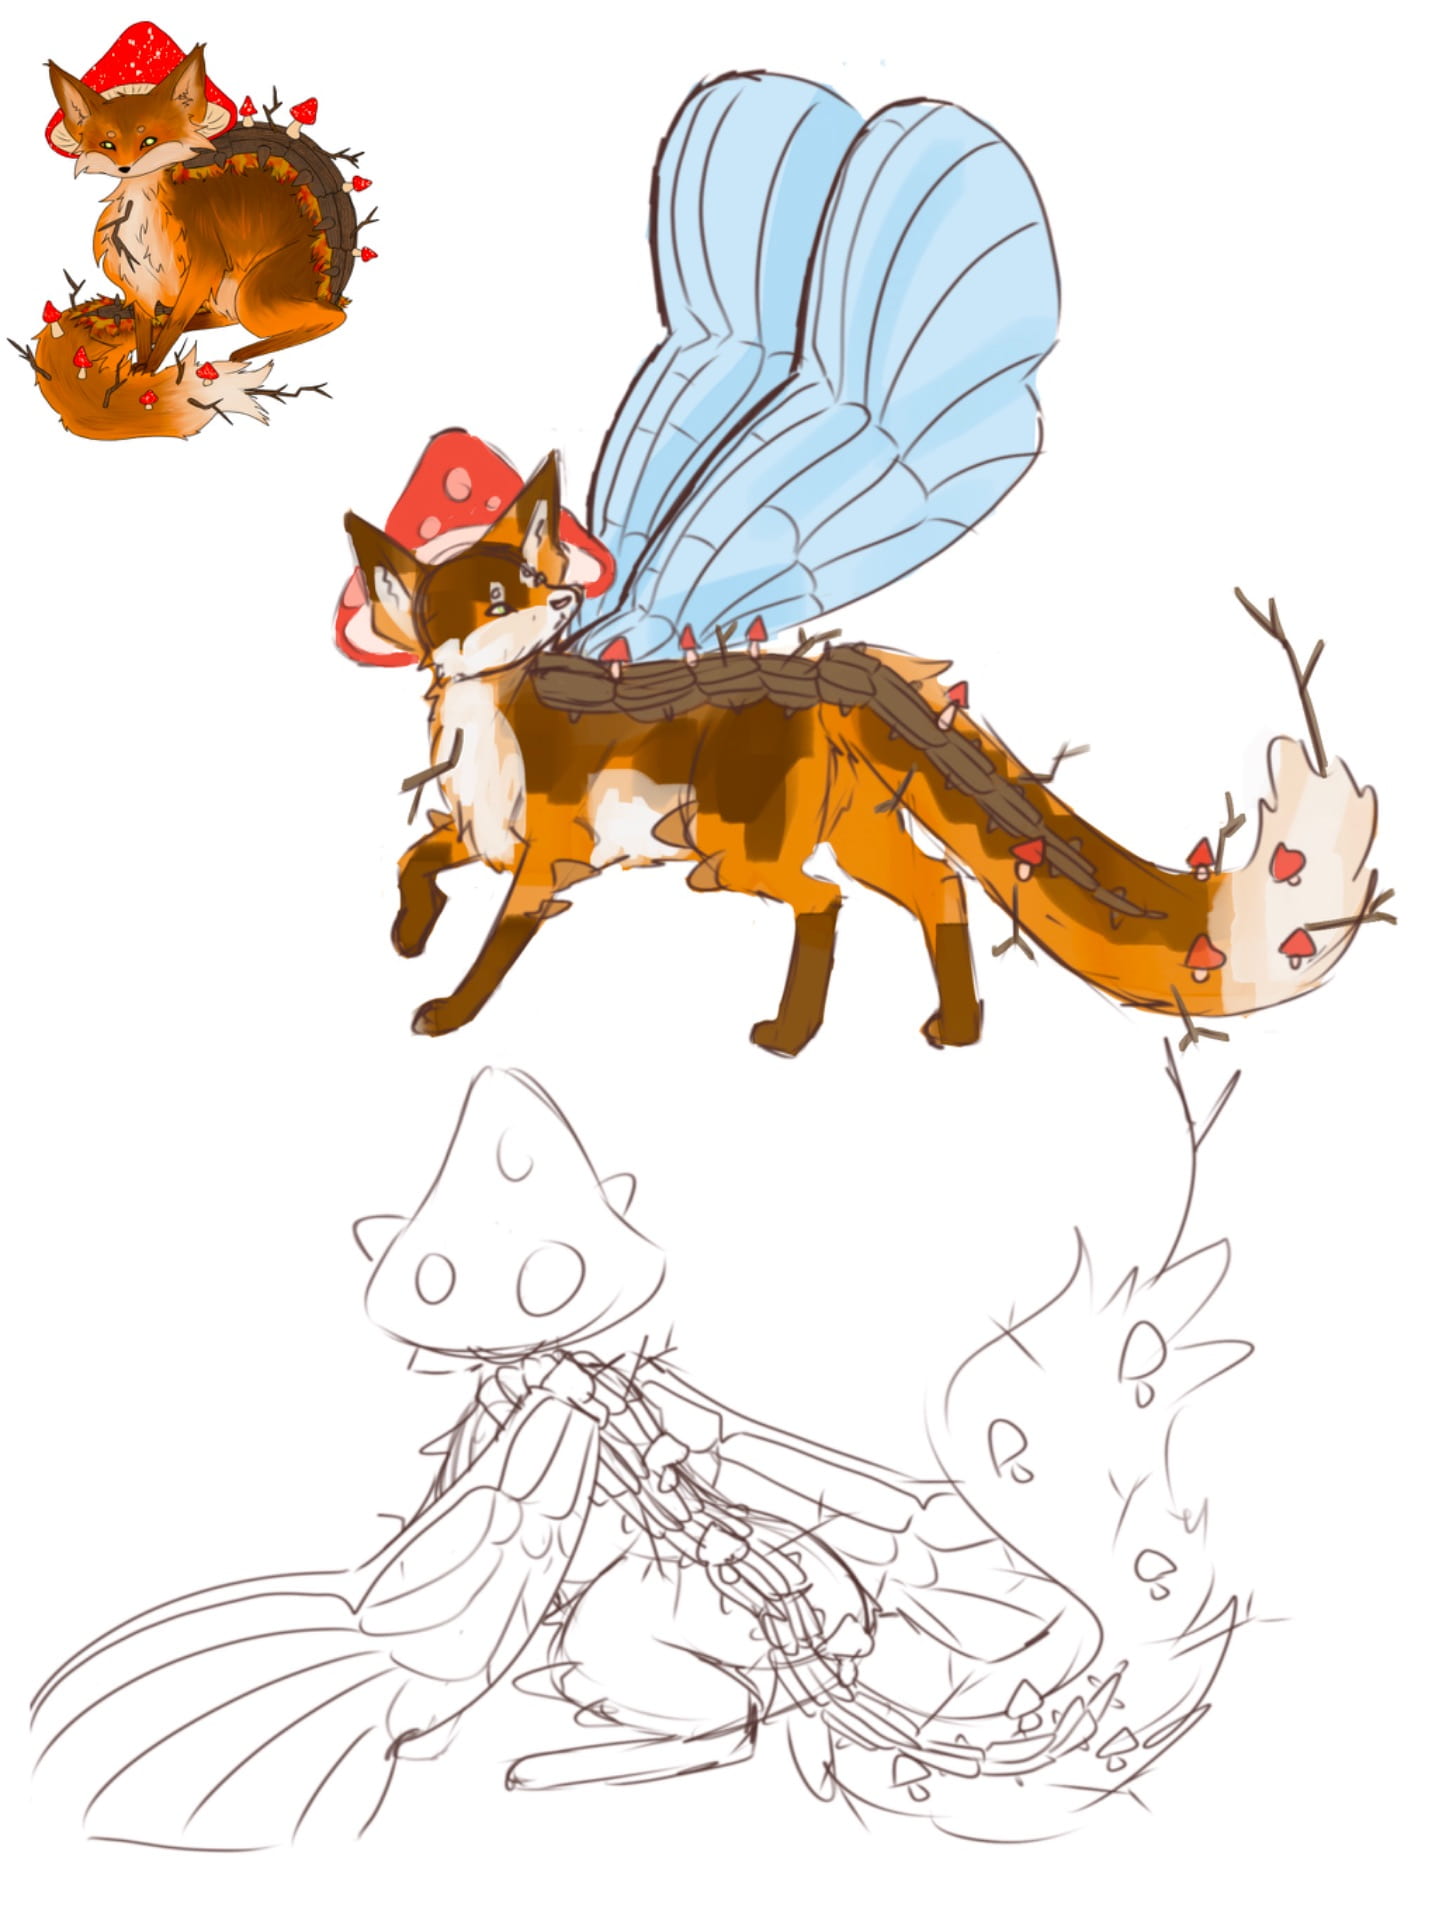
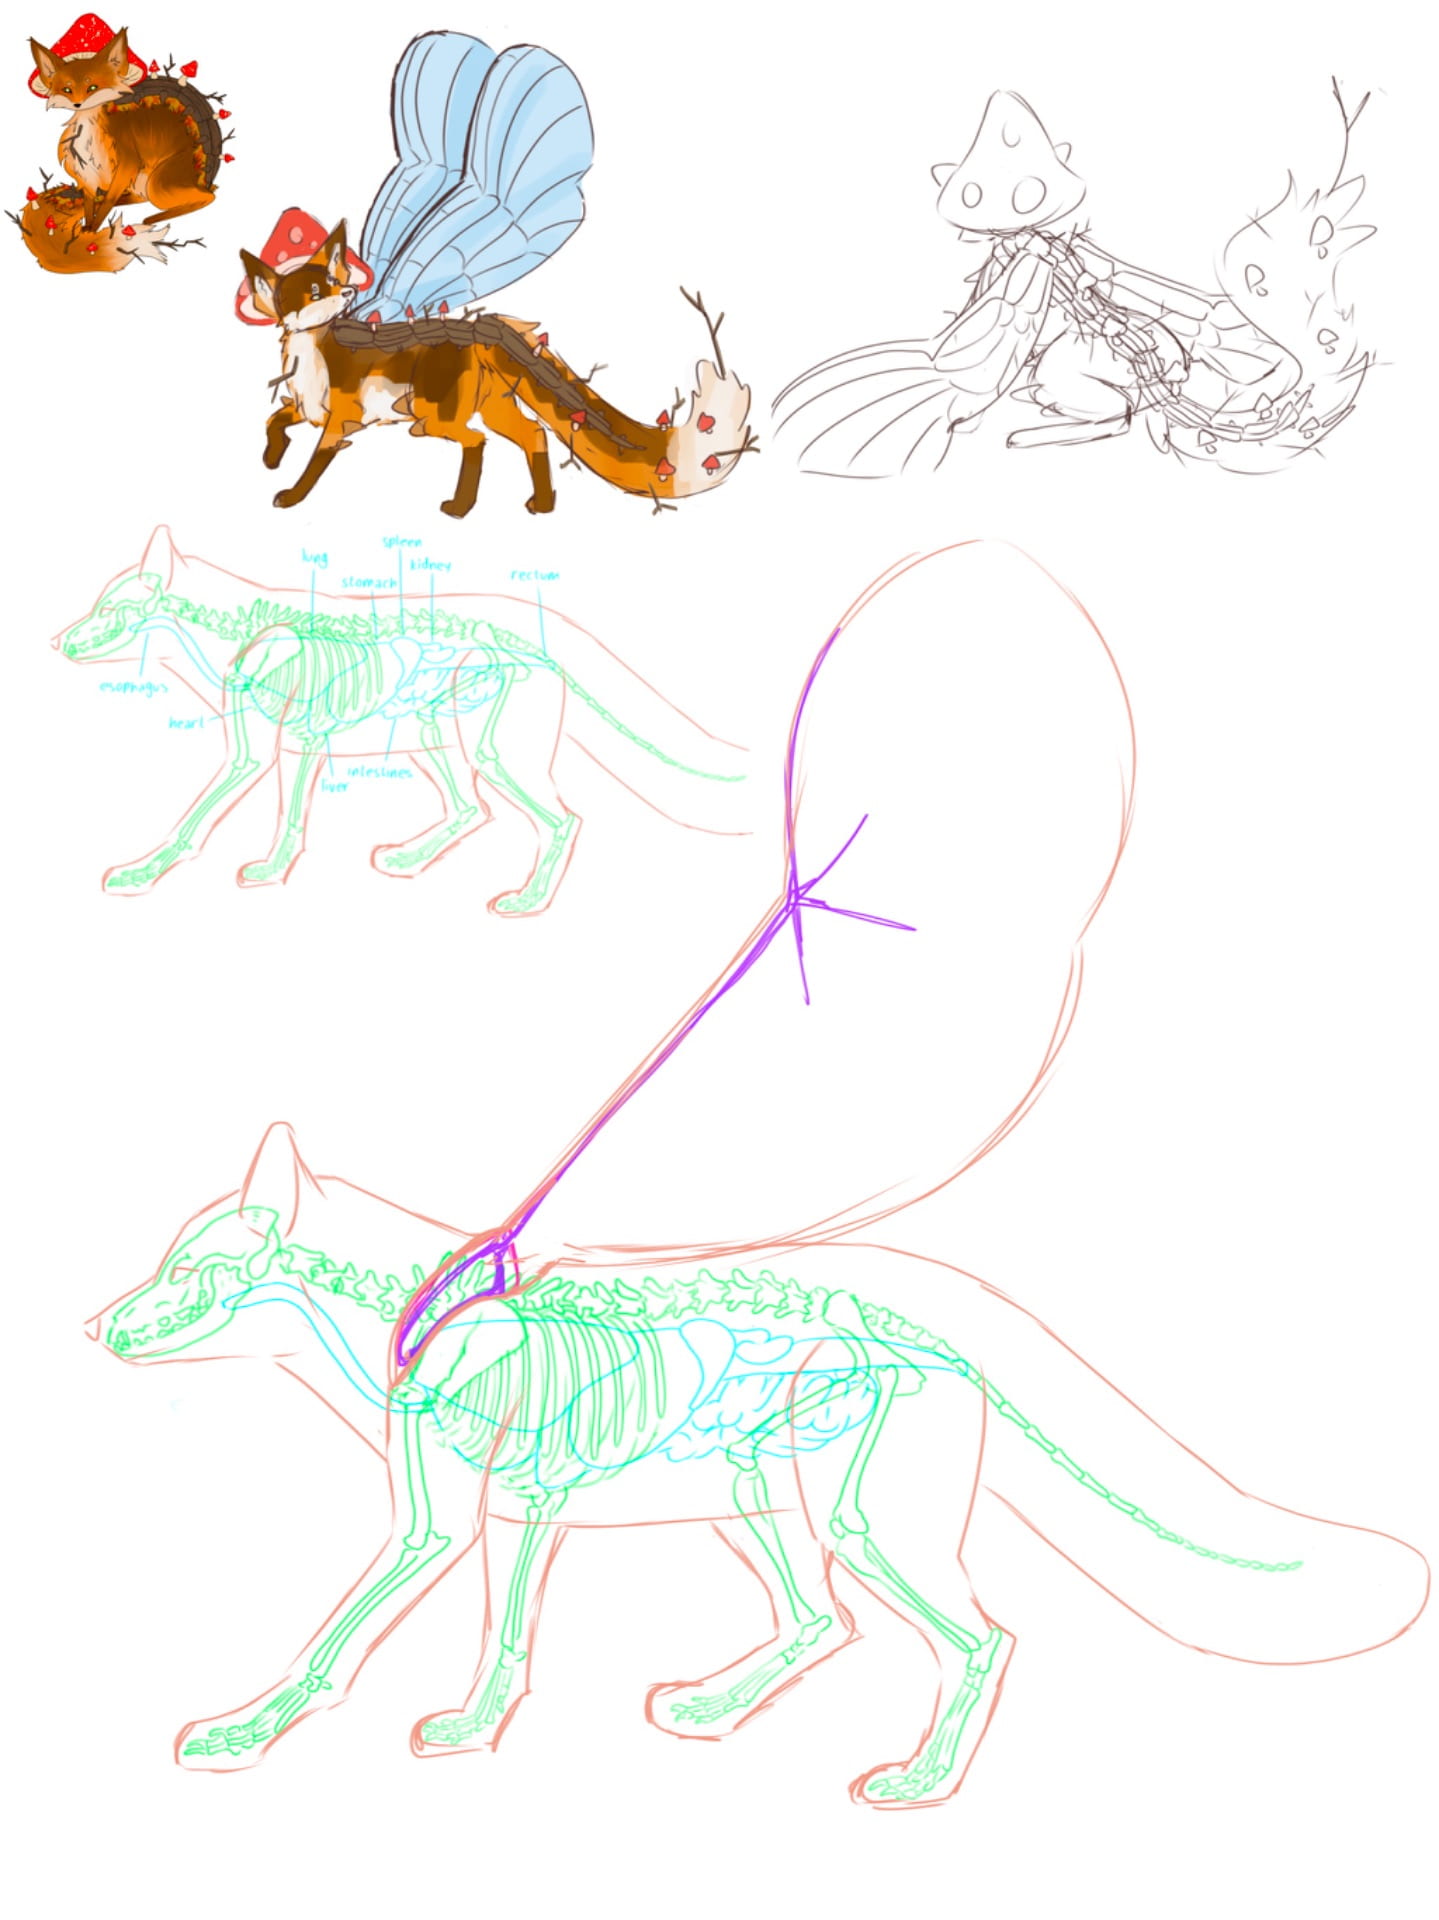
I Felt the original design was a little basic, and so I wanted to add the scaled back from the Reptile version of the fox, that I had drawn in my original sketches. I thought it could be cool to have this look like tree bark, as the mushrooms and twigs on the back where to help camouflage the fox with its surroundings, I also thought to add some brighter colours right by the bark, to look like fallen autumn leaves. I did like these changes, but the leaves felt a little too much, so I opted to take them out. But I still wasn’t happy with the design. Around this time I was working on some of the homebrewed Races for a DND campaign I am writing. One of them being a type of Fairy that has Dragonfly wings. And so I tried out what the Fox character would look like if they had dragonfly wings, and I really liked how the sketches turned out. So I tried to make it work anatomically by sketching out the internals of the fox and seeing if I could fit the dragon fly wings in, I also referenced anatomy of a dragonfly to see what kind of muscles are used to make the wings move. The muscles are very compact but expand when in use, they make roughly a sphere shape when both are expanded. There is one muscle that lifts the wings and one muscle that lowers the wings. The outer ones pull it down and the inner ones pull it up. I realised because the muscles never completely touch (there is a gap at the very top) I could put the two muscles on either side of the spine without worry that they would end up causing damage to the Spinal Colum. I didn’t feel like my design was missing anything anymore. So I decided to move forward with blocking out the model in blender.
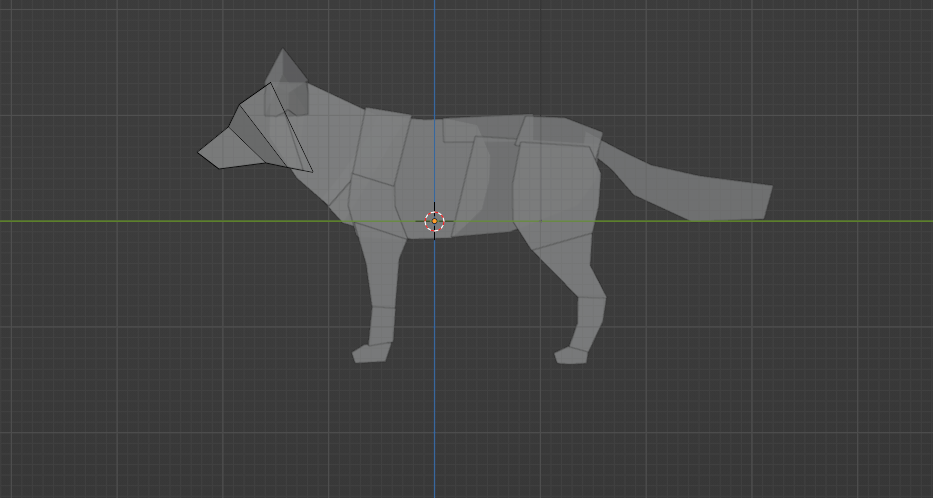
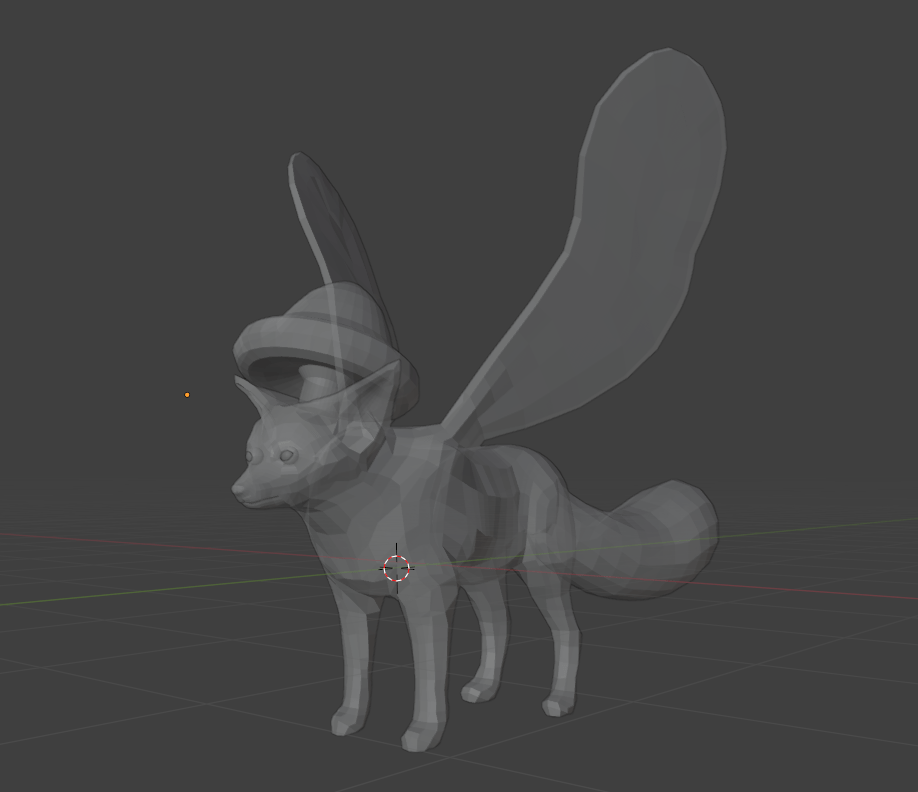
I blocked out my fox character using a reference, and mirrored the legs and ears. To keep Them in line with each other. I found this process really fun, and quite relaxing. Because of how easy it was, I then blocked out the wings. After this I joined the pieces of the blocked out model and then smoothed out the shapes, and started to build up the areas of muscle on the fox, using a few anatomical reference pictures just to make sure the fox’s proportions were right.
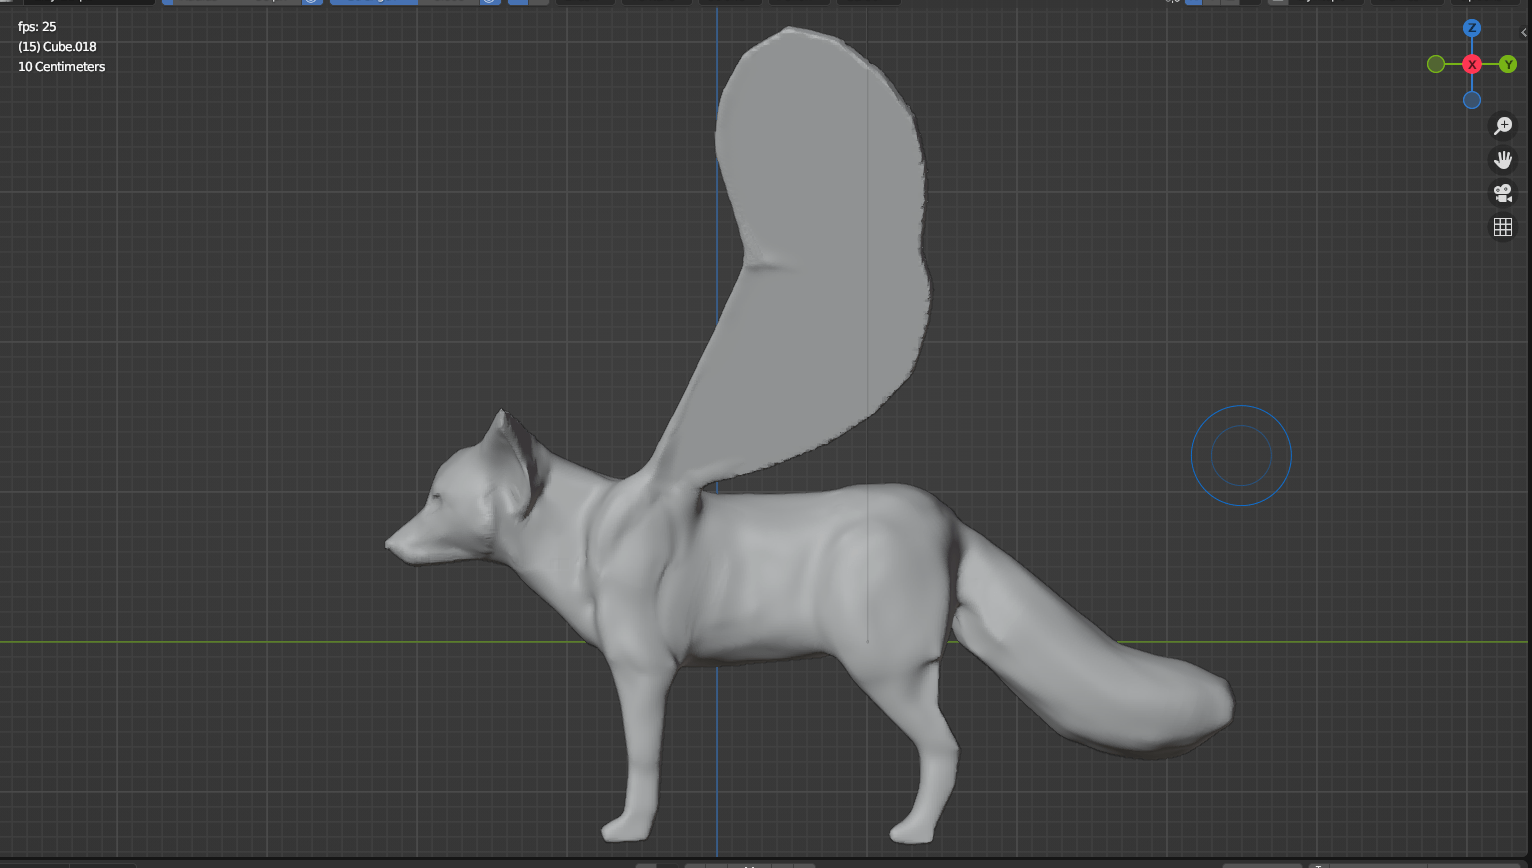
I then smoothed out the areas I built up in sculpt mode, and also made the tail a bit bigger as it felt a bit small for what I wanted the tail to look like. I also continued to bulk out the body a bit. as it still felt a little like it was just flesh and bones and so I bulked out my model so it would start to look a bit more fluffy.
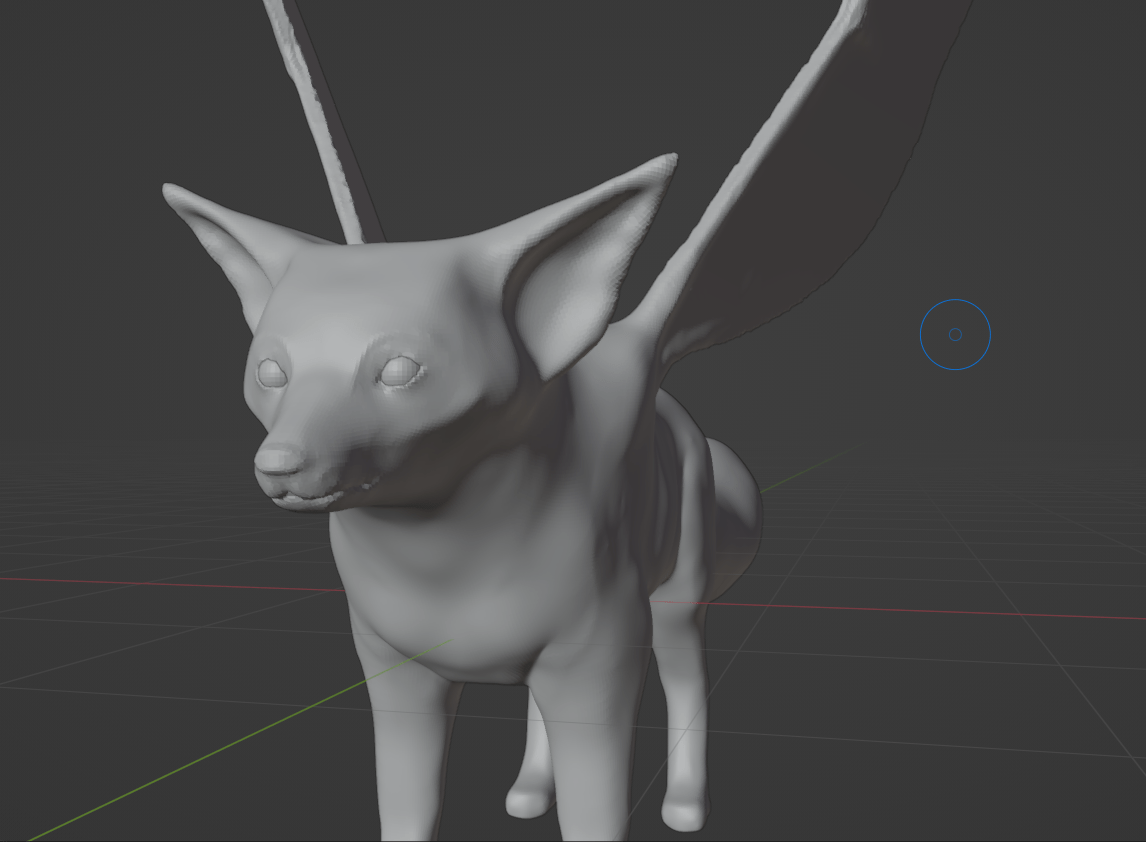
I then focused on the face, and adding eyelids, and some more nose definition, as well as the indentation of the mouth. I was really happy with the face, and how it turned out. I focused on the planes and edges of the face, as foxes have more sharp features, and so I thought that if I focused on the sections of the face and trying to make them distinct It would help it read as fox and not wolf. However, I had to be careful to not make the face comically sharp as I was going for a more realistic model.
I also started to sculpt the veins on the wings, and I added the eyes. The wings took a really long time, and I only realised afterwards that I didn’t need to do it yet, I should have done this after I retopologies the model, as the details are going to disappear when I do that. Though on looking back, this did help me later, as I put the model in see through mode and was able to trace the veins on the retopoligised model, which sped up that part of the process. However, in the time, when I realised I wasted so much time on it I was very stressed, that I made this mistake, and thought I had put myself really far behind where other people where in terms of progress.
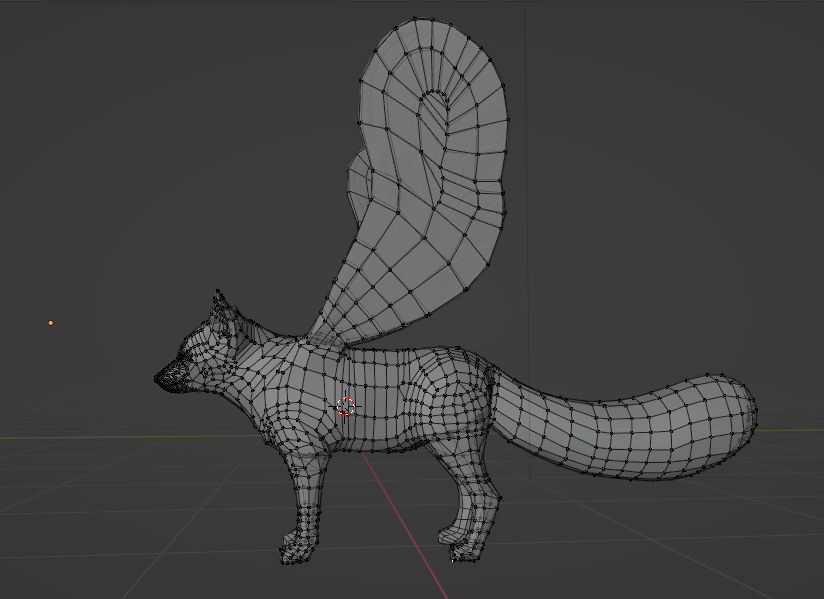
Then I retopoligised the model. This was pretty fun, but it took me a long time, I started with the face, adding loops around the eyes, nose, ears, and mouth, adding the mask around the eyes, and then connecting the loops up. However, it felt like it was taking a very long time, much longer than I thought it should be taking, so I went around the model and added loops, to the base of the wing, the shoulder joints, around the legs, around the tail, and the waist. And that made it feel much more finished which made the work feel quicker.
Then I added the mushroom to the top of the head, as a separate object. I made the mushroom from a sphere and shaped it, re-did the faces on the top, and then extruded from the bottom to make the stem. I Really like how the mushroom turned out as I was able to make it really quickly.

Trying to make the brushes proved to be a lot more difficult than I originally thought it would be, I tried to make the mushrooms but they kept being really pixelated. so I tried to make a brush using the mushroom from the head. but this had different problems in it broke the model, Pixelated the rest of the model and when I tried to actually get it to be out of the model it pixelated the entire model.
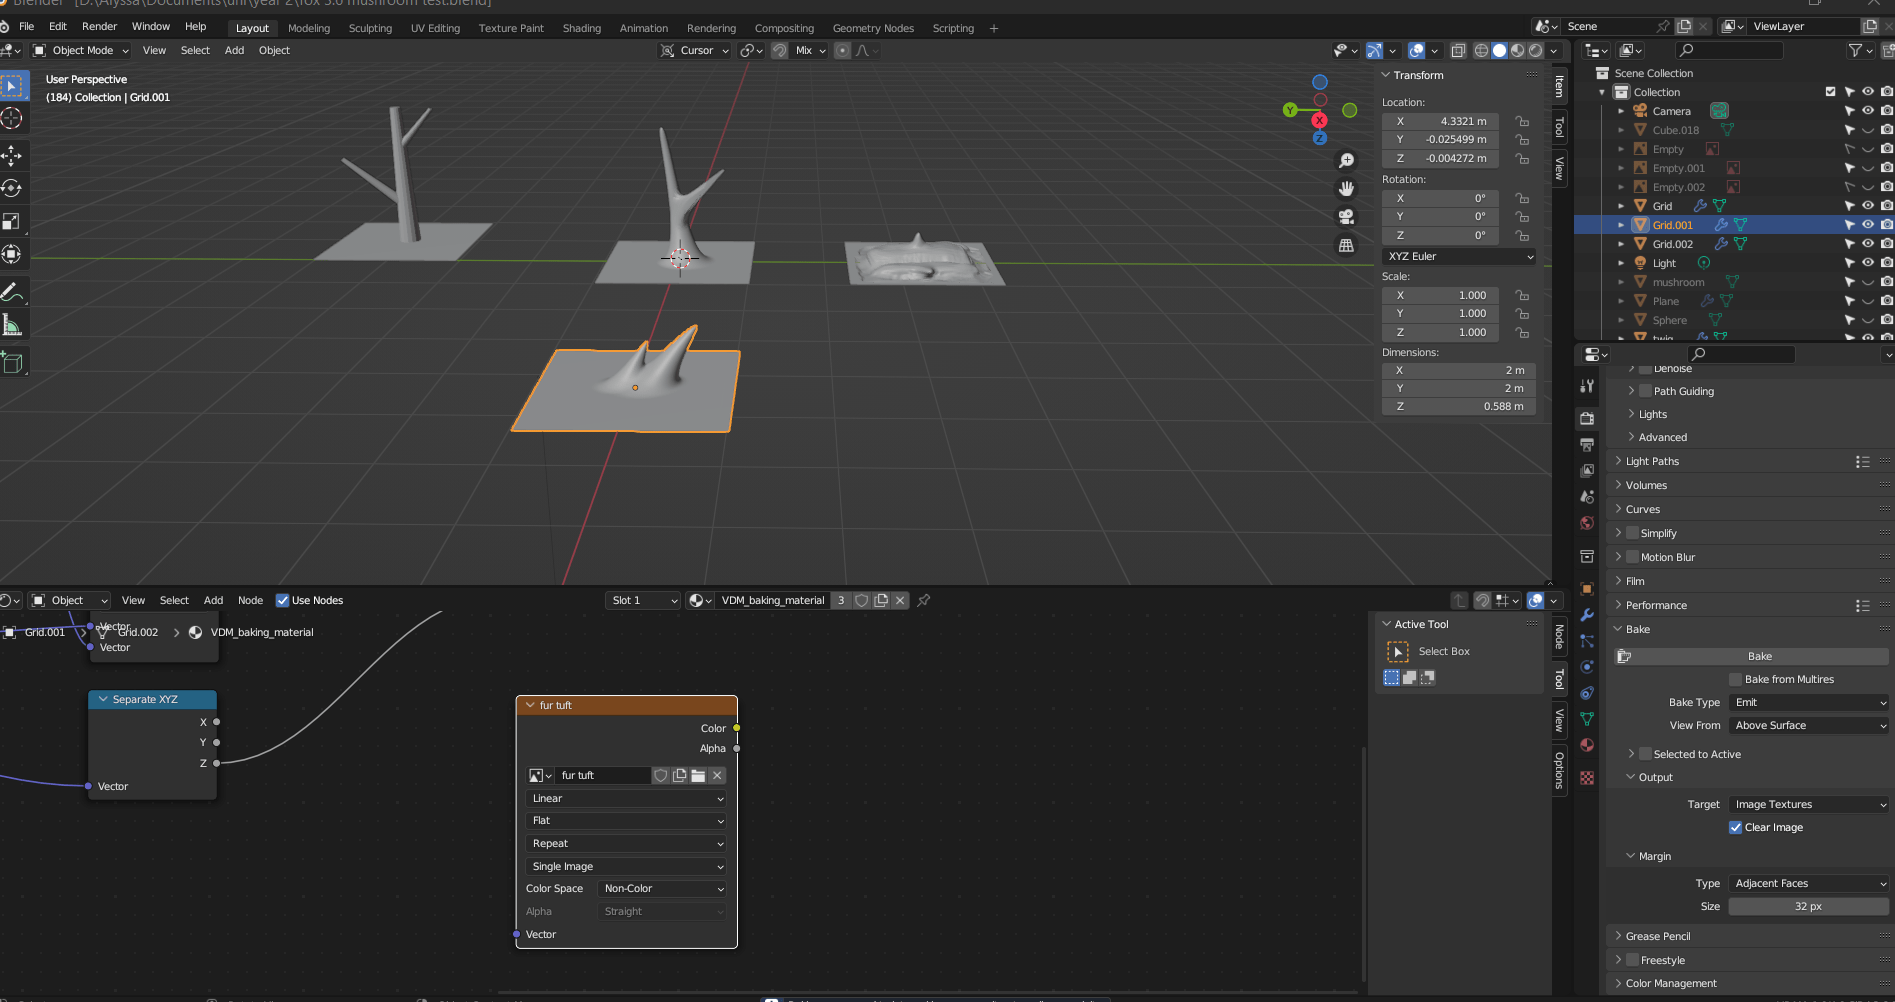
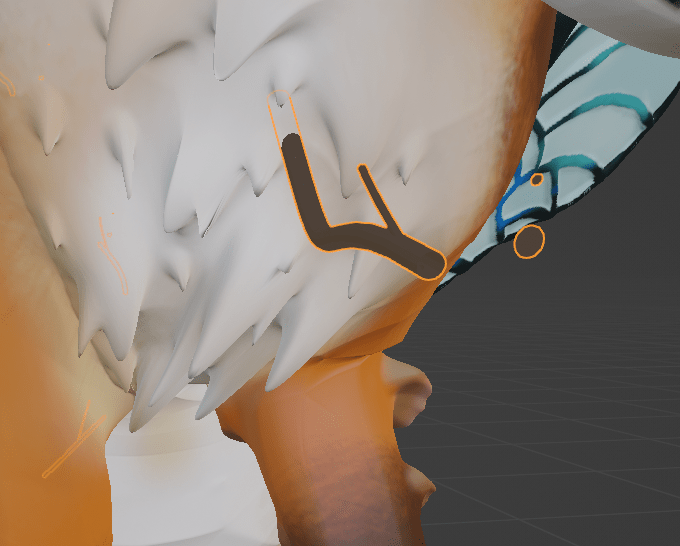
Then I made the rest of the brushes all just from sculpting as that was the only one that would work, I couldn’t model things and make them into brushes. But then, some of the sculpted brushes still didn’t work, or just didn’t look how I wanted them to look. the branches are an example of this, I could not get them to look like way I wanted them to. So I resorted to modelling some branches using curves. The bark brush/ the scale brush worked pretty well, but I did have to sculpt over top of it in some places just to add some definition back into it. The fur brush worked well but I had to add some variation using the snake tool.

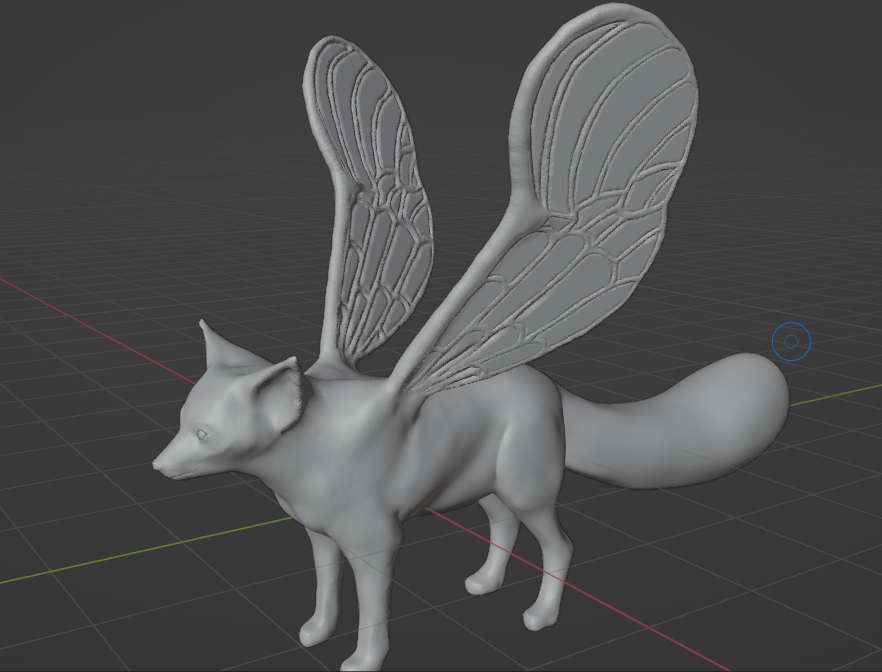
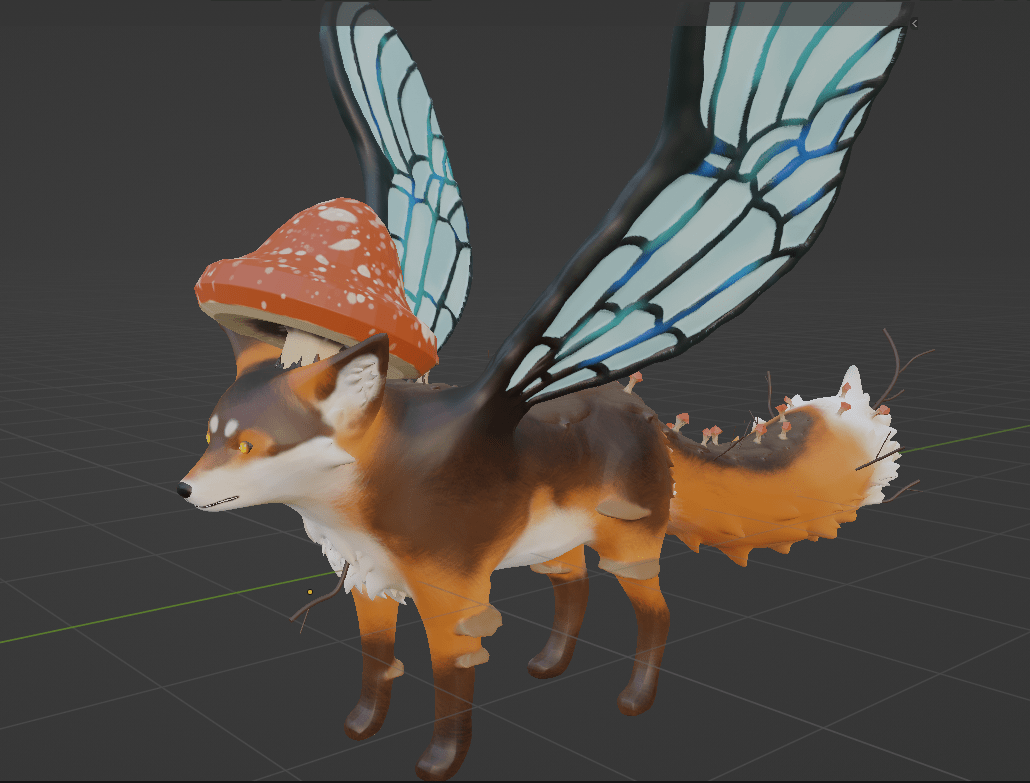
I finished the sculpt using a mix of brushes, and externally sculpted things like the head mushroom, and the branches. where as everything else is sculpted, or made using a custom brush. I was really happy with the result, as when I was having the problems with the custom brushes, I though I had been too over ambitious with my design, so to see it turn out almost exactly how I wanted it to felt really amazing.


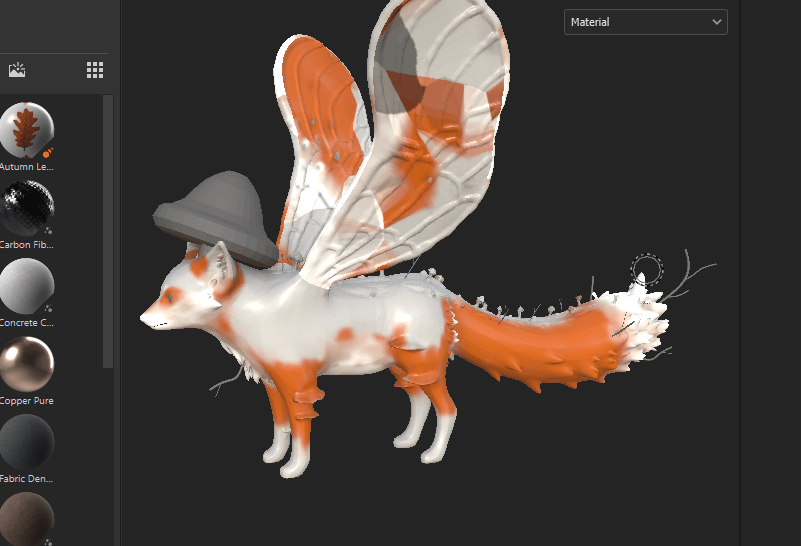
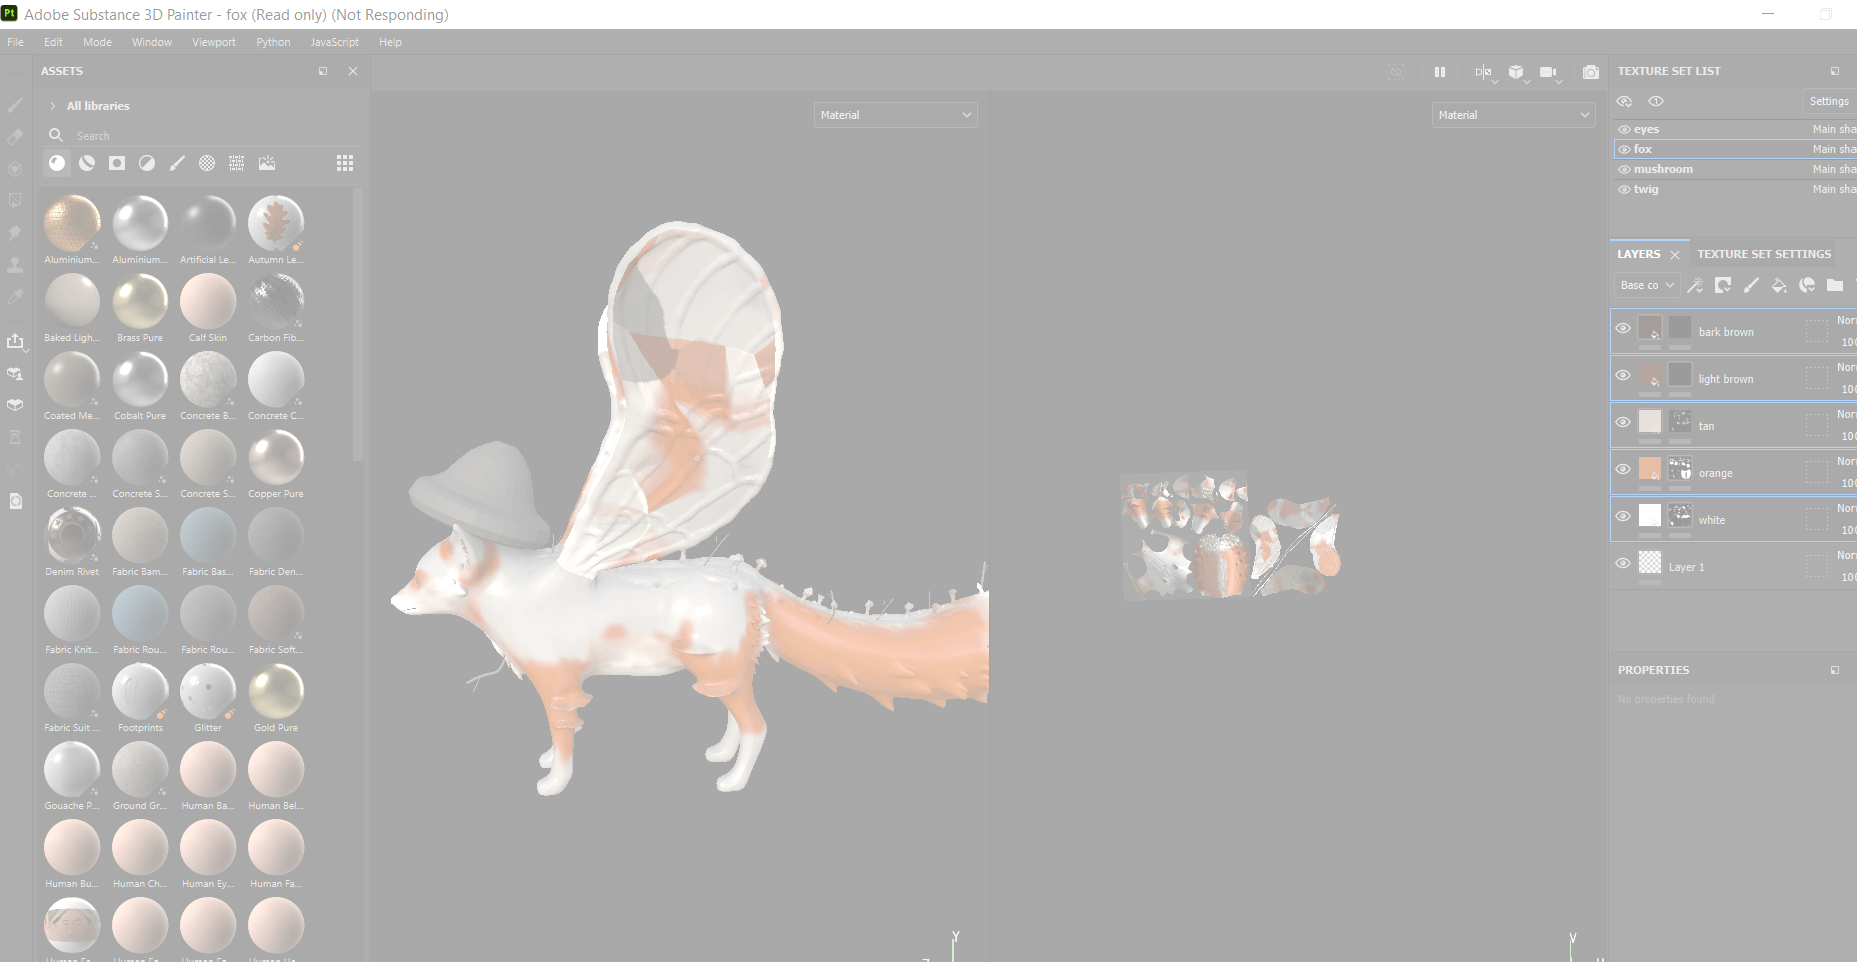
I brought my model into substance and it started giving me problems It started by just not loading, I gave it multiple hours once and then it said ( [scene 3D] Failed to load 3D scene. Loading failed. ) I couldn’t figure out why for a while as I thought I had done everything correctly. So when it did load I quickly started to paint my model however, it was still a little broken as it was painting on other body parts such as the wings and wouldn’t let me erase or actually paint on the wings. I asked the teacher why this might be happening but he wasn’t sure, he said something that made me remember a pop up I closed in my excitement that the file had loaded. I realised this was because I made it a UDIM but only had 4 UV squares where as I needed 5 so I fixed it by changing to a different fbx file with the fixed UV squares.
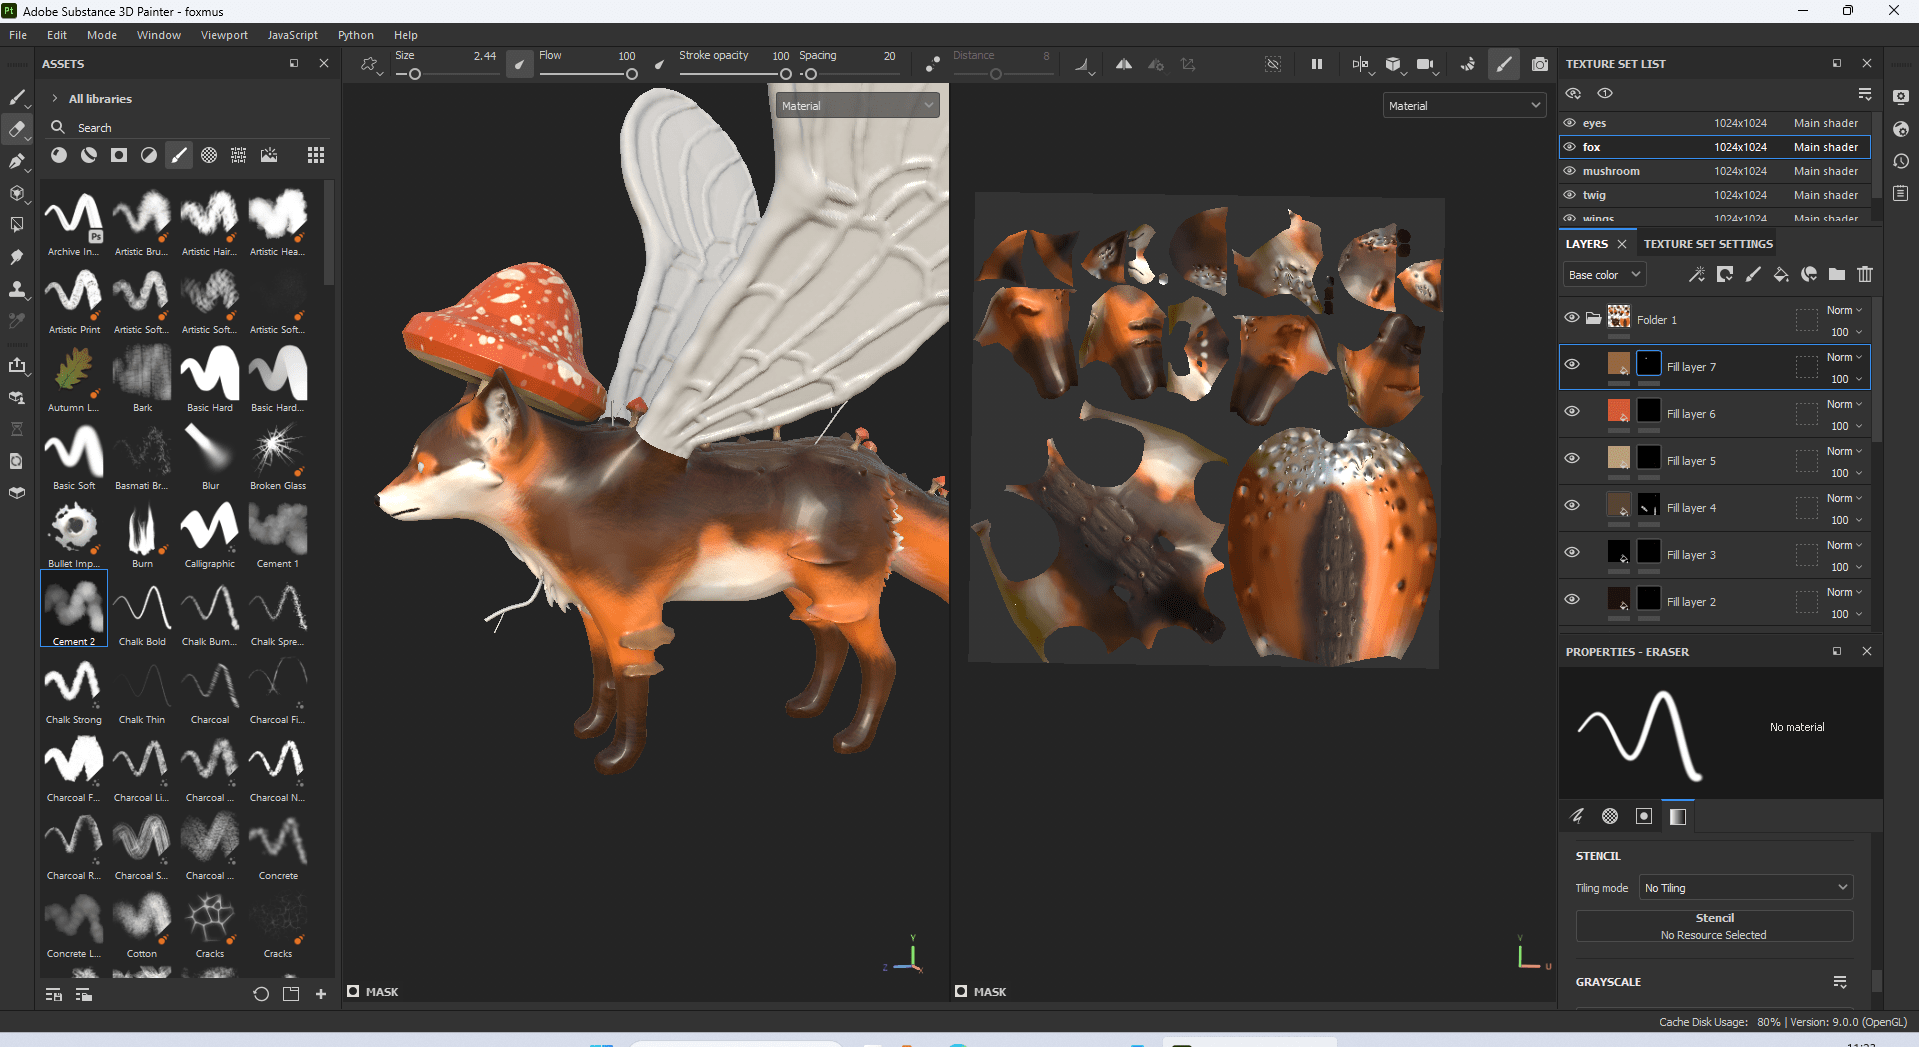
Painting was very fun and rather relaxing now that I fixed the problem. I really enjoyed painting my model. Of course there where some annoyances such as the mushrooms, as they likes to bleed onto the rest of the model, but if I just took my time, it was pretty easy to fix.
I brought my textures into blender to make sure everything looked fine, I was really happy with my model at this point and was very exited to continue and get it finished.
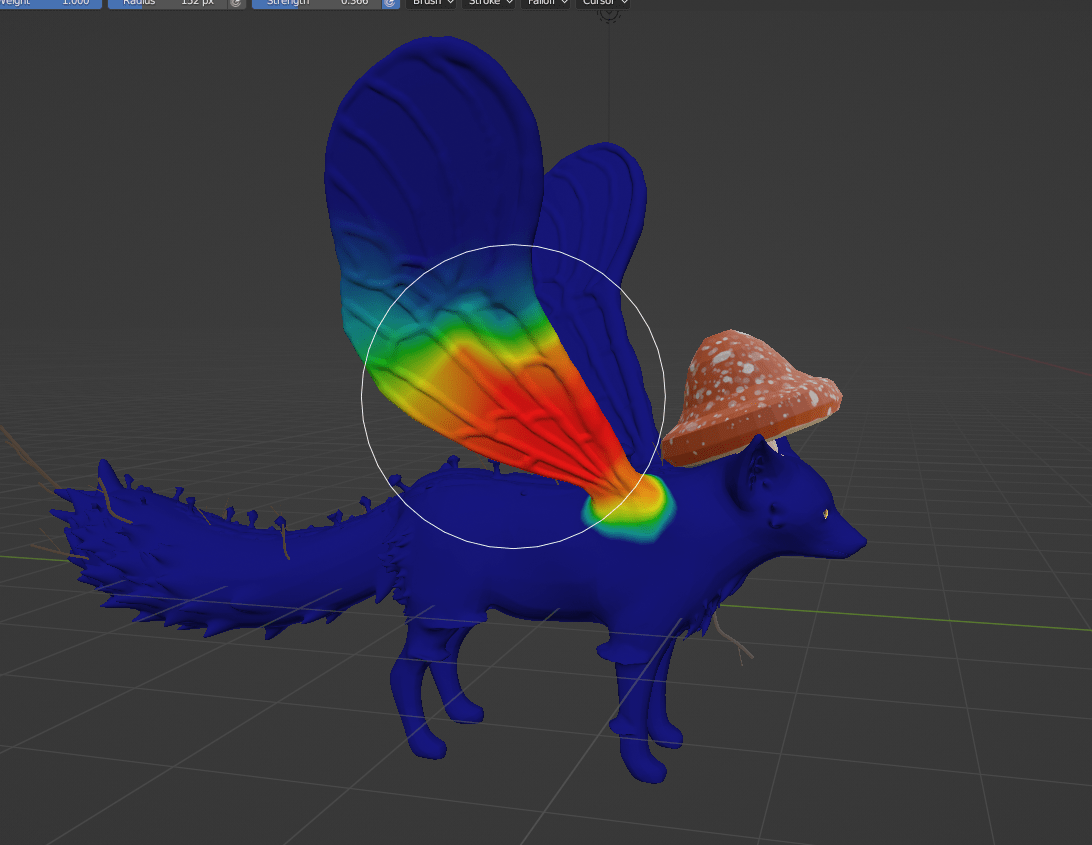
Next I started weight painting, this proved to take much longer than I thought it would. I tried automatic weights and it worked pretty okay for the body, but the wings where a mess and so where the branches and mushroom. so I went in and painted each branch, and painted the mushroom to match the bone it was connected to. this took a while as there is a lot of branches. I also completely messed this up the first time, as I forget the names of the bones in the tail and accidentally painted the branches to the wrong bones, so I had to restart them. When I thought I had it all weight painted correctly I tried to pose the model again, as it was the only way for me to check if everything was painted correctly.
but the branches kept loosing their caps even though they looked like the correct colour. so I had to go and repaint, them again, to make absolutely sure they where the same colour, this fixed a few of the caps, but not all of them, so I went through every single bone to make sure there wasn’t a bone that was effecting the branches that I hadn’t realised was effecting them. and this solved a few of my problems, as the front legs where effecting the chest branch a bit and that fixed that one, but the back branches where still loosing their caps, and I couldn’t figure out why. so once again, I went through every bone and subtracted or added even if it looked correct I went over all the branches just in case. there was still one or two caps that shifted a bit but I couldn’t get it to be perfect and so I moved forward.
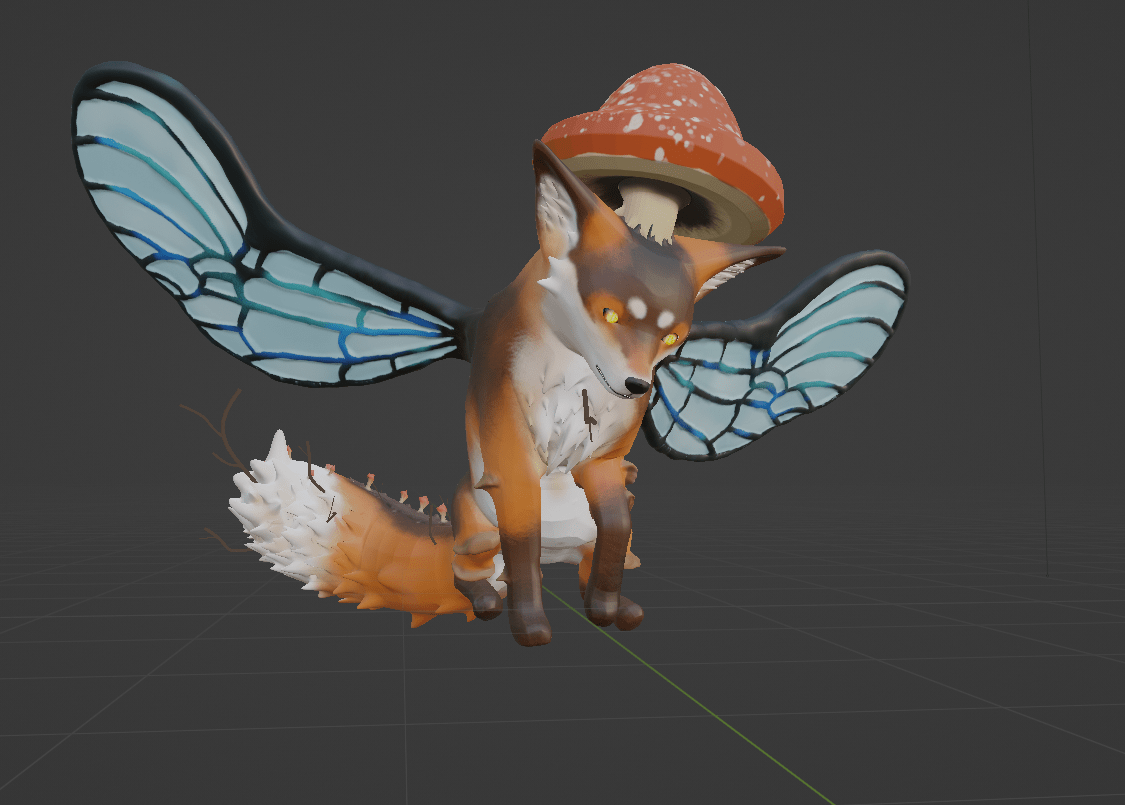
I posed my model and really liked this pose of them looking at something curiously. I though it captured there personality pretty well, as they are cautious but curious, shown by them pulling one of there paws up a little in case the thing moves they can swat at it, to keep them selves safe. There wings are also up so they could flap them down to propel themselves back if something jumps at them.
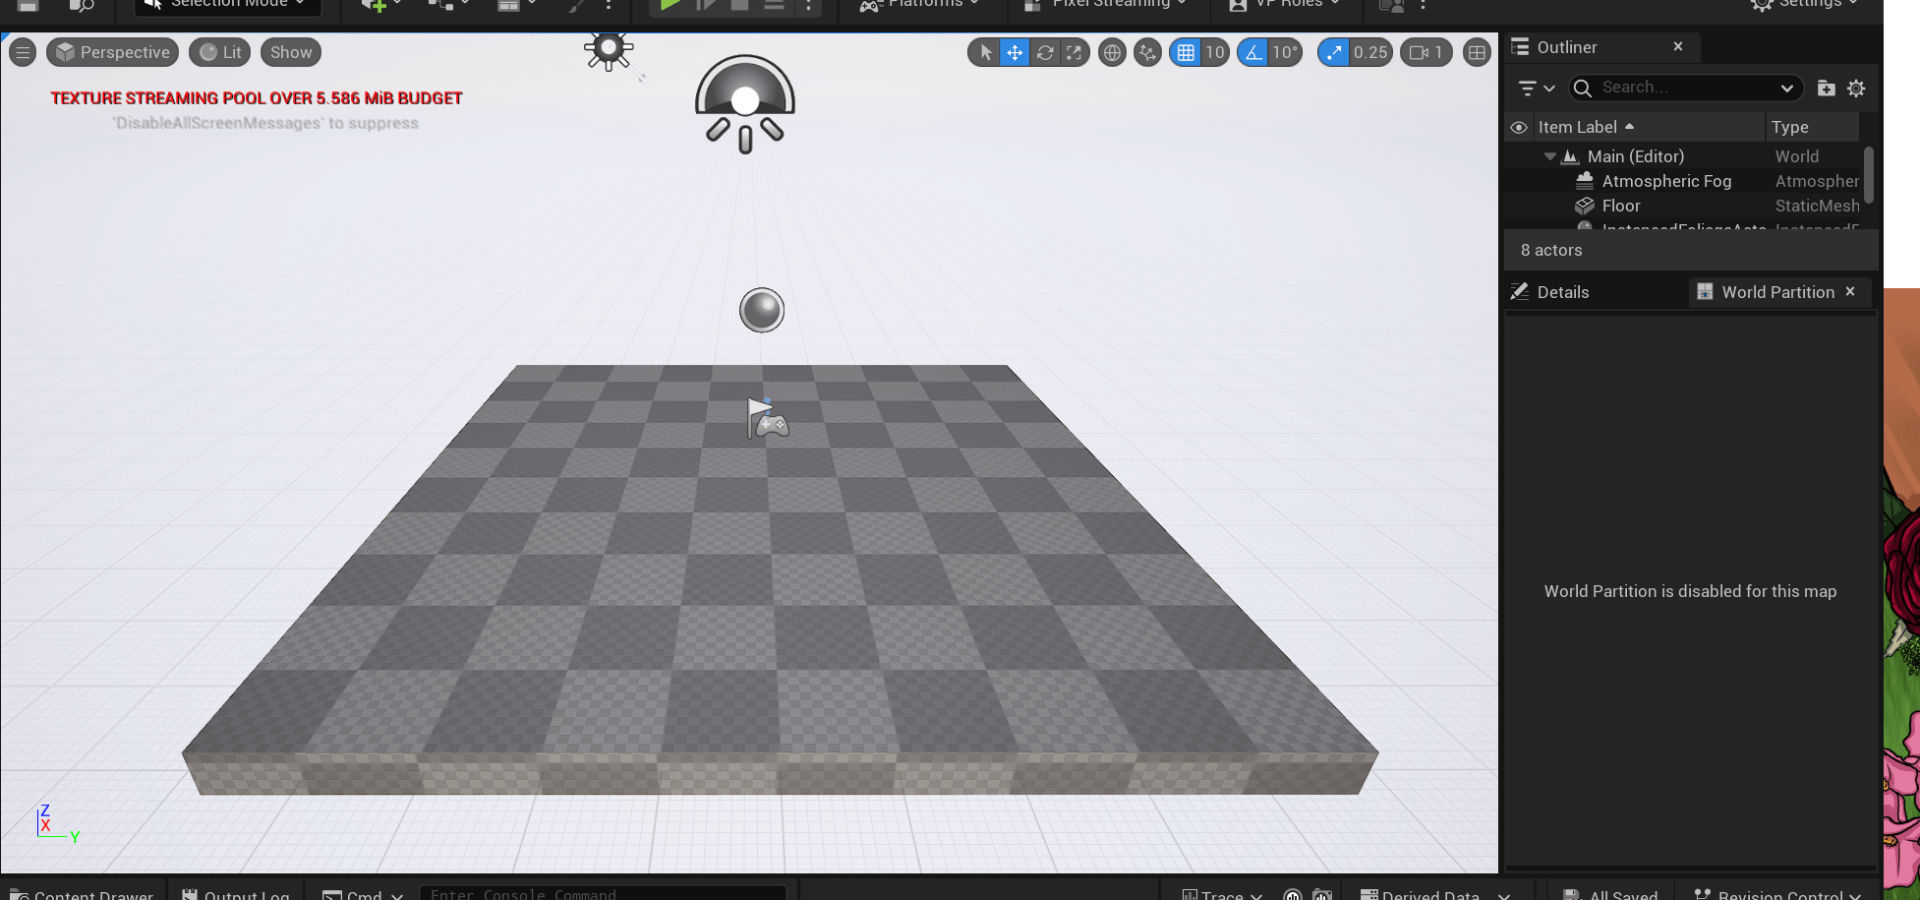
I then loaded up unreal engine, and this began the most problems I have had in this entire project, which I didn’t think was possible. I tried to follow the class tutorials, but my Pc wasn’t doing the things the teachers program was doing. I couldn’t get the world partition to show up, at all. I tried for about an hour to get the screen to move or rotate looking through options and drop down menus to see if I could get it to work, but nothing was working, so I thought it might be a storage shortage issue, so I deleted some things from my computer to try and free up some space, I freed up 7GBs of storage that I wasn’t using, such as old programs that I installed for previous classes/ courses, that I didn’t have access to anymore, to see if this would help at all.

I was able to rotate and create a landscape, still no world partition, and the textures wouldn’t load. the grass just made the checkers have a green film over a top of them, and the basalt made the mountains grey, but not show any texture. I asked some friends if they knew why this might be happening, if there was something I needed to turn on, or something I needed to do to get the texture to show, like how in blender you need to be on the right viewing channel. but none of them knew why it was happening, and it was Christmas break so I didn’t want to bother the teachers. I tried to figure out what was happening on my own, but I couldn’t. I decided my best course of action was to wait until the university was open again to go and use the PC’s there to make my scene, However, my friend Chloe offered to let me come over to her house, and use her computer, to make my scene. she downloaded some of the assets I would need, such as some trees, and mushrooms, Then I went over to her house and made my unreal scene.
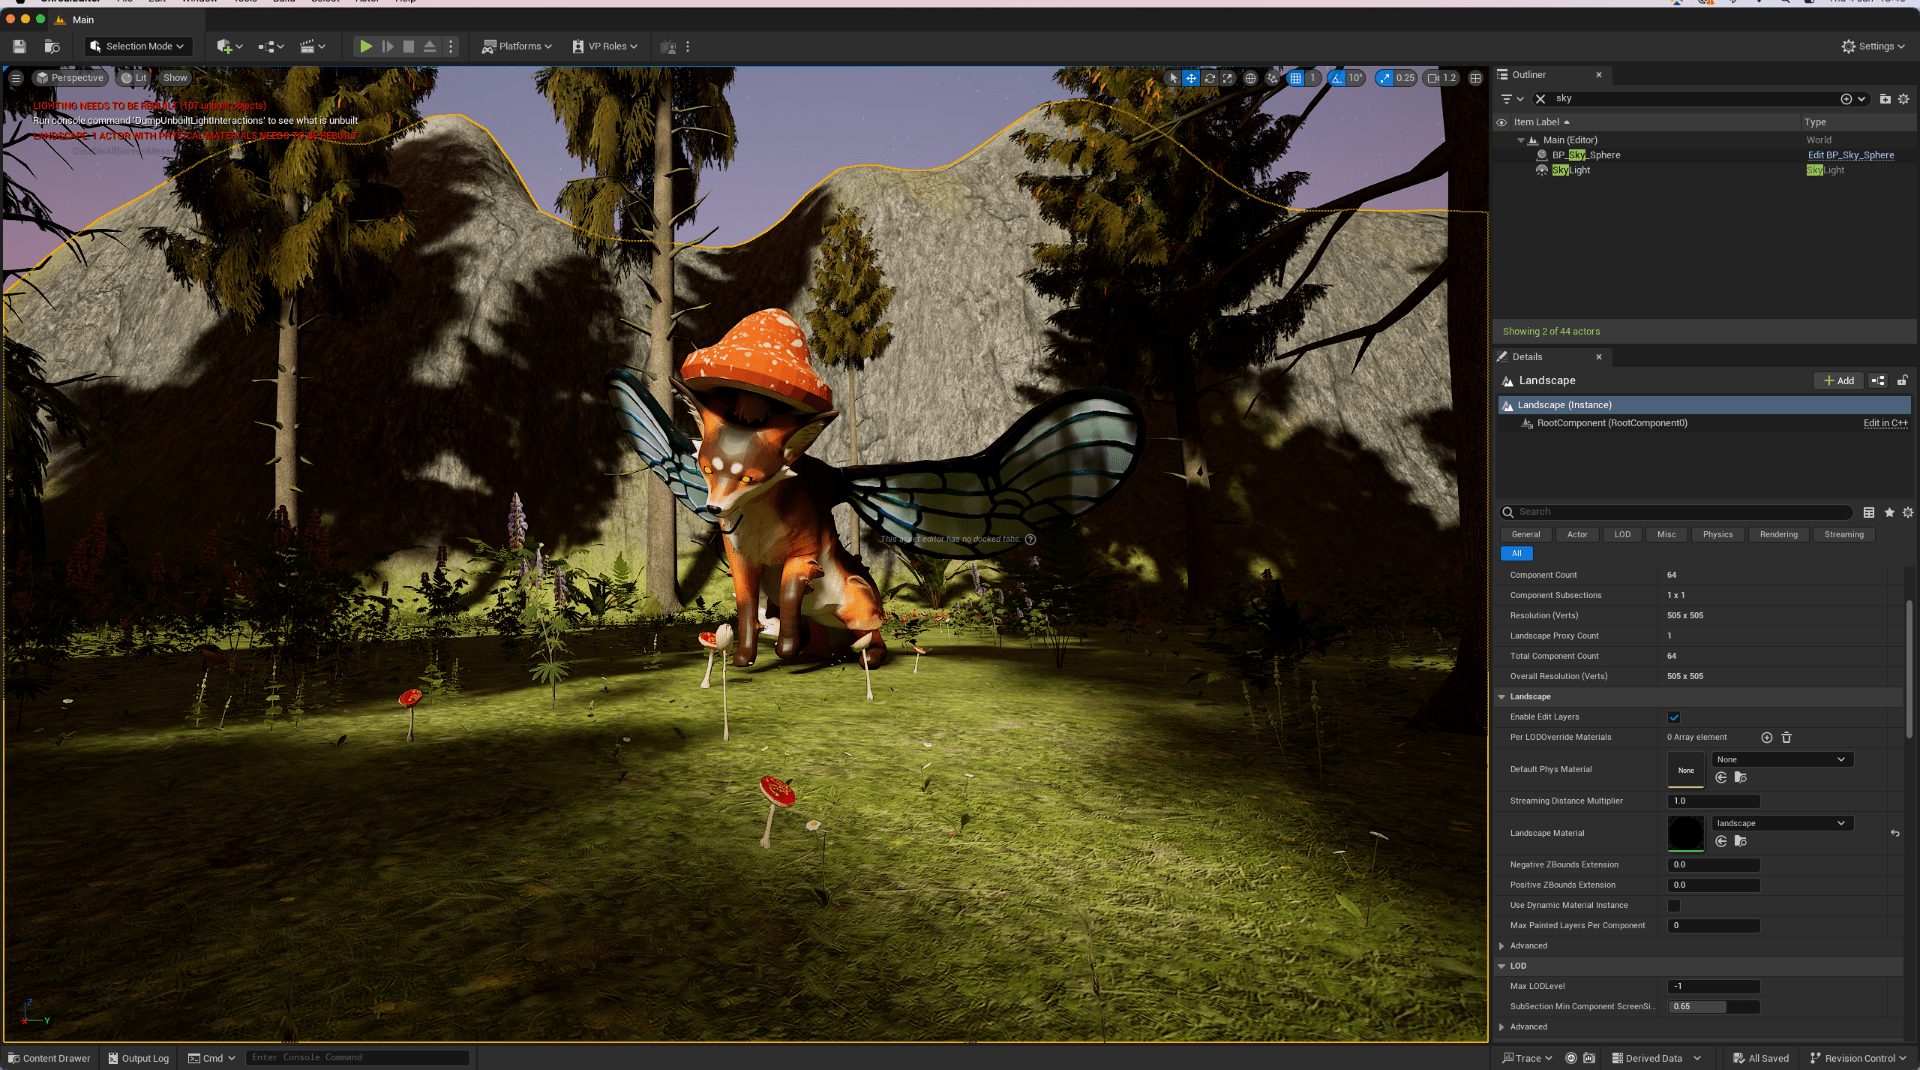
This took most of the day to do as her WIFI was acting up, and so it was taking ages to download the assets, however, I am really happy with the result, I started by sculpting the mountains, then put all the textures in the layer folder to paint, it was really nice actually being able to see the textures, and know what I was painting. I really like unreal, so I hope to be able to get it to work on my pc as I would like to be able to use it. I had a few problems getting things to work as a foliage brush, as Chloe’s mouse only lets you go across the screen so far before you have to pick up the mouse and move it to continue going in that direction, and so trying to drag things into the add foliage drop down was hard as when I lifted the mouse it would drop the thing I am trying to drag, so all of the ferns where placed individually and scaled up using the panel on the right. same with the trees, however I was fine with the trees as that let me make them the size I wanted them to be. whereas I couldn’t scale up individual things that I placed down using the foliage brush, I could only scale up all of them, which also moved everything as they scaled from the centre point. I also had to change the sky as it wouldn’t let me edit the sky sphere’s sun position, so I had to delete that and add a new sky sphere. Then I was able to take a screen shot and all I had left to do was to edit the picture.
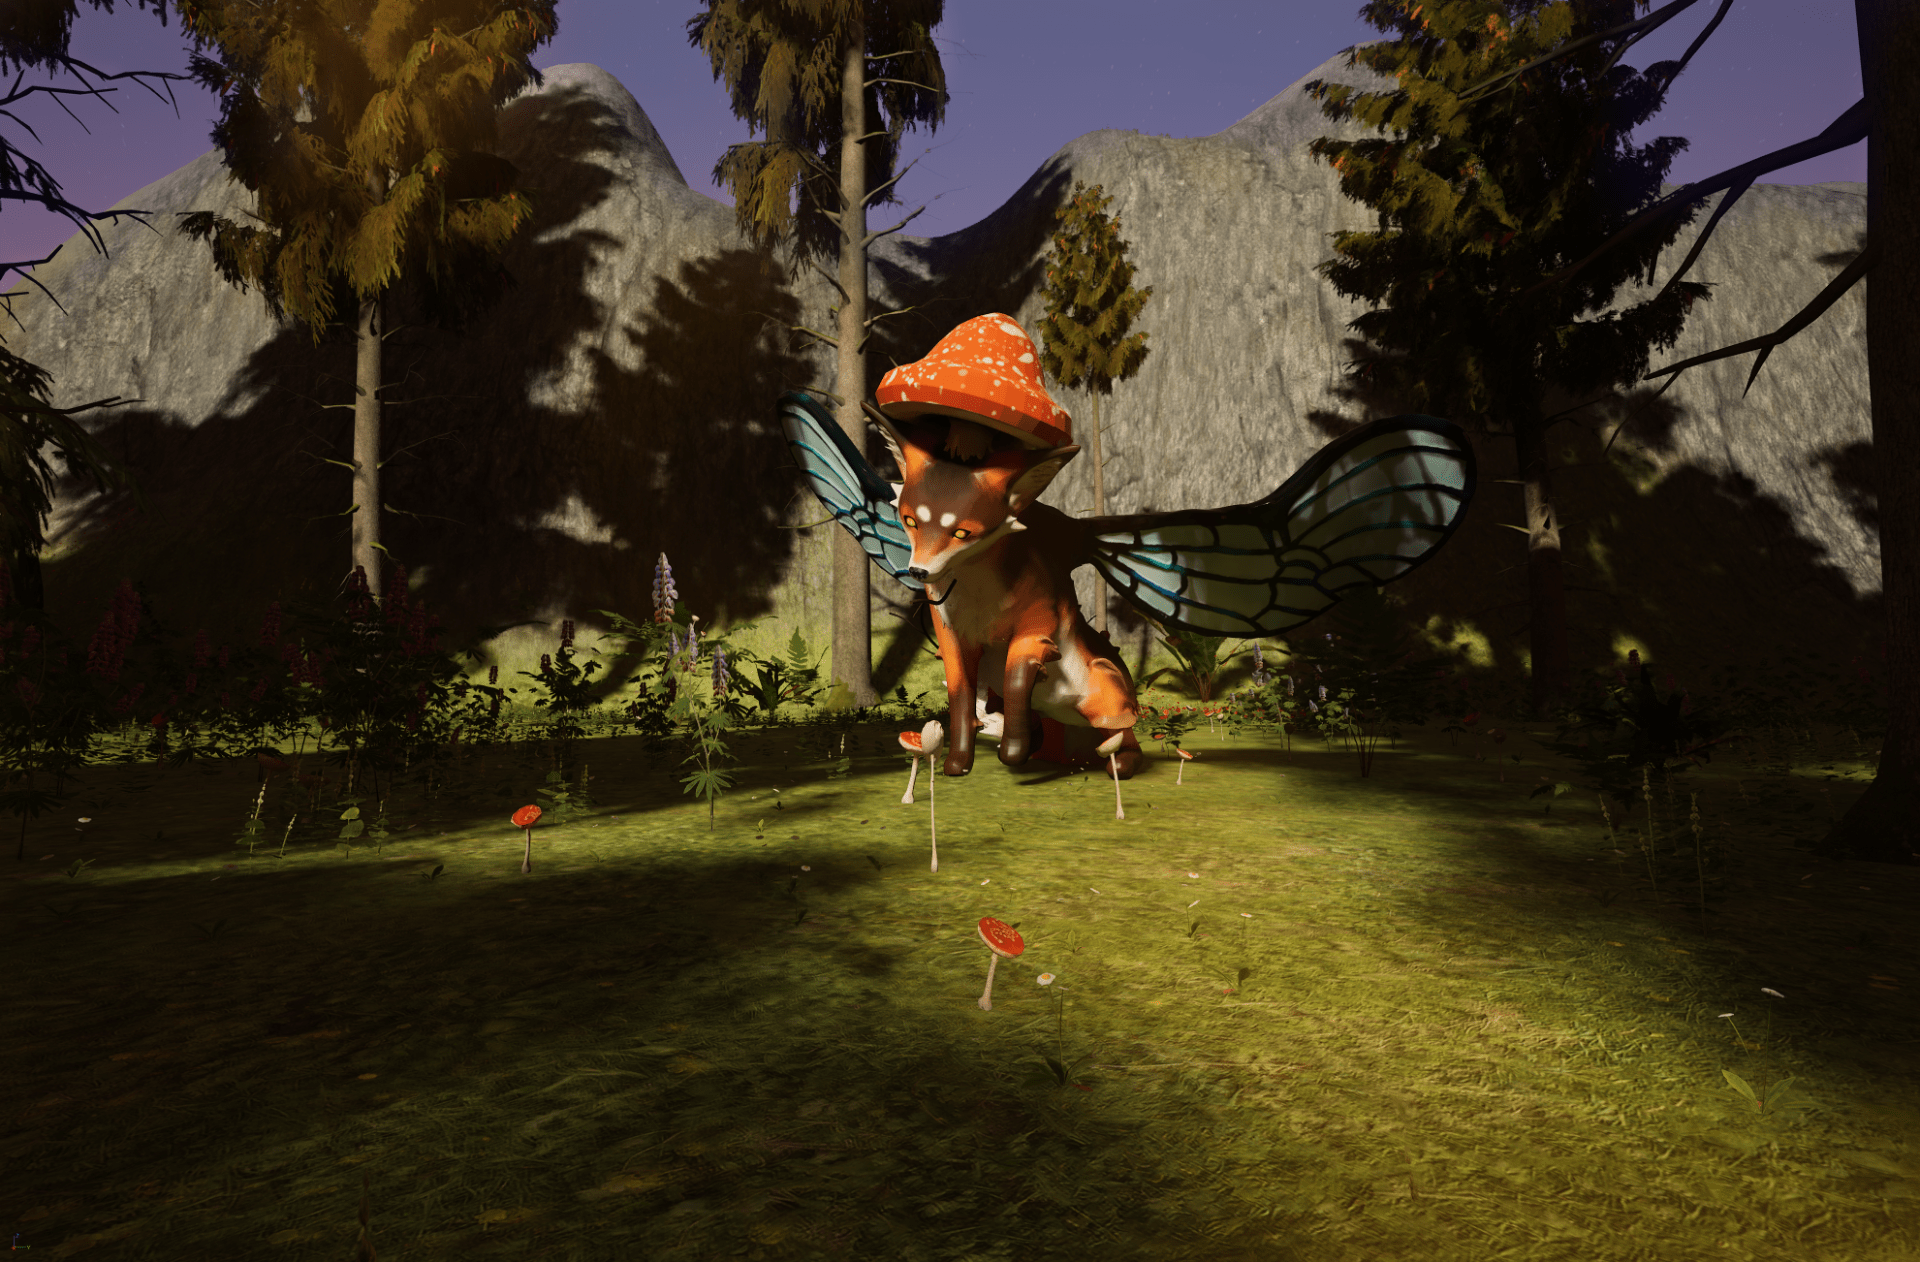
I didn’t have to edit much, as I liked how the picture turned out. I got rid of the shine on the forehead and added a little definition around the eyes, I smoothed out the wrinkles in the arm bend and the stomach, and adjusted the shadows underneath the fox as one of the legs that was meant to be on the ground was floating a little. I also darkened the sky just a little and added a bit of a more golden glow to the light area. I am really happy with how it turned out, however, next time I make something in 3D I am going to try to finish everything as quickly as I can, as the amount of time I have been set back by because of the problems I have had, has made me way more stressed than working on the actual project has. I get very stressed when things go wrong, but if I had more time to solve the problems, I think I would be much less stressed, so I will try to do this moving forward. Even though this project did cause me a lot of stress, I did enjoy working on this and especially seeing the final outcome, it makes me excited to learn more about the 3D process as if I knew more I would be able to solve my problems more efficiently and on my own, which is something I hope I am able to do one day.